
DIY Wood Beams Tutorial | Guest House Ceiling
Wood beams are an amazing addition to a home! I’ve wanted to add ceiling beams to our home for 2 years now, and I’m so excited to finally try this project out! Learn how to make DIY faux ceiling beams with this simple tutorial as part of our guest house remodel.
This post may contain affiliate links where I earn a small commission on your purchases.
Guest House | One Room Challenge
If you’re new to our guest house remodel, make sure to check out the progress we’ve made to this point! I’m participating in the One Room Challenge and this is week 7 of the project. We are so close to the finish line!

- Week 1: Guest House Before Photos
- Week 2: Guest House Design Plans
- Week 3: Mantel Update
- Week 4: How to Hide a Mini Split
- Week 5: Bathroom Remodel for $300
- Week 6: Combined with week 7!
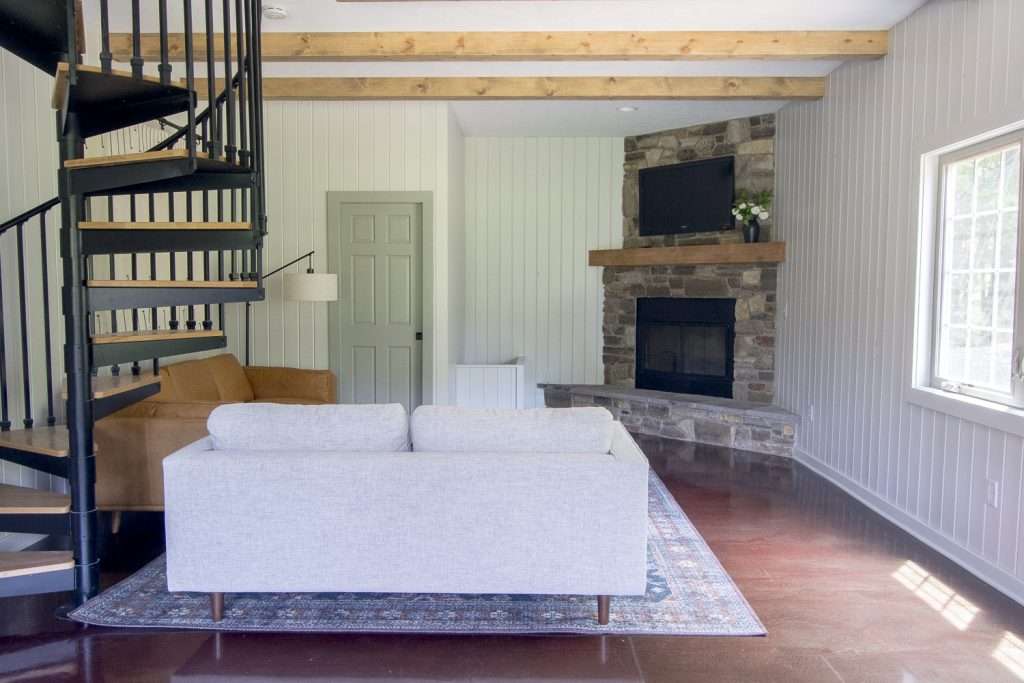
DIY Faux Ceiling Beams
This week for the guest house remodel, I’m sharing how we installed DIY faux ceiling beams. This project ended up being a DIY/contractor combo project.
I knew that DIY box beams were 100% doable as a DIY project, however, I didn’t have any help to install them. And installing 20 foot beams solo, upside down on a ceiling, didn’t sound super appealing to me.
So I called our contractor Al, from Preferred Builders, and struck a deal to work together on this project! Al installed our new kitchen and took down the wall in our dining room when we first moved in.
It is a huge blessing to know a contractor who does quality work, is reliable, and willing to work with the homeowner.
So, I asked Al to cut the miter cuts and do the installation of the wood beams. (AKA, all the hard stuff.)
In preparation, I would sand and stain all the wood, and then do any finish work or touch ups after they are installed. It worked out great to tag team the project!
How to Build & Install Wood Beams
Determine Beam Placement
The first step to installing wood beams is to determine placement and measure.
Aaron and I spaced them out 3 feet apart, which allowed us to avoid the lighting and fire alarms on the ceiling.
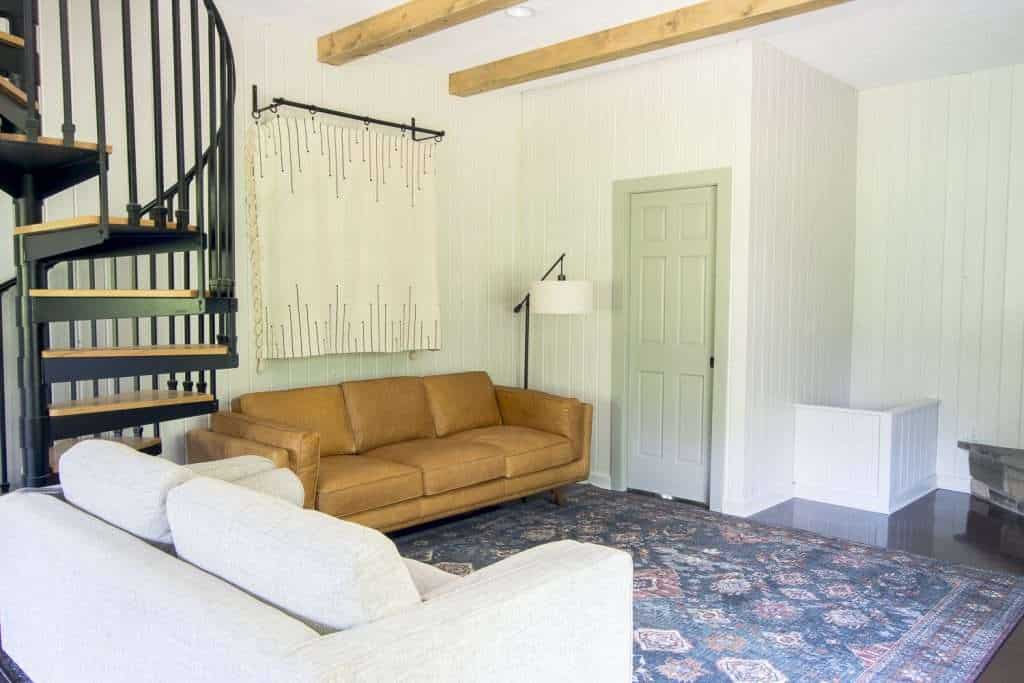
Now, our ceiling line has one spot where it ends into a spiral staircase. I will tell you now that I made the mistake of assuming it would look ok to have two of the beams essentially floating on that ending.
You’ll see the issue as we go on, however, I did end up installing a work around to mask the problem.
In hindsight, I would not have placed the beams the way I did! Live and learn. Instead of doing 5 beams, I would have only done 3 on the center of the room.
I still love the way it turned out, but can appreciate that I would have done it differently had I envisioned it better from the start.
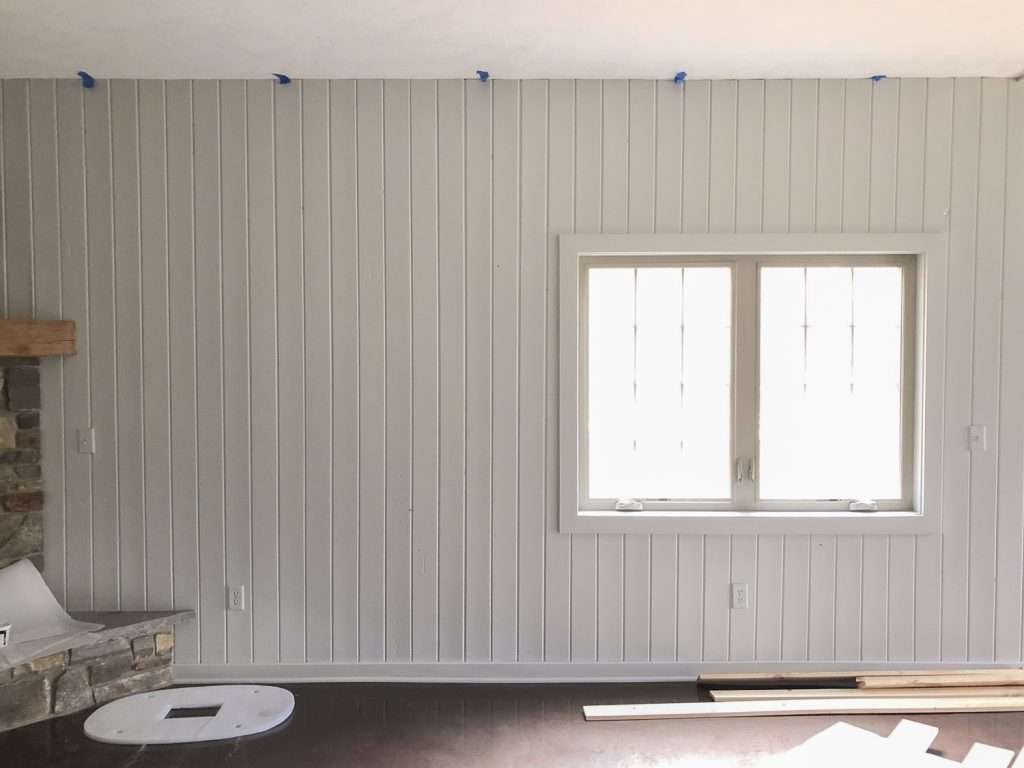
Install Supports
The next step is to install the supports for your faux ceiling beams. Al used 1×4 pine cut to length. He installed them using construction adhesive as well as toggle bolts since our joists ran parallel to the beams.

Cut Miter Edges
The next step is to cut all your miter joints on 1×6 pine. We went with affordable 1×6 pine boards to give the beams a substantial size. Al commented that pine is more difficult to work with because it bows easier, but I think he did a fabulous job whipping them into shape!

You will essentially be building a box with one open side, so you’ll need three pieces of 1×6 pine for every beam you make.
Two of the boards need to have one edge with a miter cut, and one piece needs to have both edges miter cut for the bottom.
Sand and Stain
I found it much easier to sand and stain all of the boards prior to to installation. That way, I wasn’t sanding and staining upside down after they had already been installed.

I sanded each board smooth and then used Miniwax Special Walnut in a semi-transparent finish.
Install Wood Beams
Al installed the first beam by attaching the sides and bottom one by one directly into the support board.
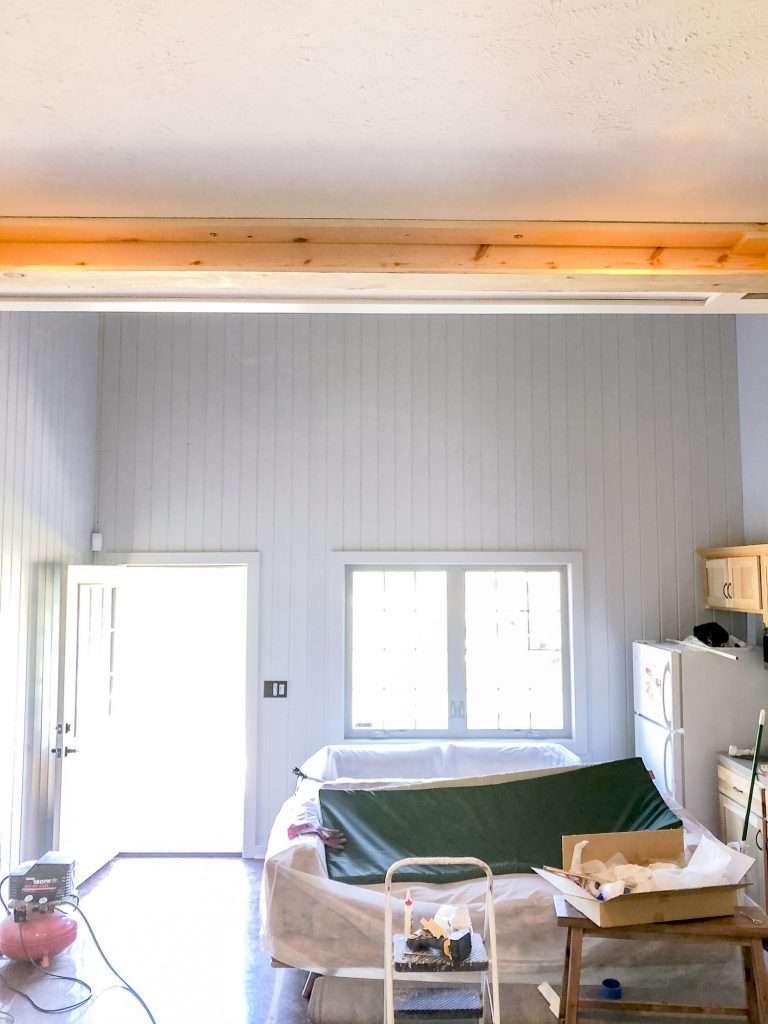
You can see here that he has one side left to attach.
After that, he found it easier to partially assemble the box beams on the ground and then do the final piece once the rest where attached.

Use wood glue on the edges and secure the 1×6 to the support boards with finish nails. You can use clamps to secure them to make sure that the seams are tight and even.
Repeat for each beam!
When Design Gives You Lemons
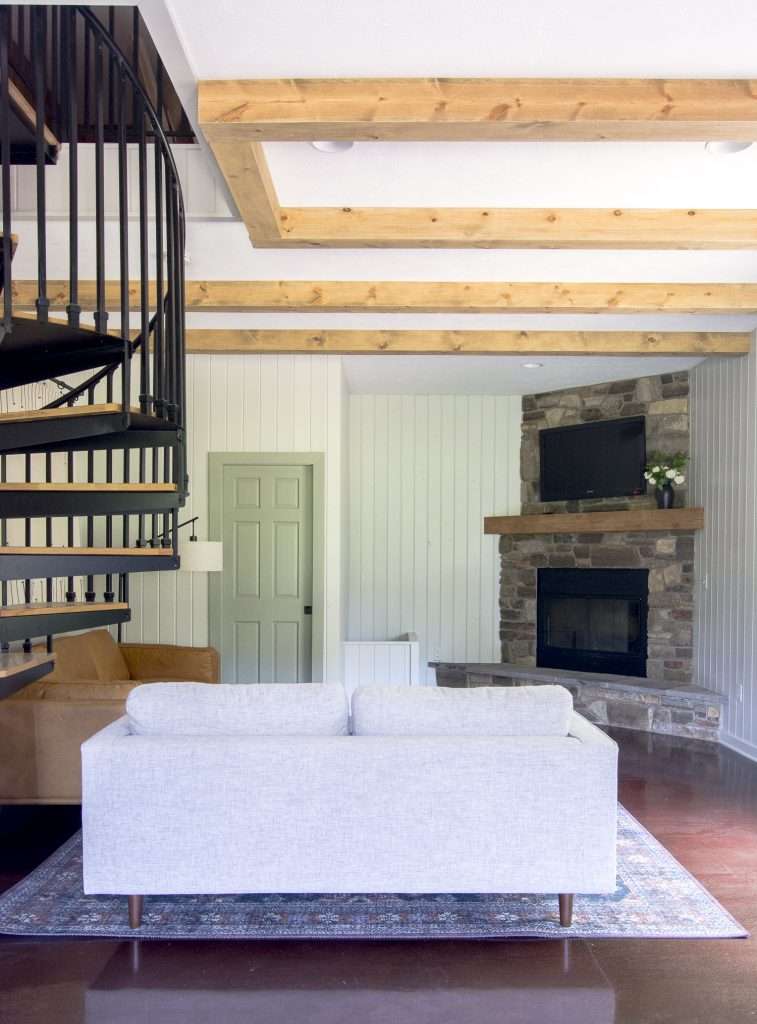
Here are the finished beams that Al installed! They are beautiful and I’m so glad that I sanded them down for a less rustic finish.
Using 1×6 pine is a very affordable way to create faux wood ceiling beams. I had looked into pre-fabricated faux beams, but the cost of purchasing them alone was double what it cost for the materials and labor fee for Al!
And, I would have still needed to hire someone to install them.

Now, when your design doesn’t go as planned…make lemonade. I’m pretty sure that’s how it goes. As you can see above, the beams themselves are beautiful! However, the two shorter beams in front look like they are floating because they don’t end into a wall.
That wasn’t what I envisioned in my head. At this point I knew I had two options:
- Pay Al to come rip all his beautiful work down and redo the entire ceiling, moving the beams in to only have three in the middle of the room.
- Figure out plan B.
Guess which one I did?
Actual DIY Beam Install
I decided, if Al can install 20 foot beams by himself, then surely I could do a three foot beam. And I did! I’m so glad I watched and learned to see how Al built these and installed them. I simply replicated the process on a smaller scale.

Rather than redo the entire ceiling, I decided to give the illusion that these first two floating beams were actually support beams. I added a perpendicular beam connecting the two.
It is definitely not perfect. I quickly learned what Al meant when he said pine can be difficult to work with since it warps easily. But, I still did it! And I learned that making faux beams really isn’t very difficult.

It certainly would be a project I’d tackle on my own in the future if I had someone to help me install them. Actually building the beam wasn’t too hard.
In the long run, yes, I would have placed my beams differently. But I’m going to choose to look at the positives! I learned how to build faux wood beams, I did it affordably, and it still makes a big impact in the guest house.
Faux Wood Ceiling Beams
What do you think of how they turned out? I love the stain color that I used as well. It complements the fireplace mantel since it is the same color, just in a semi-transparent finish.

And having the ceiling beams done means I can finally check all of the big items off the list!
The remaining items I will be tackling next week to wrap up this remodel are:
- Updating the kitchen countertop
- Refinishing a table set
- Staging and Decorating, my favorite part!


Stay Connected
Thanks so much for stopping by the blog today! This has been such a transformative project and I can’t wait for the final reveal next week!
One Room Challenge Update
The project is complete! If you missed the 8 week process, catch up with the links below!
- Week 1: Guest House Before Photos
- Week 2: Guest House Design Plans
- Week 3: Mantel Update
- Week 4: How to Hide a Mini Split
- Week 5: Bathroom Remodel for $300
- Weeks 6 & 7: DIY Ceiling Beams
- Week 8: The Big Reveal


Brilliant idea using angles for the joints so the seams are on the edges. I’m looking at doing something like this to retrofit over a colonial style mantle and I think that’s the solution to making it look the most like a solid beam.
Thank you!
Love that you were able to somewhat envision Plan B and not get stuck because it wasn’t going as planned. I think that’s what slows my roll. I have a tough time un-seeing the original plan, so the frustration leads to, what my teen son calls rage quitting. Lol! The room is coming along beautifully and I can’t wait to see the virtual grand tour!
Thank you so much!
Truly a beautiful transformation. Love your solution for the short beams as it really gives a finished look!
Thank you so much!
Everything looks great! You have mentioned you still don’t like the color of the floors. Have you considered painting them?
Thank you so much! I had considered painting them, but I think we will just live with them as is until we put down a different flooring type. 🙂