
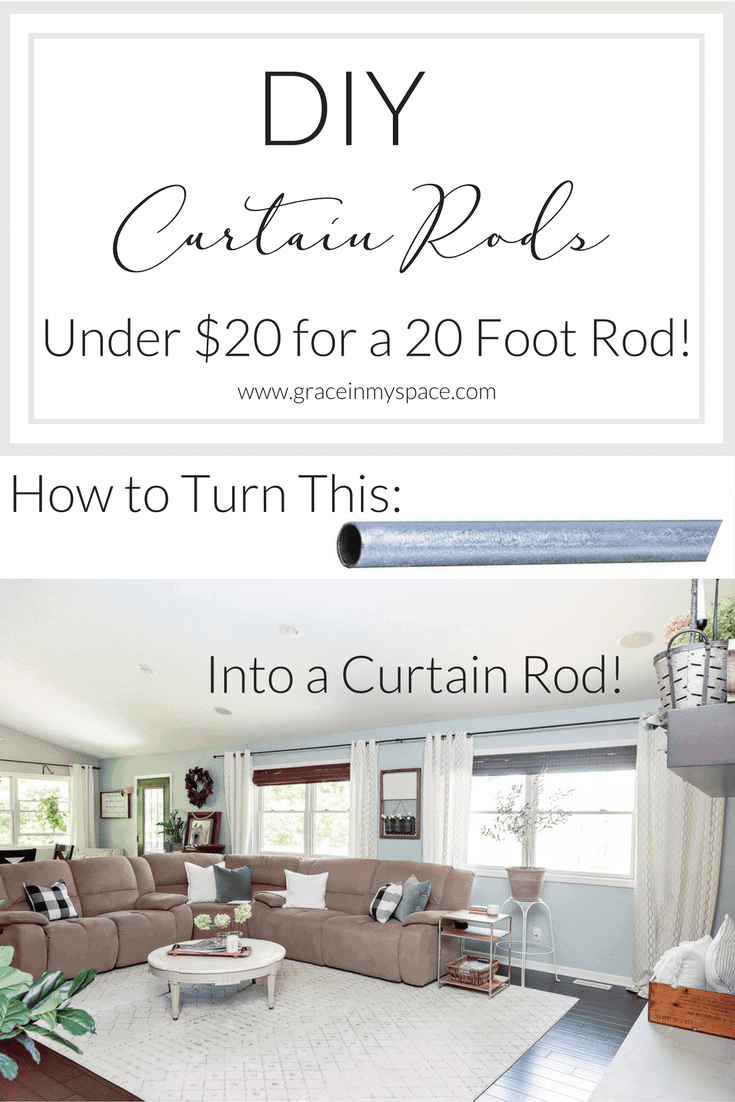
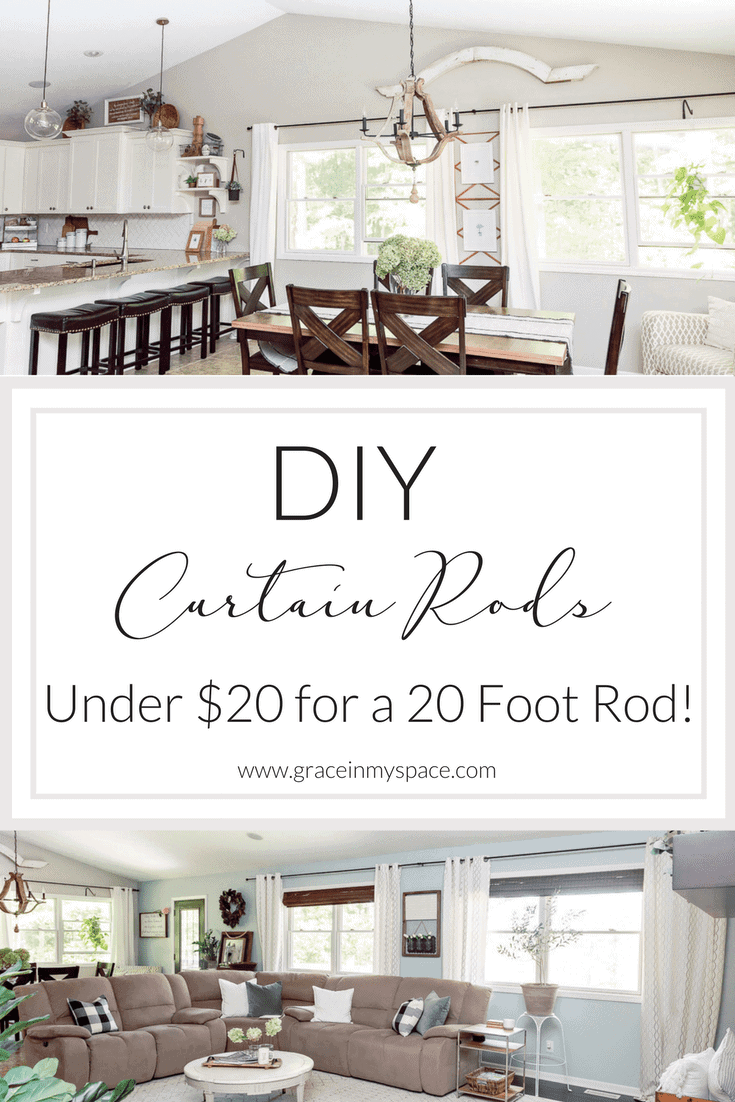
DIY Curtain Rods Under $20 | Up to 20 Feet!
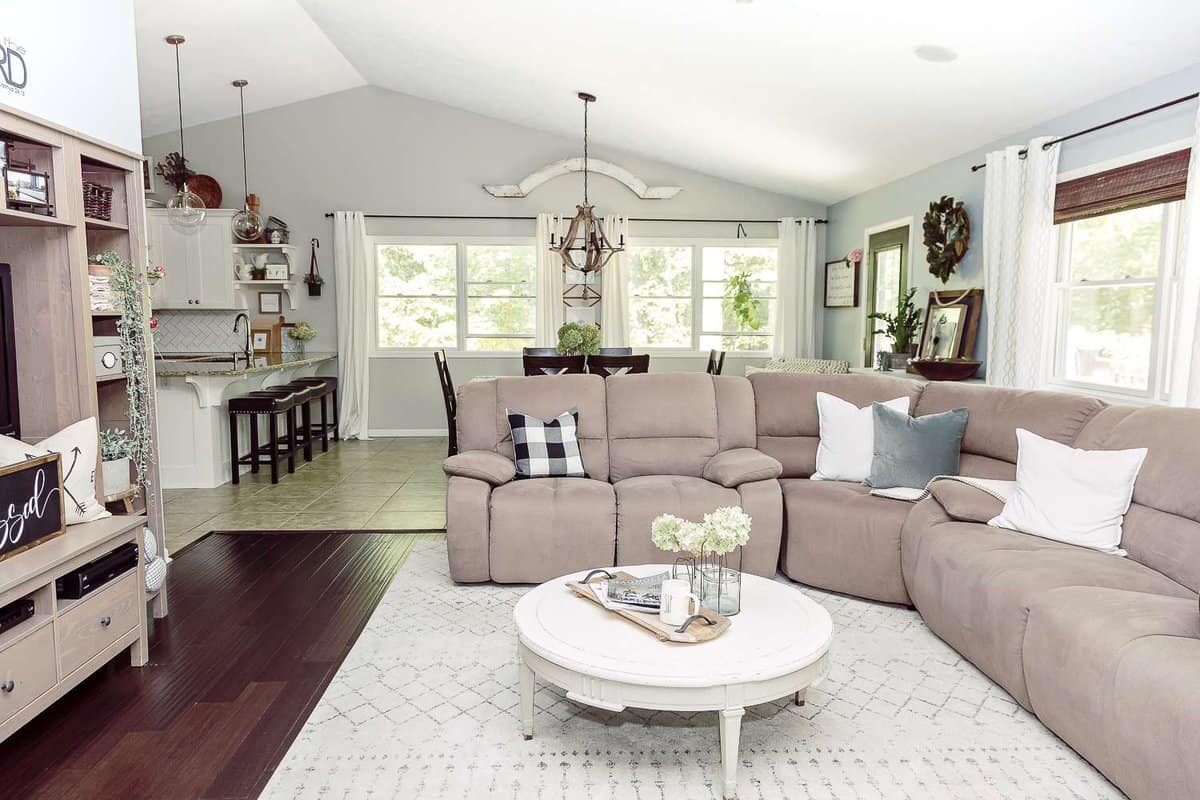
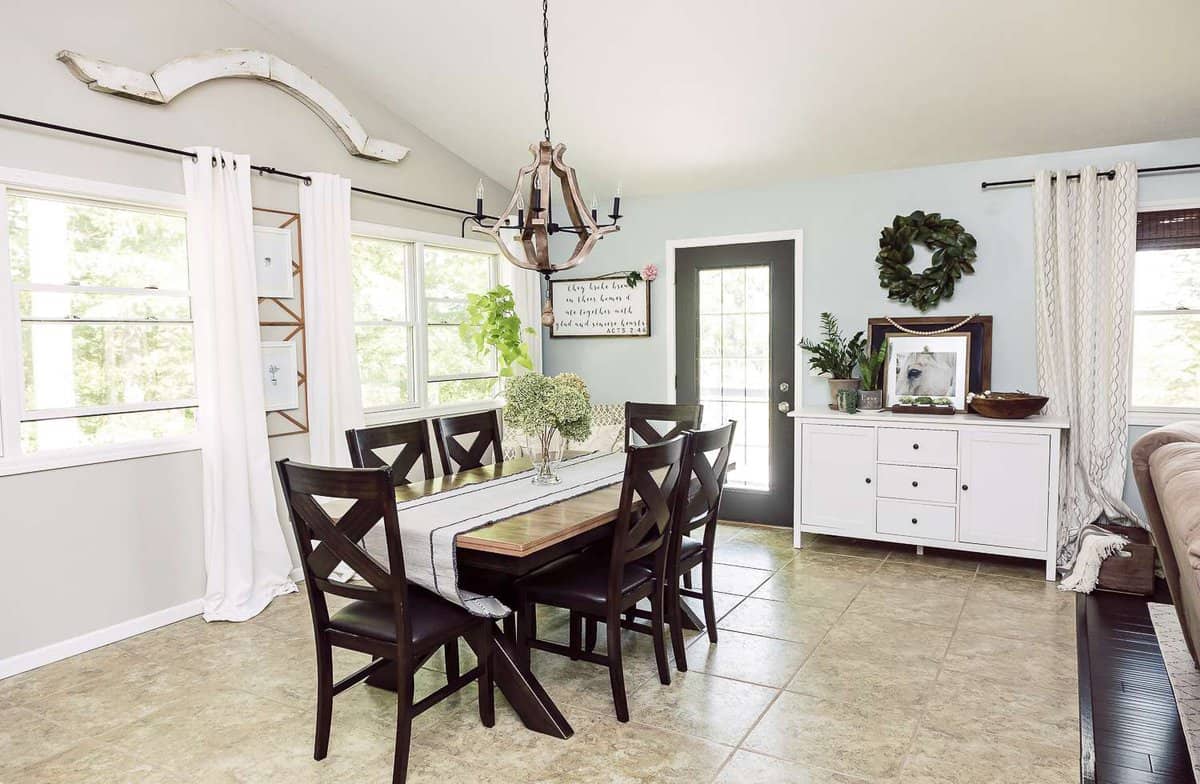
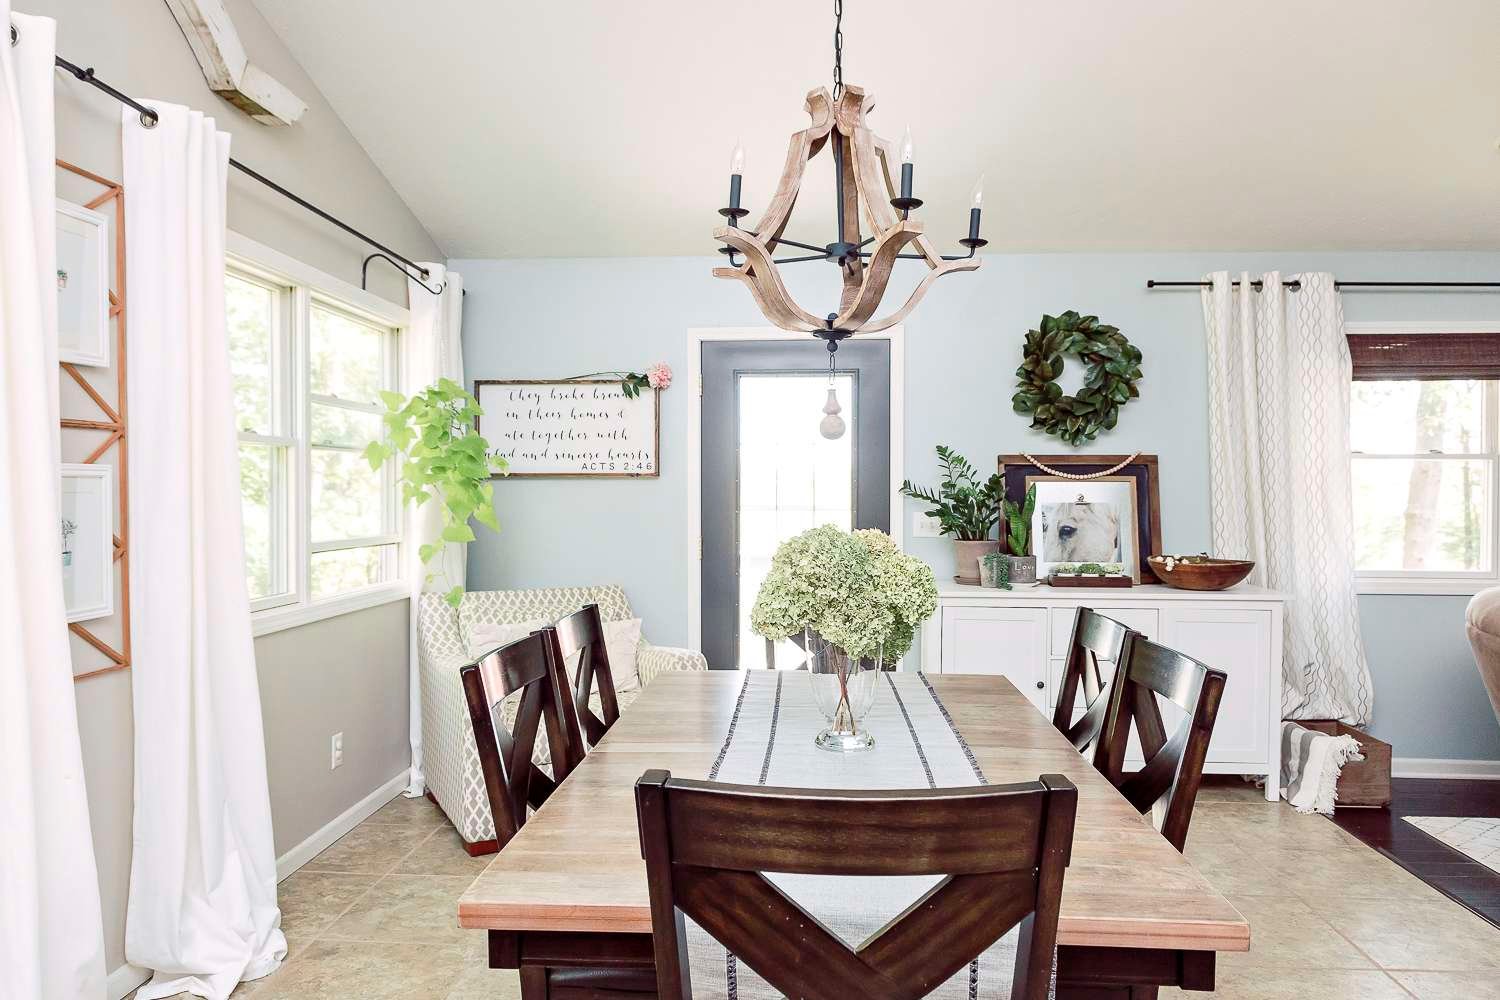
Hello Friends! I’ve got another super simple DIY project for you today! Do you have a large span of windows in your home that you’d like to frame with curtains, but the custom curtain rod would cost you your first born child? Yes? I did too! So, I figured out a way to make my own DIY curtain rods that span up to 20 feet of windows!
Post may contain affiliate links where I earn a small commission at no extra cost to you on your purchases.

I’ve been making my curtain rods this way for almost 6 years now and they are so simple. These DIY curtain rods will take you less than an afternoon to make and the hardest part will be deciding which beautiful curtains to adorn them with. Oh, and did I mention they will cost you less than $20? Ready to DIY? Here we go!
DIY Curtain Rods: Supply List
- Two pieces of 1 in. x 10 ft. electrical conduit or 1/2 in. x 10 ft. electrical conduit depending on your preference of bar diameter and length needed.
- 1 in. Coupling or 1/2 in. Coupling depending on the conduit size you’ve chosen above.
- Flat Black Spray Paint
- Curtain Rod Brackets (Make sure you buy as many as is necessary for full support of your bar.)
- Finial of your choosing! I used this set.
- Depending on your needed rod size, you may need a sawzall with a blade able to cut metal.
DIY Curtain Rods: Tutorial
Step 1
Measure
Measure the length of your windows + 6 in.- 12 in. on either side of the window for overhang. (This is to allow your room to seem wider by hanging the curtains on the outside of the window trim.) This will determine how many pieces of conduit you will need. Each piece is 10 feet long so if your windows span more than 10 feet you will need two pieces. I’ve made these DIY curtain rods for two spans of windows in my home.
Trim
The first was 17 feet and the windows butt up against a wall. This meant that I had to cut down the full length of my rod by 2 feet in order to fit my space with the necessary overhang I desired on each side of the window to place the curtains. So, for this rod I had to buy two pieces of conduit, making sure that I cut each piece to the same length so the joining of the two pieces is in the middle of my window span. Therefore I had to trim off 1 foot from each piece of conduit.
Had I taken the short route and cut off 2 feet from just one rod, then the coupling that joins the two pieces together would not be centered on my window span. This might not matter to you, but it did to me!
For the second set of 18 foot windows I had plenty of space on either side of the windows to keep the entire 20 feet of rod without needing to trim it down. This is the ideal situation!
Step 2
Paint
After you’ve trimmed your conduit according to the length of your windows (+ overhang), the next step is to spray paint your electrical conduit and coupling. I chose to use flat black and Rustoleum is my favorite brand for durability.
Simply set up two saw horses outdoors and place your conduit on top. If you need to, make sure to protect the ground below your work area. I used the spray and wait method. 🙂 Spray one side of your conduit using long continuous strokes to avoid drips, and then wait for it to dry. Once that side is dried, then you can rotate your conduit and do the same to the other side.
Since you will use thin coats it dries fairly quickly. Use two to three coats of paint on each bar for full coverage and durability. Make sure to paint the coupling as well!
Step 3
Assemble
Once your paint has fully dried you can assemble your bar to its full length. I recommend doing this INSIDE in the room you will be hanging the DIY curtain rod in! Imagine trying to maneuver a 20 foot rod through your house! That’s a DIY no-no.
Simply place each piece of conduit on the floor in front of your windows and slide each end of the conduit into the coupling. Use the included set screws and tighten them to secure each piece of conduit in place.
The final assembly step is to secure your finial to each end. You should do this AFTER the rod has been hung and you’ve placed your curtains on the rod. Using the set I linked above, I simply hot glued my finial directly to the rod. I was able to do this because my curtains fit over the finial so I don’t need to remove it to get curtains on and off my rod.
However, if you do want to be able to remove the finial easily, I’ve also simply screwed the finial into a wine cork, trimmed the cork to size to fit into the conduit, and then shoved it in! Easy peasy. However, realistically, hot glue is really easy to just peal off and re-glue if I needed to remove my finials.
Step 4
Hang
After you’ve assembled your new DIY curtain rod the only thing left to do is hang it! Make sure you properly secure your brackets to the wall using appropriate screws for your wall type.
Adorn with Curtains
Finally, adorn these simple DIY curtain rods with your favorite curtain! I’ve linked up a few of my favorites below if you’re looking for some ideas!
I hope that this saves you some moolah my friends! Let me know if you have any questions below!

{A little hard work goes a long way.}
Get the Inside Scoop
Have you subscribed yet?! Get the inside scoop, become a blog buddy, and get access to all my DIYs first, PLUS my free printable library!
The interior design is so beautiful!
Does the paint scrape off when you open and close the curtains?
We haven’t had an issue! You can add a clear coat if you use it frequently.
Would you be able to share a close up photo of the final curtain rod where the two conduit pipes connect with the coupling (and sit on the bracket). Thank you!
Unfortunately this post is from our last house! So I can’t take a photo. But it looks fairly seamless!
Did you use 1/2” or 1” conduit? Trying to figure out if the finials from IKEA would work for me. Thanks!
I’ve used both! The 1/2″ works best with the Ikea finials.
It appears you only needed support for the center of the 18-foot span. Is the conduit less likely to bend? Did you use metal or pvc conduit?
It can sag if you have heavy drapes. I would put a middle support if your drapes are substantial. 🙂
Hello,
Any advice for making tab curtains slide easier on this? We got to the end and realized that they are hard to slide.
Thanks so much!
Hmmm, I’ve never had an issue! Maybe it would help to gather them all together and slide on at once?
Thank you so much for this tutorial! I have a 20ft ramada that I’m trying to hang curtains on and wasn’t sure how to do this without breaking the bank. I want to be able to use grommet curtain panels, but I was worried that a rod that long would need multiple brackets to support it. If that’s the case, then I wouldn’t be able to close the curtains fully on either side. Can you please tell me how many support brackets you needed on your 20ft rod? It looks like you may just have one in the middle, which would be ideal. If that’s all you have, do you feel like the rod is secured enough and could handle curtains being pulled back and forth on a daily basis?
Thank you!
I’m so glad it was helpful! I used a bracket on each end and one in the middle. However, I didn’t ever open and shut my curtains. They were purely for decor. I never had an issue with the brackets sagging, but if you are going to use them daily you may want to do four brackets total. You could try to simply loop the grommets over each bracket on the ends and then do two curtains in the center depending on your windows. Then you’d be able to draw them shut from the ends and the middle. Hope that helps!
What a fun project! Thank you for linking up to our Friday Friends Parade!
Thank you Ashley! It was a fun one! I need to make more. 🙂
Great tutorial, Sarah! Came over by way of the Friday Friends Parade! Love the name of your site, and your photos are lovely!
Thank you so much Julie! I appreciate your sweet words my friend.