
No-Knead Loaf Pan Sourdough Bread Recipe (With Baking Schedule)
Baking sourdough in a loaf pan is an amazing option for the everyday baker. This recipe is uncomplicated and uses no special tools. Perfect for a sourdough novice. Learn how to make a rustic, no-knead loaf pan sourdough bread with this delicious recipe!

This post may contain affiliate links for your convenience.
If you are a sourdough novice, I highly recommend reading through the entire contents of this article prior to jumping to the recipe. This will help you understand the process and cover some FAQs.
Sourdough Bread Quick Facts
If you are a beginner sourdough baker, you might be confused by much of the terminology found in sourdough recipes. There is a lot to learn when tackling sourdough, so here are some quick facts and terminology to get you started.
What is Sourdough Starter?
Sourdough starter is the ingredient that makes sourdough bread rise. It is a combination of flour and water.
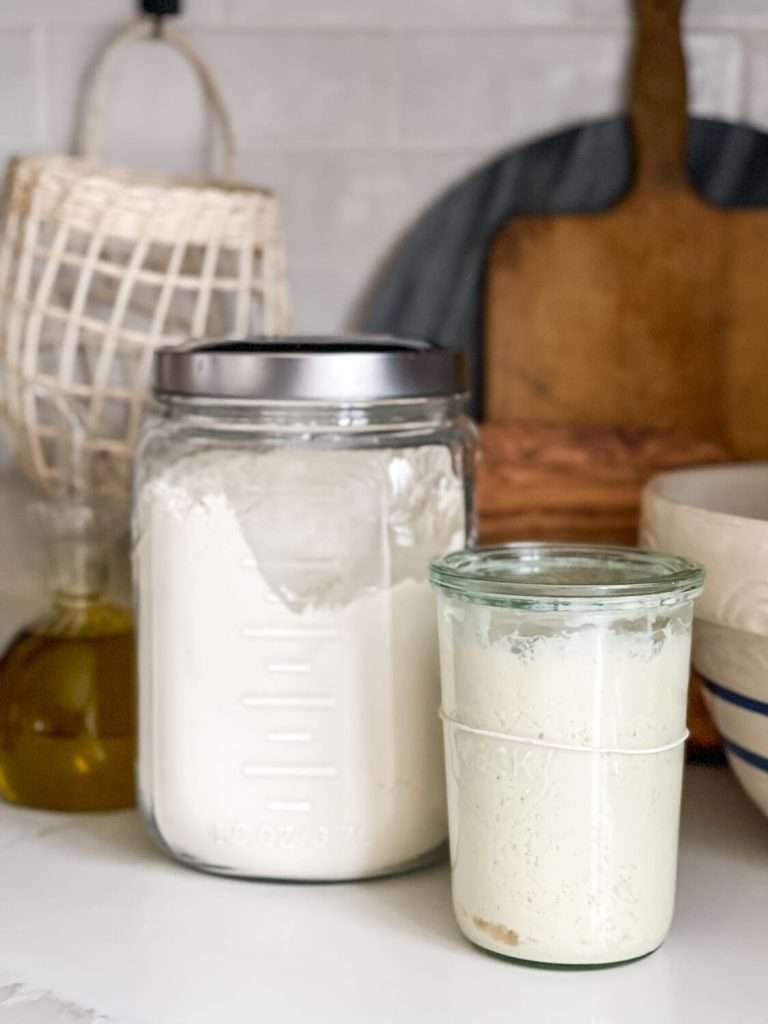
When you create sourdough starter over a period of 7-14 days, you are developing a live fermented culture of the flour and water. Think of it like an alternative to yeast.
Traditional breads typically use active yeast to make them rise. Sourdough uses sourdough starter!
How Do I Make Sourdough Starter?
You can make sourdough starter right in your own kitchen over the course of a 7-14 day fermentation process.
If you are new to sourdough baking and want to create your own sourdough starter, you will find this article very helpful.
If you do not want to make your own starter, you can purchase it, or ask a friend to gift you some!
Once you have an active and alive sourdough starter, you can keep it forever! You just need to feed it regularly. So if a friend or relative already has starter, they can pass some on to you easily.
Is Sourdough Healthier Than Regular Bread?
Sourdough has some amazing qualities that yeast breads lack.
It offers more vitamins and nutrients, has less gluten, and is easier to digest than white or wheat bread. Plus, it is made without any sweeteners or oils.
It is an amazing option to consume in place of yeast breads and other baked goods.
Do I Need Special Tools to Make Sourdough Bread?
The beauty of this recipe is that you don’t need any special tools at all!
Most recipes call for some materials that are unique to regular bakers, like a stand mixer, dutch oven, proofing bowl or Bannenton basket.
However, if you are just getting into bread making you likely don’t have these materials. This recipe simply calls for a bowl, spoon, and loaf pan!
Loaf Pan Sourdough FAQs
Loaf pan sourdough bread is perfect for beginner bakers. If you’ve searched for sourdough bread recipes, you may have noticed that many call for baking bread in a dutch oven. But, perhaps you don’t have one!
Can I Bake My Sourdough in a Loaf Pan?
Yes! If you have a loaf pan, then you can make sourdough bread! Most recipes that use a loaf pan are for sourdough sandwich bread. However, this specific recipe is for a rustic sourdough loaf that isn’t quite as light and airy.
Can You Use a Loaf Pan Instead of a Dutch Oven for Bread?
While sourdough bread in a loaf pan isn’t the most popular way you can cook sourdough, it’s an excellent option for those without a dutch oven. The main differences between the two types of bakeware is the end shape of your loaf and the crust texture.
Dutch ovens steam the bread from having an enclosed lid, whereas loaf pans are used without a covering. This will slightly change how crunchy the crust is, though not enough to say one is better than the other.

The other main difference is the shape. Loaf pans will produce a traditional sandwich bread style rectangle loaf. Dutch ovens are wider and allow the bread to spread out more, producing a more circular and flatter loaf.
Both options are excellent and produce delicious bread.
What Size Loaf Pan for Sourdough Bread?
Some recipes call for a sandwich bread loaf pan. This produces a longer rectangle.
However, this recipe simply calls for a standard 1 lb loaf pan that you likely have in your cupboard. This is my favorite loaf pan. The bread bakes so nicely and slides right out when it’s done.
How to Make Loaf Pan Sourdough Bread
Baking sourdough in a loaf pan is very simple. It produces a delicious loaf that is easy to slice and perfect for toast, sandwiches, or a side at dinner.
Follow this simple baker’s schedule to take the guess work out of making sourdough bread!
Loaf Pan Sourdough Bread Baker’s Schedule
This schedule prepares your bread the day before. You will bake the bread the next morning. You can adjust your timeline as needed if you want to bake your bread in the evening.
Feed Sourdough Starter
7:00am: The day before you will bake your bread, feed your sourdough starter. You must use an active, mature starter for this recipe. Your starter should peak, and then begin to come back down before you mix your bread ingredients.
Mix Bread Ingredients
7:00pm: The night before you bake your bread, mix all ingredients together.
7:15pm: Do your first set of stretch and folds to help produce gluten and structure to your loaf. (See full recipe for details.)
7:30pm: Do you second set of stretch and folds.
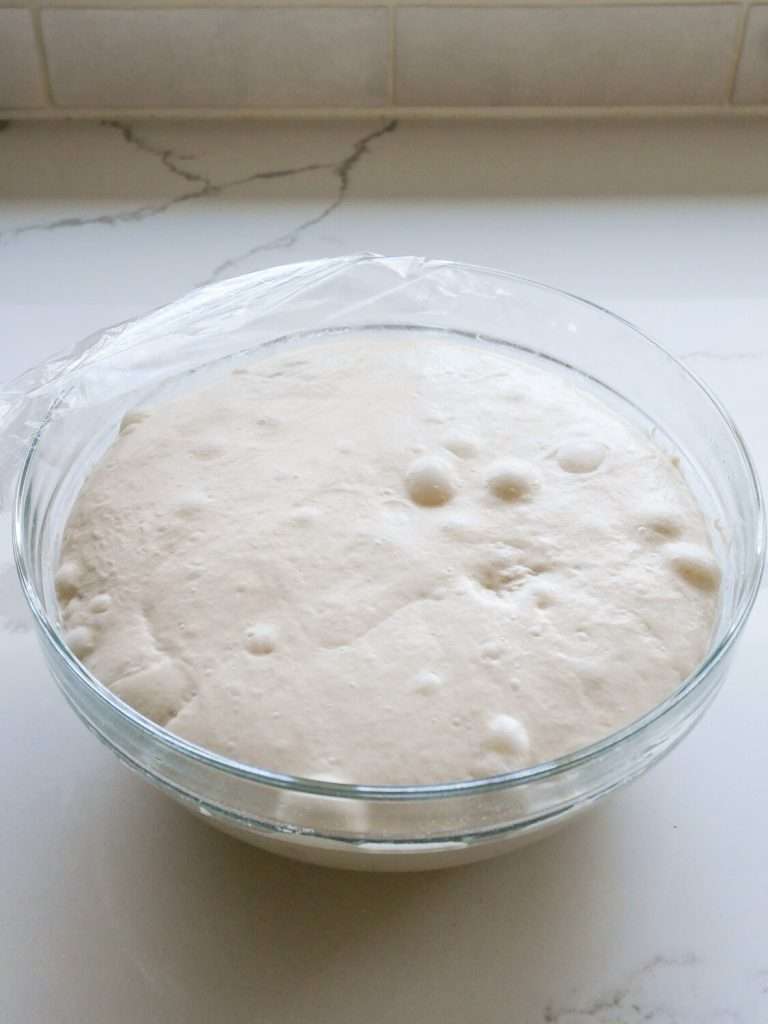
7:45pm: Do a third set of stretch and folds, then let rise overnight in a bowl. Cover your bowl with a damp towel and place in a warm room, away from drafts or cold walls.
SHape & Ripen
6:00-9:00am: Check your dough when you wake up to see how it has progressed. If you live in a warm climate, your dough will likely be ready sooner than those who live in a cold climate.
Your dough should be almost double in size, jiggly, and show signs of bubbling. Do the poke test to see if it has proofed properly. Poke a floured finger into the dough. It should be soft and spring back.
Once ready, shape your dough with a series of stretch and folds. (See full recipe for details.)
Place shaped dough in a 1 lb floured loaf pan and let rest uncovered in the refrigerator 1 hour. (You can line with parchment, if desired.)
Preheat oven during that hour. Your oven must be hot.
Bake
One Hour After Shaping: Remove loaf pan from the refrigerator and bake in pre-heated oven.
Let cool before slicing.
Full Recipe Details
Now that you have the baker’s schedule in mind, let’s talk details!
Baking bread is more an art form than following a recipe. The temperature of your home, water temp, type of flour you use, and stage of your sourdough starter can all impact your final results.
Tools You’ll Need
- Kitchen Scale
- Glass Mixing Bowls
- Dutch Oven
- Dough Scraper
- Spatula or Wooden Spoon
- Loaf Pan (This pan bakes every loaf perfectly without sticking)
- Stand Mixer (Optional)
If you’re an experienced bread maker, then you’ll know there are a million variations that are possible for a simple loaf pan sourdough. But I’m here to make this as simple as possible for my novices!
As you make more loaves, study the process, and get familiar with what to look for, you can easily branch out into using a variety of flours, adjusting hydration, and adding things like seeds and herbs.
Sourdough Bread Ingredients
Feed Sourdough Starter
As stated in the baker’s schedule above, you will want to feed your sourdough starter in the morning. Let it rise and fall (may take 6-10 hours) before incorporating into bread mixture.
Step 1: Mix Flour & Salt
First, place a large mixing bowl onto your kitchen scale and zero it out.
Then, spoon bread flour into the bowl until you measure 520 grams.
Next, add 2 tsp fine sea salt. You can alternatively use kosher salt if you don’t have sea salt on hand.
Mix dry ingredients together.
Step 2: Mix Water & Sourdough Starter
In a separate smaller bowl, add 375 grams of warm water. Then, mix in 90 grams of active sourdough starter. Stir together until the starter is dissolved and the water looks cloudy.
Step 3: Mix Wet & Dry Ingredients
Next, take your dry ingredients and slowly incorporate the wet ingredients with a spatula or wood spoon handle. Mix thoroughly until no flour is left.
This will produce a shaggy dough that is fairly tough. If you have issues fully mixing the flour, add 1 tablespoon of warm water and stir some more. The dough will be sticky, but should not be runny.
Cover the bowl with a towel or plastic wrap and let rest 30 minutes. The dough will loosen up as it rests.
Step 4: Stretch & Folds
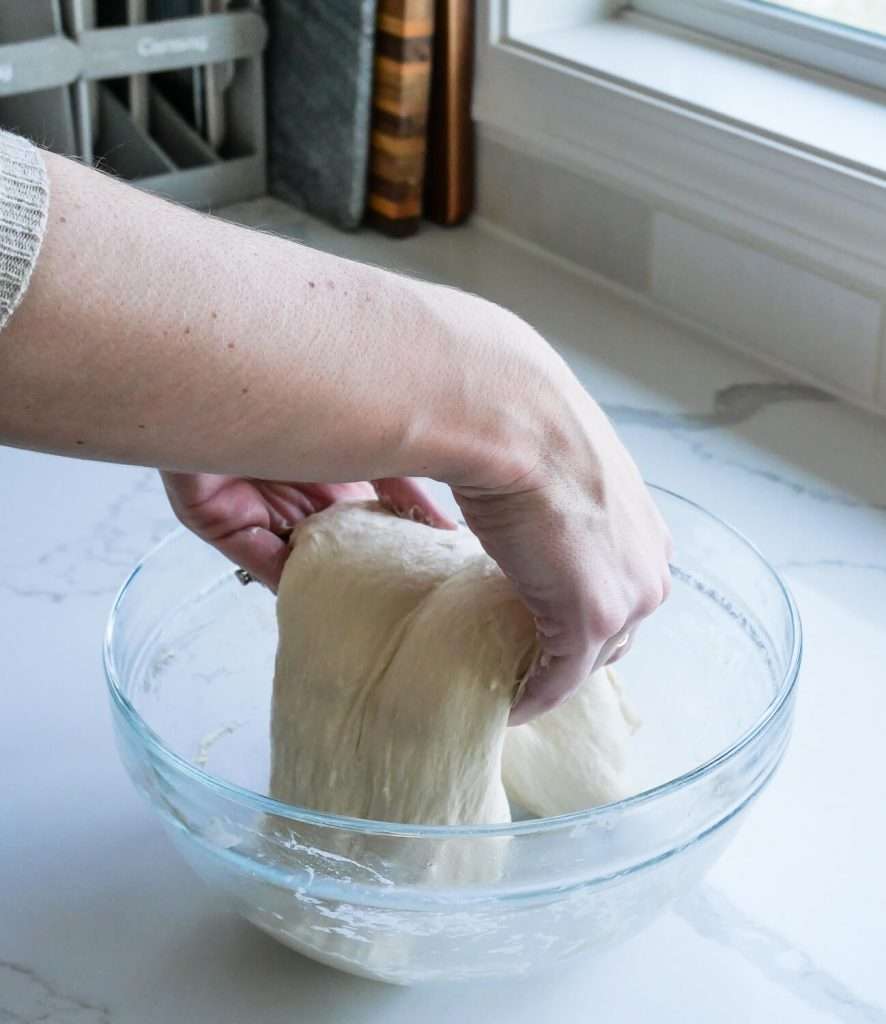
After the dough has had some time to rest, do three to four sets of stretch and folds 15-20 minutes apart. You will do these right in the bowl, no need to place on a floured surface.

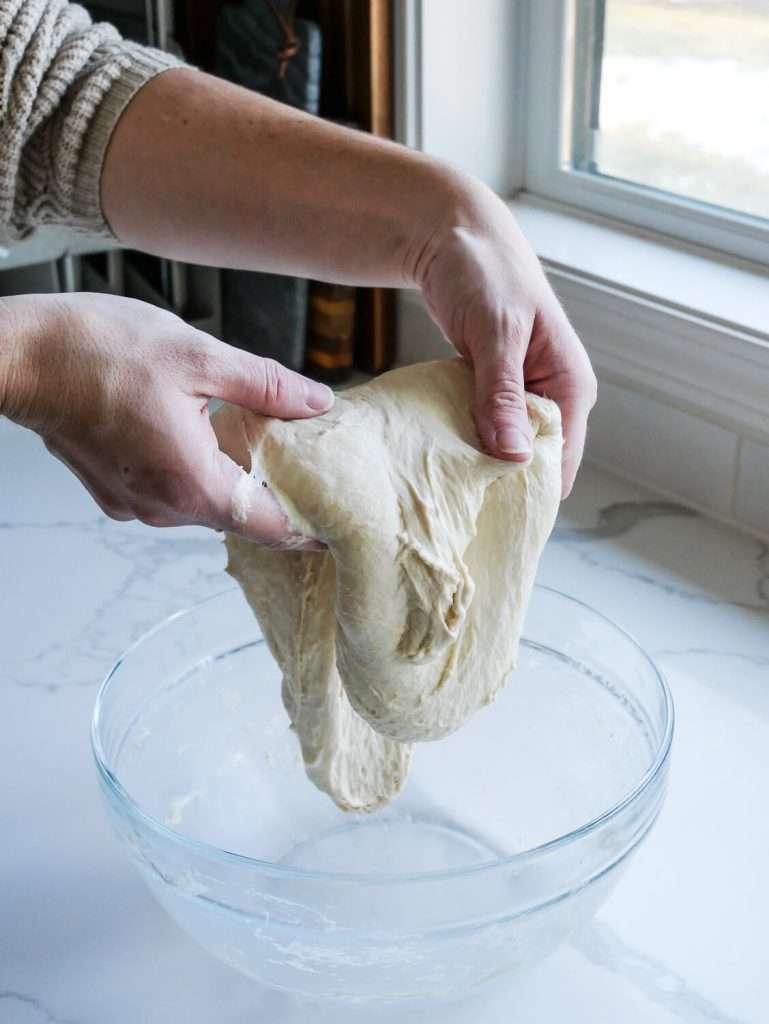
For this set of stretches, think of your dough as a round ball segmented into fourths. Wet one hand, take ahold of 1/4 of the dough and pull it straight up, then fold it over on top of the rest of the dough.
Turn your bowl slightly, then take the next 1/4 and do the same. Repeat this process around the dough ball until all four segments have been stretched up and folded back down. Do this again one more time for a total of 8 stretch and folds.
Wait 15-20 minutes to let the dough rest.
Repeat another set of only 4 stretch and folds.
Wait 15-20 minutes. Repeat another set of 4 stretch and folds if needed.
This process helps strengthen the gluten in the bread.
Cover the bowl with a wet towel and let sit to proof (rise) in a warm place overnight. If you live in a cold climate, make sure you place the dough in your warmest room, away from drafts or exterior walls.
Step 5: Final Stretch & Shape
The next morning, check your dough first thing.
Your dough should be almost double in size, jiggly, and show signs of bubbling. Do the poke test to see if it has proofed properly. Poke a floured finger into the dough. It should be soft and spring back.
If it is hard, it needs more time to proof. You can try placing it in the oven with the light on (but not the heat) for an additional hour. Check again.
Once the dough is ready, you will do your final sets of stretch and folds.
This set will be different than the first. Wet both hands, place them on either side of the dough and scoop it up in the middle. Let the dough hang down on both sides a foot in the air. Let it stretch down a few seconds, then place it back in the bowl, folding over itself.
Wait a minute, turn the bowl, and repeat this process.
Wait 15-20 minutes and repeat a second set of stretch and folds in the same manner. If your dough is runny, you will want to repeat this process again a third time.

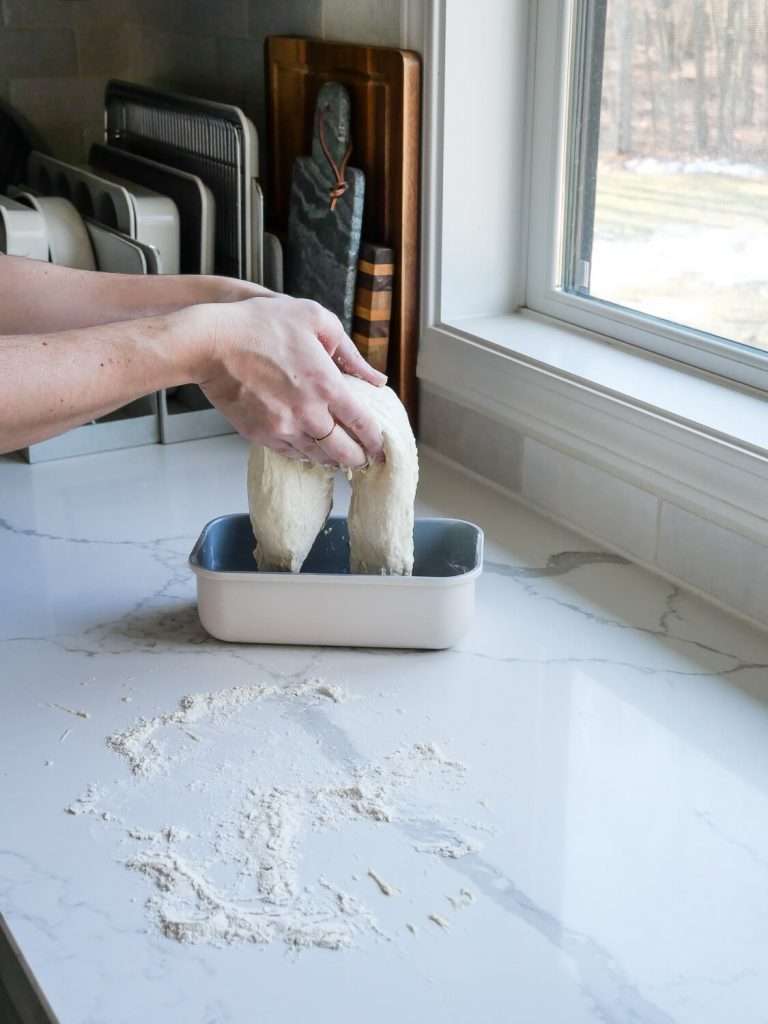
This time, flour a countertop or work surface and place the dough on the counter. Do your third and final set of stretch and folds from the countertop, then place directly into the floured or oiled loaf pan.
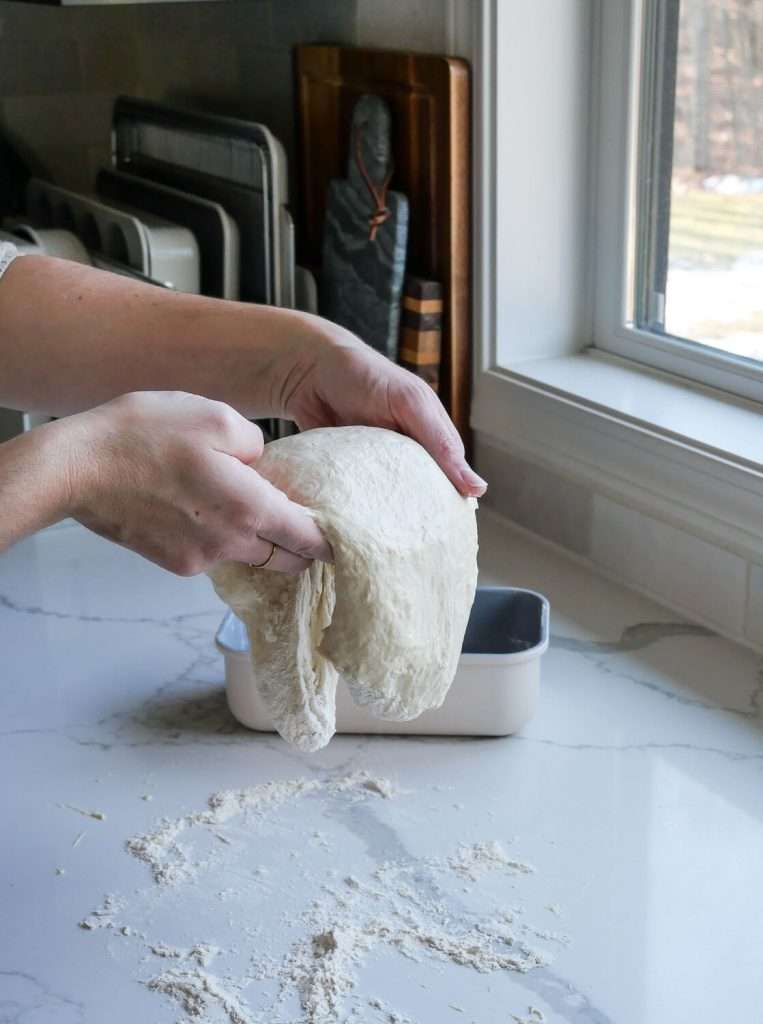
Some loaf pan recipes call for you to shape the dough into a rectangle before placing it in the pan. You can certainly do so for a more even shape. However, I find that it works just as well to fold it into the pan for a more rustic appearance.
Step 6: RIpen Dough in Refrigerator
Place your loaf pan with the sourdough dough into the fridge.
Pre-heat your oven to 450 degrees Fahrenheit. Time for one hour.
After the hour is up, your dough will have had time to firm up in the fridge, and your oven will be nice and hot.
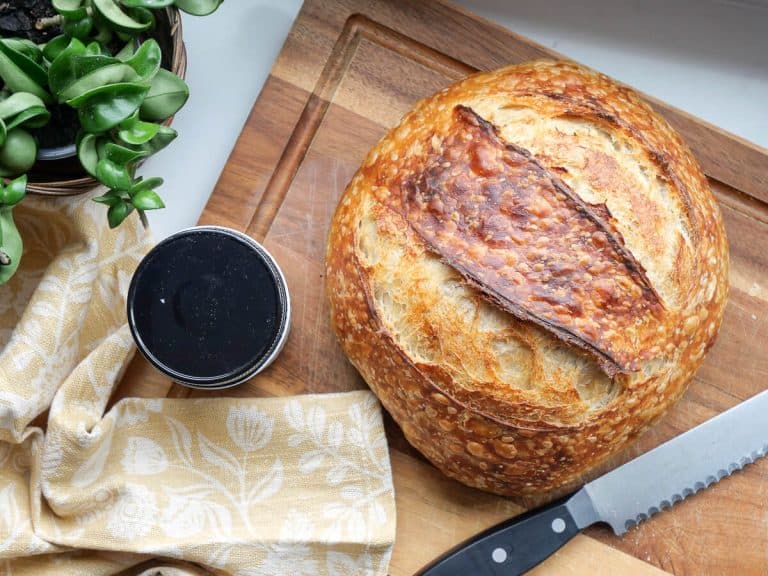
Step 7: Bake and Cool
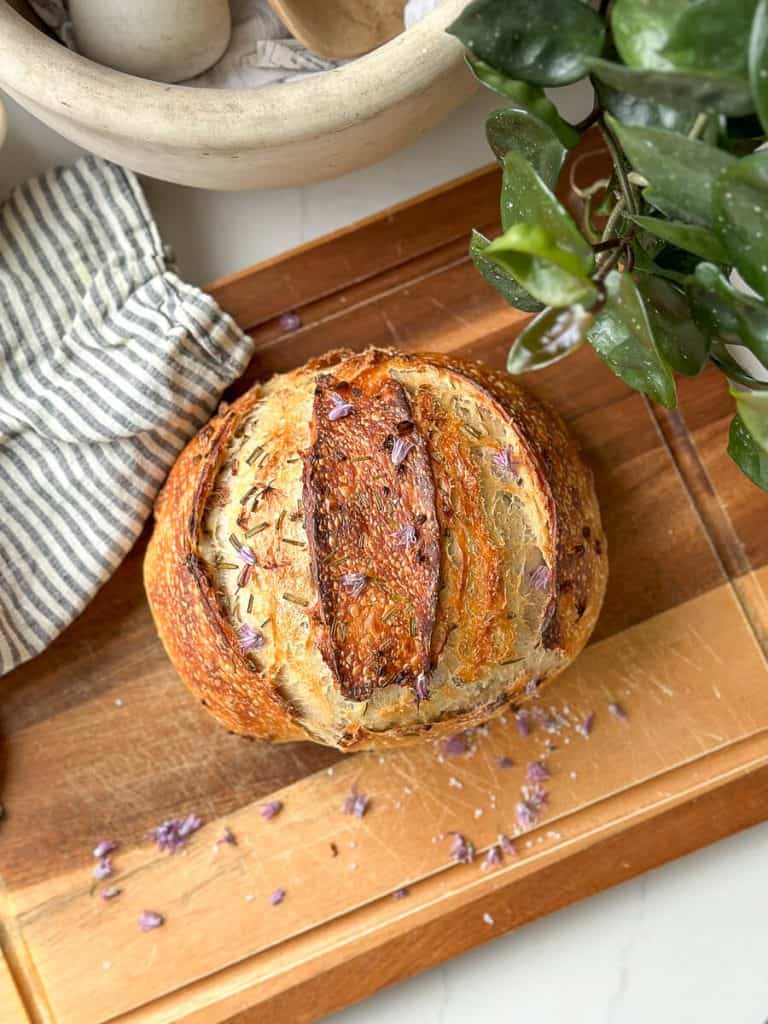
The final step is to bake your loaf pan sourdough! If you wish, you can score the top for appearance sake. For a fuller dome, do not score it.
Bake at 450 for 20 minutes. Then, lower the heat to 425 and bake 20-25 more minutes. Your bread should read 205 degrees when taken with a thermometer.
Your oven may vary, so make sure you aren’t over baking around the 30 minute mark from the start of your bake time.
Let your bread cool in the loaf pan for 10 minutes, then remove and cool completely on a cooling rack.
Enjoy!
Free Printable Recipe

Rustic Loaf Pan Sourdough Bread
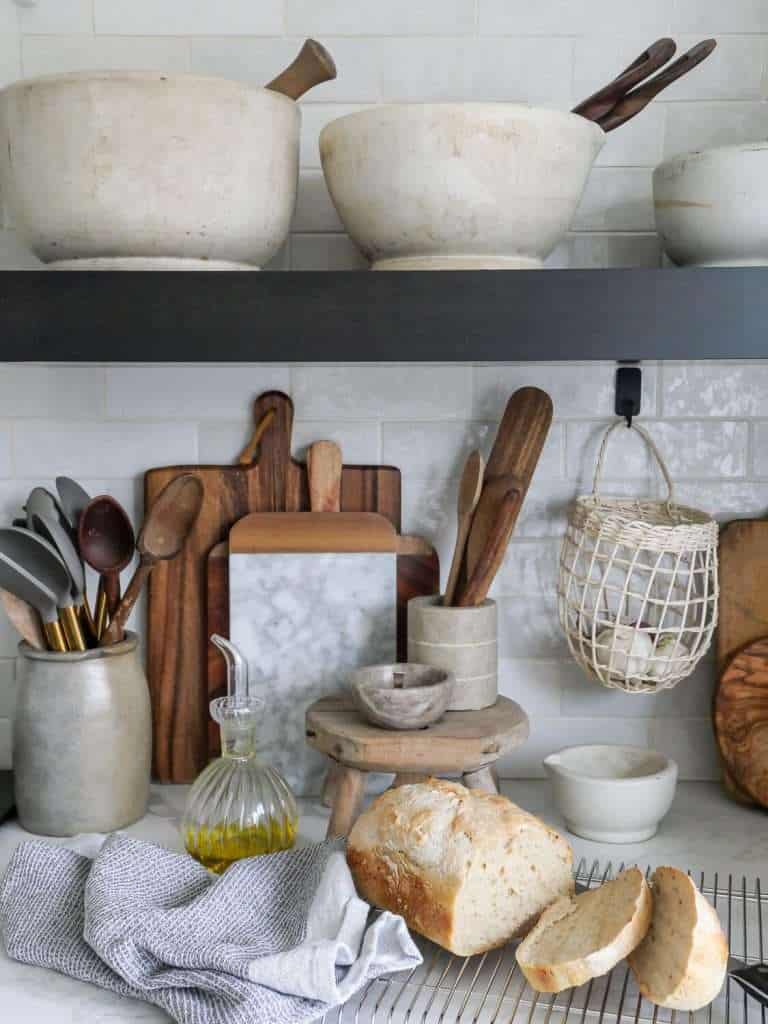
This rustic, no-knead loaf pan sourdough bread is simple to whip up with this delicious recipe! It turns out moist on the inside with a delicious crunchy crust, perfect for toast, sandwiches or a dinner side.
Ingredients
- 520 grams bread flour
- 2 tsp fine sea salt
- 90 grams sourdough starter
- 375 grams warm water
Instructions
- If you are new to baking sourdough, it is recommended for you to read my entire blog post with notes prior to starting.
- Morning: As stated in the baker's schedule (see full post), you will want to feed your sourdough starter in the morning. Let it rise and fall (may take 6-10 hours) before incorporating into bread mixture.
- Evening: First, place a large mixing bowl onto your kitchen scale and zero it out. Then, spoon bread flour into the bowl until you measure 520 grams.
- Next, add 2 tsp fine sea salt.
- Mix dry ingredients together.
- In a separate smaller bowl, add 375 grams of warm water. Then, mix in 90 grams of active sourdough starter. Stir together until the starter is dissolved and the water looks cloudy.
- Next, take your dry ingredients and slowly incorporate the wet ingredients with a spatula or wood spoon handle. Mix thoroughly until no flour is left. This will produce a shaggy dough that is fairly tough. If you have issues fully mixing the flour, add 1 tablespoon of warm water and stir some more. The dough will be sticky, but should not be runny.
- Cover the bowl with a towel or plastic wrap and let rest 30 minutes. The dough will loosen up as it rests.
- After the dough has had some time to rest, do three to four sets of stretch and folds 15-20 minutes apart.
- Wet one hand, take ahold of 1/4 of the dough and pull it straight up, then fold it over on top of the rest of the dough. Turn your bowl slightly, then take the next 1/4 and do the same. Repeat this process around the dough ball until all four segments have been stretched up and folded back down. Do this again one more time for a total of 8 stretch and folds.
- Wait 15-20 minutes to let the dough rest. Repeat another set of only 4 stretch and folds.
- Wait 15-20 minutes. Repeat another set of 4 stretch and folds if needed.
- Cover the bowl with a wet towel and let sit to proof (rise) in a warm place overnight.
- Next Morning: The next morning, check your dough first thing. Your dough should be almost double in size, jiggly, and show signs of bubbling. Do the poke test to see if it has proofed properly. Poke a floured finger into the dough. It should be soft and spring back.
- Once the dough is ready, you will do your final sets of stretch and folds. Wet both hands, place them on either side of the dough and scoop it up in the middle. Let the dough hang down on both sides a foot in the air. Let it stretch down a few seconds, then place it back in the bowl, folding over itself.
- Wait a minute, turn the bowl, and repeat this process.
- Wait 15-20 minutes and repeat a second set of stretch and folds in the same manner.
- Wait 15-20 minutes. Flour a countertop or work surface and place the dough on the counter. Do your third and final set of stretch and folds from the countertop, then place directly into the loaf pan.
- Place your loaf pan with the sourdough dough into the fridge. Pre-heat your oven to 450 degrees Fahrenheit. Time for one hour.
- Remove loaf pan from fridge and bake in preheated 450 degree oven for 20 minutes. Then, lower the heat to 425 and bake 20-25 more minutes. Your bread should read 205 degrees when taken with a thermometer.
- Let your bread cool in the loaf pan for 10 minutes, then remove and cool completely on a cooling rack.
Notes
- Step 14: If your dough is hard, it needs more time to proof. You can try placing it in the oven with the light on (but not the heat) for an additional hour. Check again.
- Your oven may vary, so make sure you aren't over baking around the 30 minute mark from the start of your bake time.
- If your bread didn't rise properly, your starter may not have been active enough. Or, sometimes people use hot water instead of warm, which can kill your starter. Aim for water around 75-80 degrees.
- Sourdough Novices: If you don't have success the first time, try try again! Repeat the same recipe so you aren't changing too many variables. This will give you a chance to learn from the process to see what you might need to change next time.
Nutrition Information:
Yield: 10 Serving Size: 1 sliceAmount Per Serving: Calories: 125
How to Eat Sourdough Loaf
I love this bread simply sliced and slathered in butter. However, if you want to jazz it up, here are my other favorites:
- Toasted with butter and jam
- Toasted, buttered, and topped with smashed avocado with salt and red pepper flakes
- Make into simple garlic bread by cutting into slices, buttering, then sprinkle with garlic salt and baking at 350 for 5 minutes on a sheet pan.
What are some of your favorite ways to add some pizzazz to sourdough?
New to Sourdough?
If you’ve made it this far, and you’re new to sourdough, you may feel overwhelmed.

I know I was the first time I attempted sourdough bread. There is a lot to learn if you are new to baking bread and it can be easy to mess up your first few loaves.
Rest assured, with practice it becomes much easier and less intimidating.
Making sourdough bread from scratch involves a lot of steps, but they are simple. It is worth learning the art of baking for that delicious, healthy, and all natural bread to be placed before your family.
If you don’t have success the first time, try try again! Repeat the same recipe so you aren’t changing too many variables. This will give you a chance to learn from the process to see what you might need to change next time.
Complete the Meal
I hope you love this rustic loaf pan sourdough! It’s on repeat weekly at our home and I hope it becomes a staple in yours as well.
If you’re looking for more quick and healthy recipes, check out these next to complete the meal!
Or, if you’re looking for a hearty soup to go with your sourdough, try one of these recipes.
You can also visit my recipe archives here.
Thanks for stopping by the blog today!
Make sure to subscribe to get my Grace Notes directly to your inbox and to access all my insider perks. You can also follow along daily on Instagram and weekly on YouTube!
– Sarah


Step 10 is confusing. A set is a total of four stretch and folds but you say do this again for a total of 8 stretch and folds?? So how many sets is it? Wouldn’t a total of 8 stretch and folds be two sets?? And then two more sets after that for step 12 and 12. Help please!
Yes, step 10 has two sets of 4 stretch and folds for a total of 8. (Essentially just stretching all four corners twice.) Steps 11 and 12 are each only one set of 4, done 15-20 minutes apart. Of course, every dough will be slightly different! So if you feel your dough is taking shape well enough after steps 10 and 11, then I’d skip the last set of stretch and folds and let it rise. This will be up to the baker’s discretion. I hope this helps!
Okay so this hs become my favorite loaf to make but now that it’s getting warmer it’s not coming out the same the next morning. It’s like mush and doesn’t seem to hold its strength from the stretch and folds and then doesn’t rise when baked. I tried using less water and it’s just not behaving the same as before. Any tips? I used to get such smooth dough with all the bubbles even once I put in my baking dish.
Hi Jasmine! It’s definitely due to over proofing. With the warmer weather, your dough will proof much faster. So it may not need an entire overnight timeframe depending on the temperature in your home. I’d start by checking on it to see if it’s done proofing 6-8 hours in and then watch it closely to prevent overproofing. You’ll know it’s ready if you poke it and the dough slowly rises back. If it doesn’t rise back at all, it’s overproofed. If it rises back quickly, it needs more proofing time. Hope that helps!