
DIY Shiplap | Shiplap The Easy Way
Well, shiplap for days is a dream of mine. But with my nook refresh it became a small reality. I told you last time that I started a project refreshing a nook in my hallway. If you’re interested, I made some DIY barnwood shelving for this nook! But today, I wanted to share the DIY shiplap that I added to this space.
DIY Shiplap
Let me start by saying that I really wanted to add real shiplap. You know, the Joanna Gaines, southern living, old wood filled with character kind of shiplap. But I read a ton of tutorials and while all of them said just how easy it would be to install, I knew better. #1. I don’t have the tools necessary to make the kind of cuts I needed for this small space. #2. I don’t have the skills necessary to make those cuts!
And I know all of you are out there saying, “Just go to a lumber store! They will make the cuts for you!” But, my friends, I’ve had my local lumber store cut wood for me. And they shot daggers out of their eyes when I hunted them down and asked them to come cut one 2×4 in half. So I wasn’t about to go ask them to rip down sheets of plywood to undetermined lengths and angles since I am really bad at measuring things. SOOOO….that leaves FAUX shiplap. And this is where my story begins.
Faux Shiplap is the Easiest Shiplap
Did you know you can “make” shiplap with PENCIL!? I know. You are skeptical. I was too. But then I saw this from Tricia @cleanhousewithkids.

And it was all over. I told my husband I was going to draw shiplap onto our walls. As he usually does, he gave me a slightly skeptical look and then said, “I trust you. Go for it.” So I did! Here is my less than technical tutorial if you want to try too!
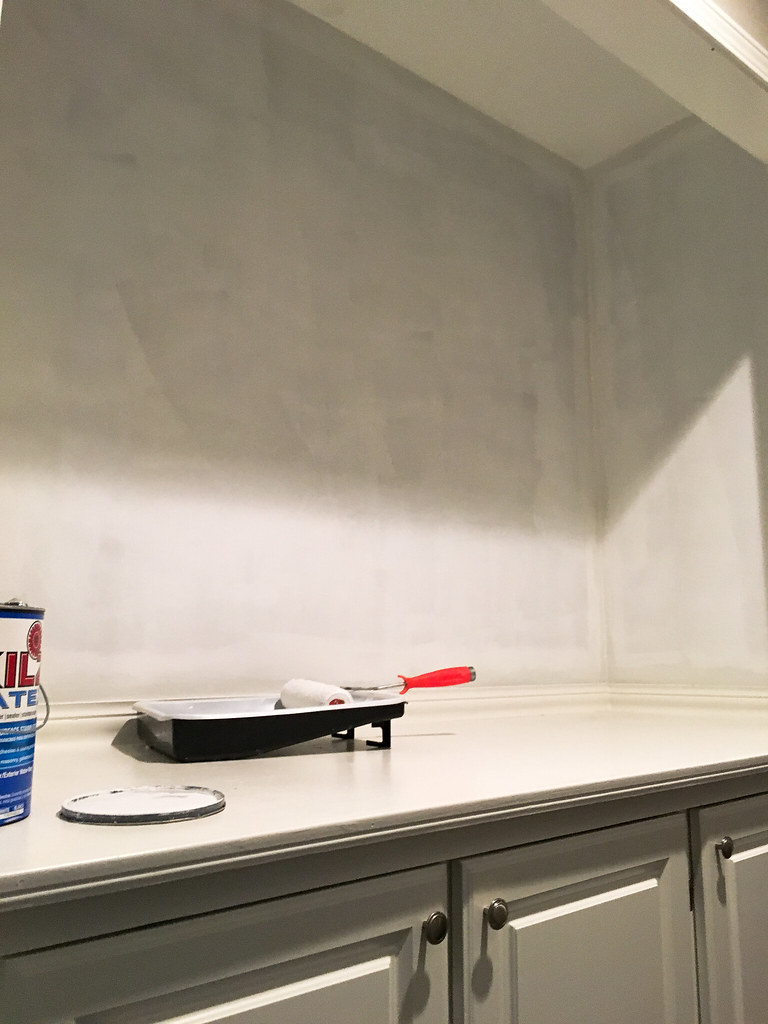
This is the before:
Before was just so so.
First step, paint those walls white. It always amazes me how I never learn to prime first. For some reason I thought my light grey walls would easily be covered by white. Well, they weren’t. So after my first coat of white paint I got out the Kilz. That helped. But honestly, I was using 4 year old paint and primer so I had to add a third coat to fully cover the extremely light grey paint with white. Sigh. Have I mentioned I hate painting?
Oh, and you’ll have to excuse the annoying shadows. Another part of the nook refresh is figuring out some lighting in there!
DIY Shiplap Tutorial
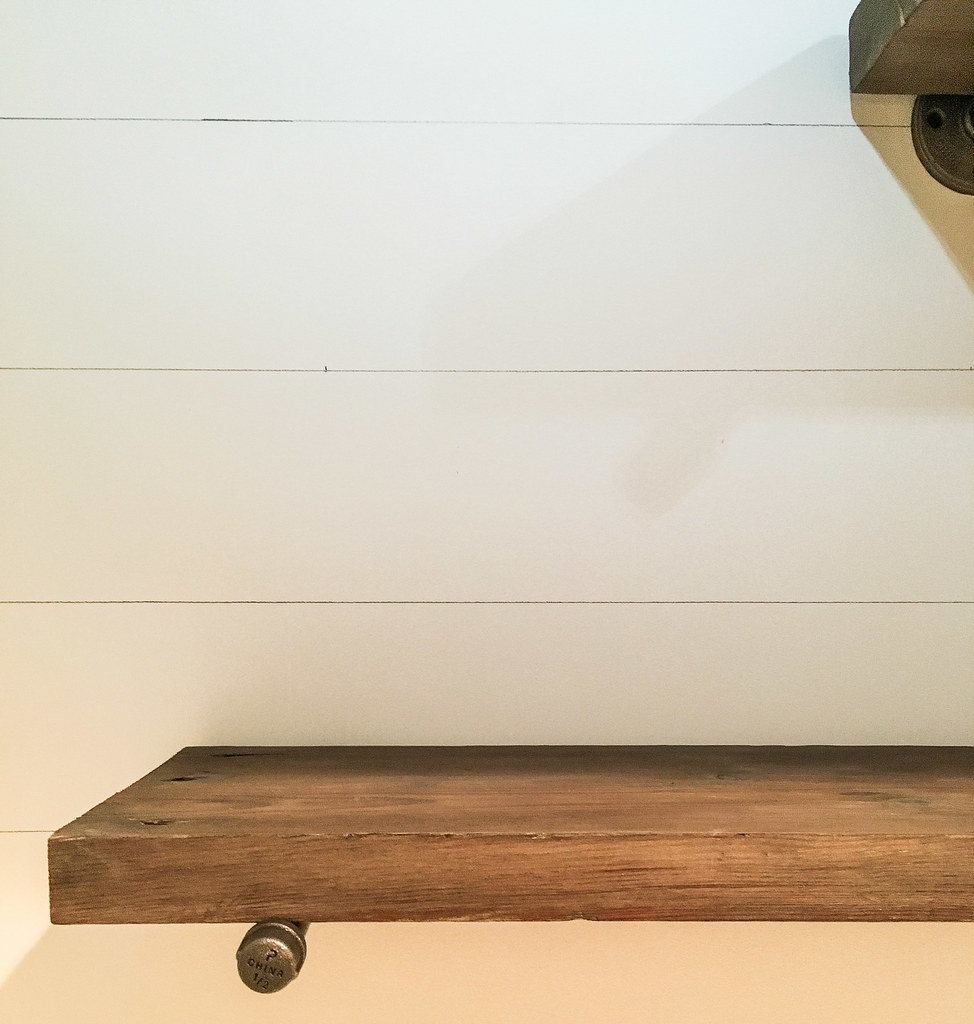
Once you have a white wall, get out your super simple supplies! (Say that three times fast.) You’ll need a pencil, level (I had to use three different sizes because of my wall sizes) and a tape measure.
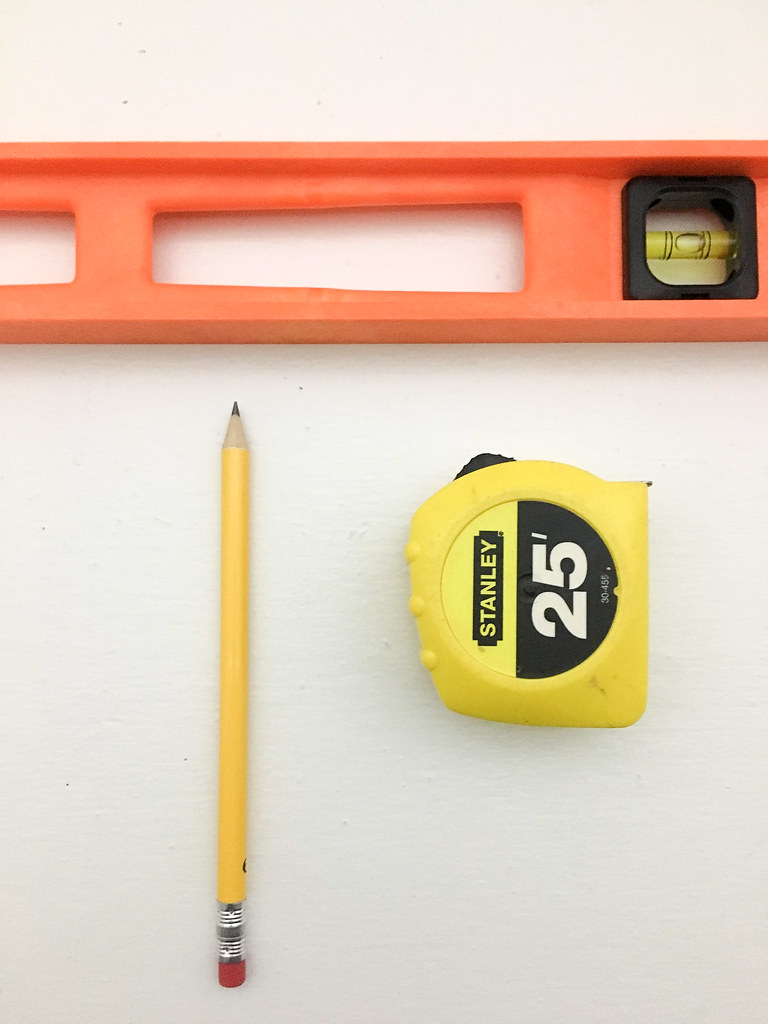
First step is measuring the width of your “boards”. I wanted it to look like my boards were 6 inches so I just marked a spot with the pencil down the wall vertically every 6 inches. Adjust your measurement depending on whether or not you want skinnier or wider looking shiplap. After that, just use the level as it is intended! Make sure that bubble is centered, hold the level steady, and use it as the guide for the pencil to make your horizontal lines.
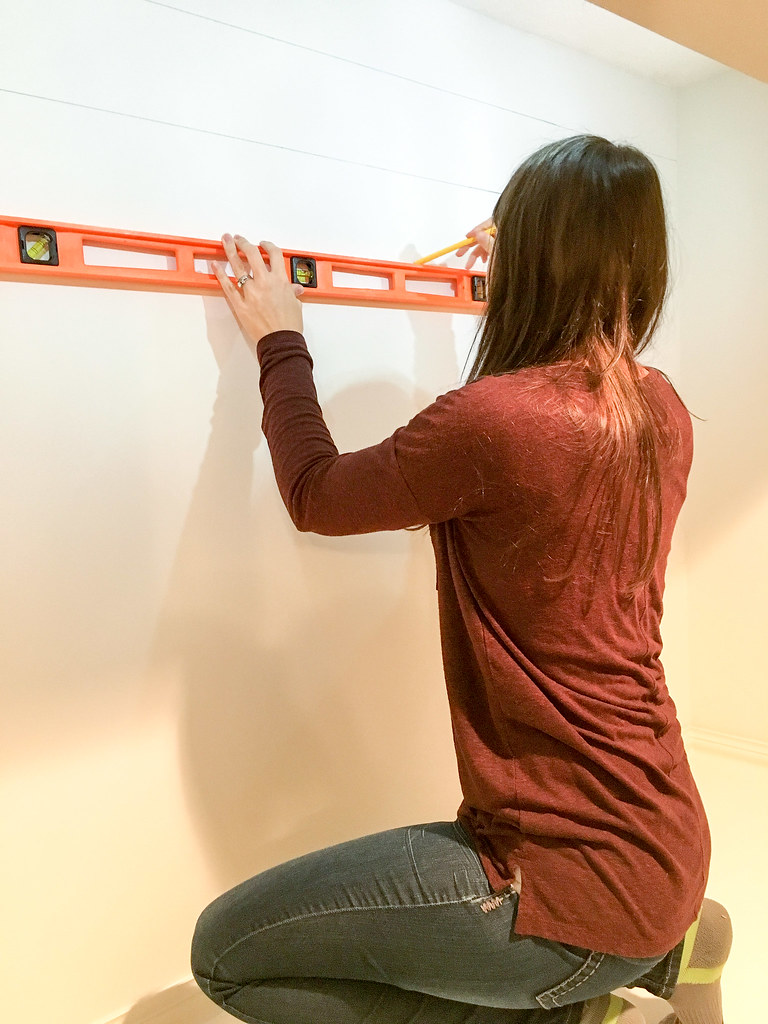
I am SO happy that this was the speedy part of the project. Do you know how hard it is for a tall woman to crouch like this? You do what you gotta do. 😉 And you also stand on top of your cabinet the entire time instead of using a step stool. Which would have been much smarter…
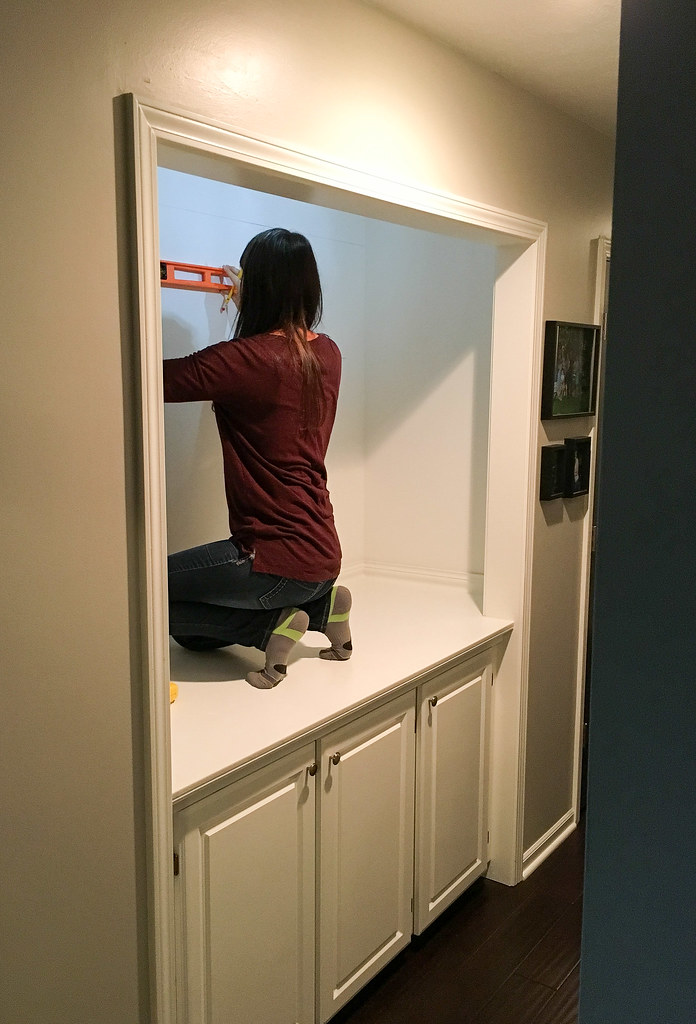
The entire process of making the lines only took about 30 minutes for this small space. The only part that was slightly tricky was lining up the marks when adjusting the level over when I hit the end of it.
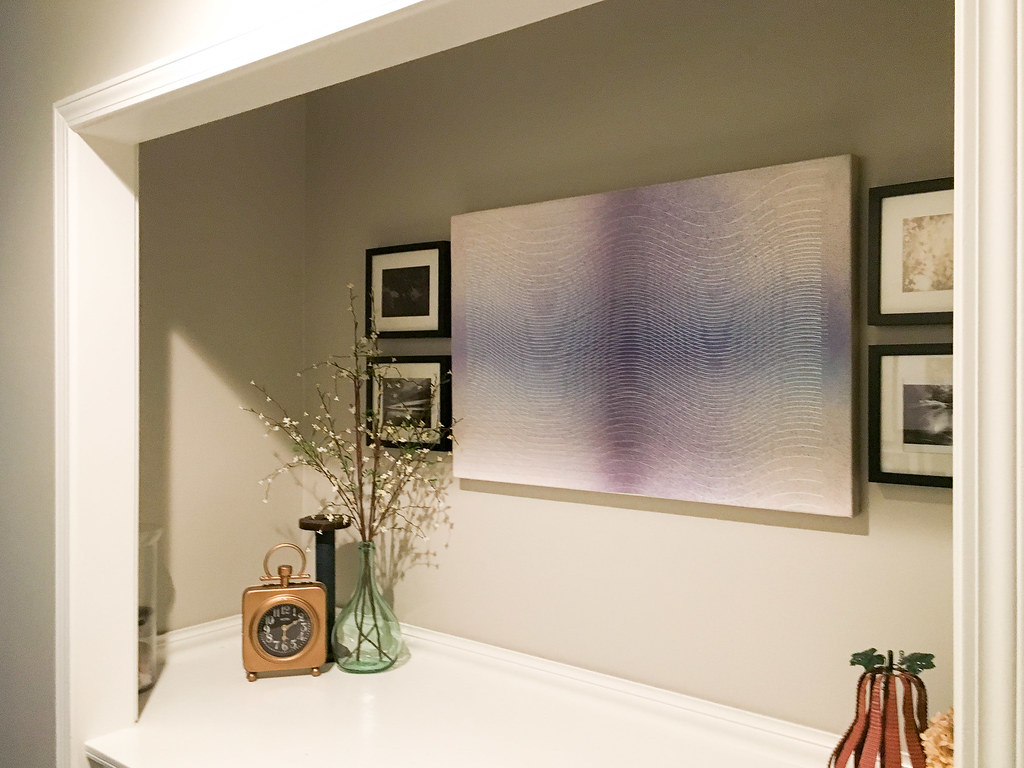
My wall was about 8 ft long and my level was only 4 ft. But it worked out just fine! And ta-da! Here is the finished product!
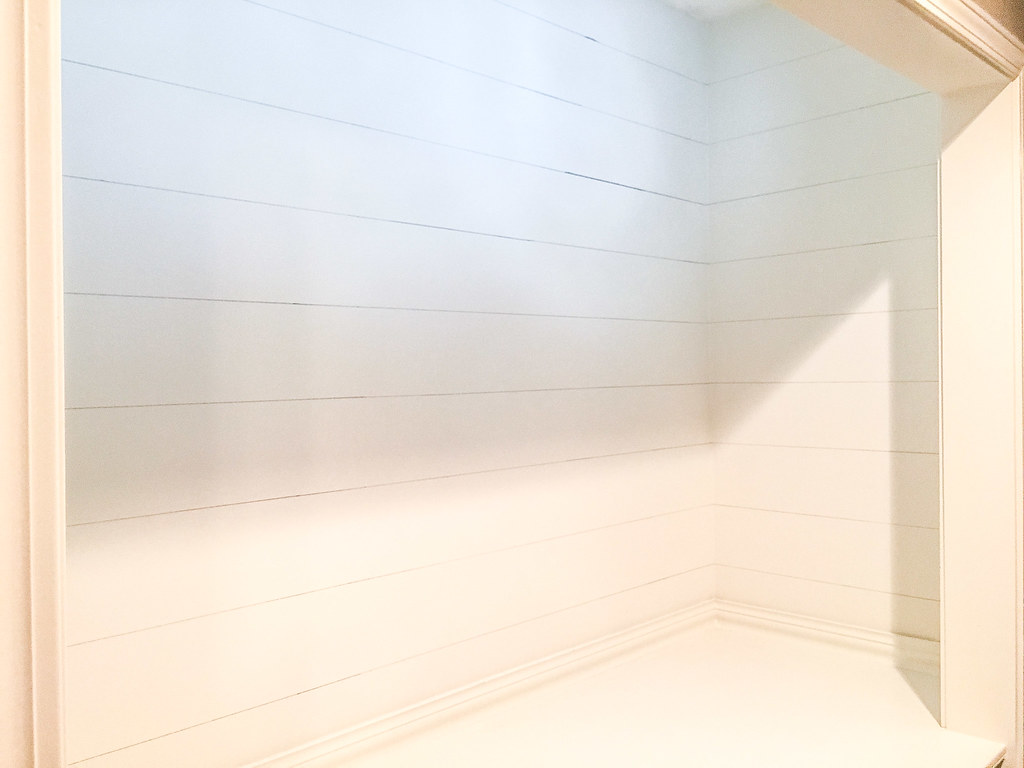
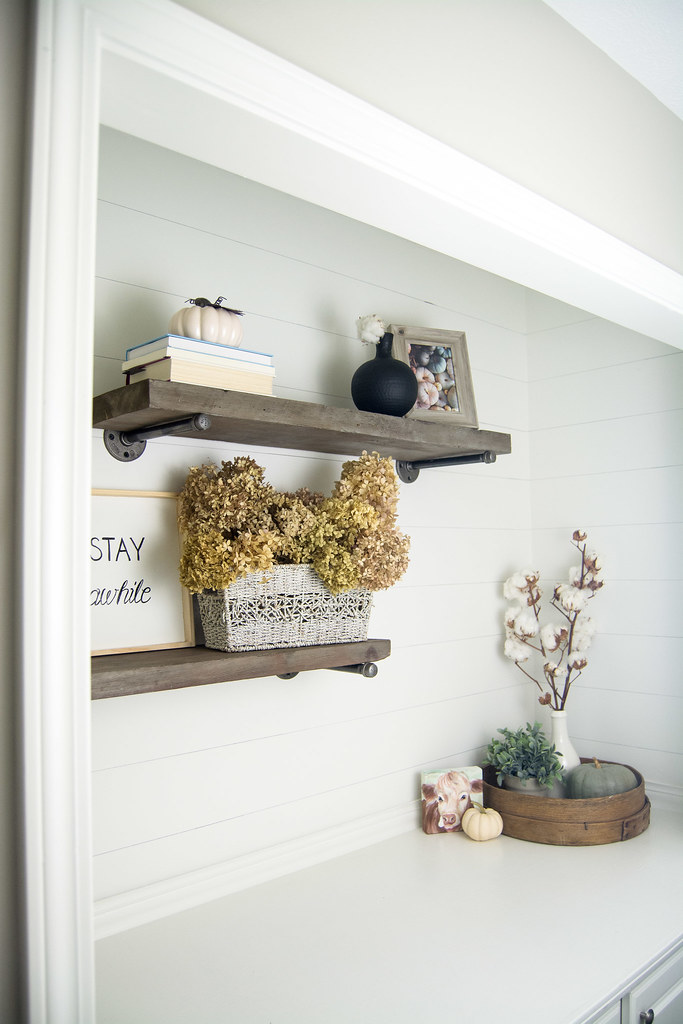
Now, I’m not going to lie and say that you can’t tell that this isn’t real shiplap. I’m too much of a realist to say that. But once I got the shelving up (thanks to the hubsters) and decorated the space it really does look like a shiplap wall! Unless you get right up to it you can’t tell it is pencil. And if you come to my house and inspect my walls, then I suppose I’m fine with you figuring out that I didn’t use wood. 😮 Just show me a little grace.
He loves me <3
And now the best part! Styling! I have got to say that I’m not a huge fan of the DIY part. I’ll always do the work, but it isn’t fun for me. The decorating, now that is what energizes me. So I had a lot of fun shopping my house to make this space pretty.
The Finished DIY Shiplap
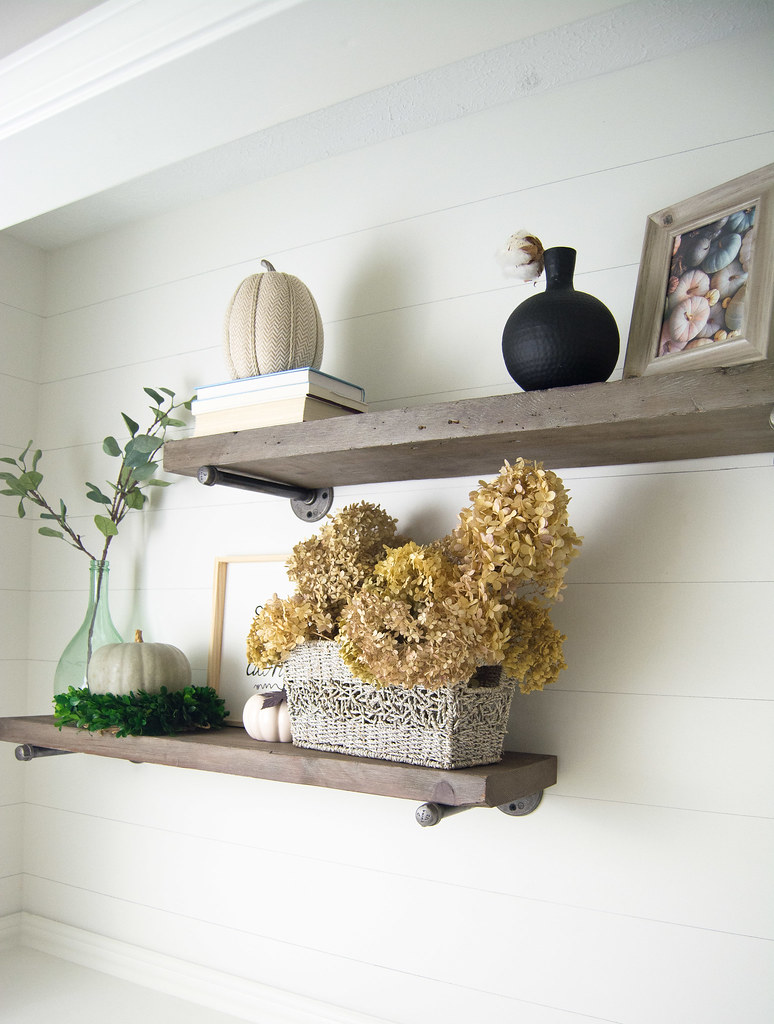
After! I LOVE a finished product.
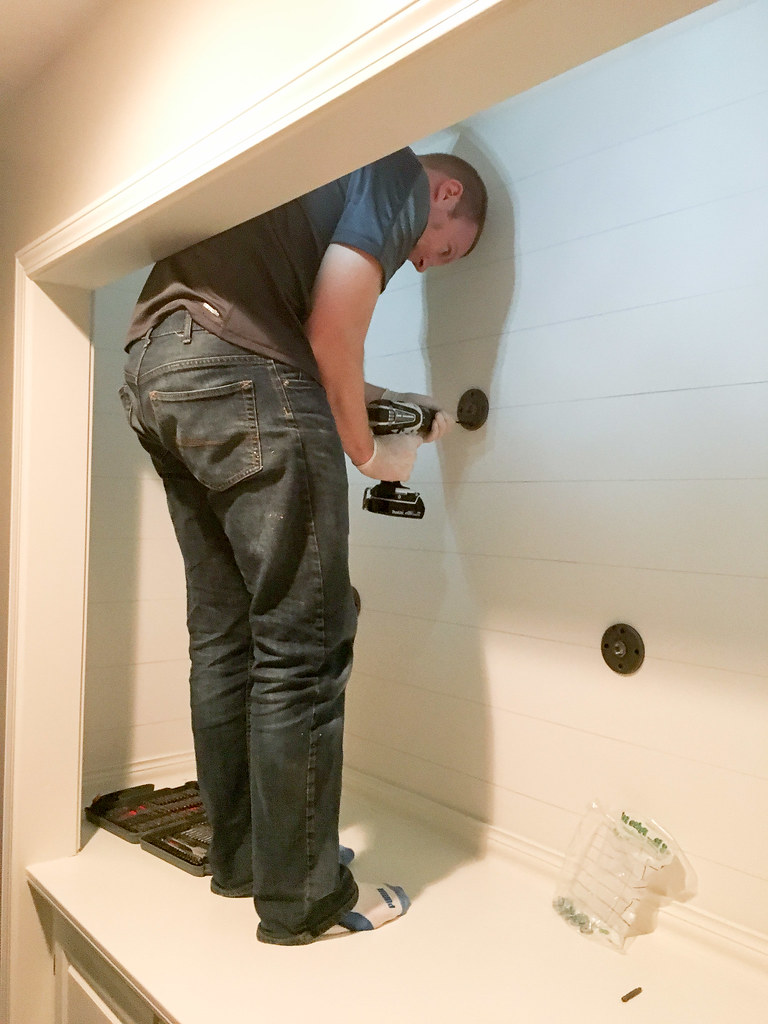
And I also just have to note that the only money I spent on this ENTIRE project is $46 for the metal pipe brackets. I used 4 year old paint (I know….but why buy when you can paint three coats instead?), tools on hand, barnwood I bought for $1.00 6 months ago, and all the decor I already owned from many years of collecting. Darn those pipes being so expensive. But I really wanted these shelves to be secure with the littles running around. So I needed something strong that didn’t look like it belonged in a garage. 🙂
Oh, and if you like that Stay Awhile sign, check out how I made it for FREE.
It makes me a little giddy now whenever I walk by this nook that used to be dark and drab. Hope you all like the space! Be blessed and be a blessing today!
Sarah
{One who loves a pure heart and who speaks with grace will have the king for a friend. Prov. 22:11}
Adding real wood paneling makes the room look much warmer!
What a great idea! I really can’t tell in the pictures that it isn’t real shiplap! I have a space I’m trying to shiplap on the cheap and this might just do the trick. Thanks for sharing!
By the way, I love your light over the table!!
Yes, give it a try! It is such an easy way to see if you like it in your space too!
Super cute! I love the look too, I may have to find a wall in my house to try this on. 🙂
Yes! It is so easy and a great free alternative to the real thing!