
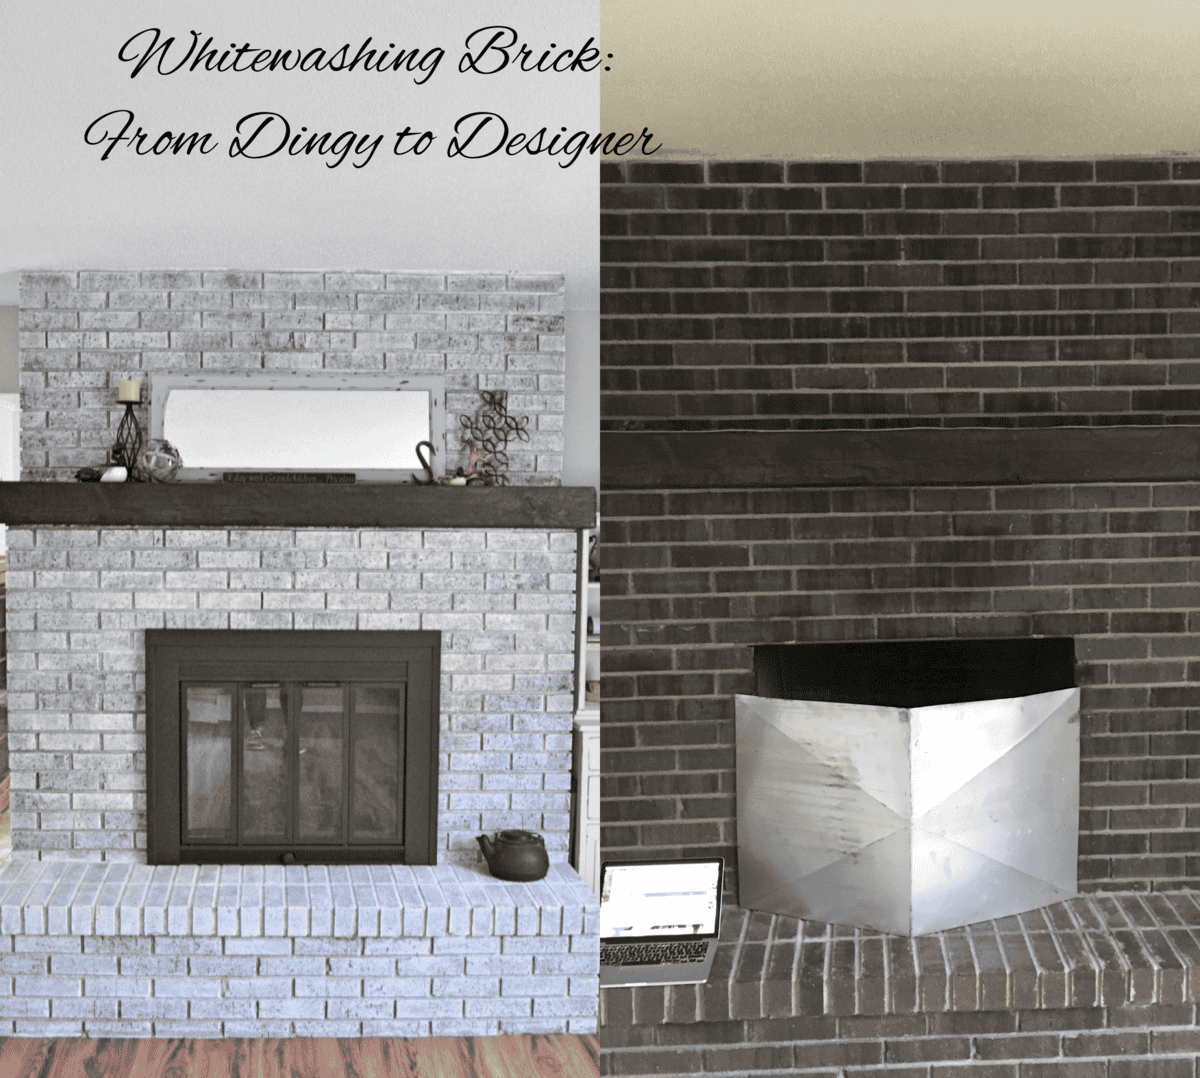
Whitewashing Brick: In-Law Refresh Take 3
Hello All!
This has been a busy and fun week doing some small projects and getting to be outdoors enjoying the beauty that spring brings. I’m glad to finally feel some warmth out there. It has been a LOOONNGG winter my friends.
Today I wanted to get back to my In-Law Refresh series. I am done helping my in-laws redo the first two rooms on the list and today I wanted to highlight my first experience in whitewashing brick.
Let me just begin by saying that this was a first for me. I did some research. I read some blogs. I particularly enjoyed Cleverly Inspired’s post from way back when because she is simple and sweet and to the point. (Thank you Tracie!) And then, I went to work and did my own thing anyway. I seem to do that a lot. Sometimes it works out, sometimes it doesn’t. Meh. Life has a way of working out. Like in this project!
So here is the beast of a fireplace that I tackled.
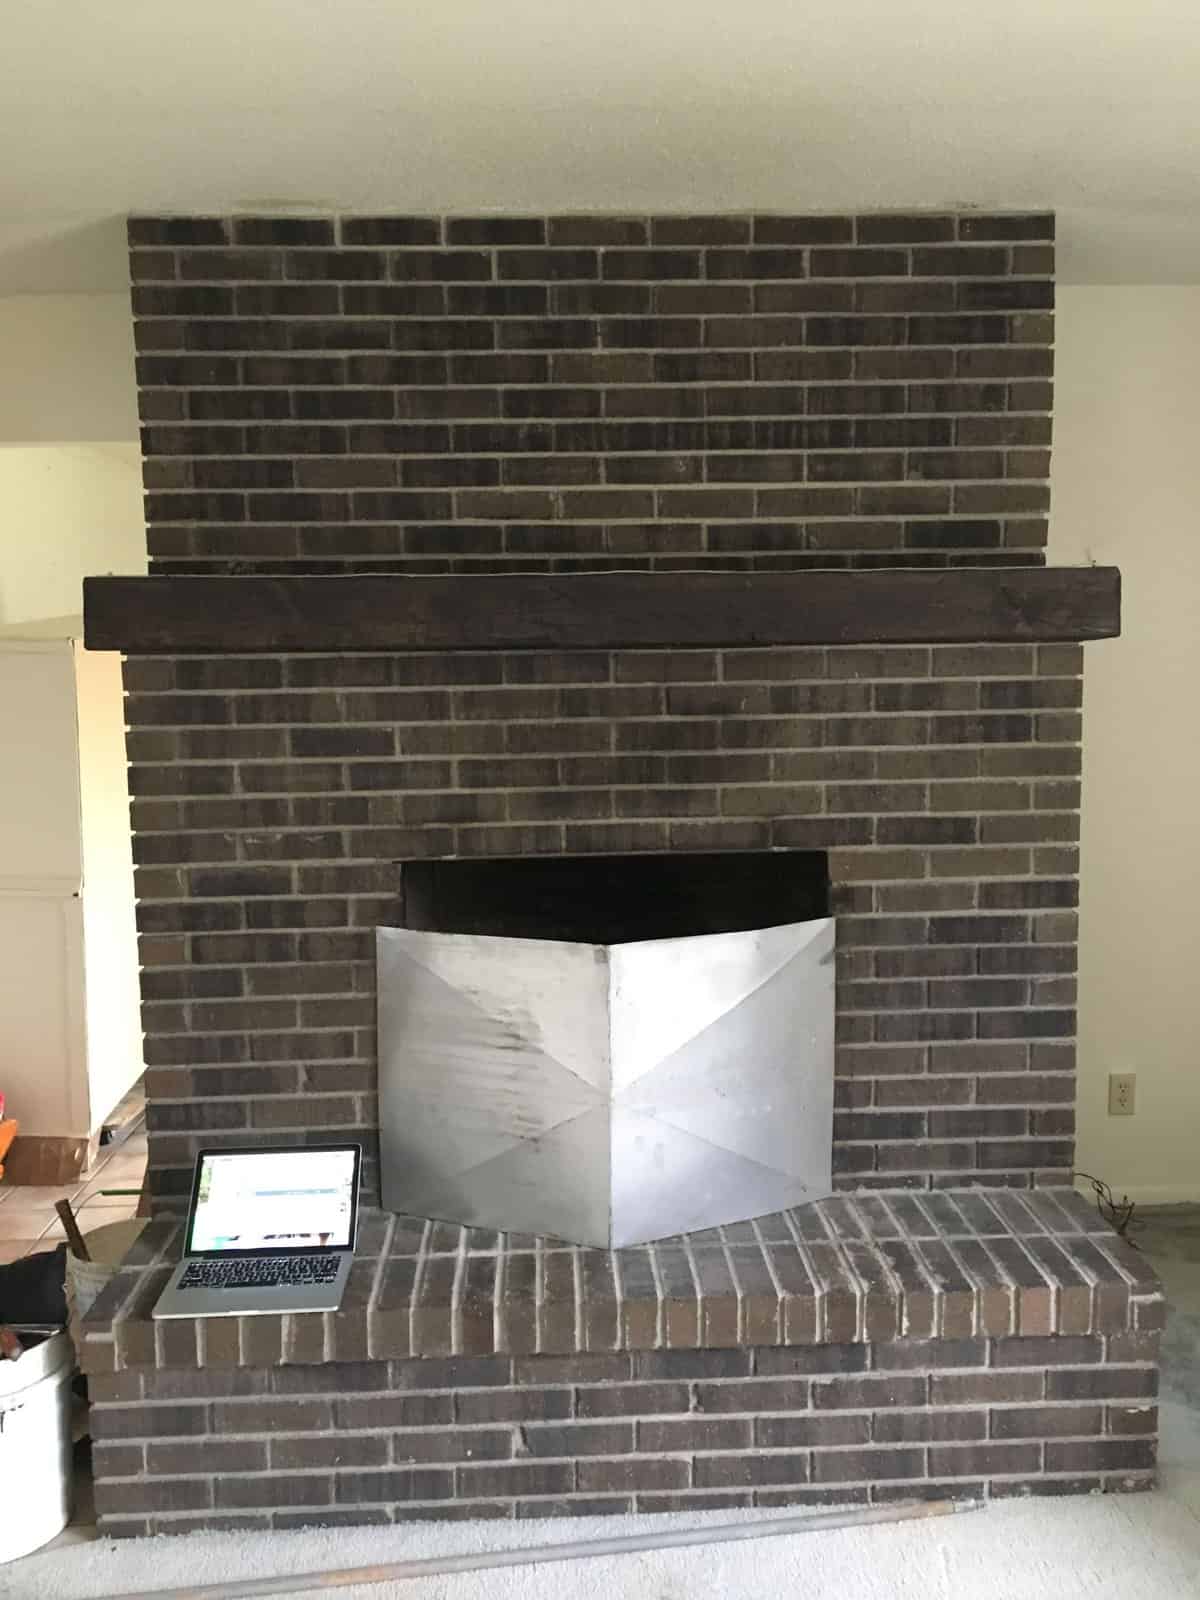
See that beautiful mantle? Yeah, me neither. That is because everything is brown! This dark dark brick made it so hard for the mantle to be the stunner that it actually is. Solution: lighten and brighten.
I think my MIL was hesitant when I told her I wanted to paint the fireplace. She definitely wanted to keep some of the color. So I suggested a whitewash. In my mind, I was thinking this would be the final product. I love how the brick shows through!

But do you know what my in-laws don’t have? They don’t have red brick. They have brown brick my friends. Very brown. So let’s just say, there were moments of panic in the process. But before I get to that, I’ll share what my process actually was.
- Gather supplies. I know, this is always obvious. But necessary. For this particular project I used:
- Leftover white paint from another project
- A small disposable plastic tub to mix the paint
- Water
- Old brush (Don’t use a new one! The brick will destroy the bristles. And you don’t need a smooth finish so an old brush is fine.)
- Rags or paper towels
- Drop cloths to protect the area
- Clean the brick off well.
- Cover the mantle VERY well. The paint is going to be a drippy mess so I didn’t want to splatter on that pretty wood. (If you need to, also cover furniture and flooring. I was grateful to be surrounded by carpet that was about to be ripped out so I didn’t have to worry about it. Score!)
- Make your paint mixture. Now here is where I just started doing my own thing. I read a few blogs that said to do 50/50 water/paint, 70/30 water/paint, 40/60 water/paint. Do you see a theme? Everyone does something different with varying results. So I started with a 50/50 mixture and it looked like cloudy water. I just thought that it wouldn’t cover any of the brown brick. So I added a dollop or two more of paint until I thought it looked better. Trial and error my friends.
Now I was ready to start applying. Everything I read said to brush on a layer of paint and then blot with a rag to remove some of the liquid. So that is what I did. And I got about halfway down from the ceiling and started to have heart palpitations. And not like, my heart is going pitter patter over this project. But the kind where I’m thinking about breathing into a brown paper bag.
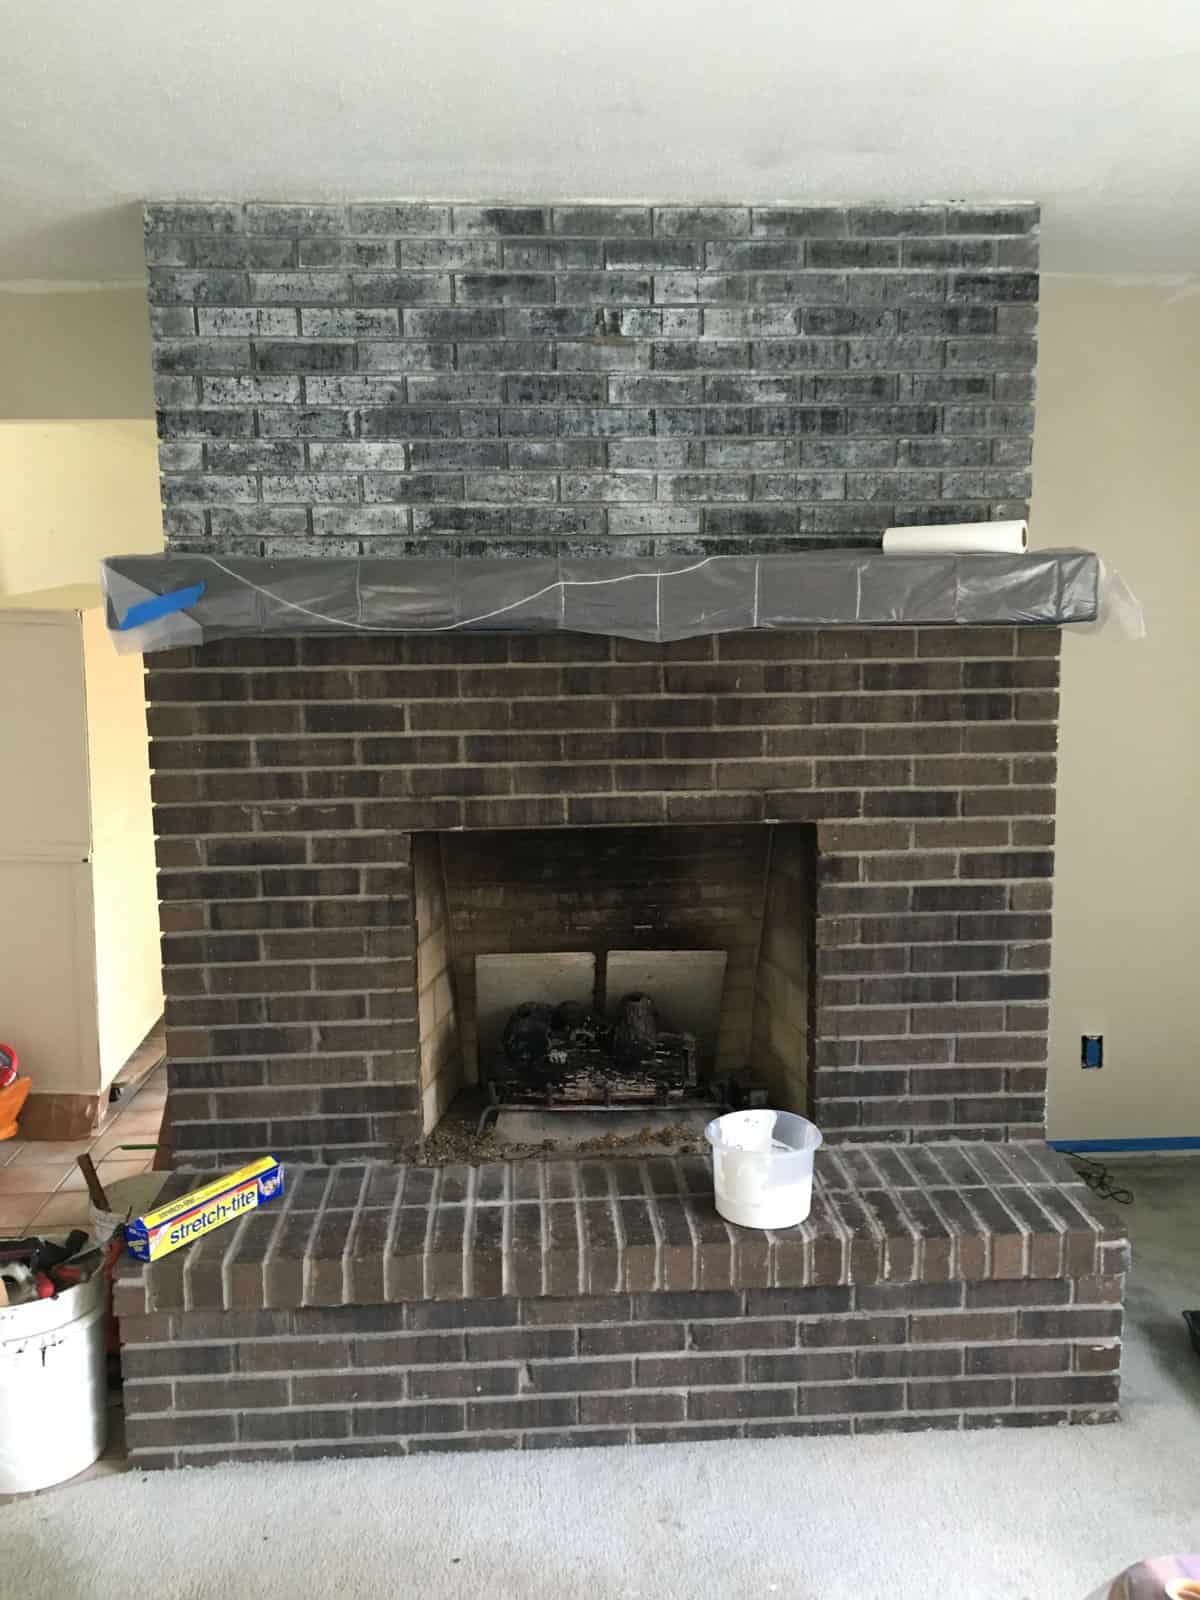
Now, unfortunately this picture just doesn’t show it well. But I’m telling you, that top half looked PURPLE in real life. Like a dark plum. The way the brown was coming through the paint mixture just was not working for me. But I remembered a few other bloggers saying they also had panic attacks after the first coat so I kept going. What else was I to do? I can’t very well keep half of it purple. Prayer and pressing on was the only logical thing to do.
Here it is after the first coat was complete.

Still much too much brown showing through for me. So I adjusted my method. Instead of dabbing with the rag to remove some of the paint, I just brushed it on and left it. The brick really soaks a lot of the paint up. And I did not want to do a third coat. So applying a thicker layer sounded logical to me. And it worked! Here it is after the second coat on the bench area. The top half still had only one coat. See the difference? (Sorry, the picture is a bit blurry. Better pictures below!)

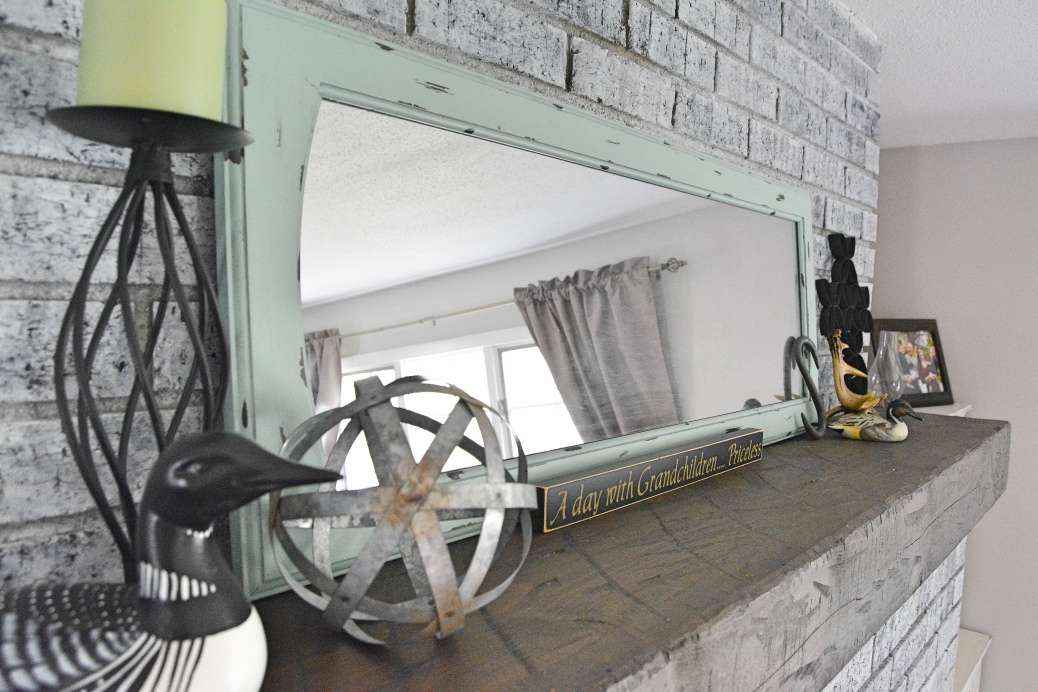
I waited a day before deciding if I wanted to do a third coat or not to make sure the brick was done absorbing what I had applied. And I was satisfied with the results. Now that mantle pops out, it brightens the room significantly, and it looks more like stone than brick. Amazing what a little paint can do! What do you think of the final product?


Anyone else have a tried and true method to share?
{I will hold myself to a standard of Grace. Not perfection. – Emily Ley}
Whitewashing brick can truly transform a space! It’s inspiring how you took the initiative, did your own thing, and achieved such a beautiful result. Your journey showcases the creativity and courage needed in home improvement projects.
What a beautiful whitewash you achieved. My fireplace is nearly identical to yours. Could you tell me where you got the mantel? It’s gorgeous.
I love the whitewash you did. I have almost the same fireplace. I also love your mantel, where did you get it?
Thank you so much! The mantel came with the house. 😉
Looks amazing everyone!! I’ve seen it in person.