
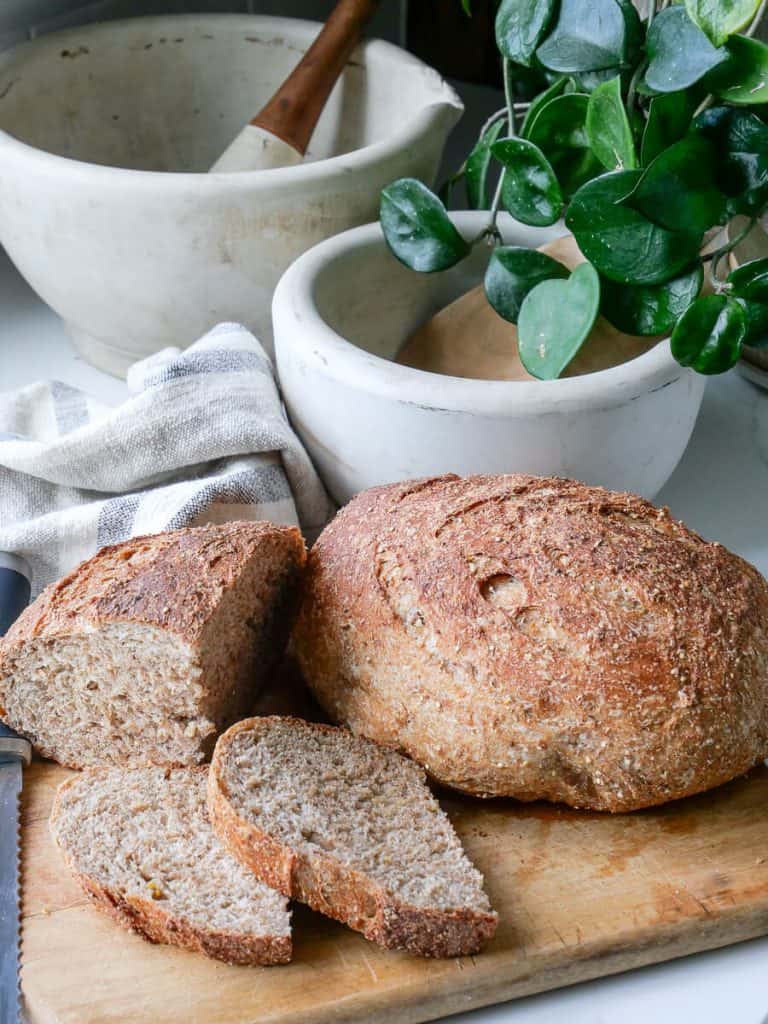
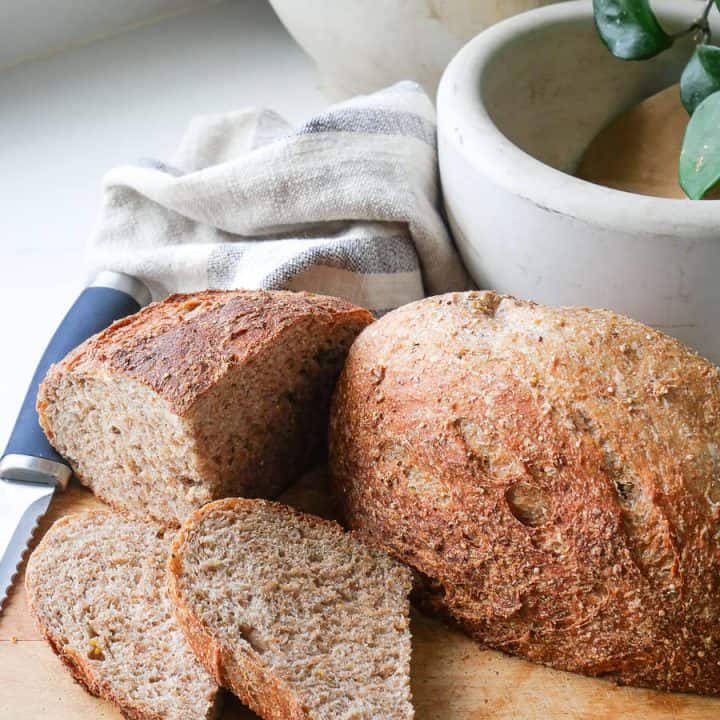
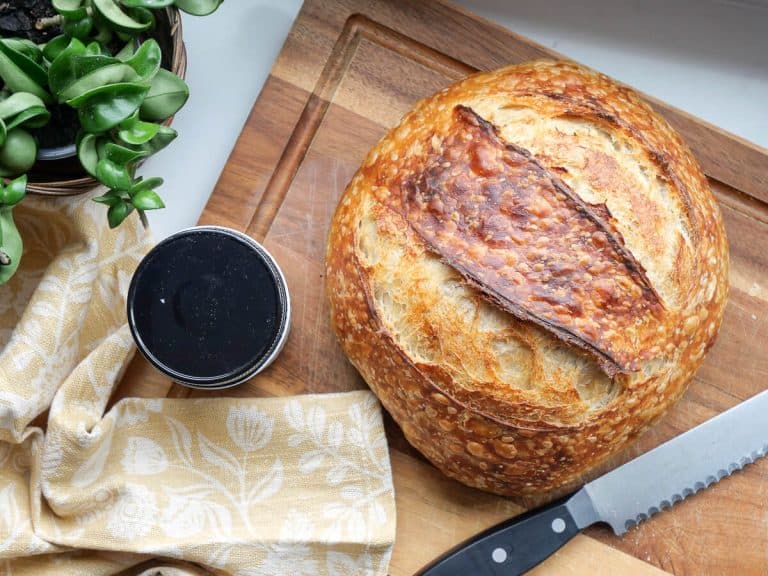
Artisan Multigrain Sourdough Bread
Making your own sourdough bread is a healthy alternative to store-bought breads. However, let’s amp up the nutrition with this delicious artisan multigrain sourdough bread with a wheat flour base. This multigrain sourdough is hearty, healthy and delicious.

Post may contain affiliate links for your convenience.
Sourdough Starter Notes
Ensure that you’ve fed your sourdough starter within the last 4-12 hours.
You will want to use your starter at its peak for this recipe to get the best rise.
The majority of the time that we see failed sourdough loaves, it is the starter to blame. Either it isn’t strong enough in the first place, or it wasn’t at its peak yet.
Make sure that your starter is robust and healthy before using for any sourdough recipe.
I am in Michigan and most of the year my kitchen is cold. I’m using 100 g of sourdough starter, which is helpful in colder climates. If you live in a warm climate, you may try 50-60 g of sourdough starter instead to avoid over proofing.
Whatever temperature you’re dealing with, watch this recipe closely in the bulk fermentation stage to avoid over or under proofing your dough.
Artisan Multigrain Sourdough Bread
This multigrain sourdough bread would be delicious as a simple wheat bread as well. Simply exclude the multigrain soak from the recipe and continue as directed.

However, we want the benefit those extra grains provide. So let’s make some multigrain sourdough!
Quick Baker’s Schedule
Day 1
- Morning: Feed starter
- Late Afternoon:
- Mix multigrain soak
- Mix dough
- Evening: Perform stretch and folds
- Overnight: Bulk fermentation
Day 2
- Early Morning:
- Shape
- 6+ hour refrigerated fermentation
- Noon: Bake
Baking Tools Needed
- glass mixing bowl (clear bowls make it easier to see bubbling activity)
- wooden spoon or spatula
- kitchen scale
- dutch oven
- banneton or similar sized round bowl with floured tea towel
You can find all my favorite sourdough tools in my storefront.
Ingredients List
- 100 g bubbly active sourdough starter (see notes for variation)
- 320 g warm water
- 400 g whole wheat flour
- 100 g bread flour
- 12 g fine sea salt (10 g for a lower sodium recipe)
- 50 g honey
Multigrain Soak
- 1/4 cup 10 Grain Hot Cereal
- 2 tbs. Old fashioned oats (not quick oats)
- 1 tbs. Quinoa (white, red or combo)
- 1 tbs. Flax chai seed blend
- 65 grams of hot water (approx. 1/3 cup)
Multigrain Sourdough Bread Instructions
Begin by combining the multi-grain soak ingredients in a small bowl.
Stir, and let soak for 10 minutes. This will soften your grains.
Next, mix 320 g warm water with 100 g sourdough starter until water is cloudy and all starter is mixed in.
Add 400 g of whole wheat flour, 100 g bread flour, and 12 g of sea salt to the wet ingredients and mix to form a shaggy dough.

Let rest, covered with a towel or plastic wrap, for 15 minutes.
Add your multigrain soak mixture to the dough and roughly mix in. Perform 2-4 sets of stretch and folds 30 minutes apart to help develop the gluten.
To perform one set of stretch and folds, grab one corner of the dough and lift straight up, then fold it down on top of the rest of the dough. Turn the bowl 1/4 turn and repeat this process until you’ve stretched and folded all four corners, completing a 360 of the bowl.
(Re-cover the bowl between each set. You will be able to tell that the dough is developing gluten when the dough becomes less sticky, less stretchy and has a smoother texture.)
After 2-4 sets of stretch and folds, cover the bowl with plastic wrap and let it rise on the counter until double in size (6-12 hours depending on your home’s conditions).
At the end of this fermentation stage, you should see air bubbles forming, the dough should be jiggly, and if you poke your finger into the dough it should slowly rise back.
During the poke test, if the dough bounces right back it is not ready for the next step. If it doesn’t rise back at all, it has over-proofed. Bake it anyway or turn it into focaccia.
Shaping Sourdough
Shape your dough into a boule.

Most people would use a banneton for this step as it will give you the best shape. However, many beginners don’t have one and can simply use a round bowl and floured tea towel instead.
Flour your work surface with rice flour, then pour your dough onto it. Shape your dough into a ball by gently cupping your hands on both sides, pushing with one and pulling back with the other.
This creates tension in your dough.
Once you have a taut ball, place it in your banneton or floured bowl and cover tightly. Place your dough into the fridge for cold fermentation. This will help develop the flavor.
Leave it refrigerated for at least 6 hours, up to 24.
One hour before you plan to bake, preheat the oven to 450 F with your empty dutch oven inside.
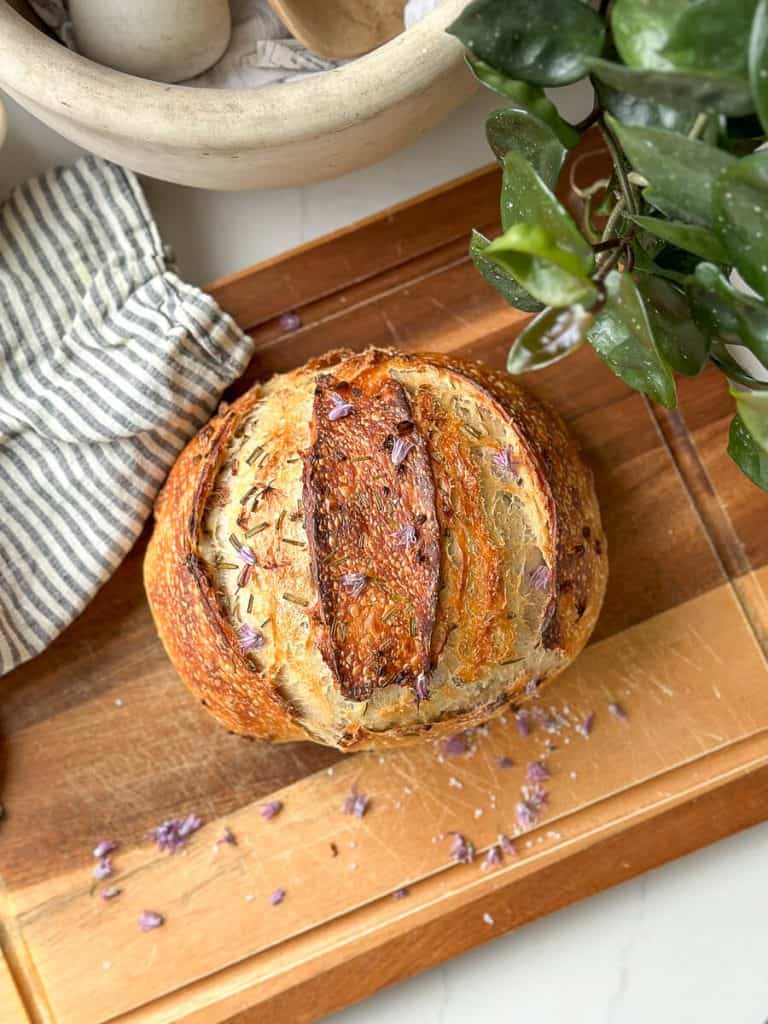
Turn your dough onto a sheet of parchment paper and gently score. You can make a pretty design, or simply rough cut it with a pair of scissors. Wherever you score is where your bread will open when baking.

Lift your dough into the hot dutch oven. (I like to pour some uncooked rice into the bottom of my dutch oven to keep the bottom of my sourdough artisan loaf from burning.)
Place the lid onto the dutch oven, and bake for 30 minutes. Then, remove the lid, lower the temperature to 410 F and bake for 10-15 minutes more.

Your bread should be around 205 internal temperature with a deep golden brown crust. Lightly browned bread is likely underdone and needs more cooking time.
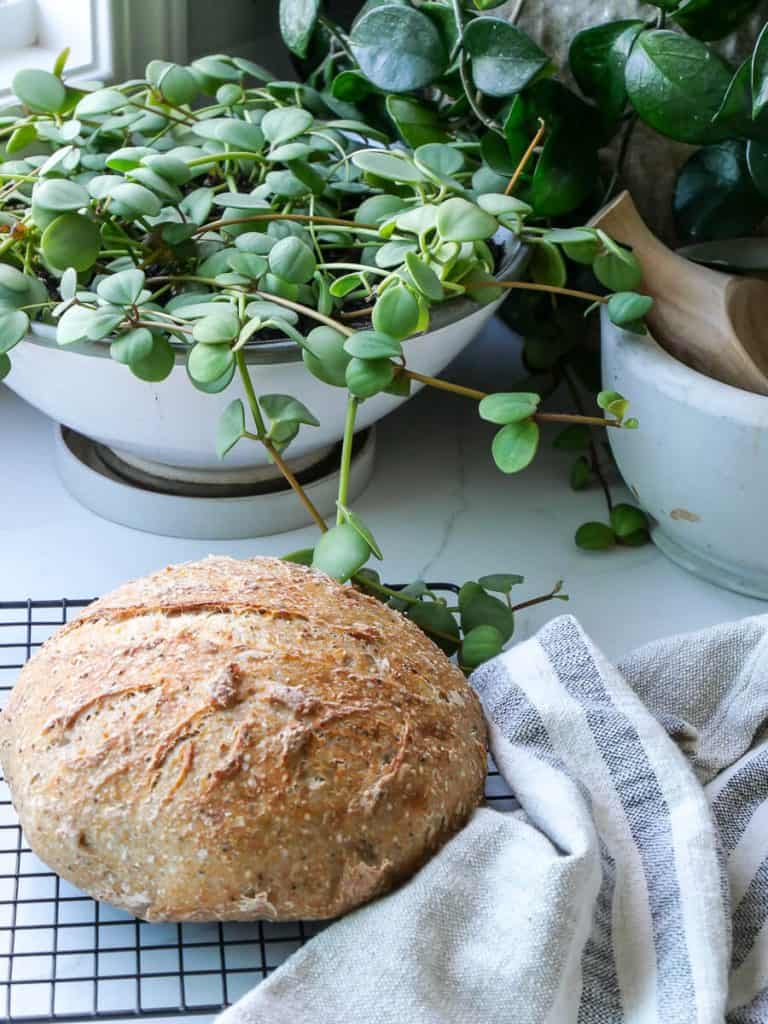
Remove your bread by lifting with the parchment paper and let it cool at least an hour on a wire rack before slicing.
Artisan Multigrain Sourdough Bread
This flavorful multi-grain sourdough artisan loaf comes together into a beautiful rustic boule that is hearty and healthy. Beginner friendly, no knead, no special tools required.
Ingredients
- 100 g bubbly active sourdough starter (see notes for variation)
- 320 g warm water
- 400 g whole wheat flour
- 100 g bread flour
- 12 g fine sea salt (10 g for a lower sodium recipe)
- 50 g honey
Multigrain Soak
- 1/4 cup 10 Grain Hot Cereal
- 2 tbs. Old fashioned oats (not quick oats)
- 1 tbs. Quinoa (white, red or combo)
- 1 tbs. Flax chai seed blend
- 65 grams of hot water (approx. 1/3 cup)
Instructions
- Begin by combining the multi-grain soak ingredients in a small bowl. Stir, and let soak for 10 minutes. This will soften your grains.
- Next, mix 320 g warm water with 100 g sourdough starter until water is cloudy and all starter is mixed in.
- Add 400 g of whole wheat flour, 100 g bread flour, and 12 g of sea salt to the wet ingredients and mix to form a shaggy dough. Let rest, covered with a towel or plastic wrap, for 15 minutes.
- Add your multigrain soak mixture to the dough and roughly mix in.
- Perform 2-4 sets of stretch and folds 30 minutes apart to help develop the gluten. To perform one set of stretch and folds, grab one corner of the dough and lift straight up, then fold it down on top of the rest of the dough. Turn the bowl 1/4 turn and repeat this process until you've stretched and folded all four corners, completing a 360 of the bowl. (Re-cover the bowl between each set.)
- Cover the bowl with plastic wrap and let it rise on the counter until double in size (6-12 hours depending on your home's conditions). At the end of this fermentation stage, you should see air bubbles forming, the dough should be jiggly, and if you poke your finger into the dough it should slowly rise back. During the poke test, if the dough bounces right back it is not ready for the next step. If it doesn't rise back at all, it has over-proofed. Bake it anyway or turn it into focaccia.
- Shape your dough into a boule. Most people would use a banneton for this step as it will give you the best shape. However, most beginners don't have one and can simply use a round bowl and floured tea towel instead. Flour your work surface with rice flour, then pour your dough onto it. Shape your dough into a ball by gently cupping your hands on both sides, pushing with one and pulling back with the other. This creates tension in your dough. Once you have a taut ball, place it in your banneton or floured bowl and cover tightly.
- Place your dough into the fridge for cold fermentation. This will help develop the flavor. Leave it refrigerated for at least 6 hours, up to 24.
- One hour before you plan to bake, preheat the oven to 450 F with your empty dutch oven inside.
- Turn your dough onto a sheet of parchment paper and gently score. You can make a pretty design, or simply rough cut it with a pair of scissors. Wherever you score is where your bread will open when baking.
- Lift your dough into the hot dutch oven. (I like to pour some uncooked rice into the bottom of my dutch oven to keep the bottom of my sourdough artisan loaf from burning.)
- Place the lid onto the dutch oven, and bake for 30 minutes. Then, remove the lid, lower the temperature to 410 F and bake for 10-15 minutes more.
- Your bread should be around 205 internal temperature with a deep golden brown crust. Lightly browned bread is likely underdone and needs more cooking time.
- Remove your bread by lifting with the parchment paper and let it cool at least an hour on a wire rack before slicing.
Notes
100 g of active starter is best for colder climates or longer bulk fermentation times. If you live in a warm climate, decrease starter to 50-60 grams.
(Optional) Additional grains or seeds as desired (ex: sunflower, pepitas, pumpkin, millet)
Recommended Products
As an Amazon Associate and member of other affiliate programs, I earn from qualifying purchases.


Nutrition Information:
Yield: 16 Serving Size: 1 sliceAmount Per Serving: Calories: 150
Multigrain Sourdough Bread Variations
In addition to my large rustic loaf, I’ve also developed a recipe for a small batch version.
Simply follow this recipe, while folding in the multigrain soak ingredients above.

This gives you a small loaf that will serve 8 and is more suited to a small family or an individual.
You can also try my multigrain sourdough sandwich loaf recipe! This uses sourdough discard so your bread is on the table in 3 hours.
If you’re looking for additional sourdough recipes, make sure to check out my sourdough recipe book.

Thanks so much for stopping by the blog today!
Make sure to subscribe to get my Grace Notes directly to your inbox and to access all my insider perks. And you can follow along daily on Instagram and weekly on YouTube!
~ Sarah


This multigrain sourdough looks hearty, wholesome, and absolutely delicious!
This artisan multigrain sourdough bread looks absolutely delicious! I love how it combines wholesome grains with that classic sourdough tang—such a perfect blend of flavor and nutrition. Baking bread like this at home feels so rewarding, and it’s amazing how much healthier it is compared to store-bought options. If you’re into baking or just want to upgrade your kitchen tools, ClothingRIC.com has some great deals that might help you get started without breaking the bank. Thanks for sharing this tasty inspiration
This artisan multigrain sourdough bread sounds like the perfect balance of health and flavor! I love the idea of using a robust starter for the best rise. The extra grains really take it to the next level!
Foods that never get boring.It’s like the rice dishes of Japan, Korea, and China.