
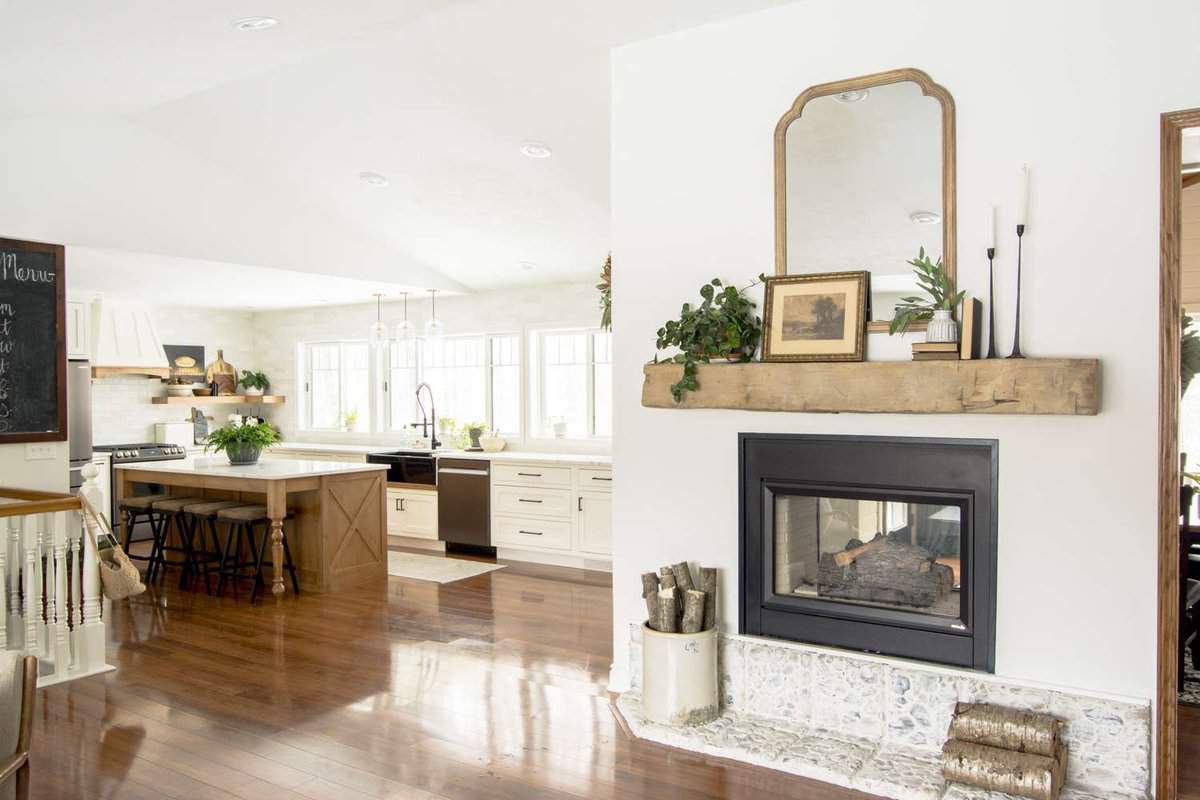
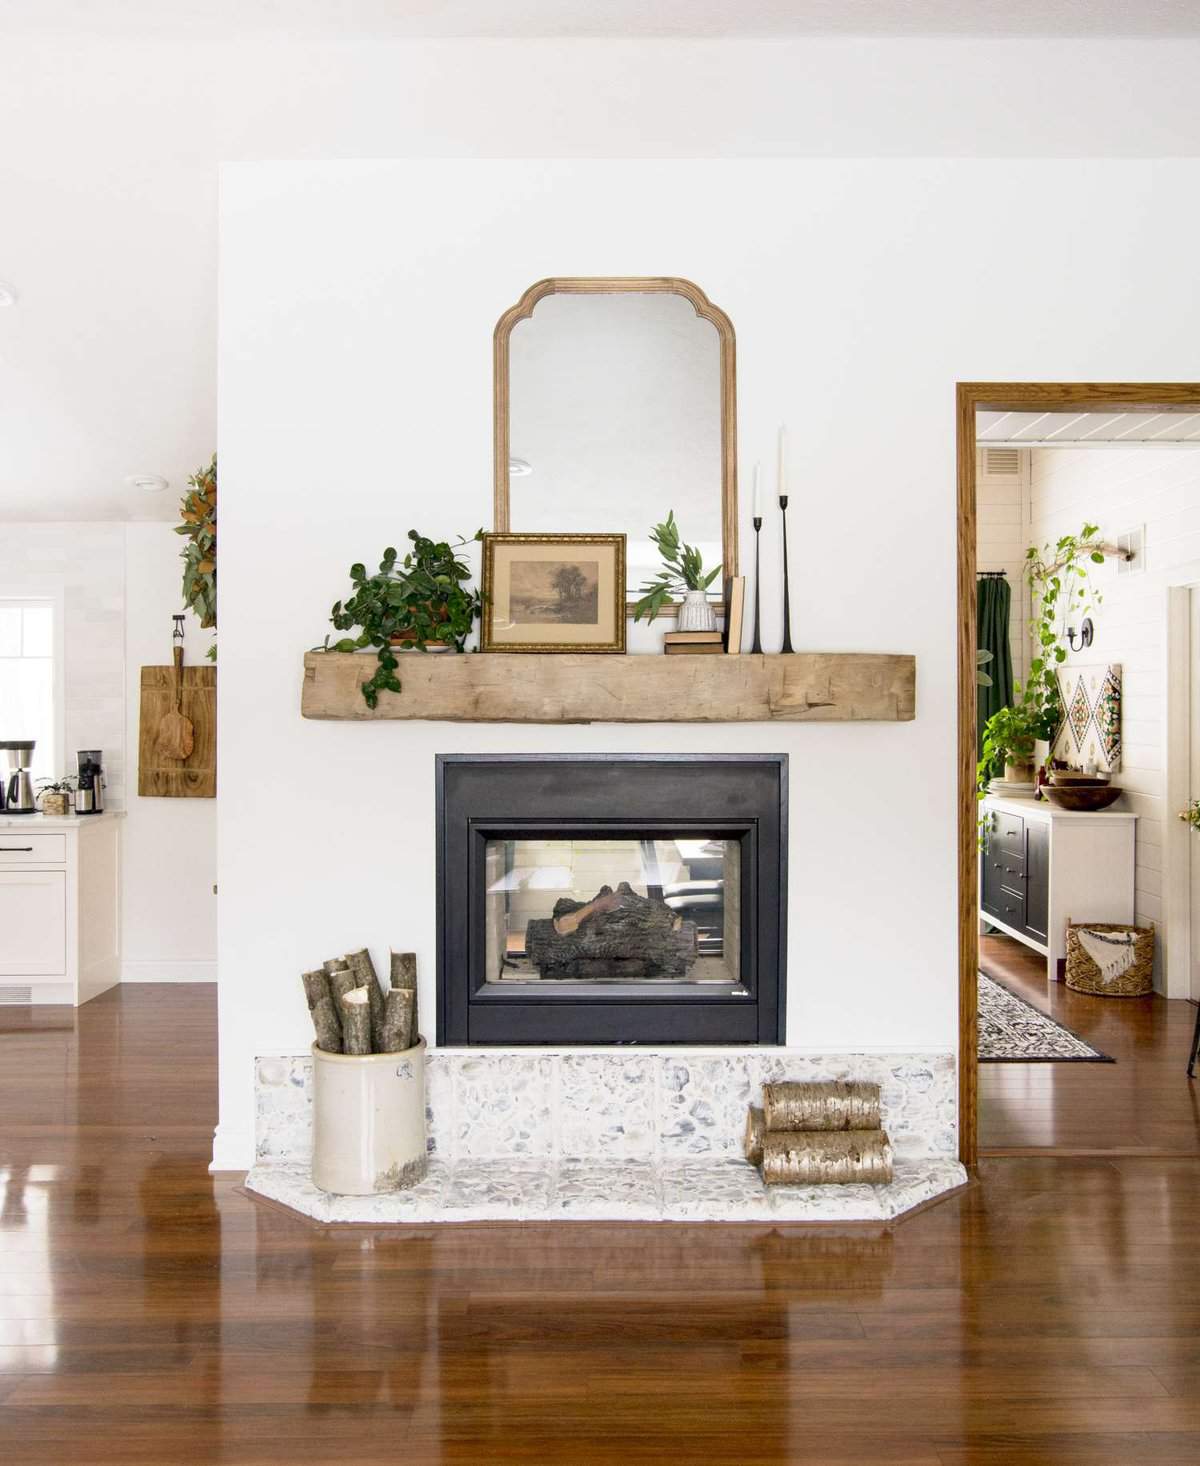
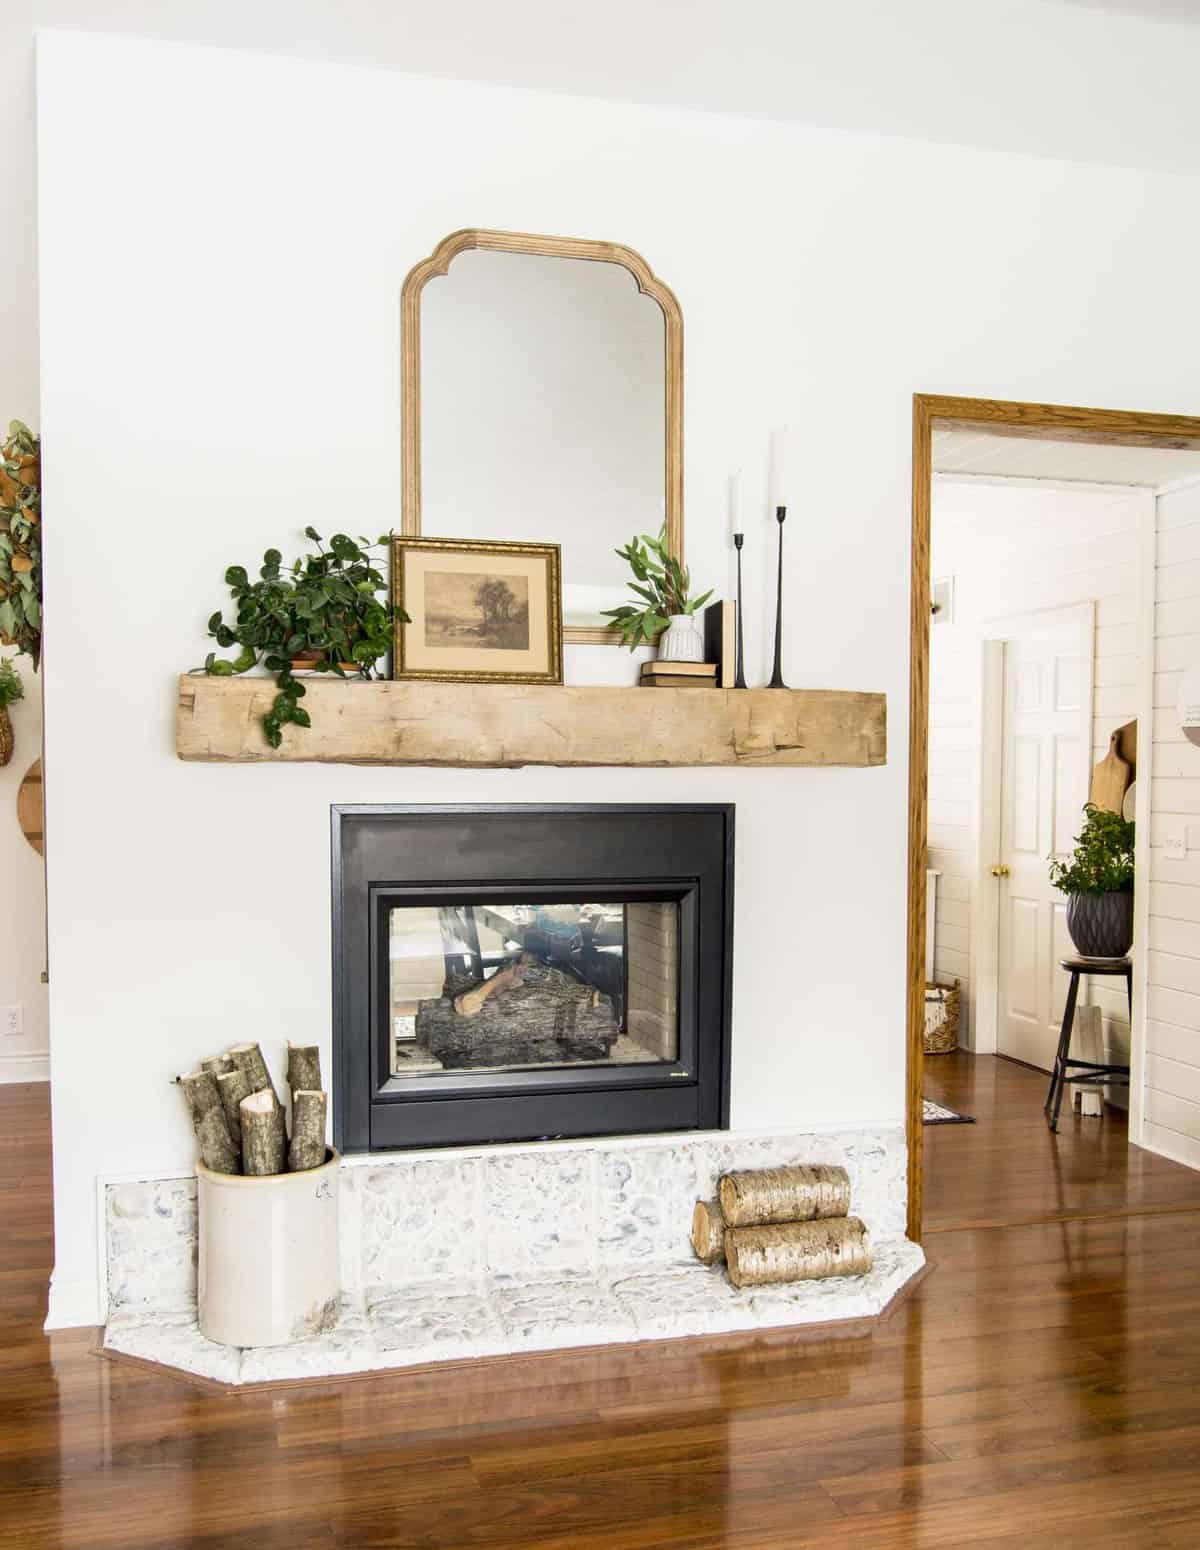
How to Install a Floating Barn Beam Mantel
Do you want to add character to your home? I know I sure did. Our home was filled with orange 90’s woodwork when we moved in, including the floating mantel. While it is beautiful woodwork, it just wasn’t my style. Then I found a reclaimed barn beam for $10! So today, I’m sharing how we easily installed a floating barn beam mantel over our gas fireplace!
Post may contain affiliate links for your convenience.
Reclaimed Barn Wood
I must begin by saying our original fireplace mantel was not bad! It was quality construction, had beautiful details and was well designed. However, it wasn’t my style.

In my book, I teach my readers how to create a personalized haven. That includes not settling for pieces of your home that you don’t love!
So, over the last couple of years I’ve attempted to make it more my own. I DIYed the existing river rock hearth for $30 with a german schmear treatment to start.
Then, I tried to simply style around it various ways to mask the more traditional style of the mantel.
I was planning to try to add moulding to the drywall this fall to make it have a more “built-in” feel. Until, I found this beautiful reclaimed barn beam for $10!
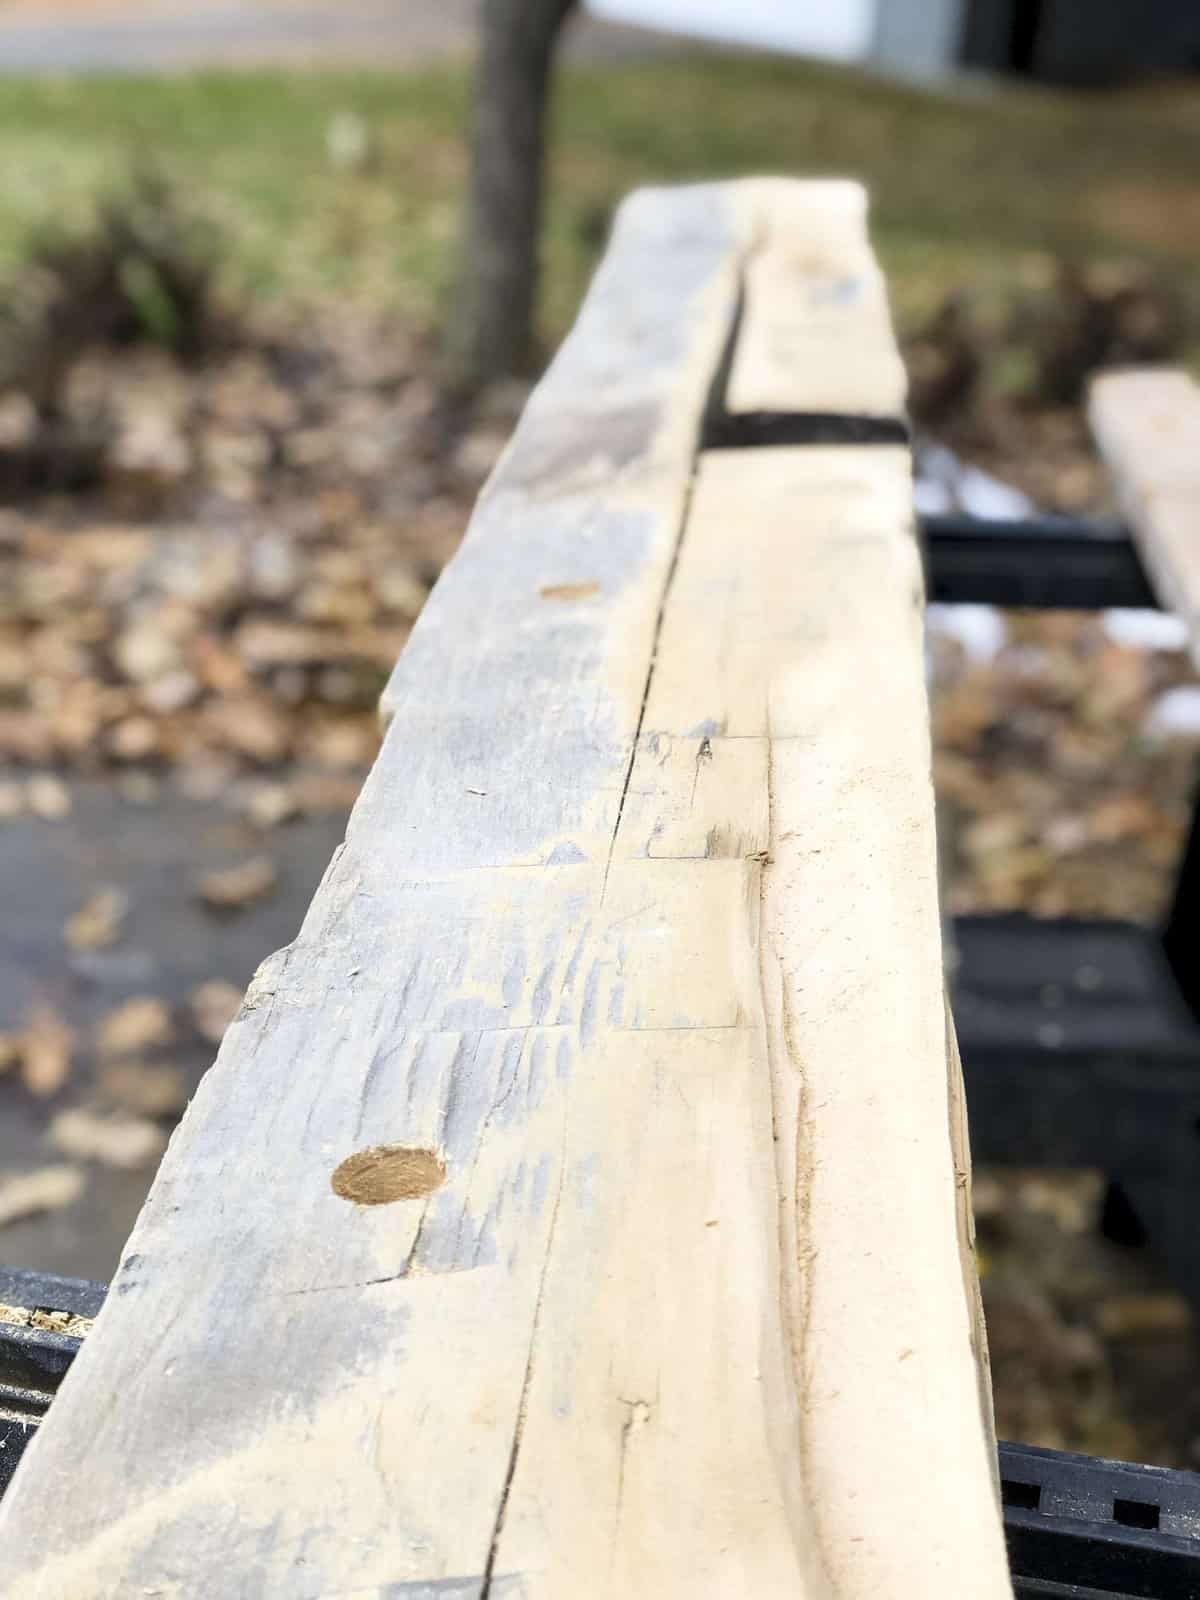
However, it was certainly not beautiful when I bought it! I found it on Facebook Marketplace and when I went to see it I found a treasure trove of barn beams.
They were heaped in a pile, it was pouring buckets, frogs jumped out at me when I moved the beams to look at them. It was filthy and wet and had rotted wood. But, I knew it could be beautiful!
So, I cleaned it up with soap and water, sanded down the uneven high spots to make level surfaces, cut off the rotten wood (with the help of the hubby), and we figured out how to install it ourselves!
DIY is a huge part of my blog and how we’ve been able to do so much to our home in such a small amount of time. If you can dream it, you can DIY it! Make sure to join my blogging community for members-only freebies like my must have DIY tool list download!
Installing a Barn Beam Mantel
Through my research, I found that there are several ways to install reclaimed barn beams as mantels.
- French Cleat
- 2×4 Mount
- Mantel Brackets (Rod system)
We chose to go with a mantel bracket for a few reasons.
- We don’t have the tools to make the angle cuts for french cleats.
- We didn’t want to hollow out the log to hang with a 2×4 mount.
- The bracket system seemed like the most secure option.
Our Experience
To preface this “tutorial”, I just want to share that this is only our personal experience! We are not licensed contractors, had never attempted this type of project before, and certainly are not experts!
However, this method worked quite well and I love sharing our experience with others to help inspire them on their own projects. So this was our method!
You can see the video tutorial here!
Step 1: Center and Level Bracket
This is potentially the most important step! Without a level bracket, you’re mantel will be lopsided and not have a level surface to place decor.
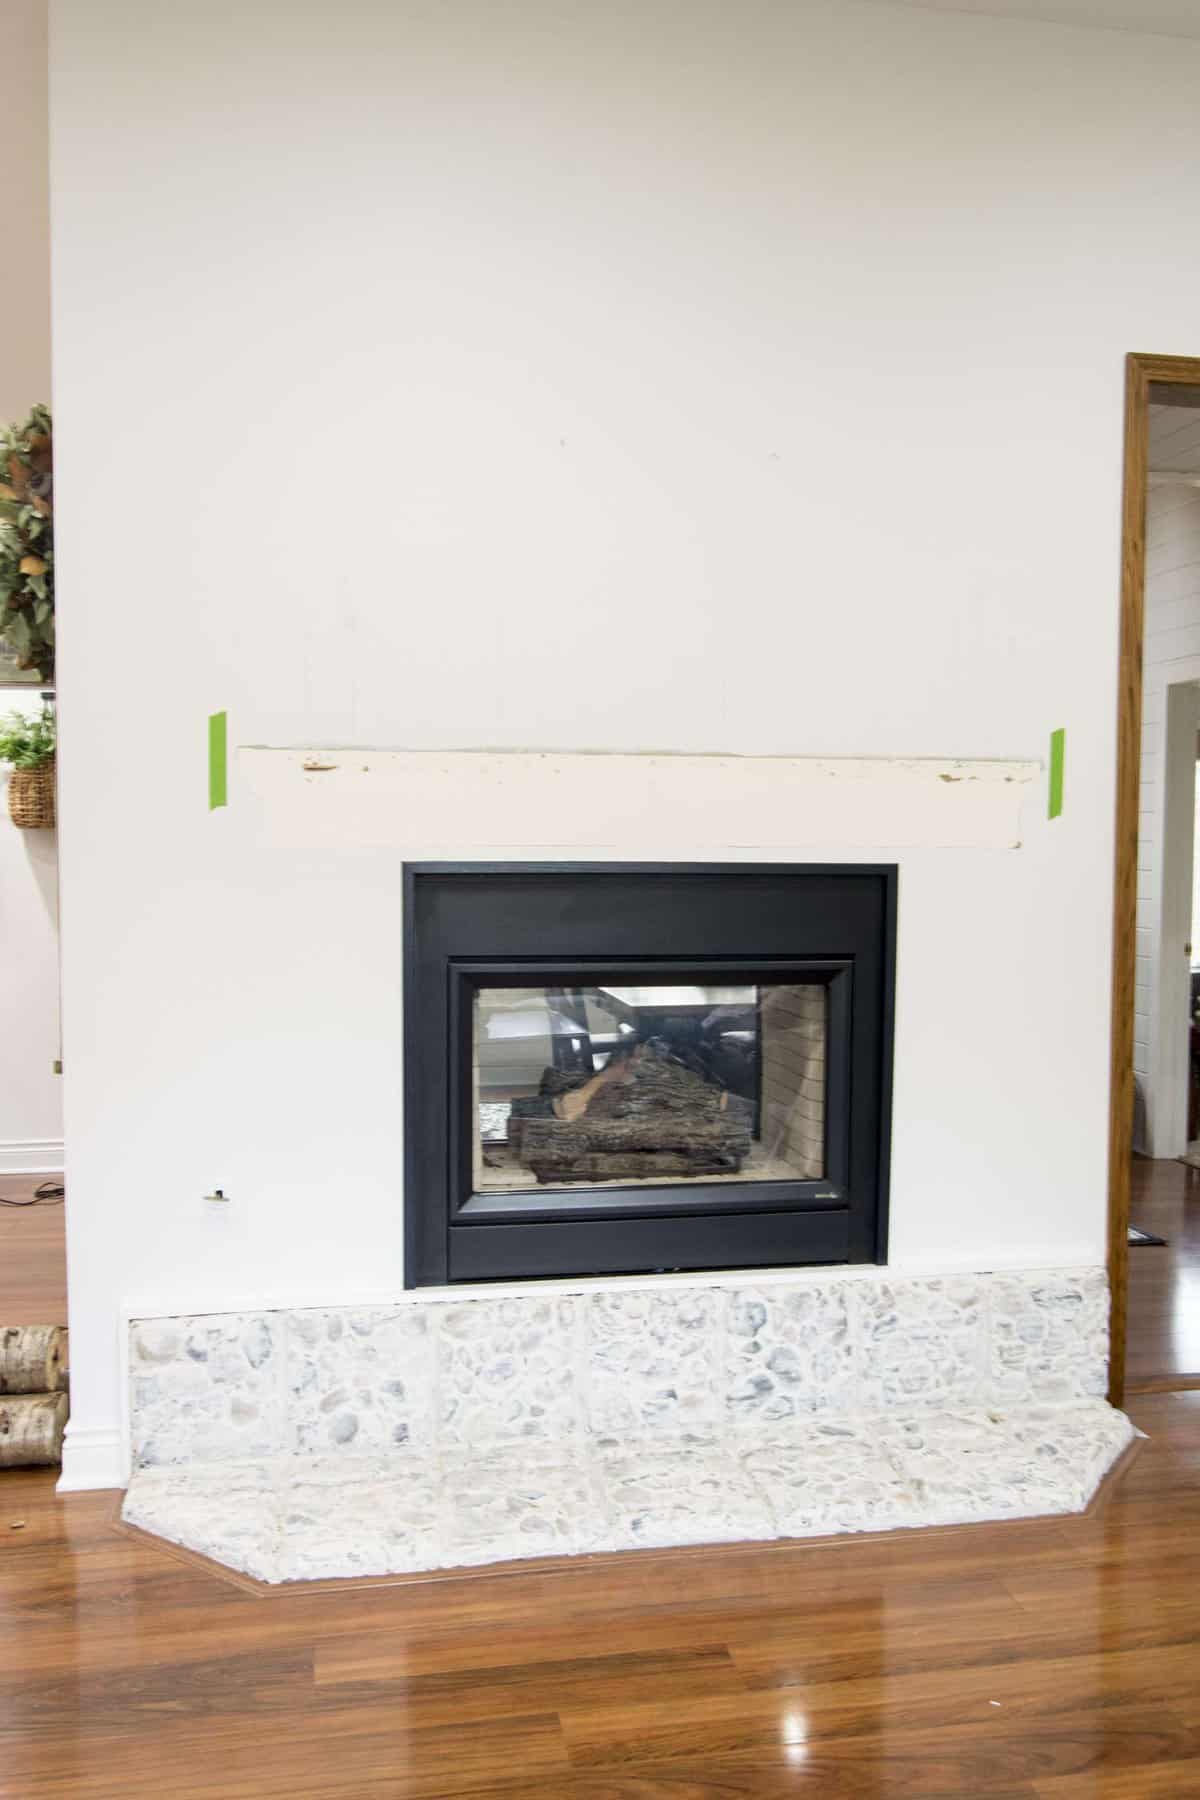
Since our fireplace is off centered, I started by placing painters tape end-to-end where the mantel would be placed. This allowed me to have a visual to be able to center the bracket.
Next, we leveled the bracket and affixed it directly to the studs.

This is extremely important for a heavy mantel. Our barn beam weighs approximately 80 lbs, without adding any decor! So I wanted to ensure that it would be able to withstand the weight.
We purchased our floating mantel bracket from Shelfology. They had many size options, so we selected the one that fit our barn beam best. I know many Etsy Sellers also create these types of brackets!
Step 2: Create a Template for Drilling
The second step we chose to do was one that came from sore muscles and exhaustion. Most tutorials I found for hanging a barn beam mantel with this method recommend holding the beam up to the rods to mark where the holes needed to be drilled.
However, that beam is heavy! It would have been very difficult with just Aaron and I to ensure that the holes we marked were level and evenly spaced.
So, Aaron had the genius idea to create a template using a 2×4. We simply held a 2×4 to the rod, leveled the board, and traced the rod holes onto the board.
This made it simple to then use the board as a template to drill the holes into the barn beam.
The main trick with this method is ensuring that you measure precisely to know where to place your template. (If your 2×4 isn’t the same length as your mantel.)
We measured the height of the bracket back bar + the distance from the edge of my tape to the first rod, to know where to place the template onto the mantel.
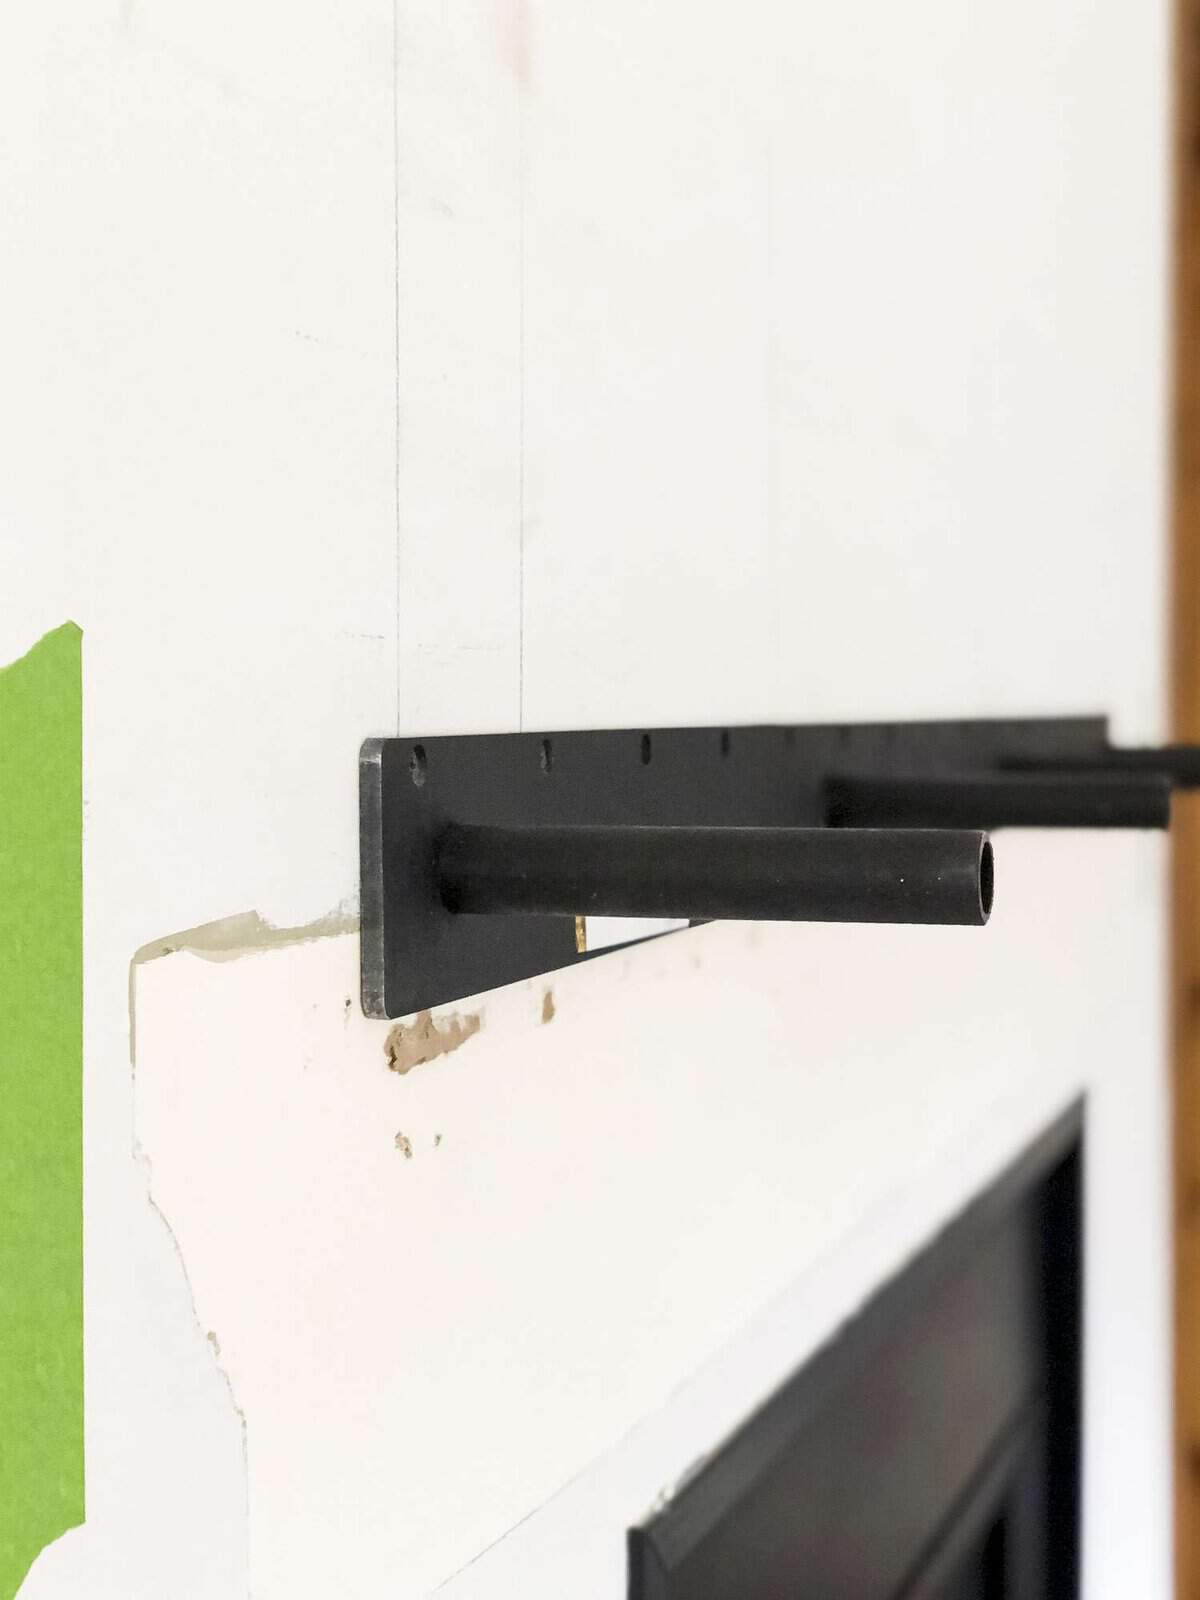
Step 3: Drill Holes for The Rods
Using your template, place the 2×4 onto the mantel and level it with a long level. (Remember to take into consideration your measurements so you know where to mark your holes top to bottom and side to side!)
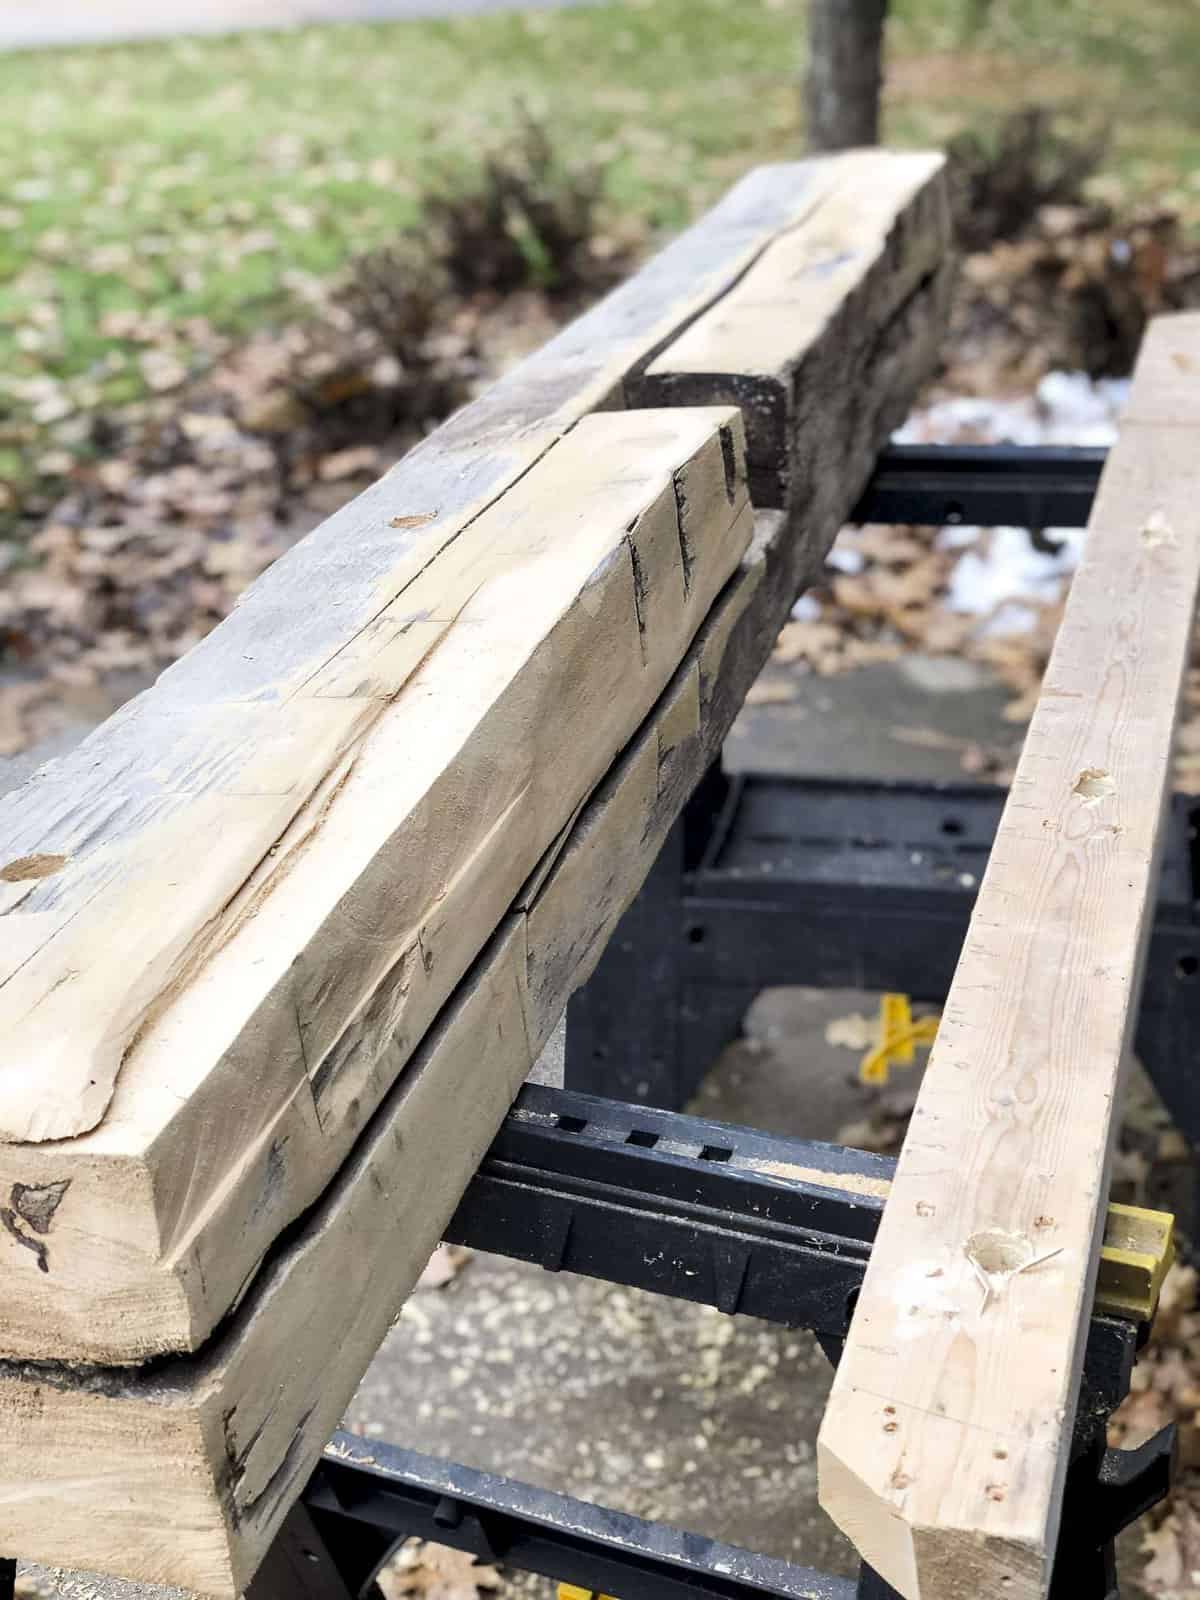
Draw holes onto your mantel, then using a wood spade bit slightly larger than your rods, drill your holes. Our rods are 1″ and we needed a 1 1/8″ bit.
You will want your holes to fit tight to the rod so it is stable, but still be able to slide it on!
Make sure that you drill deep enough for the rod to fully be covered and your mantel to sit flush to the wall.
{Make sure that the depth of your mantel can accommodate the depth of your rods before ordering!}
Step 4: Slide it On!
The final step is to slide the mantel onto your bracket rods. This took a lot of work, to be honest! Like I said, heavy beam = difficult to work with. But once we got it onto the rods, we were able to hammer it in using a 2×4 to protect the beam itself from being marred.
This was a slow and steady process. We could have used a larger bit to make the holes larger, but it would have made the fit sloppy and unstable.


So take your time and it will eventually move back! (See video for an example of how we used the 2×4.) You can also choose to add construction adhesive to the holes prior to sliding the mantel on for extra security.
Join the Community
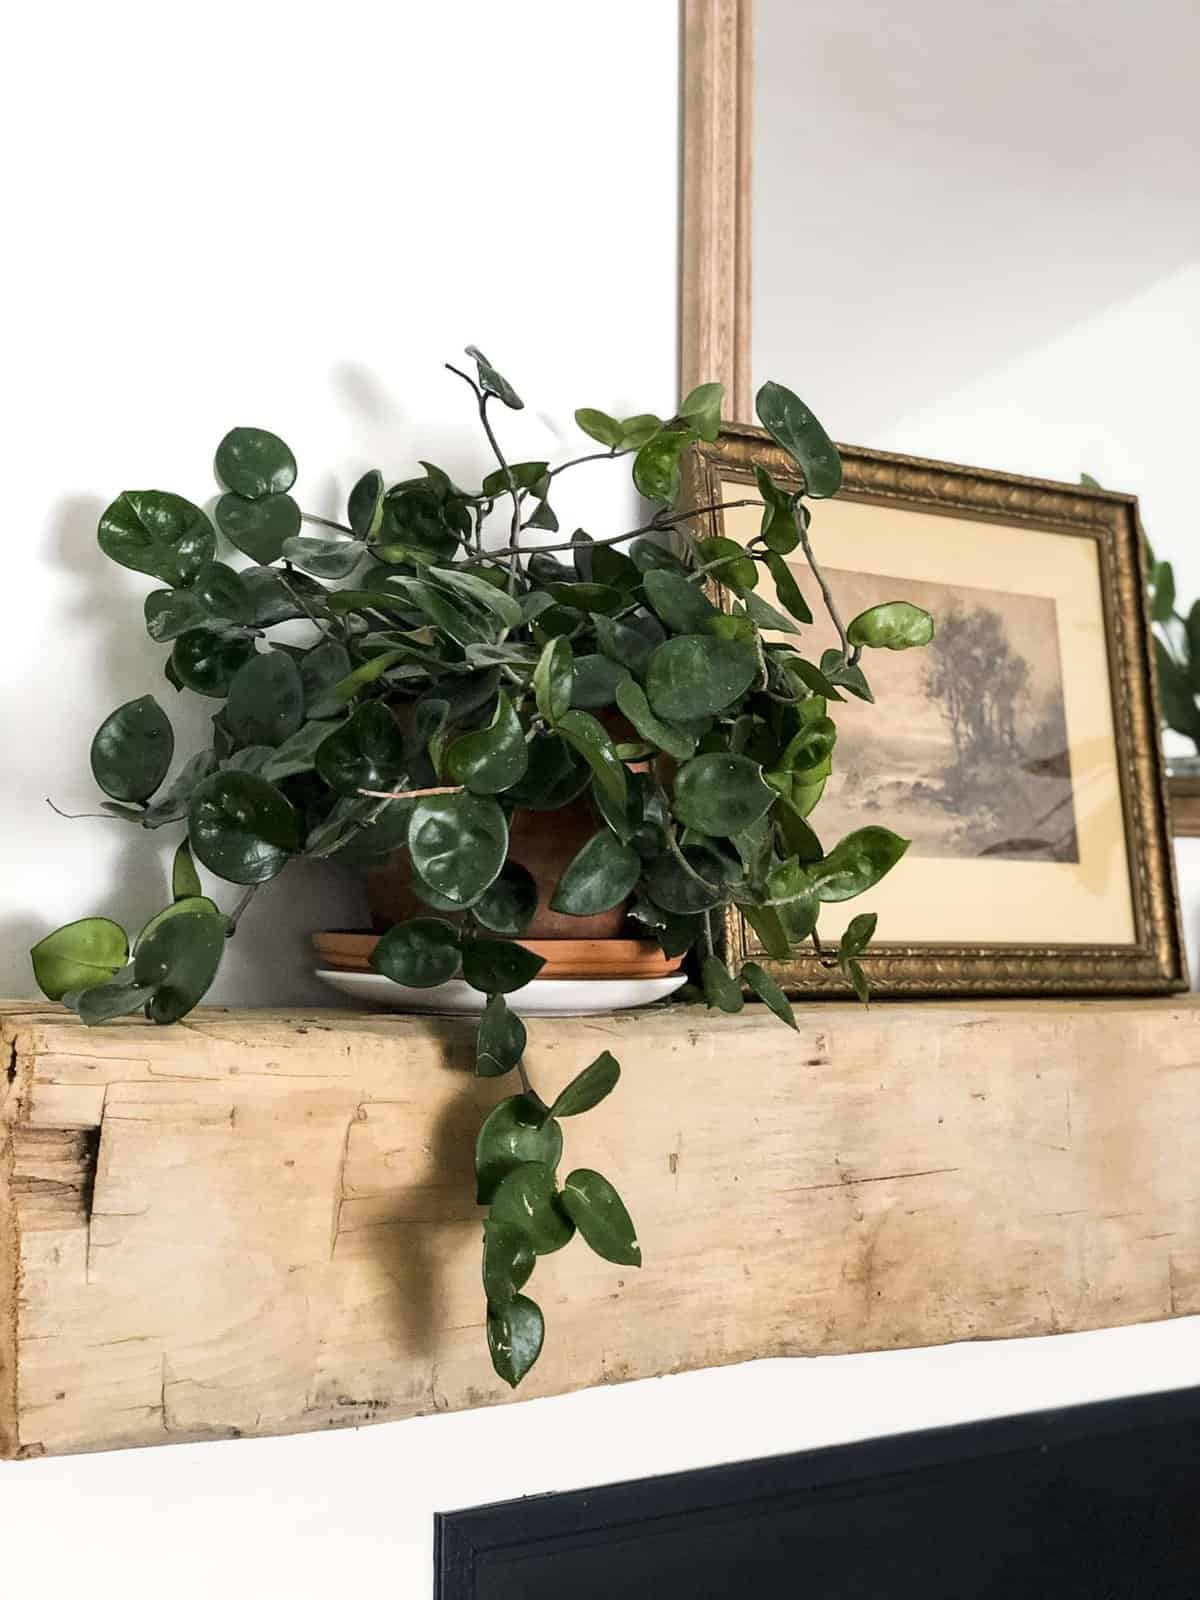
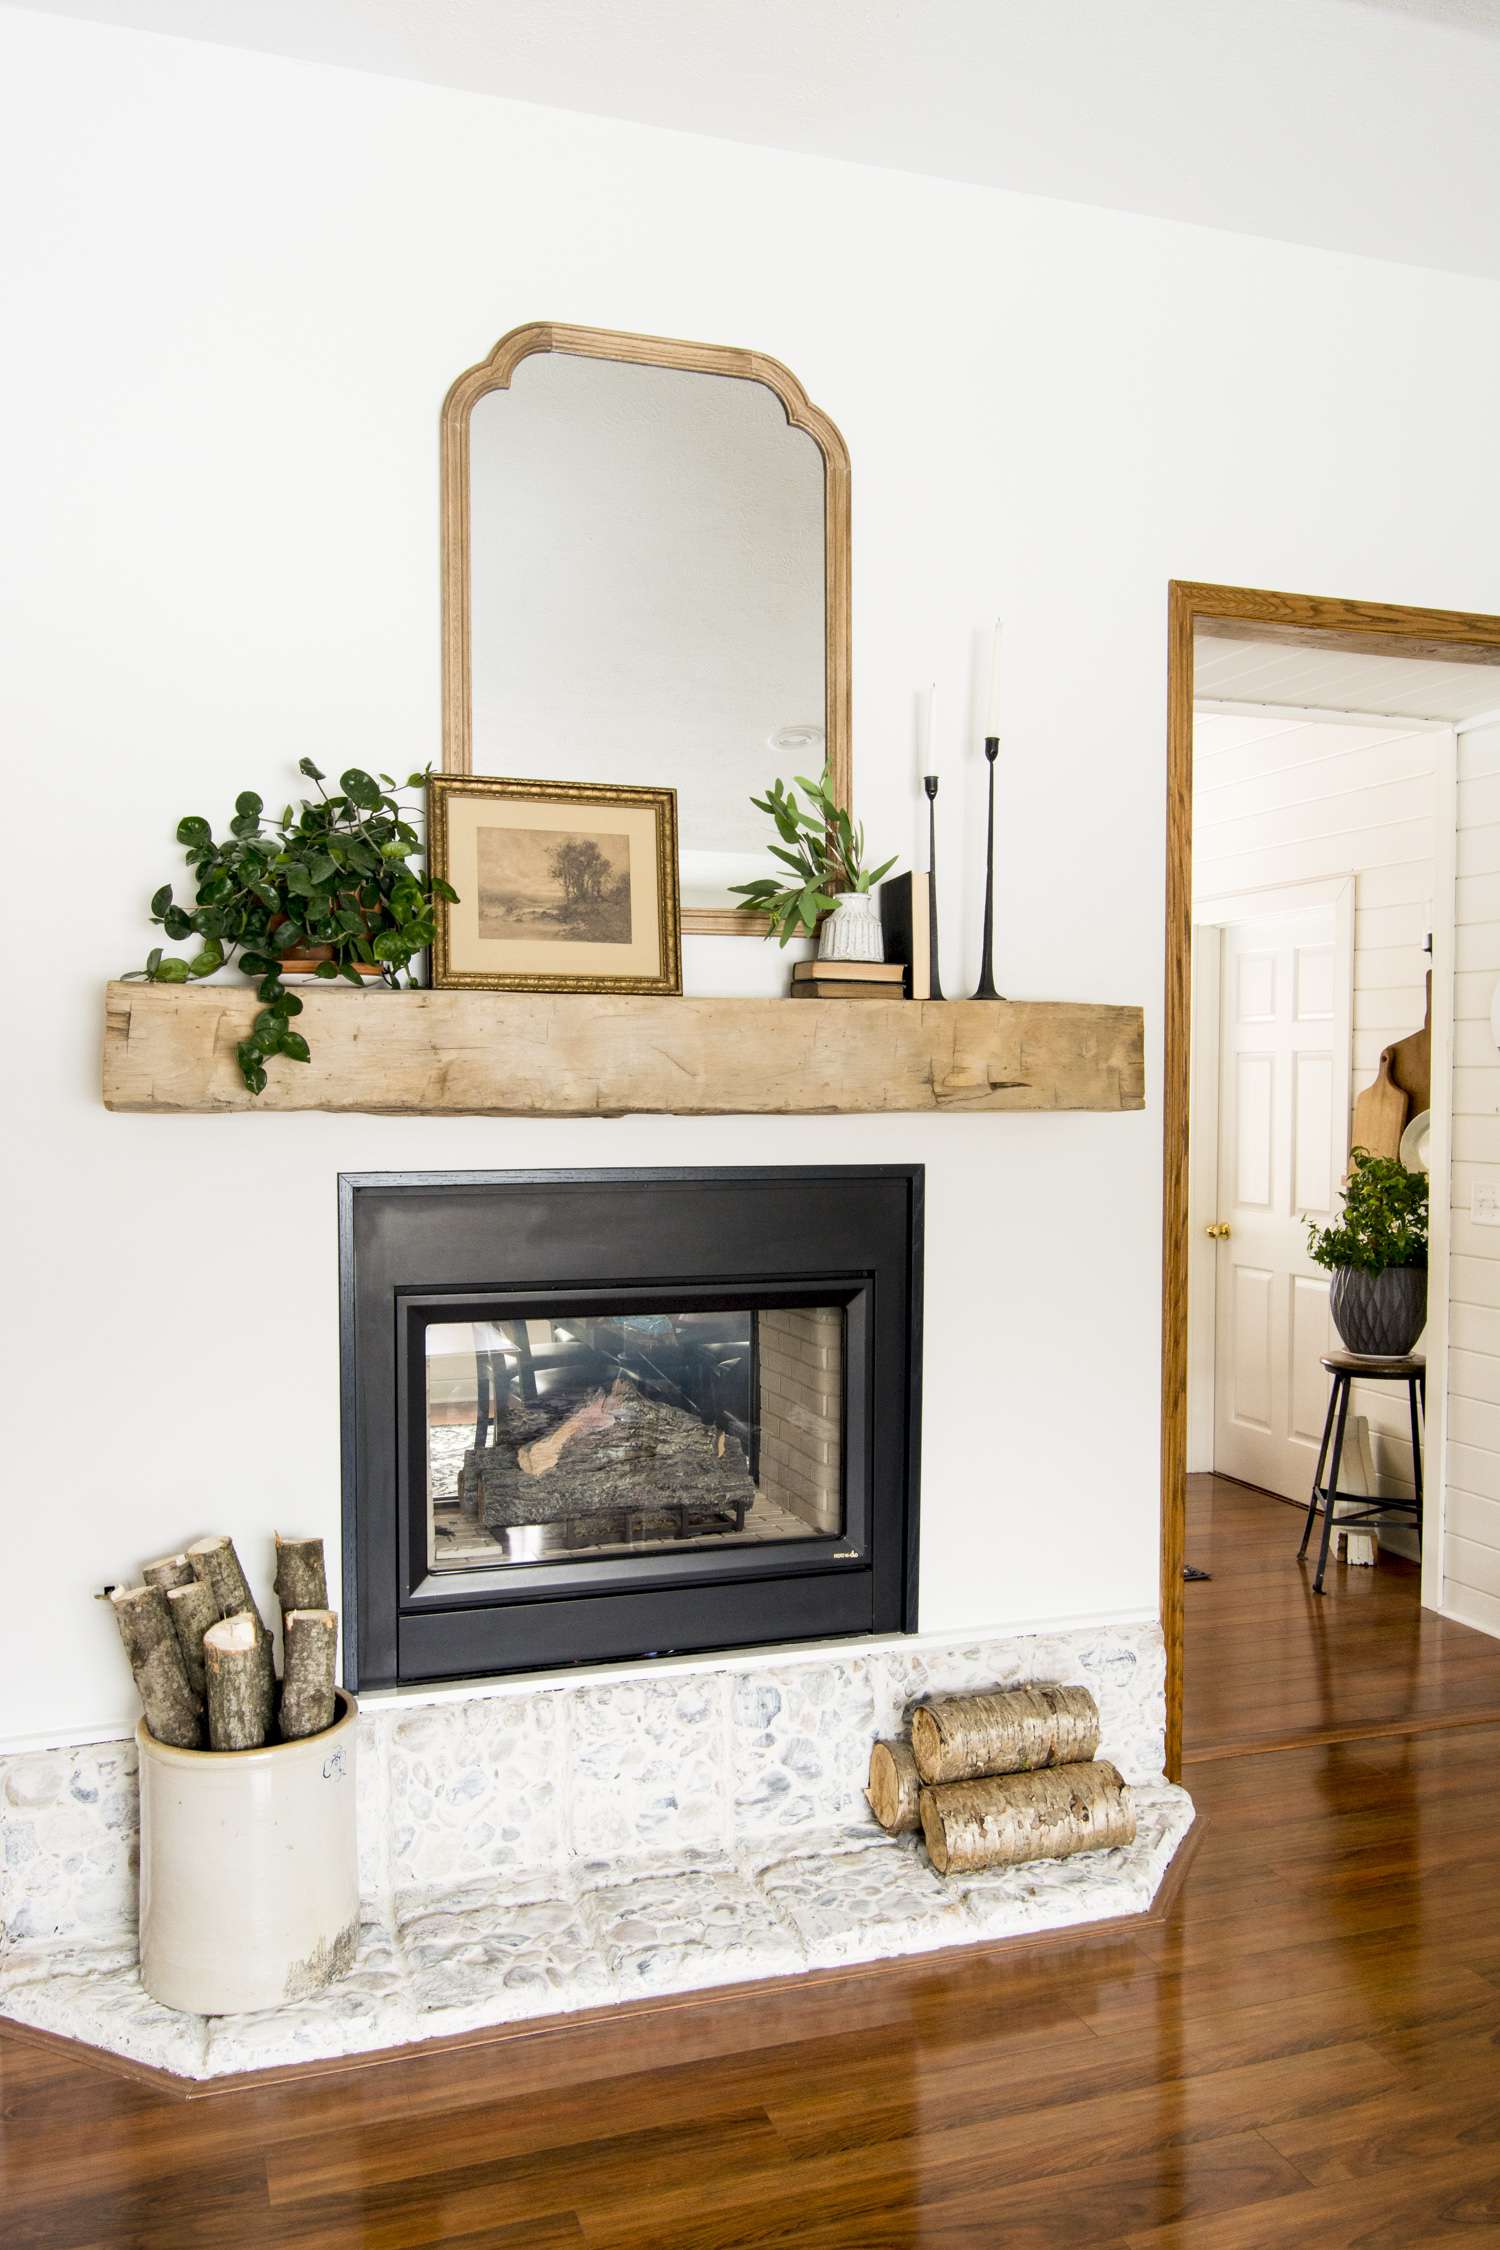
And there you have it, in all her imperfect glory!
A new {old} barn beam mantel that fits my style so much better. We also chose to raise the placement of the mantel 2 inches so that if we choose to add stone down the road it will fit better.
So what do you think? This was a new project for us and we learned a lot along the way! I hope this mini tutorial is helpful! Thank you so much for stopping by the blog today.
Make sure to see the various ways I style my mantel throughout the year in this article on mantel decor ideas!
I’d love for you to become a blog subscriber to take part in our, DIY project guides, freebies and weekly newsletters. And you can always follow along with my daily escapades on Instagram where we are cultivating a community of haven makers!
Be blessed my friends,


This tutorial is so helpful! I’ve been wanting to add a floating beam mantel to my living room, and your step-by-step instructions make it feel doable. The tips on choosing the right wood really stood out to me. Can’t wait to try it out! Thank you for sharing such great insights!
I absolutely loved this tutorial! The step-by-step guide made the process so much easier than I expected. Your tips on selecting the right beam and finishing touches were particularly helpful. I can’t wait to try this in my own home! Thank you for sharing your expertise!
Hi! We ordered a bean recently and will be installing it the same way. Did you notch out space for the bracket along the beam so the beam sits flush against the wall? Or do you just have a small gap from the bracket? Thanks!
We actually left a larger gap than necessary because down the road we want to add stone. But I would imagine that the small gap from the bracket would barely be visible.
Love the look! What did you do – if anything – around the edging of the beam and the wall?
It is just flush to the wall. 🙂
Did ya’ll do the stone work around the bottom of the fireplace or is that original to the house? Love it and would love to replicate it but unsure how!
It was original! They had a river rock hearth and then I applied a german schmear technique to it.
That turned out great. Love it
Thank you Kirstin!
I love this idea. I know it was hard, but your guys made it look so easy. You got such a great deal on purchasing the beam. I love using antiques I have an old banister railing that I need to install on my stairs. You have given my the inspiration to get it done!!! Thanks, Sarah! And many blessings.
Thank you Barbara! That sounds like a fun project!
Wow! I love it!! It looks wonderful. You both did a great job.
Thank you so much!
I have had an old barn beam we hauled out of a demolished old farmhouse that had burned. It weighs a ton. I am so excited to see how you did this! This summer I hope we can do ours. I have a sissy mantle too and while it is okay, I want a beam!! We are going to take it to an Amish wood mill to have a bit taken off as it must be the heaviest wood in the world!! It has beautiful hack marks from an ax and I love her. Thank you for the inspiration!! P.S. I also dug up some old fashioned irises with a stick that are now in my garden 🙂
That sounds like an awesome find!! Taking it to a mill is a great idea. We almost did the same but ended up not needing to.
I remembered watching your story about your “new” mantle using a very dirty barn beam. Now that we are redoing our fireplace, I am in search of a old barn beam?. I am sending this tutorial to my hubby?now. I’ll keep you posted!!! Thank you for sharing!!! And you just sealed/preserved it with tung oil?
I hope you find one! They add so much character! I ended up not adding the tung oil to make sure I didn’t want to stain it first, but I think I will soon!
Great info and the beam looks wonderful. Sorry to learn that your giveaway is only on instagram. There are those of us who subscribe to your blog but are not on instagram and it’s a shame that we can’t partake.
Thank you Jill! You’re right! I should definitely host a giveaway for my loyal blog subscribers as well. Stay tuned!!
Hi Jill. We’re building a house and will have an inset electric fireplace. I’d love to use tiles across the bottom of ours, similar to those you used in this project. What size are they and what material are they? I love them! I love that whole fireplace look! Thanks.