
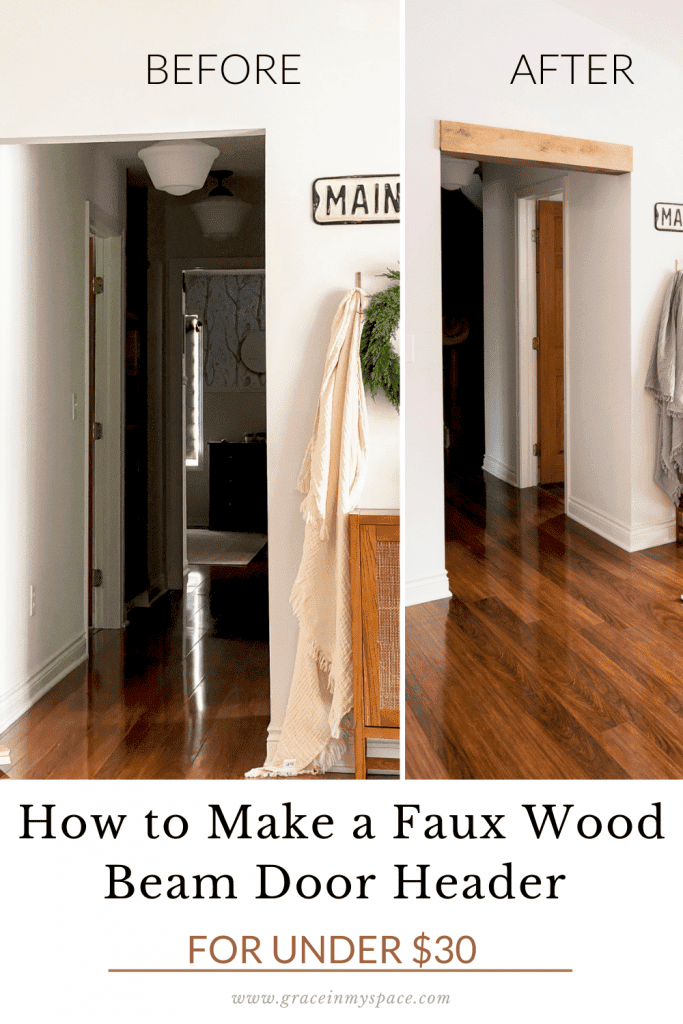
How to Make a Faux Wood Beam Door Header
Are you looking for easy ways to give your doorways character? I love the look of wood beams, and wanted to dress up our doorway leading from the living room to the hallway. But all of the tutorials I found only showed me how to install a permanent beam or wrap the entire doorframe. So, I decided to figure out how to make a faux beam for the doorway that wouldn’t be a permanent fixture. For under $30 in wood, let’s learn how to make a faux wood beam door header!

Post may contain affiliate links for your convenience.
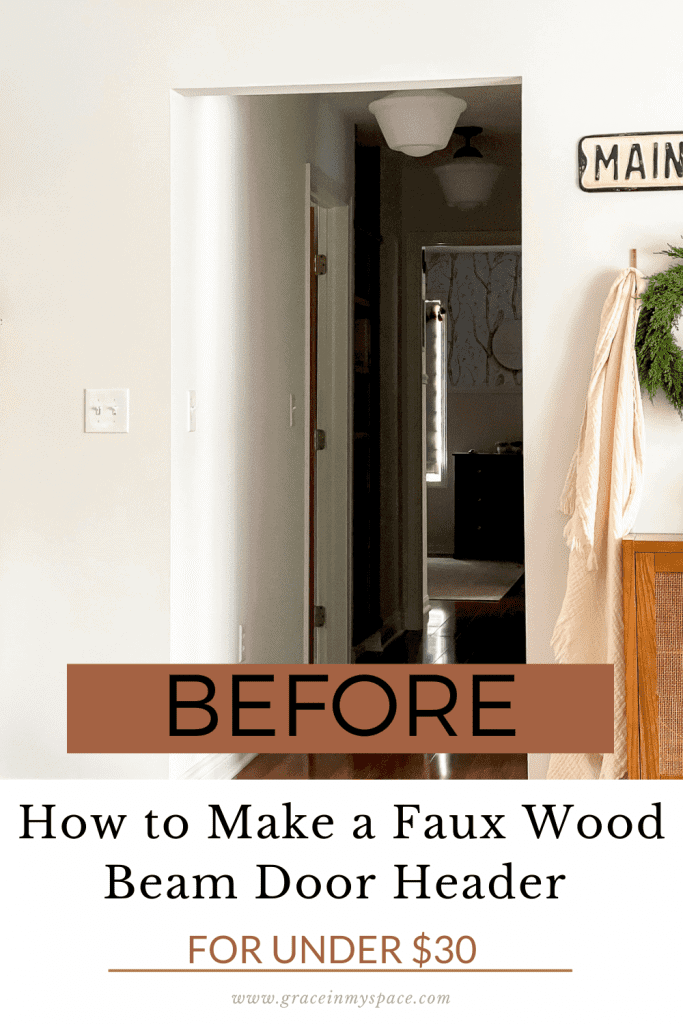
Wood Beam Door Header Obstacles
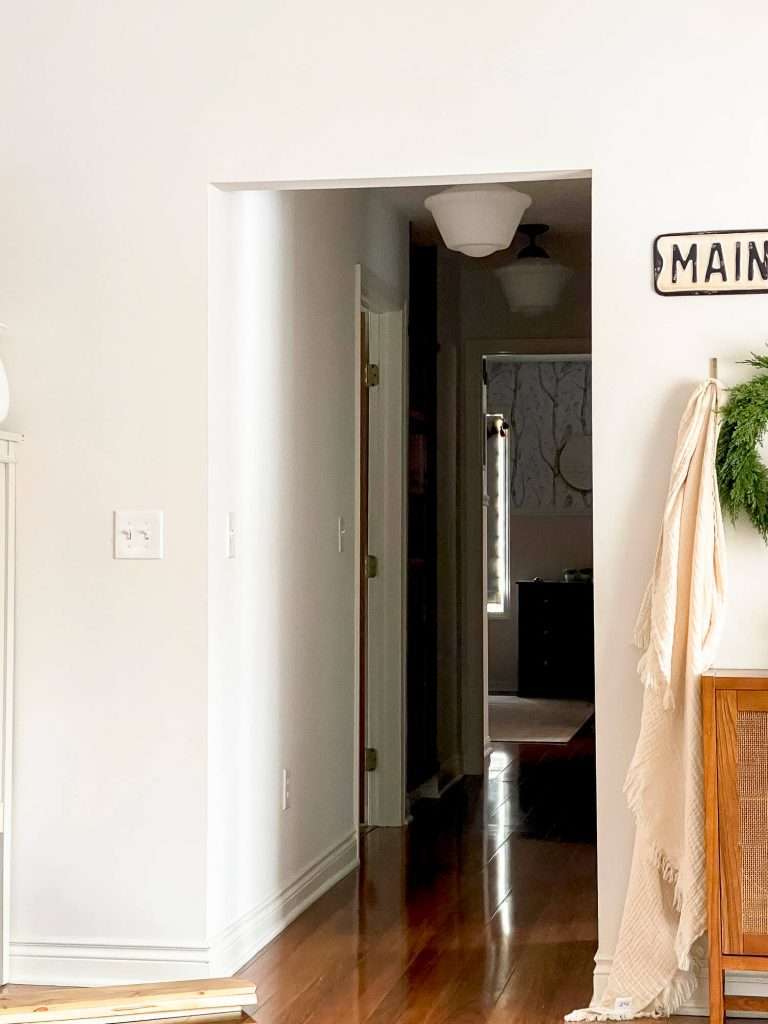
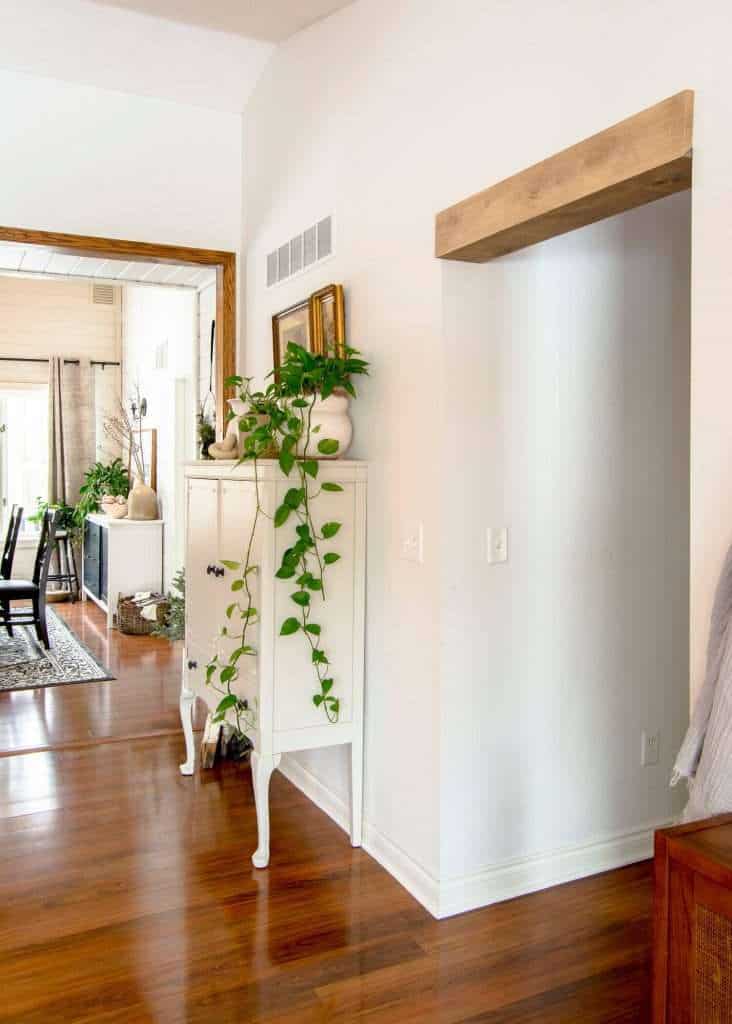
Wrapping an opening or doorway is a beautiful way to dress it up. Our hallway doorway was plain drywall and lacked character. So, I looked to European inspiration from my time in Portugal, and decided I wanted to add a beam header.
As I processed how to do this, I ran into a few problems.
- Our doorway is only 7 feet tall, so adding a beam below the opening would eliminate too much head room.
- A true structural beam would be recessed into the drywall. I didn’t want to cut into the drywall and have such a permanent installation, so I needed to come up with a solution that still looked correct but wasn’t that complicated.
- This project needed to be a beginner DIY level because of my lack of tools.
- All the existing tutorials I could find wrapped the entire opening, but I just wanted to create a header.
After mulling over the project for a few days in my mind, I decided to give it a try! This tutorial is based off of what I did and the measurements of my doorway. However, there are more ways than one to accomplish this and you might find that a different method works better for you and your space!

How to Make a Faux Wood Beam Door Header
First, keep in mind that I am wrapping my wood around the existing drywalled opening to create the look of a header. This is not intended to be structural in any way.
Materials
Your wood measurements will be dependent on your opening. To wrap a standard opening, I used:
- 2 1×6 pine boards (cut to length)
- 1 1×8 pine board (measurements to follow)
In addition, you will need:
- Stain color of choice
- Sandpaper or palm sander
- Brad nailer
- 2″ finish nails
- Construction adhesive
- Miter saw
- Table saw (for the intermediate option)
- Wood glue
- Tape measure
Beam Door Header Tutorial
To build a traditional faux wood beam, see my tutorial on how we added ceiling beams to the guest house. This is a good starting point to see how the basic structure of our header will come together.

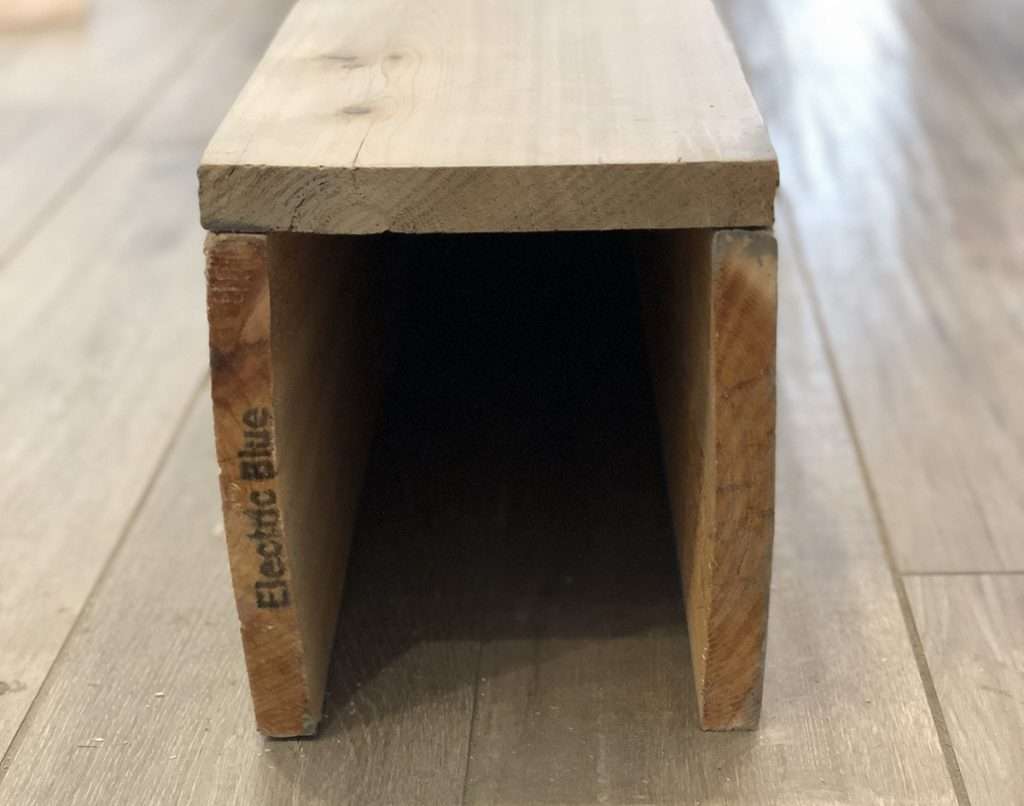
You will cut three sides to create a box that wraps around the header opening to give the illusion of a floating beam.
Beginner v. Intermediate Assembly
Before we go any further, there are two ways to build this wood beam header. If you are a beginner or do not have the tools needed to cut long edge 45 degree angles, then you can alter this tutorial to a beginner level. To create your header wrap, you will keep all of your board edges at a 90 degree cut and then simply overlap them to assemble.
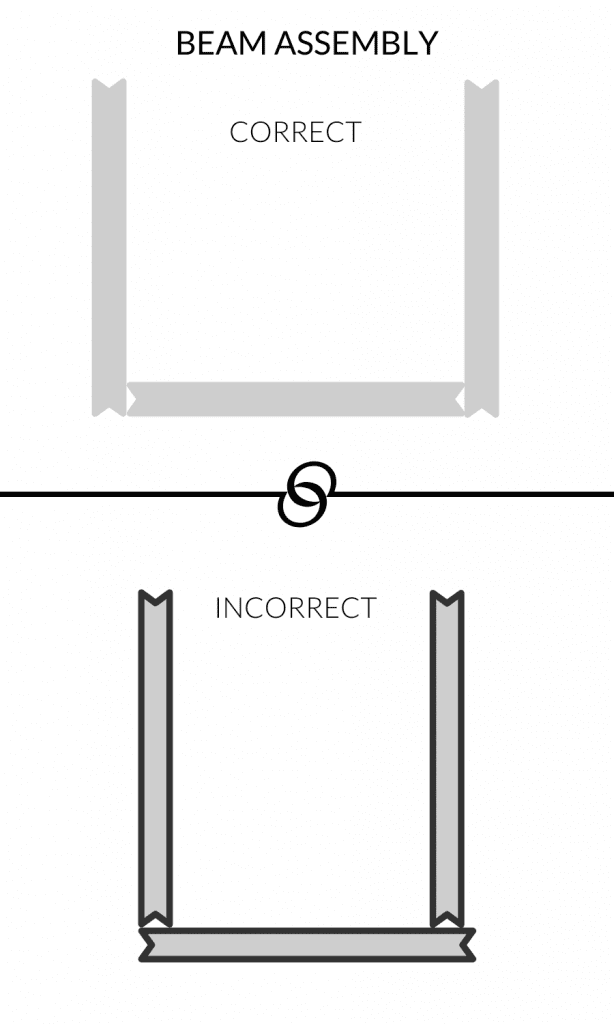
Just ensure that for this tutorial, your side pieces are on the outside of your middle board. From a visual standpoint, this will ensure that your face boards are full length and the bottom of the beam is recessed so you don’t see seams.
The board placement is determined on the height of your opening. If you are looking at a standard height opening, you will be looking at it just above eye level. By placing your face boards on the outside you are covering the seam.
For ceiling beams, like the one below, the middle board is placed opposite so that when looking up, it masks the seams as well.
If you want a more polished and seamless look, like I did, then you will need to be able to make long edge 45 degree cuts. I didn’t have the tools needed to make this cut, so thankfully my dad was willing to help me out! A table saw is the best tool to achieve these long cuts. However, you can also use a circular saw with a fence to keep the cut straight.
Long edge 45 degree cuts allow you to piece your boards together so that they fit to make their own 90 degree angle. This will create a virtually seamless look for the most realistic option.

Measurements and Angle Cuts
First, cut your 1×6 and 1×8 boards to the length of your opening. I used pine boards that were affordable, but you can choose whatever wood species you like and coordinates with your home. If you can find it, using barn wood is a great option to give the illusion of a very old beam.
My opening is 38″ wide, so I cut both 1×6 boards to 38″ long. These will create the vertical faces of the beam.
Floating Face v. Recessed Face
Your home will inevitably be different than mine. For my opening, I had one floating face where the wood is essentially floating on the drywall. Below, you can see that my doorway extends onto a wall and there is nothing for the wood to dead end into.
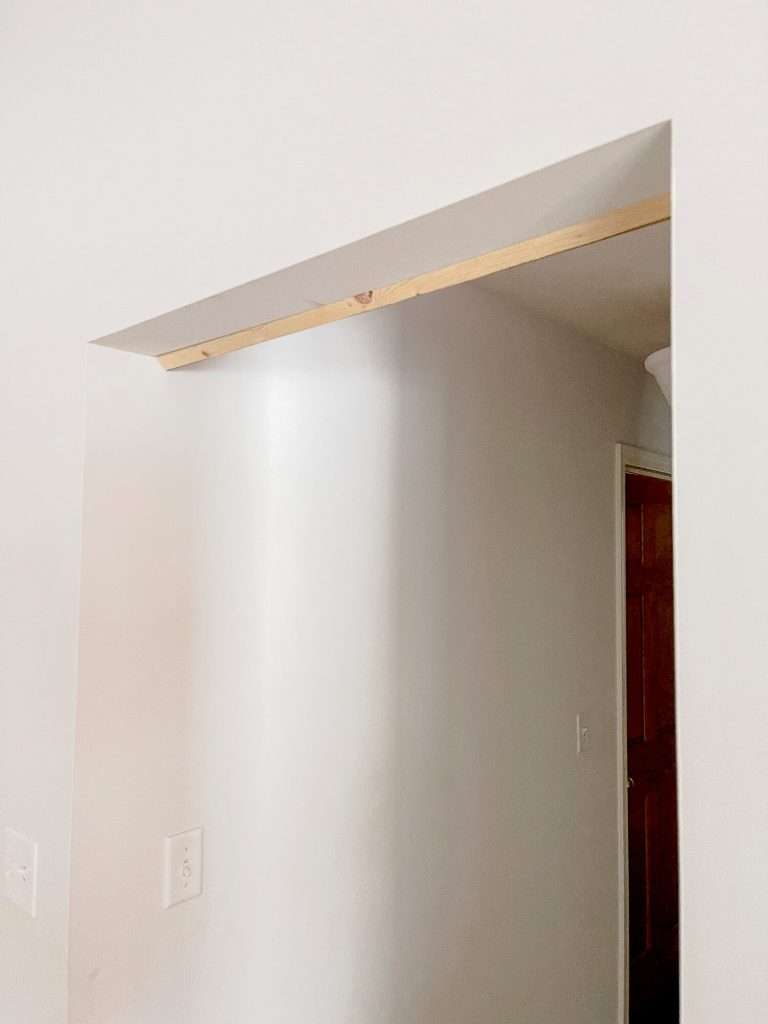
Conversely, on the inside of the doorway I have a recessed face. (Recessed is a loose term, but basically I just mean that the wood dead ends into a wall on both sides.)
Your opening may have two floating faces, two recessed faces, or one of each like mine. This will determine how you cut your face boards. For floating faces, you will need to cut 45 degree miter cuts on both short edges. For recessed faces, you can leave the boards as is (90 degree) on the short edge. You’ll see why as we continue!

Board Angles
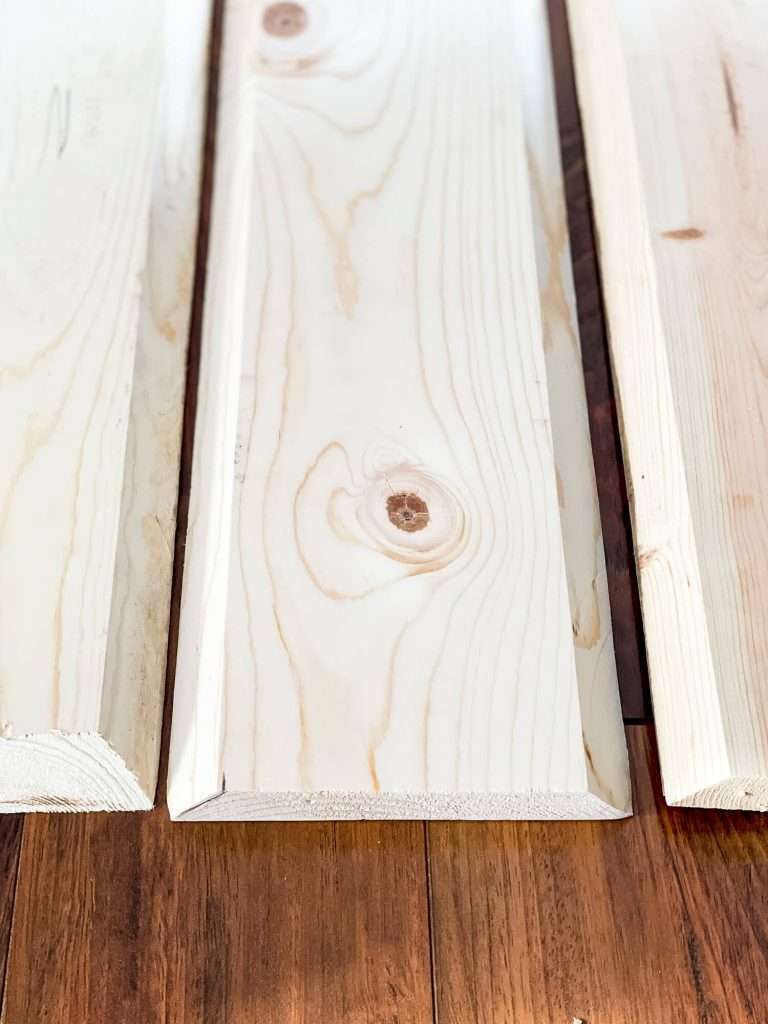
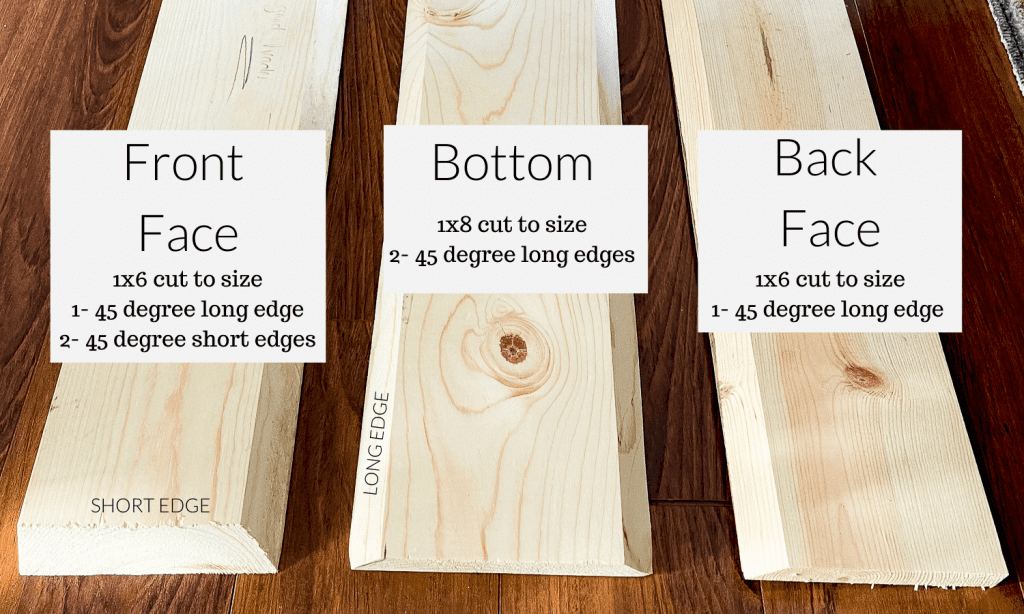
Depending on which assembly option you choose, mitered or 90 degree, at this time you can cut your 45 degree edge on the long sides. Your front and back faces will have one 45 degree long edge. Your bottom piece will have 2 45 degree long edges, as shown below.
Next, measure and cut your middle/bottom piece. My opening has a surface width of 4 3/4″. In order to be able to add 45 degree angles to my bottom board on both sides, I needed to account for the surface width plus 3/4″ on each side from where the face boards join together.
The easiest way to measure your bottom board is to measure the width of your opening, and then add 3/4″ on each side (if using 1x boards).
Then, cut your face board short edges as needed for your opening.
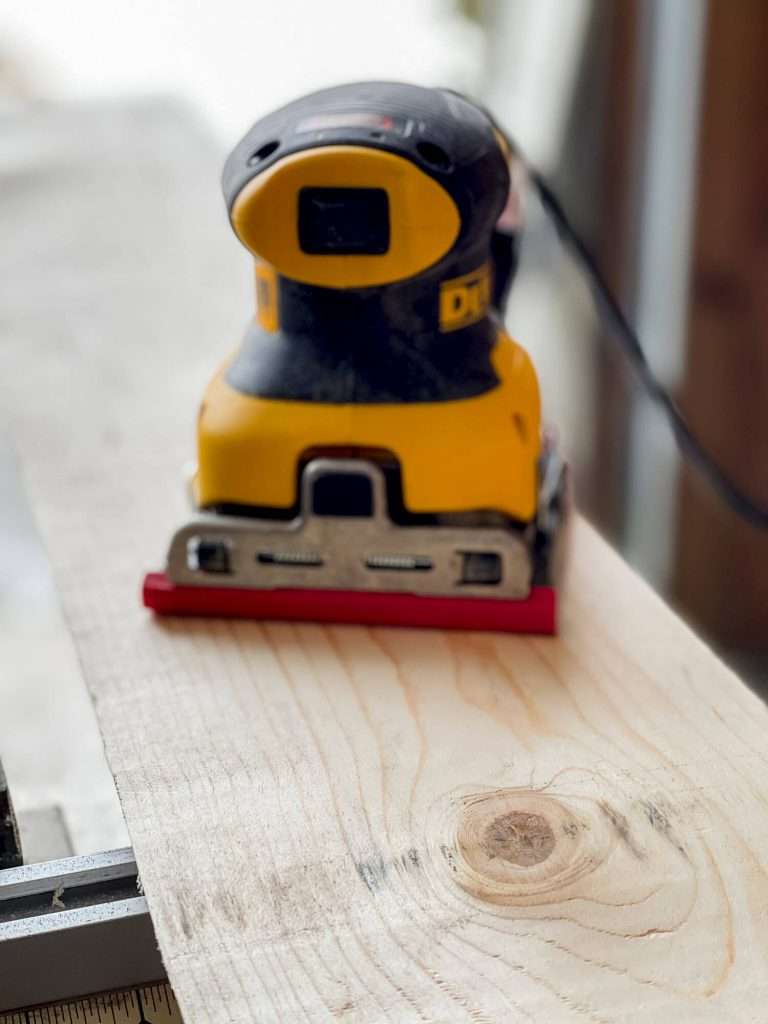
Once all of your boards are cut, sand and stain them as desired. I used Miniwax Semi-Transparent stain in Special Walnut.
How to Build Your Wood Beam
Once you have all of your wood pieces cut and stained, it is time to assemble. I started by attaching my inside recessed face first with 2″ finish nails. I chose to forgo using construction adhesive because I didn’t want to damage the wall if I wanted to remove the faux wood beam header in the future.
If you choose not to use adhesive, make sure you hit studs when installing for security. If you want that extra measure of security, which will also aid in holding your seams together long term, then apply construction adhesive to the back of your board.
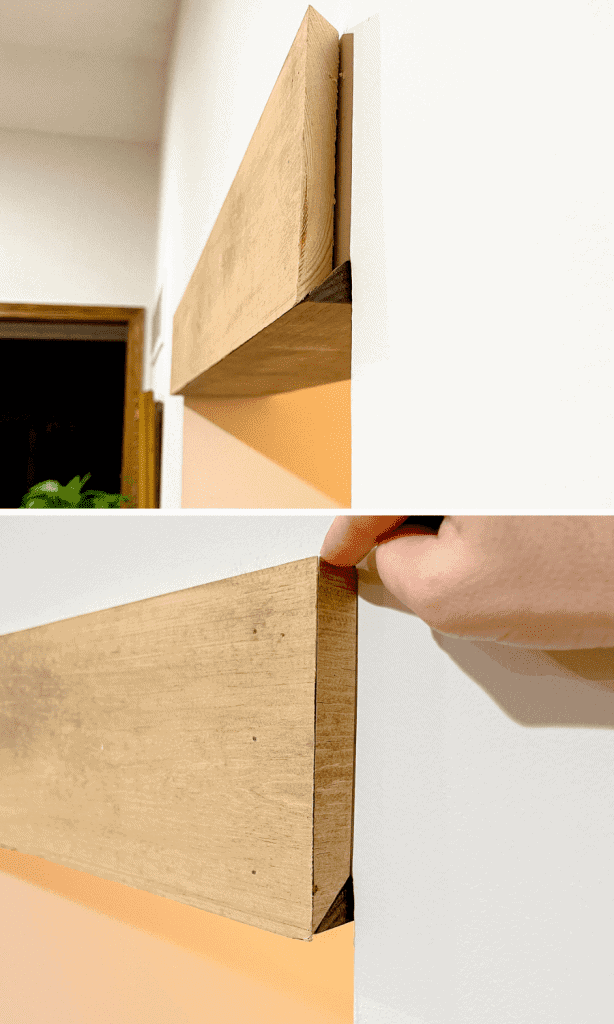
Then, position your face board so that the straight line of the miter edge hits flush with the bottom of your opening. You can see below that it allows your miter cut to hang below the drywall so that your bottom board can meet up with it.
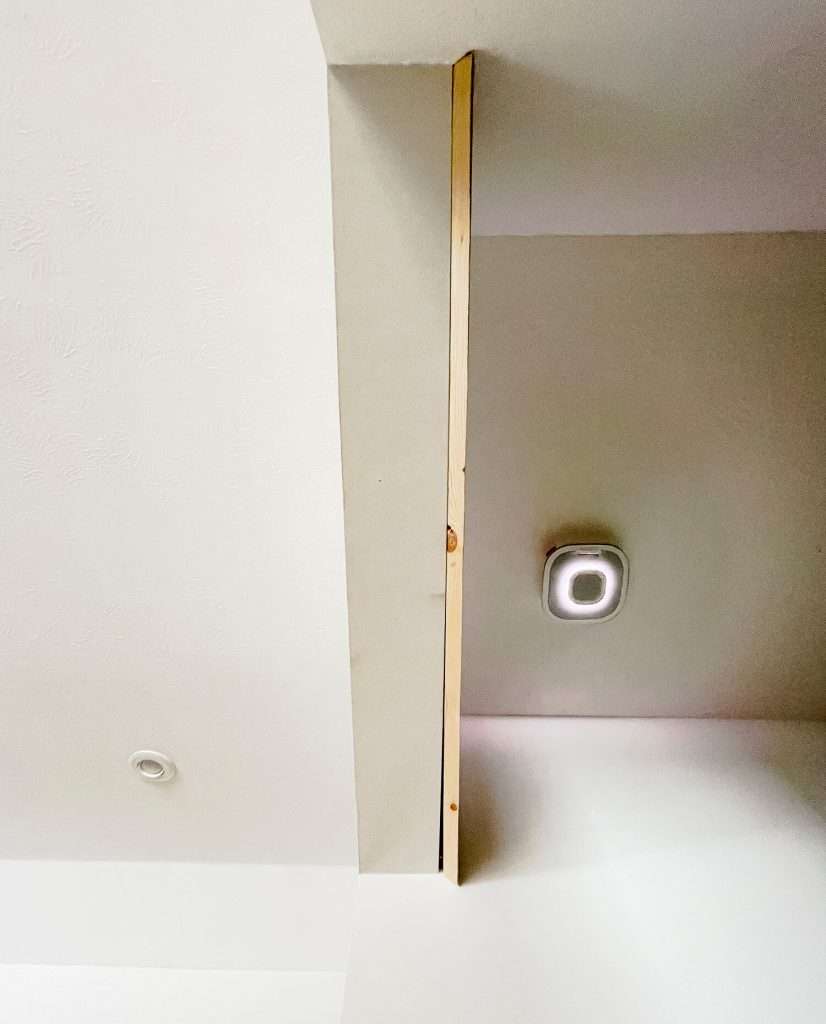
As you can see, when working with pine boards it is hard to get a completely straight board. My board is bowed slightly, and construction adhesive would have fixed that problem. I’ll show you how I worked around that at the end.
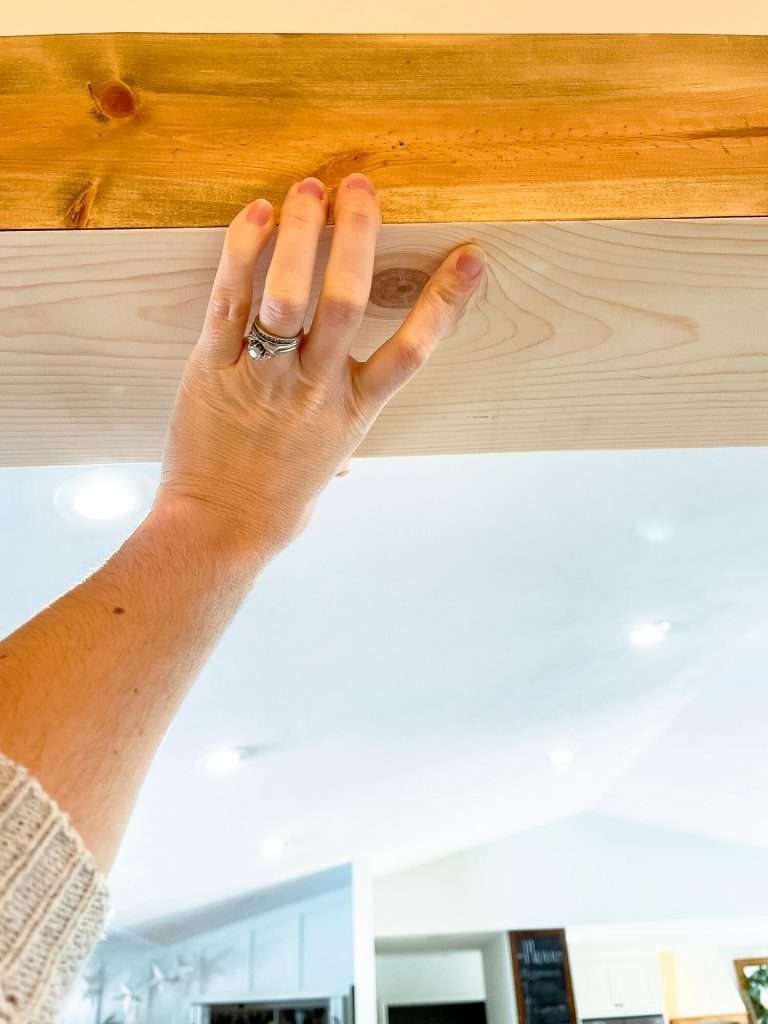
Next, line up your bottom board and attach it directly to the underside of your doorframe.
Then, finish off the wood beam header by wrapping the front floating face and securing it. I originally started by attaching both faces first, but then quickly realized it made more sense to do the back, bottom and then front. This way I could position my front facing board to cover the bottom seam for the most seamless look on the most visible piece.
If you prefer, you can use wood glue on all your mitered seams to help ease any gapping.
Beam Returns
By now you may be wondering, what do you do with those mitered edges on your floating boards? This is where the trickiest part comes in. You need to make returns!
A return is basically an end cap so that you have a finished edge rather than the raw edge of your board showing. If you’ve never cut a return before, I found this video to be very helpful.
Once you’ve cut your returns, you’ll find that you need to make an additional cut. Normal returns would be placed on a floor or ceiling, making them a 90 degree straight edge. However, for this project, the bottom is a 45 degree angled cut.

As you can see, a regular return doesn’t line up with the bottom board. To fix that, you need to cut the bottom of your return at the complementary 45 degree angle. Once you’ve made that cut, you will see that all the angles line up appropriately.

I attached my returns with wood glue. Here’s a tip for best adhesion: do not run a single bead of glue onto your wood and then squish the pieces together.
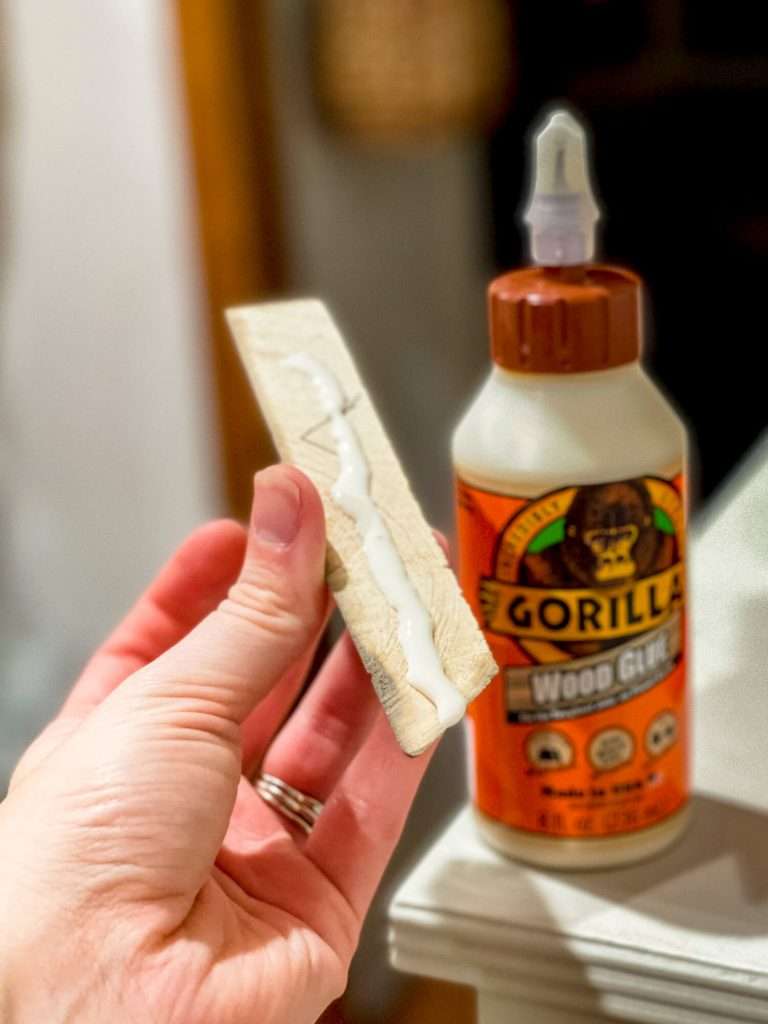
Instead, use your finger to spread it evenly across the surface of the wood so that the entire flat area is covered. Then, attach your return. This way the surface area will adhere appropriately.
Filling Gaps
Once your beam is installed, you can use wood filler to clean up any gaps or oversized nail holes! And if you’ve chosen to use wood glue to attach your mitered edges for security, make sure to securely clamp it together.
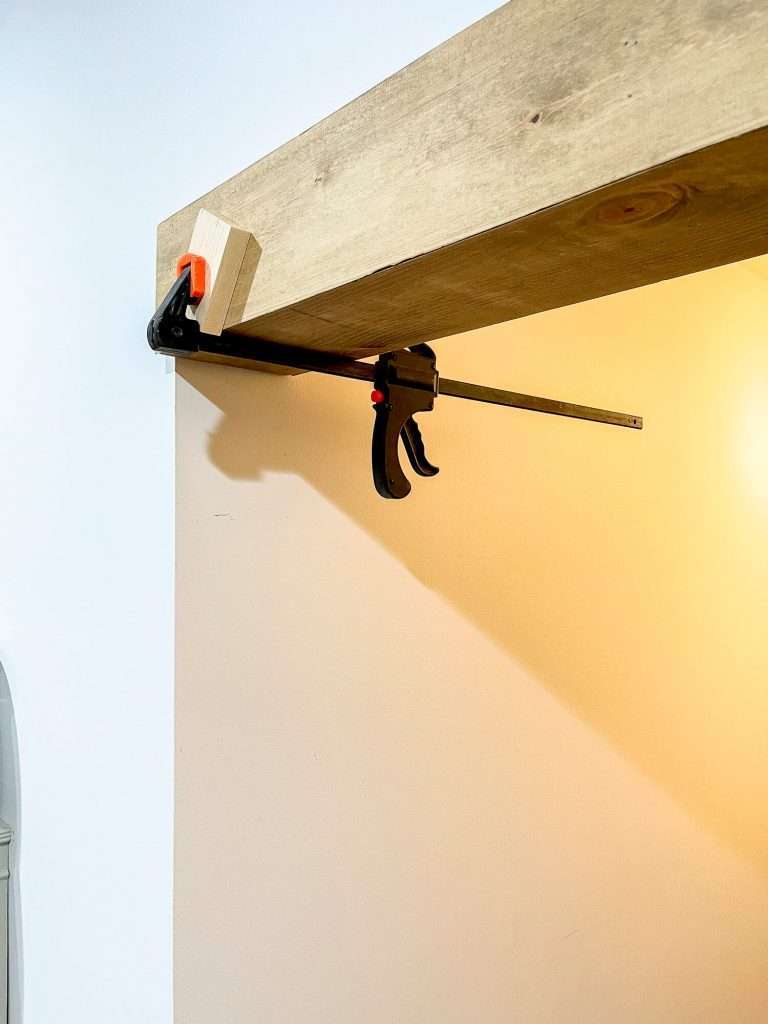
This is one of the ways I chose to hide that bow in the back board and it worked well.
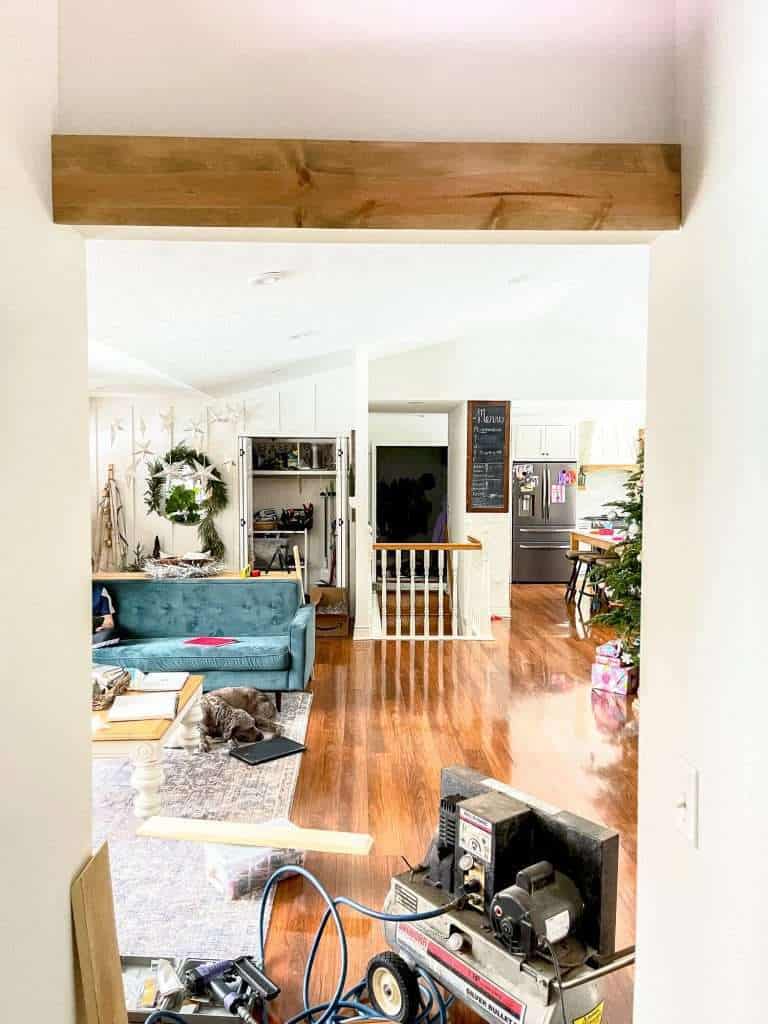
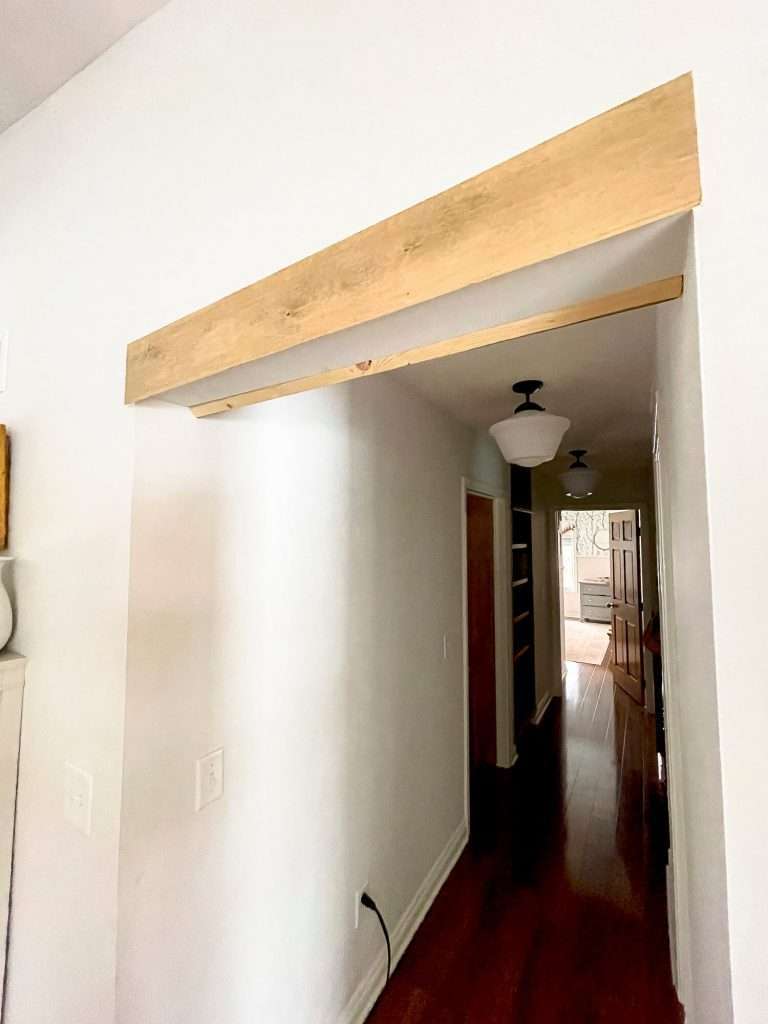
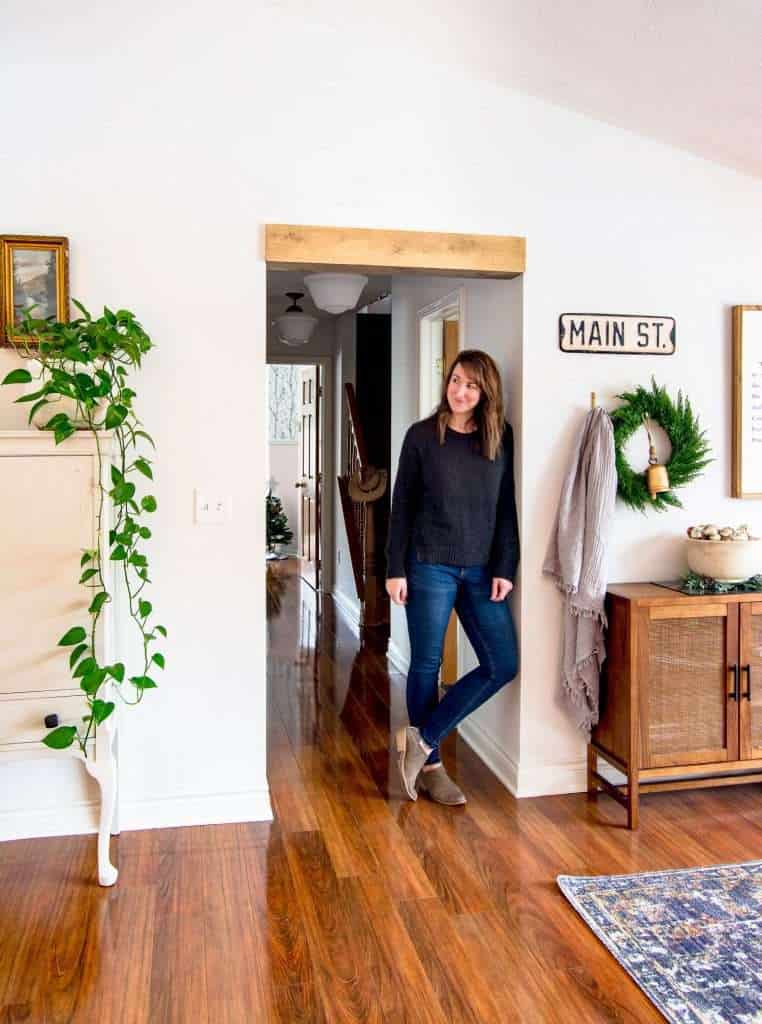
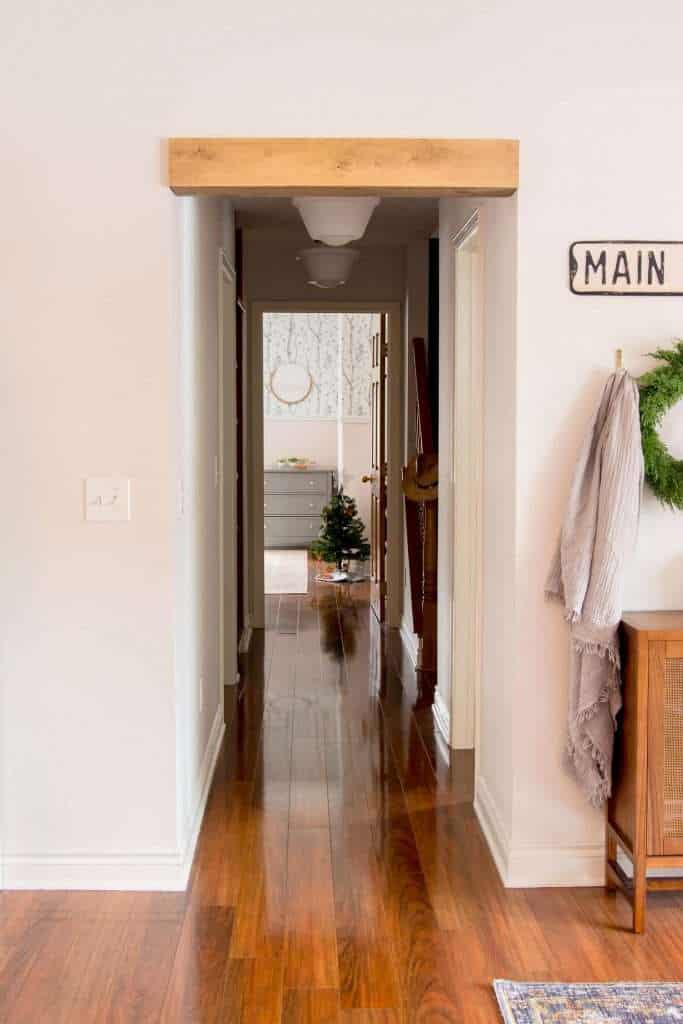
Completed Faux Wood Beam Header
She’s done! The actual hands on work for this project was about 3 hours, but mostly because I was experimenting the whole time! With this tutorial, hopefully you can do it in less time.
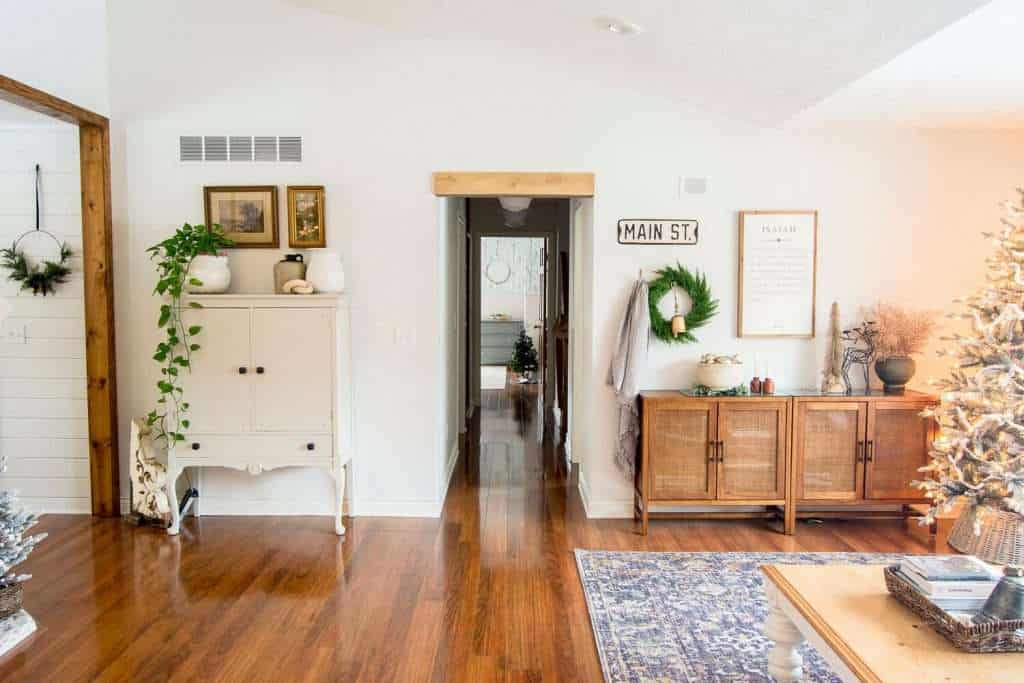
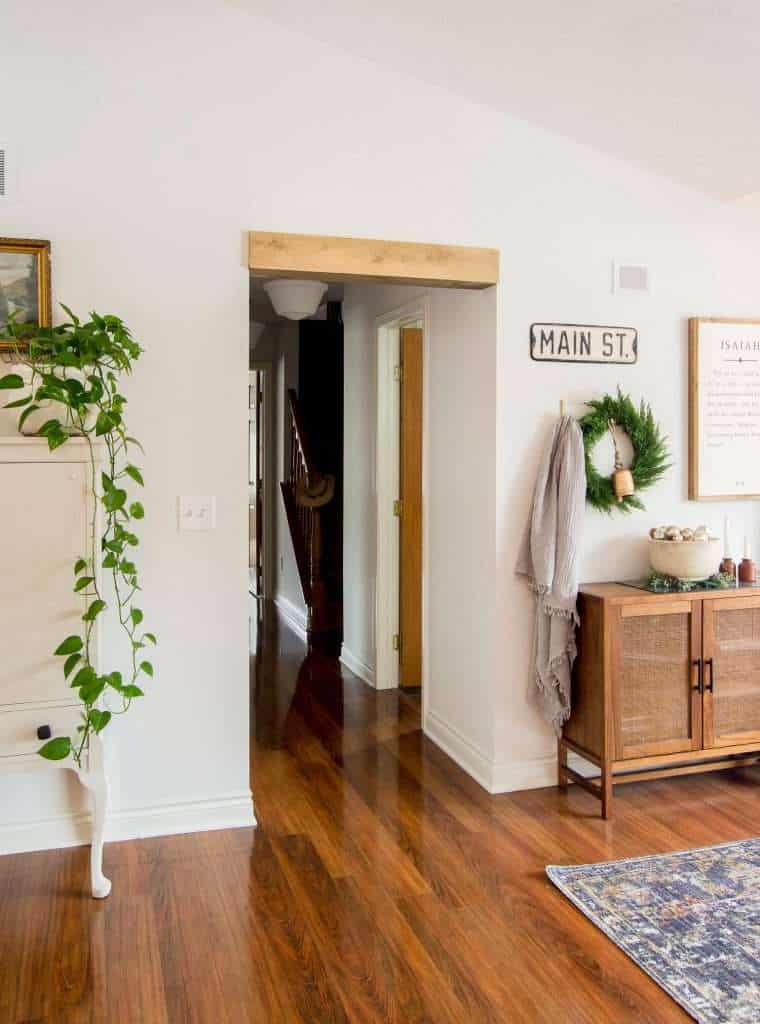
I think that it adds just the right amount of character for our home. If you like a more rustic look, you can also age your wood with wire brushes and steal wool.
Shop This Space

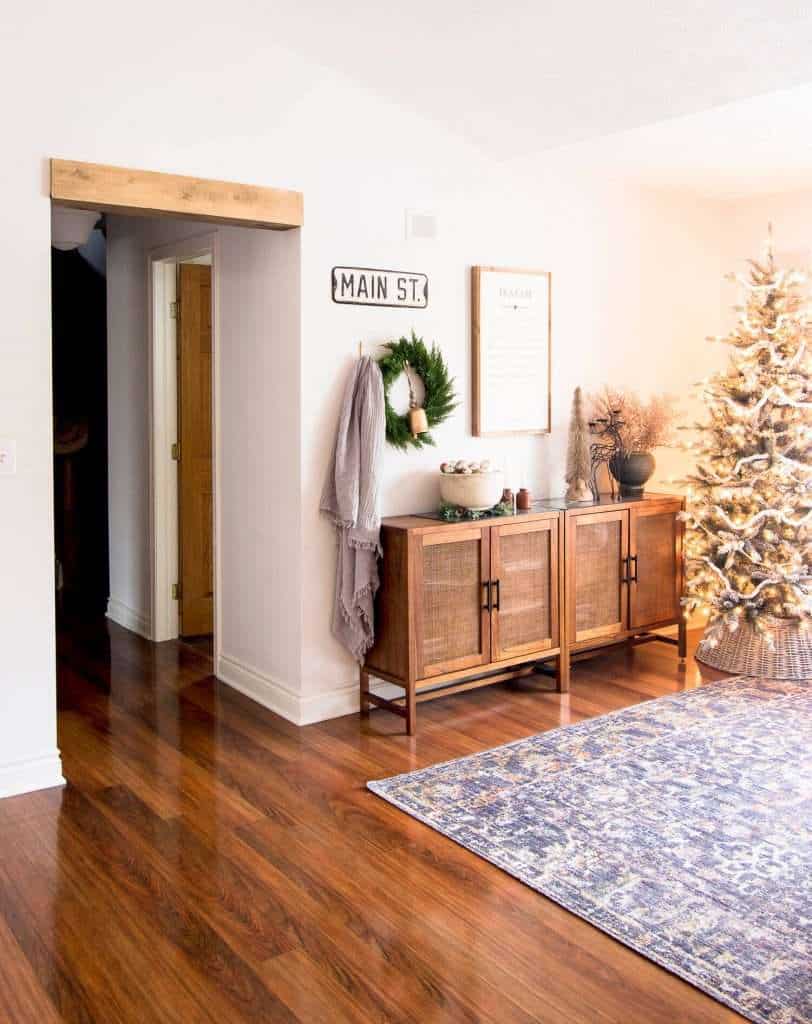
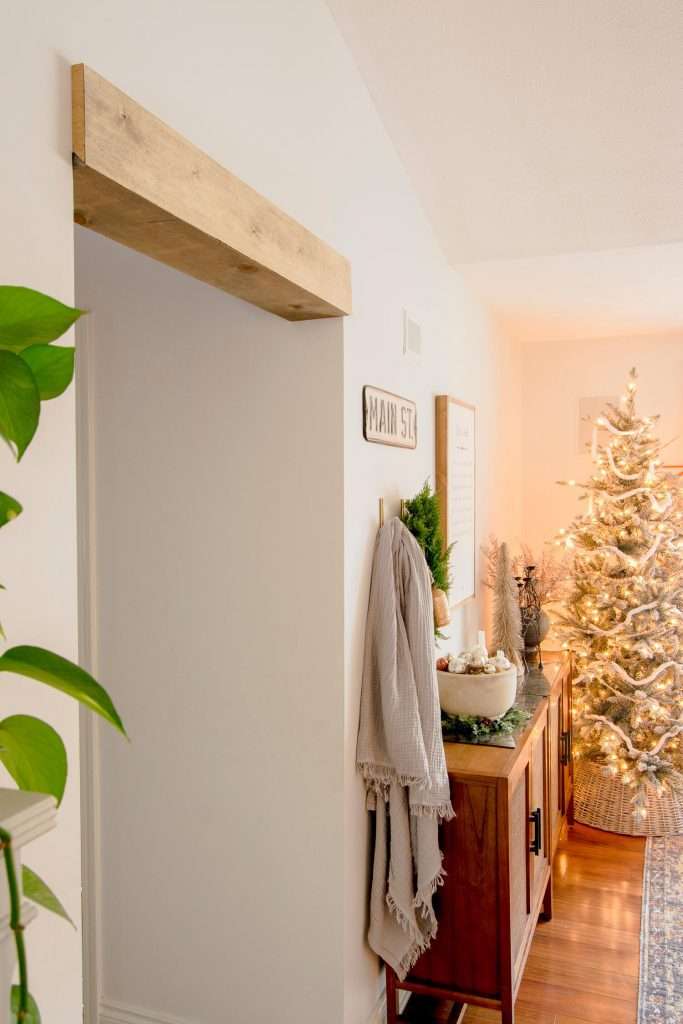
I’m glad that I didn’t fully wrap the opening. While I think that would look beautiful as well, I already have a fully wrapped opening adjacent.
I feel like they would have competed if I’d done this one as well. Eventually, I plan to sand and restain the wrapped opening into our dining room the same stain color as this beam to bring them all together.
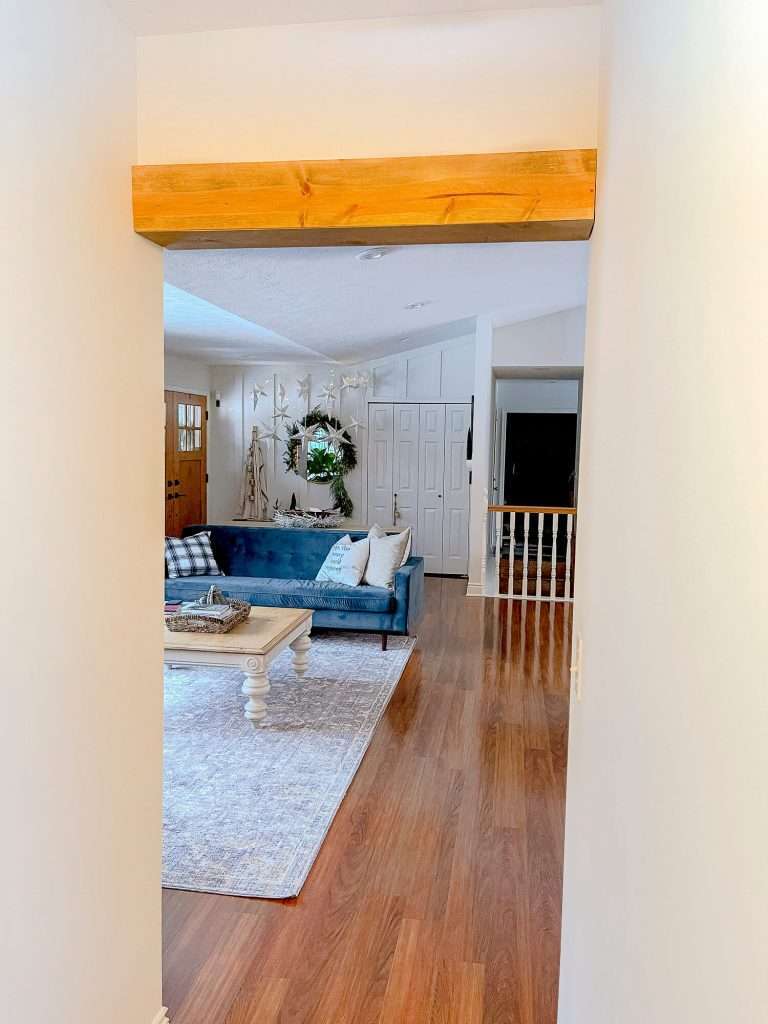
Here, you can see the back face from the hallway looking into the living room. This project would be extremely simple if you have only recessed faces and don’t have to worry about the returns.
But even with the returns, once I learned the right way to do them from my Dad, it wasn’t too complicated! I do think that between he and I, we cut about 15 pieces wrong before we figured out the appropriate angles for the returns. Ha! But practice makes perfect and neither of us had attempted those type of angled return cuts before.
I am grateful that we chose to do the returns as it helps the beam header to appear more realistic rather than just a floating piece of wood.
Stay Connected
What do you think of how it turned out? If you plan to attempt this yourself, make sure to Pin this post for later reference! And, I’d love to see how yours turn out. Tag me on Instagram @graceinmyspace so I can see!


Hi! Did you stain the wood before putting it up or after it was installed? Thanks!
I did it before! But you could also do it after.
Any chance you remember the name of your flooring? Love the color.
Unfortunately it is a discontinued laminate.
What stain did you use on this project? I love the lighter wood tone. I’m currently trying to decide whether to wrap my whole entry way and the entry into my kitchen or just do the top beam. You did a great job. Thank you for the inspiration.
That sounds like a beautiful project! I used one very light coat of special walnut in a semi transparent stain.
Finally a proper faux wood beam! I will be tackling one of these very soon and every blog post I’ve come across until yours is just 3 pieces of wood sandwiched together. Bravo on cutting the bevels to eliminate those tacky seams and going the extra mile with the returns. It looks awesome!
I was thinking that I would glue, tack, and finish the pieces in the shop then slide it in place. Did you consider that method? Is it easier to assemble it on the doorway? Nice work though, I hope mine comes out this nice!
I’m glad this was helpful to you! I think it would be fairly easy to finish ahead of time for an experienced carpenter. For beginners, assembling around the opening might be the best bet so measurements don’t have to be quite as precise.
Wow! You are so creative! Love your website too btw!
Thank you so much!