
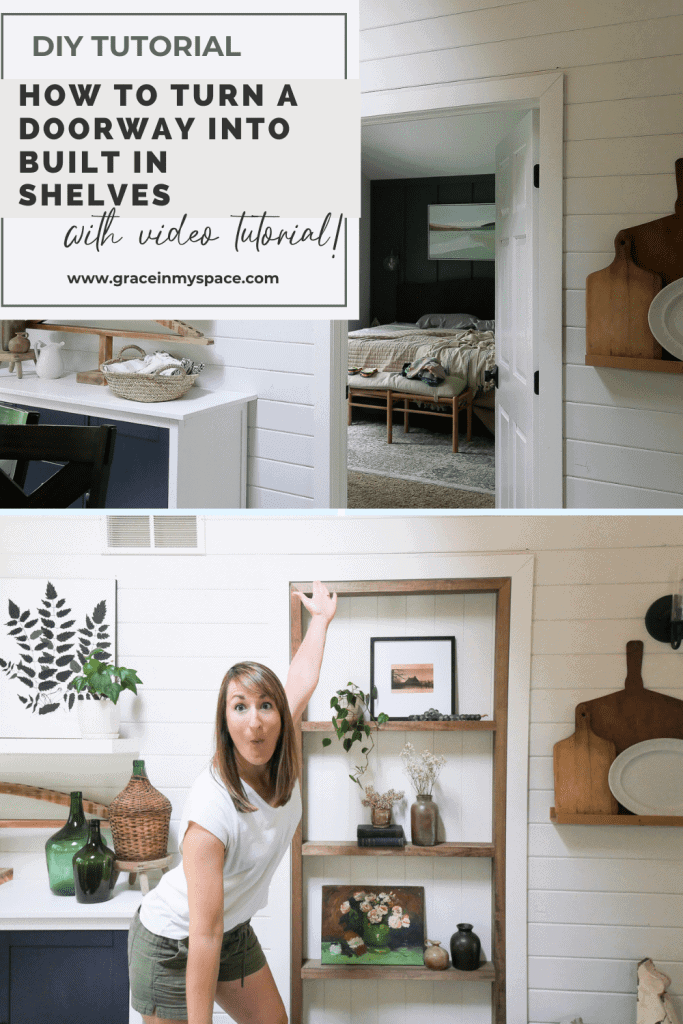
How to Make Custom Built Ins In An Existing Doorway
Do you need a creative way to close off a doorway? Try adding DIY built in shelves! This was such a fun project to tackle and I love how it turned out. Learn how to make custom built ins from an existing doorway with this easy tutorial.
This post may contain affiliate links where I earn a small commission on your purchases at no additional cost to you.
One Method of Closing Off a Doorway
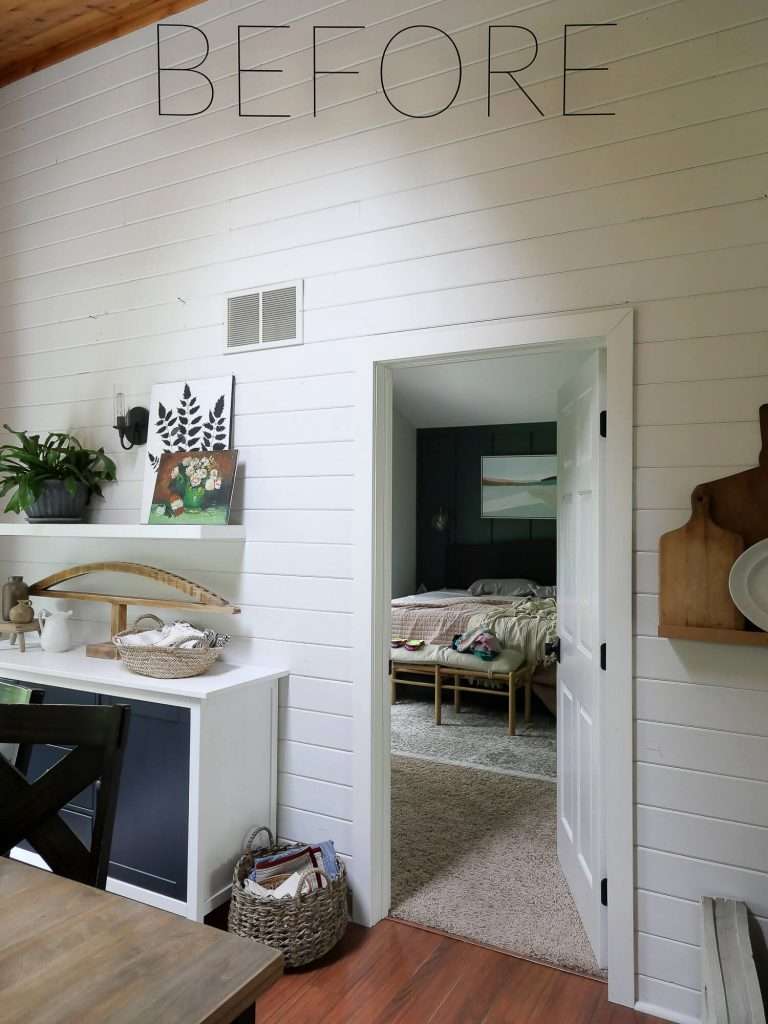
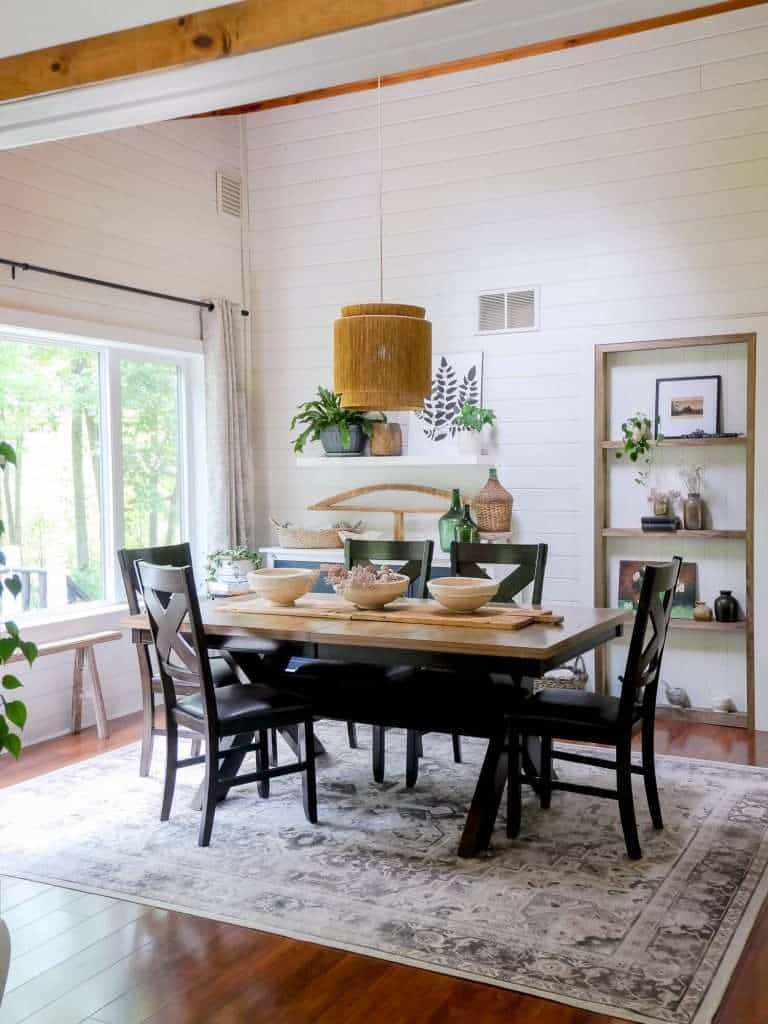
If you’re new to my blog, then you may have missed our dining room remodel where we turned an indoor hot tub room into our dining room. When we did that remodel, we left the door that lead into the bedroom open, even though it was an awkward layout.
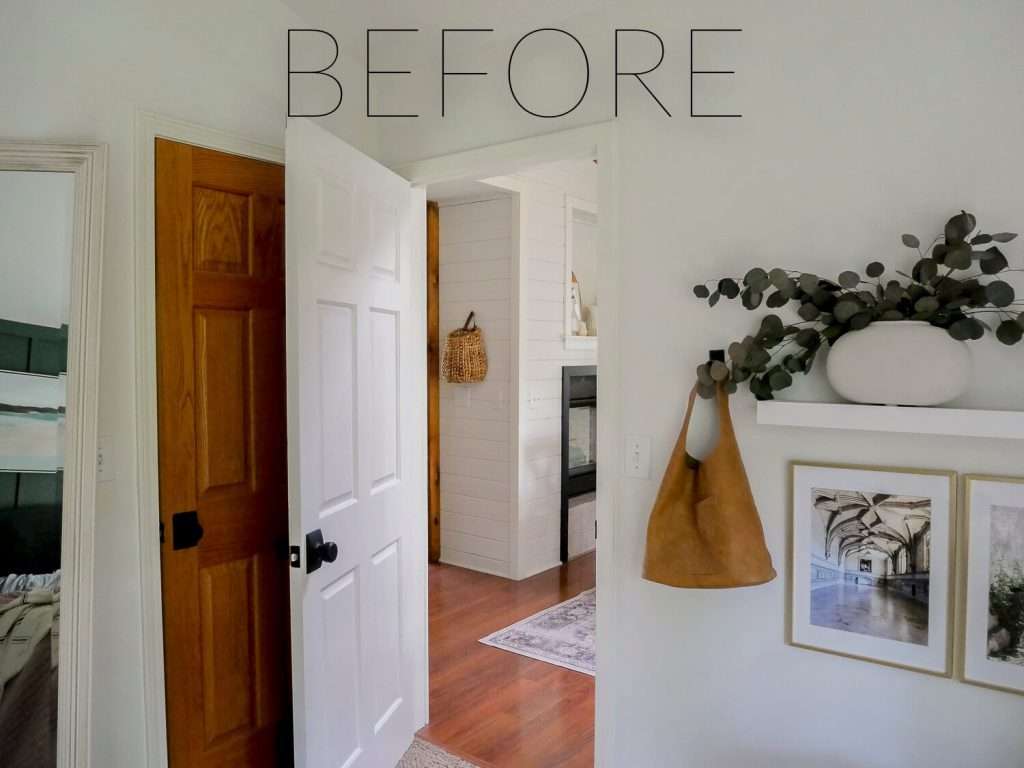
After living with it for three years this way, I wanted to tackle closing the doorway off. We’ve had plenty of embarrassing moments with guests walking into the unkept bedroom accidentally, and the lack of privacy always bothered me.
There were a few ways we could have closed off the doorway, which I’ve detailed for you in my full YouTube video that walks you through the entire project.

But I decided to try my hand at turning the doorway into custom built in shelves!
I’m so happy with how the project turned out. You can view the video tutorial here, or follow the steps below, if you want to attempt this project.
You could also use this tutorial for a framework to build your own built in wall units, or shelves, because the method is quite simple. I hope you enjoy it!
How to Make Custom Built Ins from a Doorway
I always wanted to try to build built in bookshelves, but was nervous to attempt it myself. Thankfully, I took that first step and just tried. Because of that, I now have beautiful built in shelves where I once had an eyesore. This project may have given me the confidence to learn how to make built in cabinets next!
But for now, let’s get to the tutorial for these custom built in bookshelves.
The cost of built in bookshelves
One of the reasons I went with this method to close in the doorway was because it was most economical for my situation. To fully fill in the wall, we would have had to reinstall cedar tongue and groove along the entire wall.
To build these custom built ins, my lumber and supply cost was less than $200.
With that said, I made very shallow shelves that would fit into the existing doorway. If you are building larger shelves in a bigger area, your costs will increase according to size.
Overall, I thought it was a fairly economical way to solve the problem!
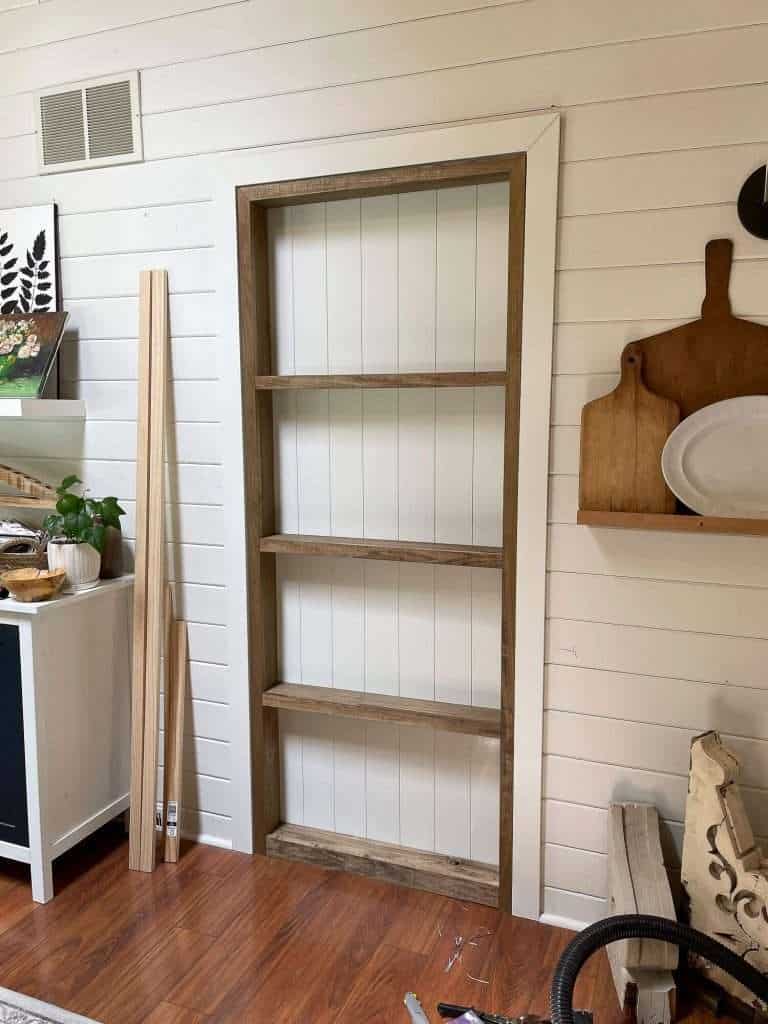
Step 1: Custom Built Ins Framework
The first step to building custom built ins in a doorway is to create your framework.
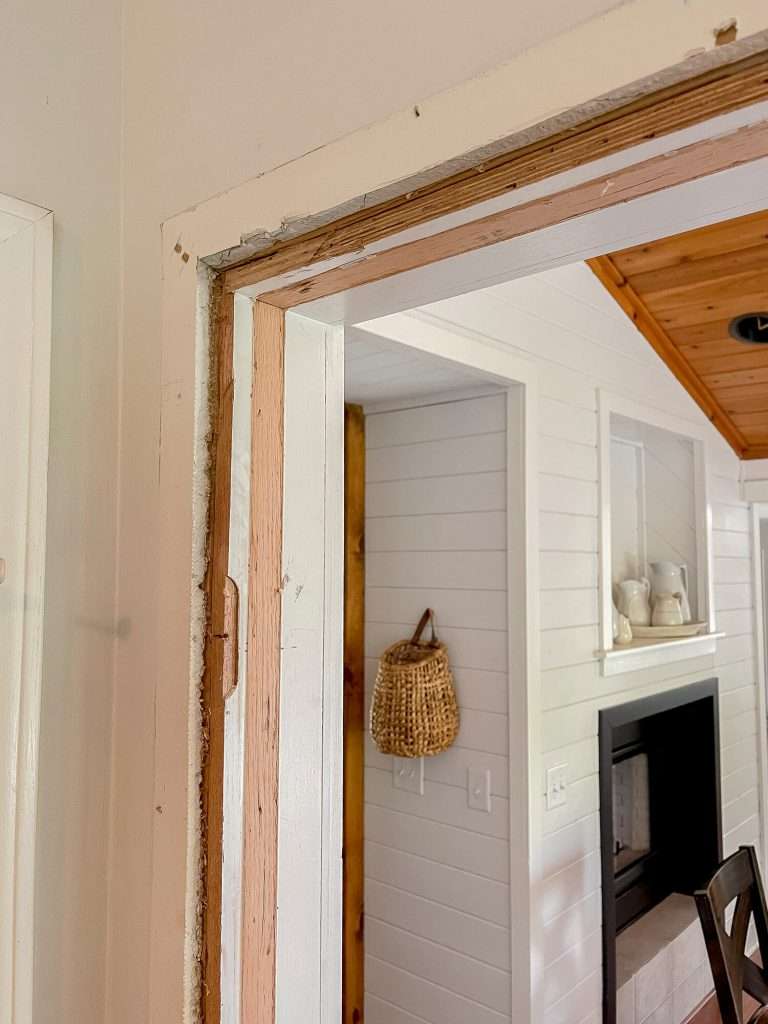
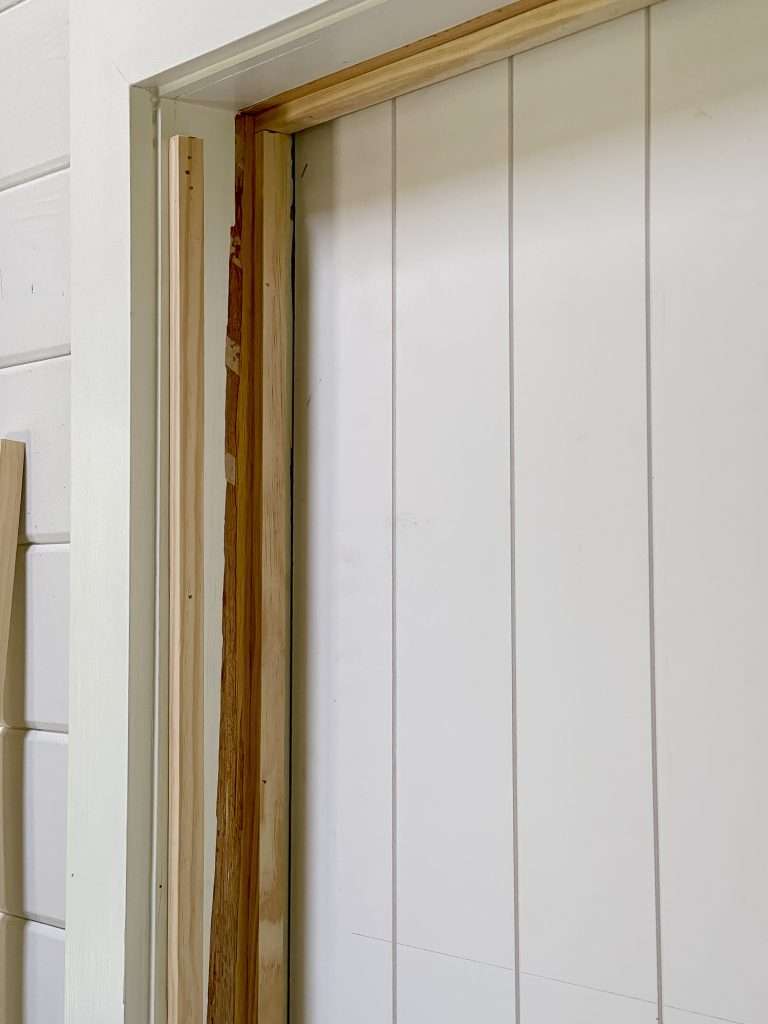
I removed all of the trim from the bedroom side of the doorway.
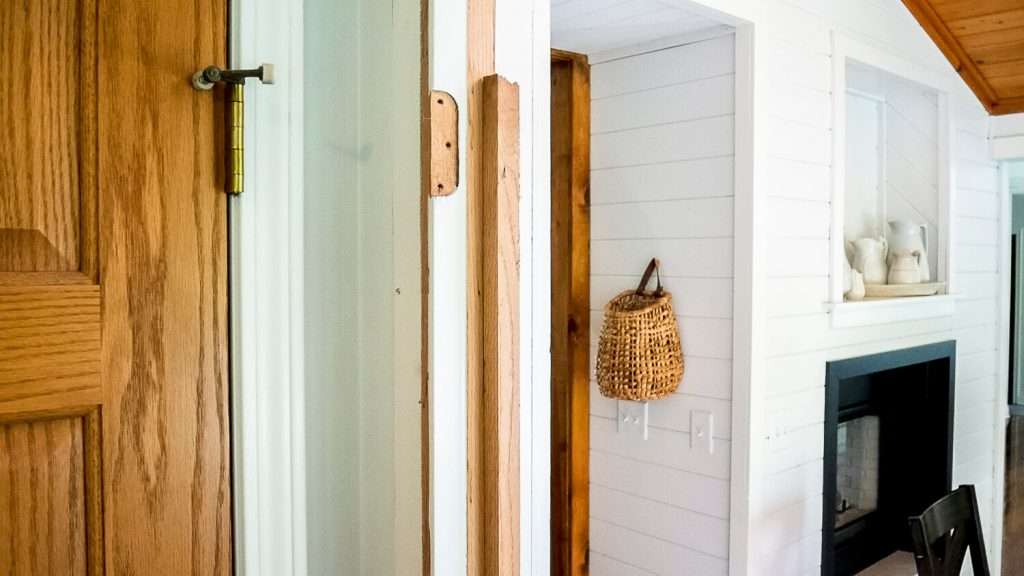
I chose to use the existing door jam as my framework for the DIY built in shelves. This gave me an already built, plumb, and installed framework to use. I simply had to modify it to accommodate a drywall patch on the interior of the bedroom wall.
To do this, I installed a scrap piece of wood to serve as a fence for my circular saw to ride against. This allowed me to cut a straight line into the door jam.
I cut out 1/2 inch on both sides and the top so I could patch in 1/2 inch drywall. This gave me a flush drywall patch so the interior bedroom wall will look seamless once it is mudded and repainted.

Step 2: Choose a Built in Back
Next, let’s head to the dining room side of the project, where we will spend the rest of our time in this tutorial.
Since a door frame is very shallow at 5 inches deep, I wanted to keep as much of that space as possible for my shelving. That means that my drywall patch is a span of 32″ without a stud in the middle, as the stud would have taken up 2″ of my shelf depth.
So I chose to install shiplap paneling that only took up 7/32″ of my depth.
I had it cut to size in the store to avoid having to maneuver a 48″x96″ panel myself on the table saw.
I installed my backing using construction adhesive since I didn’t want to nail into my 1/2″ drywall patch.
You can choose how you want to finish your backing anyway you want! Just take into account the depth of what you choose.
Step 3: Custom Built In Shelf Framework
Next, you will make your cuts to build out your framework for your custom built ins.
I used 1×4 poplar for all of my shelving and side supports. Then, I finished it with 1×2 poplar for the face frame.
Lumber Materials List
For my custom built ins within a standard 32″x80″ doorway, I used the below lumber materials:
- Standard 2×4: 32″
- 1/2″x3/4″ Pine Moulding: 32′
- 1×4 Select Poplar: 28′
- 1×2 Select Poplar: 16′
- 1×3 Select Poplar: 32″
Always buy excess that you can return if not needed! No one wants to make an extra lumber run in the middle of a project if you make a bad cut.
In addition, for this project you will also need:
- Construction adhesive or wood glue
- Brad nailer (this one is amazing!)
- 2″ 18 gauge brad nails
- Miter Saw
- Circular Saw (if cutting out your door jam)
- Hammer
- Crow bar
- Safety gear (these safety glasses are made for women and my favorite!)
- Palm Sander or Sanding blocks
- Stain color of choice
Add Spacers
Once you’ve installed your backing, place 2 pieces each of the 1/2″x3/4″ pine moulding on all three sides of your frame.
This serves as a spacer so that your finish pieces of the 1×4 poplar can attach to the pine and create the width needed to support your 1×2 face frame. You can also use any other material you have that is 3/4″ for this step. I simply had the pine moulding left over from my basement accent wall.
Once you’ve added the spacers, you can begin to build the framework for your shelves.
Use the 2×4 for the base to create a level surface for the rest of the shelving to be built off of. This also gives your built ins a chunkier appearance in the end.
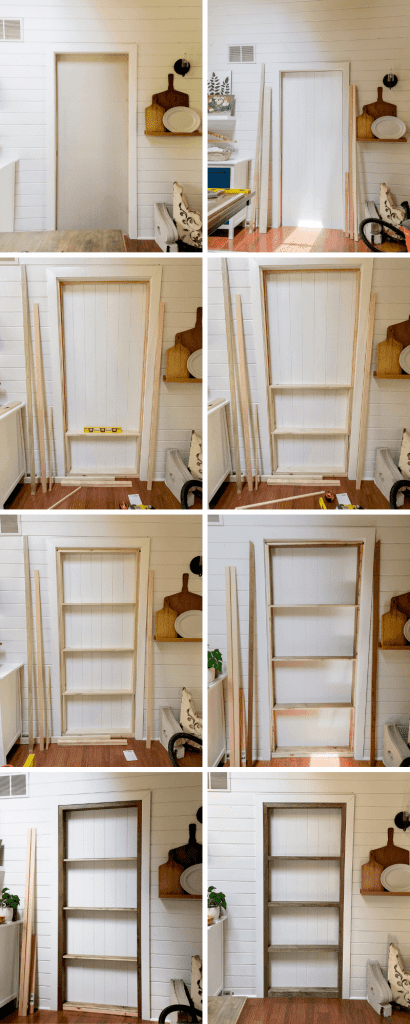
Determine how many shelves you want to fill the space, and then cut your side panels accordingly.
For 4 shelves, I cut my side panels at 18 1/4″ tall.
Place your first 1×4, cut to width, on top of your 2×4 for the bottom shelf.
I dry fit all of my pieces first. Then, I removed them and marked where each piece went, so that I could sand and stain them off the wall.
Work your way up, cutting each side piece and shelf to length and making sure each shelf is level as you go.
Your side 1×4’s will be the support for each shelf.
Step 4: Sand and Stain
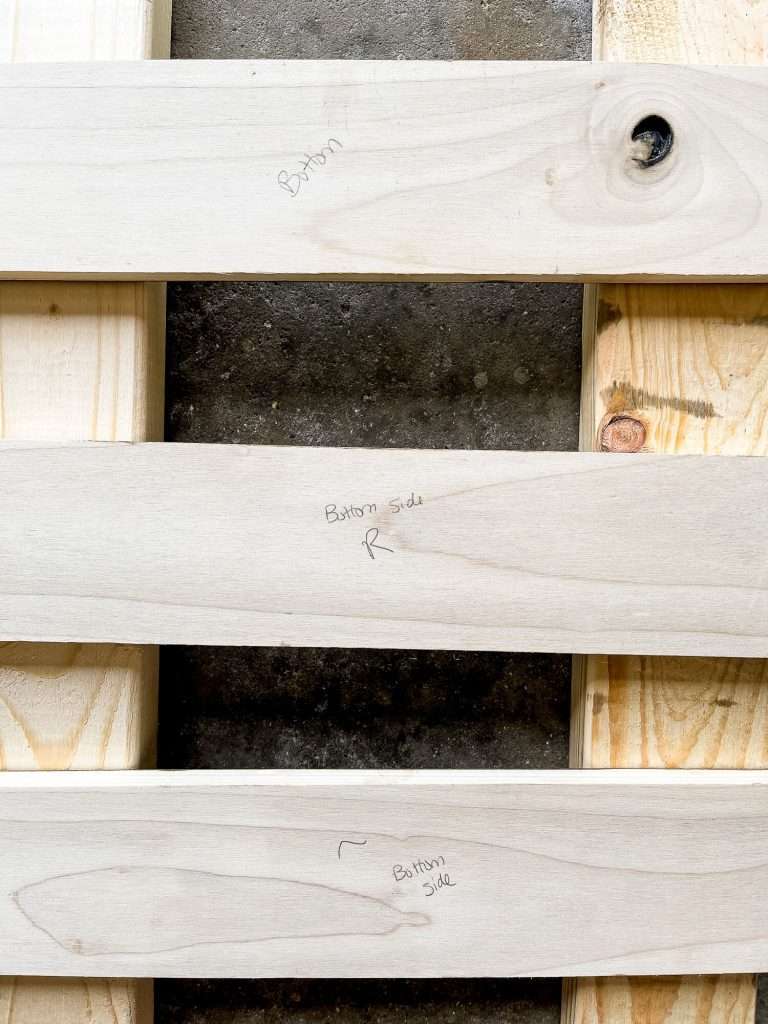
Once you have all your pieces measured and cut accurately, take them down and mark them.
Then, sand and stain each piece for a flawless finish.
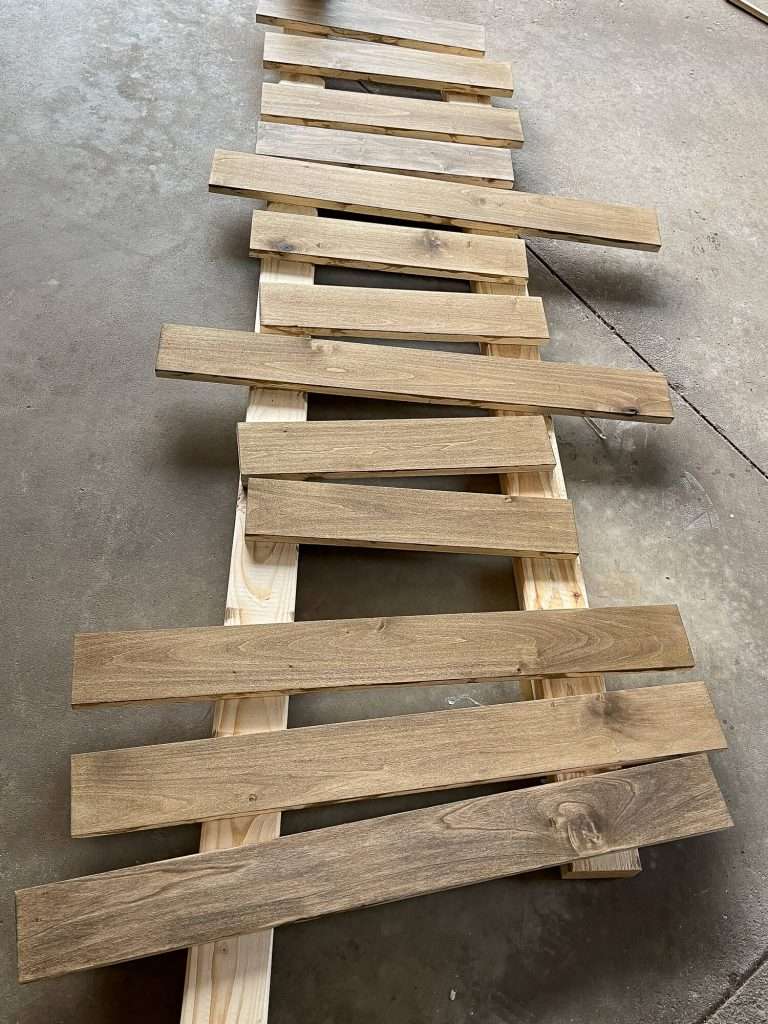
I used my favorite stain color, Special Walnut. You can paint or stain depending on your preference.
At this time, you should also paint or stain your back board. I painted my shiplap panel the same color as the rest of the tongue and groove walls in our home: Shiplap by Magnolia.
Step 5: Assemble your custom built ins
Once your paint and stain is dry, the last step is to assemble your built ins.
Start at the bottom and glue and nail each 1×4 to your spacers. Once you’ve built all the side panels and shelves, attach your 1×2 face frame and 1×3 baseboard.
I chose to miter the outside frame at the top for a more finished look. Add 1x2s to each shelf face as well to give it a thicker appearance.
You can fill any unsightly nail holes with wood filler after it is assembled!
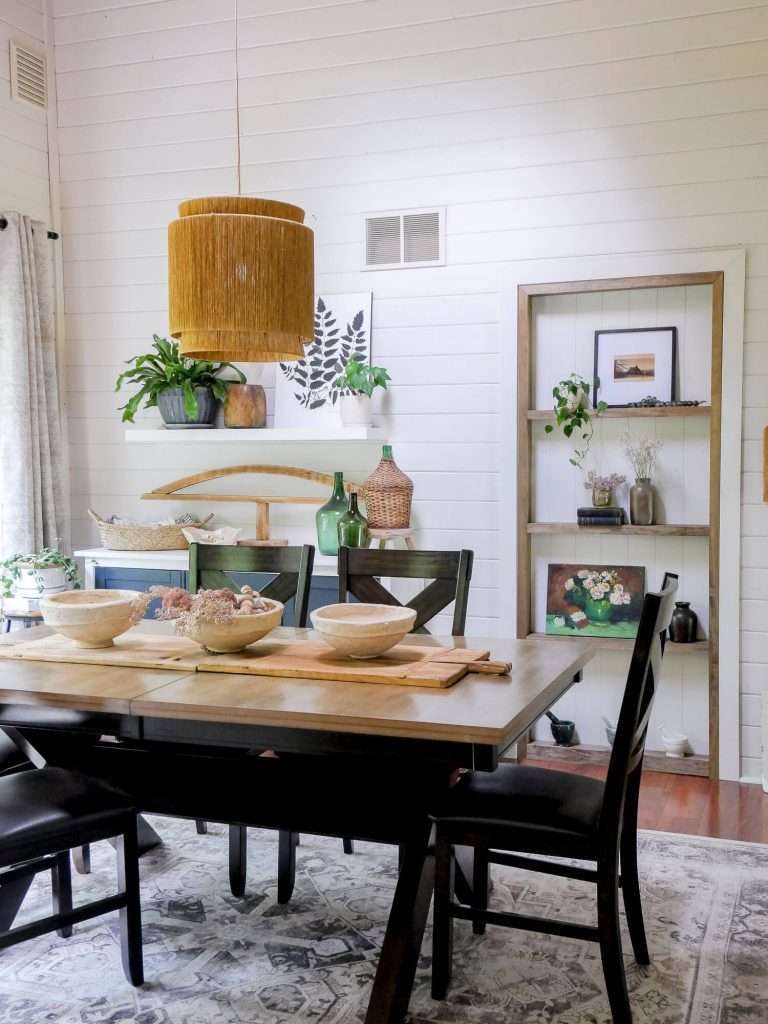
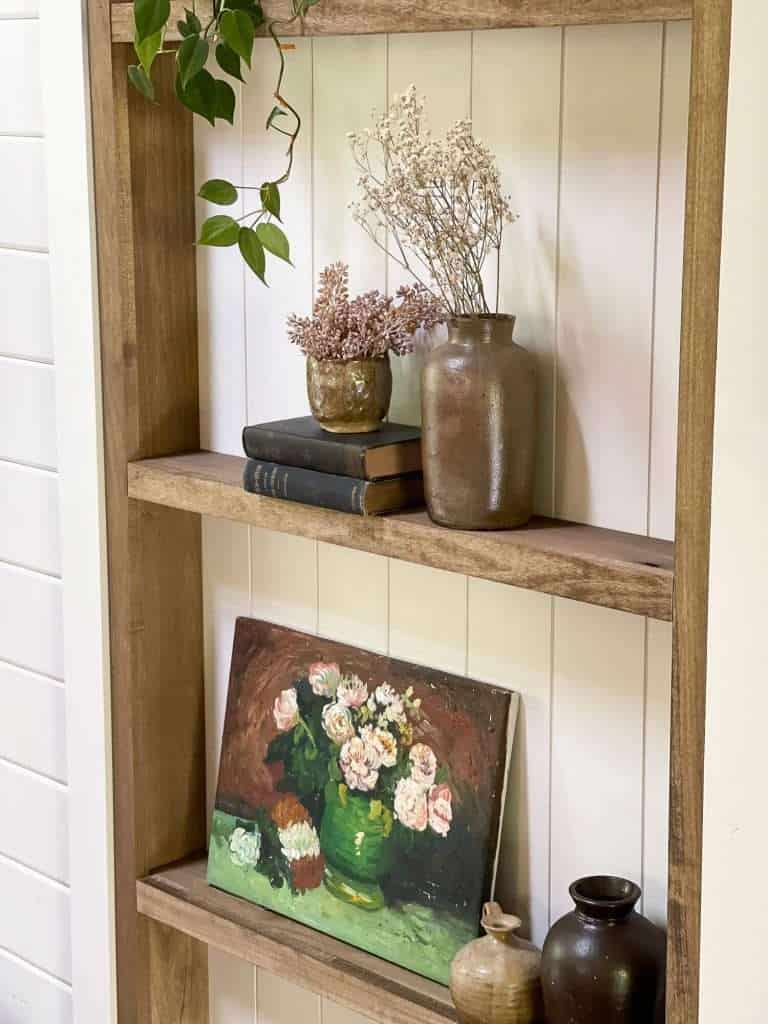
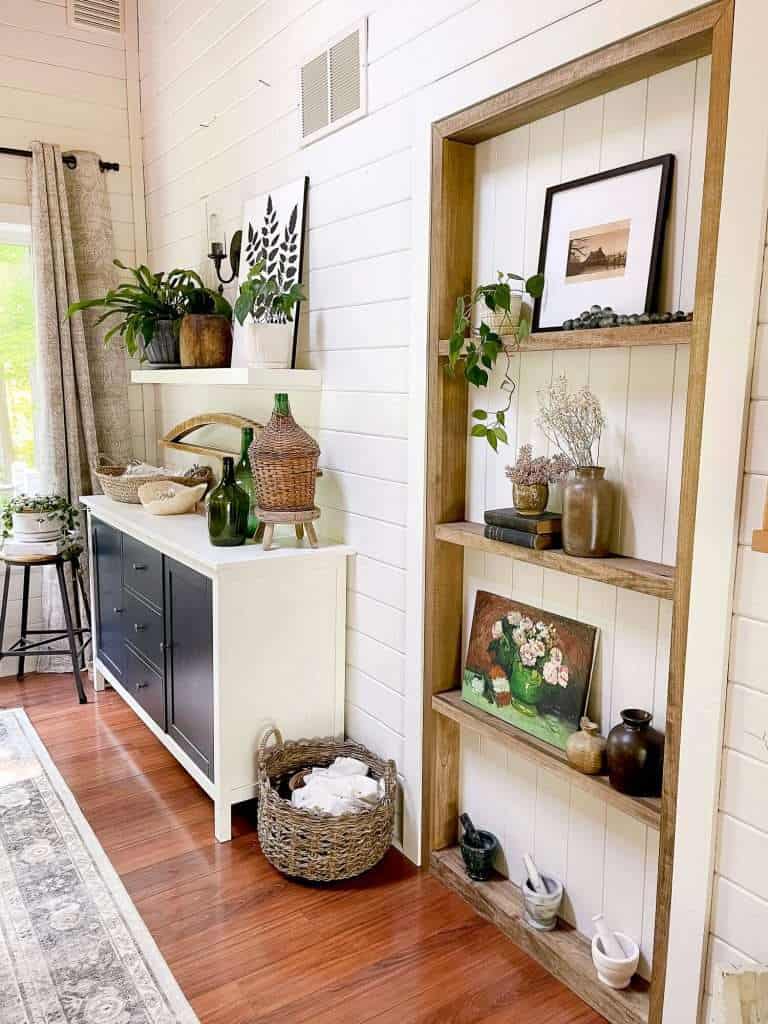
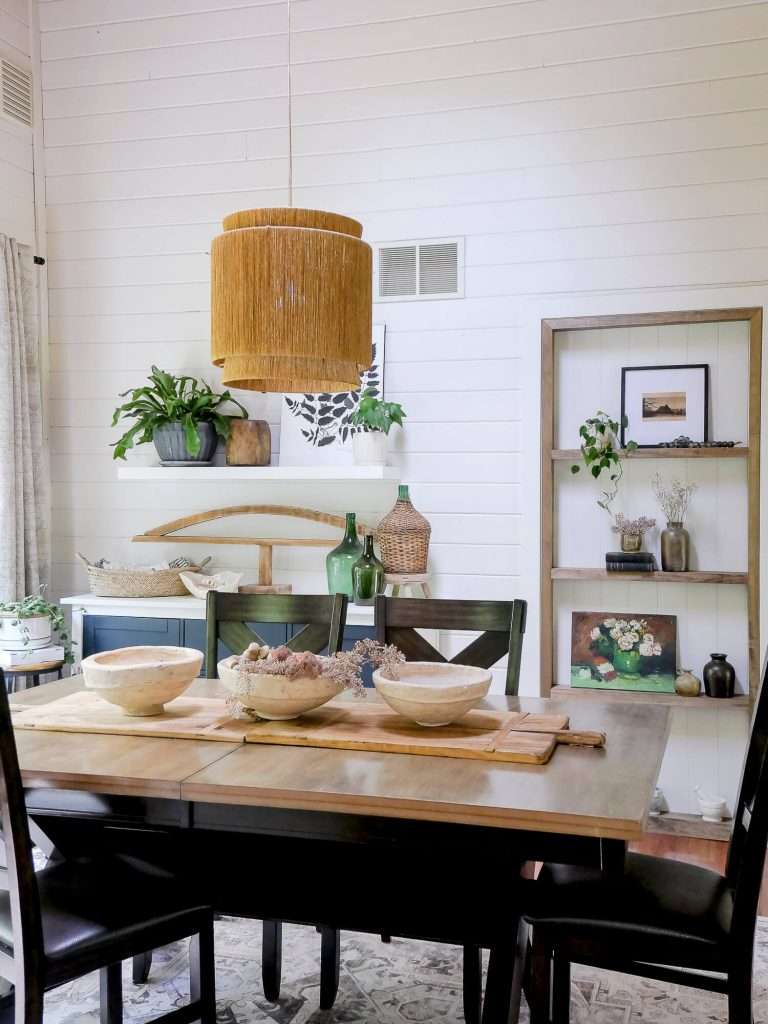
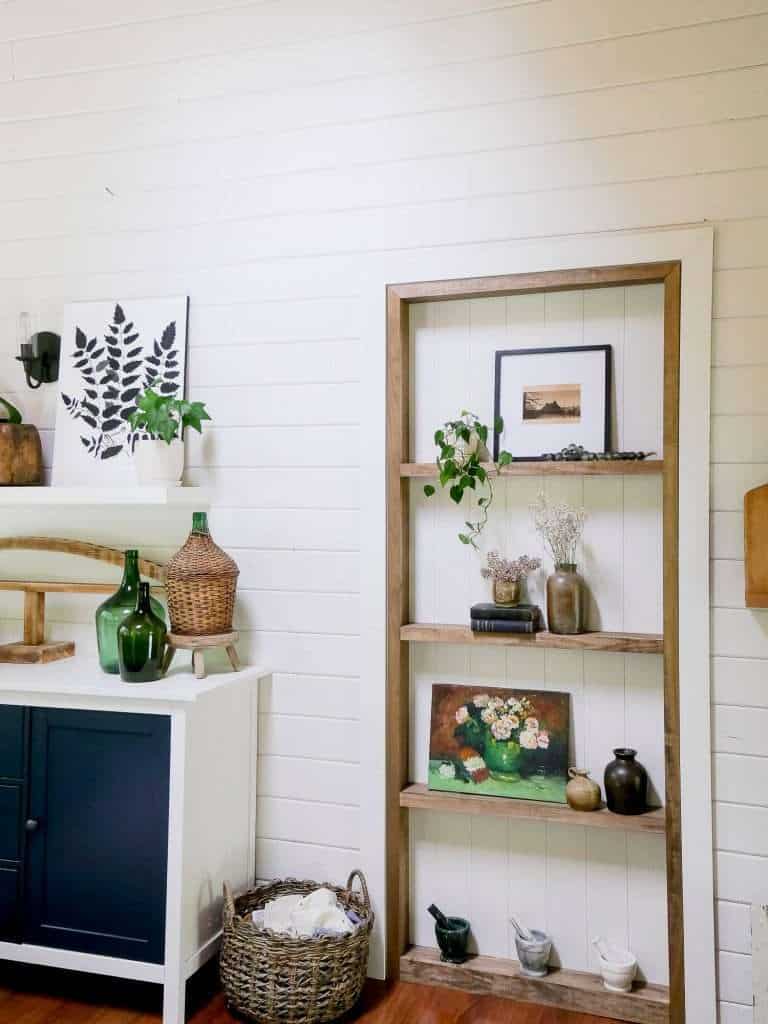
Decorate Your Custom Built in Shelves
The final step is my favorite part: decorating!
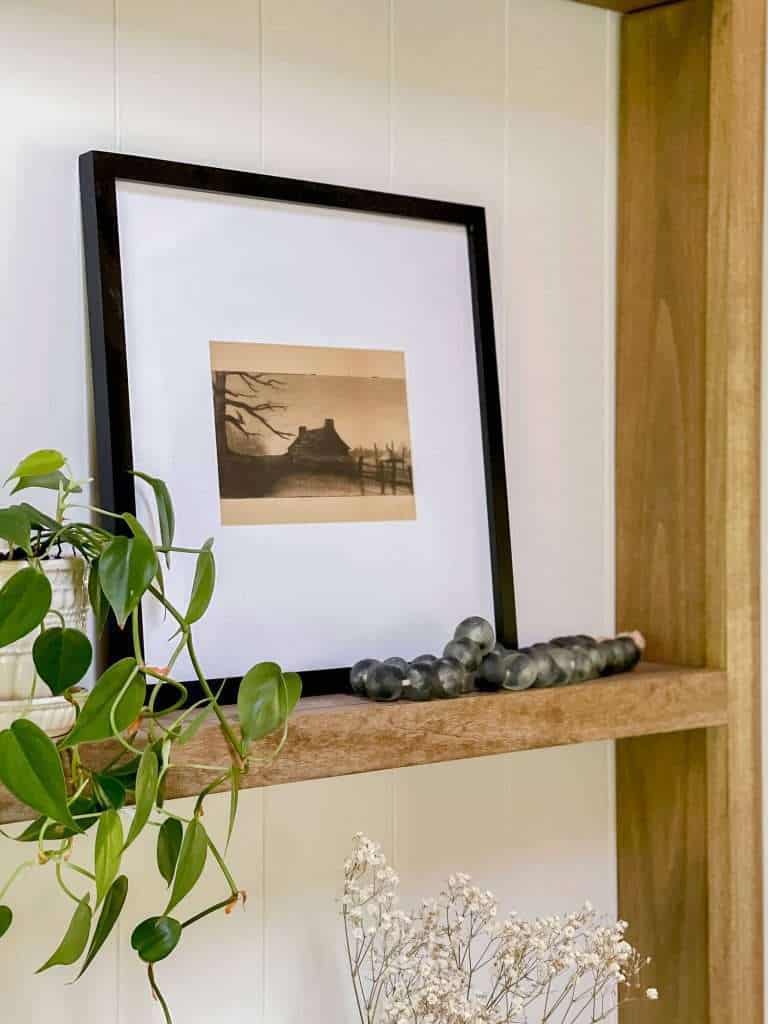
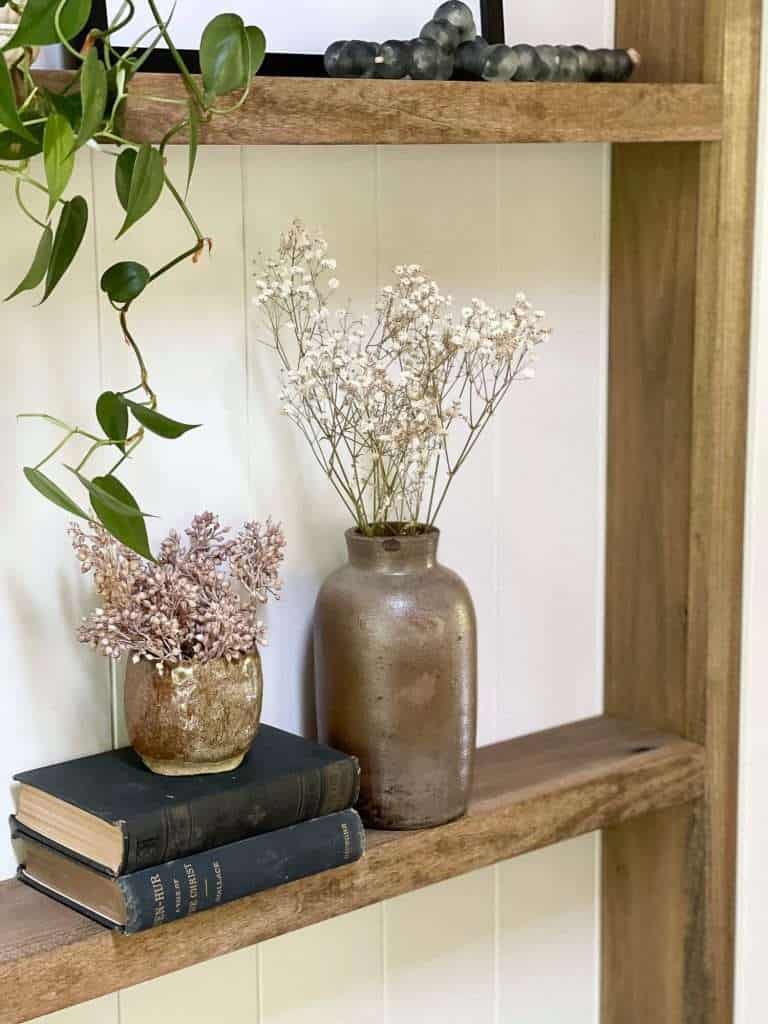
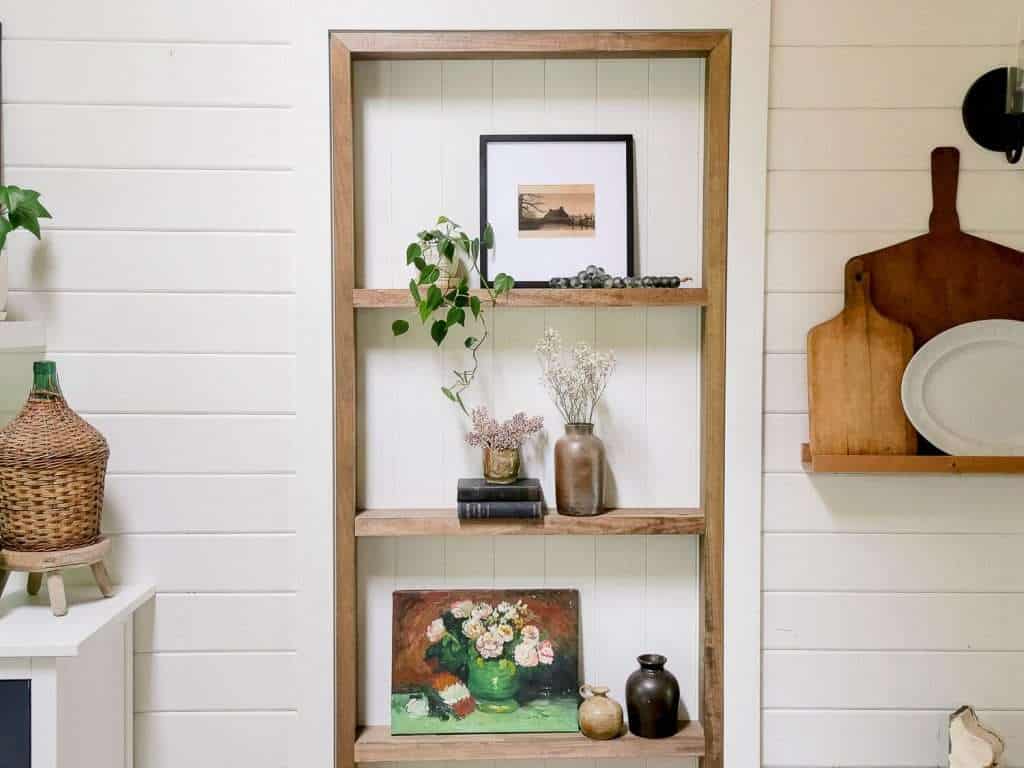
Since the shelves are only about 4 inches deep, this is the perfect spot for small items or thin frames.
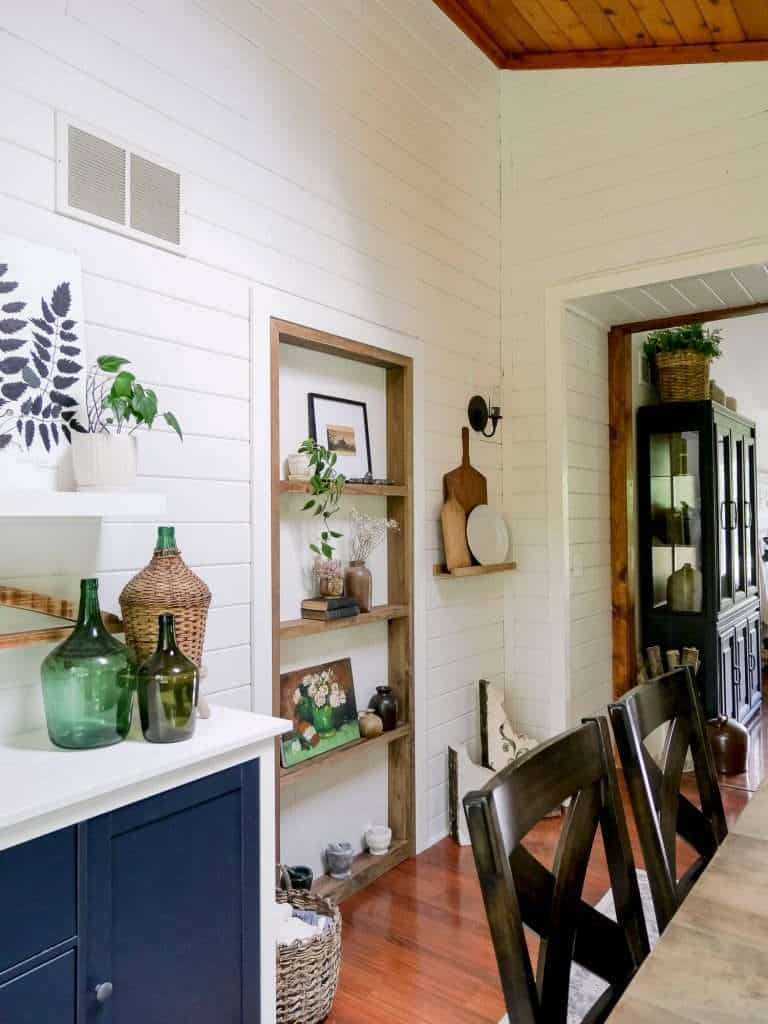
I used a lot of my favorite vintage finds, pottery and artwork. The white backdrop helps the pieces to stand out and the wood frame looks very high end.
If you wanted to, you can use this tutorial to create a plate rack as well by simply adding in a final piece of trim slightly higher than the shelves to serve as a barrier from any plates falling.
Now, my privacy issues are solved! Plus, I’ve created a spot to display smaller items that can often get lost in large spaces.

Shoppable Home Decor
While many of my favorite home decor pieces are vintage or antique, I do have some shoppable sources for you! You can find my available home decor via the affiliate images below.

Stay Connected

I hope you enjoyed this project! If you’re new to DIYing, make sure to subscribe below to download my free beginner DIY tool kit.
You can follow along with projects like this daily on Instagram and weekly on YouTube as well.
Thanks for stopping by the blog! If you decide to tackle this project, I’d love to see it when you’re done. Make sure to Pin this tutorial so you can easily find it later. Best of luck!


Sarah, very clever idea. Unless I missed something somewhere…..what di you do on the bedroom side of the doorway?
It’s in the process of being taped, mudded and painted. 🙂 It will look like a seamless full wall.