
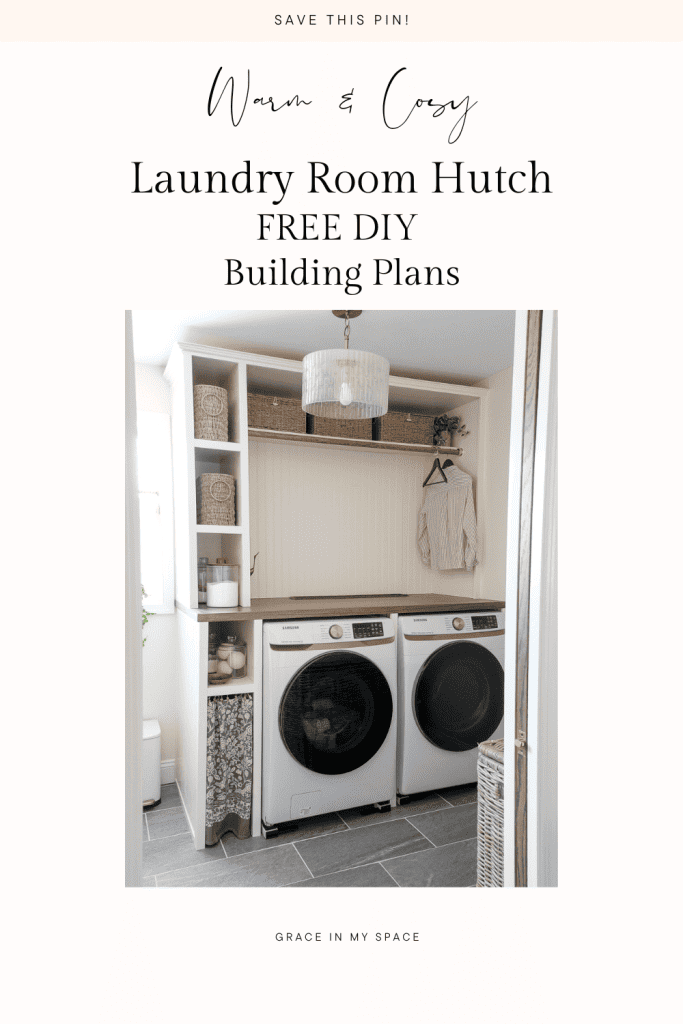
How to Build DIY Custom Laundry Room Cabinets
Custom laundry room cabinets will completely change the look and functionality of any size laundry room. So why not make it highly functional with loads of storage, but also beautiful and classic at the same time? Learn how to build laundry room cabinets using my free custom DIY building plans.
This post may contain affiliate links for your convenience.
Custom Laundry Room Cabinets
We’ve all seen plans for how to build a cabinet around a washer and dryer. In fact, you can buy pre-made washer dryer cabinet tops for a very affordable price.
SHOP TOPS

However, to really get custom laundry room cabinets, you either need to build them yourself or hire it out. I decided I wanted to build laundry room cabinets to save money after recently completing our whole home renovation.
In order to do that, I had to draw up my own DIY laundry cabinet. While the majority of DIY laundry rooms involve the use of stock upper cabinets, I wanted mine to look more like a piece of furniture.
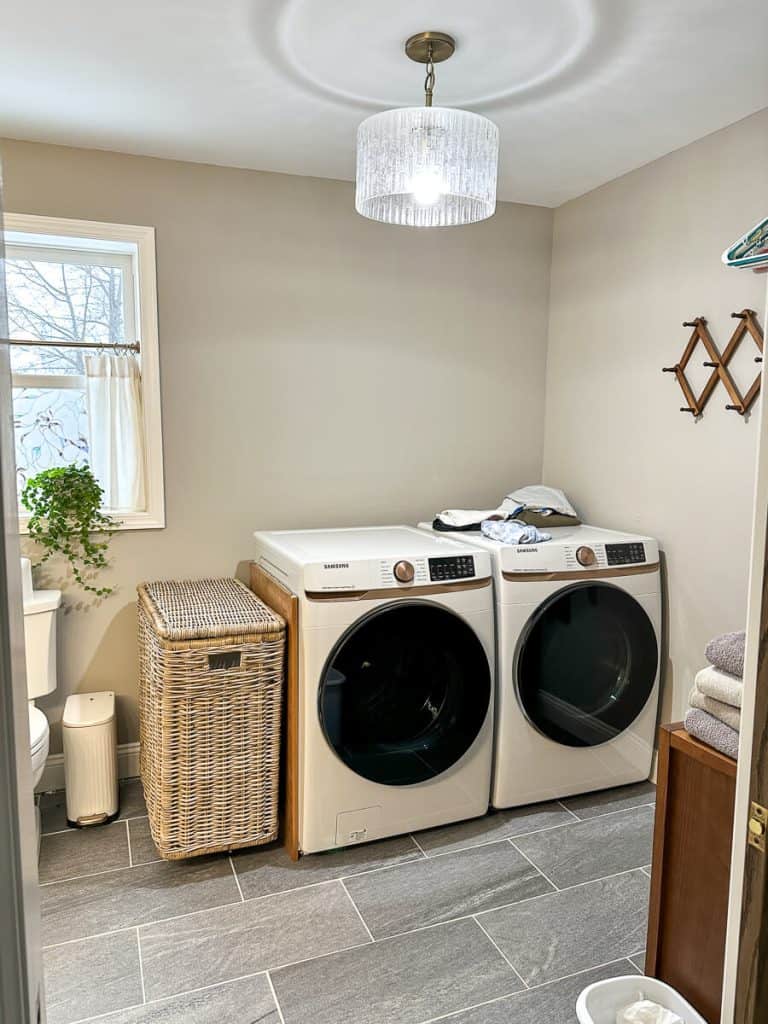
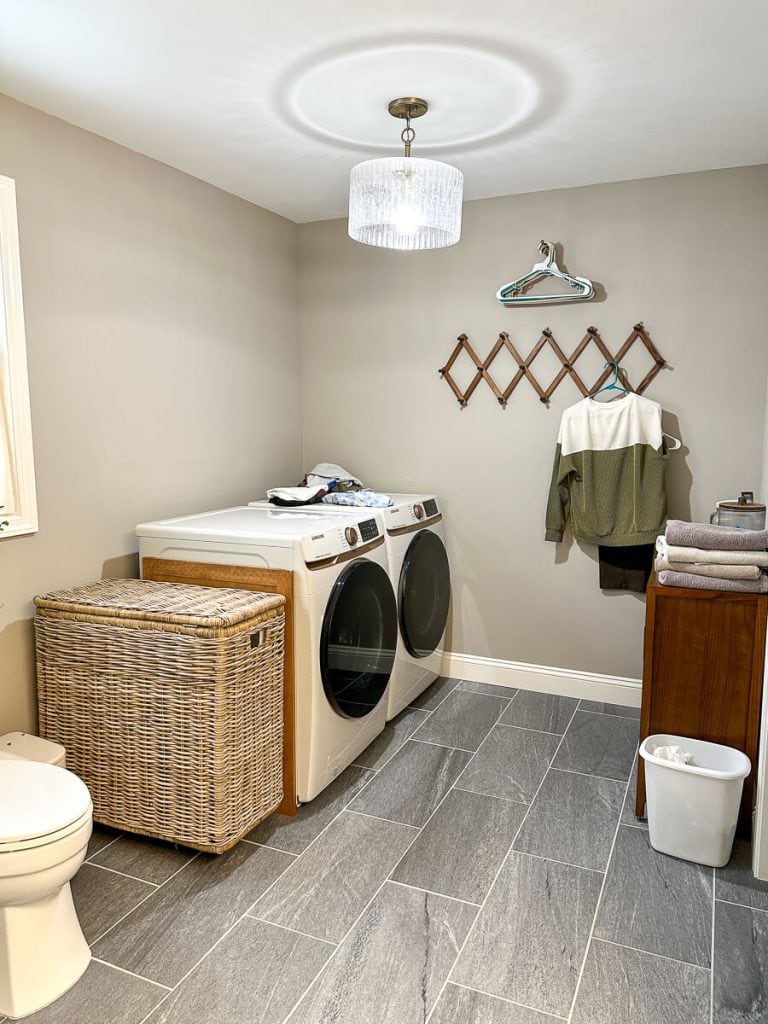
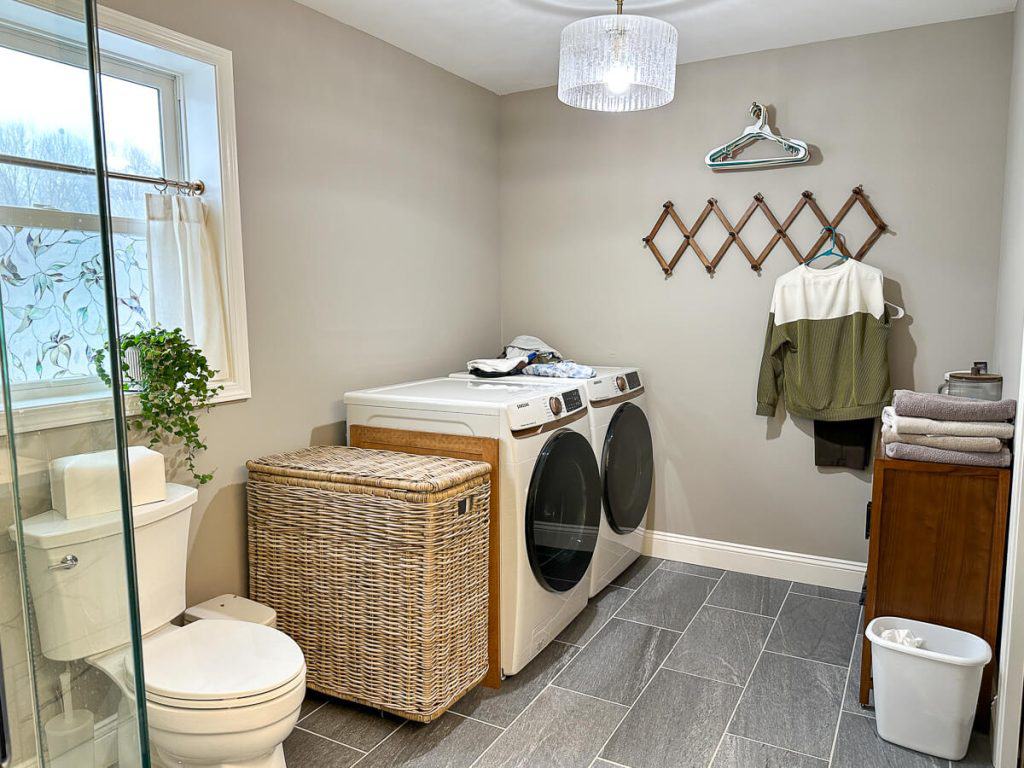
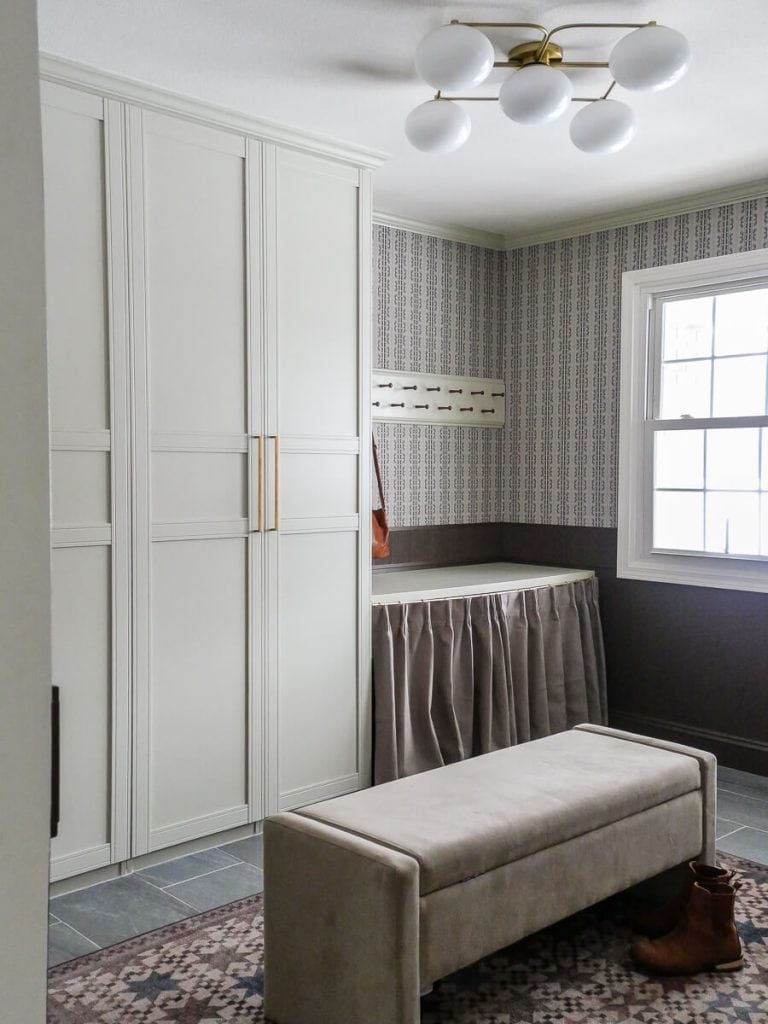
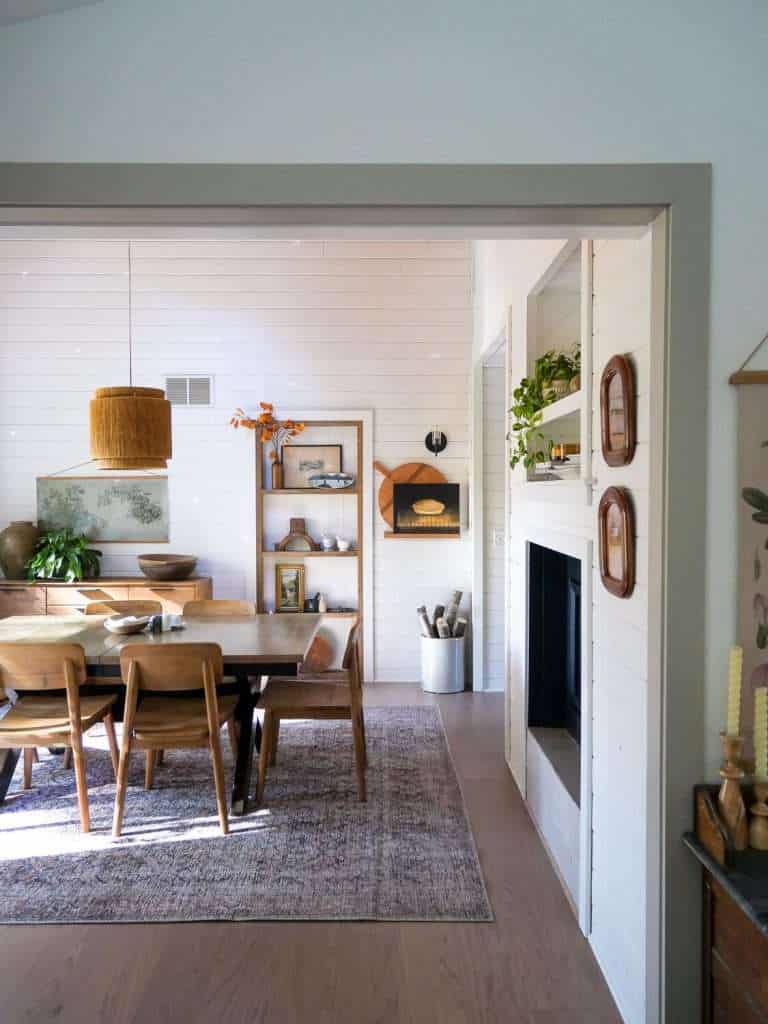
My laundry room is actually a part of a bathroom/laundry room combo room. Since this is our main guest’s bathroom, I wanted the laundry side to be beautiful with loads of hidden storage.
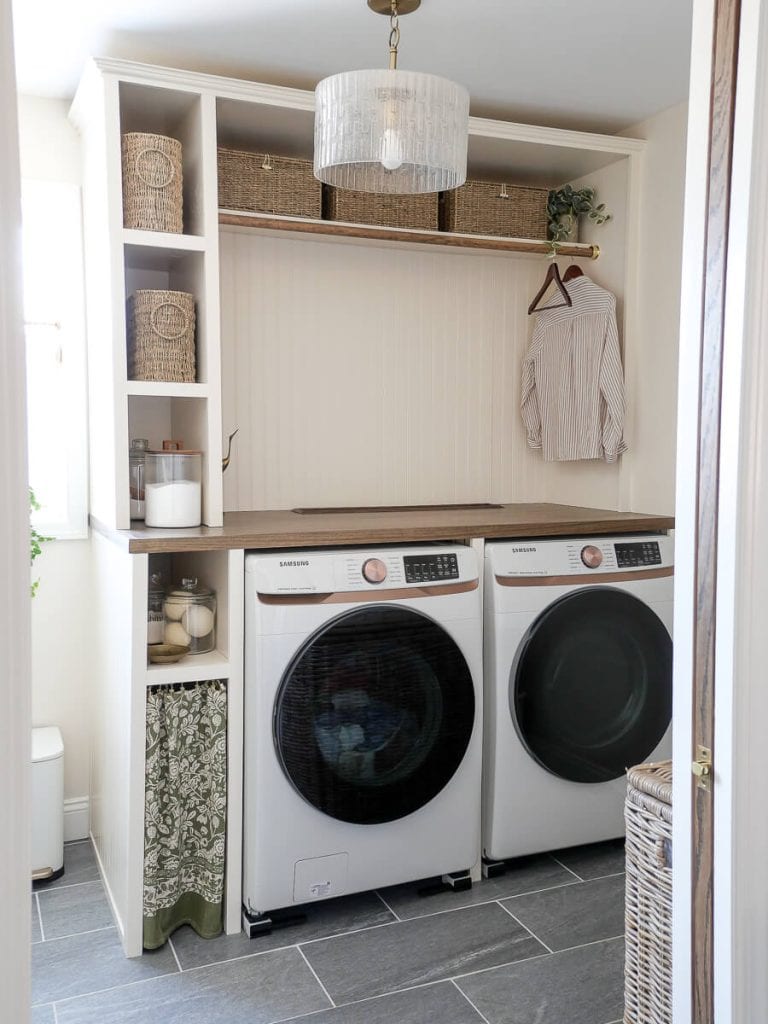
Thus, the laundry hutch was born.
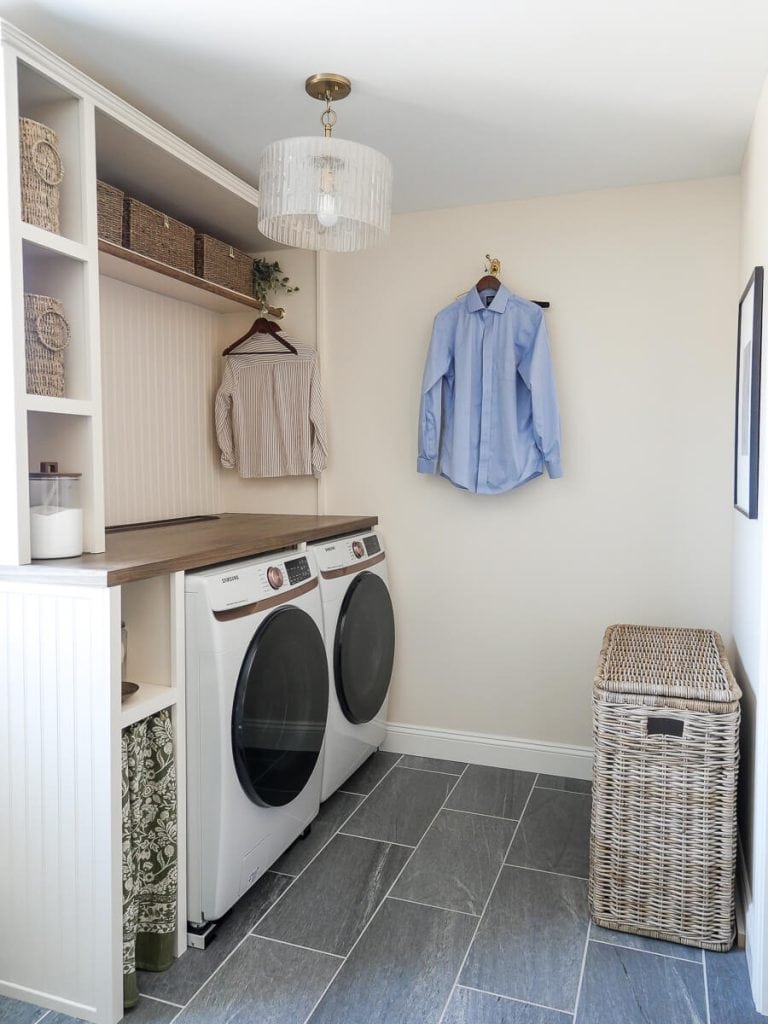
How to Build a Laundry Cabinet
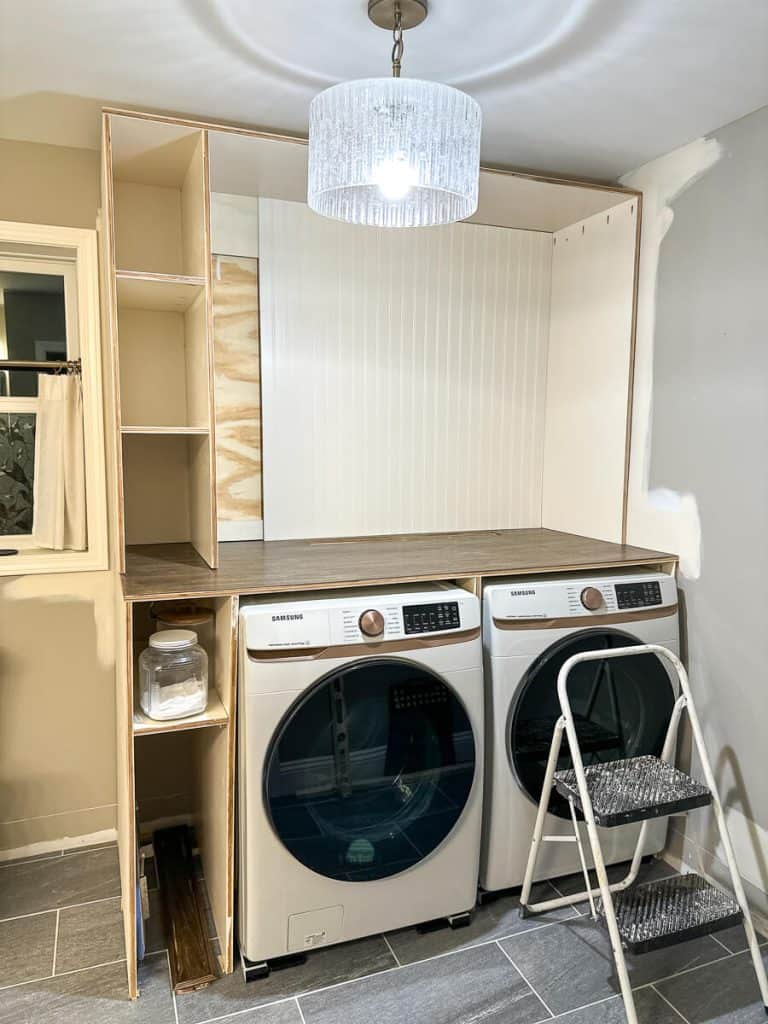
My custom laundry room cabinets include two separate pieces. A bottom washer/dryer surround and a top hutch with clothes hanging rod.
For the entire cut list, cut optimizer, full measurements, and all wood materials needed, you can download my free building plans here.
Tools Needed to Make DIY Laundry Room Cabinets
While you can use a variety of tools for this project, I find these tools most valuable.
- Accucut Kreg Jig with Circular saw
- Table saw (alternative to circular saw)
- Kreg Pocket Hole Jig
- Jig Saw
- Miter Saw or Miter Snips
- Drill
- Driver
- Electric Sander
- Brad Nailer (I use this one)
- Clamps
- Speed Square
- Measuring Tape
- Retractable Pencil Holder (Invaluable!)
- Level
Tutorial: How To Make a Custom Laundry Hutch
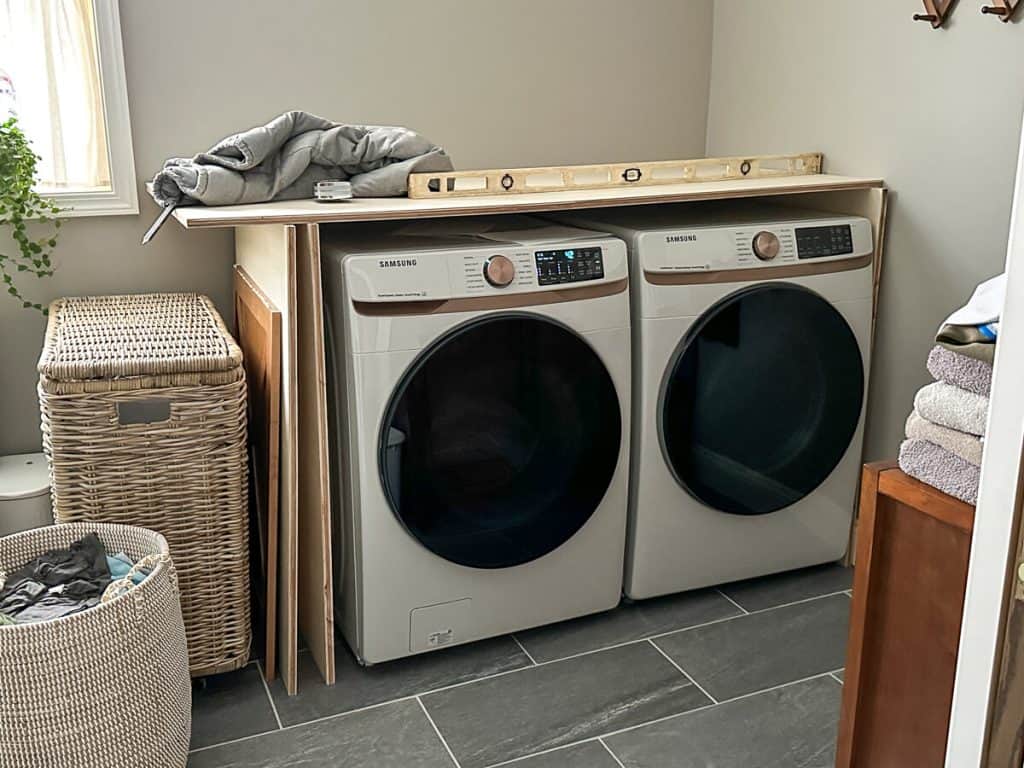
Start by measuring your space and making any necessary adjustments to my original measurements as needed.
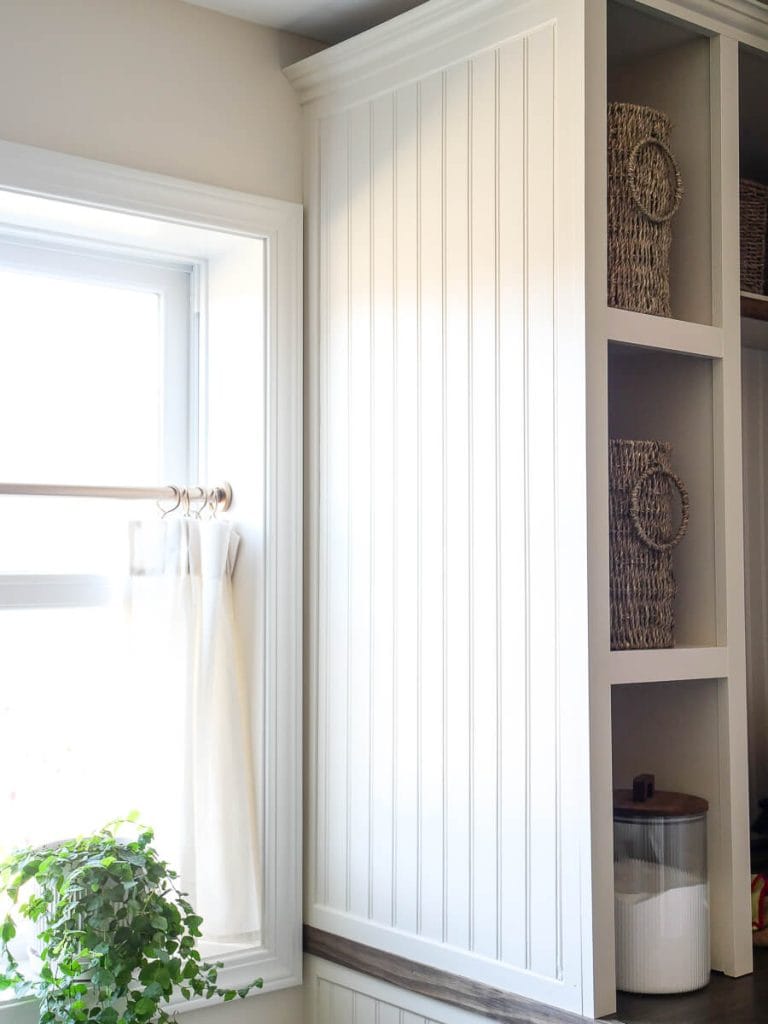
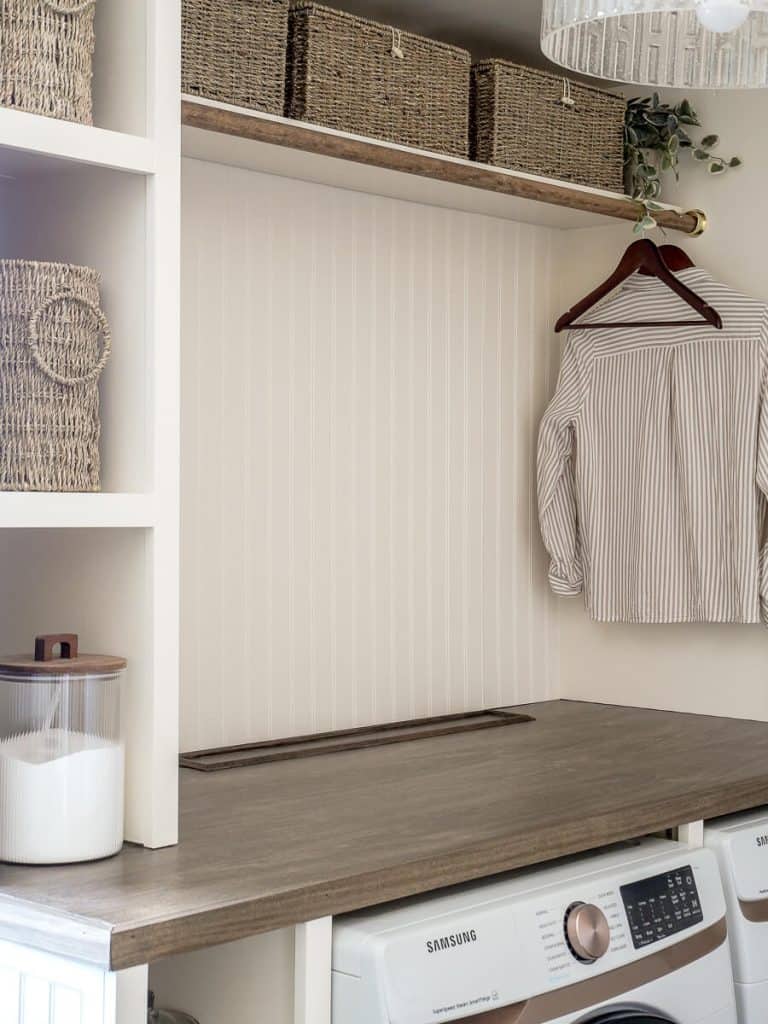
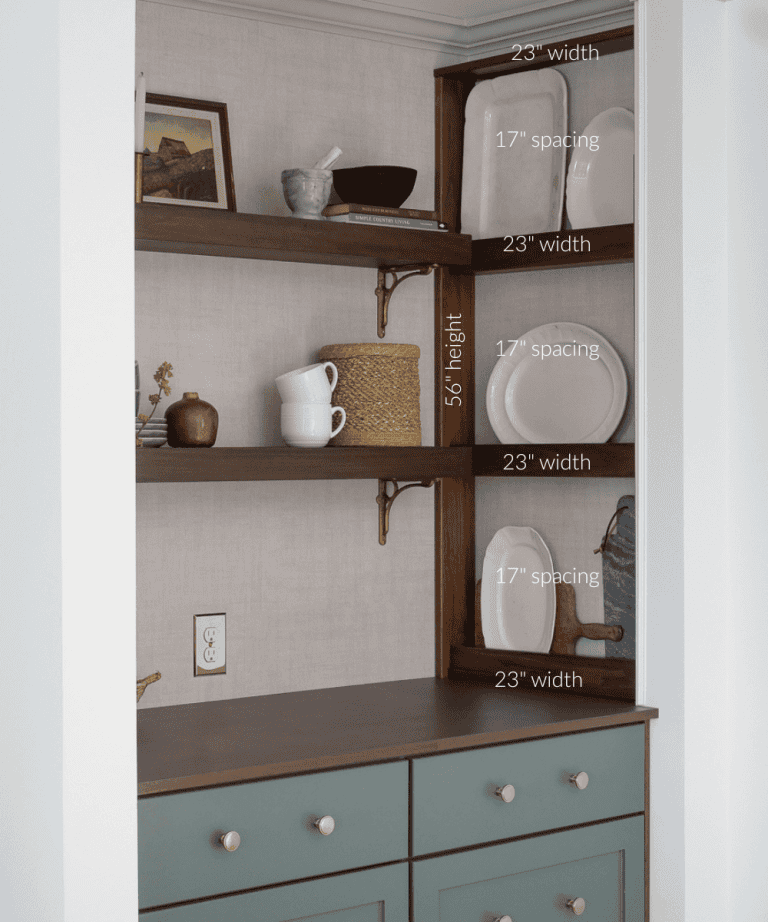
I chose to make narrow shelving on the left side simply because I was constrained to 69″ due to a window. However, I actually really love having the narrow storage and it holds much more than you’d think possible. I used the below matching baskets and storage containers and they fit my dimensions perfectly.
SHOP THE ROOM
Cut & Prep Materials
Next, make all your 3/4″ plywood cuts from this cut list.
If you don’t have a table saw, or find cutting sheets of plywood cumbersome on a table saw, the Accucut Jig is an invaluable tool. It allows you to cut large sheets of plywood with very straight and accurate cuts using a circular saw.
It also has a built in backing that prevents tear out on cross cuts. (This is a great video to get you familiar with the tool).
I like to do the same task all at once as much as possible. Therefore, next up is sanding all your panels.
Lightly sand the surface of your plywood to prepare it for paint (or stain). Ensure you’ve blown and wiped off all remaining dust and reside.
Laundry Hutch Paint and Stain Colors
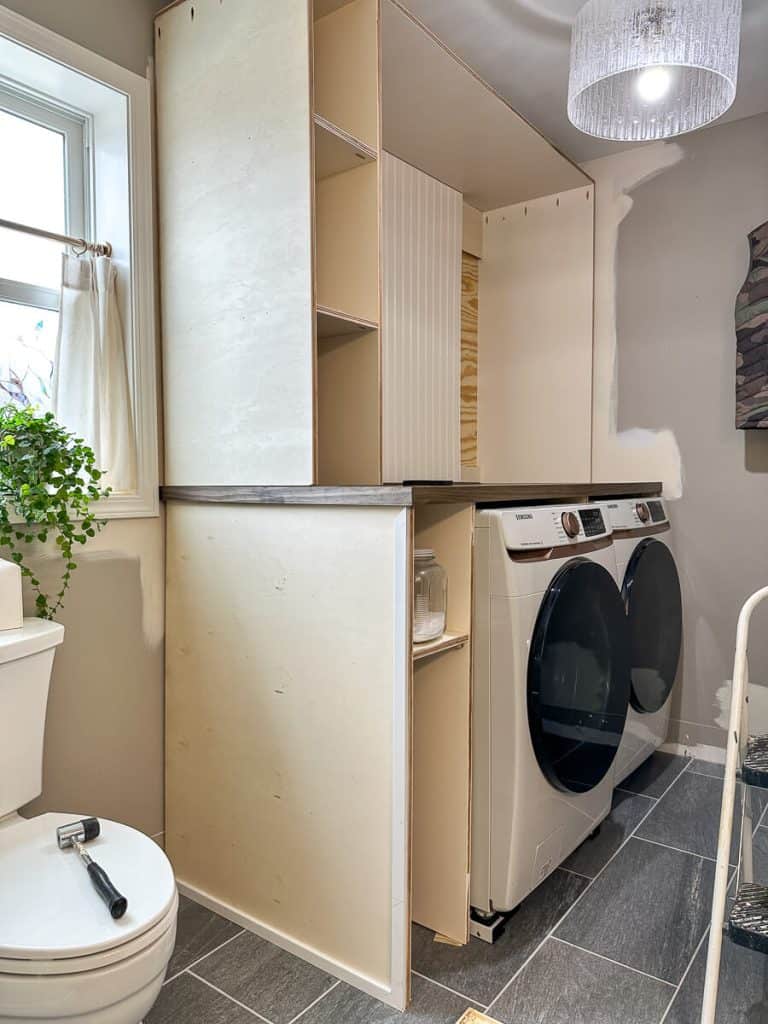
Next, I pre-primed and painted my panels since it would have been awkward to paint once assembled. I used the color Steamed Milk by Sherwin Williams. I have many painting tutorials on the blog for you if you are new to painting furniture.
This painting tutorial will be of great help for this project.
For the washer/dryer surround countertop, I applied a layer of wood conditioner, followed by Minwax Special Walnut, followed by a layer of Minwax Jacobean. After assembly, I finished the countertop with three layers of polyurethane.
Laundry Cabinet Assembly
Once you’ve prepared all your panels and shelves, it is time to assemble.
Suggested pocket hole locations are detailed in my free building plans.
Use a Kreg Jig to drill pocket holes on the side panels of the top hutch and bottom support panels. (This is a great video to help you get familiar with the Kreg Jig.)
Next, drill pocket holes along one long side of each shelf. Since these shelves are so narrow, I assembled them using pocket holes on one side and then glue and brad nails on the other. You can assemble using cleats, or simply glue and brad nails for both side. There are a variety of options.
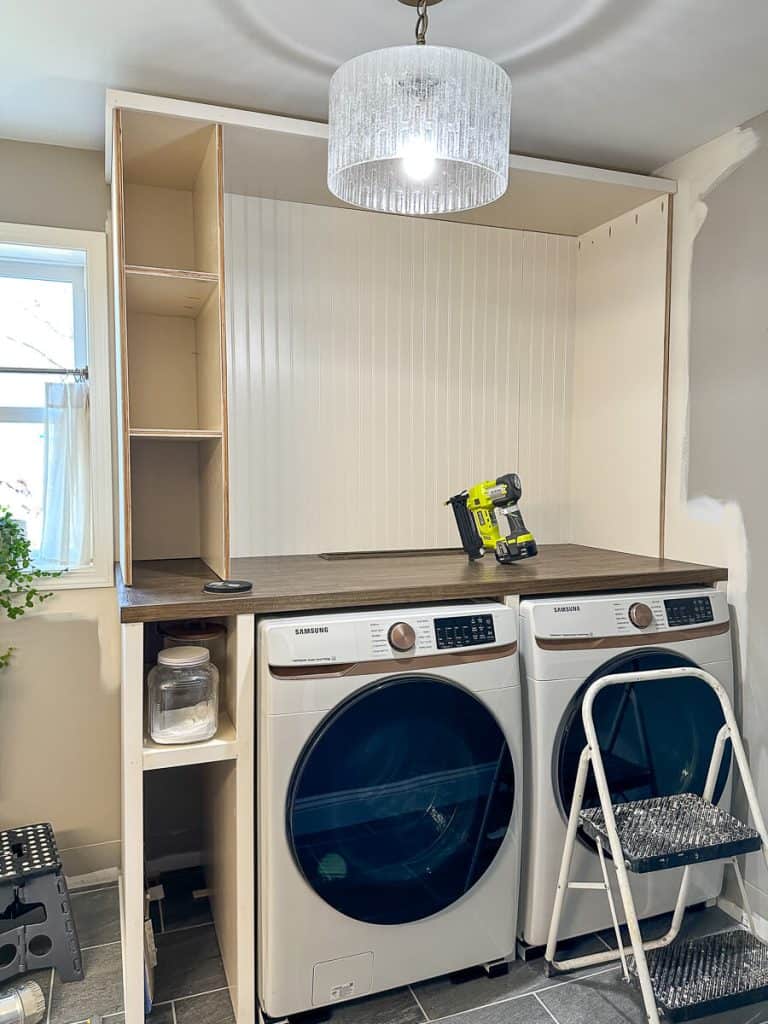
Washer/Dryer Surround Assembly
Once all your pocket holes are ready, grab your wood glue and clamps to assemble using 1 1/4″ pocket screws.
With each panel, apply a nice layer of wood glue to the edge before assembling with screws. Wipe away any excess after it is joined.
Start by screwing your shelf into the outside panel of the lower unit. Always ensure that you are pointing the screws towards the inside of the unit rather than an outside edge (applies to the top joinery specifically.)
This means that your pocket holes will be on the outside of the panels, rather than the inside.
Use clamps and a speed square to ensure you are getting 90 degree corners for level shelves.
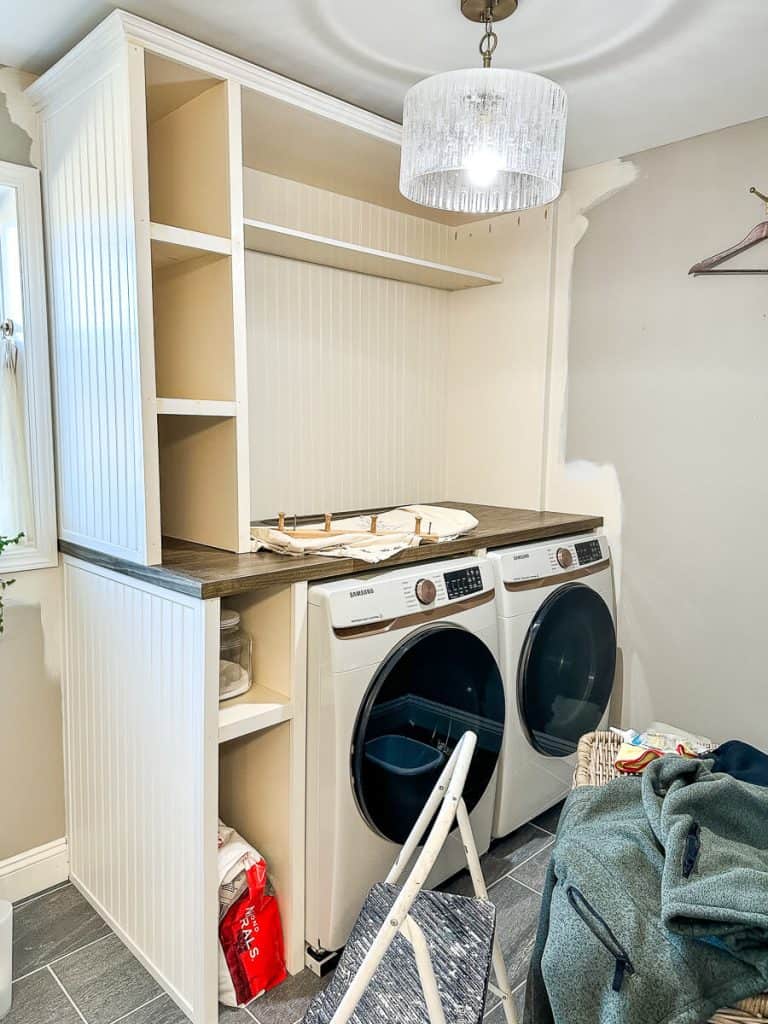
I installed mine with 12″ clearance on the top to give me a tall space underneath for dog food bins and a mini ironing board. However, you can adjust the placement of all shelving for your needs.
Once the shelf is installed on the outside panel, attach the top countertop to both outside panels. Make sure the shelf is positioned on the inside of the unit.
Once the countertop and two outside panels are installed, install the third and final panel to the opposite side of the shelf and the underside of the counter. This is where you will use glue on the long edge of your shelf, clamp, and then secure with brad nails into the shelf.
(Alternatively, you can assemble the shelf unit fully and then secure the top on all three panels. I simply did it this way because I was building on site and needed to be able to carry in the unit in pieces.)
In addition, I added a 1x support piece directly to the wall studs spanning the length between the inside panel and outside right panel. This gives the countertop stability and strength, but it also helps keep the piece level.
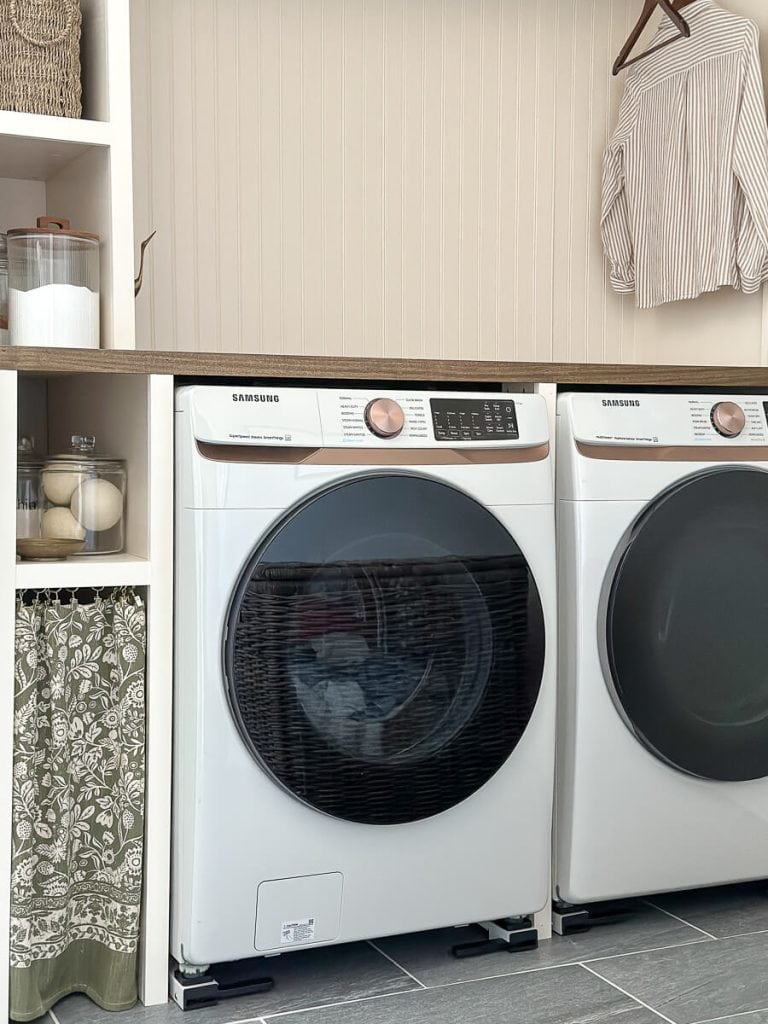
Optional: Add one additional panel in between the washer and dryer. This adds support to the long span of plywood countertop, but also creates a more built in look for the washer and dryer.
I chose to do this, but only made that center panel 12″ deep to give me access to the washer/dryer components on either side when only one appliance is pulled out.
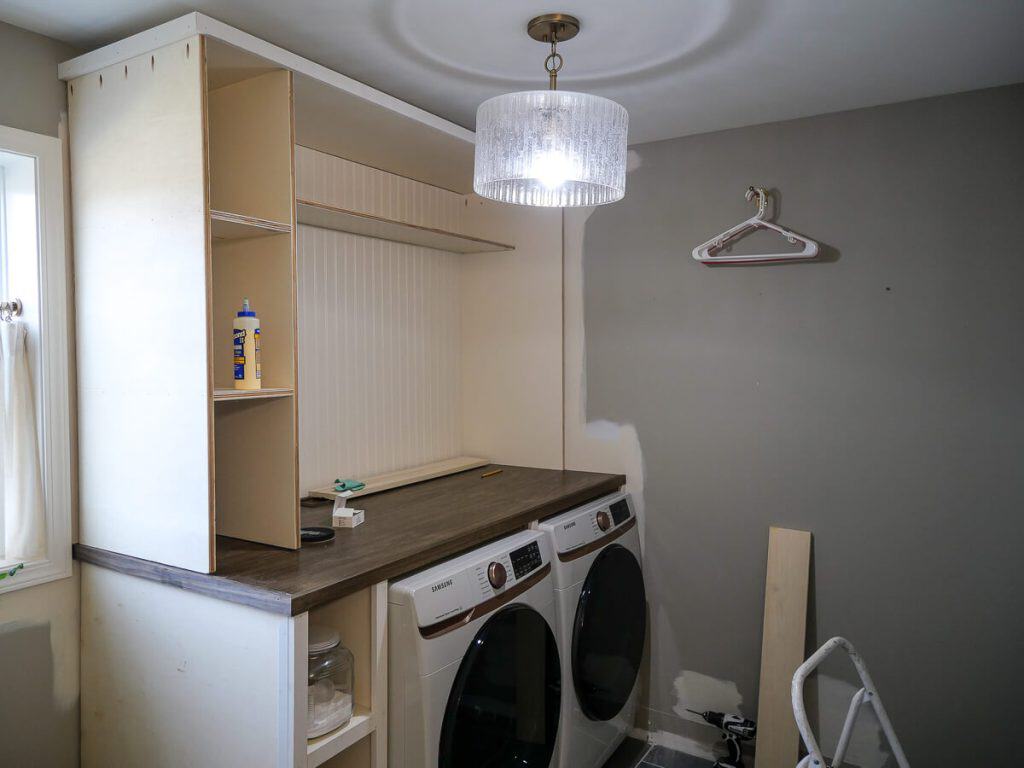
Laundry Hutch Top Assembly
The hutch top for this unit will be installed in a similar fashion. Since it is more complicated with additional shelving, I recommend assembling the bottom first as a dry run.
Again, with each panel, apply a nice layer of wood glue to the edge before assembling with screws. Wipe away any excess after it is joined.
Start by screwing your two shelves into the left outside panel. Always ensure that you are pointing the screws towards the inside of the unit rather than an outside edge (applies to the top joinery specifically.)
Use clamps and a speed square to ensure you are getting 90 degree corners for level shelves. Adjust the spacing as needed for your storage solutions.
Next, attach the right side of the shelf unit to the shelves using wood glue and brad nails.
Once the shelving unit is dry, attach the unit to the top piece on the left side. Next, attach the far right side panel to the top using wood glue and pocket screws.
Remember, ensure that the outside panels have the pocket screws pointing inward, not to an outside edge.
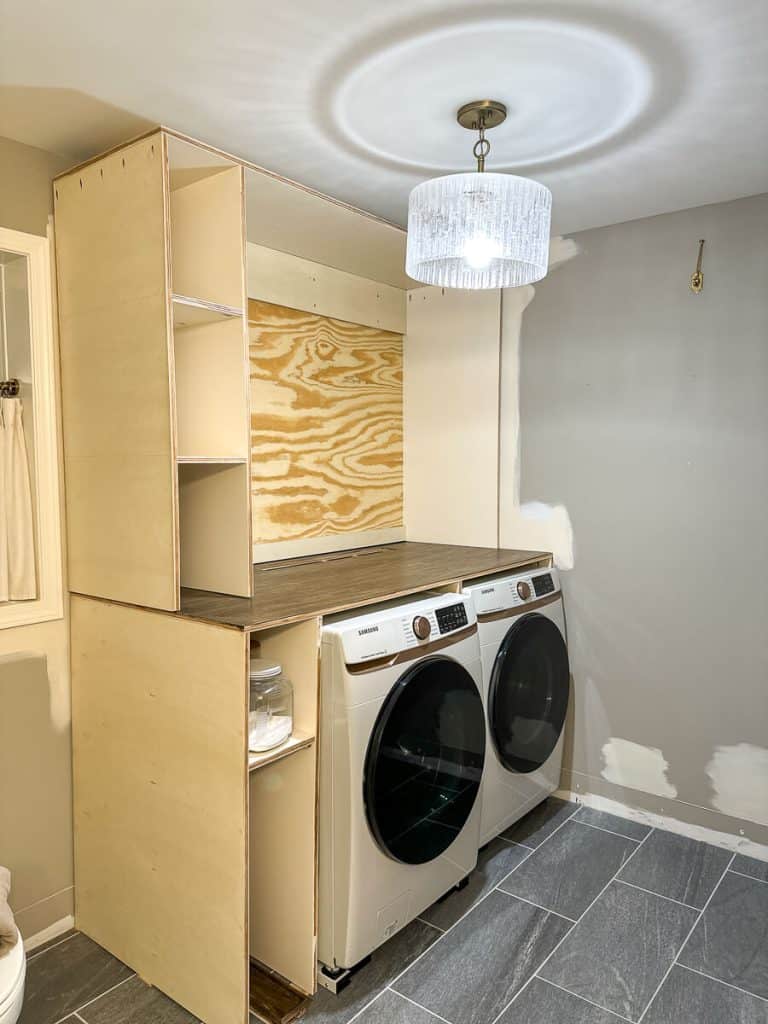
Attach the back of the hutch using brad nails. This gives the unit stability and a place to attach the inner bead board, if you choose to use it.
(Note: You may notice in the photos that my back has two support pieces not noted in the building plans. I did this because I used 1/4″ plywood for my back and felt I needed more support. However, my building plans call for 3/4″ plywood for the back. This is much sturdier and if I were to build this again, I would use 3/4″ for the back panel and omit the two support pieces.)
If using the bead board, secure it to the back of the inner section of the top using brad nails and glue. If not, continue to add the final shelf.
(Note: I built my long shelf at 11″ depth so it wouldn’t interfere with my hanging bar. You can make this shelf as shallow or deep as you would like.)
Using tall wood spacers, rest the long shelf on each spacer so it is level. Secure into the side panels using pocket hole screws and wood glue on the underside of each side of the shelf.
Secure the laundry hutch directly to the wall studs using construction screws.
Adding Face Frame and Crown
Everywhere you see the unfinished edge of plywood, you will add face framing.
For the countertop, I chose to stain my 1×2 to match. This gives the countertop a thicker, more substantial look. Secure with brad nails, using miter corner joints for the best finish.
For the rest of the unit, I painted 1x2s for the front of the piece and secured with brad nails.
For the sides of the unit (I only have one side, however you may have two visible sides) I trimmed out the top and bottom using 7/16 trim with mitered corners.
Then, completed the look with matching bead board.
For the long hutch shelf, I used 3/4″ trim to keep it a skinny shelf. However, you could also use edge banding or 1×2 trim for a beefier look.
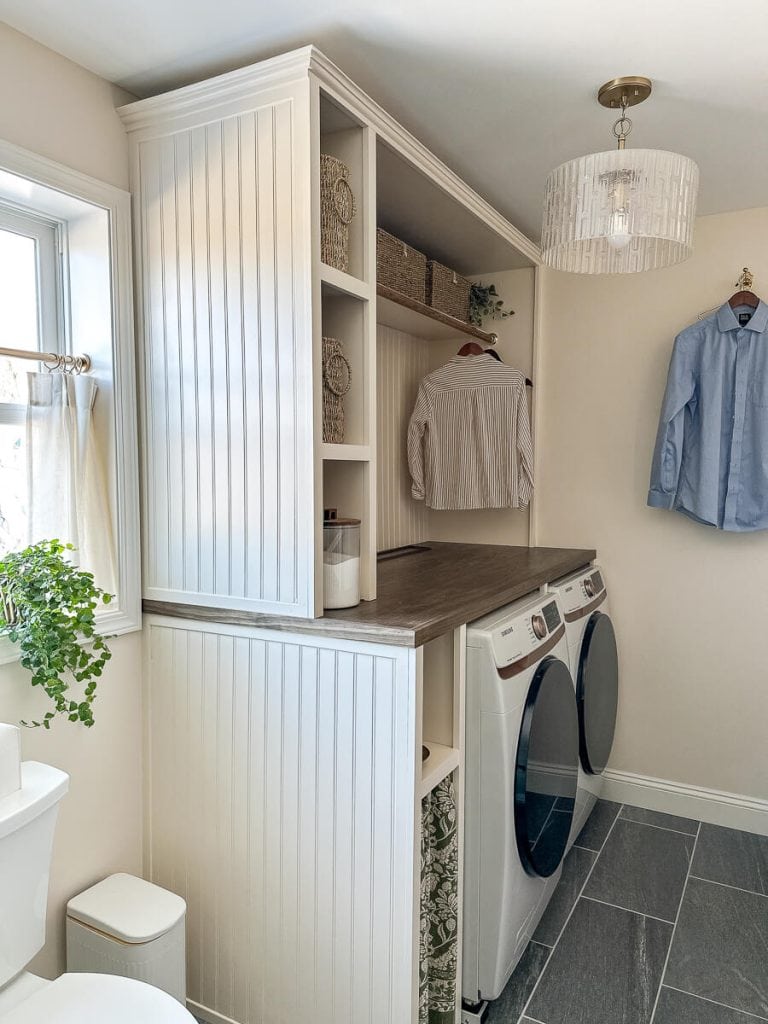
I chose to create my custom laundry room cabinet as if it were a piece of furniture. Therefore, I didn’t take the crown all the way to the ceiling. However, you can finish out the top with your crown or moulding of choice.
Caulk, Nail Holes, FInishing Touches
Once everything is fully assembled and dry, it’s time for the finishing touches.
Caulk all visible seams using paintable caulk.
Fill all nail holes with wood filler, then sand smooth.
Any visible pocket screw holes can either be filled with wood filler and sanded smooth, or you can use these pocket screw plugs.
Touch up these areas with paint and you are done!
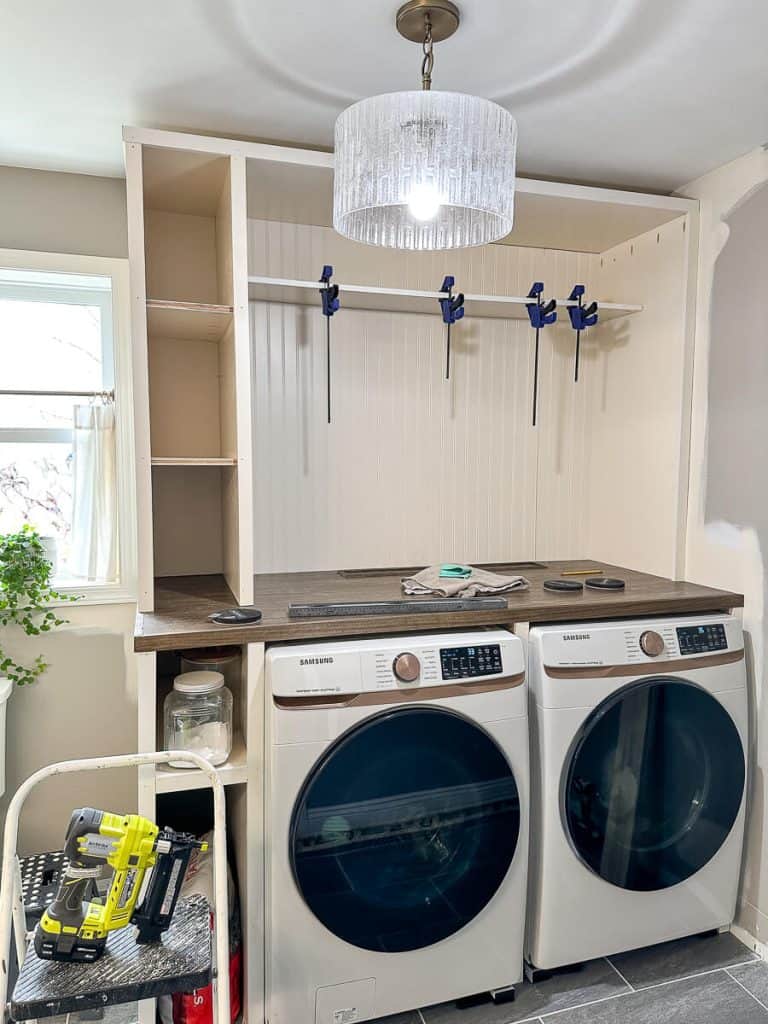
Add the Hanging Bar
The final piece of the puzzle is to add the hanging bar.

I positioned mine 1/4 below my long shelf. Ensure you secure the rod brackets far enough from the back of the unit so the hangers don’t hit the back and can move freely.
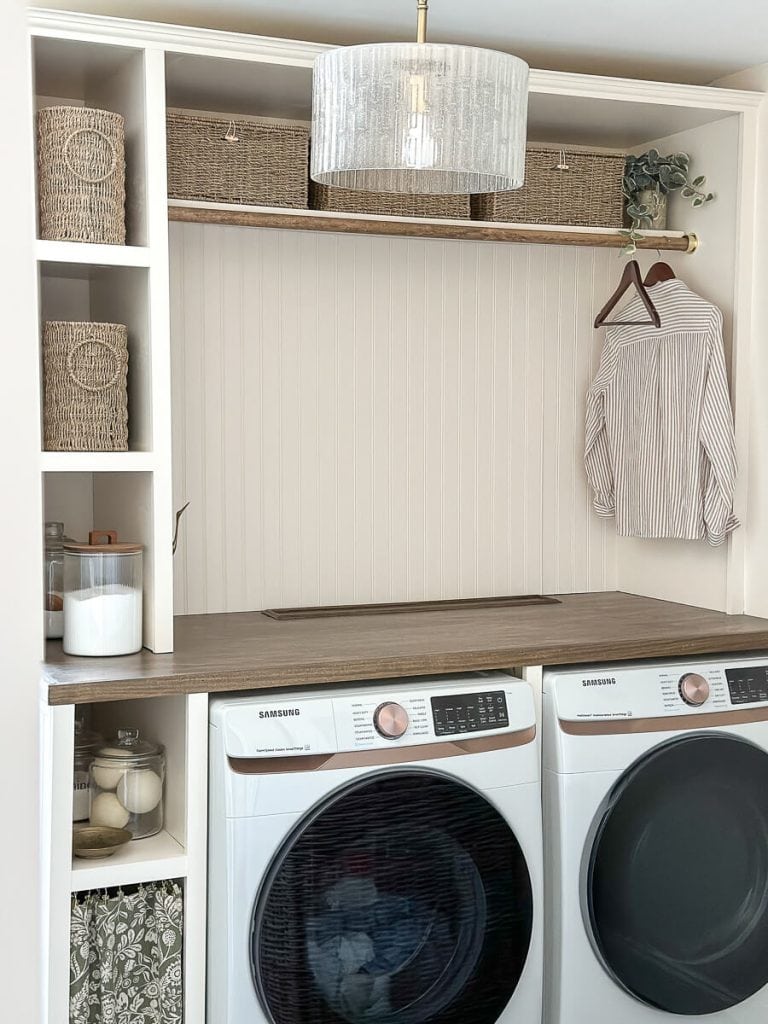
I used a simple dowel that I stained to match the countertop. You can use steel closet rods as well.
SHOP THE LOOK
Free DIY Laundry Room Cabinets Plans
As I’m sure you noticed throughout this tutorial, I created free plans for this exact unit.
Since everyone has a different amount of space to work with, and different ceiling heights, you can adjust the plans as needed to fit your space.
If I had more width to work with, I personally would have given myself 2 more inches of space within the opening for the washer and dryer. Since washers tend to move when spinning, a little wiggle room is beneficial.
Also note that my washer and dryer units are standard 27″ each, but yours may differ. I placed my units on appliance rollers so they are easy to move in and out of the unit quickly.
I also cut an access hatch into the top of my countertop so I can see the washer drain mechanics and dryer plug at all times. You can view more about that process in this video tutorial.
More DIY Projects
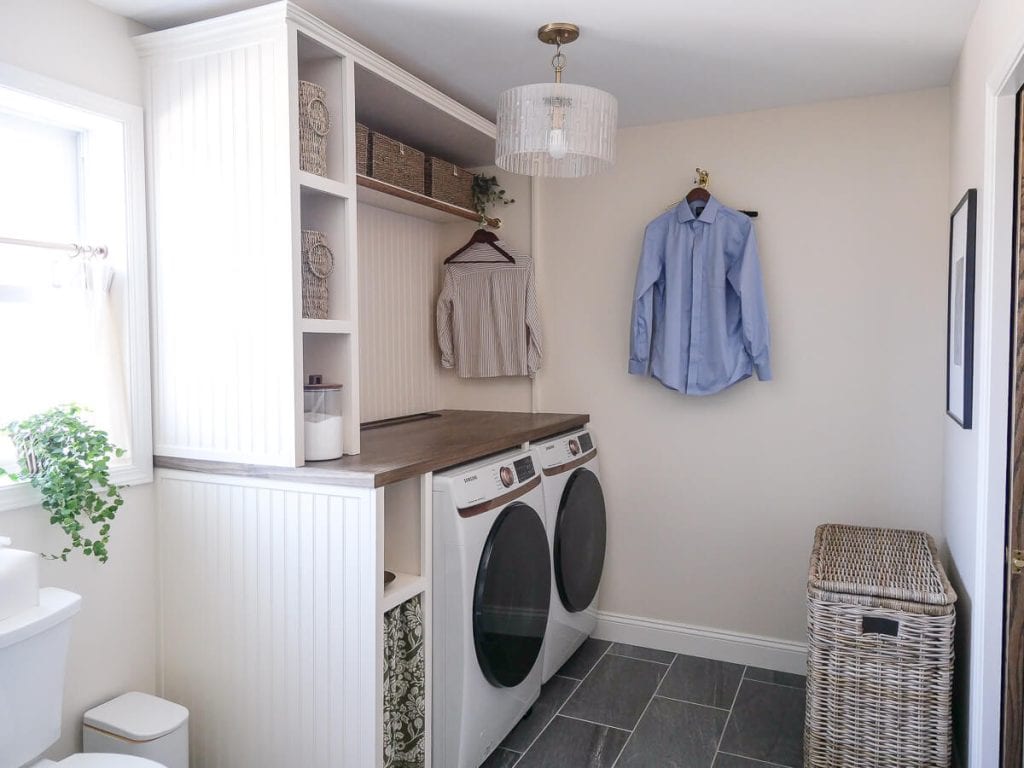
I hope that this DIY laundry cabinet idea is helpful to you as you plan your own laundry storage.
I love how it turned out and elevates a very functional space with loads of storage and beauty.
Thanks so much for stopping by the blog today! If you are looking for more DIY projects, make sure to browse the posts below.
Make sure to subscribe to get my Grace Notes directly to your inbox and to access all my insider perks. And you can follow along daily on Instagram and weekly on YouTube!
~ Sarah
This is truly a class of its own.
Thanks for sharing.