
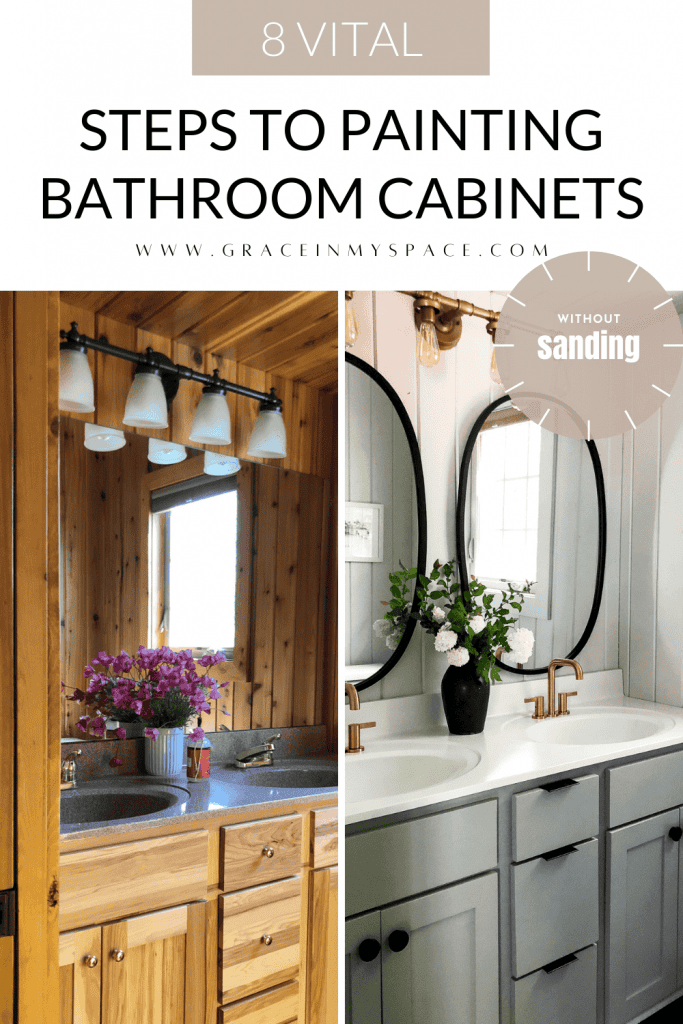
How to Paint Bathroom Cabinets WithOUT Sanding (8 Vital Steps)
If you are staring into the face of a bathroom remodel budget, you might find yourself searching, “how to paint a bathroom vanity” on Google. I’ve DIYed my way through many remodels and refinishing bathroom cabinets is a surefire win in my book! Through my many bathroom remodels, I’ve perfected how to paint bathroom cabinets withOUT sanding in these 8 vital steps!
Post may contain affiliate links for your convenience.
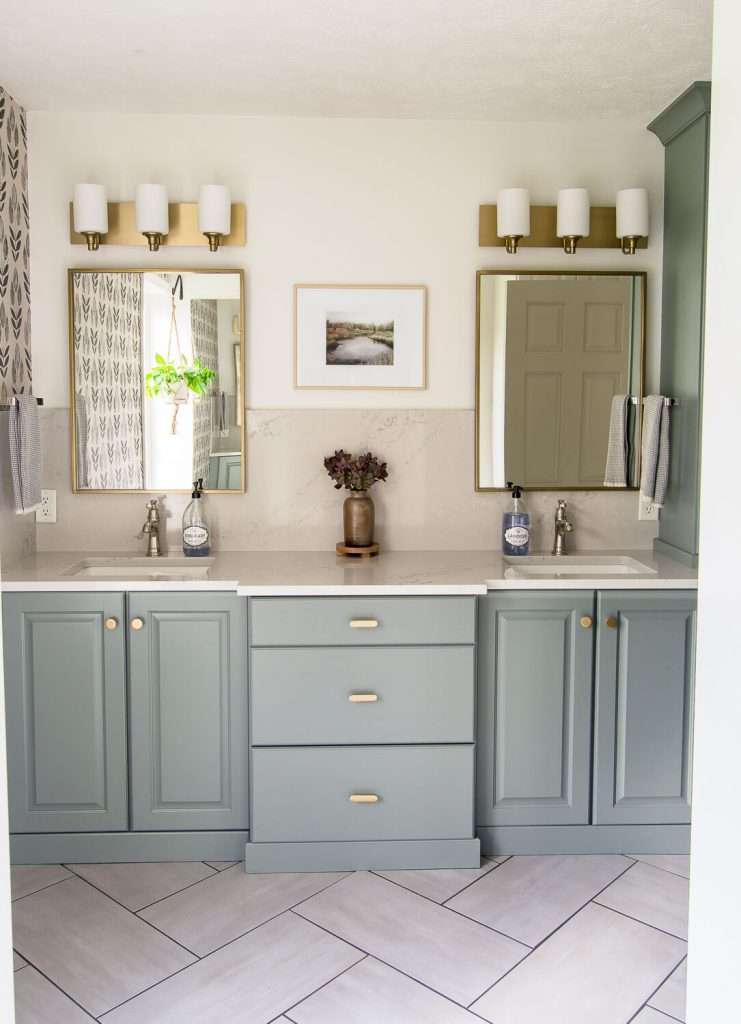
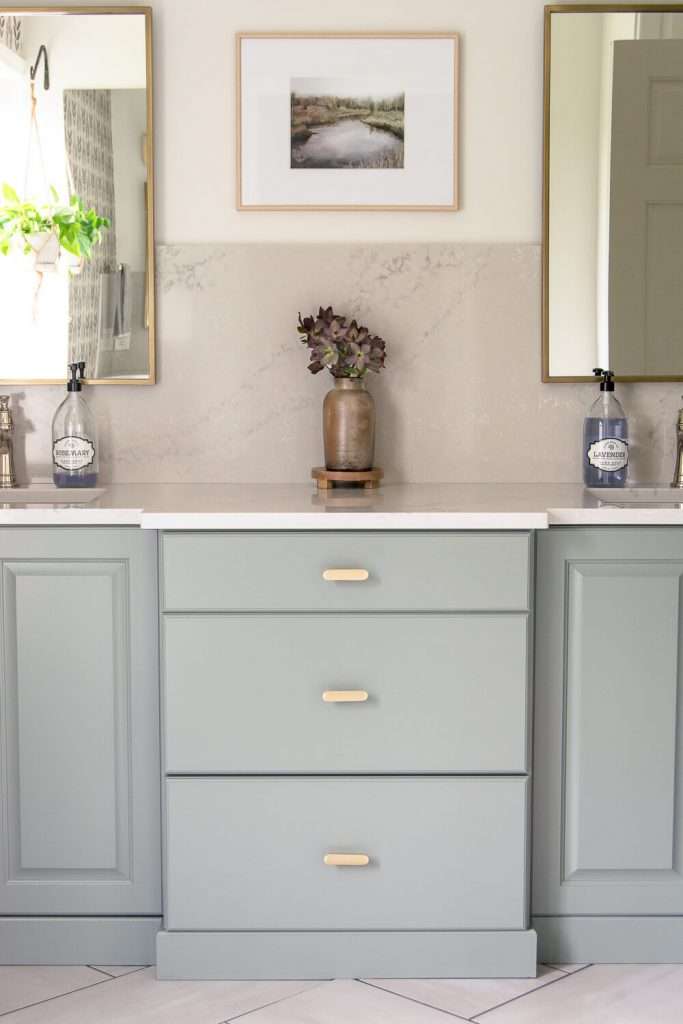
How to Paint a Bathroom Vanity
Let’s start with some frequently asked questions before we dive into the meat of this article.
Can you paint bathroom cabinets without sanding them?
Yes, you can absolutely paint bathroom cabinets without sanding them!
Sanding cabinetry is extremely messy, labor intensive, and time consuming. If I can avoid sanding in a project, I will!
The key to painting cabinets without sanding is that you must replace the sanding step with another option (i.e. step 5 in my process!). If you forgo it altogether, your paint job will not be as durable.
What Happens if I Don’t Sand Cabinets Before Painting?
Sanding cabinetry gives the paint something to grip and hang onto. Painting over a slick surface that hasn’t been prepared can cause chips and peeling.
If you don’t sand or use an alternative method of preparing the cabinets, your paint job will not hold up as well long term.
TAKE NOTE
In my humble opinion, there is nothing worse than skipping a step to save time only to have it cost you hours more work down the road in repairs.
So make sure to keep reading to see how skipping the sanding step is possible!
What type of paint do I use to paint a bathroom vanity?
There are many viable paint options for painting a bathroom vanity.
The best paint for bathroom cabinets is oil based paint or an enamel cabinet paint. These are the two most durable options for a high traffic area.
Of course, you can also get away with using basic latex paint or an interior alkyd paint with proper prep and sealing. There are pros and cons to every type of paint, which I’ve detailed for you in this post!
Here are my favorite types of paint for painting a bathroom vanity, in order of personal preference.
- Cabinet Paint: Behr Cabinet, Door, Trim Enamel or Magnolia Home Kilz Cabinet Paint
- Oil Based Paint: Behr Oil Based Enamel
- Interior Alkyd: Benjamin Moore Advanced
- Chalk or Mineral Paint
- Latex Paint
What Paint Finish Is Best for Bathroom Cabinets?
Once you’ve chosen your paint type and paint color, you’ll also have to choose a paint sheen.
Choosing a paint finish for bathroom cabinets is influenced heavily by personal preference and if it will be a high traffic area.
You can grab my free paint guide if you want to learn more about how to choose paint for various projects below!
In general, durability is on a scale from worst to best based on the finish. Paint finishes are least durable using a flat sheen and most durable using a gloss finish.
Each paint brand may call their finishes something slightly different, but the basic sheens from most durable to least durable are:
- High Gloss
- Gloss
- Semi-Gloss
- Satin
- Eggshell
- Matte
- Flat
With a high traffic area, you will want to stick to the most durable sheens. I personally wouldn’t go below a satin finish, however, my first choice would be a semi-gloss.
Semi-gloss is a very wipeable paint finish for easy cleaning.
If you want a high end or modern look, you should choose high gloss! Just beware, the glossier the finish, the more finger prints and smudges are shown.
Can You Paint Over Previously Painted Bathroom Cabinets?
Painting wood cabinets that have not been painted is a slightly different process than repainting cabinets that have previously been painted. However, both can be done without sanding!
If you have a painted bathroom vanity, you will want to make sure you know what type of paint was used previously. Using latex paint over a previous oil-based paint without priming will not allow them to bond properly.
If you don’t know what type of paint was previously used, just be safe and use a high bonding primer, which I recommend regardless of if your cabinets were previously painted or not.

8 Vital Steps for how to Paint Bathroom Cabinets Without Sanding
I hope that these FAQs were helpful to you as you plan your bathroom vanity makeover! Now, let’s get down to how to paint bathroom cabinets without sanding in 8 simple steps.
Here are the basic steps to paint bathroom cabinets without sanding.
- Remove any chipped or peeling paint or varnish with a plastic putty knife
- Repair any damage with wood filler
- Patch and re-drill any hardware holes (if you are moving or switching hardware)
- Clean thoroughly with TSP
- Degloss
- Prime
- Paint
- Seal
Tools you’ll need
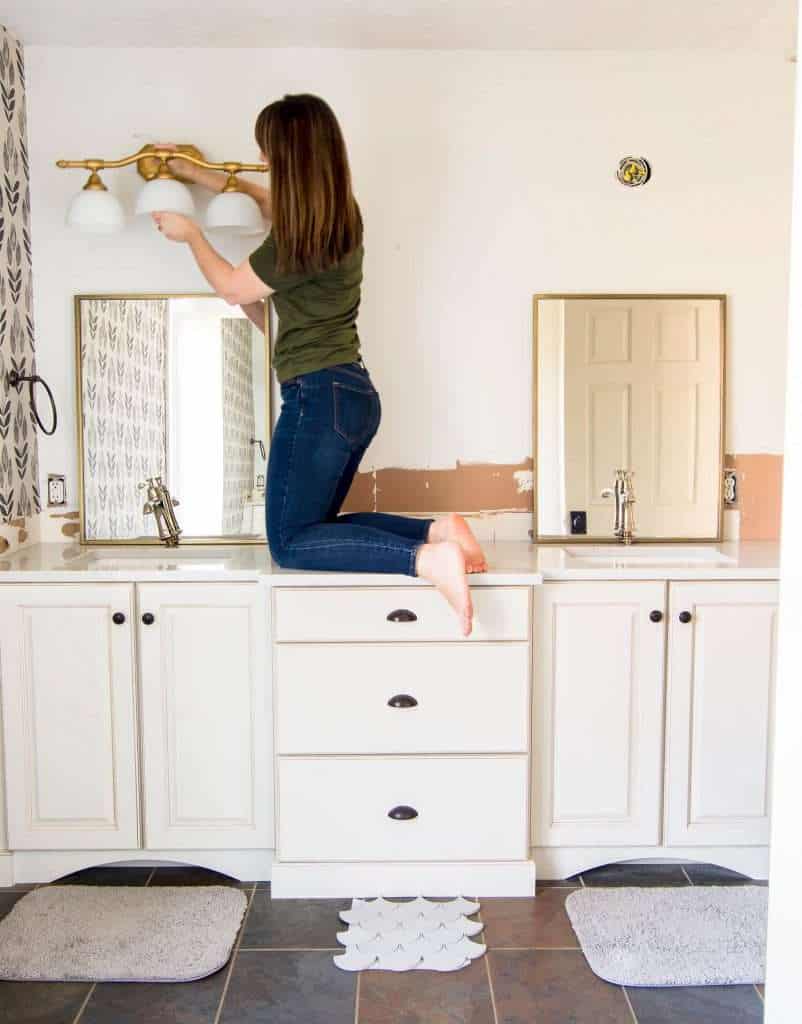
1. Remove Chipped or Peeling Paint/Varnish
The first step to achieving a professional finish on your bathroom vanity makeover is preparing it for a smooth surface.
If your vanity is painted, remove any chipping or peeling paint with a plastic putty knife. Take care not to damage the rest of the finish.
If your vanity is varnished, inspect it to ensure the varnish isn’t flaking anywhere. Remove it with a light sanding if needed.
2. Repair any Damage to your Bathroom Vanity
Once you’ve removed any peeling debris, repair the damage with wood filler.
You will need to sand any damaged areas once the wood filler is dry to create a smooth surface for your paint.
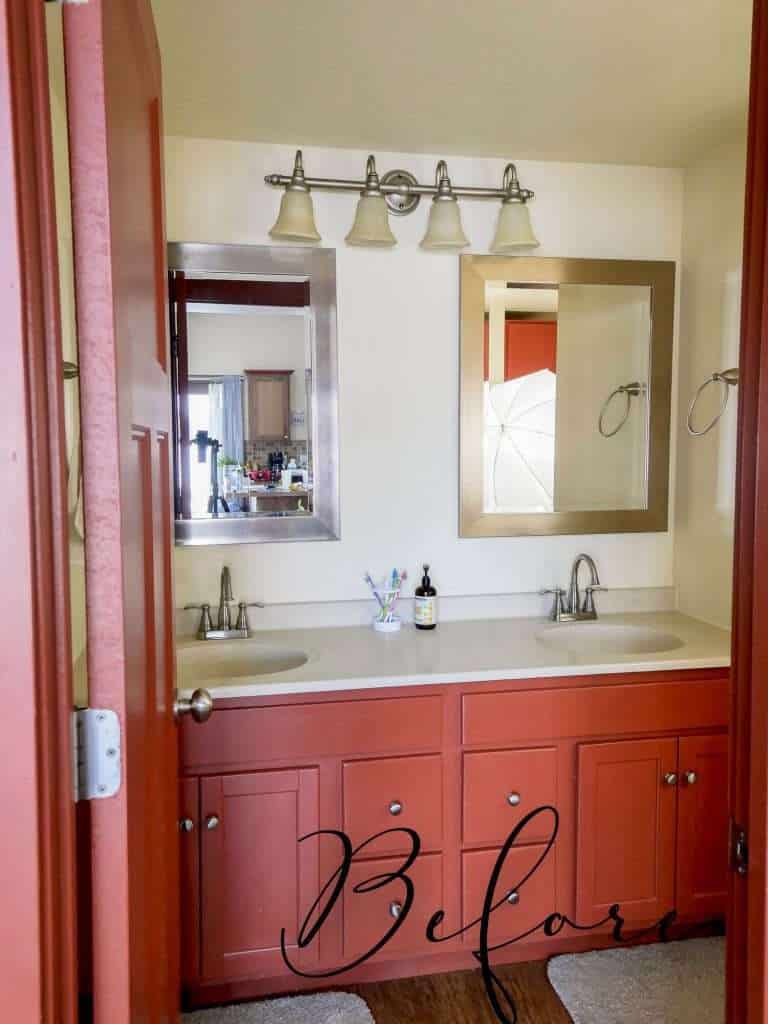
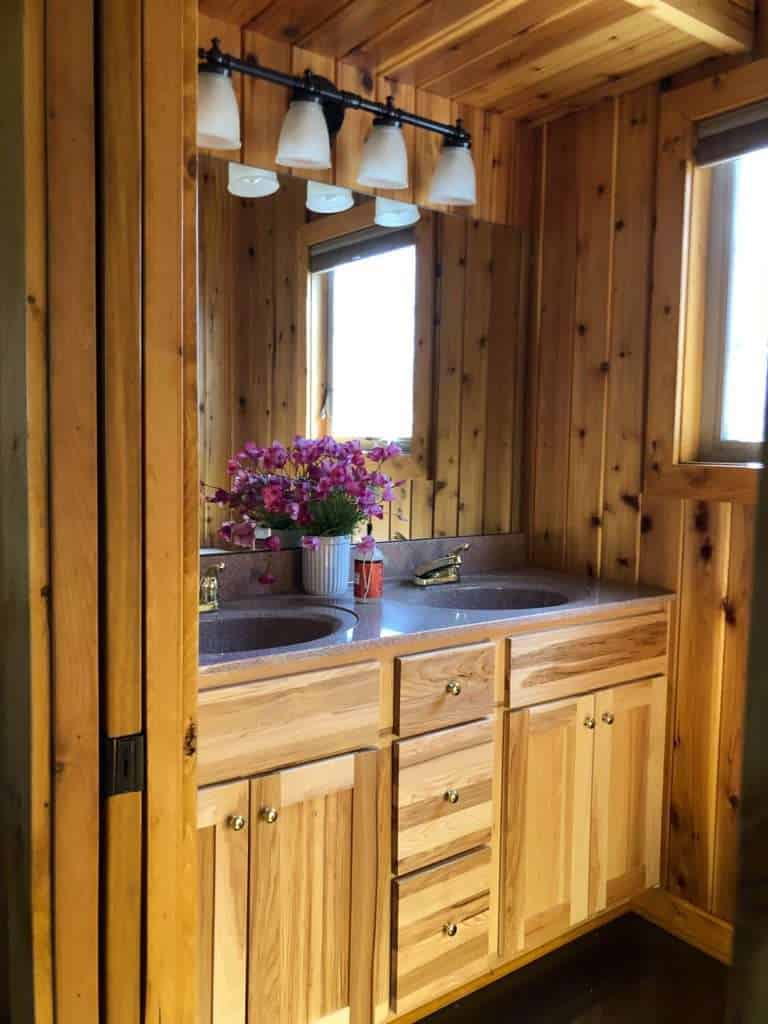
If you skip steps 1-2, your bathroom vanity will show these imperfections after painting. These are the most important first steps that many people overlook in order to get a professional finish in the end.
3. Patch & Re-Drill Hardware Holes
Chances are, you may be switching out your cabinet hardware if you’re giving your vanity a fresh coat of paint.
Ensure that your new hardware will fit into the existing holes before continuing. If it doesn’t, you can easily patch the old holes and drill new ones.
Take the time to do this step now, before priming and painting, so your final finish is flawless.
4. Clean with TSP
Once you’ve done all of the damage control, it’s time to prepare your bathroom cabinets for painting!
The first step of prep work is a vital one.
Clean your bathroom cabinets thoroughly with TSP. This is a heavy duty degreasing cleaner which will remove any unseen film, grime and dirt. This is important to give your paint a clean surface to cling to.
5. Degloss Bathroom Cabinetry to Avoid Sanding
Remember when I mentioned that if you don’t sand, you must use an alternative method?
This is it!
Deglossing is the key to how to paint bathroom cabinets without sanding.
Essentially, using a deglosser removes that shiny slick surface so the paint has a clean surface to bond to. It will prevent the paint from peeling and chipping easily when combined with the other steps detailed here.
Deglossing is very simple. Using a clean white rag (I always use my husband’s old white tshirts), wipe the deglosser over the entire surface of your vanity according to product directions. Then, follow with a clean wet cloth.
It’s as basic as wiping down the cabinet with water, but does a ton of work for you to avoid sanding!
6. Prime With a High-Bonding Primer
The next step you should not skip is priming.
Priming your bathroom cabinets is essential to producing a professional and durable finish for your bathroom cabinet makeover.
Favorite Primers
Whether you are painting wood cabinets or painted cabinets, a high bonding primer will be your best option.
Before priming, make sure to run a tack cloth over the entire surface of your cabinetry to remove all dust and debris.
Next, apply both your primer and your paint with one of the following options.
- Paint sprayer for the most professional finish
- Quality mini-rollers and brush for tight spaces
- Quality paint brush
If a paint brush is all you have available, you can learn how to avoid brush strokes when painting in this article.
7. Paint Bathroom Cabinets
Next, it’s time to paint!
Give your primer the allotted time to dry that’s in the directions. Then, apply your top coat.
I’ve listed my favorite cabinet paints in the FAQ section above.
Apply using one of the three methods from the priming section, doing your best to get a smooth finish.
Apply at least two coats to get the full color saturation; more, if needed for full coverage.
8. What to Use to Seal Bathroom Cabinets
Finally, the last step in the process for how to paint bathroom cabinets without sanding.
Sealing.
This is a controversial step in the process for how to paint a bathroom vanity.
Some say it is unnecessary if you use a quality paint. Others say it’s your best bet for a finish that is durable.
Your situation will be unique, so choose whether or not to seal based on:
- The paint you chose. Lower quality paints will do best with a sealer.
- Bathroom traffic. High traffic rooms will have more wear and tear and can benefit from a sealer to be on the safe side.
Use your best judgement. If you decide to forgo the sealer and find you shouldn’t have down the road, simply repair and repaint and chips and then apply a sealer to a clean vanity.
The con to applying a top coat is that it can yellow over time. This is especially important to be aware of if you are using white paint. The two most popular sealer choices for cabinetry are:
- General Finishes (semi-gloss)
- Varathane (multiple finishes)
It is important to note that your sealer should be the same sheen/finish as your paint choice.
If you chose a satin paint finish, your sealer should also be satin. Otherwise, it will change the finish appearance to whatever the topcoat finish is.
Other Painting Tips and Tricks
I hope that this tutorial for how to refinish bathroom cabinets without sanding was helpful!
Painting is one of my popular blog topics, so make sure to check out all of the resources available below.
More Painting Tutorials


Thanks for stopping by the blog today! Make sure to subscribe to get my Grace Notes directly to your inbox and to access all my insider perks. You can also follow along daily on Instagram and weekly on YouTube!
~Sarah
I am grateful to you because this post saved me a lot of time and helped me with a problem I was having. Thank you so much
I am thankfull for you because i was facing a problem and this post help me alot and safe my time.
The step-by-step instructions and the emphasis on skipping the sanding step for a quicker makeover are a time-saver.
Very easy article to understand. Thanks.
2 questions…when you say if using white (ie satin whisper white by Dunn Edwards) will cabinets turn white with or without the seal(top coat). And is there a way to try to prevent yellowing from occurring (or too lessen the yellow?)
Question 2….when either spray painting or brush painting what do you recommend the cabinets are resting on so when painting it doesn’t stick to the material.
Lastly if using brush which brush wil give the smoothest look when working on vanity. And if spraying (ie DIY)…do you recommend a DIY sprayer that gives high quality either rentable or worth the purchase (ie trying to be cost efficient).
Thank you!!!!!
White paint doesn’t typically yellow itself. It’s the poly that can yellow over time. I usually just use cans or bowls to prop my cabinets but they do make cabinet triangles for that specific purpose. And spraying usually gives the smoothest look with the right technique, but can be tricky to master. I like the Wooster short handle brush best, linked in my article. Good luck on your project!
Hi there! Great article
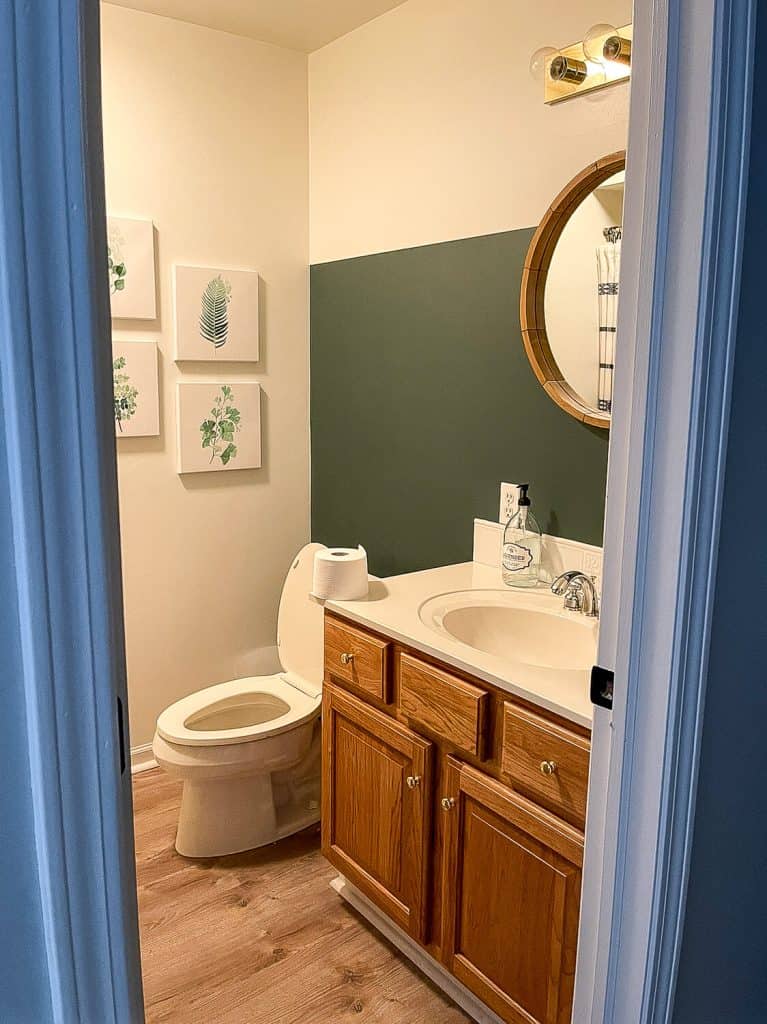
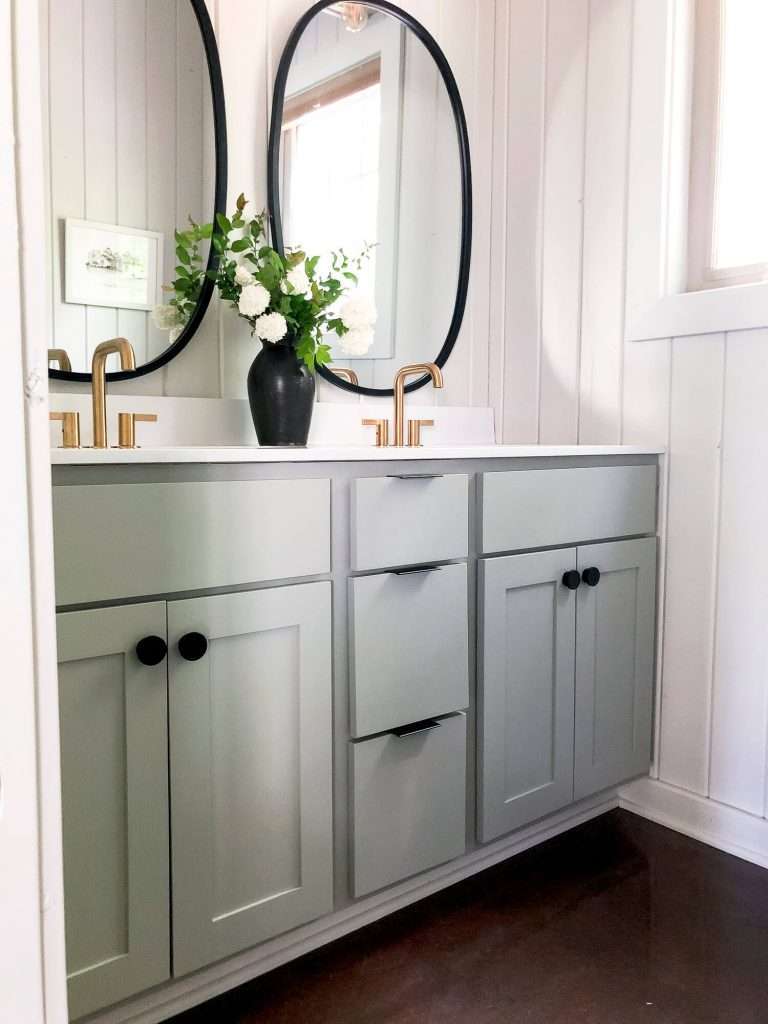
What is the wall color with the BM Intrigue vanity.
Thanks!
Thank you! It is called Shiplap by Magnolia Home.
this is the most helpful post i have found – thank you SO much! one dumb question…do you recommend removing the vanity doors and drawers before starting, or can you achieve this while leaving it all intact?! thanks again, love your blog! xx
Never a dumb question! You can try to work around hinges but it is MUCH easier to take them off. I’d recommend setting up a work station for drawers and doors.
Hello! If I wanted the durability of a higher gloss sheen, but I don’t want the shininess, does it work to paint with a high gloss sheen and then tone the shine down with a more matte sealer? Is it an issue for durability or otherwise to not match the sealer sheen to the paint sheen if you’re going for a particular look? Thanks so much for all your tips!
The higher the gloss the harder it is for a topcoat to adhere. So I would advise against doing a high gloss paint and then a matte sealer. I think the sealer would end up peeling. If you don’t want the shine, I’d go with a satin or semi-gloss enamel cabinet paint for best durability.
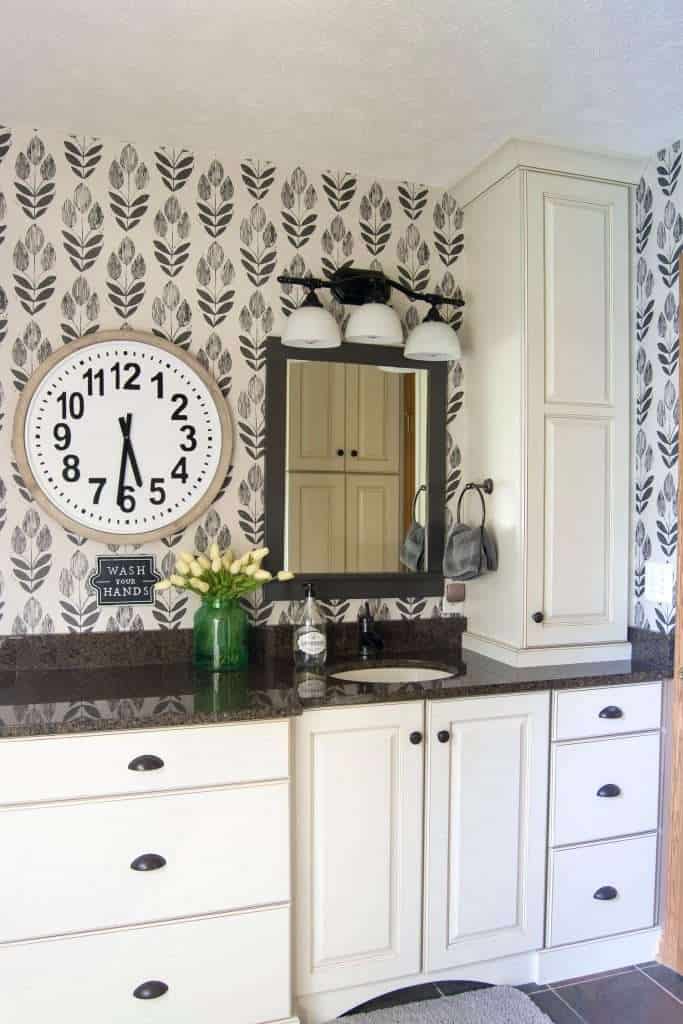
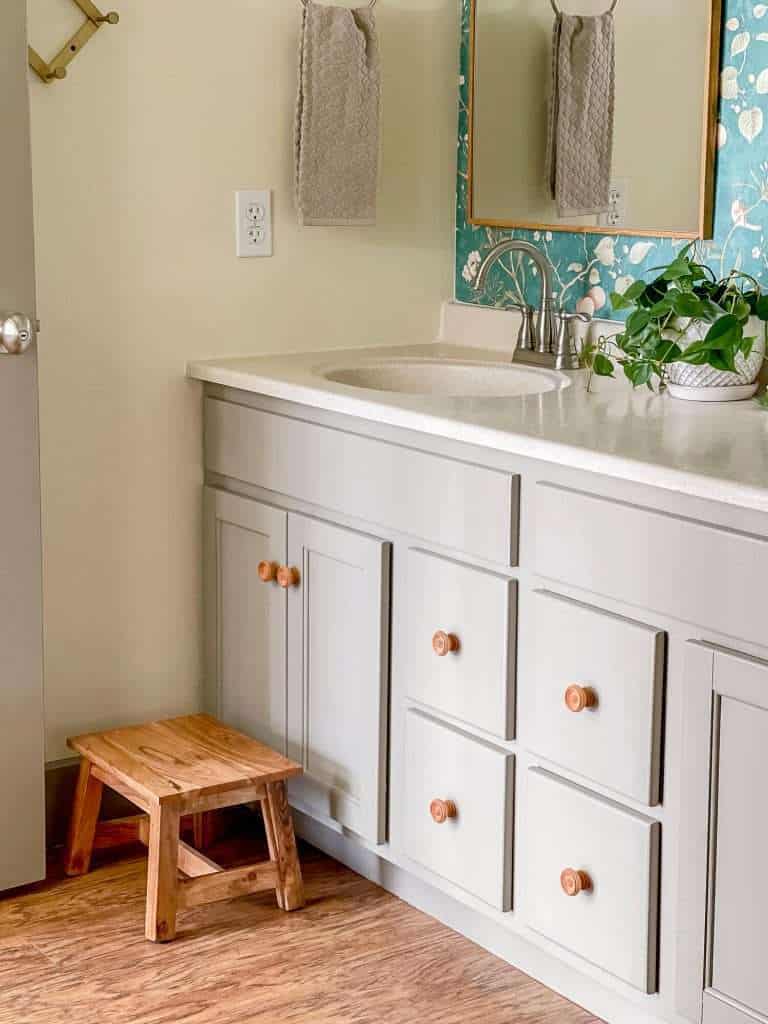
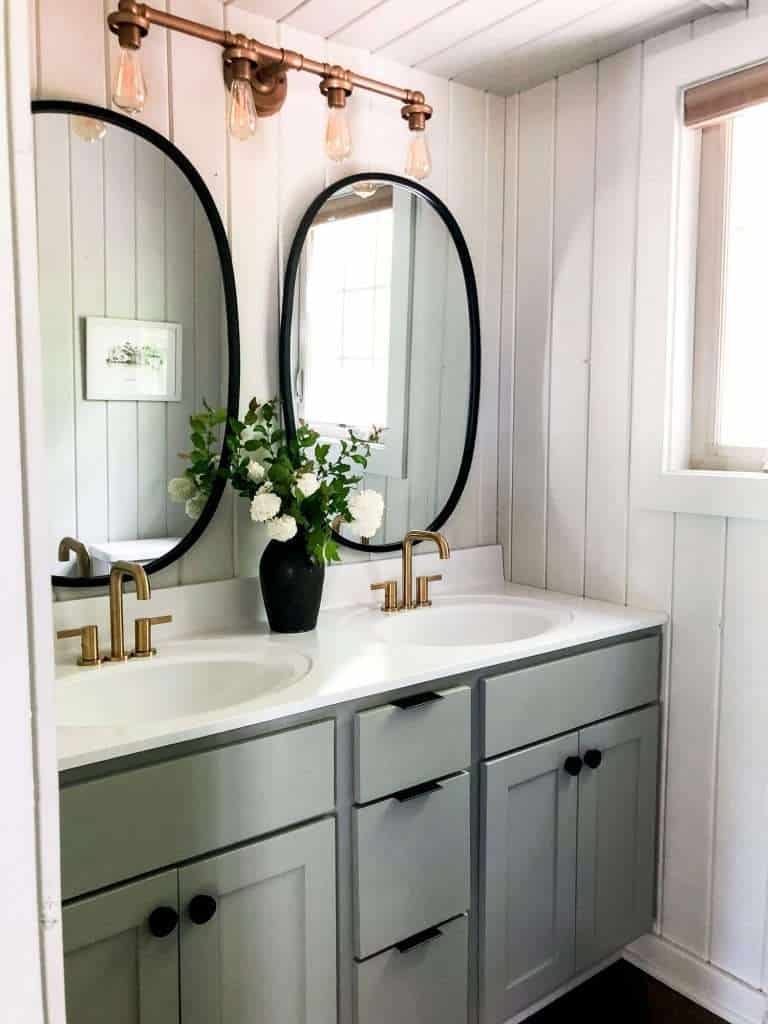
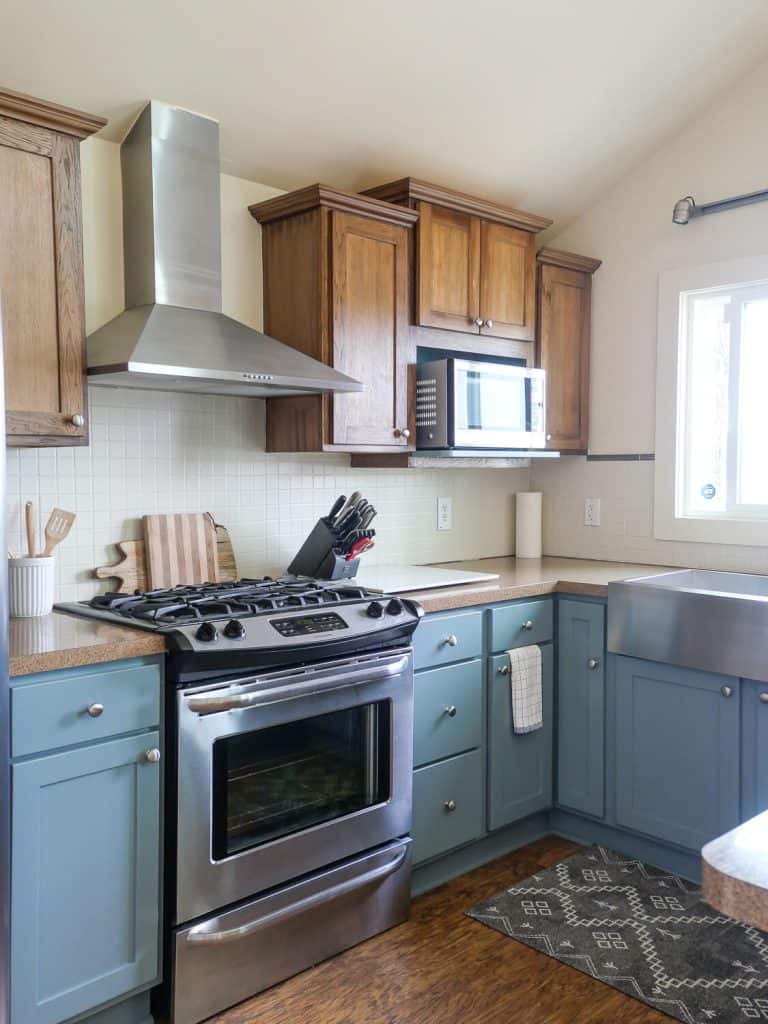
I noticed the counters are different; Did you paint those and what is the process?
One counter is the same! Changing the paint color just makes it look more appealing. The counter with the soft blue cabinets was painted (https://graceinmyspace.com/budget-small-bathroom-remodel-for-300/) and the larger remodel included new quartz countertops.