
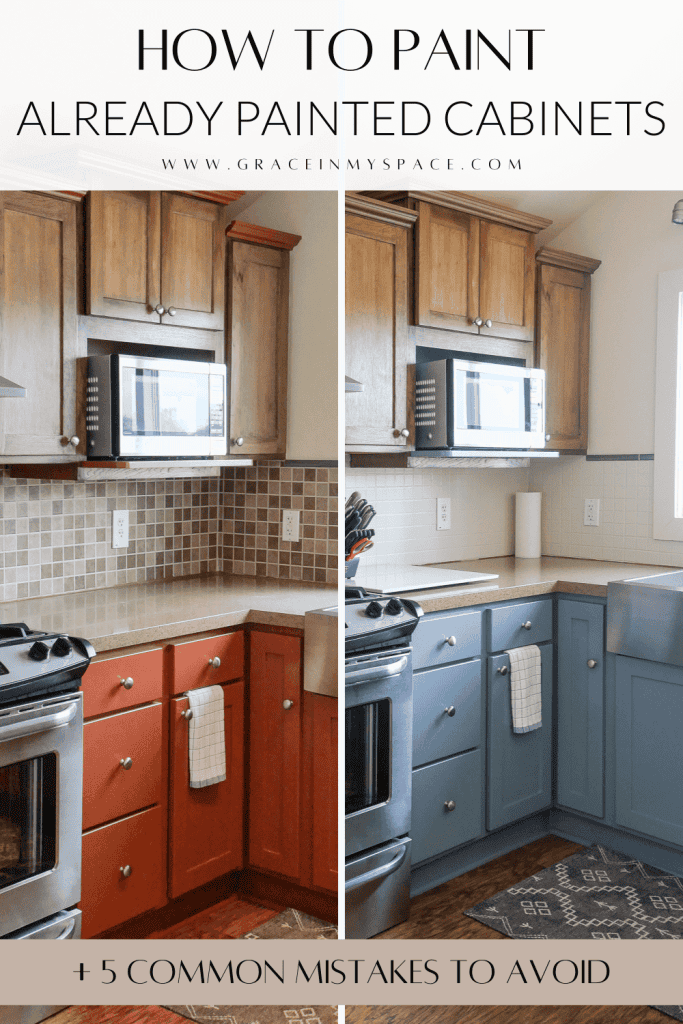
Avoid These Mistakes: How to Paint Cabinets That are Already Painted
Do you dream of transforming your kitchen or bathroom with a fresh and updated look, but don’t want to break the bank? Repainting your cabinets can instantly breathe new life into these spaces. However, the process of painting cabinets can be daunting and overwhelming, especially for beginners. Today, I’m sharing how to paint cabinets that are already painted for a professional finish.
If you’re considering this DIY project, it’s crucial to avoid common mistakes that could result in a sloppy, unprofessional-looking finish. In this article, I’ll guide you through the most common mistakes people make when painting cabinets and provide tips on how to avoid them.
By the end, you’ll be equipped with the knowledge and confidence to tackle this project like a pro. So, let’s get started!
This post may contain affiliate links for your convenience.
How to Paint Cabinets That Are Already Painted
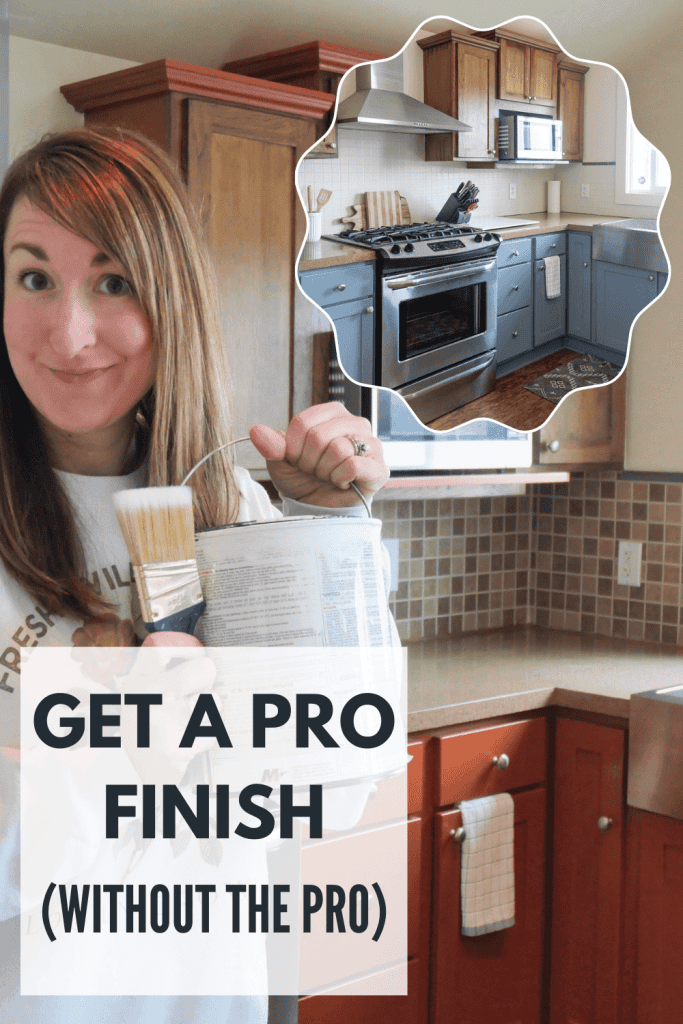
I’ve painted many bathroom and kitchen cabinets since the beginning of all my home renovation journeys in 2006. In that time, I’ve learned the tricks of the trade to get a professional finish, without the pro.
One of the most transformative DIY tools is paint. Thankfully, it’s also affordable and, with practice, not an overly difficult skill to master.
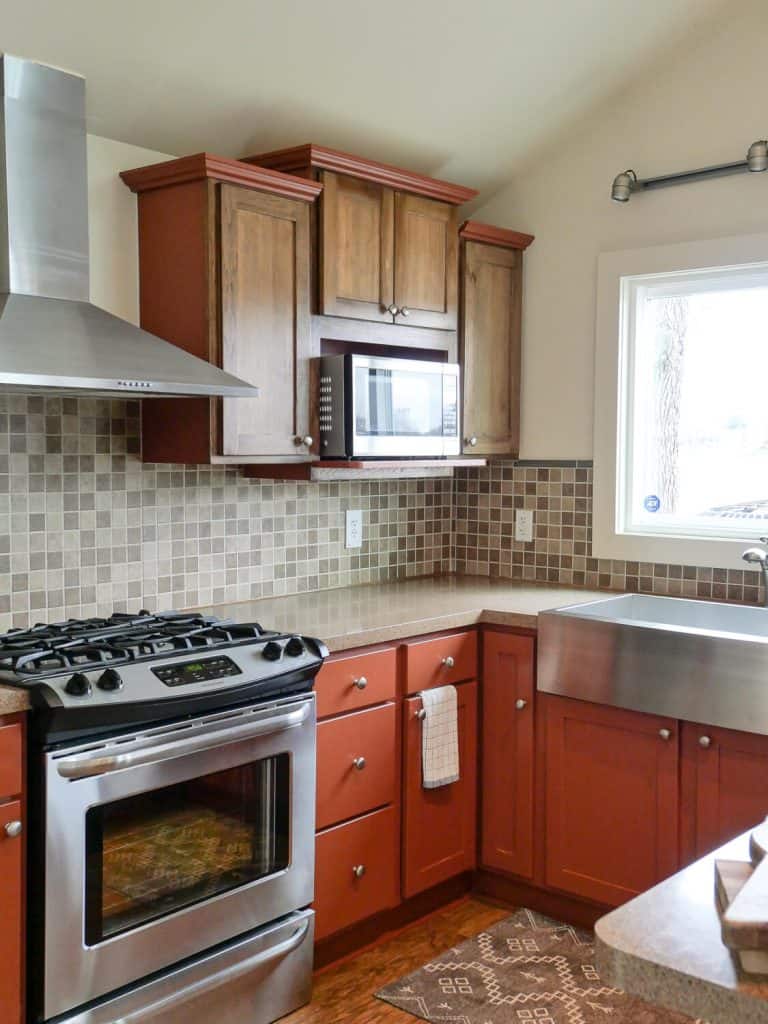
If you have cabinets that are painted a color you don’t like or are damaged, this tutorial will teach you exactly how to paint cabinets that are already painted so you can affordably update your space.
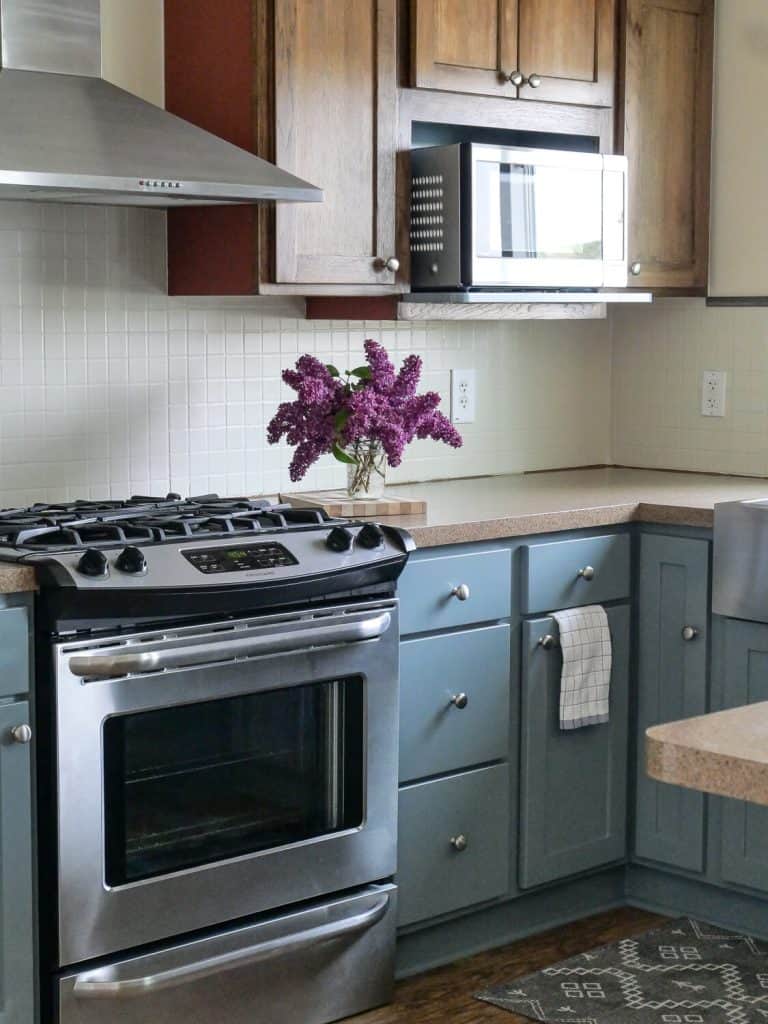
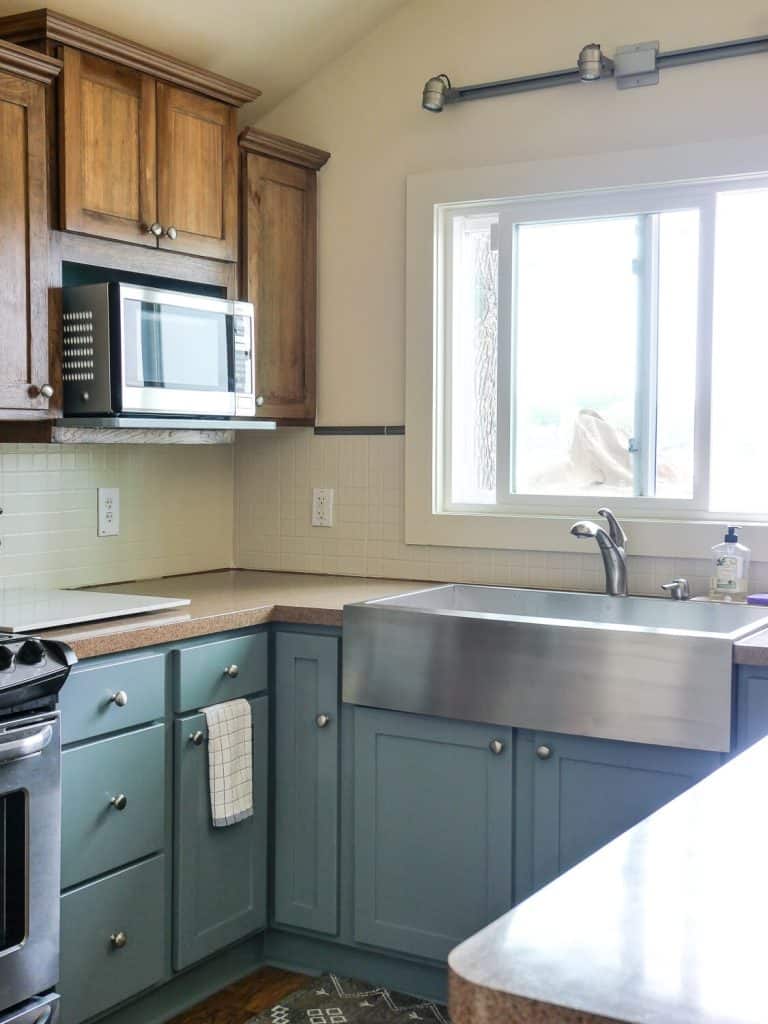
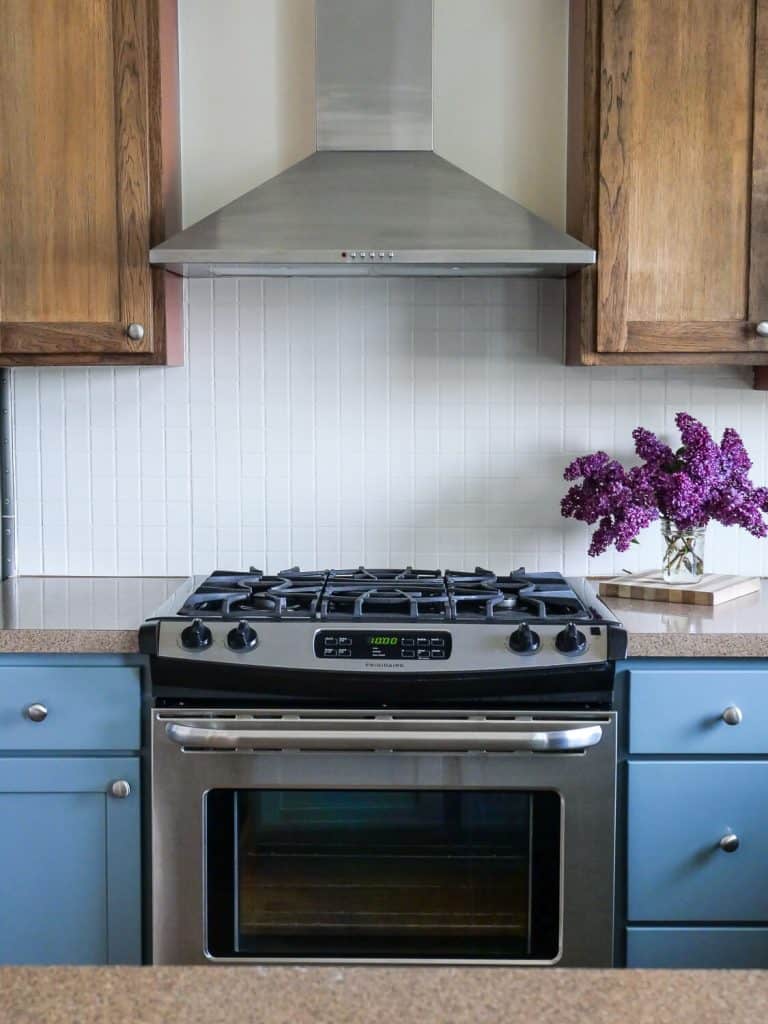
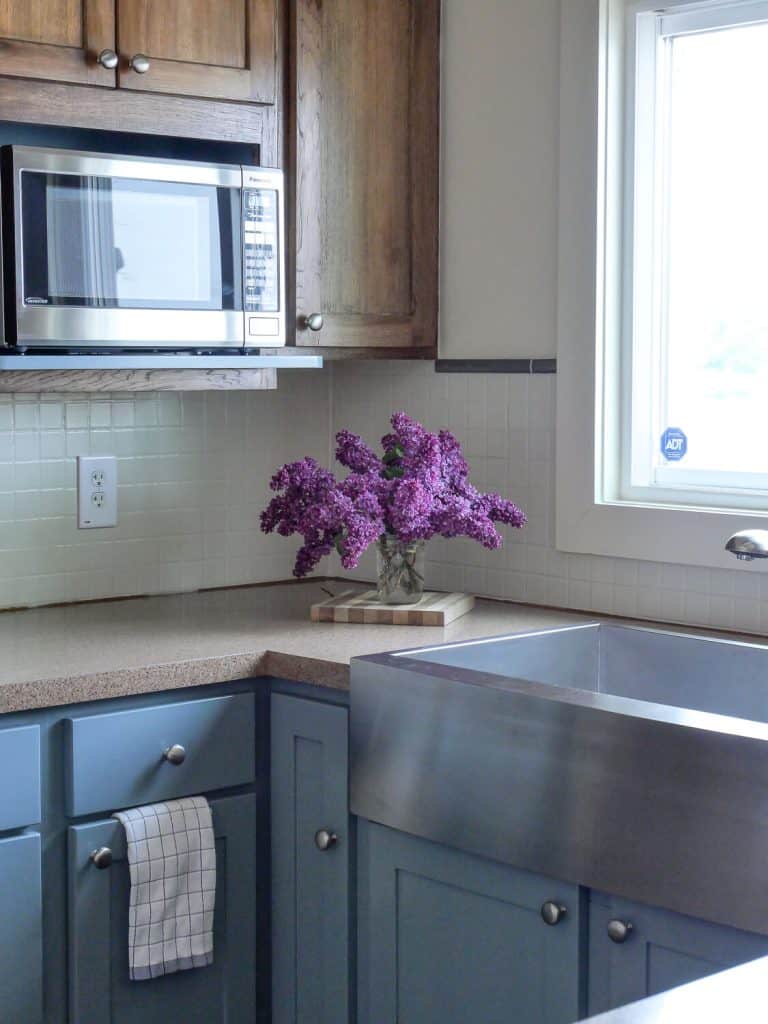
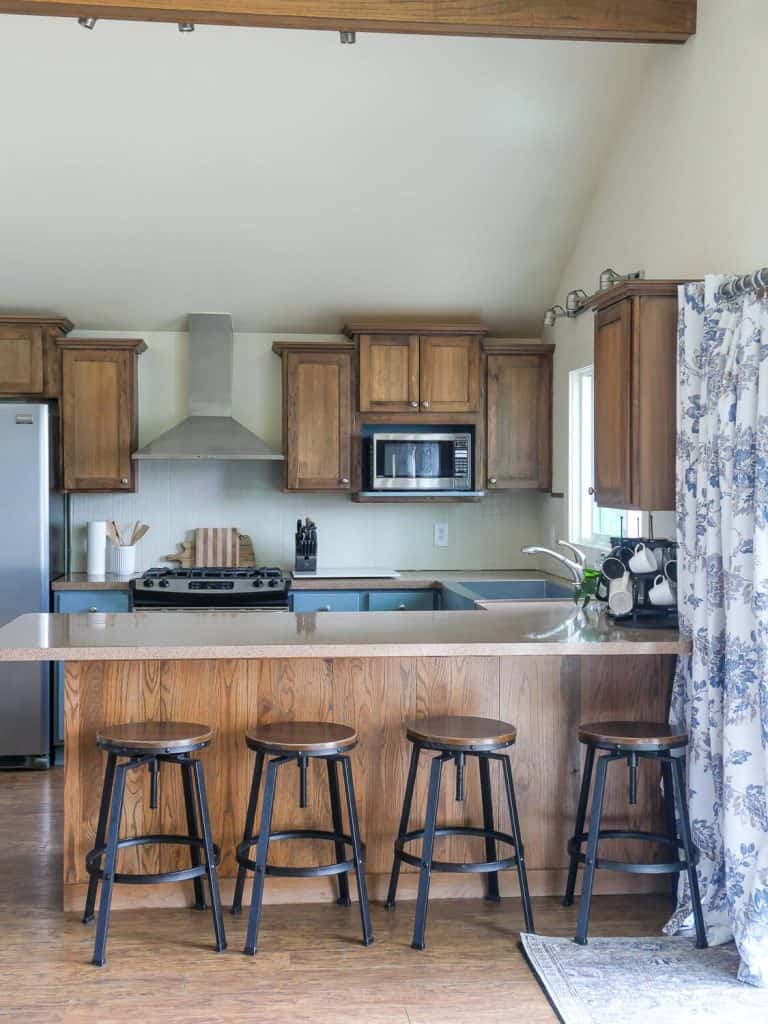
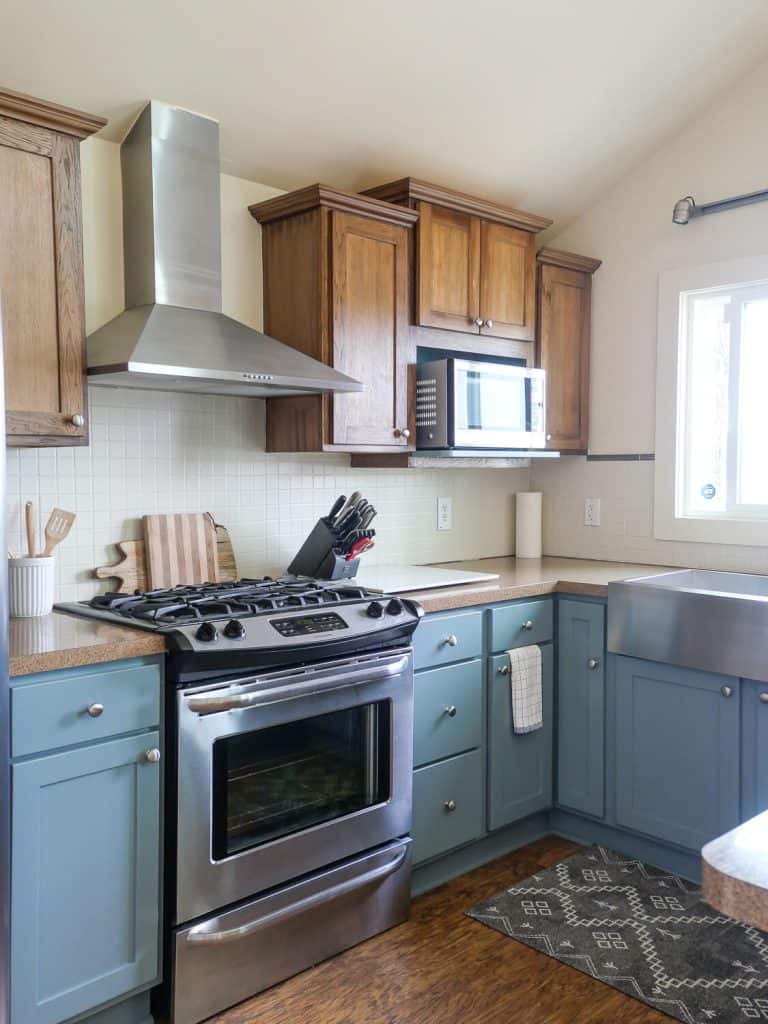
Today, I’ll be tackling our Airbnb kitchen cabinets for this tutorial. As you’ll see, I also painted the tile backsplash using this tutorial.
And I discovered a method to fake the look of wood for the crown moulding and the sides of the upper cabinets!
Materials Needed to Paint Cabinets
To properly prepare and paint cabinets that have already been painted, you’ll need to first gather these supplies.
- Painter’s Tape
- Paint Brush
- Mini Paint Rollers
- Roller Trays
- TSP
- Sand paper
- Tack cloth
- Painting pyramids (Alternatives that work well: canned goods, flat bottom glasses or low bowls)
- Drop cloths
- Cabinet Paint
Optional, as needed
- Bondo wood filler
- Liquid sand paper
- Caulk
- Primer
- Paint Sprayer
Note: I’ve rounded up my favorite DIY and painting tools in my storefront. Shop all materials in one place, here.
Properly Prepare Your Cabinets for New Paint
Before you even pick up a paintbrush, it’s crucial to properly prepare your cabinets.
This step may seem tedious, but it will ensure that the paint adheres properly and the finished product looks professional.
Start by removing all hardware, including knobs, handles, and hinges. If you plan on reusing the hardware, place them in a safe place where they won’t get lost or damaged. Label them appropriately so reinstallation is easier to tackle.
How to Clean Cabinets Prior to Painting
Next, thoroughly clean the cabinets with TSP or soap and water, making sure to remove any grease or grime.
TSP is a great industrial strength cleaner, however it can react negatively to some paints. So make sure to read the label of your paint to ensure that it can be used with TSP.
I go into great detail on how to clean cabinets prior to painting in this tutorial.
Repair and Sand Cabinetry
If your cabinets have damage or peeling paint, it is essential that you take the time to repair the damage and then sand them smooth. Bondo wood filler is a great option for filling cracks, dings, and dents.
At this stage, you’ll also want to fill any old hardware holes if your new hardware needs to be placed in a different spot.
Alternatively, if your cabinets are in good shape you can simply sand the cabinets lightly with 100-150 grit sand paper to remove any gloss or sheen, allowing the primer to adhere properly. Alternatively, you can use liquid sandpaper as a deglosser to avoid a mess.
You can learn how to paint cabinets that are in good shape without sanding in this tutorial.
Finally, use a tack cloth to remove any remaining dust or debris. Proper prep may take some time, but it’s worth it in the long run to achieve a flawless finish.
As important as proper prep is, choosing the right paint is just as crucial. Keep reading to learn about the types of paint to use and avoid when painting cabinets.
Prime If Needed
Priming cabinets that have already been painted prior to painting them again is not always necessary.
However, it is an important step if you have done any repairs to your cabinetry or are dealing with a previous paint job that was done poorly.
Primer will help protect your cabinets. In addition, it creates a smooth base to help you get better adhesion and truer color from your paint.
Priming is an excellent way to give your cabinetry the best surface for good paint adhesion. However, if you’re cabinets are in great shape, cleaning them may be enough.
Personally, I have done both. I have primed previously painted cabinets before painting. I’ve also simply cleaned them and painted a fresh topcoat without priming.
Both have held up well, however, you’ll need to determine whether or not your specific project would benefit from priming first.
Choosing the Right Paint
Choosing the right paint for your cabinets can make all the difference in achieving a flawless finish.

While it may be tempting to use a leftover can of paint from a previous project, it’s important to choose a paint that is specifically designed for cabinets. Look for a paint that is labeled as “cabinet and trim paint” or “furniture paint.”
These types of paint are formulated to withstand wear and tear, resist chipping and peeling, and provide a smooth and durable finish.
Avoid using traditional wall paint or latex paint, as they may not adhere properly or stand up to the daily wear and tear that cabinets endure. Additionally, oil-based paints may provide a durable finish, but they can be difficult to work with and have a strong odor.
Instead, opt for a water-based alkyd or acrylic enamel paint, which dries quickly and cleans up easily with soap and water.
When you’re ready to tackle the painting step, always apply two to three coats of paint.
This will give you the full saturation of color, as well as the best durability. Sand lightly between coats, but not after your final finish coat.
If you’re looking for painting tips, make sure to check out these tutorials:
Can I Use Water-Based Paint on Top of Oil-Based Paint?
When painting cabinets that are already painted, you need to know what type of paint is already on your cabinetry. Oil based paints cannot be painted over with water based paints.
If you don’t know what type of paint was used on your cabinets before, dip a cotton ball or cotton pad into a small amount of denatured alcohol. Gently rub the denatured alcohol in an inconspicuous area of the cabinet (I like to use the inside of a drawer or cabinet door).
If the paint doesn’t come off, it is oil-based paint. Remnants of paint on your cotton swab is an indicator that it’s likely not oil-based paint.
If you have oil based paint on your cabinetry, you must use a primer on top of oil based paint before finishing with a top coat. Skipping this step will cause your water based paint to bead up and peel off down the road.
I like both Kilz bonding primer and Zinsser Oil Based primer for use on cabinetry.
Conversely, if you are painting over water based paints, you can use an oil based paint on top, if desired.
The Best Paint Finish for Cabinets
In addition to choosing the right type of paint, consider the finish.
I prefer a satin or semi-gloss finish for cabinets, as it provides a durable and easy-to-clean surface. Avoid using a high-gloss finish, as it may highlight imperfections and blemishes on the cabinets.
Flat or eggshell finishes are also options to avoid as they are less durable and show fingerprints and smudges easily.
The Best Type of Paint for Painting Already Painted Cabinets
There are a lot of paint options to choose from when deciding how to paint cabinets that are already painted. Here’s a quick break down of the various paint options.
Oil Based Paint
Oil based paint is an amazingly durable paint option which is perfect for painting cabinets. Once painted, your cabinets will clean up well, be extra durable, and have the smoothest finish.
However, the cons of using oil based paint often causes people (myself included) to opt for other options.
Oil based paint is odorous and is a more time intensive clean up. Plus, once you’ve painted with oil based paint, you should not paint overtop with latex as it won’t adhere well. So once you’ve chosen oil based paint for your cabinets, you’re all in!
CERAMIC ENAMEL OR URETHANE ALKYD PAINT
I’ve grown very fond of using ceramic enamel paint on trim and baseboards, and that has extended to cabinets as well.
It comes in a semi-gloss or satin finish and dries to a hard, durable finish. It dries quickly and offers easy clean up.
Our painter introduced me to this type of paint years ago and it’s been my go-to choice of paint for areas that I need high durability since!
Another similar option is Urethane Alkyd Semi-Gloss Enamel. This provides a similar finish to oil based paint, but with water clean up. It is one of the most durable finishes and can also be painted on metal.
CABINET & DOOR PAINT
Of course, they make paints for almost any specific surface these days! So don’t overlook the value of a paint made specifically for cabinets and doors.
These are formulated specifically for a high traffic area and will offer great clean up and a long lasting finish.
When looking at the options for cabinet paint, I have had great success with Magnolia Cabinet Paint as well as Benjamin Moore Advance Cabinet Paint, both found at Ace Hardware.
By taking the time to properly prepare your cabinets and choosing the right paint, you can ensure a flawless finish that will last for years to come.
Speaking of which, let’s talk about the finishing touches that can take your cabinets to the next level.
Finishing Touches Matter
While choosing the right paint type and finish is crucial for a flawless cabinet painting job, it’s the finishing touches that can take your cabinets from good to stunning.
After painting, consider adding new hardware such as handles and knobs to refresh the look. You can also add decorative features such as molding or trim to create a custom look.
Another finishing touch is the proper sealing of painted cabinets. When using a cabinet paint, this step is considered “extra.” However, may be beneficial if using a lower quality paint.
A clear coat of polyurethane can add an extra layer of protection to your cabinets, making them more resistant to wear and tear. However, be sure to use a non-yellowing polyurethane to prevent any discoloration.
But before you get to this step, it’s important to avoid common mistakes that can ruin your hard work.
Avoid These Common Mistakes When Painting Your Cabinets
While painting your cabinets may seem like a simple task, it’s important to keep in mind that there are some common mistakes that can turn your project into a disaster.
Here are a few things to avoid when painting your cabinets:
- Rushing the Preparation Process: Before painting, it’s essential to prep your cabinets properly. This includes cleaning them thoroughly, sanding them down, and taping off any areas you don’t want to paint. Skipping or rushing this step can result in a sloppy and unprofessional-looking paint job.
- Using the Wrong Type of Paint: Not all paints are created equal, and using the wrong type of paint can lead to chipping or peeling. Make sure to choose a high-quality paint specifically designed for cabinets, and avoid using regular wall paint.
- Painting Over Cabinets That Are Not Dry: If you’ve recently cleaned your cabinets, make sure they’re completely dry before you start painting. Painting over damp cabinets can result in bubbling or peeling paint.
- Not Allowing the Full Dry/Cure Time: Every paint is different. It is vital to follow the manufacturer’s instructions for dry, re-coat and cure time. If you re-coat too soon, or begin using the cabinets before they have fully cured, then your cabinets will be much more susceptible to damage down the road.
- Forgetting to Label Doors and Hardware: When taking doors and hardware off your cabinets, make sure to label them to avoid confusion when it’s time to put everything back together. This will save you time and headaches in the long run.
By avoiding these common mistakes, you can ensure that your cabinet painting project goes smoothly and results in a beautiful finished product.
If you’re new to DIY and want to learn how to paint anything like the pros, make sure to check out my ebook, DIY YOUR DREAM HOME. This 58 page guide will teach you how to paint anything in your home like a pro. Plus, snag free paint labels and my paint planner too!

Frequently Asked Questions
Can You Paint Over Painted Cabinets?
Obviously, it is possible to paint over painted cabinets when following the steps in this tutorial. However, you will want to consider a few things first.
- What type of paint is already on your cabinets? Make sure to test for oil based paint as instructed above to avoid a big headache down the road.
- How many layers of paint are on your cabinets? Too many layers of paint can cause obstructions to hinges and opening and closing drawers. Make sure there is space to accommodate more layers of paint.
- Are you painting over lead based paint? If you’re painting very old cabinets, make sure to test for lead based paint first. You DO NOT want to sand lead based paint as it is toxic and can cause harm.
Do I Sand cabinets Already Painted to Paint again?
In the prep steps stated above, we discussed sanding or deglossing your painted cabinets.
Removing any gloss or sheen is very important to help your new coat of paint adhere to cabinets properly. Sanding not only removes that slick surface, it also smooths out any imperfections.
However, it is a messy and tedious step. If your cabinets are in good shape, you can avoid sanding by using a deglosser and following this tutorial.
What is the Best Paint for Cabinets That Are Already Painted?
As you saw above, there are a lot of viable paint options for painting cabinets that are already painted.
However, my favorite option is to prime first, and then follow with ceramic enamel or alkyd cabinet paint. Behr, Magnolia and Benjamin Moore all offer excellent cabinet paint with a smooth finish and high durability.
Should I Spray or Hand Paint Cabinets?
There are pros and cons to both spraying and hand painting cabinets.
Spraying requires much more prep, but is faster and gives a smoother finish.
Hand painting gives more flexibility for timelines that require starting and stopping, smaller work areas where you can’t hang doors, and for those who don’t want to invest in a sprayer.
Both options work well, but I tend to stick to hand painting simply because I don’t have a way to set up a spray booth well in our climate. You can view more pros and cons to both options in this article as the same principles apply to painting cabinets as interior doors.
More Painting Tips and Tricks
A quick recap: Proper preparation is the key, from cleaning and sanding to removing hardware and taping off areas. Selecting the right paint and finishing touches, such as sanding between coats and applying a clear topcoat, can have a huge impact on the outcome.
Remember to avoid common mistakes like skipping the priming step or rushing the drying process. By taking your time and following these tips, you’ll be able to transform your space with a beautiful, lasting finish.
As the saying goes, “Measure twice, cut once.” The same goes for painting cabinets – do it right the first time, and enjoy the results for years to come.
Thanks for stopping by the blog today! Make sure to subscribe to get my Grace Notes directly to your inbox and to access all my insider perks. You can also follow along daily on Instagram and weekly on YouTube!
You can find so many more painting tutorials below!
~Sarah


Would you recommend ceramic enamel paint for stair banisters and railings- or something else? The previous owners of our home had the stair banisters (previously wood stained) painted over with white paint. The paint job was done poorly, with many areas becoming gummy to the touch. I’m not sure it the contractor didn’t prep the surface properly first, used the wrong kind of paint, or both. Anyway, I’m planning to sand off the paint, prime and repaint. Thanks in advance for your paint recommendation!
That would be a good choice! It’s possible the previous owner didn’t prime and prep properly. Make sure to give each coat the full curing time when you redo it. You’ve got this!
I paid to have our house remodeled and I’ve learned that they failed to do things properly. The kitchen cabinet paint is gummy in areas due to the heat. What paint gets gummy? What paint prevents this? I saw your suggestions and just trying to avoid this happening again…
It could be a number of things. They may have painted over cabinets that wasn’t cleaned and prepped properly. They may have not waited long enough between coats. Or it might not have cured fully yet. It could be old paint that was used, but I’d say one of the other options is more likely.
Choosing paint color for kitchen cabinets is also very important because it will create a cozy feeling for the kitchen.
Currently trying to remodel our kitchen on a budget, it’s a very old house (1930s I believe) with LOTS of cabinets. I know the cabinets have oil paint on them now, I’ve cleaned them and in the process of using a TSP substitute then sanding them. I’m very nervous to not get it done right but want to keep it cheap as can be! Based on your article, I think I’ll get the Zinsser primer and either Magnolia or Behr paint, if you recommend those being the best choice and relatively affordable. I’m by far no expert at this so any suggestions are welcome!
Those are great choices! Good luck with the project.
I had my house painted before I moved in, in August 2022. They painted my island with an oil base paint in a high gloss black. NOT what I asked for and I absolutely hate it. If I sand the gloss off and put a primer on, do I still need to go with an oil based paint?
Thank you for your time.
So sorry that happened! If you use an oil based primer, you can use a latex top coat. Good luck!
I am deep into getting my bathroom cabinets prepped for painting. I painted them last year only to find out I did a horrible job and whoever painted them before me also cut corners. 😅so I have 2 layers of paint peeling off most of the cabinets but there’s some spots that are not peeling. So it’s leaving me with some not so smooth cabinets with different levels of paint on them. What should I do to get it all on the same level before taking the next step?! This is especially bad where the cabinets meet the walls like in the seems.
I would strip or sand them clean and start from scratch. Peeling paint sounds like you may have painted over oil based paint with latex paint, which means you will have problems long term if you don’t get back to bare wood. That’s your best bet!
I had no idea that preparing to paint your cabinets is perhaps the most important part. You make a lot of compelling arguments though. I learned so much from reading this.
Indeed, you might use it in that situation as well. Simply make sure that everything is well sealed to prevent any harm from moisture!
The kitchen looks beautiful! Will the Retique liquid wood that you used for the cupboard molding, etc, also work on bathroom under sink cupboards to make them look like wood? We want to redo some cupboards in our bathroom and were thinking of painting over the existing paint. After watching your video about the molding, we wondered if it would also work on cupboards. We would appreciate any words of wisdom. Thank you so much for sharing all your ideas and DIY 🙂
Hello! Yes, it would work there as well. Just make sure to seal it to avoid moisture damage!
Thank you! We might give it a try 🙂