
How to Paint a Tile Backsplash: Kitchen Renovation 2026
There is nothing I enjoy more than a DIY budget kitchen renovation! Today I’ll be giving an easy tutorial on how to paint a tile backsplash so it doesn’t chip or peel.
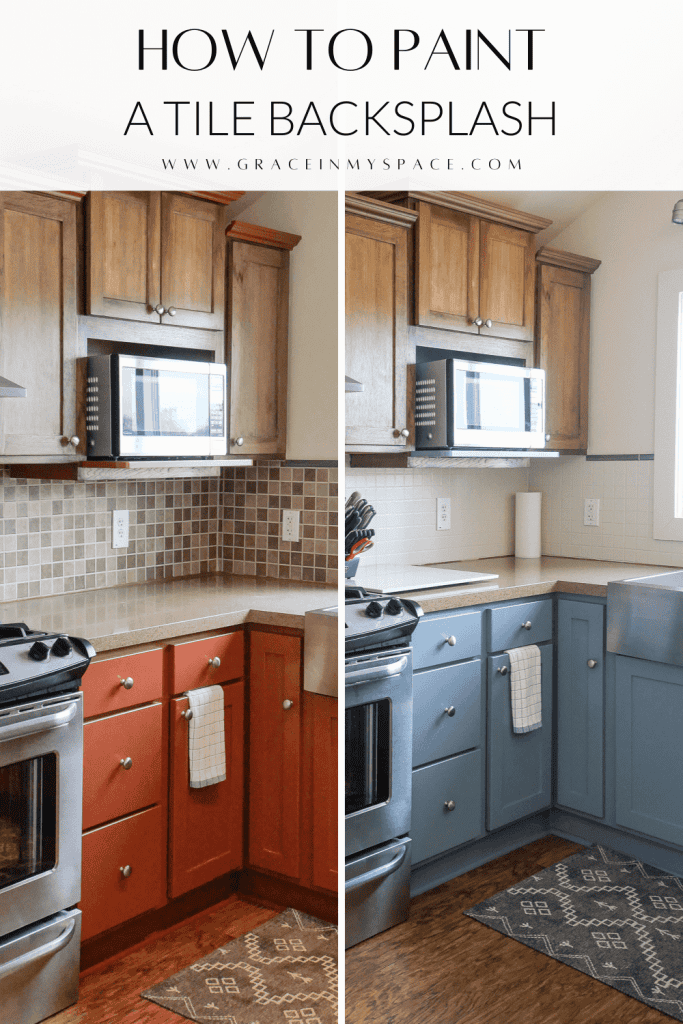
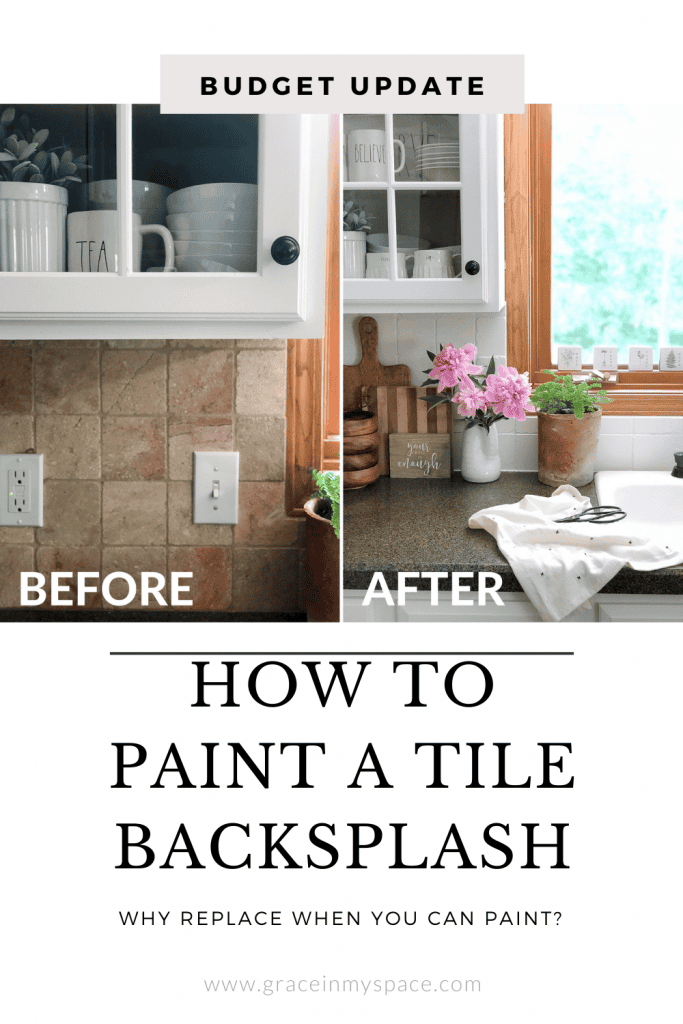
This simple tutorial will transform your outdated tile backsplash in one day for a fraction of the cost of new tile. I can’t wait to show you the transformation.
If you’ve missed the rest of the series on my DIY budget kitchen renovation, you can read all about how I painted my kitchen cabinets {here}.
Post may contain affiliate links where I earn a small commission at no extra cost to you.
Originally published June 2018, Updated January 2026.
How to Paint a Tile Backsplash
As you’ll see in this post, this is a tried and true method I’ve personally used on multiple kitchens.
This method works best on non-glass tile like ceramic, travertine, and porcelain. Make sure to read the full tutorial to learn everything you need to know to paint a tile backsplash!
Can You Paint Over a Tile Backsplash?
Let’s start by answering a commonly asked question, “Can you paint a tile backsplash?” Yes you can!
Painting a tile backsplash is the most affordable way to update outdated tile. There is no demo, no cost of new tile, and no tedious installation.
Thankfully, most tile surfaces are paintable. You simply need the right prep work and materials for your specific project. See below for exactly what you need to complete this project successfully.
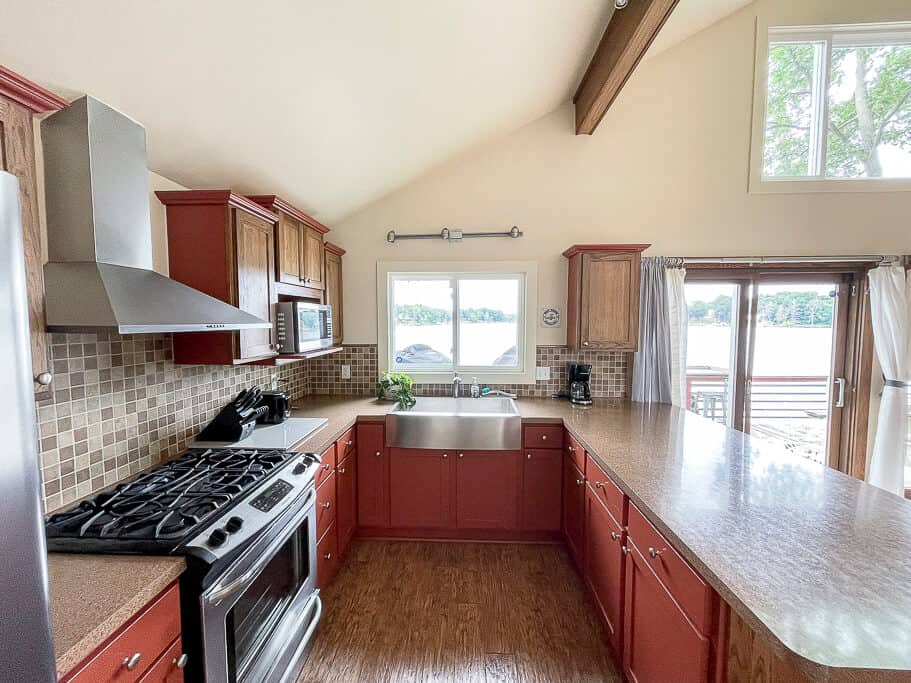
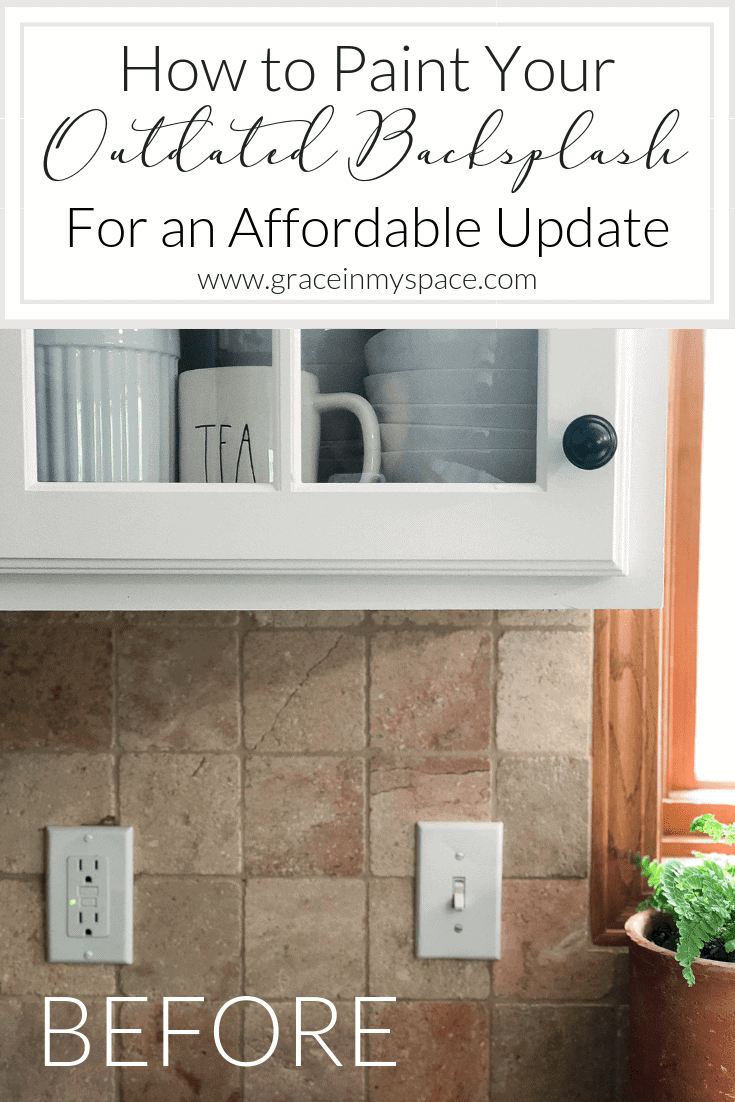
Painting Travertine Backsplash: Before
Everyone loves a good before and after. Here is our tile backsplash before.
Note that this is not your traditional ceramic tile. It is travertine, which is more porous; however, the process remains the same for both.
You can see some additional suggestions for painting a ceramic tile backsplash in step 4.
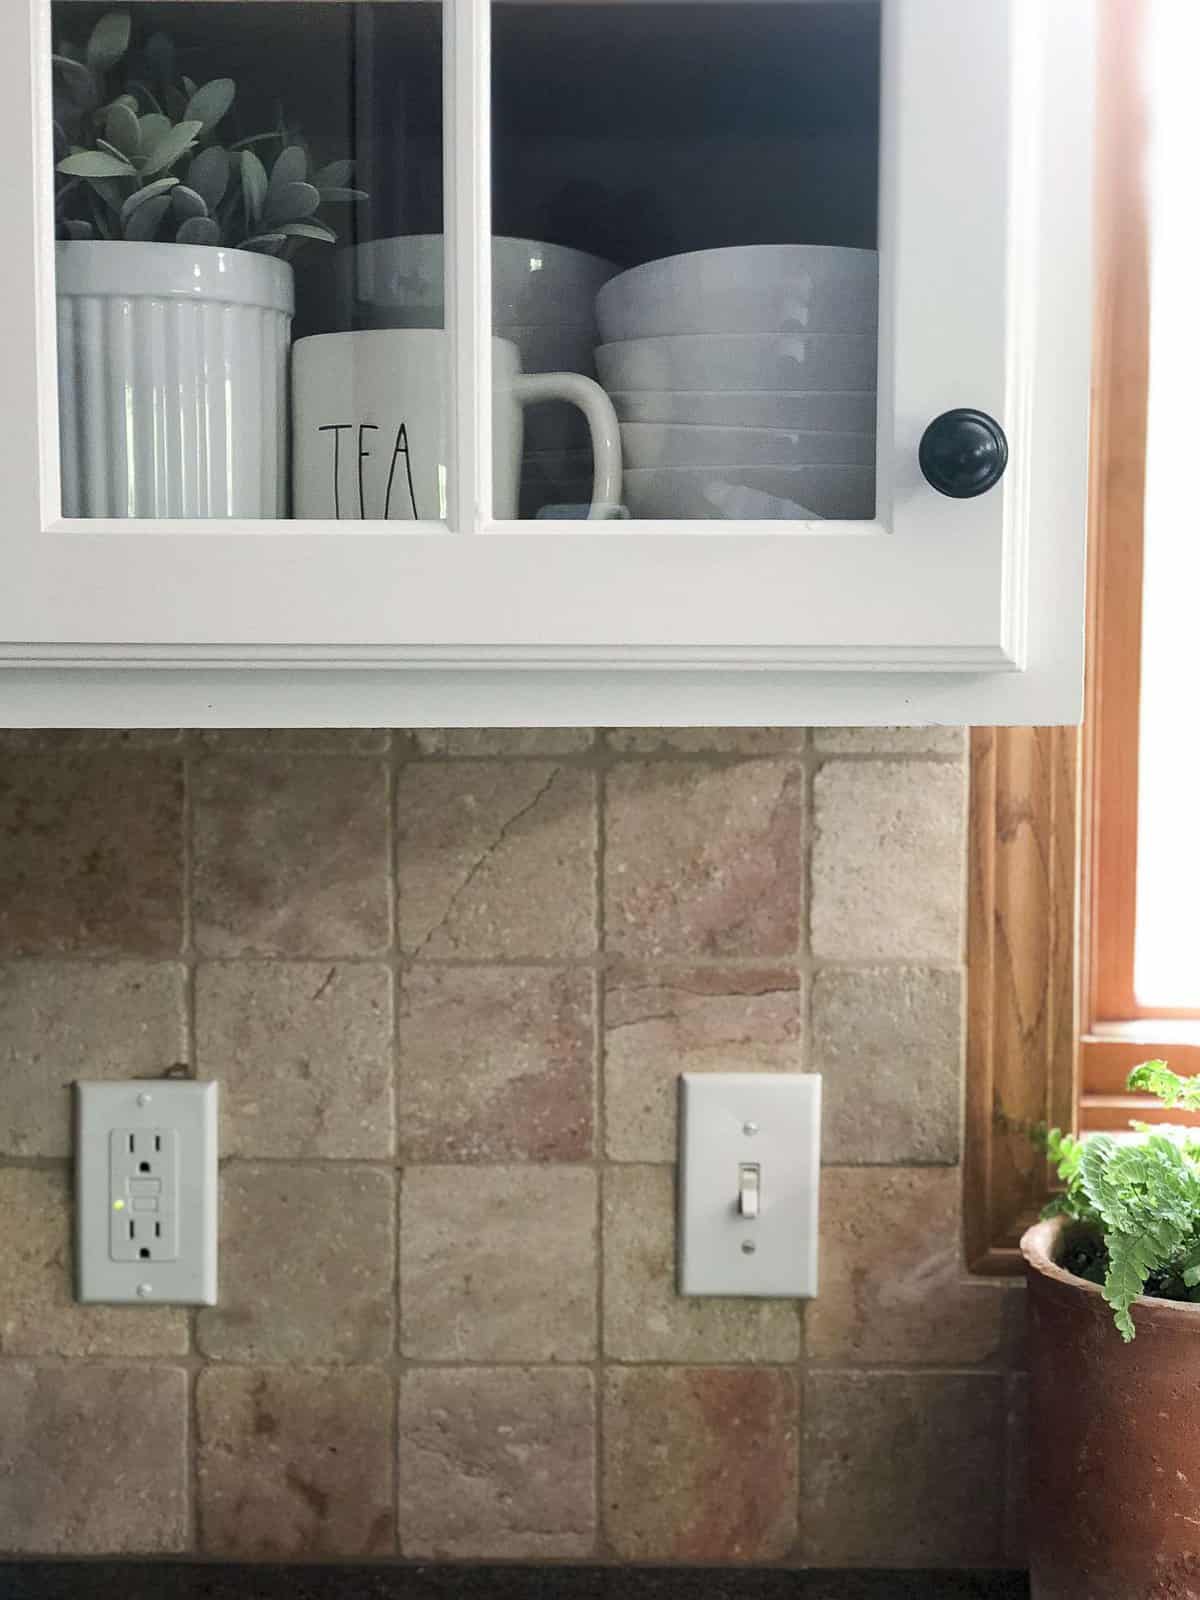
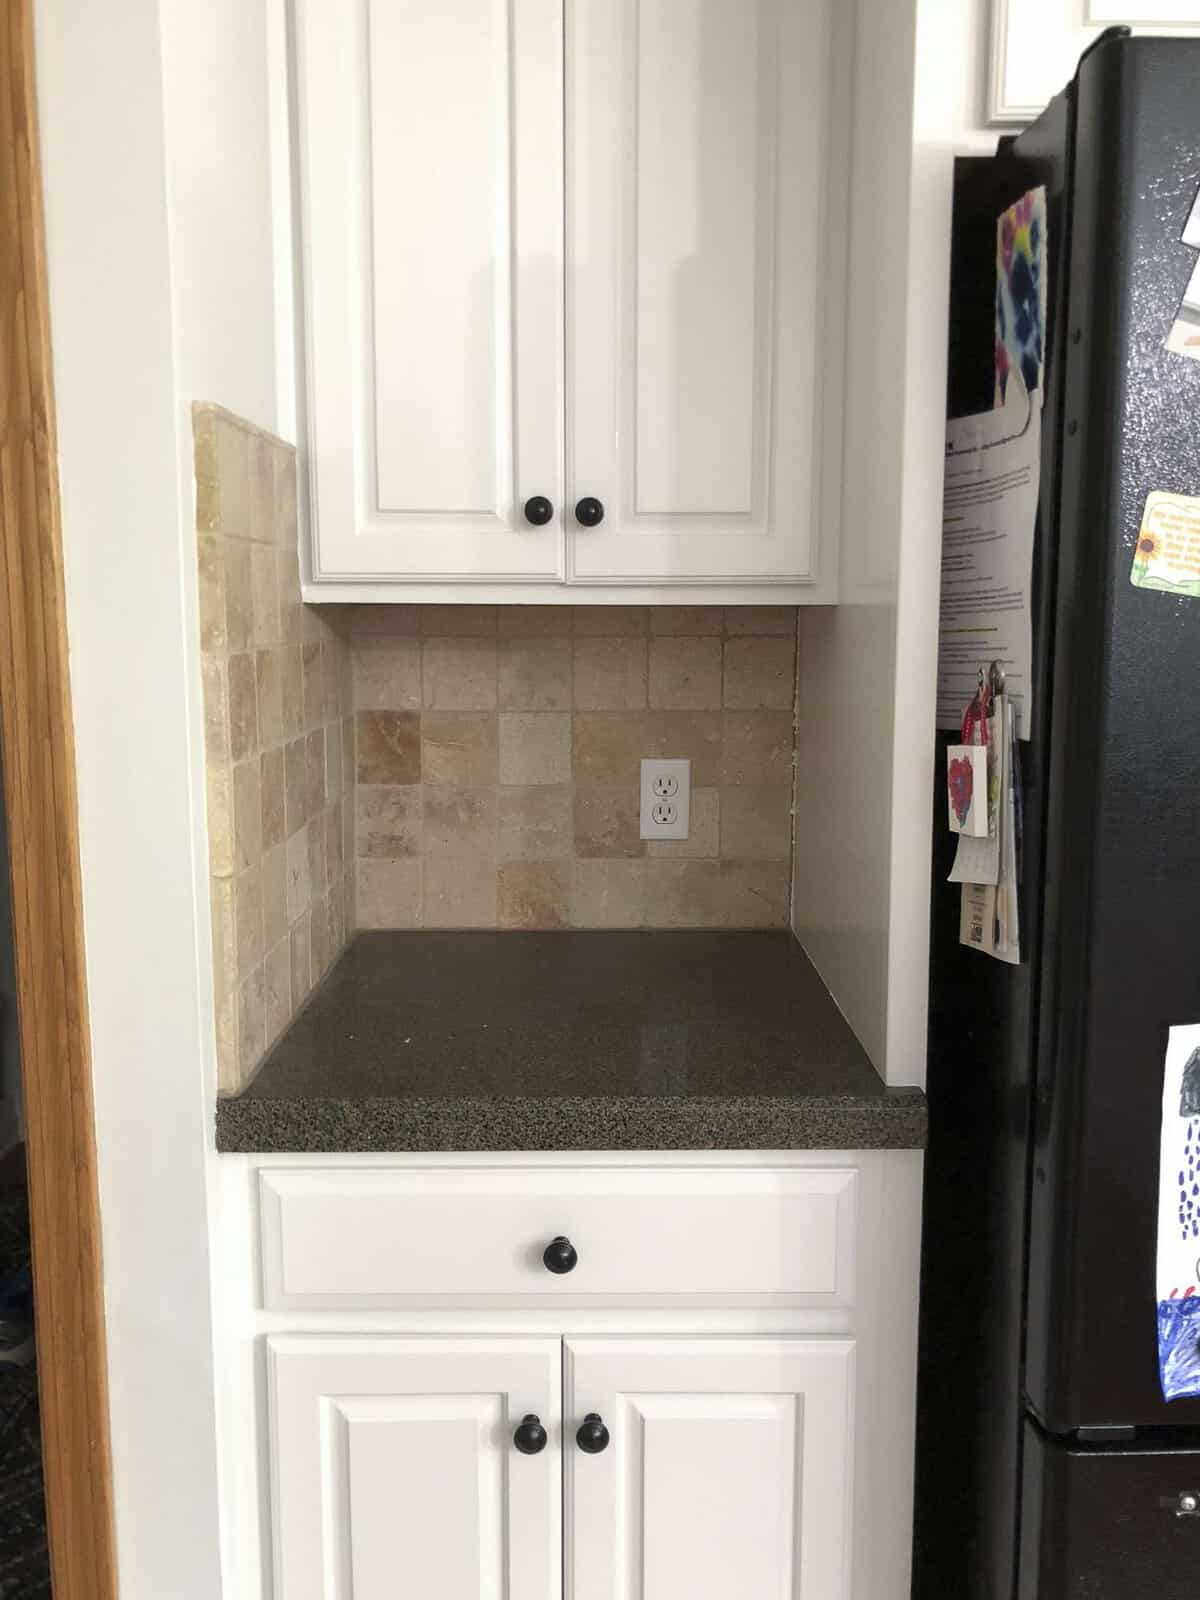
Many may call this tile neutral and already updated. I really didn’t mind our tile backsplash prior to painting our cabinets white.
However, once the cabinets were fresh and clean the tile just screamed at me to paint it too! The biggest issue for me is that the busyness of the countertops combined with the tile pattern weren’t cohesive.
In reality, I didn’t pay one penny for this project because I used all left over materials from our kitchen cabinet renovation. If you are solely painting your kitchen tile backsplash, then the cost will still be very minimal.
Materials Needed for Painting a Tile Backsplash
Similar to painting our kitchen cabinets, the materials for painting tile backsplash are listed below!
- TSP
- Calcium/Rust Cleaner for glossy tile
- Rubber Gloves
- Bucket
- Rag or sponge
- Heavy Duty Primer
- High Quality Paint (They make tile paint! However, I just used a semi-gloss interior paint and it worked perfectly.)
- Mini 4″ Paint Rollers (Multiples! I used at least 2 for my backsplash.)
- Paint Tray
- High Quality Paint Brush (THIS is my favorite brush.)
- Saran Wrap + Tin Foil for preservation of brushes and rollers in between coats
- Painter’s Tape
- Drop Cloths if needed (I didn’t use any, but I’m a pretty clean painter.)
Most DIY projects include painting at some point, so I like to stock up on painting supplies ahead of time. That way I always have the painting materials I need when project inspiration strikes!
If you are new to following along at Grace In My Space, make sure to check out my DIY toolkit in my storefront full of all my favorite DIY tools.
The Process for Painting a Kitchen Backsplash
If you’re new to DIY and want to learn how to paint anything like the pros, make sure to check out my ebook, DIY YOUR DREAM HOME.
This 58 page guide will teach you how to paint anything in your home like a pro. Plus, snag free paint labels and my paint planner too!

Step 1: Clear Your Counters + Protect Surfaces
The first step to painting your kitchen backsplash is to clear everything out of the way.
Clear your counters, remove outlet covers and prepare your work surface. It is best to have a home base for all your materials, whether that is a work table or kitchen island.
At this point, inspect your backsplash to see if there is any excess caulk build up. Using a flat utility knife, scrape any over-caulk off the tiles.
Many times builders do not use paintable caulk on the backsplash to countertop seam, so you need to remove the excess for the paint to adhere correctly.
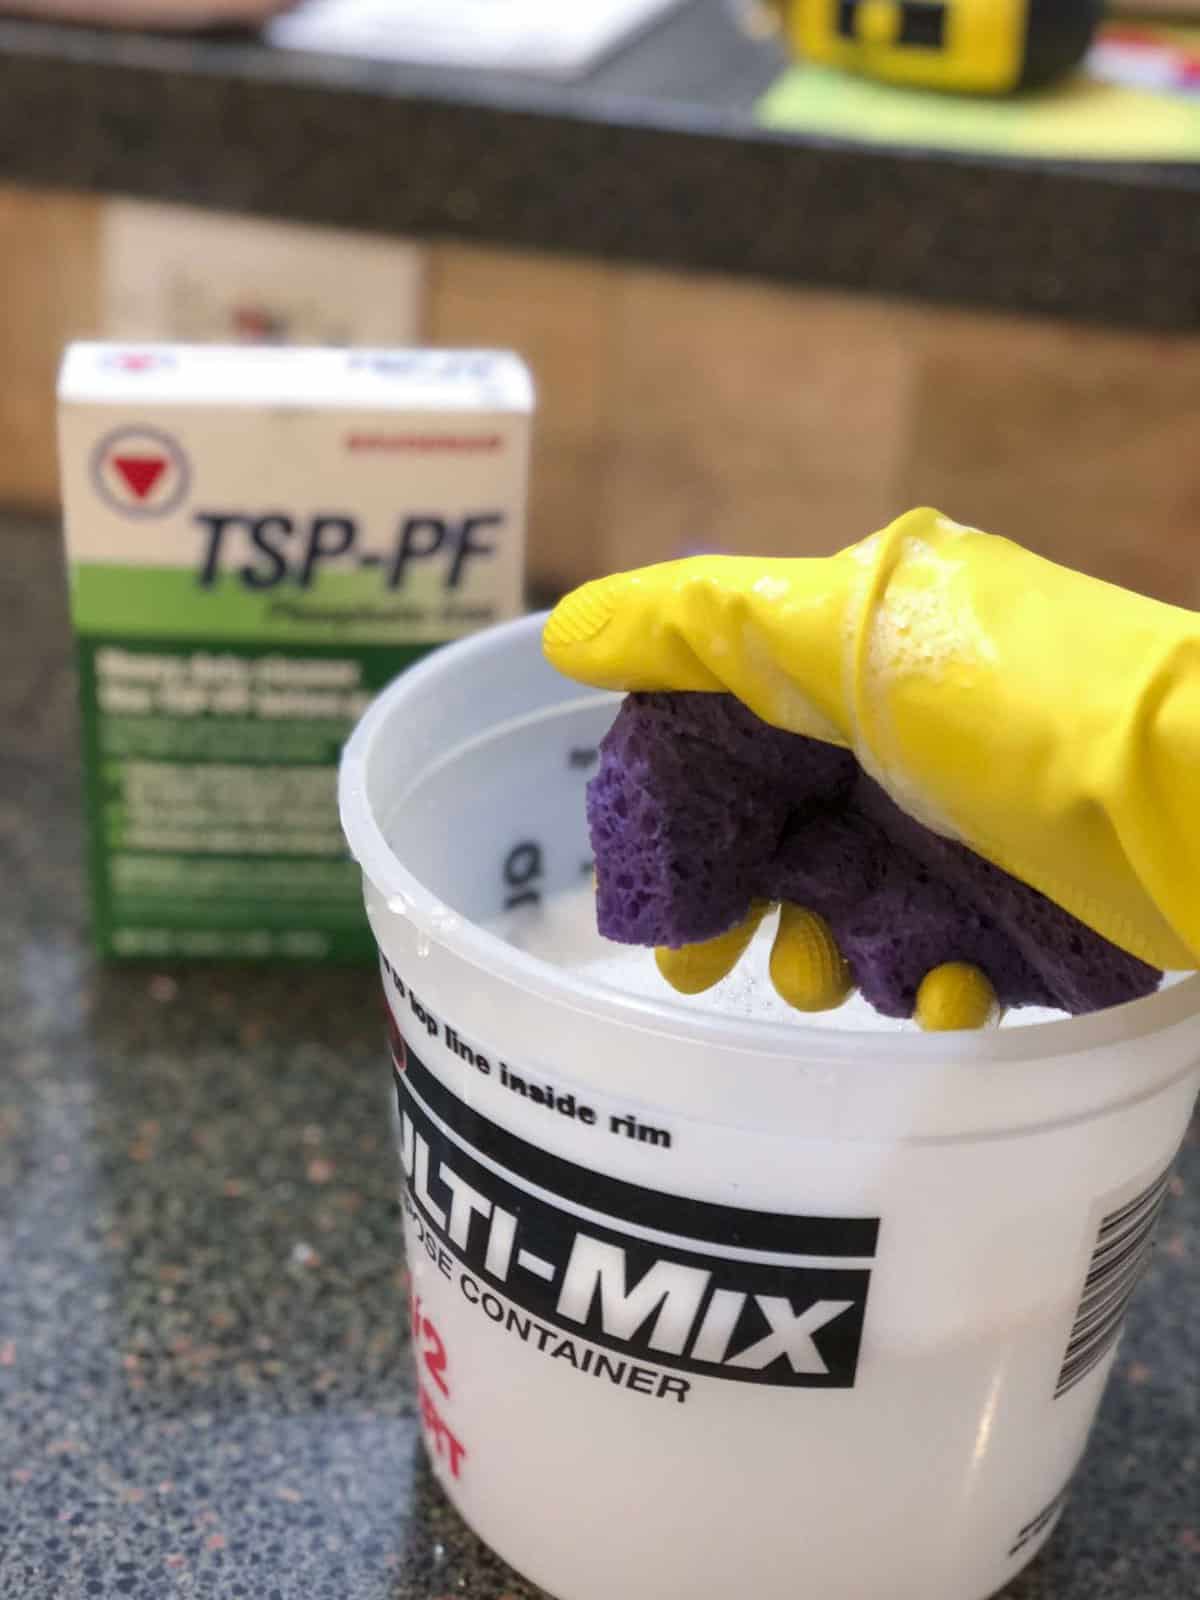
Step 2: Clean Your Tiles
Next, using the TSP according to package directions, wipe down your backsplash to remove any residue or grime. This is arguably the most important prep step.
Make sure to look closely for splattered food from cooking or any greasy residue. Your tile should be fully clean and dry. Paint will not stick to grease and dirt!
Pay special attention to the area behind stoves and sinks, as those are often the dirtiest.
Step 3: Tape Your Countertops
Next, protect your surfaces.
Place plastic or canvas drop cloths on your countertops to catch any paint splatter. Use painter’s tape to adhere your plastic drop cloths to your counter so there is a clean paint line. This also holds your drop cloth in place.
I taped the edge of my countertops, along my window trim, as well as the sides of my kitchen cabinets where they joined.
Step 4: Etch the Surface
My tile is a porous tile, which is more likely to soak in paint than many other kitchen backsplashes. Depending on your tile type, you may need to etch the surface so the paint adheres well and is long lasting.
To etch the surface of a glossy tile, start by cleaning it with a calcium/rust cleaner. Clean your tile backsplash with the cleaner and a sponge and then let it dry.
Next, use a very fine grit sandpaper, I recommend 400 grit, to rough up the surface further. Do not use a course sand paper as that will leave visible scratches on the surface of your tile.
After you’ve etched the surface of your tile backsplash, clean it with a damp cloth. Let it dry fully so that the tile and the grout are completely dry.
What Kind of Paint Do You Use on Tile Backsplash?
The next step is to prime and paint your final color onto your kitchen tile backsplash. You have several paint options which will all work well to paint a kitchen tile backsplash.
The best paint for a kitchen backsplash is one of the following:
- Semi-Gloss or gloss latex interior paint with proper primer
- Gloss enamel paint
- Tile epoxy paint
Latex Paint v. Epoxy to Update Tile Backplash
At this point, you have a choice!
Using the above preparation steps, you’ll be able to use a simple latex interior paint or gloss enamel paint to paint your tile backsplash. However, you also have the option to use a tub and tile epoxy specifically made to paint tile.
Pros and Cons of Latex Paint v. Tile Epoxy
There are a pros and cons of each type of paint.
Latex Pros and Cons
First, let’s discuss the option I used on my first kitchen, an interior latex paint.
The pro of using latex paint or a gloss enamel paint is that it is more affordable, readily available, and can be tinted to any color of choice. It is easily applied with a paint brush and roller, and offers easy clean up during the painting project.
Conversely, using a latex paint requires you to prime your tile with paint primer to help with adhesion and longevity. Additionally, it can be less durable than an epoxy paint.
I used our kitchen for almost a year with the painted tile prior to our full kitchen remodel.
In that year, I never had any chips, cracks or peeling from my painted tile backsplash.
Enamel
However, I painted my cottage kitchen tile in 2021 with an enamel paint and it’s still going strong, even being used heavily as an Airbnb!

Even though I’ve seen excellent results, latex paint would traditionally be considered the less durable option. Enamel paint would be the next best option to honor all the pros of latex paint, but with more durability.
Epoxy Pros and Cons
On the other hand, the pro of using epoxy is that it is highly durable.
It is made specifically to adhere to tile, and offers a glossier surface. It also holds up to moisture very well. This makes it easier to clean and less susceptible to chips and peeling.
Epoxy tile paint sticks to a kitchen backsplash most effectively.
The two main cons of using epoxy paint is that it can be more expensive, depending on the square footage you need to cover, and is highly odorous.
So if you choose to go this route, make sure you have proper ventilation.
If you decide to use an epoxy, simply do all the preparation steps stated above, then follow the directions on your epoxy kit. This tub and tile kit comes highly recommended.
If you decide to move forward using a latex paint or enamel paint to paint your tile backsplash, then continue on with this tutorial. Next up: priming!
Step 5: Prime
Just like with cabinetry, you want to give your paint the best surface possible to adhere to.
Use a high quality primer to prime your tile backsplash. First use a brush to trim out tight spaces and corners and then finish with a roller.
Make sure to pay special attention to your grout lines. Painting grout with a brush can take more paint than expected since the grout tends to soak the paint up quickly.
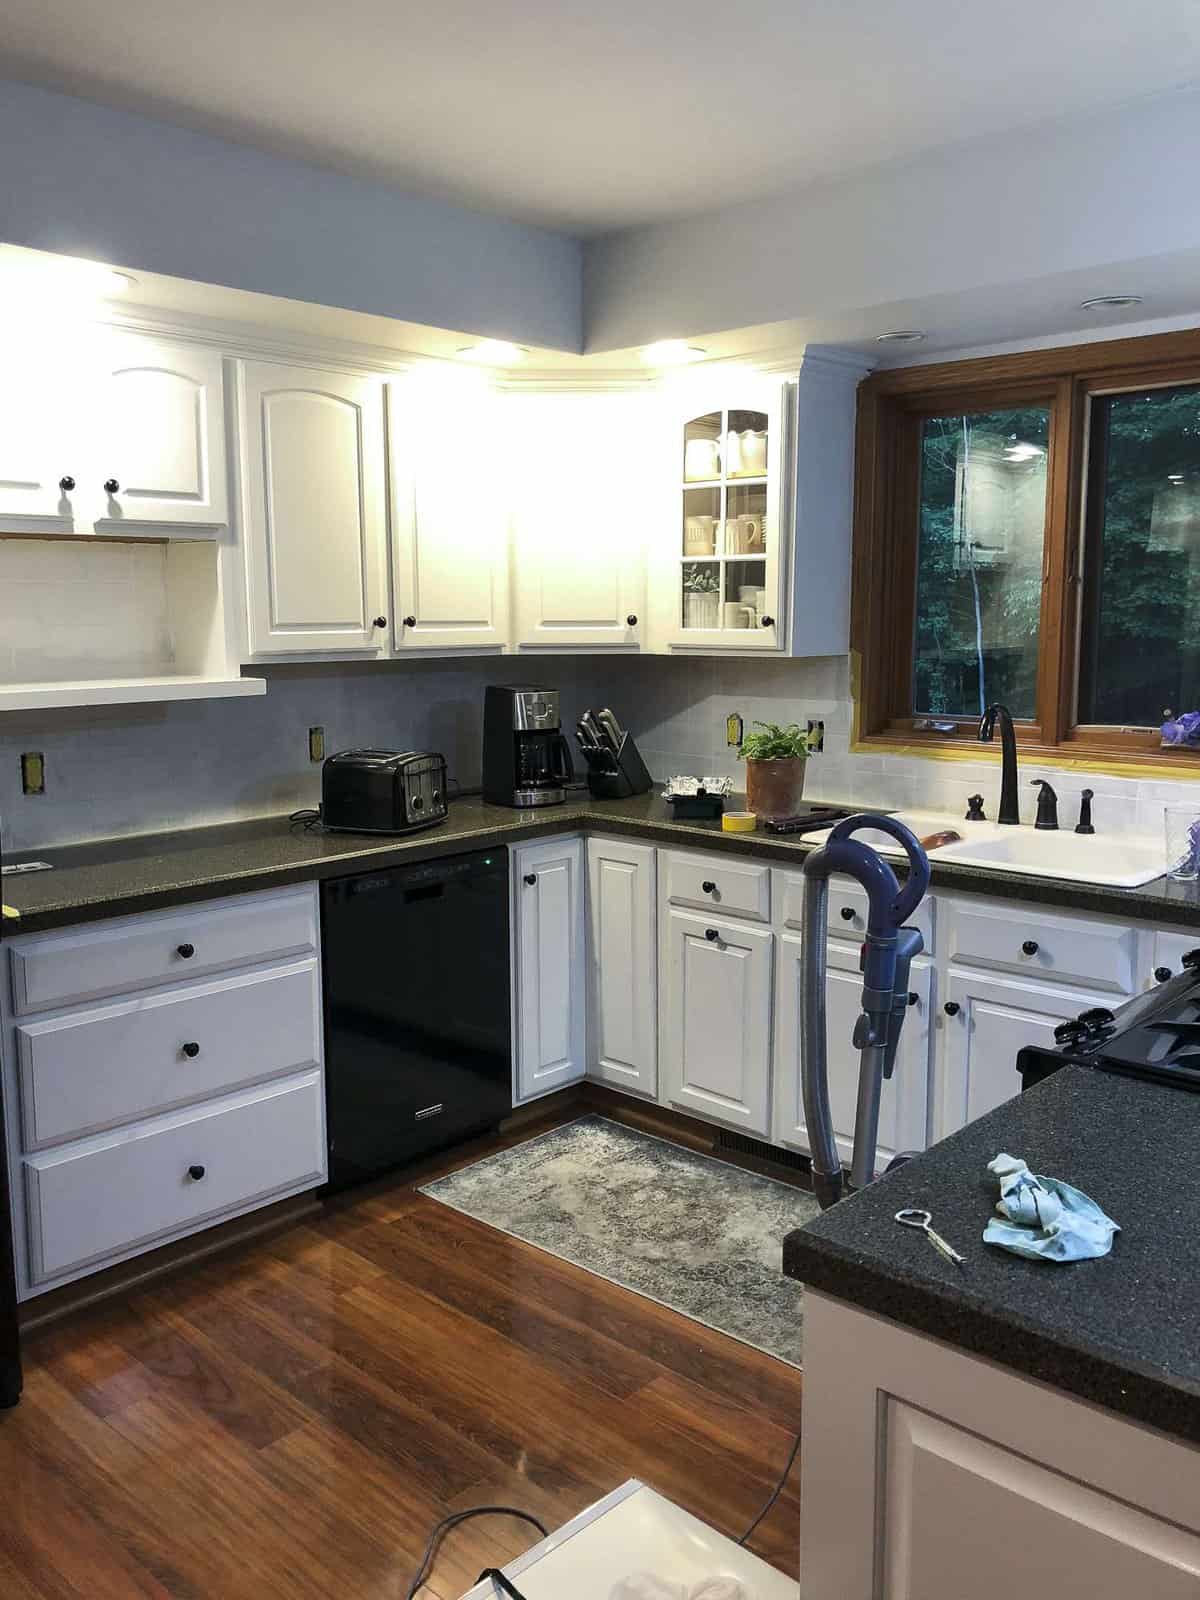
As you can see, I worked on this project at night. But even with the poor quality photo you can see that the primer itself improves this space dramatically already!
I applied one coat of primer and that was sufficient because of the porousness of my tile. However, if you are painting a glossy tile, I would recommend applying two coats of primer to ensure durability on that slippery surface.
Step 6: Paint
Repeat the same process of priming, but with a high quality paint.
I used Magnolia Home’s Cabinetry and Trim paint which comes in a semi-gloss. I highly recommend either using an enamel or a semi-gloss/gloss interior paint.
If you choose to use a matte paint you will need to seal your tiles after painting so they are durable and able to be cleaned.
Apply two coats of paint for extra coverage and durability, allowing ample time between coats to dry fully.
Depending on the color of your existing tile and the color paint you choose, more than 2 coats may be required for full coverage.
Once you’ve applied enough coats for full coverage, you can remove your tape!
As you can see this is SUCH a simple process. If you can paint a wall then you can paint a tile backsplash!
Wait for the paint to be fully dry and cured (at least overnight) before re-installing your outlet covers.
Can Grout Be Painted a Different Color?
If you like the high contrast look, then you might not want to paint your grout the same color as your freshly painted tile. If that is the case, then your project may take a turn towards the tedious.
You can paint grout with a grout paint pen if you desire a contrasting color!
There are many colors of grout paint found available in an easy to apply pen. If you choose to use a grout paint pen, then the process for how to paint your tile backsplash will look a little different.
You can paint your grout one of two ways:
- After preparing the entire backsplash surface with steps 1-4 above, tape off existing grout lines prior to painting your tile backsplash. Then, paint your backsplash tiles fully, remove grout line tape, and use the grout pen to change the color of the grout. If that seems too tedious, try option 2!
- Hand paint each individual tile with a brush without touching the grout lines. Yes, this sounds very hard and prone to mistakes! But it is a viable option if you have a steady hand. Once the tiles are painted, you can leave the original grout or come back with the grout pen to finish off your backsplash.
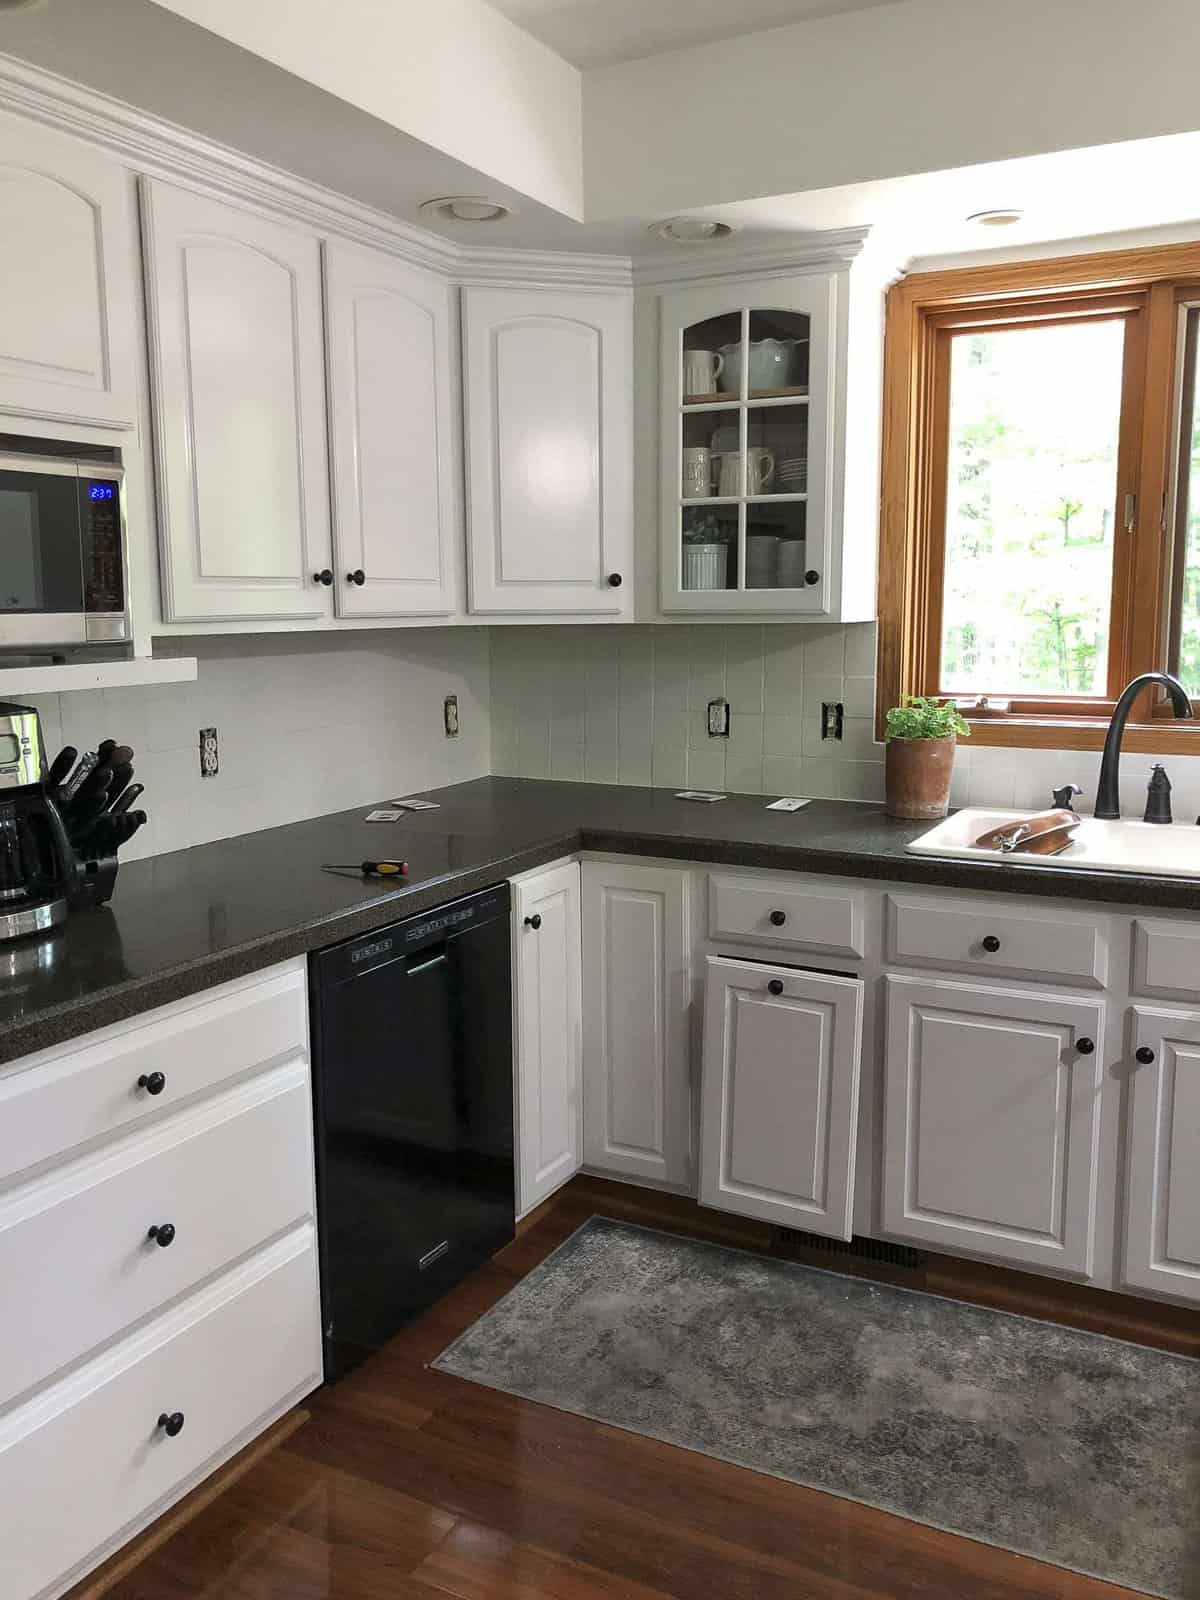
A Painted Tile Backsplash: The Reveal!
Don’t you love how fresh the painted tile is?! It’s a completely different kitchen and the entire transformation was done SOLELY with paint!
Updated: The full DIY kitchen remodel reveal is live {HERE}.
If you missed it in my posts on how to paint kitchen cabinets, I do have a free guide and printable materials list for my subscribers! I hope it is helpful to you if you are renovating the entire kitchen along with painting tile backsplash!
Subscribe now to gain access to this free guide and my free printable library.
I hope this has been a helpful tutorial on how to paint a tile backsplash! I absolutely love to hear from you so if you follow me on Instagram please tag me in your post showing your progress using one of my tutorials!
Make sure to also follow along on YouTube where I get into these projects in detail.
Before and afters are so inspiring to me and I love seeing how you are benefiting from what you’ve read here.
Click here for the full DIY open shelving tutorial + free guide!
Looking for More Painting Tips?
- How to Paint Cabinets that are Already Painted (Avoid these mistakes)
- How to Paint Trim Without Brush Strokes
- How to Paint a Deck
- How to Paint Kitchen Cabinets
- How to Paint Shiplap
~Sarah
Paint Tutorial Archives


Before and after photos are incredibly inspiring! I love seeing how you implement what you’ve learned and the positive changes it brings to your spaces.
Hello!
Your vlogs & blogs helped me with our basement kitchen renovation! We painted the backslash…but the Benjamon Moore paint they sold us only came in a Satin….I’m not happy as it looks so flat!! Can i apply a Polymeric coat to give it shine? Next stop….cabinets! Semi Gloss Benjamin Moore Hale Navy! Using either BM Scuff X or BM Advance
I trust that you will continue to offer the community exceptional content.
I love this article! Thank you for sharing this innovative DIY project~
What a great tutorial! I love the idea of transforming my tile backsplash with paint. The detailed instructions and product recommendations are incredibly helpful. I’m particularly interested in the tips for ensuring durability. Thank you for sharing this innovative DIY project!
This article is fantastic! I never thought about painting my tile backsplash until now. The before-and-after photos really inspired me. Your suggestions on color choices and techniques are super helpful. I’m excited to give this a try and refresh my kitchen. Thanks for the great tips!
You’re so welcome!
I absolutely loved this guide on painting tile backsplashes! The step-by-step instructions were clear and easy to follow. I especially appreciated the tips on surface preparation and choosing the right paint. Can’t wait to try this in my kitchen! Thank you for sharing such valuable information!
I would like you to know how much your words of support and encouragement mean to me; they have assisted me in maintaining a positive outlook and contributing to the advancement of my profession.
A kitchen renovation is a great investment in your home, often boosting its resale value. From choosing the right materials to optimizing the layout, careful planning ensures the renovation meets both your current and future needs.