
Kitchen Remodel on a Budget | The Reveal
Who is ready for the final reveal of my kitchen remodel on a budget?! I’m SO excited to share the final product of our kitchen remodel after many weeks of hard work and dreaming for this day to come. So grab your favorite cup and celebrate with me for the full reveal of our budget friendly kitchen remodel.
This post may contain affiliate links where I earn a small commission at no additional cost to you. The gorgeous pendant lighting featured in this post was provided by Lamps Plus; all opinions and reviews are my own.
The kitchen is a space I spend a lot of time in and in our previous home it was my favorite space. So when we moved to our new house I was sad to leave my dream kitchen knowing a full remodel wasn’t in the cards anytime soon. However, I’m delighted to say that my kitchen remodel on a budget is done (for now) and I am so pleased with how it turned out.
Kitchen Remodel on a Budget
If you’ve missed the previous three posts in this series, you can read all about them below.
- Tutorial on Painting Kitchen Cabinets: Prep + Materials
- Painting Kitchen Cabinets: Paint Tips + Tricks
- Painting a Tile Backsplash
Remember, my subscribers have free access to guides (like my Painting Cabinetry Guide!), DIY project templates and free printables!
Before
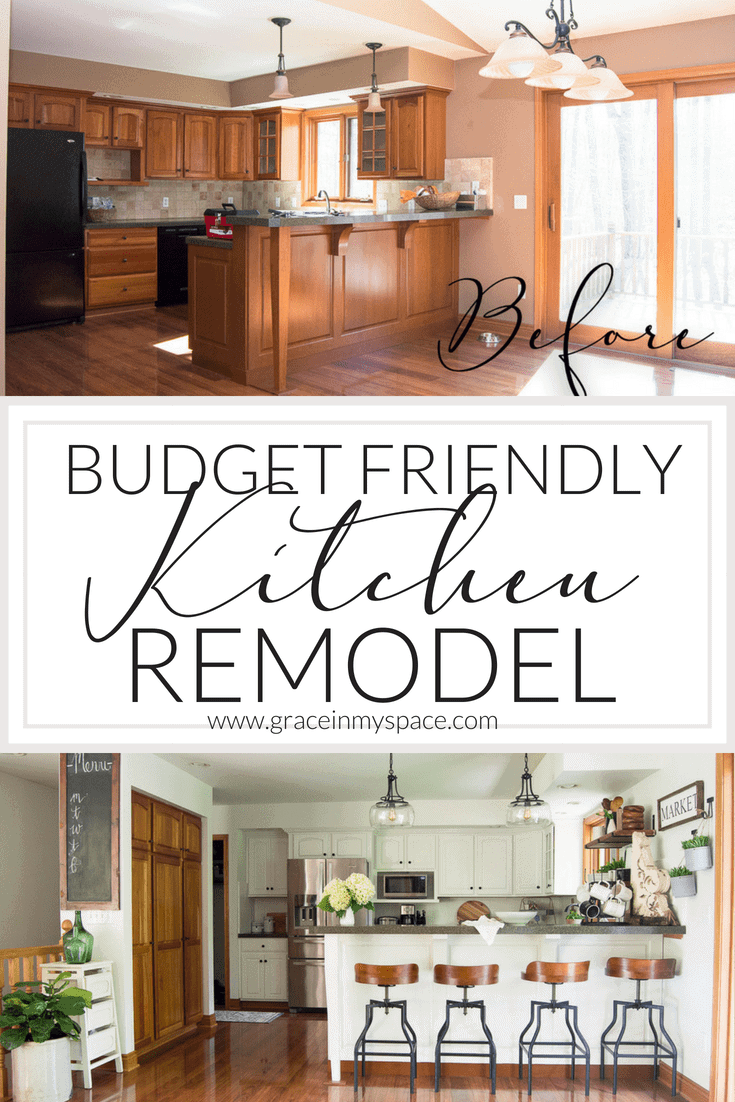
Let’s take a moment and reminisce about how our kitchen looked before.

While the finishes and layout are not my dream design, I was more than willing to work with it after getting bids upwards of $40,000 to redesign this space. Queue the kitchen remodel on a budget. And when I say budget, I mean it! For the cost of paint, materials and new pendants this space was transformed.
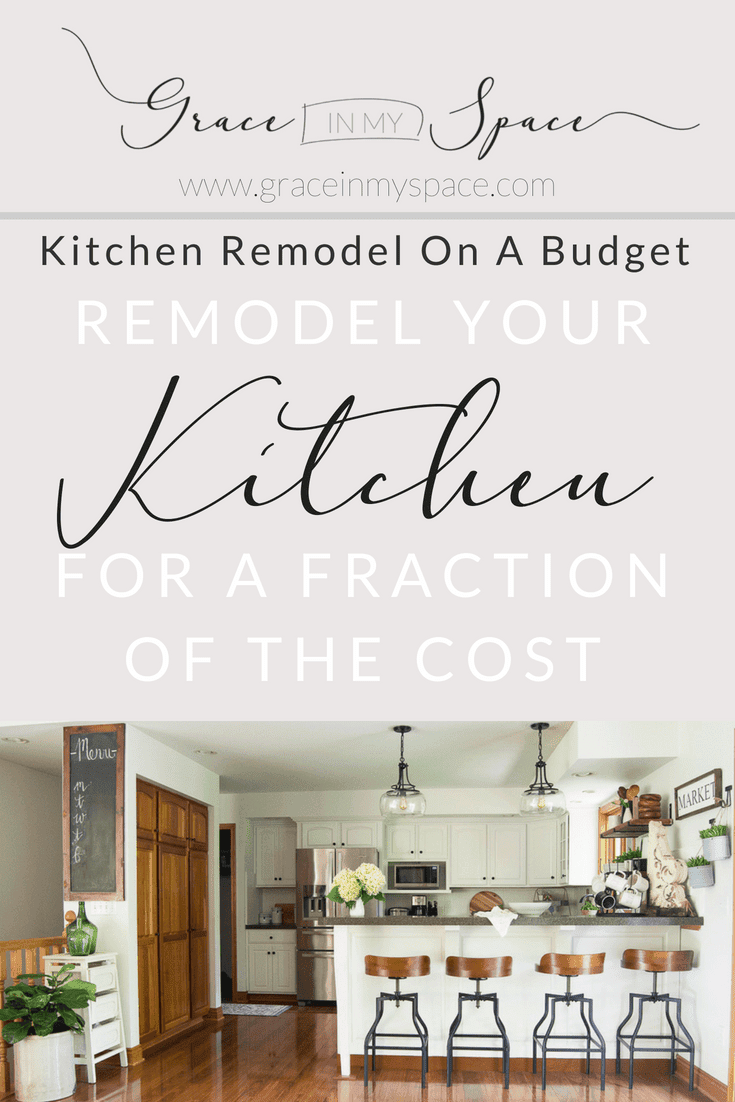
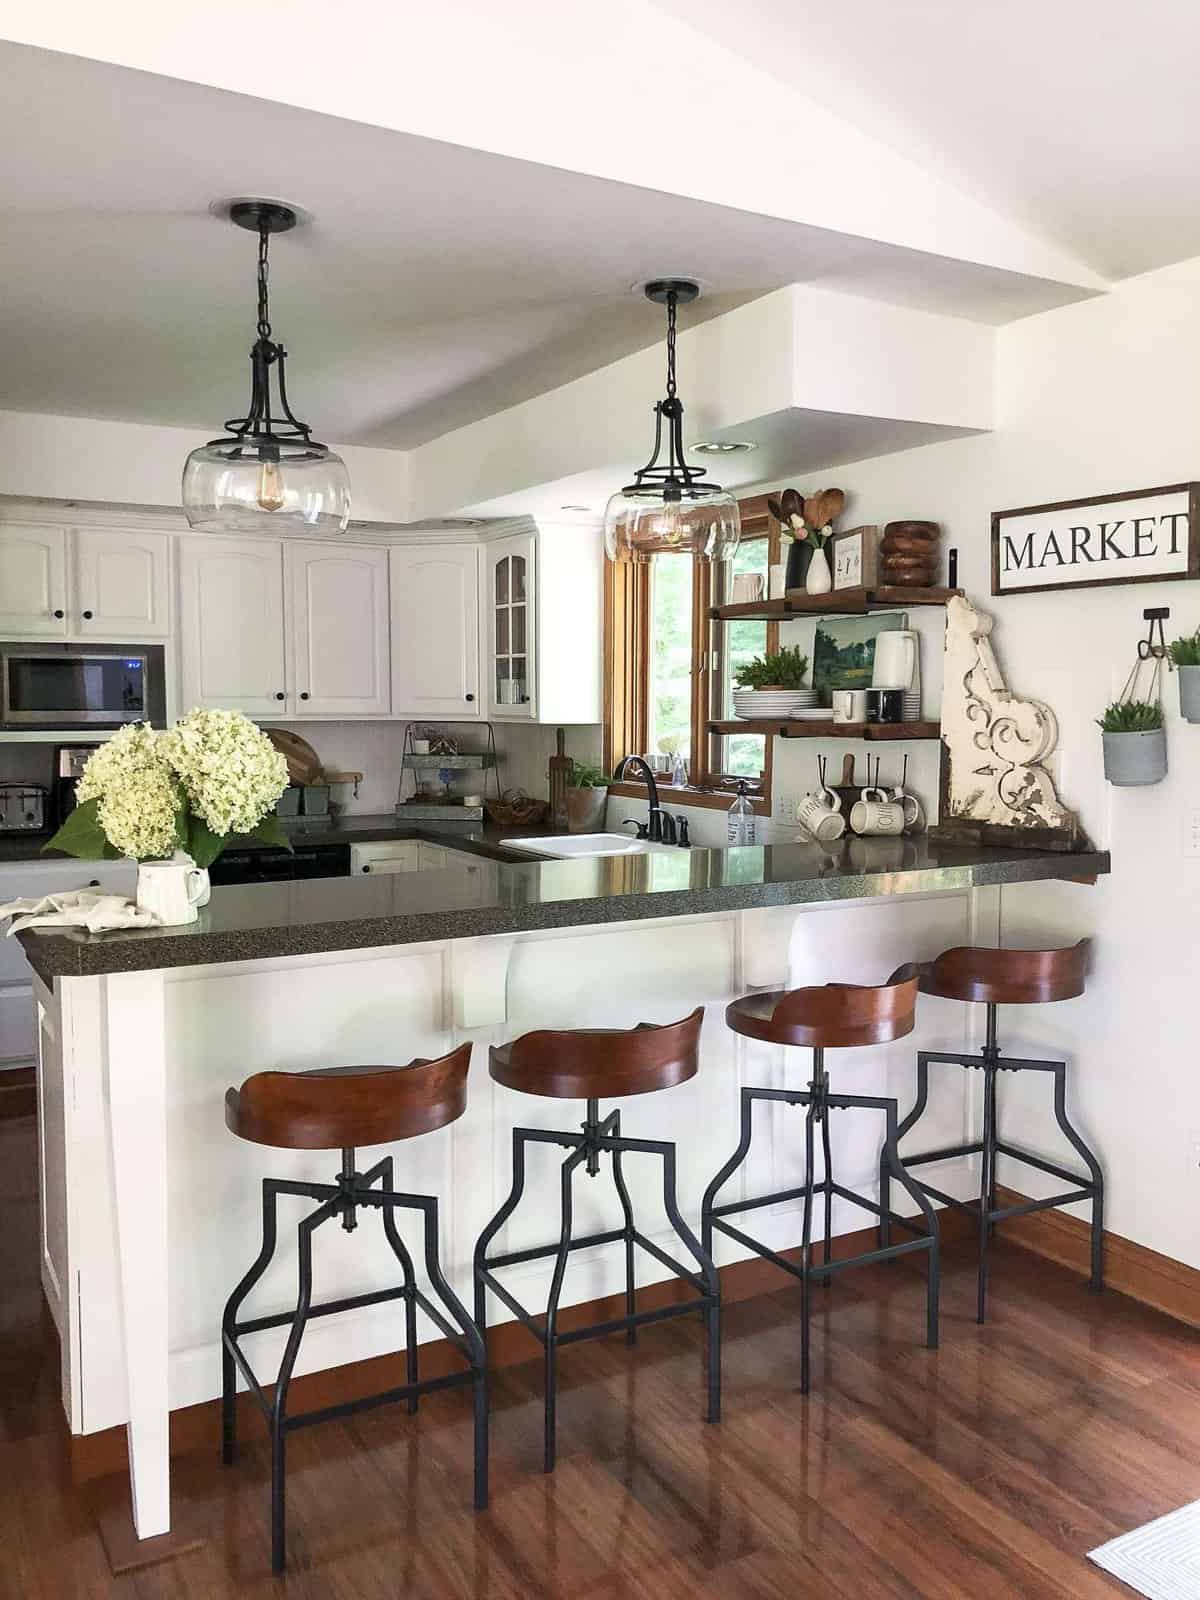
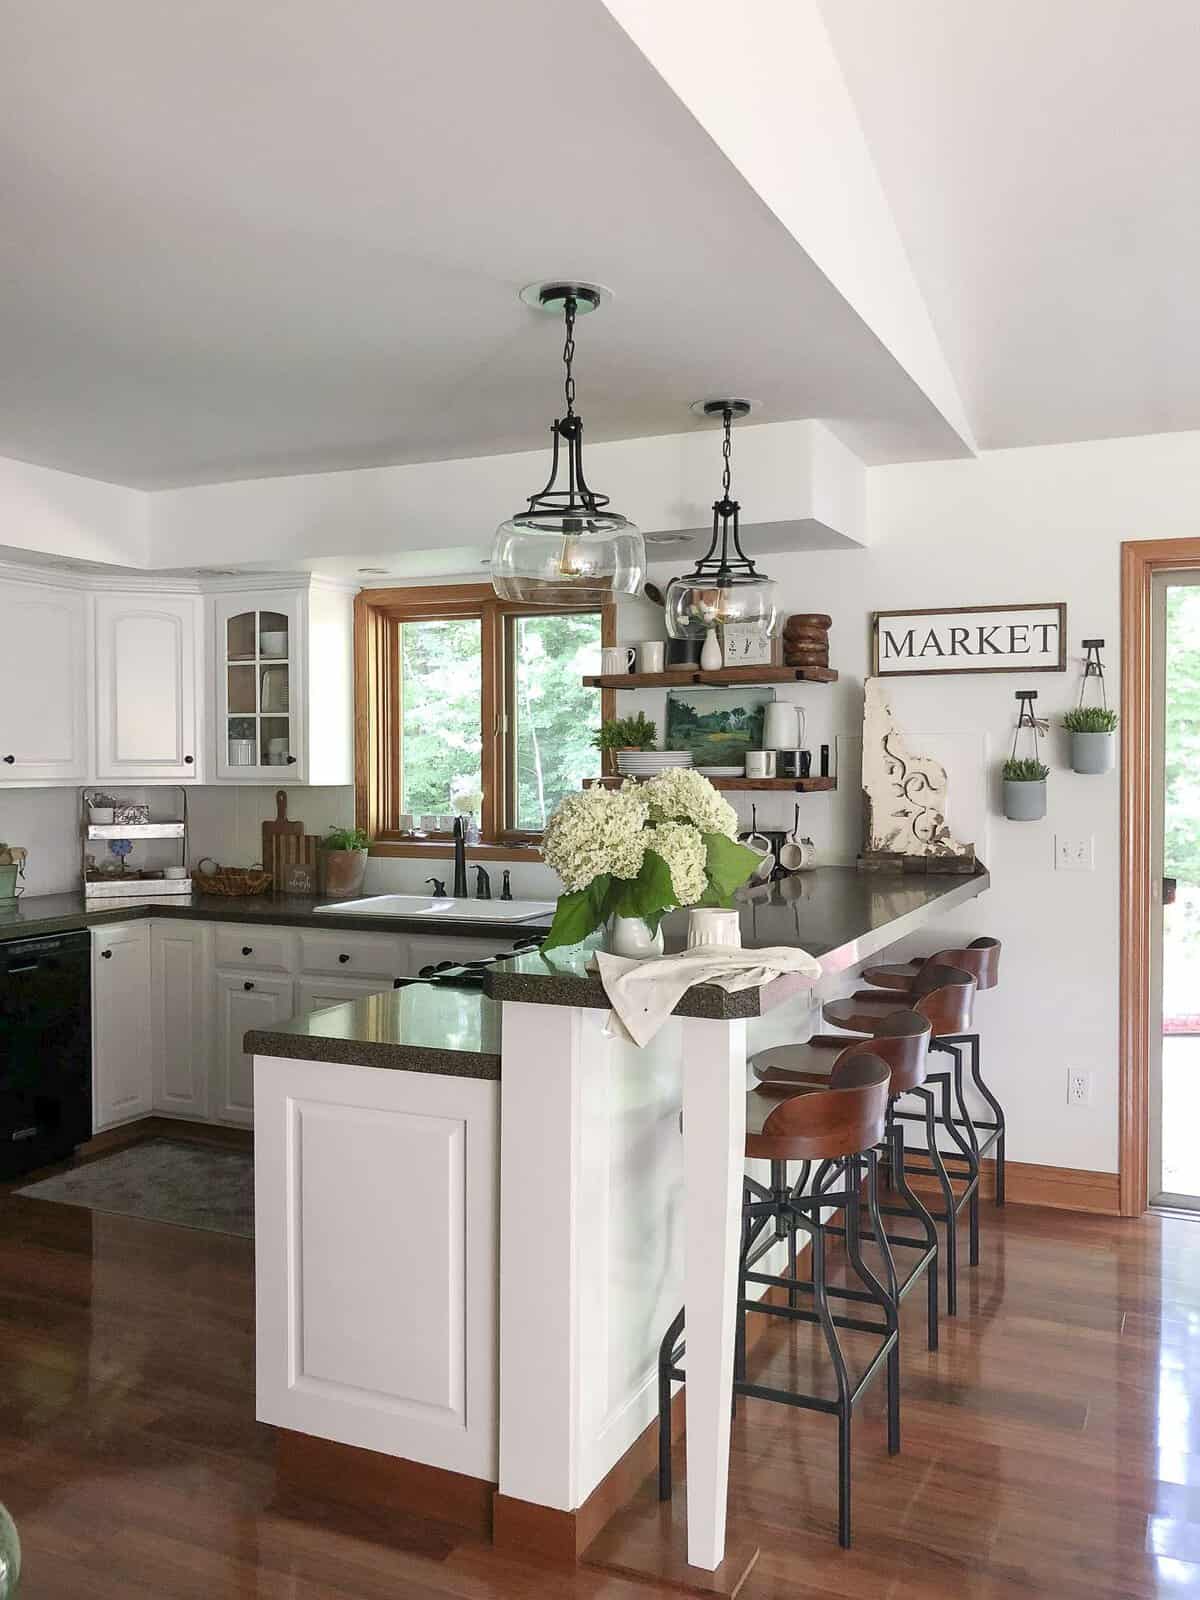
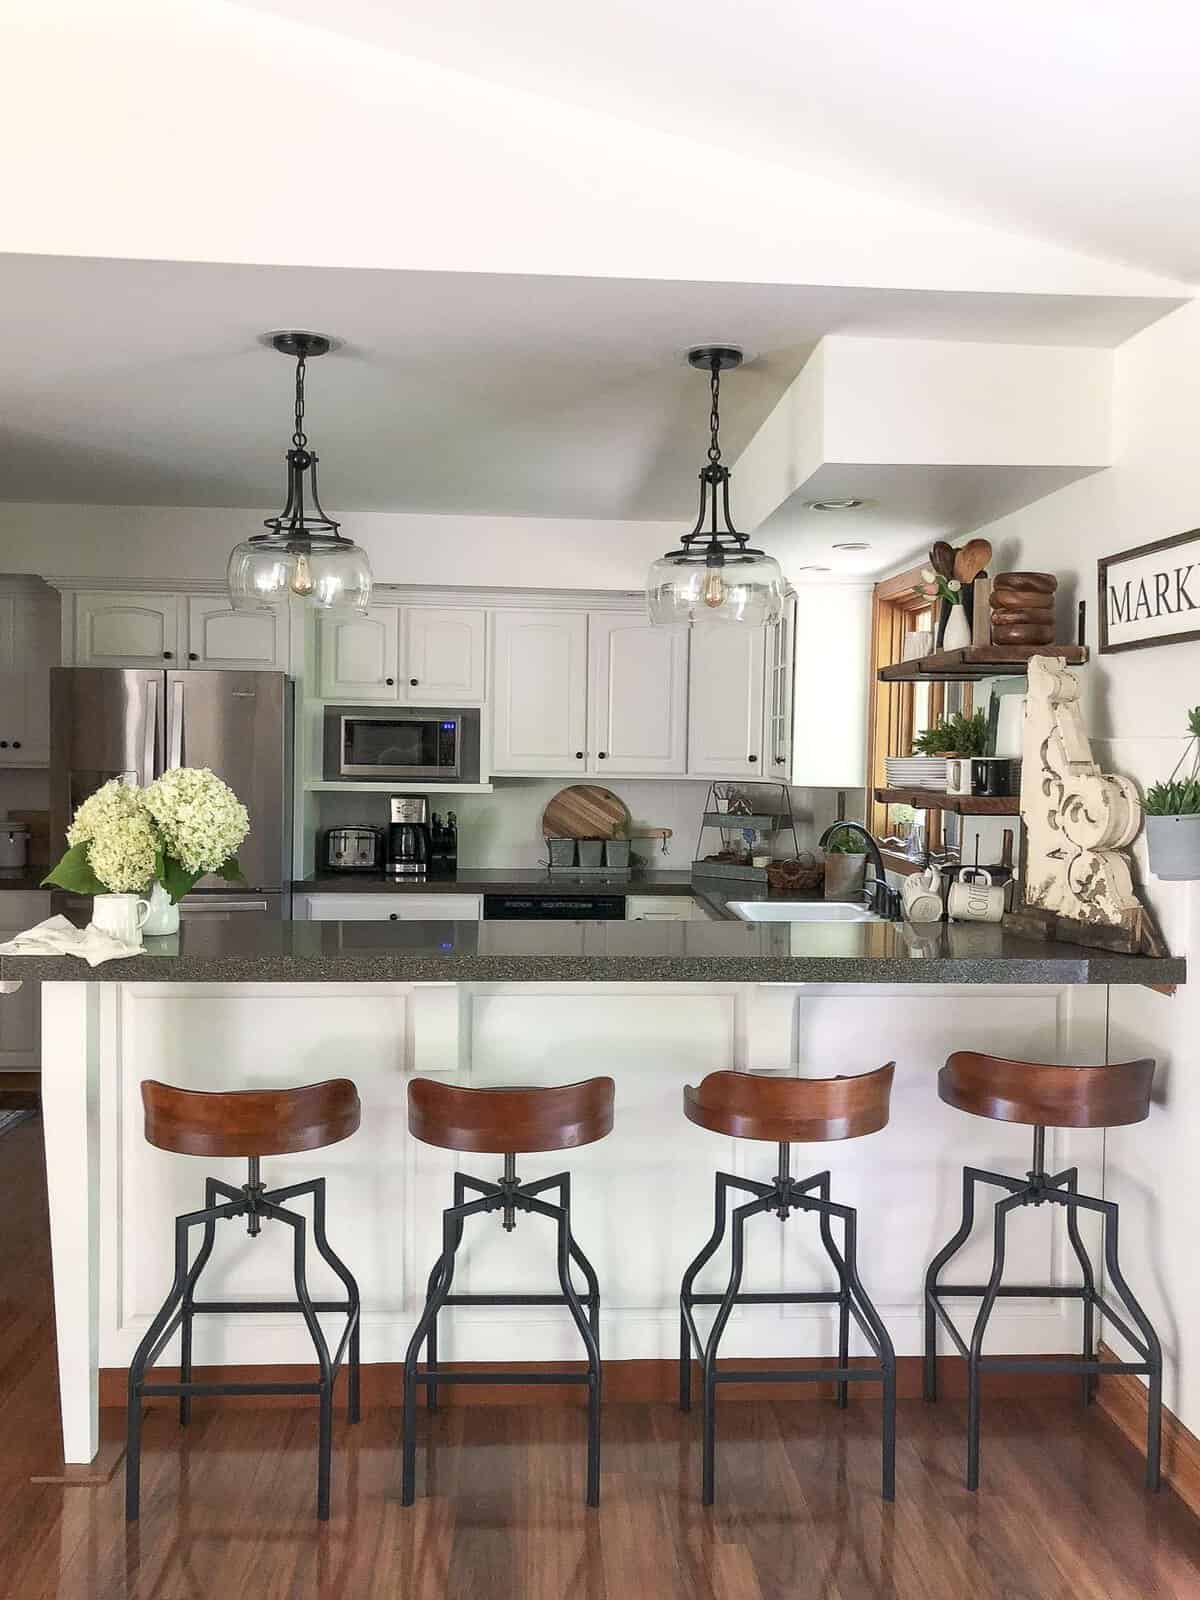
After
As you saw in my previous posts, I was able to lighten this space and bring it out of dungeon-mode by painting the cabinets and also painting the backsplash. Once the hard work was done, I added DIY open shelving in place of previously existing cabinetry and new pendant lighting.
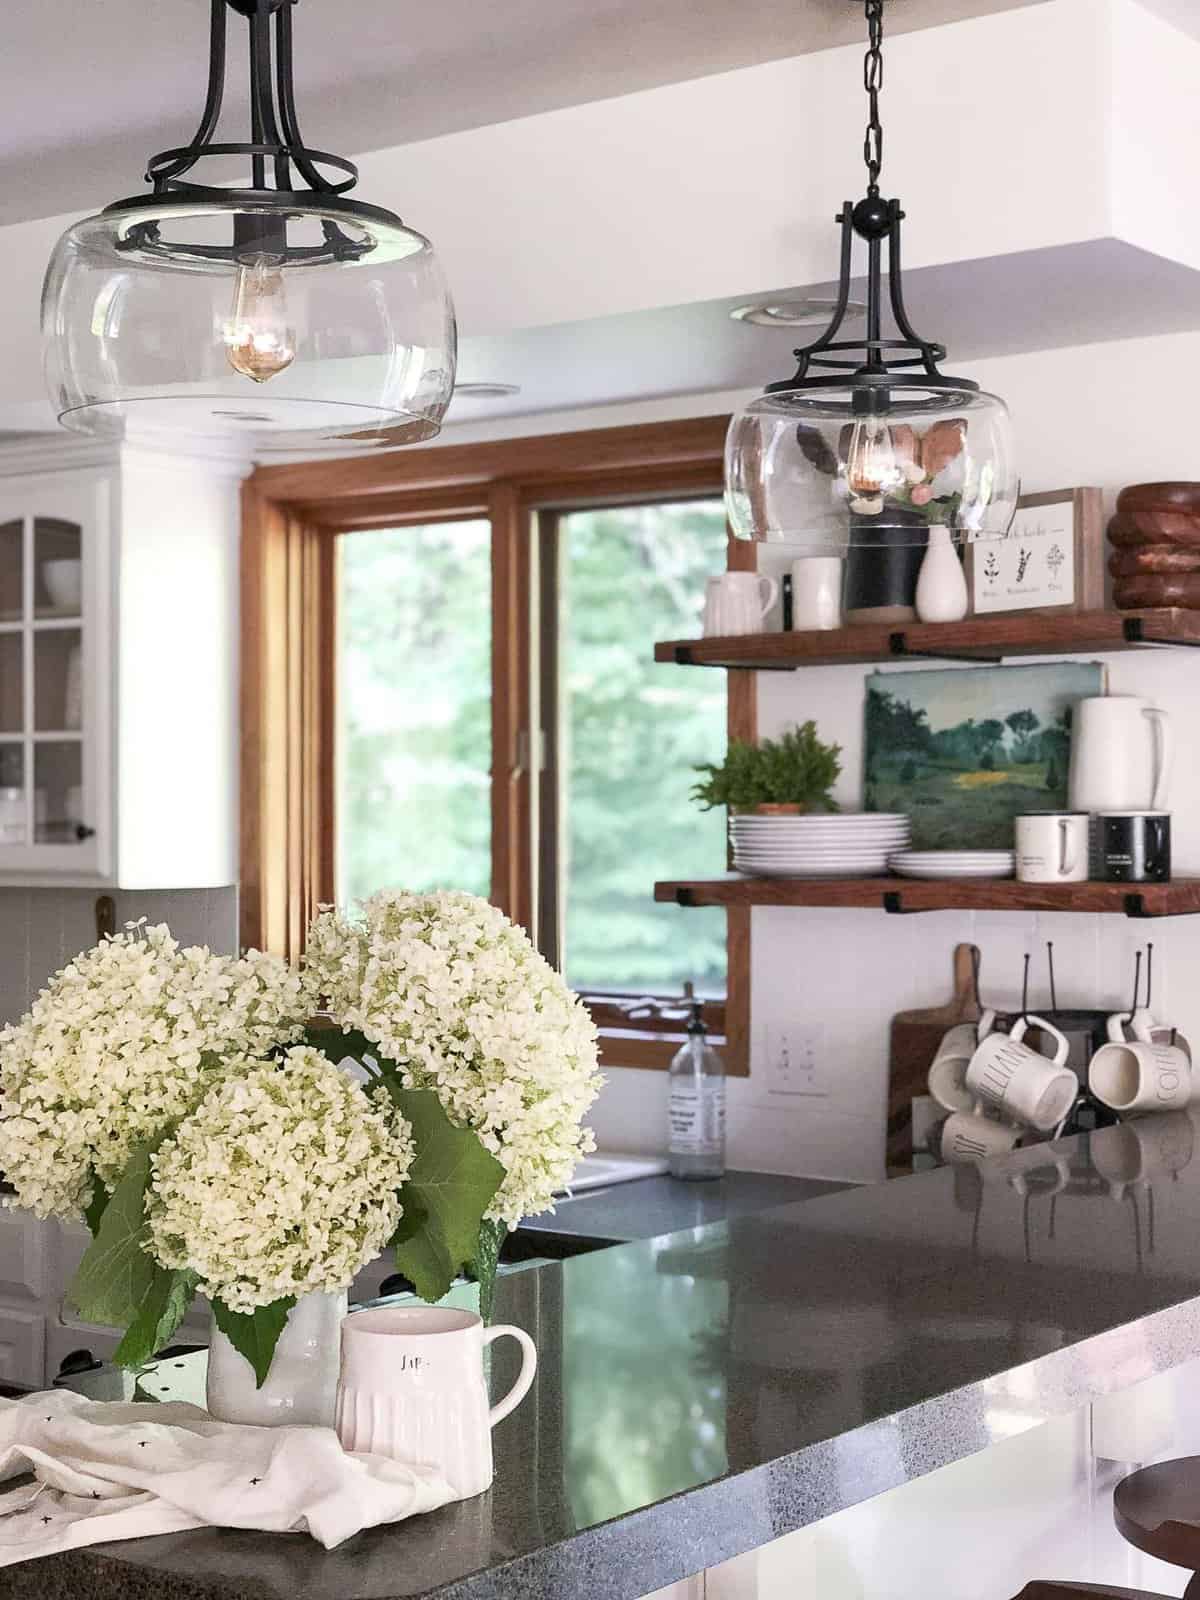
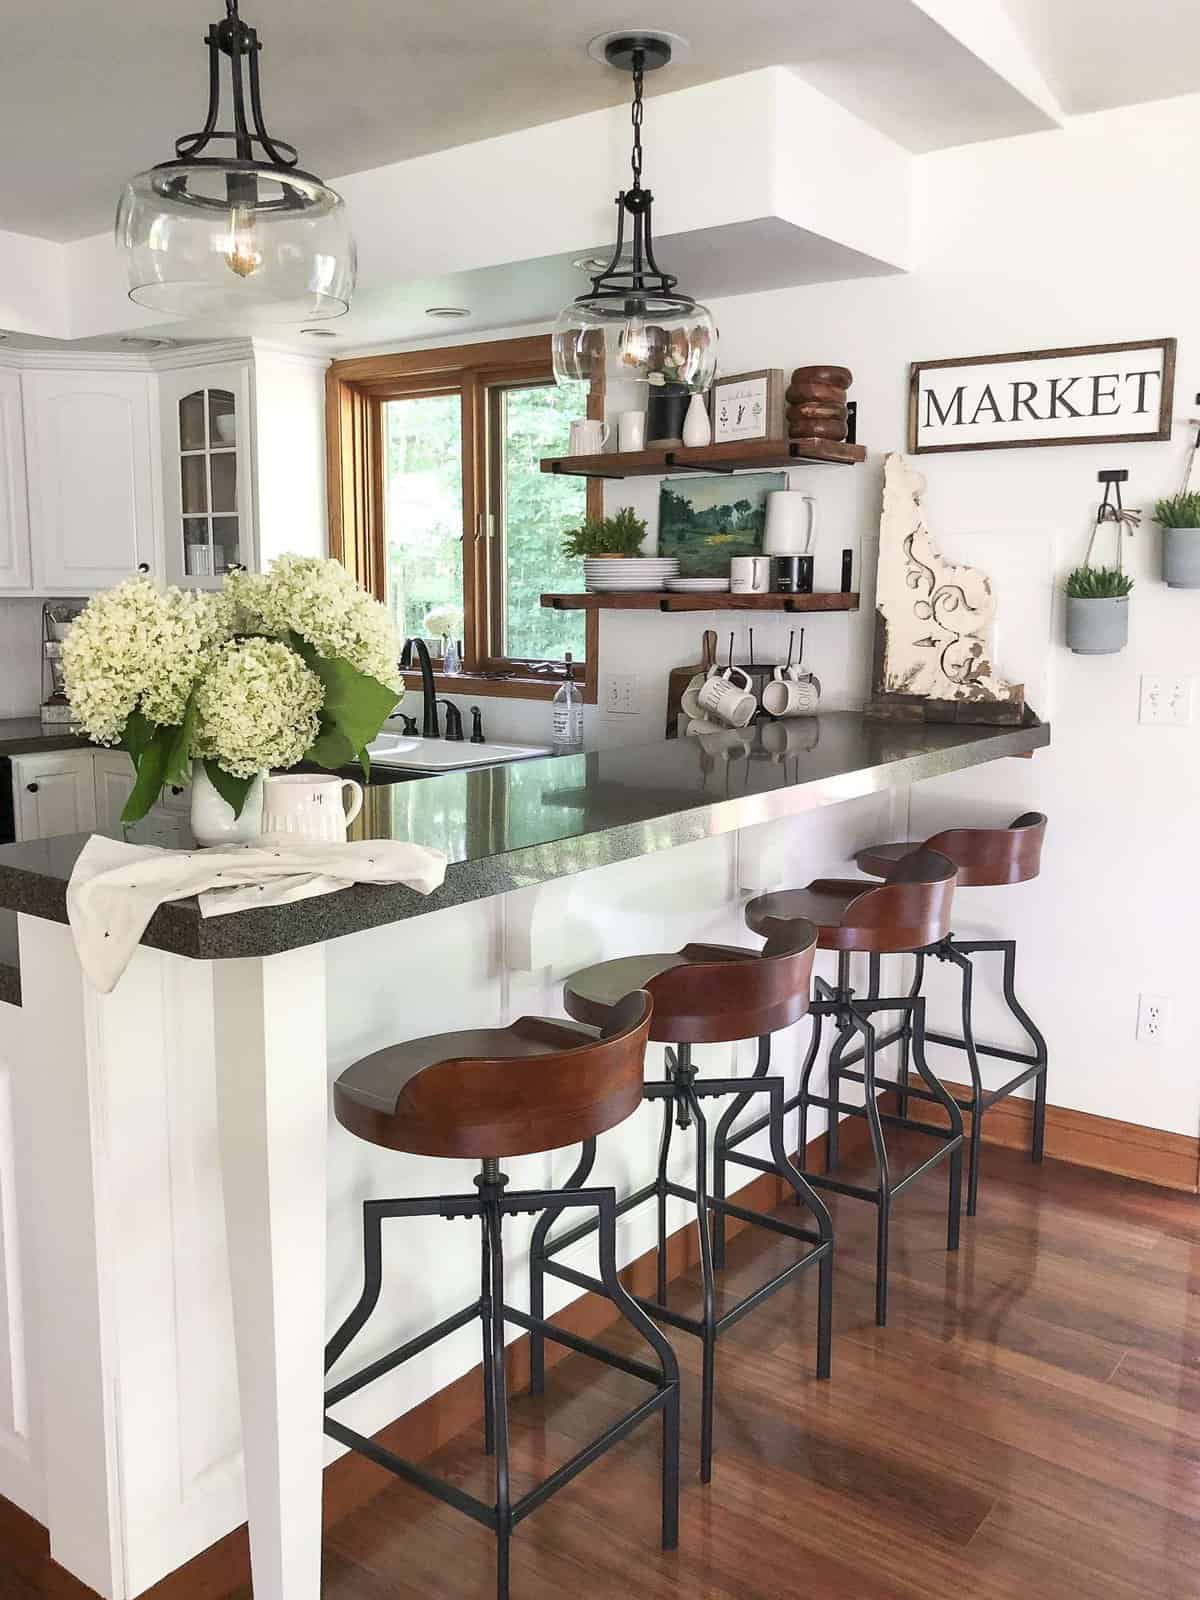
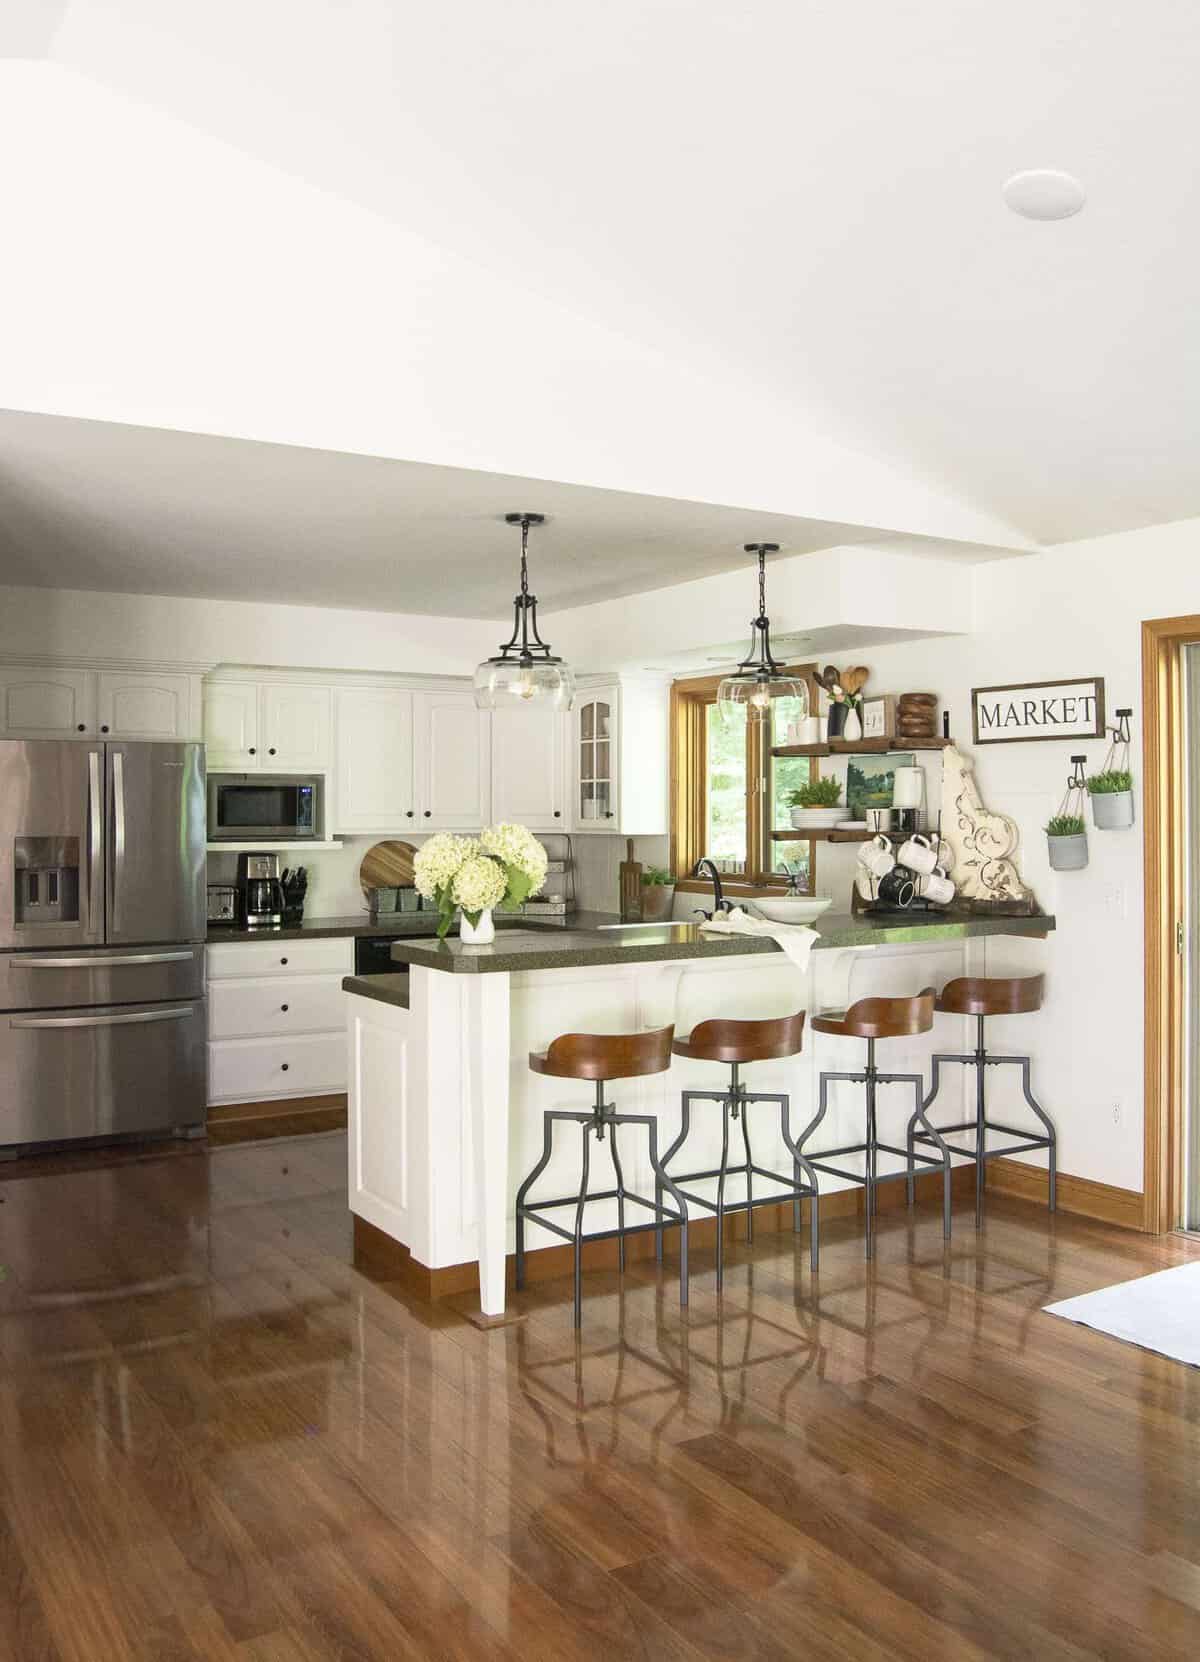
Kitchen Remodel on a Budget | Pendant Lighting
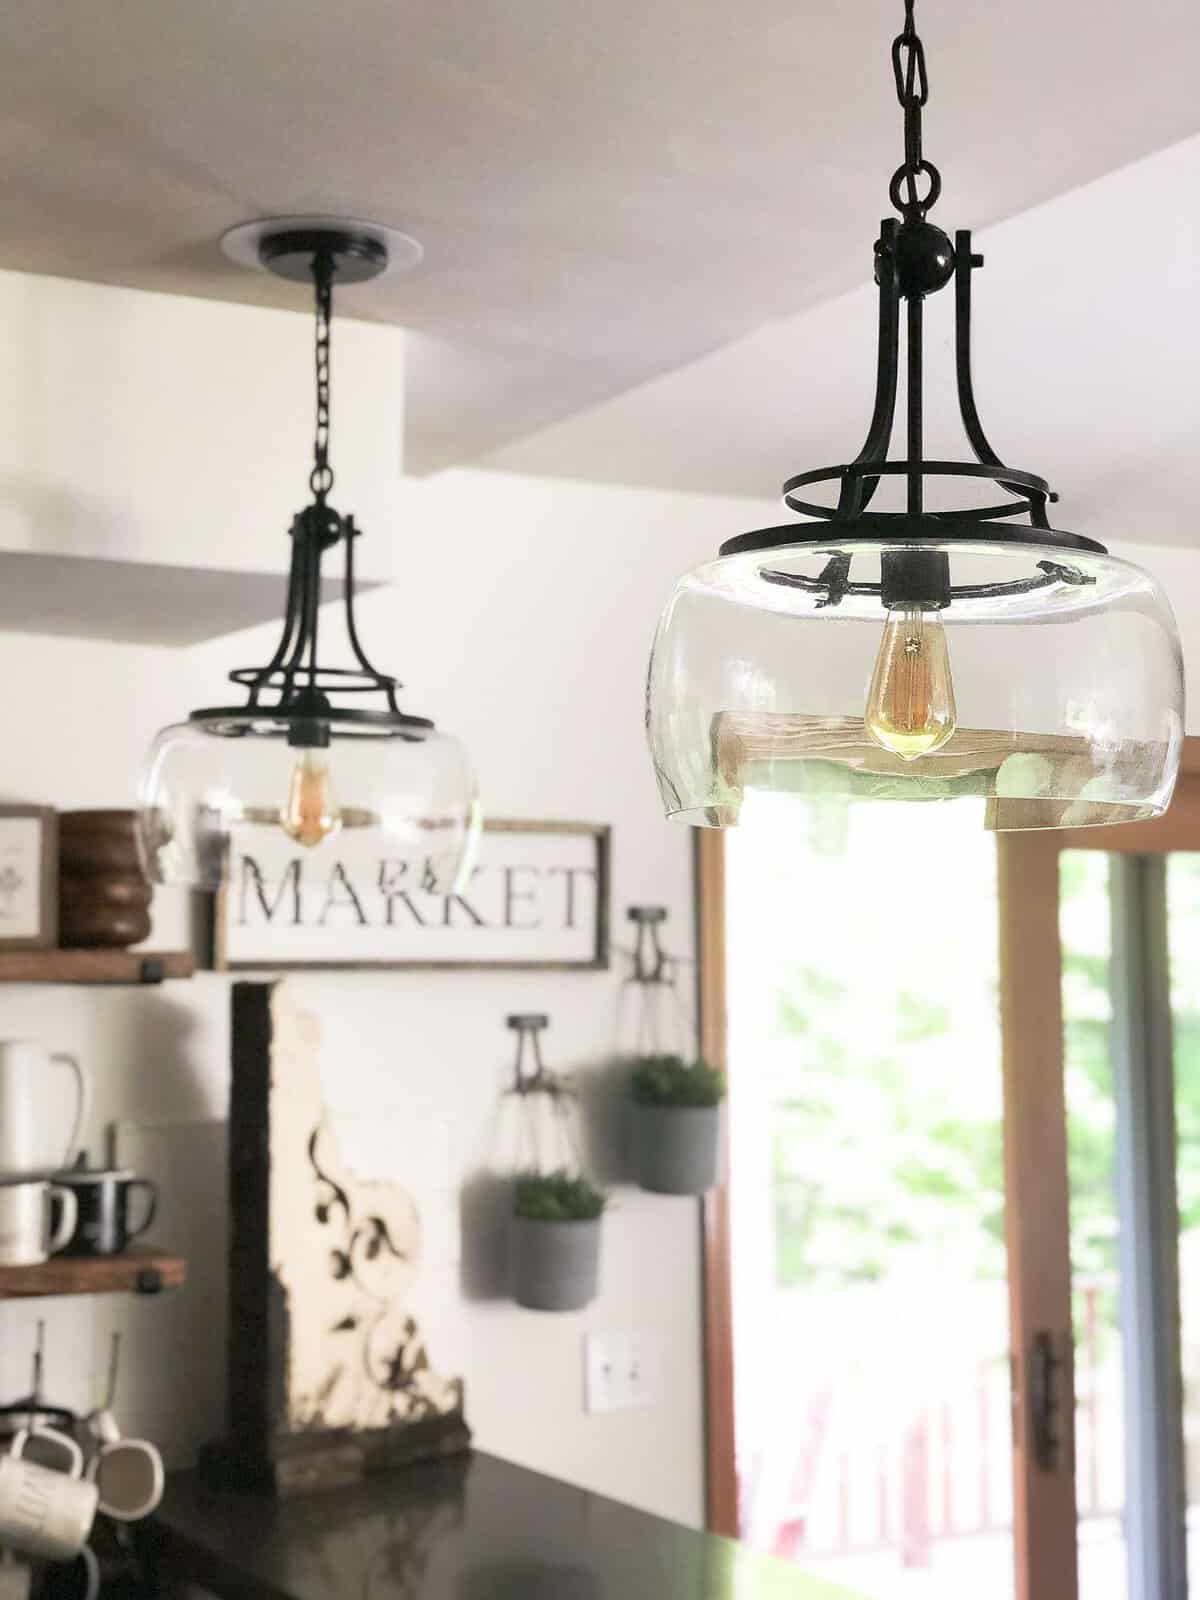
When these beautiful Charleston pendants from Lamps Plus arrived I was so excited to get them hung. (Rather, for my husband to hang them.) 😉 They are beautifully structured and the perfect size for our space to replace the previously teeny tiny pendants.
However, after I eradicated all of the oil rubbed bronze from our kitchen and replaced it with black finishes, they were just a touch too brown.
DIY Pendant Update
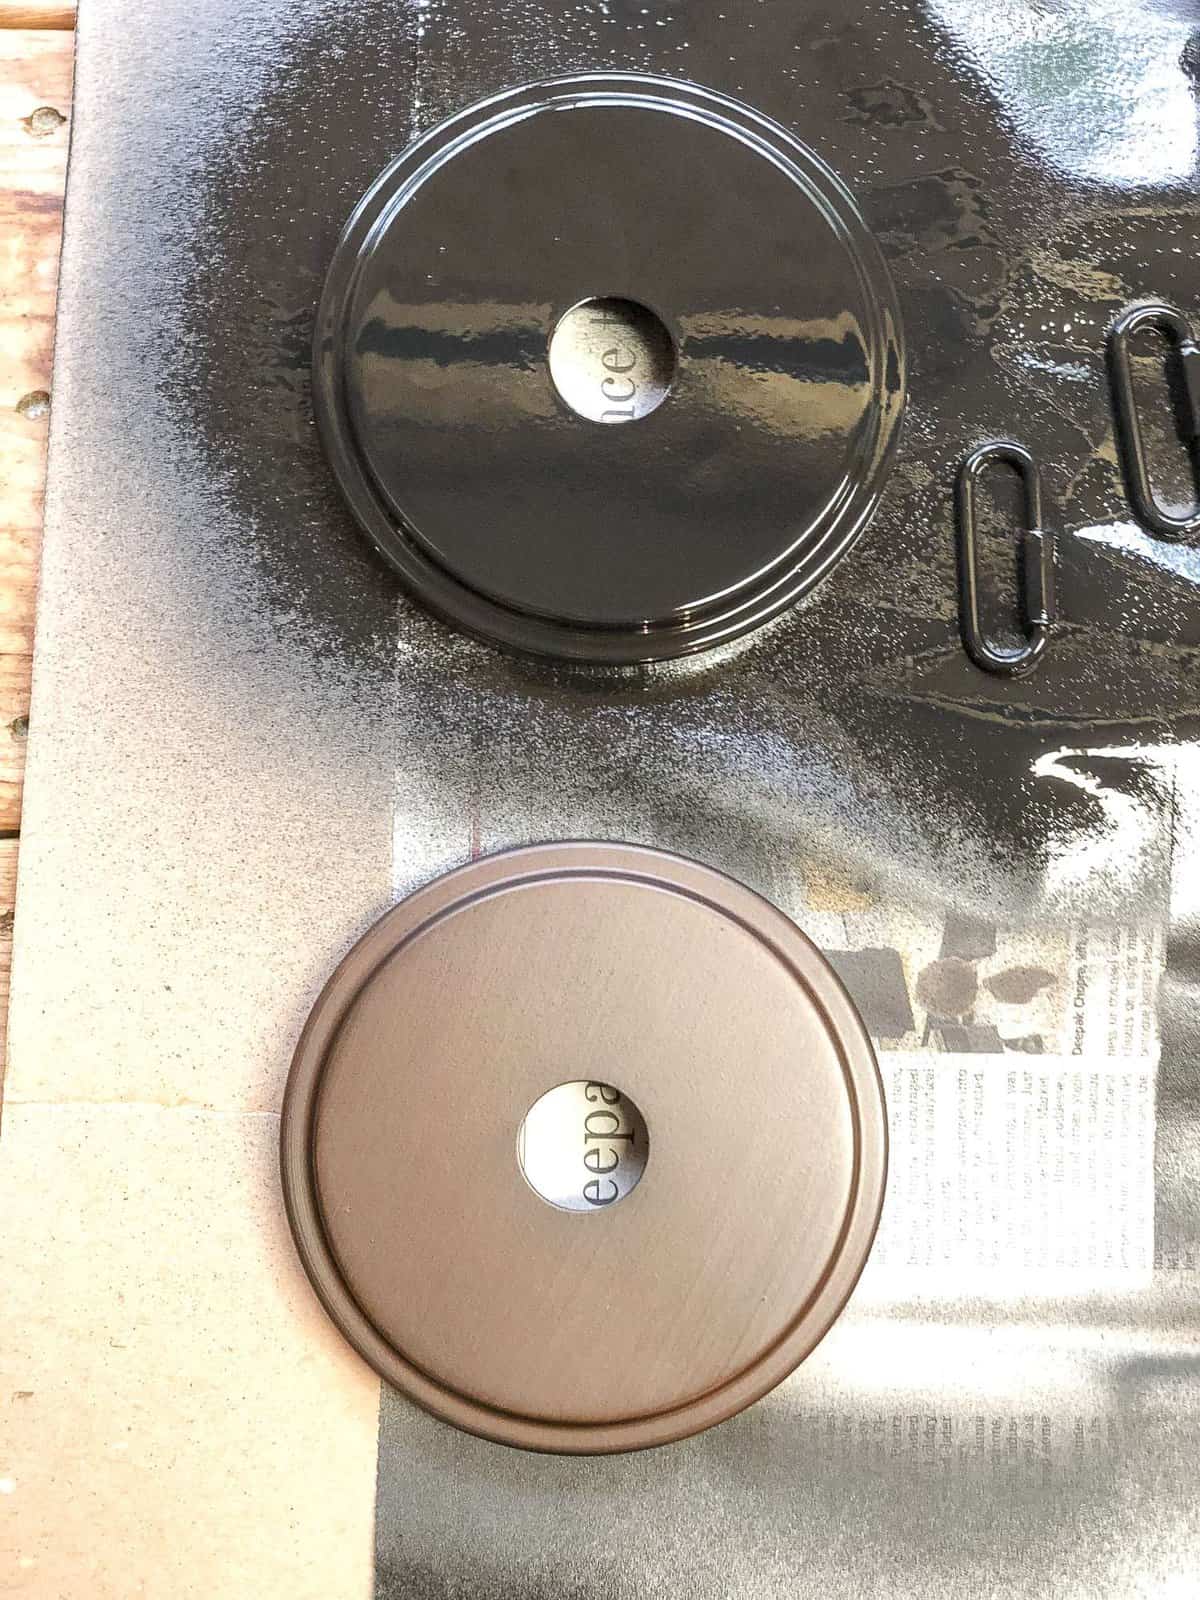
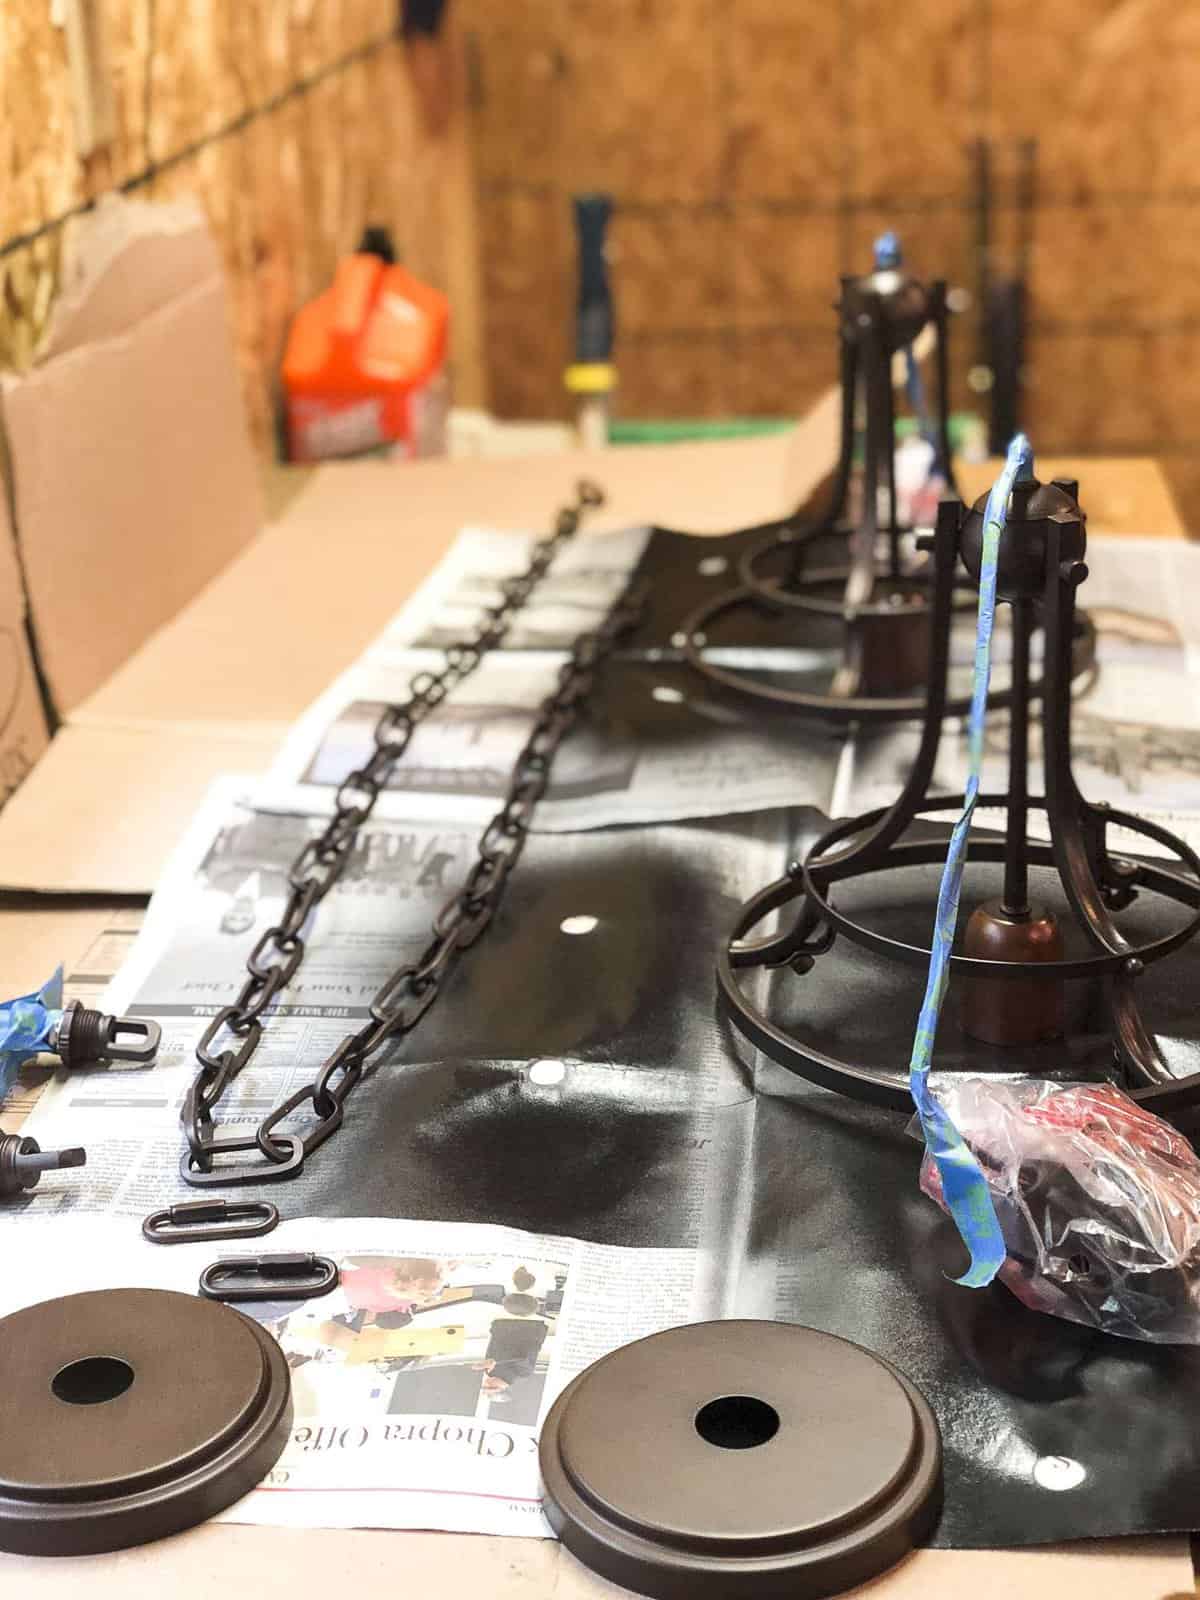
Has that ever happened to you? You find the perfect piece and then when it arrives you find that one element wasn’t quite what you thought it was? Rather than return these beauties I simply updated them with the same satin spray paint I used on the other hardware.
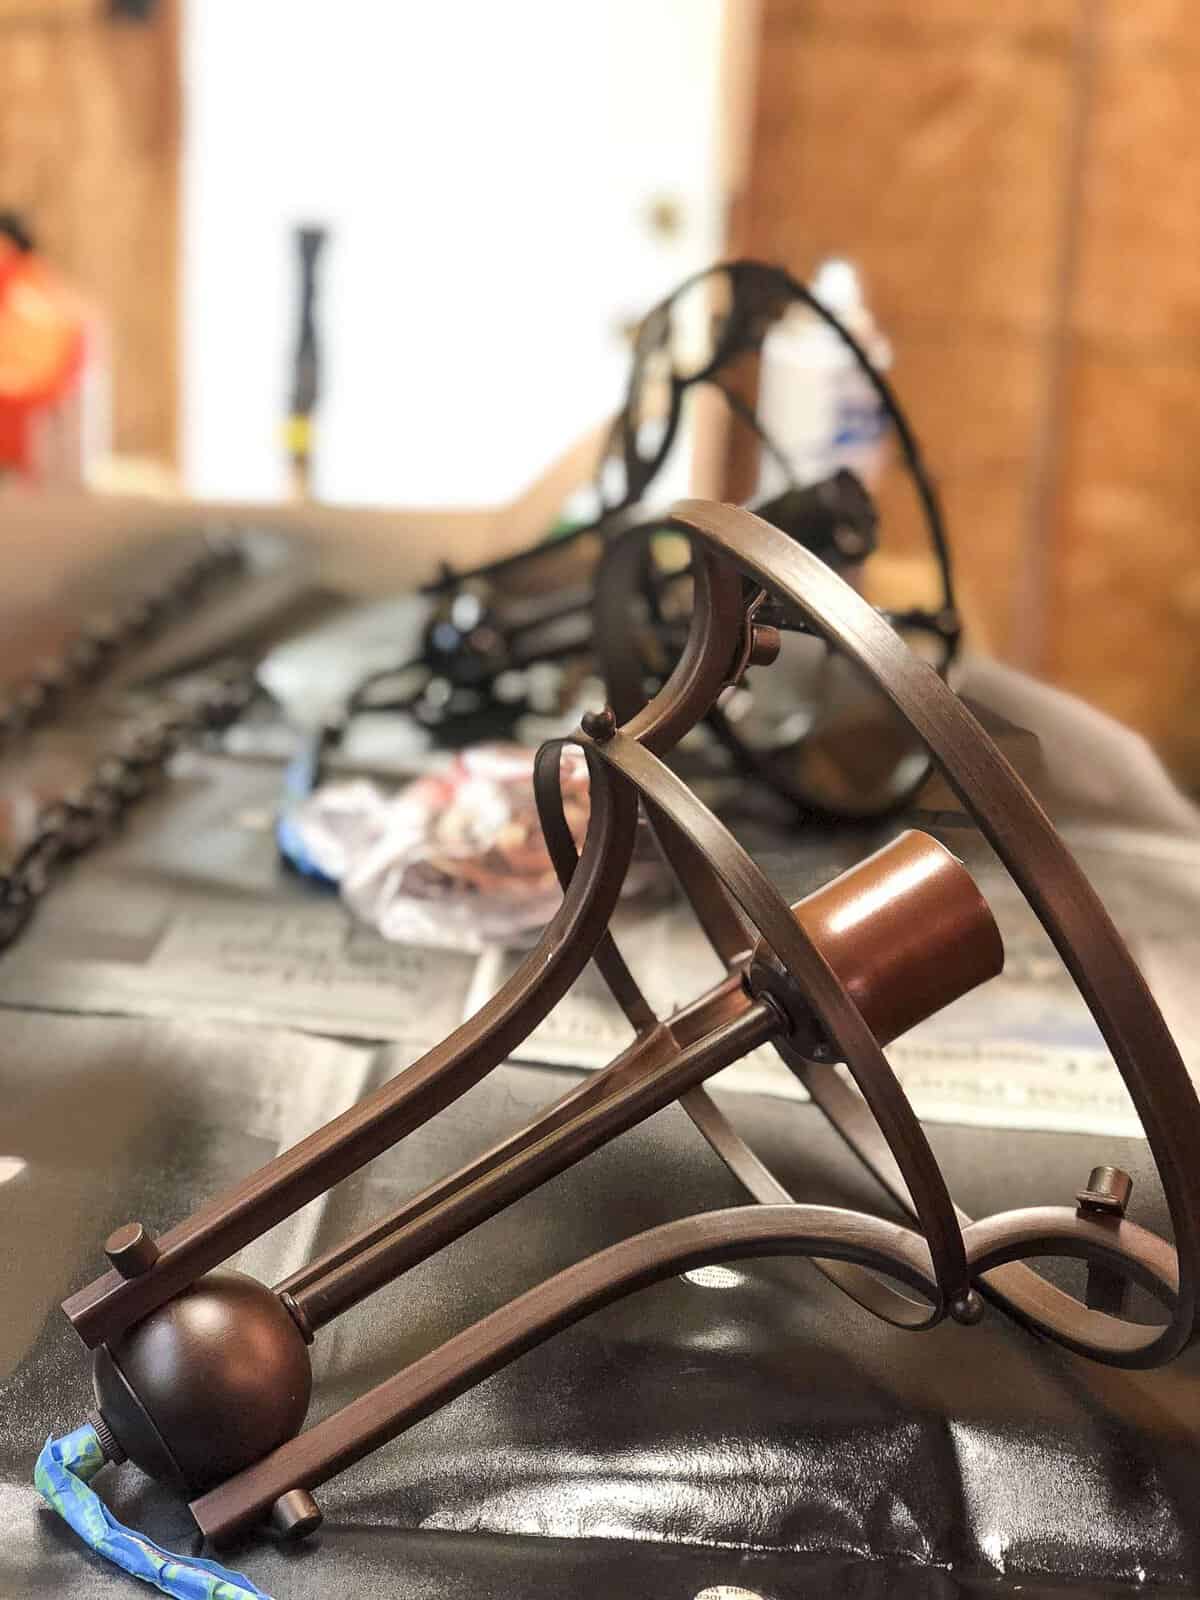
I knew I wouldn’t find the globe size and metal accents I was looking for in another pendant so I was happy to put a little elbow grease into matching the color to the rest of our kitchen accents.
Tip: If you find that structure, size and materials are perfect but the color isn’t quite right, you can fix most things with spray paint!
You’d never know these Charleston pendants weren’t originally this creamy satin black. I am happy that I didn’t return them and go on the never ending hunt for new pendants that wouldn’t be quite what I wanted.
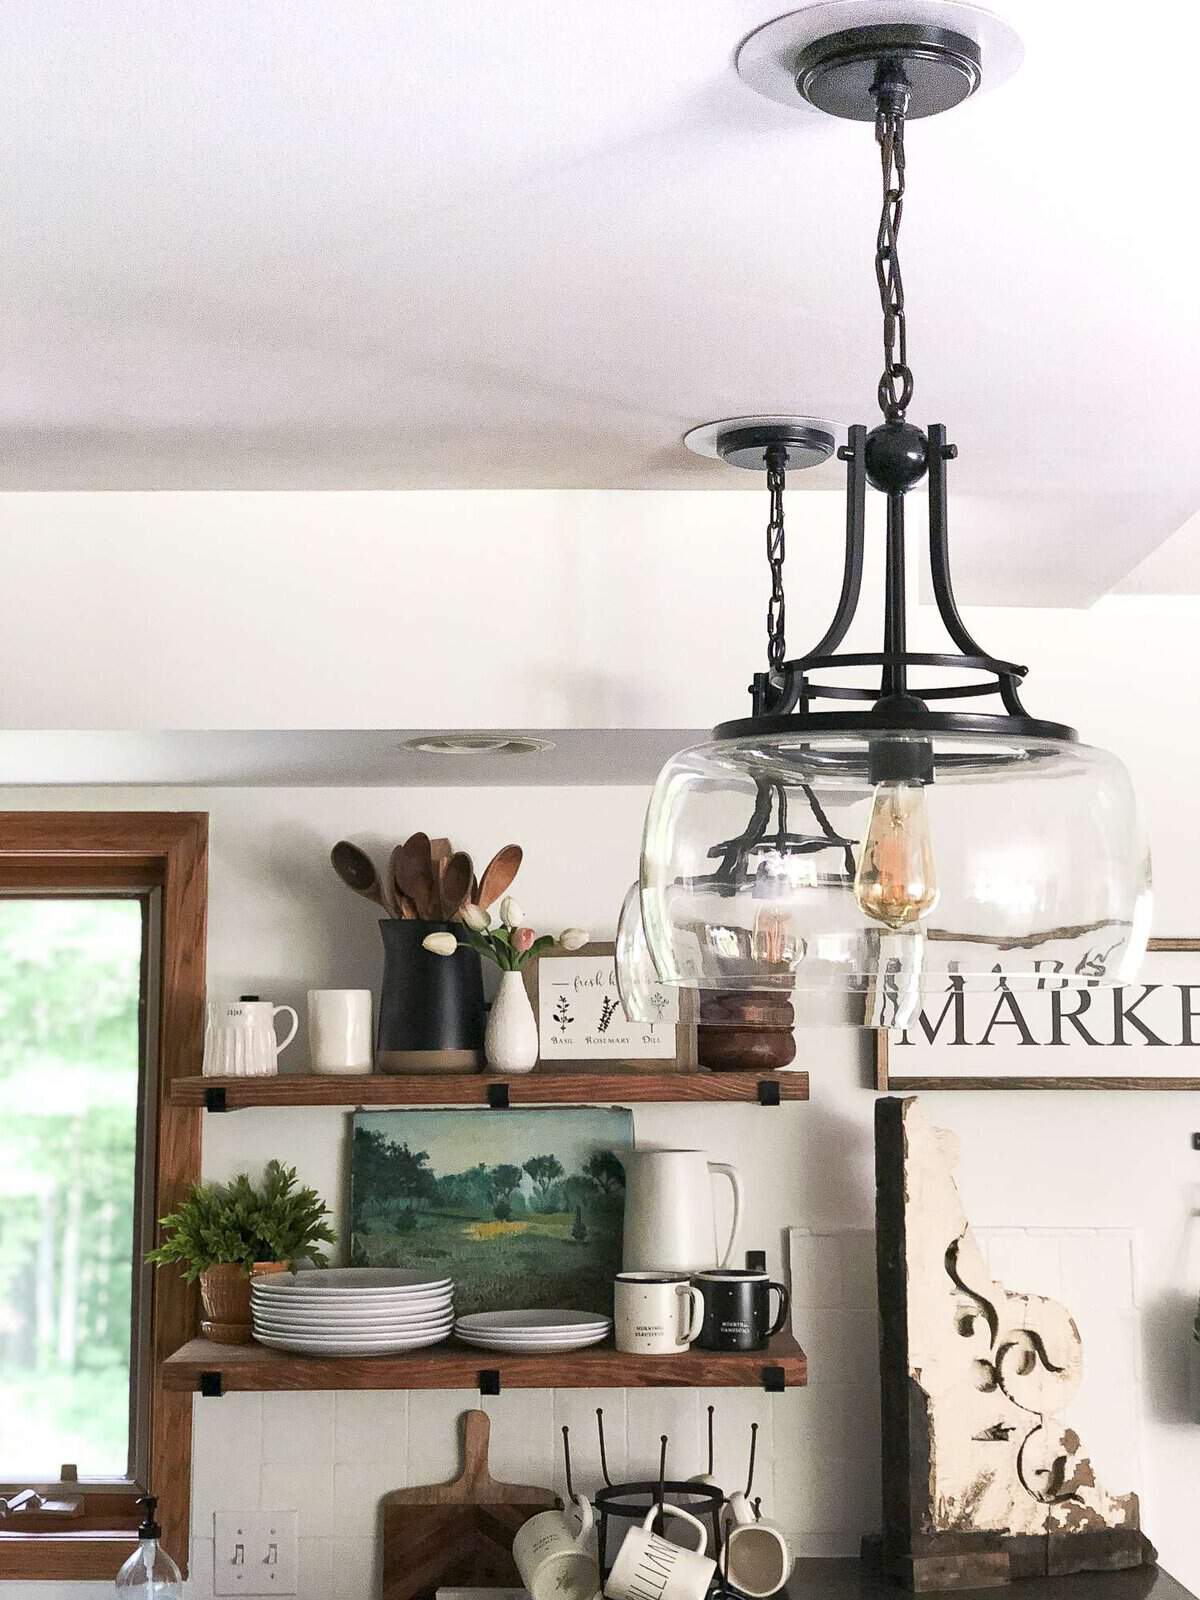
My number one goal with replacing these pendants was to increase their size so they were more substantial. The Charleston pendant has a 13 1/2 inch globe, which is double our previous pendants’ size! They make such a huge difference in transforming and updating this space.
Kitchen Remodel on a Budget | Open Shelving
Another easy way to update this space was to remove one of the upper cupboards. I always felt hemmed in with cupboards surrounding the sink. Removing one of the sides opened our space and made it feel so much more spacious. I plan to share a DIY open shelving tutorial for the many friends on Instagram who’ve been asking!
Updated: The DIY open shelving tutorial is live with a free guide {HERE}.
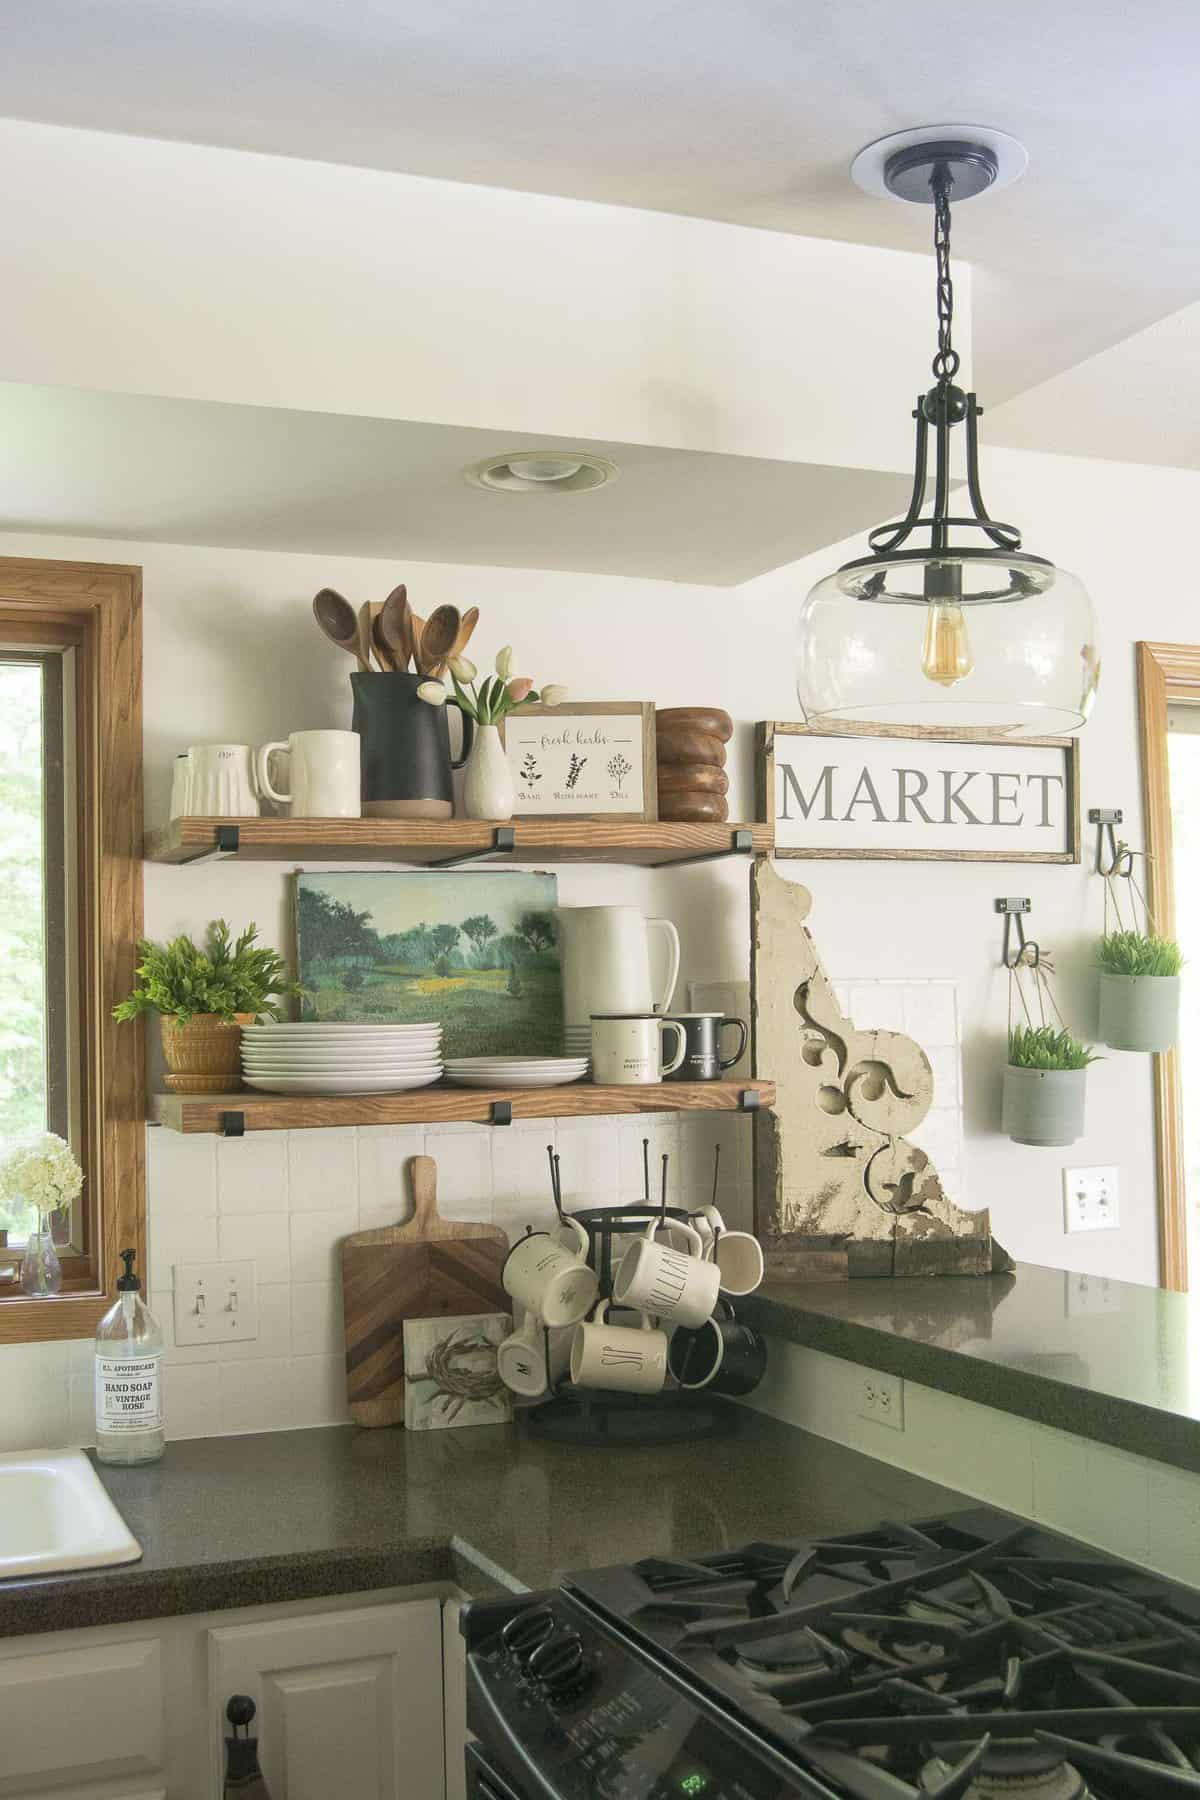
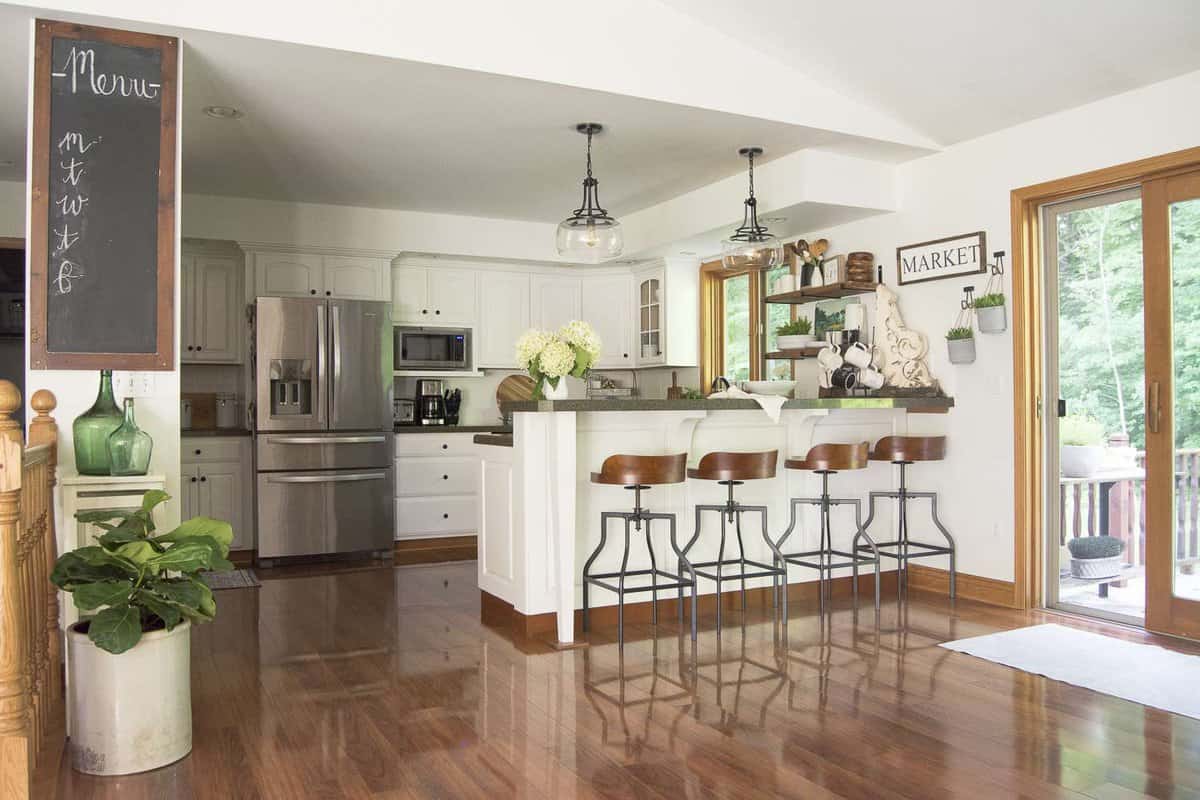
Kitchen Remodel on a Budget | Decor
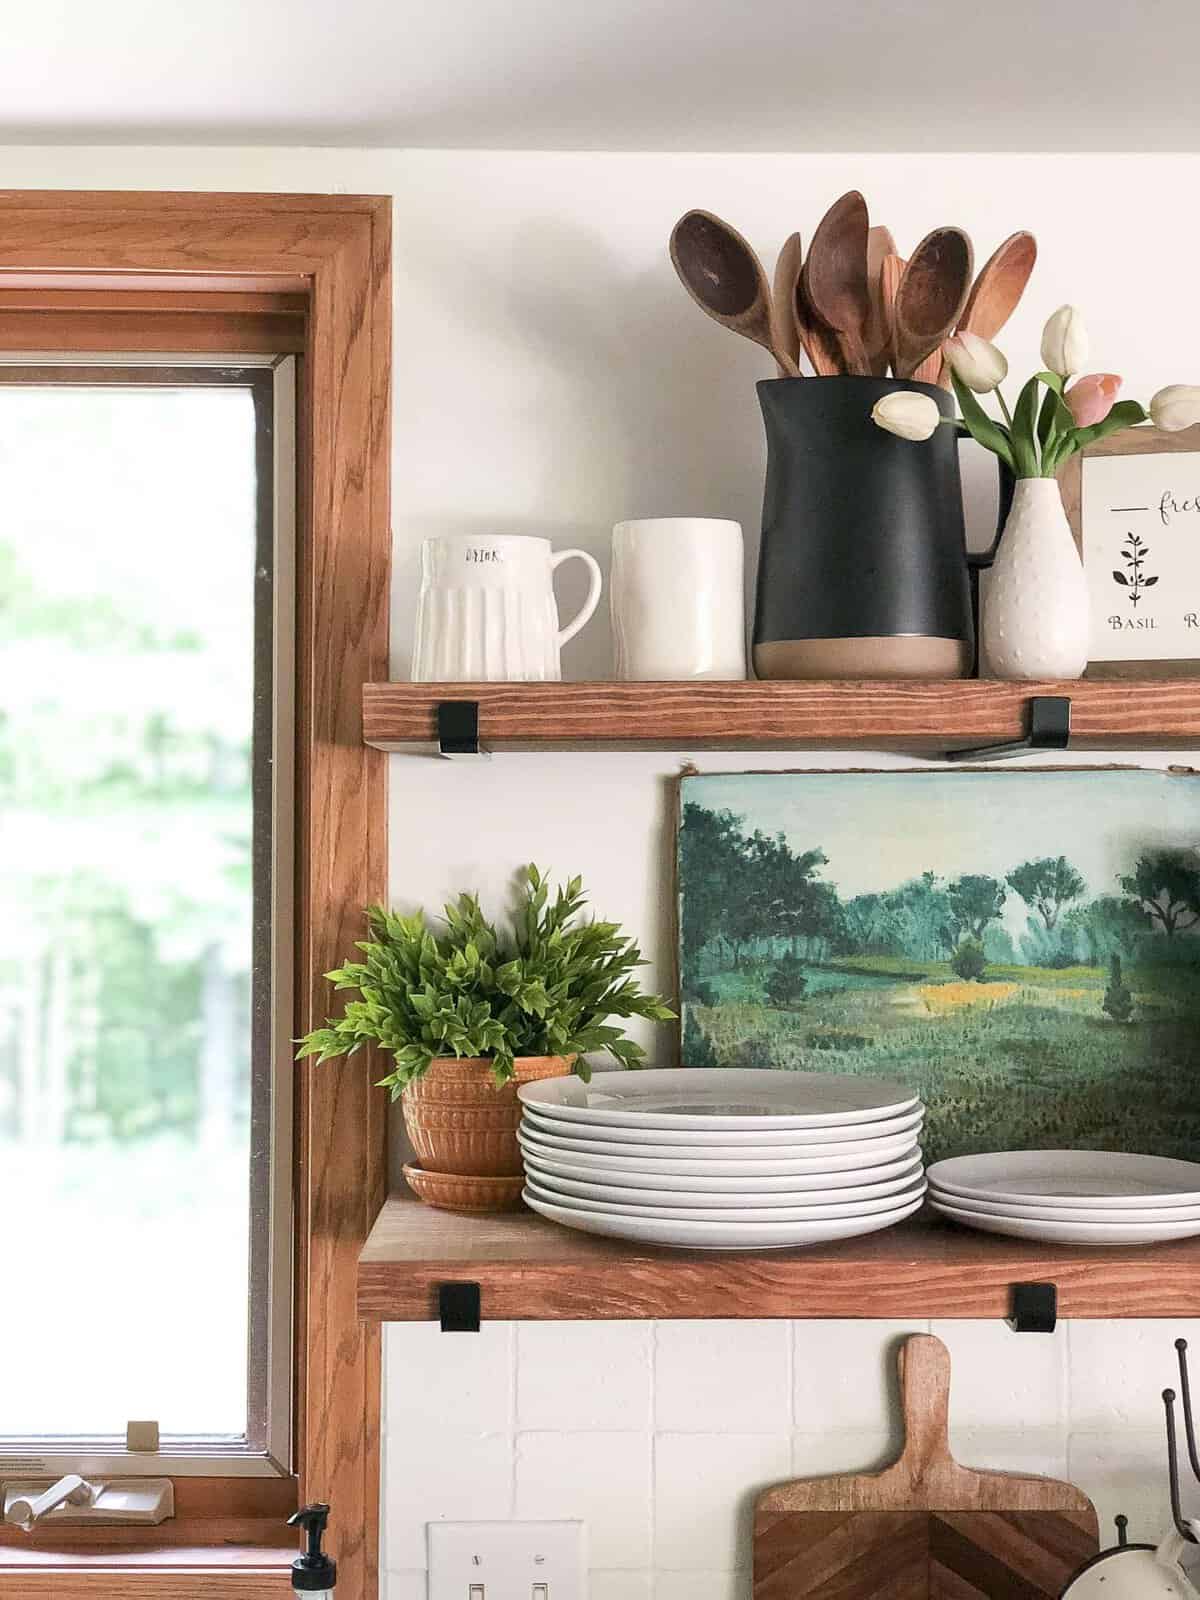
The final element of our kitchen remodel was updating a few of the more substantial pieces of decor. Adding bar stools with a vintage feel gives the space lots of character and charm. Plus, now that I have open shelving I am able to highlight some of my favorite pieces of decor alongside more practical items like dishes and pitchers.
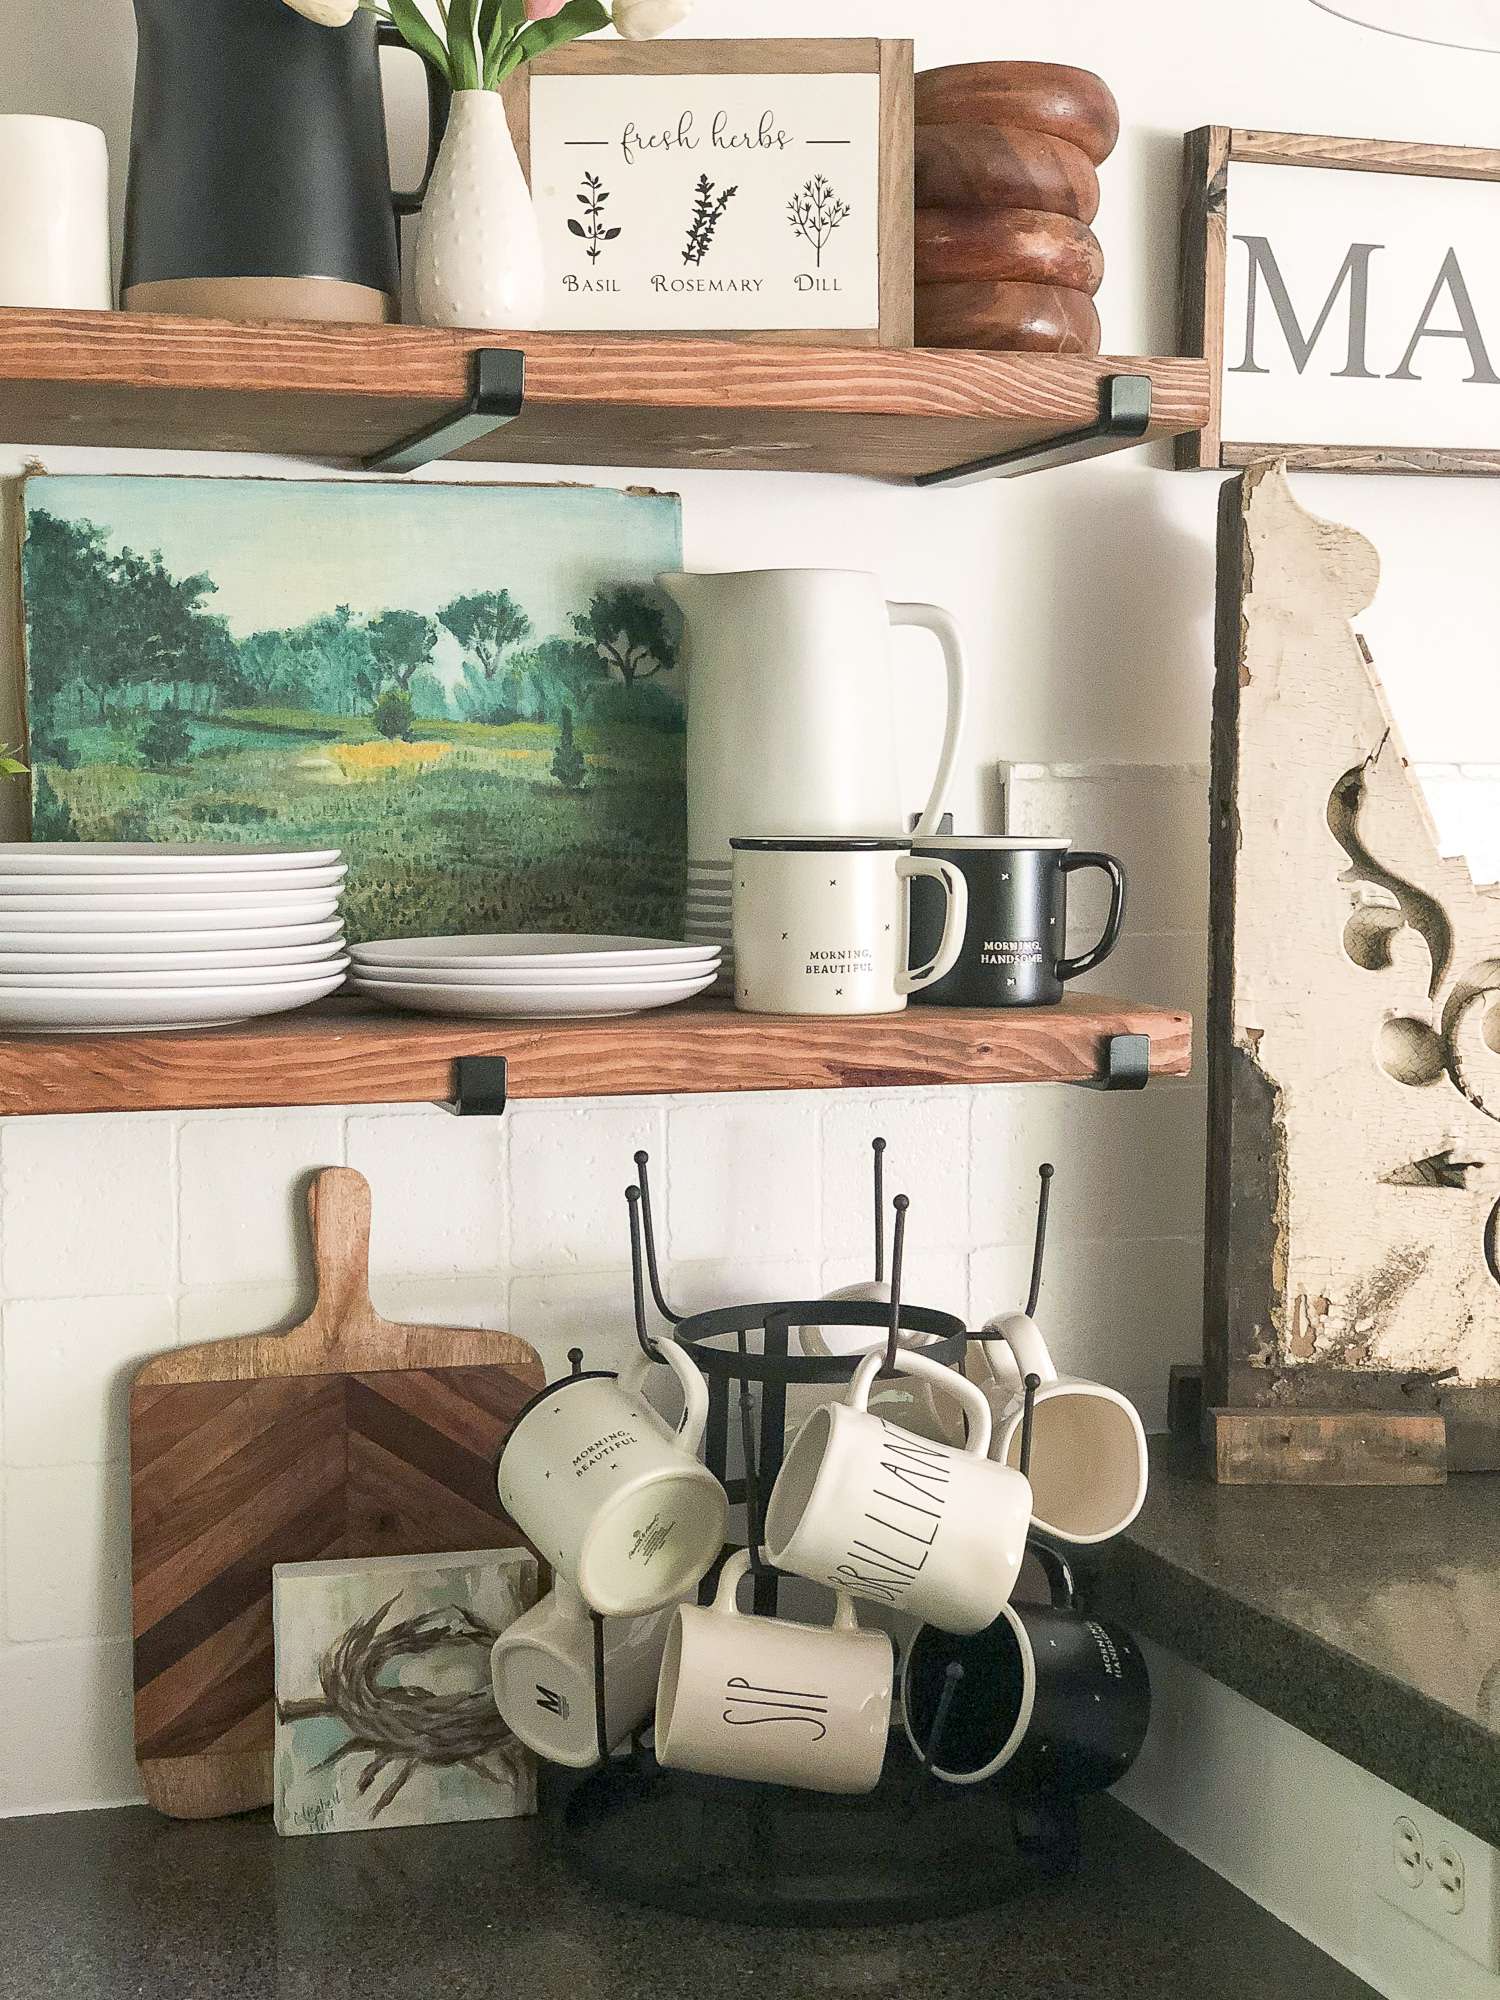
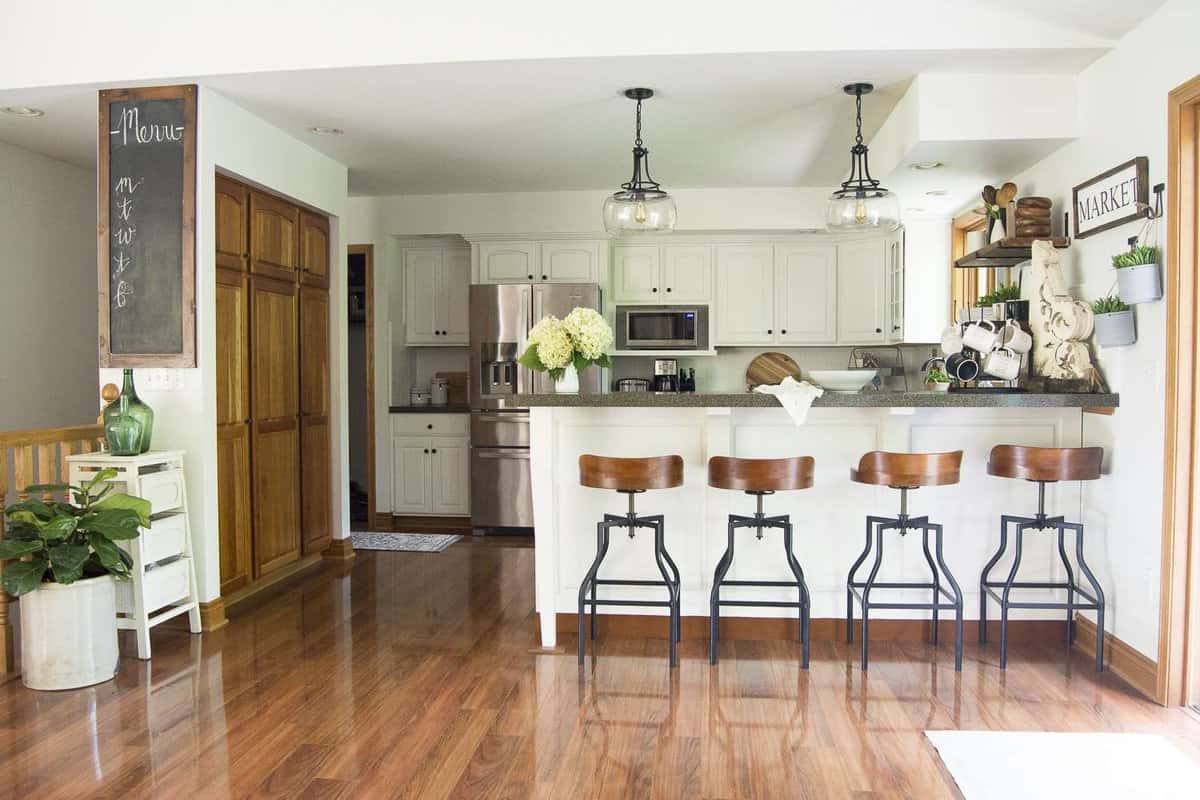

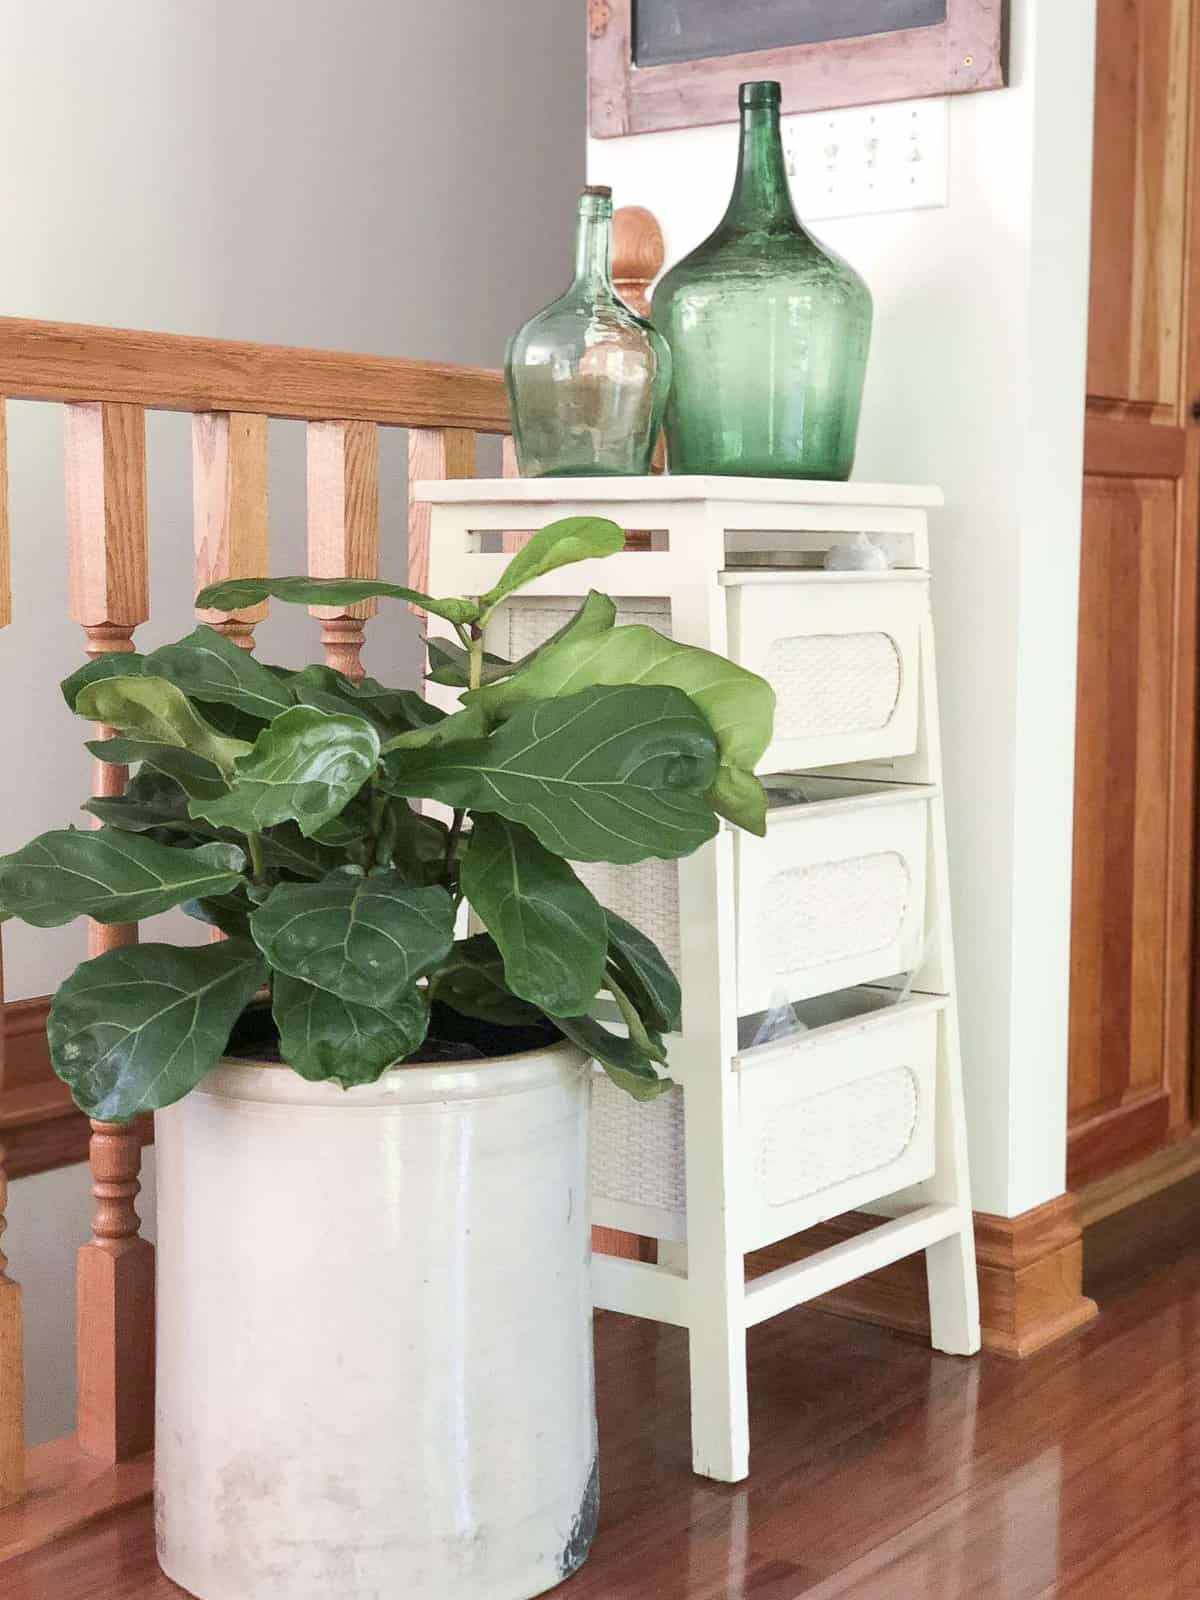
A quick tip I always make sure to mention is not to neglect decorating your kitchen!! Plants, artwork, and a few character pieces can transform a utilitarian space into a lovely extension of your living area.
Can you believe the transformation!? This kitchen remodel on a budget was worth the effort to create a fresh and updated kitchen in the short term. Perhaps down the road we will do a full remodel, but for now I am so pleased to enjoy what we’ve been blessed with.
Next up, I’ll be adding an unexpected 5th post to my kitchen series to give you the full tutorial on how I create my DIY open shelving {HERE}.

{Design is a plan for arranging elements in a way that best accomplishes a particular purpose. – Charles Eames}
Shop My Kitchen
You can shop my decor below by clicking on the affiliate image.
The “Kitchen Remodel on a Budget | The Reveal” is really impressive and shows that style doesn’t have to come with a high price tag. Smart planning and thoughtful choices can transform a kitchen without overspending. It’s inspiring to see how creativity and budgeting go hand in hand to create a beautiful, functional space. This reveal is a great example for anyone looking to renovate wisely.
Consider the layout by painting the cabinets and functionality of your kitchen and also enhances your daily routine.
Love the way your kitchen turned out! I’ve been looking into using the Magnolia trim paint and was curious to know how is holding up about 5 years later.
It’s quality! Only chipping has occurred on a door that wasn’t aligned properly and hit the jam everytime. 🙂
Hi! I love this. Beautiful job. Did you use the same color on cabinets as you did on the backsplash? What paint color(s) did you use? Thanks!
Thank you! Yes, it is the same color. Shiplap by Magnolia Home.
Transformation is so real. Do you have tips can you share with those who are planning to renovate their kitchen? Have a lovely day https://www.hackneykitchenrenovations.com/!
What a great redo! I painted some tumbled marble tile at our son & daughter-in-laws house and it was an amazing transformation. My dil wanted to rip it out but I said, ‘before we do it lets just try this’ and it was a $40 (if that) redo! I used white chalk paint I had leftover from another project, I bought a grout pen for the grout and used it to ‘smear’ over the pretty silver accent pieces of rope and a fleur, and then I coated it with about 4 coats of satin oil based poly! People comment all the time on it! It looks like hand-cut european tile. Check it out here. https://starkey1981.smugmug.com/DIY-by-Maria/n-twSMTz/i-7Ncvr86/A
To bef honest you did get new refrigerator and microwavee
Hi Sarah,
I love your remodel it’s beautiful! We just started our remodel! Can you please share the make and models of your appliances please! We have a similar layout and I love the look of yours!
Thanks so much m!
Thank you Melissa! We have the Samsung appliance package in Tuscan Stainless Steel finish. We love them!
Your Blog is awesome. I liked the one thing in your blog the most is that you have shared your ideas through pictures. The pictures are very important to give a visual or reality look. Kitchen has a very important part in our homes. Also need to take care of them. Thankyou for sharing this post.
Thank you!
There is definately a great deal to learn about this topic.
I really like all of the points you made.
Thank you!
Hi Sarah!
I’m new to your blog, but I can’t believe how similar our kitchen layouts are. Your remodel is almost exactly what I imagined in my head for my own kitchen! With the amount of limited space, I’d love to know how you organized your cabinets (especially the pesky upper corner cabinet left of the sink).
I have a few differences with my kitchen – like my left wall is shorter and the fridge is where your microwave is. Currently our microwave sits on the counter and eats up so much space, but there’s just nowhere else to put it! We also have a rectangular table in the dining room instead of bar stools (family of 5).
Just love this remodel, and I’ll definitely be saving this for inspiration!
Thank you, that means so much that you find inspiration here! Good luck with your remodel when it comes time!!
I love the “after” picture of your remodeled home. I recently bought a house and am looking to remodel the kitchen in a similar way to how you remodeled yours. I will definitely use your photos and advice as a reference. I especially like how you painted your cabinets white and then added plants around the room.
Thank you so much Sandra! I’m glad it is helpful to you!
What brand and color spray paint did you use for the top of the pendants? Absolutely stunning by the way! Is your kitchen height 8′ or 9′ ft?
I used rustoleum in semi gloss black. 🙂 We have 8 foot ceilings.