
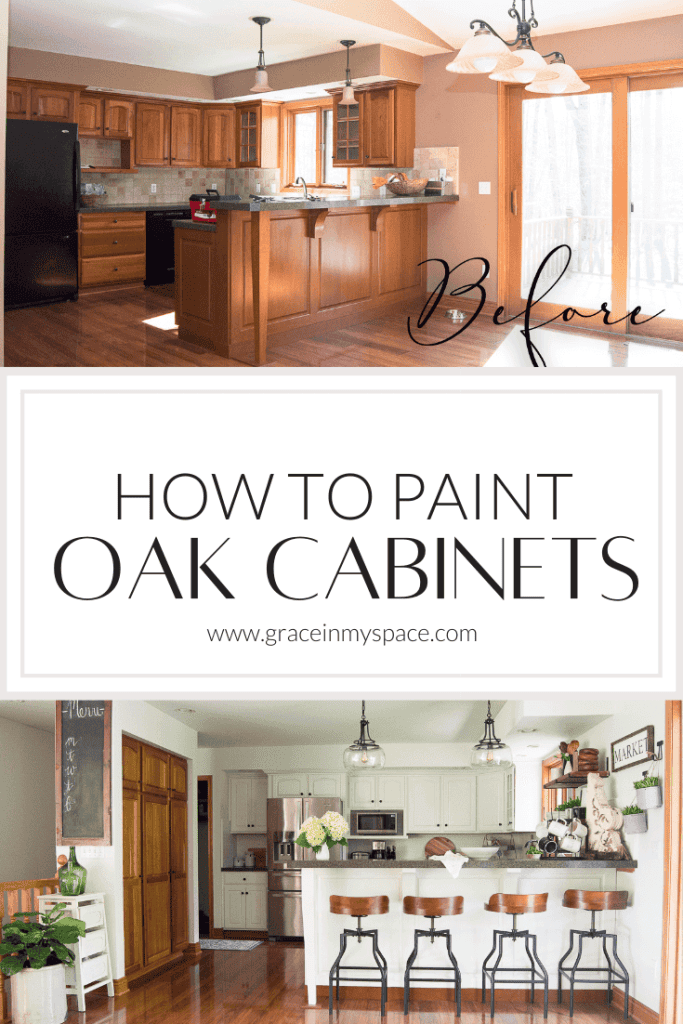
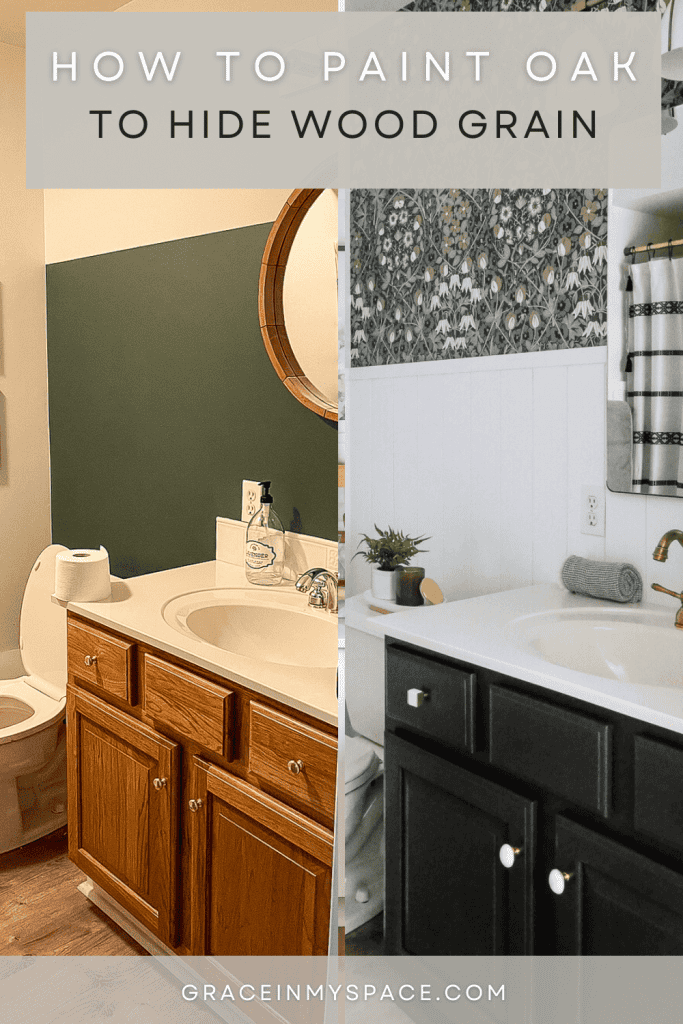
How to Paint Oak Cabinets and Make Wood Grain Disappear
Are your oak cabinets in need of a refresh? Say goodbye to outdated oak cabinets and hello to a modern makeover with my step-by-step guide on painting oak cabinets. Not only will you learn how to paint oak cabinets, but you’ll also make that wood grain disappear.
Post may contain affiliate links for your convenience.
Transform Your Kitchen: The Ultimate Guide to Painting Oak Cabinets
Painting things is my area of expertise.
I’ve transformed 4 of my personal homes with paint and elbow grease and painting cabinetry is always on the list of must-dos.
Today, I’m sharing the simplified process for how to paint oak cabinets with must-know details called out for my skim readers.
Set Up a Work Station
First, painting cabinetry is a task that requires a lot of space.
You should set up a work station somewhere accessible and with climate control so the paint can cure properly.
I usually use a garage or open basement space, but I’ve also just set up card tables right in my living room when needed in the colder months.
Drying Rack Options for Painting Cabinetry
These paint risers work well if you’re painting on a table top surface.
If you are very tight on space, consider looking into an affordable drying rack system like this one.
If you plan to spray your cabinets (more on that later), then assemble a hanging system using cup hooks and hangers on a cheap drying rod. Simply screw a cup hook into the top of each side of the cabinet door, then hook onto a wire hanger and hang on the rod.
You may even want to use this system if you are hand painting. However, make sure you aren’t over saturating your brush or roller as hanging doors vertically may cause drips to appear.
Gather Your Supplies
Before you can revamp your oak cabinets, make sure you have all the necessary supplies on hand.
Stock up on sandpaper, a good quality primer, paintbrushes or a paint sprayer, paint in your desired color, painter’s tape, drop cloths or plastic sheeting, and a tack cloth to remove any dust.
Once you have all your supplies ready, you’re all set to move on to prepping your cabinets for painting.
Here are my recommended supplies.
- TSP cleaner
- Wood filler
- Sandpaper (80 grit up to 300 grit)
- Mouse sander (best for corners)
- Detail sanding tool
- Tack cloths
- Paint brush
- Mini paint rollers
- No-Shrink Spackle (optional to hide wood grain)
- Paint sprayer (optional)
- Quality primer
- Quality cabinet paint (see notes)
Prepare Your Oak Cabinets
To prep your cabinets for painting, start by removing all hardware such as handles and hinges. Use a screwdriver to carefully take them off and set them aside in a safe place, labeling them if needed.
If you are adding new hardware with a different hole placement, now is the time to fill those old holes, sanding smooth and drill new ones.
Next, thoroughly clean the cabinets to remove any grease or grime buildup. Please refer to this article for detailed cleaning steps needed to get the best adhesion.
Once they are cleaned, lightly sand the surfaces with 150 grit to roughen them up and create a better surface for the primer to adhere to. Wipe down the cabinets with a tack cloth to remove any dust from sanding.
Finally, use painter’s tape and drop cloths to protect the surrounding areas from any paint drips or splatters. Now you’re ready to move on to priming and painting your cabinets in the next step.
How to Fill Wood Grain When Painting Oak Cabinets
This step is optional for how to paint oak cabinets.
However, if you really want to modernize your cabinetry, then filling the wood grain is important.
No amount of sanding will remove visible wood grain from oak cabinets. Instead, you will need to fill the wood grain to get a smooth finish.
First, take some spackle and mix it with a small amount of water. You should have a consistency of slightly runny pancake batter. Adjust as needed until you get this consistency.
Next, paint the spackle mixture onto the door fronts using a paint brush, running cross grain to ensure the grains are fully filled. Finish by running the brush with the grain to smooth out the mixture as much as possible.
Pay attention to edge details and corners to make sure you don’t miss any spots. (Don’t worry about getting this application smooth like you would with paint. That is the next step.)
Let the mixture dry fully. Then, lightly sand the entire surface with 150 grit sandpaper until smooth. Do not over sand or you will cause the surface to be uneven, which will show in the final paint coverage.
Once the surfaces are all smooth, take a tack cloth and once again clean the entire surface to remove any dust.
Prime Oak Cabinets
For the next step in transforming your oak cabinetry, it’s time to prime.
Once you have prepped your cabinets by removing hardware, cleaning, sanding, and protecting the surrounding areas, you are now ready to apply a primer to ensure the paint adheres properly.
A high bonding primer will be your best option. These are my favorite primers for cabinetry.
Use this tutorial for tips on how to paint without brush strokes becoming visible for both the prime and painting steps.
Apply the primer to all surfaces and let dry fully according to the manufacturer’s dry time.
How to Paint Oak Cabinets
After priming, choose a high-quality paint in the color of your choice and apply even coats for a smooth, professional finish.
My favorite cabinet paints are:
- Cabinet Paint: Behr Cabinet, Door, Trim Enamel or Magnolia Home Kilz Cabinet Paint
- Oil Based Paint: Behr Oil Based Enamel
- Interior Alkyd: Benjamin Moore Advanced
Apply two to three coats, allowing full dry time between coats.
If you plan to hand paint your oak cabinets with a brush and roller, follow this tutorial.
If you plan to spray paint your oak cabinets, use the same methods from this tutorial.
Once you have completed painting, allow the cabinets to dry fully before adding any finishing touches. If you rush the curing process, your paint will not hold up as long.
I recommend only very light use for at least a week.
Painting Tips
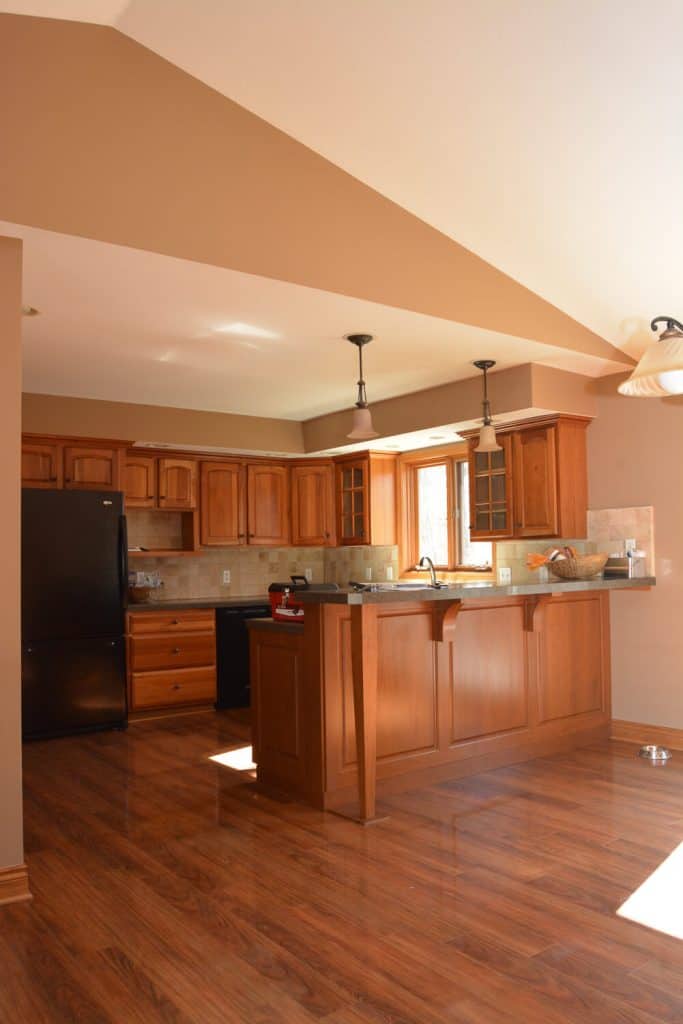
What is the best Color to Paint Oak Cabinets?
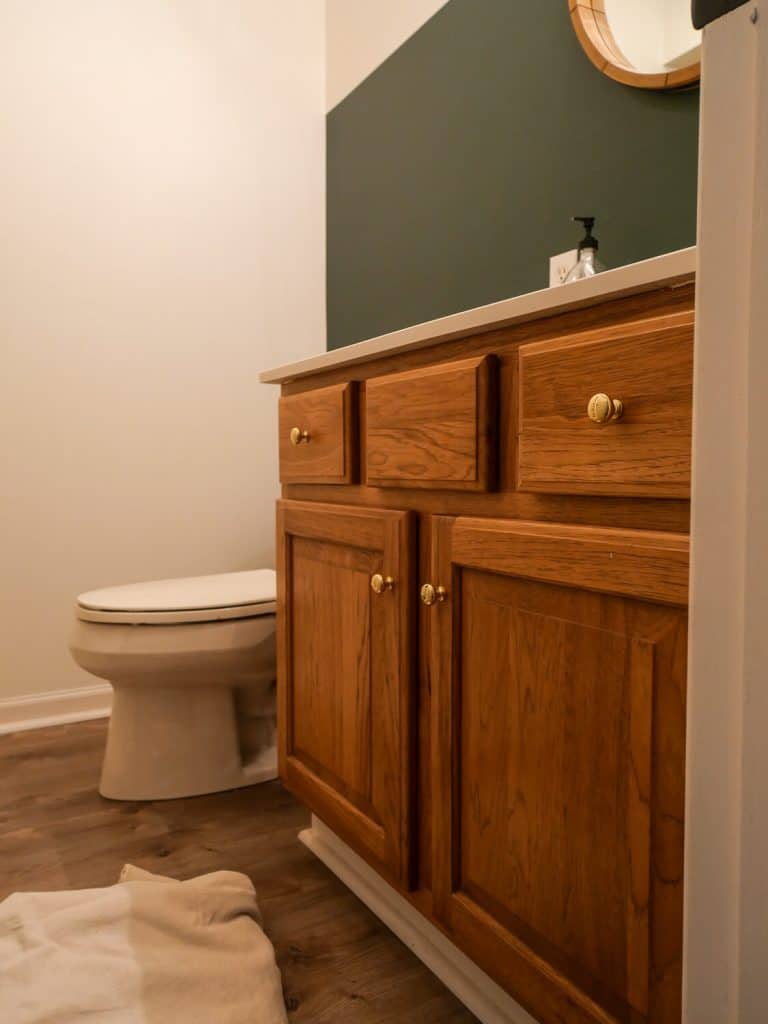
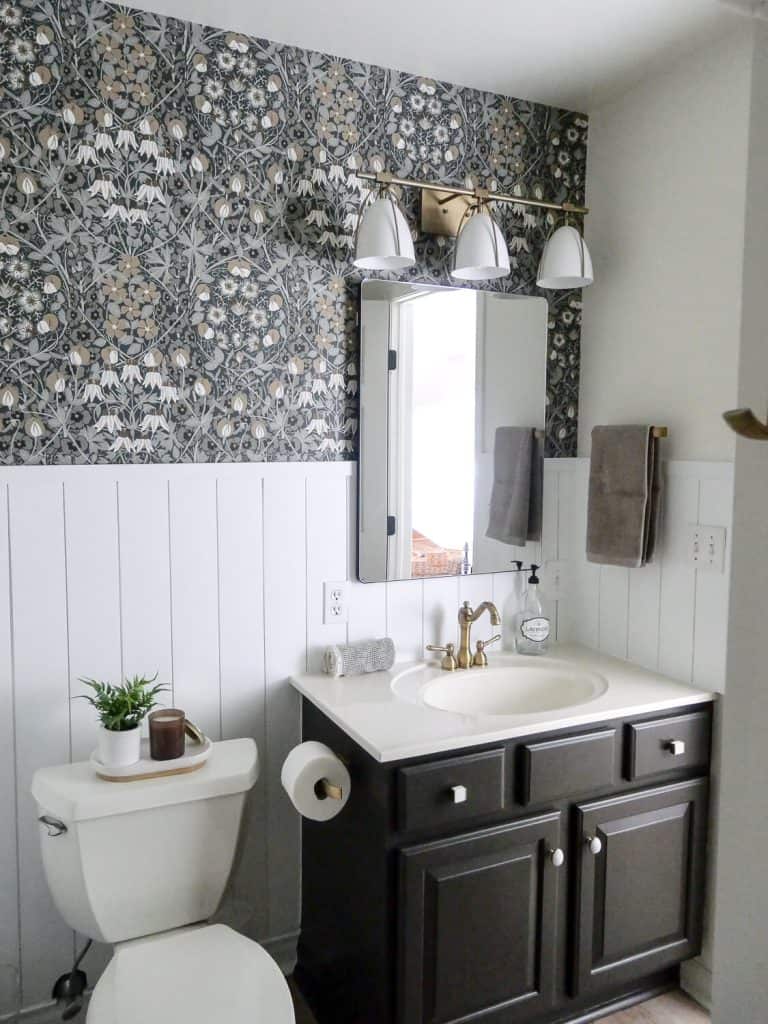
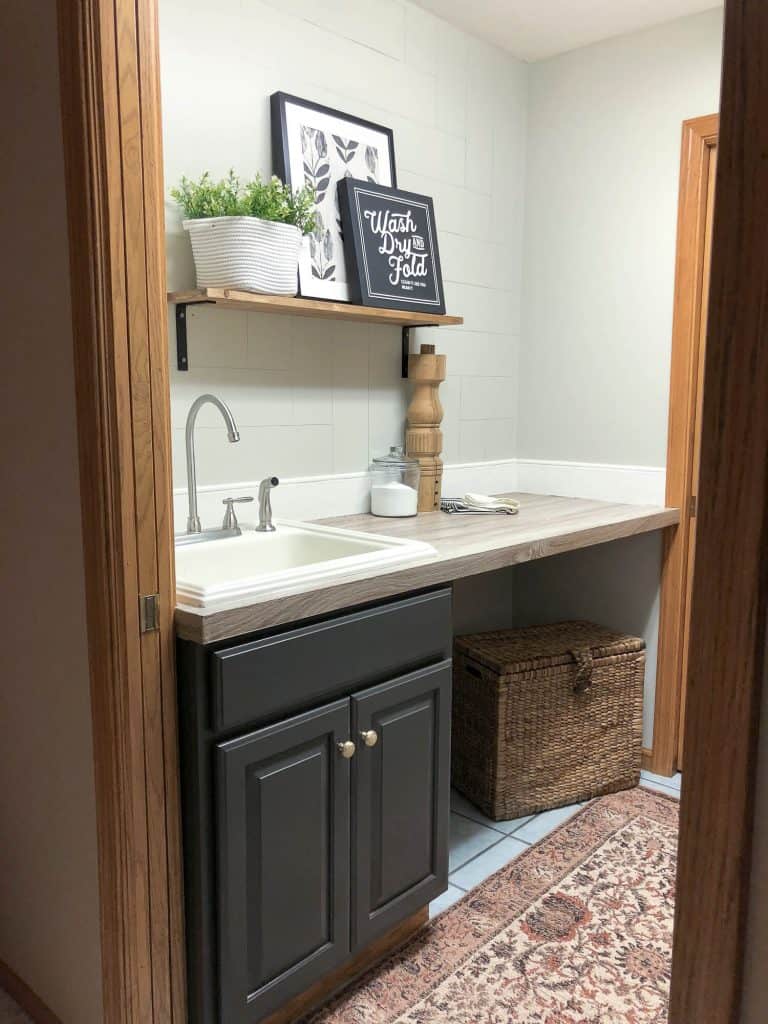
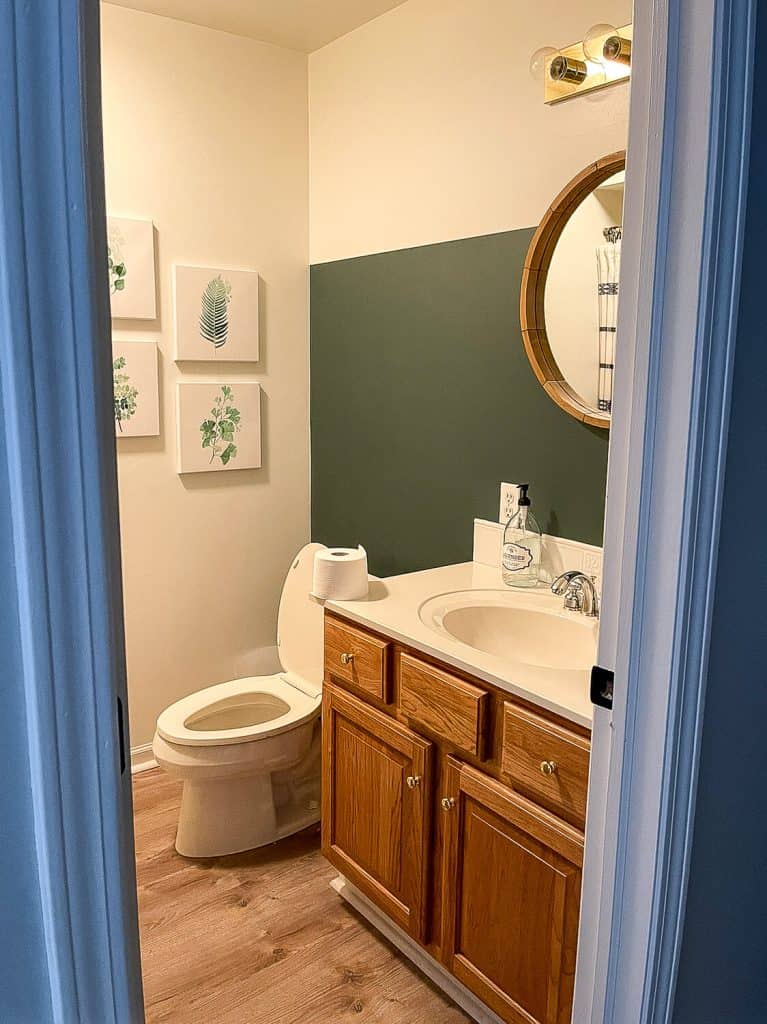
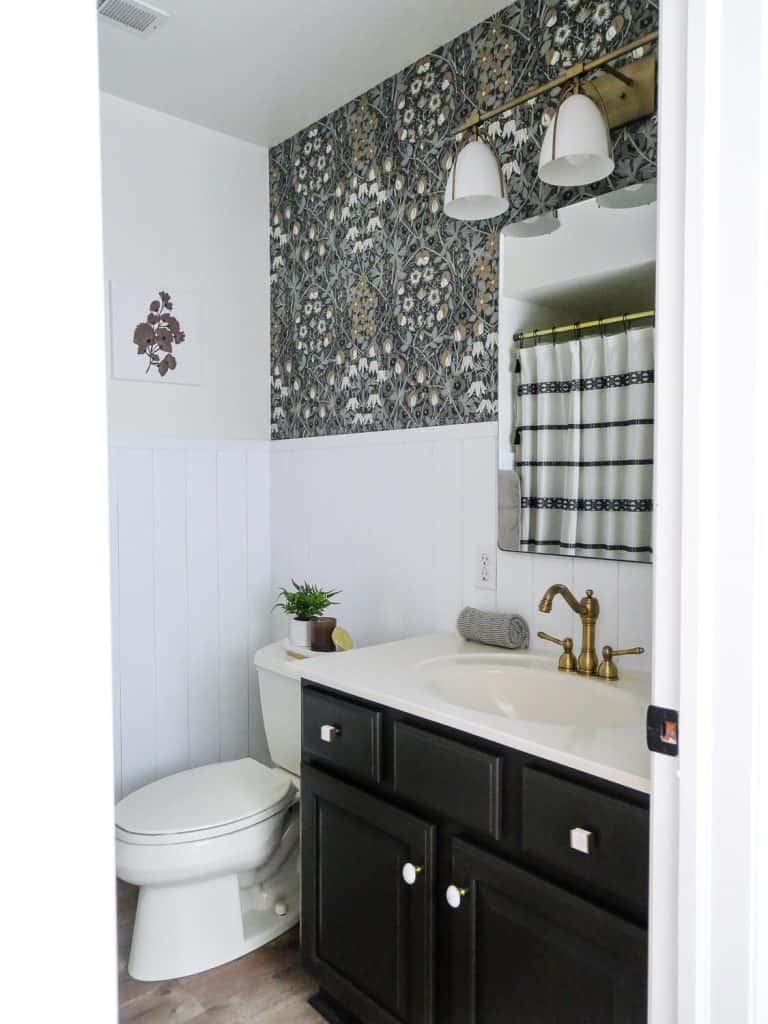
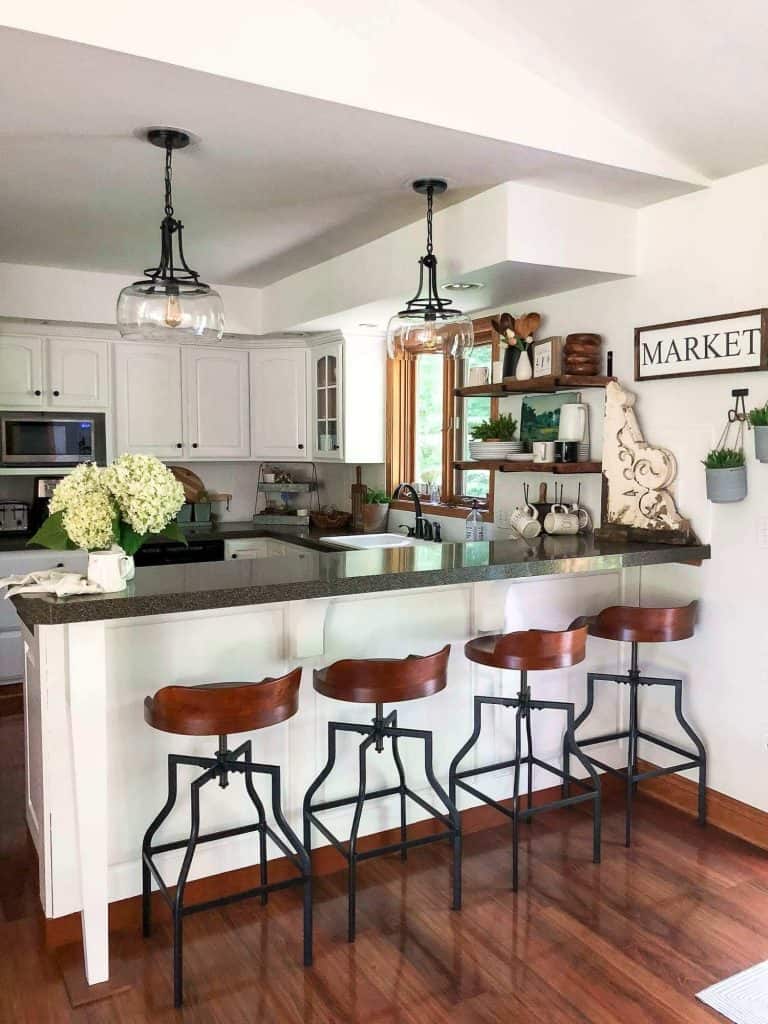
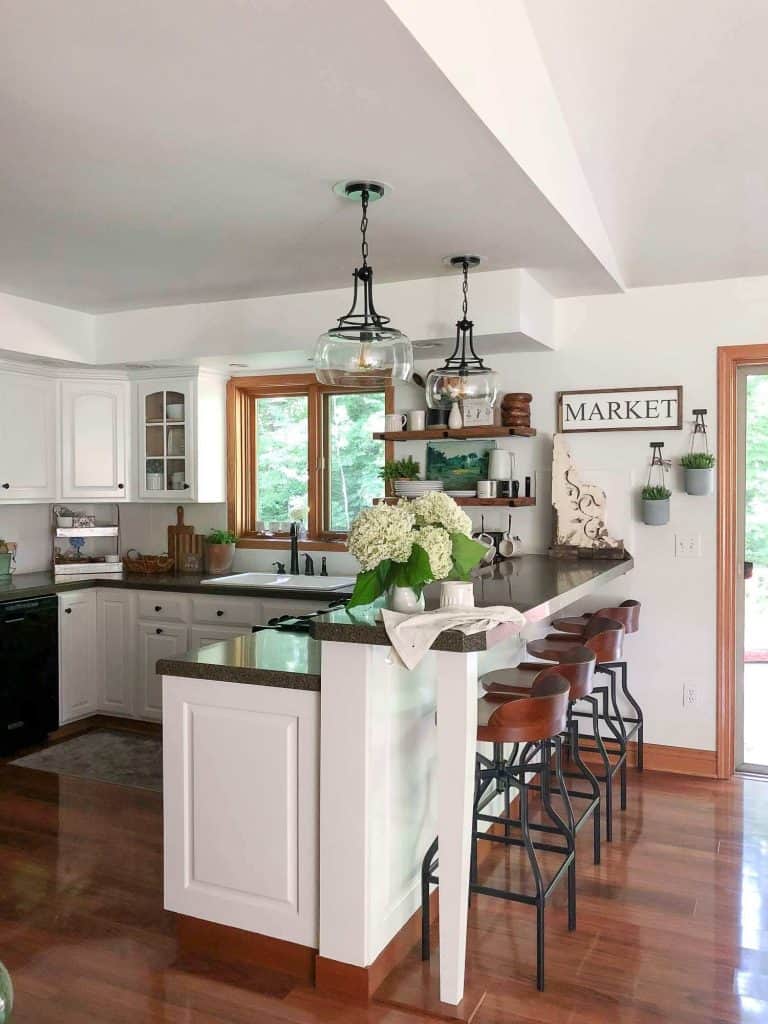
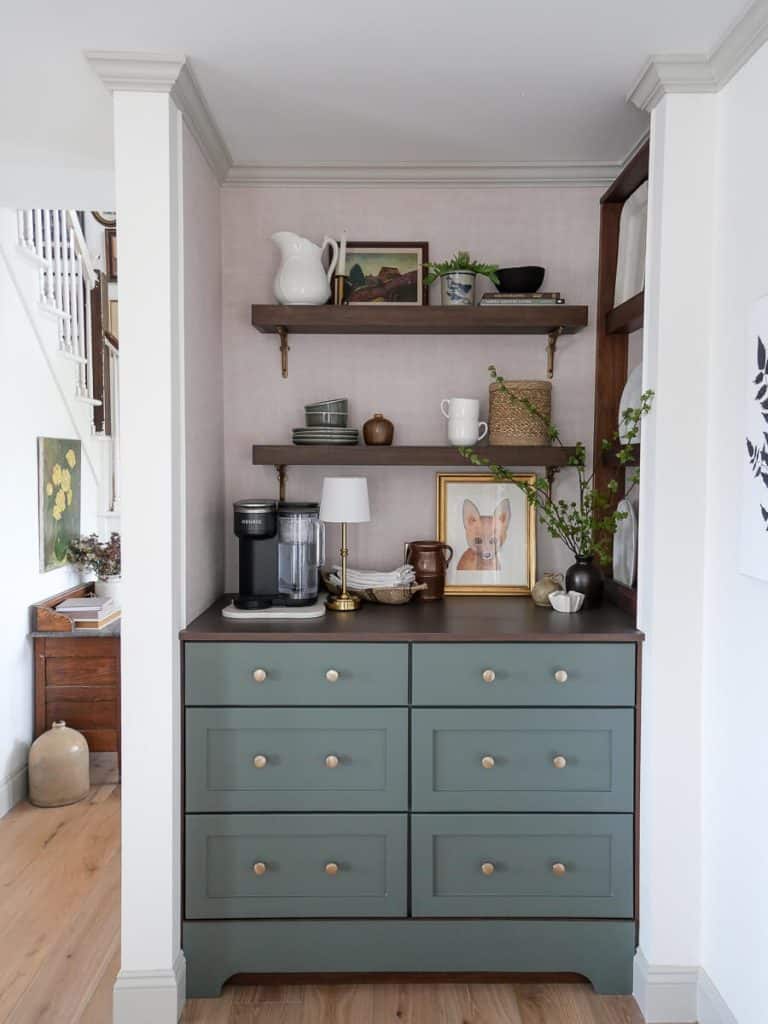
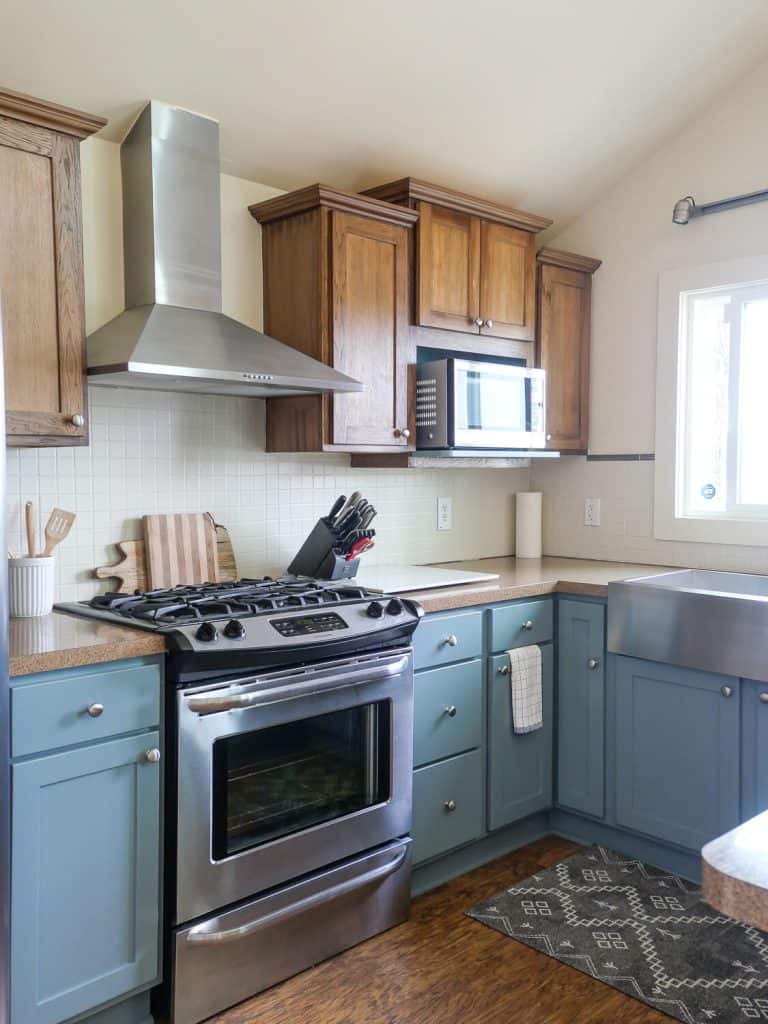
Color is such a personal preference. I’ve painted my kitchen cabinets white, bathroom cabinets green and mocha, and cottage kitchen cabinets a cheery blue.
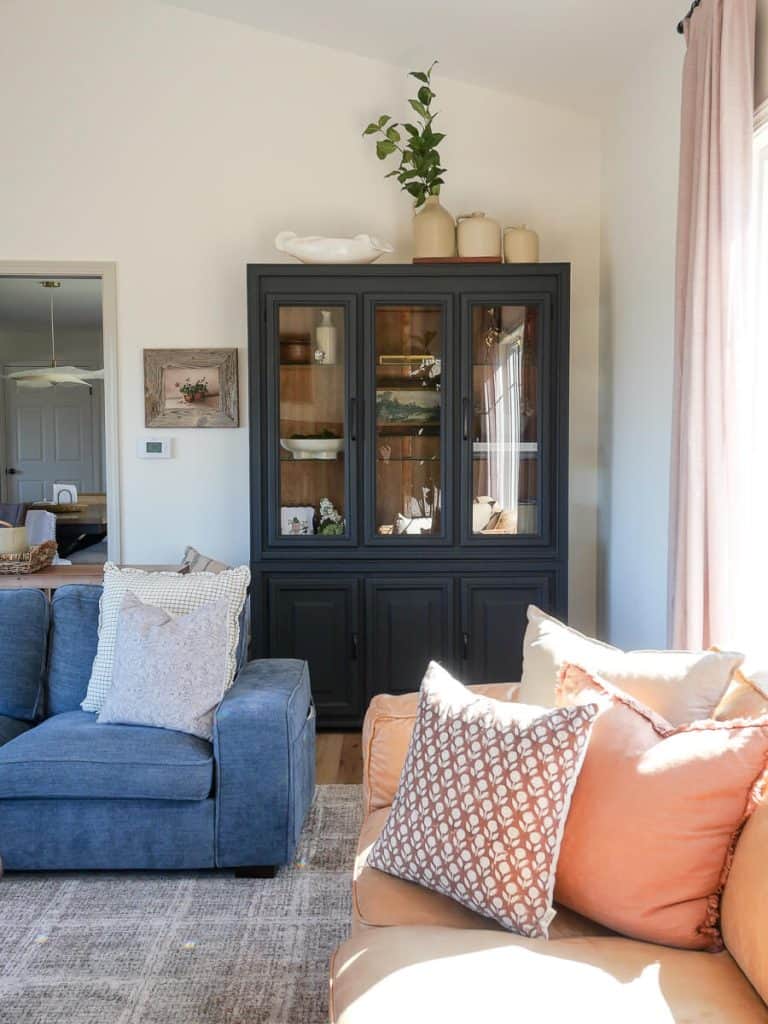
The beauty is, by filling the wood grain on your oak cabinetry, you are creating a perfect surface for any color! From modern colors like white or black to traditional colors like navy or taupe.
My top cabinet paint colors are:
- Taupe Color Family: BM Revere Pewter (see more options in this color family in this post)
- White Color Family: BM White Dove (see more options in this color family in this post)
- Green Color Family: BM Intrigue or Old Celadon
- Blue Color Family: Hale Navy or Smokestack Grey
If you want to see what’s trending in kitchen colors, check out this article!
Add Finishing Touches
To truly complete this transformation, it’s essential to add the finishing touches to your newly painted oak cabinets.
Consider updating the hardware with modern knobs or handles for a fresh look. Additionally, adding decorative molding or trim (before painting!) to the cabinet doors can elevate the overall aesthetic if you want to change the appearance even more.
Complete Guide to Painting Anything
In conclusion, transforming your cabinetry by painting oak cabinets is a rewarding DIY project that can give your space a fresh, modern look on a budget.
Don’t be afraid to take on this project and bring new life to your spaces. Paint is truly transformative and this concept extends well beyond just cabinetry.
If you want my complete guide to painting anything like the pros, check out my 58 page ebook.
Thanks so much for stopping by the blog today!
Make sure to subscribe to get my Grace Notes directly to your inbox and to access all my insider perks. You can also follow along daily on Instagram and weekly on YouTube!
~Sarah


I actually just finished painting my own oak cabinets last month and went through the same struggle with the wood grain showing through! Your tip about the primer makes so much sense – I think I might have rushed that step and it’s exactly where I went wrong. Now I’m debating whether to repaint or just live with it for a while.
I love that you mentioned this is something you’ve done in 4 homes – that kind of real experience is exactly why I came to this article. There’s nothing worse than following advice from someone who’s only done something once or twice. The before and after photos are incredible too, by the way. Did you use a specific brand of primer or just stick with the traditional BIN shellac-based ones? I’m curious if the water-based options have improved enough to skip the smell and extra ventilation steps. Thanks for breaking this down in such an approachable way – I’m definitely saving this for my next cabinet project!
Hi! Water based primers can do well also. Kilz premium is a good option. But the BIN shellac options really do offer the most durability! I always say it’s better to go hard the first time so you don’t have to redo it in a year or two.
This is exactly the kind of guide I’ve been looking for! I’ve been putting off painting my oak cabinets because I was worried about the grain showing through. The idea of a smooth, updated look is so appealing. It’s almost like taking a classic car and giving it a fresh coat of paint – maybe even customizing it for some Drift Hunters-style action, haha! Seriously though, thanks for the clear instructions; I’m feeling much more confident about tackling this project now.
Wow, what a transformation! The cabinets look amazing — thanks for sharing your tips.
Don’t hesitate to embark on this project! Paint has the power to transform not just cabinetry, but various aspects of your home. If you’re looking for more in-depth guidance, consider checking out my complete guide to painting anything like the pros—a comprehensive 58-page ebook designed to help you every step of the way!
You should set up a work station that is easily accessible and with climate control so that the paint may cure correctly. I normally utilize a garage or an open basement space, but I’ve also set up card tables right in my living room during the colder months.
You have a gift for finding beauty in the little things, and it’s truly inspiring.
Such an awesome blog! All the information provided by you is really very helpful for all. By using tack cloth you can keep your project dust-free and it is useful for cleaning fine dust off a surface and gives you a smooth finish. Keep Posting! Keep Sharing!