
Our 1970s Remodel: Kitchen and Bathroom Remodeling Plans
Kitchen and bathroom remodeling are two of the most influential remodels you can tackle in a home. Designing a dream kitchen and bath sets the stage for the rest of your home’s design style elements. I can’t wait to share our 1970s remodel plans for our main floor kitchen and bathroom renovations.
This post may contain affiliate links for your convenience.
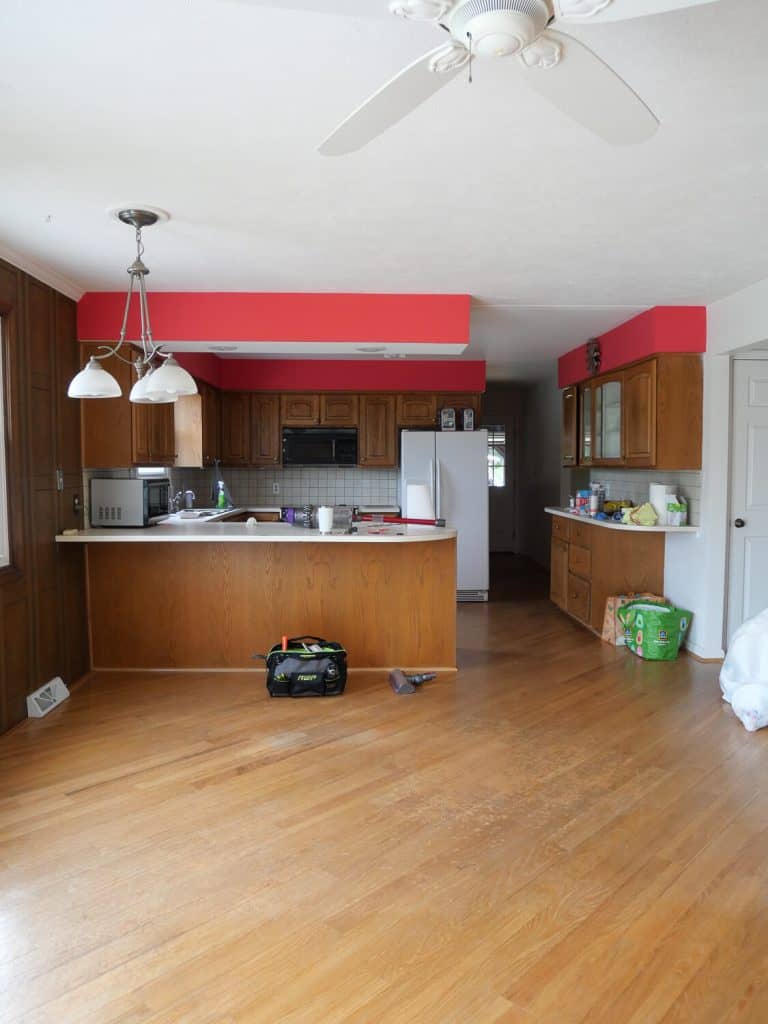
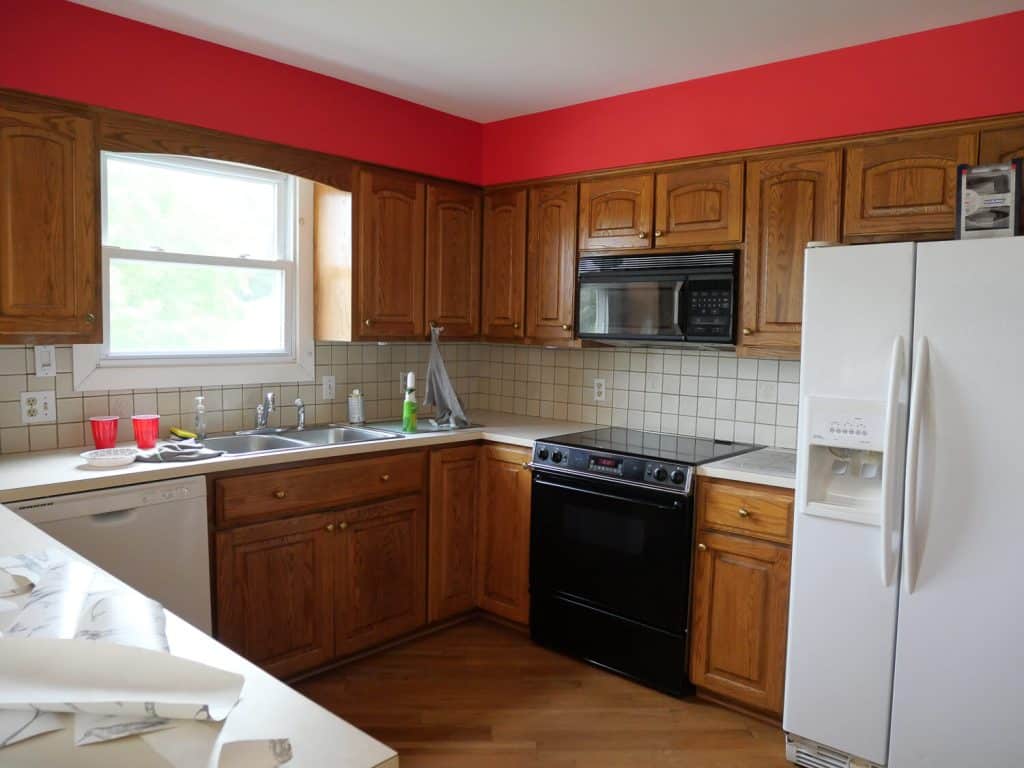
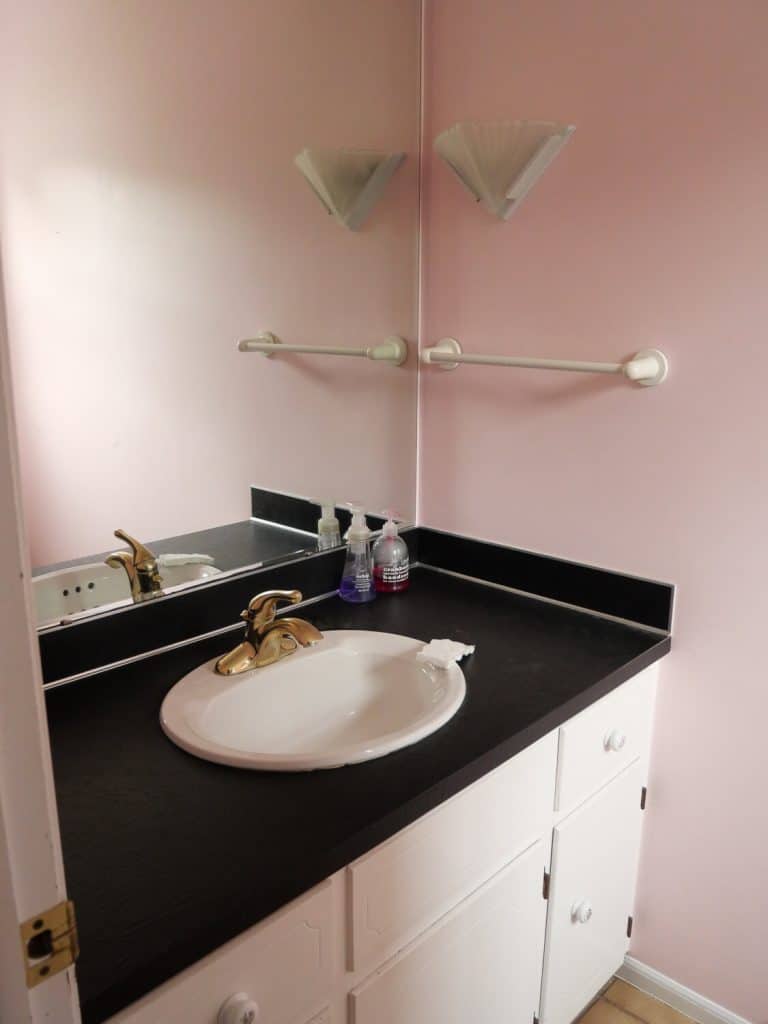
1970s Home Remodel: Before
If you have followed our home journey for any length of time, then you know we finished fully remodeling a 1990s house in 5 years at our last home.
When we found this 1970s home, we knew it would be a full remodel. This time, however, we wanted it to be a much quicker process so we weren’t living in a construction zone for years on end.
With that in mind, we’ve set out to tackle the main level in phase 1. The kitchen and bath renovation are the two biggest components of this phase.
In this article, I’m excited to share the kitchen and bath remodeling plans! Let’s dive into the nitty gritty details of the why and how I’ve chosen everything in these design plans.
Kitchen and Bathroom Remodeling Plans
The day we made an offer on this house I started designing it.
I worked through multiple layout iterations before we even received the news that the offer was accepted. For me, this is the best way to visualize the opportunities a space presents.
This is also part of my troubleshooting process to see how different configurations would function.
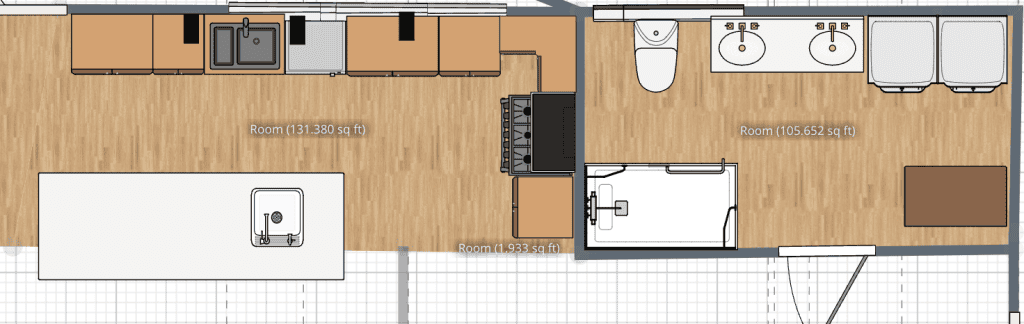
Here are several options that were nixed for one reason or another.
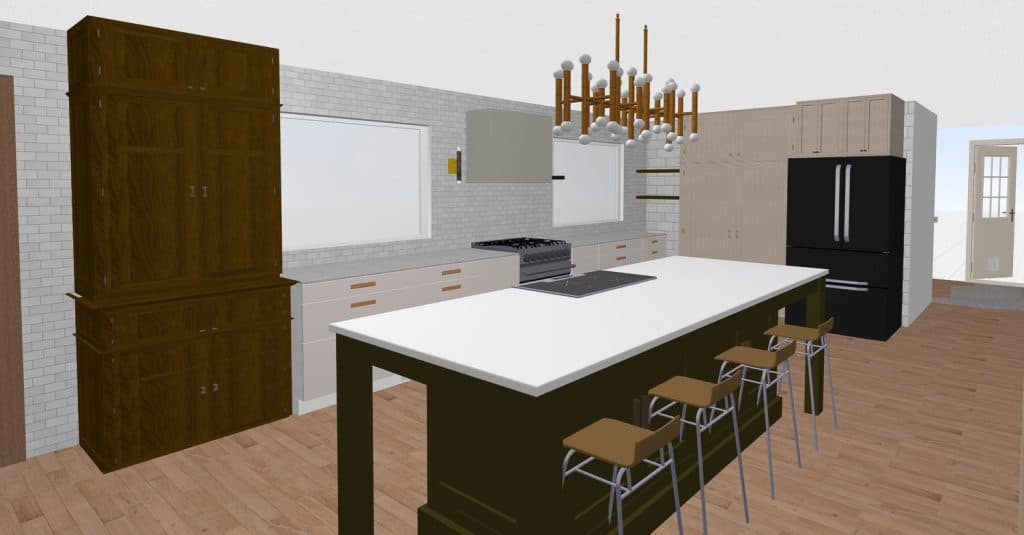
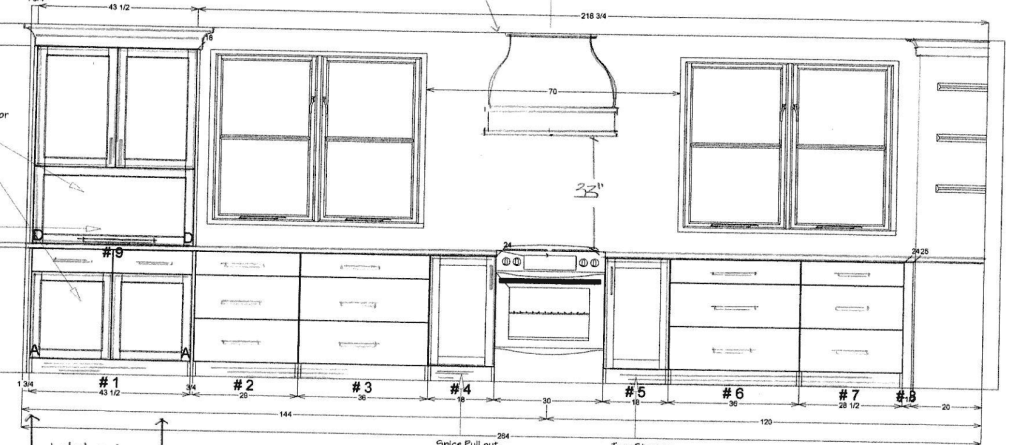
Kitchen Remodel Layout Plans
I spent several weeks troubleshooting plumbing and HVAC issues from our two story house. This limited where we could place headers and windows in the kitchen.
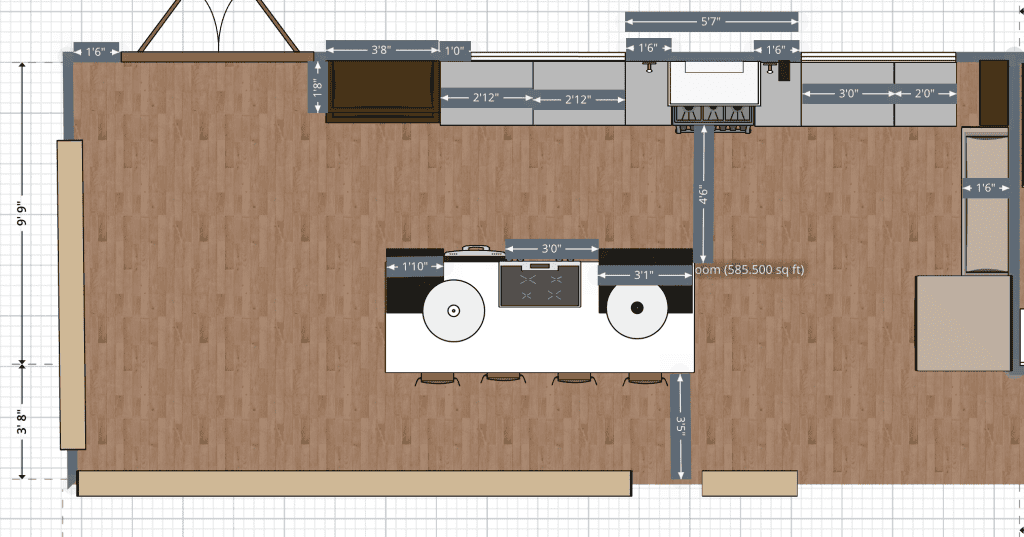


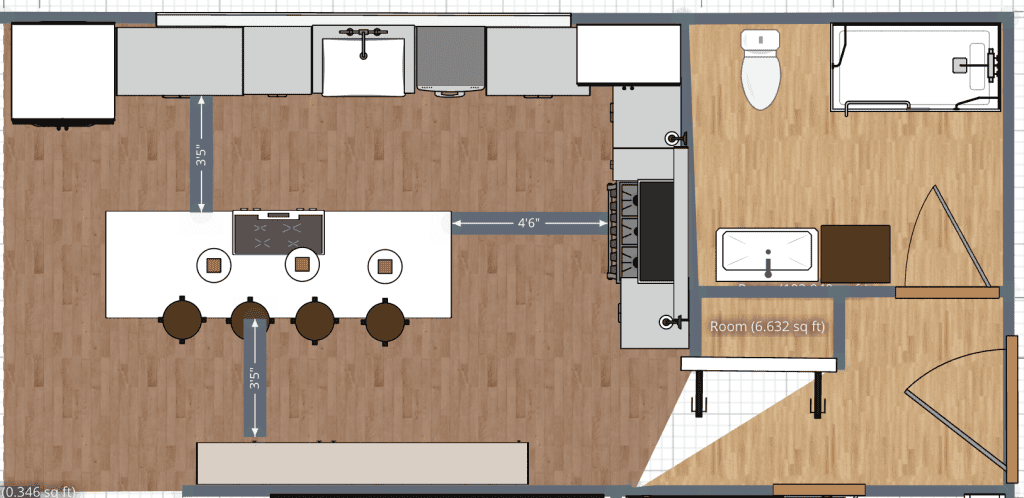
After spending countless hours testing different layouts, this is where we’ve landed!

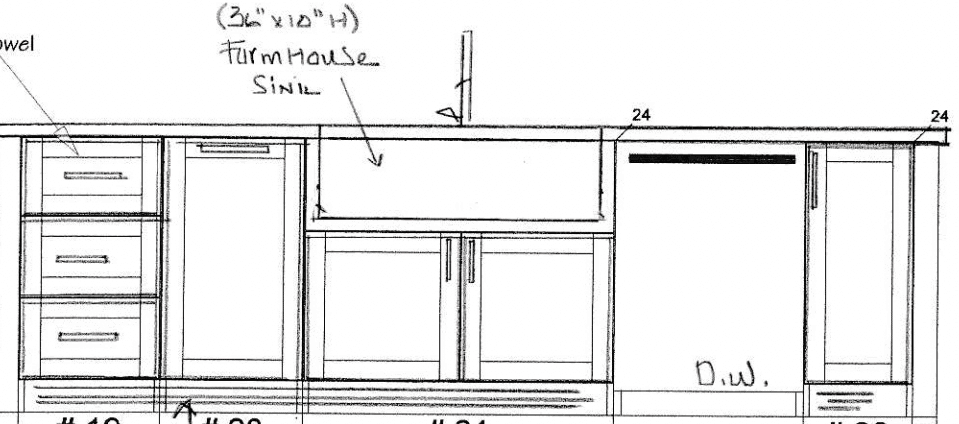
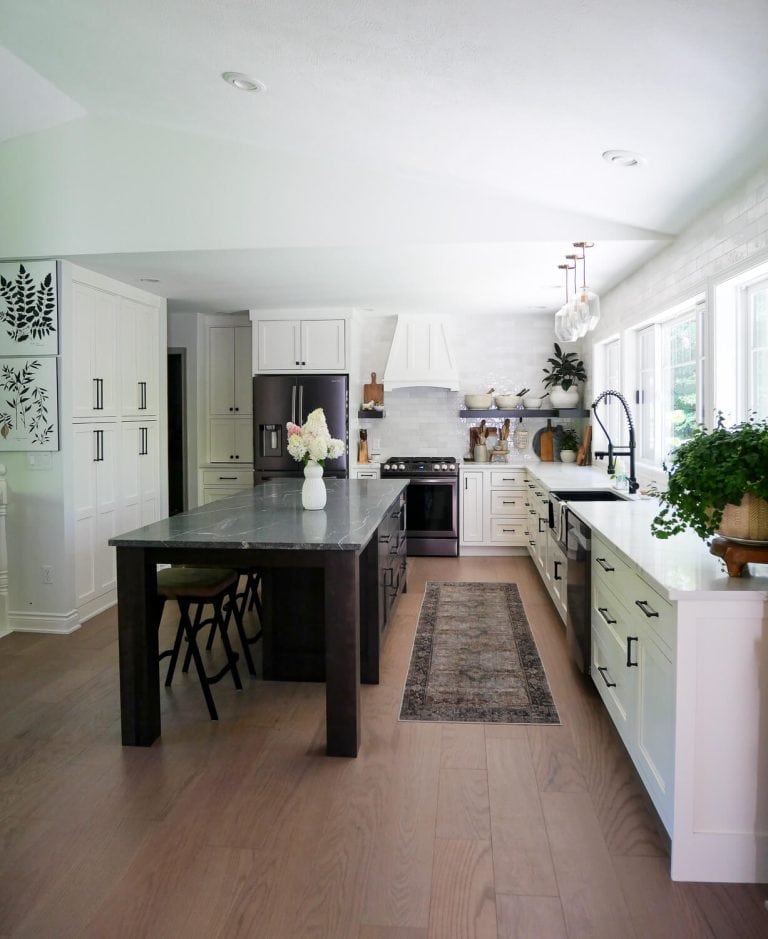
Placing the stove between two large windows allowed us to avoid moving a main drain line in the wall from our upstairs bathrooms.
My last home had a 17 foot wall of windows that I was hoping to replicate here. However, we were able to eek out 10 feet of windows, broken up by the range hood.
This will make it a beautiful focal point on the room. Additionally, it allowed us to keep our refrigerator where it was previously located for a perfect triangle between the sink, stove and refrigerator. This is optimal for prep work and cooking functionality.
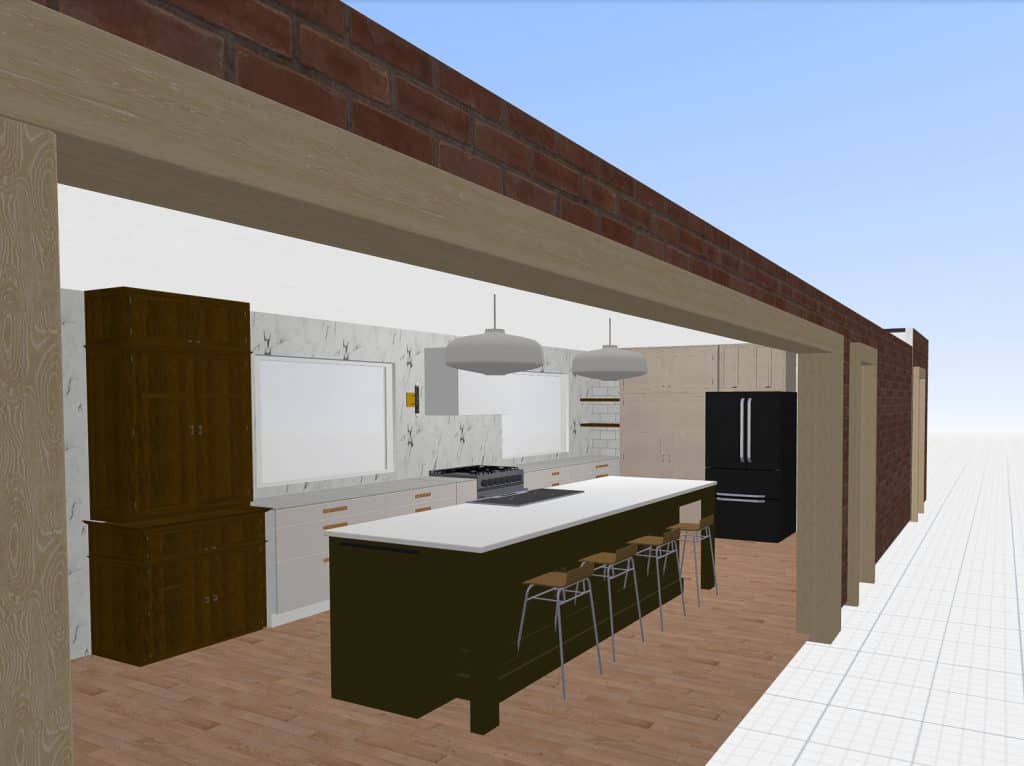
While I was hoping to have my sink under a window to take advantage of our beautiful backyard view, it ended up making the most sense to place the sink in the island (rendering only shows a placeholder for the sink).
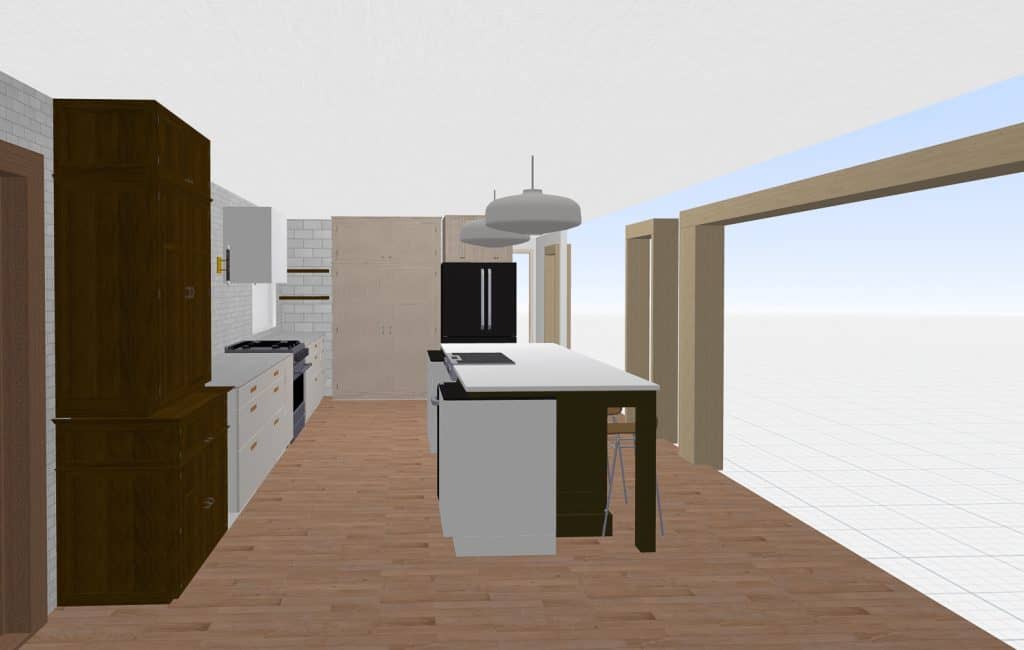
I wasn’t a fan of the symmetry issues it created when placing the sink under one of the two windows flanking the range.
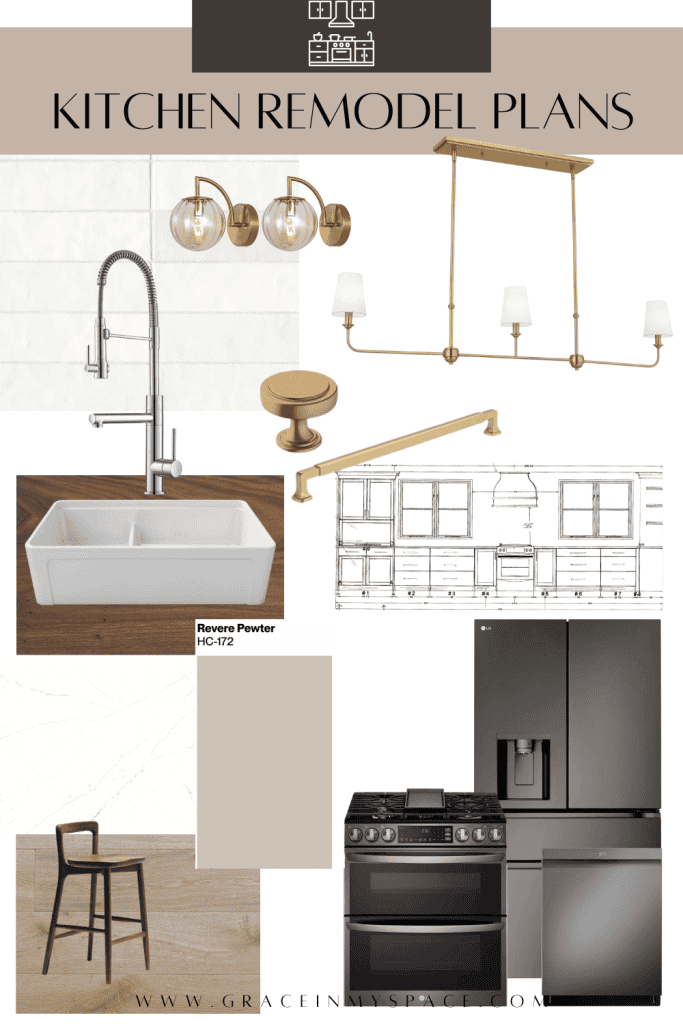
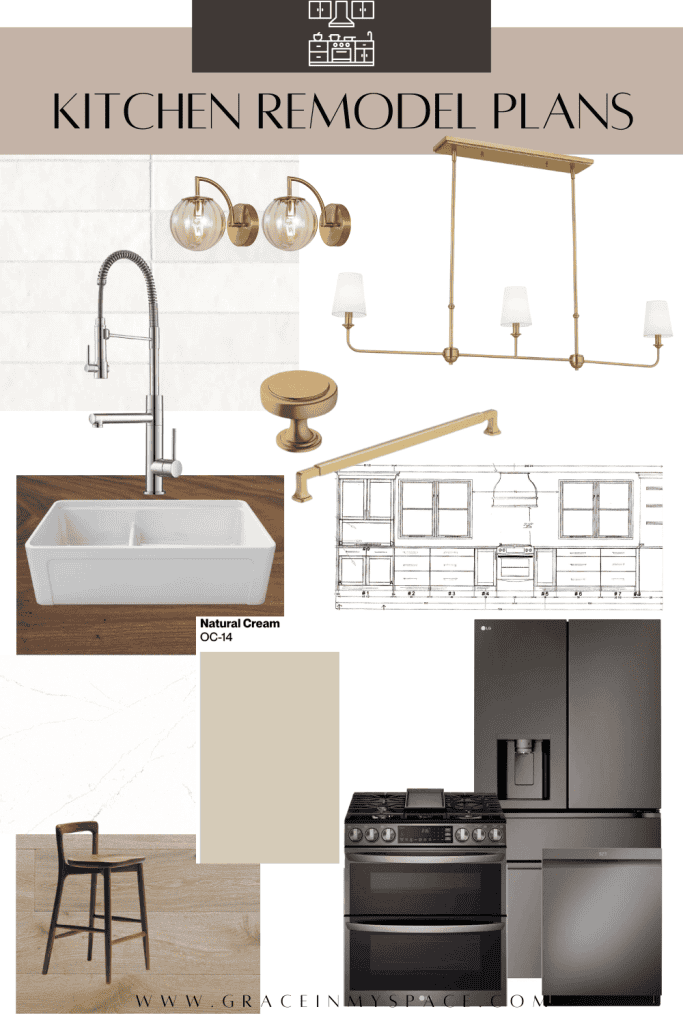
Kitchen Remodel Finishes
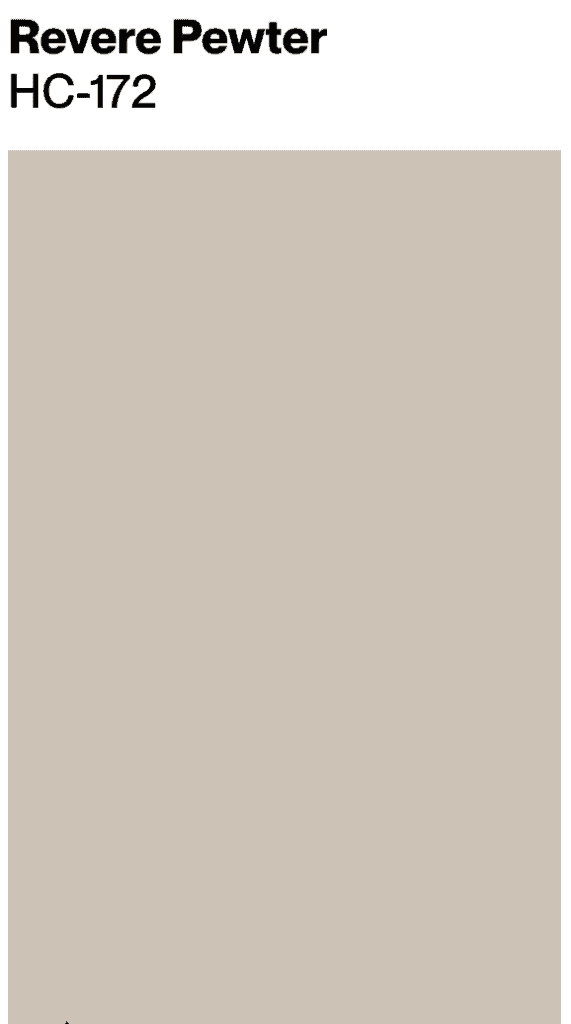
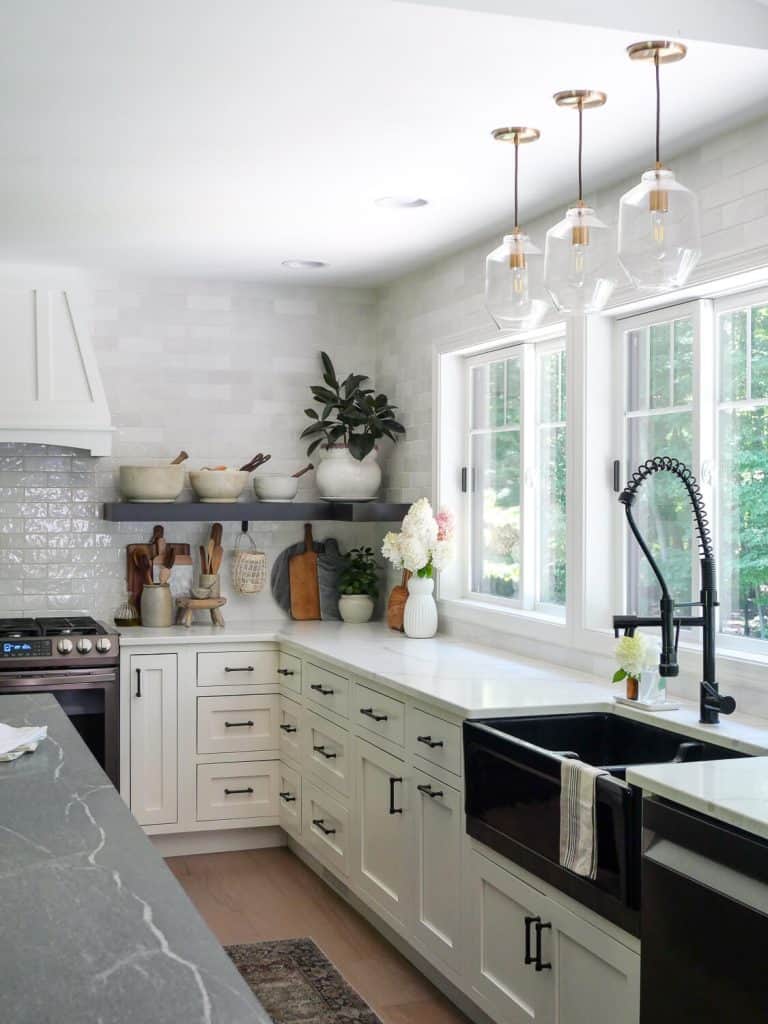
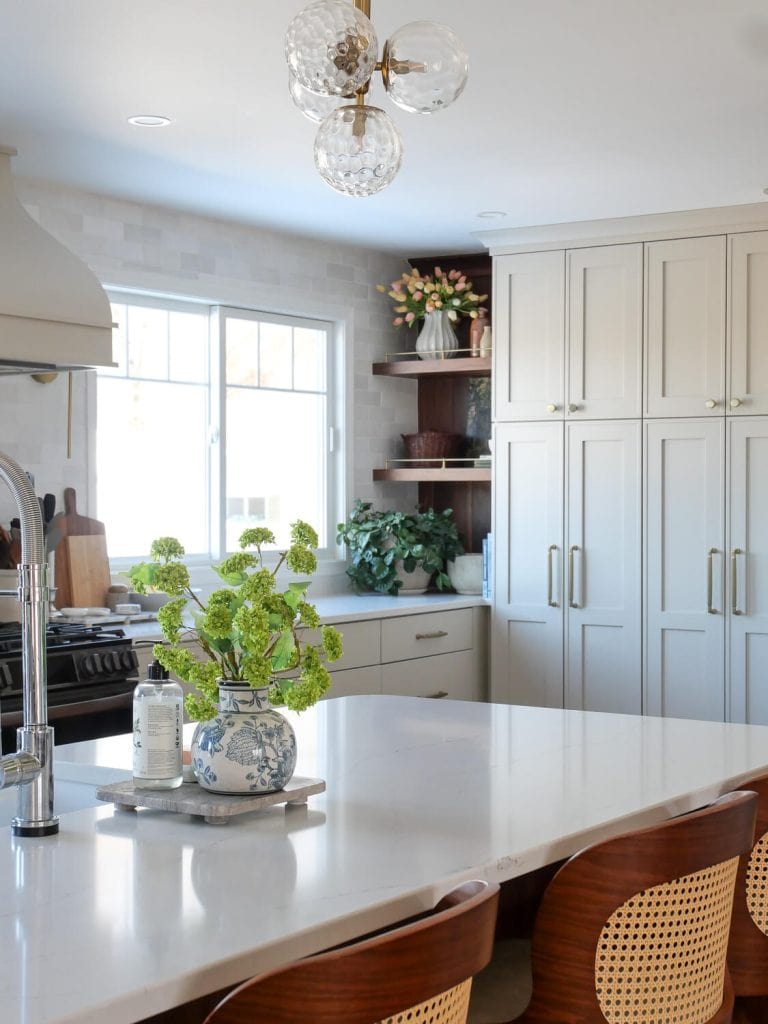
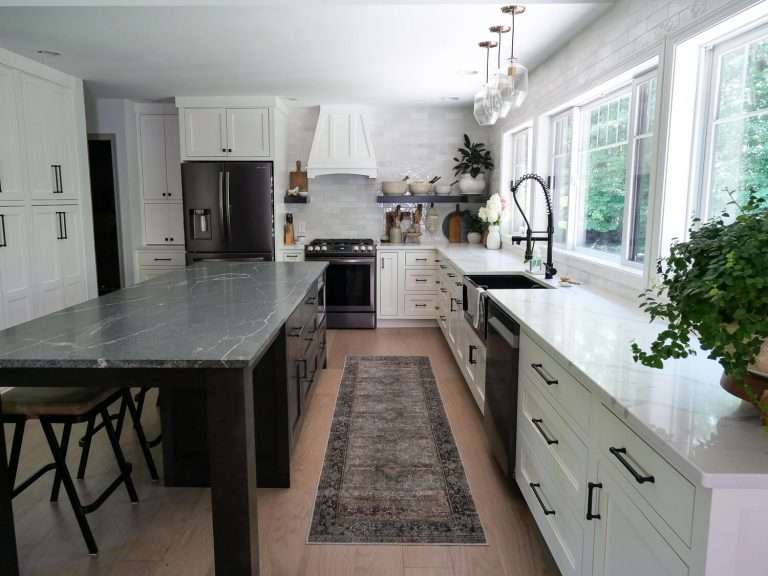
Our last kitchen was a classic white kitchen with a dark espresso island. For this kitchen renovation, I wanted to warm up the finishes.
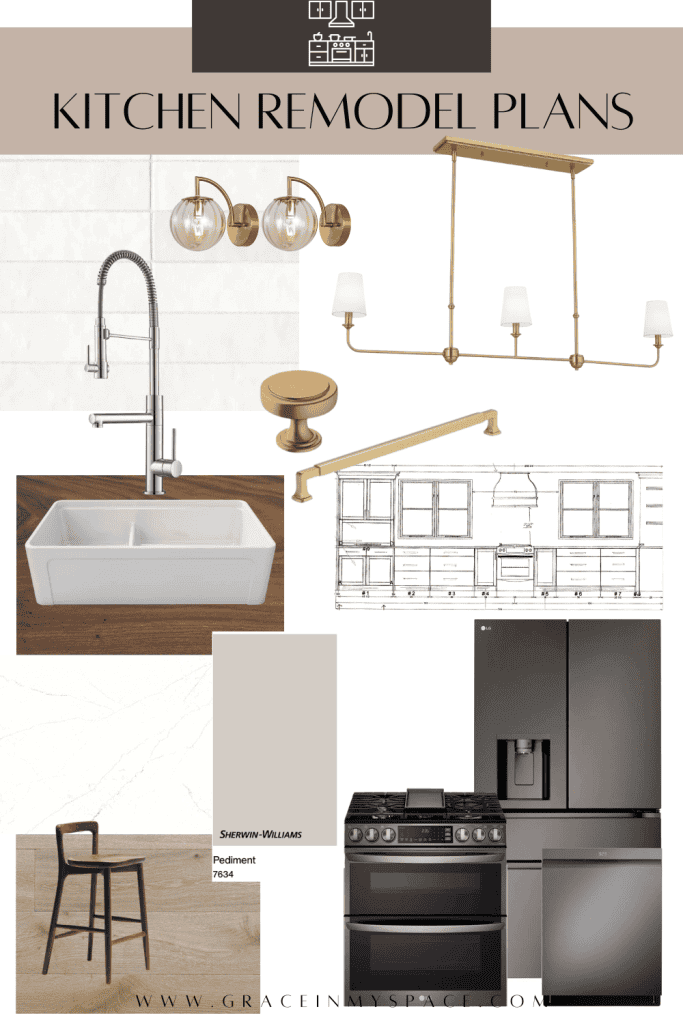
We will be doing a medium tone walnut island with taupe/greige painted perimeter. I am still undecided at this point for the paint color as I have several options I love.
You can shop our kitchen finishes via the image sources below.
SHOP THE LOOK

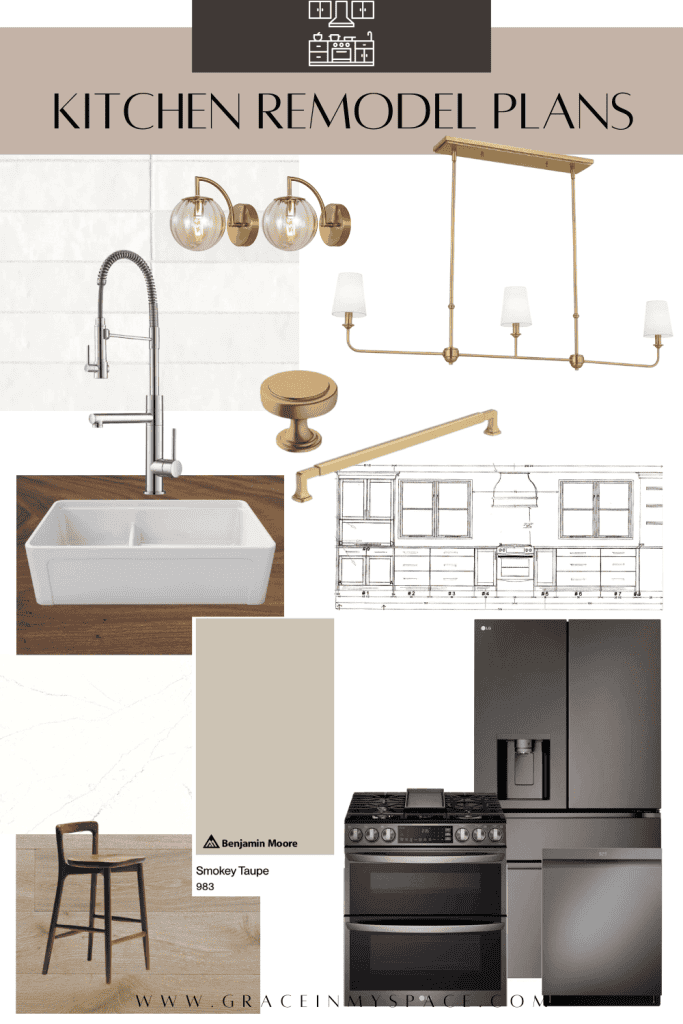

Weigh in with your vote in the comments!


For added warmth, I’m using brass fixtures and hardware.
Island Finishes
Since the sink is in the island, I wanted the faucet to disappear more than brass tones would allow. I am 100% focused on functionality for the sink and faucet, so I chose this dual spout faucet, very similar to the one I loved in our last home.
It is a very tall faucet so I didn’t want it to be an eyesore. A chrome finish will blend in with the backsplash tile in the background more than brass or black finishes would. Plus, I love to mix metals in kitchen and bath remodeling and this gave me the perfect opportunity.
Learn how to mix metals in this article!
For the sink, I really love a dual bowl. This goes against popular opinion in modern kitchen design. However, we wash dishes by hand daily so I prefer a washing bowl and a drying bowl so I’m not stacking on the counter.
With a 36″ 60/40 sink, the washing bowl is still plenty large.
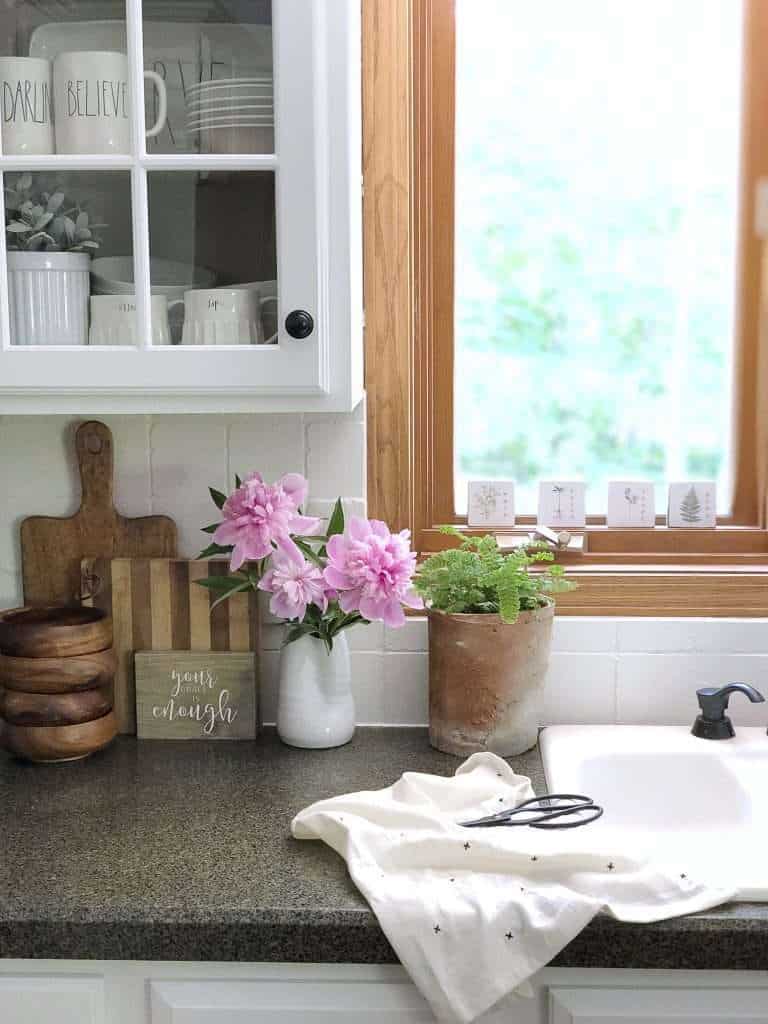
And finally, I absolutely loved our backsplash tile in the last kitchen. So I’m using it again! You know you love a product when you install it twice.
You’ll see how I’ve mirrored the finishes in both rooms in this kitchen bathroom renovation to keep it cohesive in the bathroom remodel section below.
Kitchen Cabinet customization
We did a lot of cabinet customization in our last kitchen. I learned quite a bit about what was worth it and what wasn’t.
Previous Kitchen Customizations
In our last kitchen, we customized:
- Inset cabinetry
- Dowel drawer dividers
- Paper towel drawer
- Pull out shelves in base cabinets
- Pull out spice drawer
- Pull out double trash can
- Appliance garage
- Corner drawers (the best feature!)
- In-island microwave
Here are the items I would not do again and why:
- Inset cabinetry: I adored the high-end polished look. However, without a cabinet door or drawer to cover the face of the cabinetry, you could see every nick and ding around the opening. This time, we chose a full overlay cabinet. This will provide a similar look without the added cost and with the ability to hide marring.
- Dowel drawer dividers: This was great in theory, however I could have accomplished the same goal using these much cheaper dividers than a custom option.
- In-island microwave: I likely would have loved this feature had we invested in an actual drawer microwave system. However, we were simply using a countertop model so had to stoop down every time we used it.
New Kitchen Customizations
In our new kitchen layout, we are building custom cabinets. However, specific customizations like the above have been done differently.
- We will do full overlay doors
- Still including a paper towel drawer (love not having it on the countertop!)
- Pull out spice cabinet and trash cabinet are included
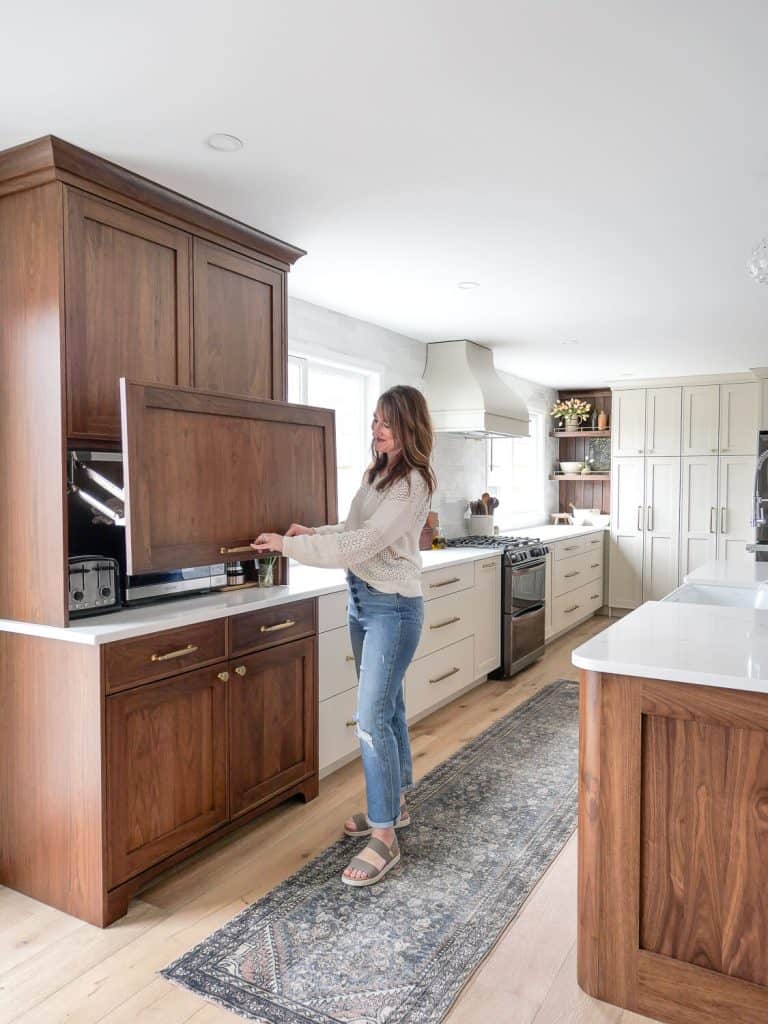
- I am expanding our appliance garage to be wide enough to include a coffee maker, toaster and microwave in a beautiful furniture style walnut hutch.
The walnut island will house the sink, dishwasher, and trash cabinet, so it limits the amount of cabinetry we can add for storage. However, I did have curved end panels on my wish list and our cabinet maker drew them up in a creative way!
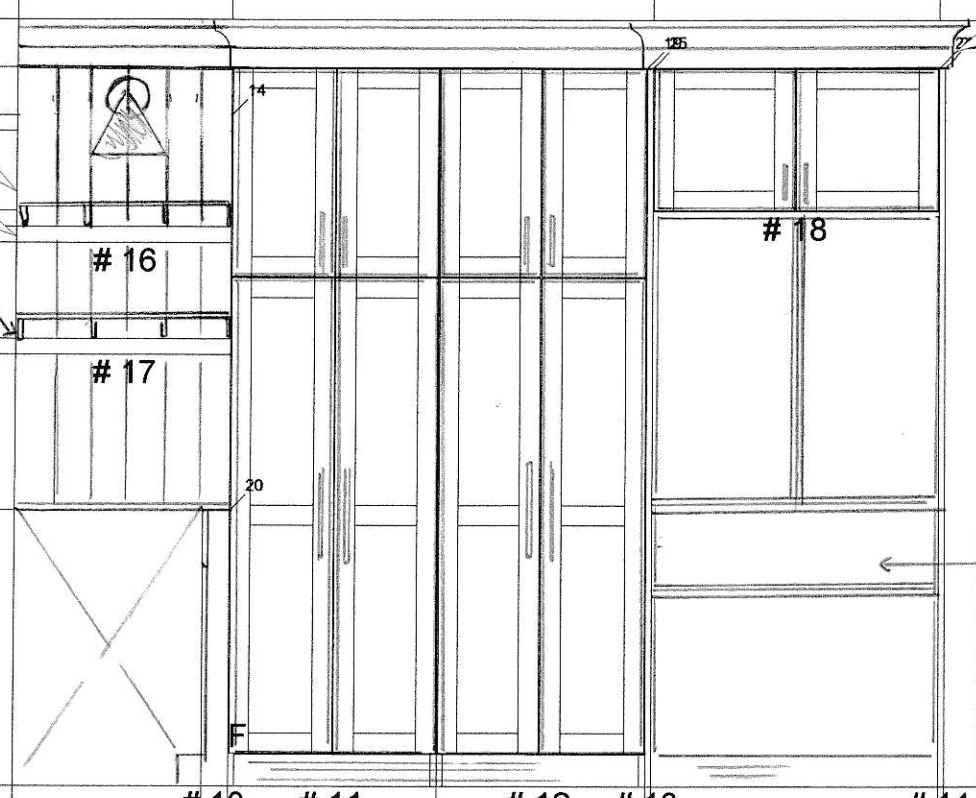
I’ve also designed a wall of shallow floor to ceiling cabinets to serve as a built in pantry.
This left us with one awkward corner that would be hard to access upper cabinets above the lower cabinets. So I’m utilizing that space for floating shelves which will hold mostly decorative items.
You can learn all the pros and cons of open shelves in this post!
Kitchen Countertops
If you are on the hunt for countertops during your kitchen and bathroom remodeling planning, make sure to browse these informative articles.
- 15 Quartz Countertops that Look Like Marble
- 20 Pros and Cons of White Quartz Countertops
- Pros and Cons of Granite v. Quartz
- 16 Pros and Cons of Granite Countertops
- 10 Granite Countertops that Look Like Soapstone
- How to Properly Care for Quartz
- How to Design a Full Height Backsplash
In our last home we had both granite and quartz. I loved both and would do both again!
In the end, we decided to go with Sillaro ENVI quartz from Lakeside Surfaces. It has very subtle, but full width, veining.
Since the kitchen has so many design elements in the cabinetry, I just focused on durability for the countertops and kept them more simple.
Bathroom Remodel Layout Plans
Now on to the bathroom!
The original bathroom was so small it only fit a toilet and tiny single sink. This was the only bathroom on the main level, making it quite small for guests.
Additionally, there was no way to wash off muddy kiddos or pets coming in from outside without walking through the whole house and up to the second level.
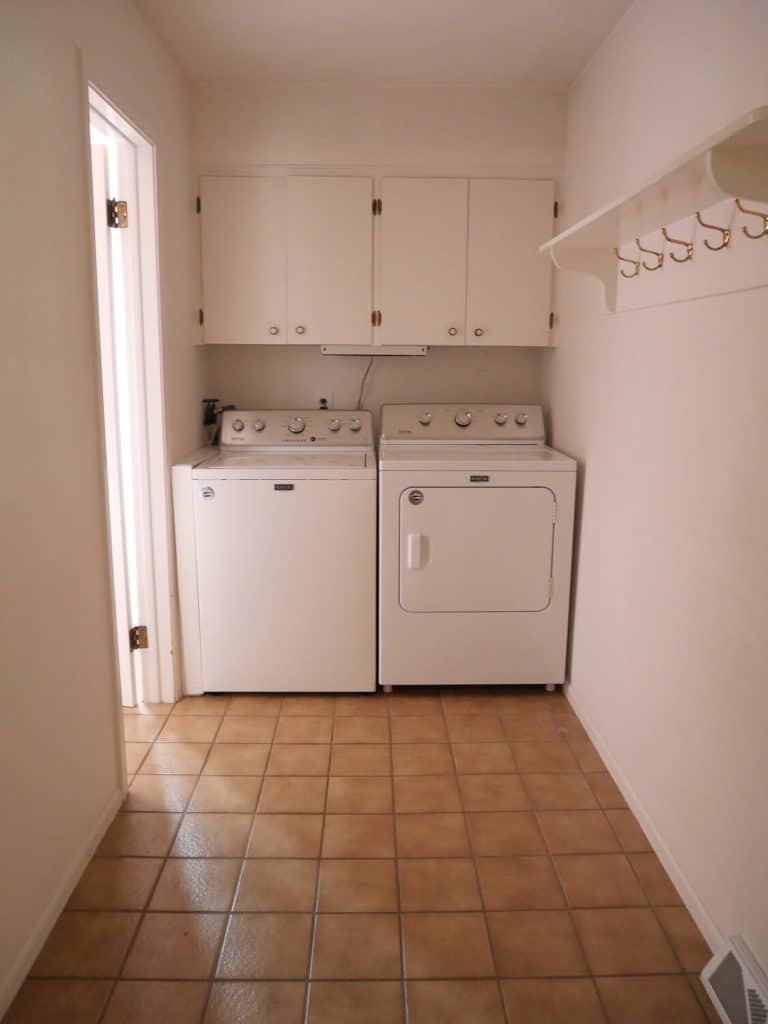
My bathroom layout plan removed a wall that separated the laundry room. Then, I moved one wall 5 feet back into the previous kitchen space to accommodate a small shower. And finally, I added a wall so there was a proper mudroom entrance that separated the bathroom from the mudroom.
This bathroom renovation has been designed as a bathroom/laundry combination to maximize our floor plan space.
Bathroom Remodel Finishes
The bathroom finishes mirror the kitchen finishes above.
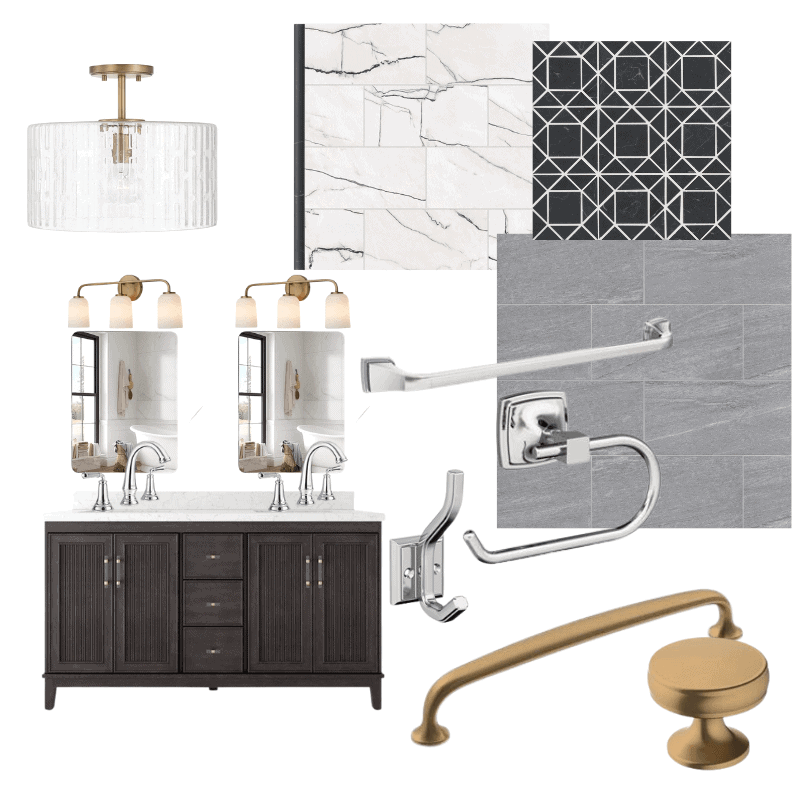
SHOP THE LOOK
The vanity will be a dark wood, with quartz top and brass hardware.
The shower tile will be a beautiful porcelain that mimics marble. The niche will have a black marble mosaic with simple trim.
And finally, we will lay the floor with a beautiful porcelain tile throughout the bathroom and mudroom.
Bathroom Customizations
The bathroom is fairly straight forward. However, we are investing in in floor heat as an added customization.

With our Michigan winters, in floor heat will be an amazing luxury in the bathroom, laundry and mudroom.
Next Steps: Kitchen and Bathroom Remodeling Phase 1
As you can see, this kitchen and bathroom remodeling project is a doozey.
We are:
- moving walls
- adding walls
- fully gutting the existing bathroom and kitchen
- completely rewiring both rooms
- moving plumbing
- moving HVAC
- moving and adding windows
- moving doors
- adding new floors throughout
- new drywall
It’s quite a project. And on top of it all, we are living in the house while it’s being renovated. But I hope you’ve enjoyed learning more about our kitchen and bathroom remodeling plans in this early phase of planning and demo.
We are nearing the end of this stage and will be starting the finishing phase soon with roughed in electric and plumbing, drywalling, and then on to install.
October 12 was the first day of demo so we are just shy of one month into demo and reframing. Kitchen and bath remodeling isn’t for the faint of heart. It is one of the most disruptive renovations you can do since it is in two of the most necessary rooms in a home.
However, at the end of the project our kitchen and bathroom remodel will be so worth it to create our dream kitchen and bath for the long haul.
Thanks for stopping by the blog today! Make sure to subscribe to get my Grace Notes directly to your inbox and to access all my insider perks. You can also follow along daily on Instagram and weekly on YouTube!
~Sarah
What was the flooring for this kitchen? I am also doing walnut cabinets and island. I love the flooring you chose.
European oak engineered hardwoods 🙂
So wonderful!!