
How to Design a Full Height Quartz Backsplash
Choosing a backsplash is a big design decision. Today we will talk about some easy design tips for choosing a backsplash. If you want to make a statement, consider a full height quartz backsplash! Let’s take a look at how to design a statement-making quartz backsplash.
This post may contain affiliate links where I earn a small commission on your purchases at no additional cost to you. Thanks to my partner, Lakeside Surfaces, for joining me on this bathroom remodel.
Bathroom Remodel Details
If you are new to my blog, you may have missed all of the details surrounding my bathroom remodel. You can catch up by reading the articles below!
- Organic Modern Bathroom Design Plans
- How to Mix Metals in Bathroom Finishes
- Tile Shower Renovation Cost Breakdown
This was such a rewarding project. Though we removed the existing shower stall and all of the flooring, I wanted to keep the existing bathroom vanity. It had good bones, and we were able to modernize it easily with new trim. It just needed a new vanity top!
If you’ve ever found yourself at a stall on making design decisions, make sure to sign up for my free e-course! This course will help you set the foundation for a haven-making mindset and lead the way to help you create your haven.
The granite countertop we had previously was a quality product, but simply not my style. We chose to replace it with a quartz countertop from Lakeside Surfaces, who we used for our kitchen remodel as well.
We’ve been so pleased with the customer service at Lakeside Surfaces. Make sure to get your own free quote today if you are planning on updating your countertops.
Things to Consider When Replacing a Bathroom Vanity Top
The first thing to consider when replacing a bathroom vanity top is what type of material to use.
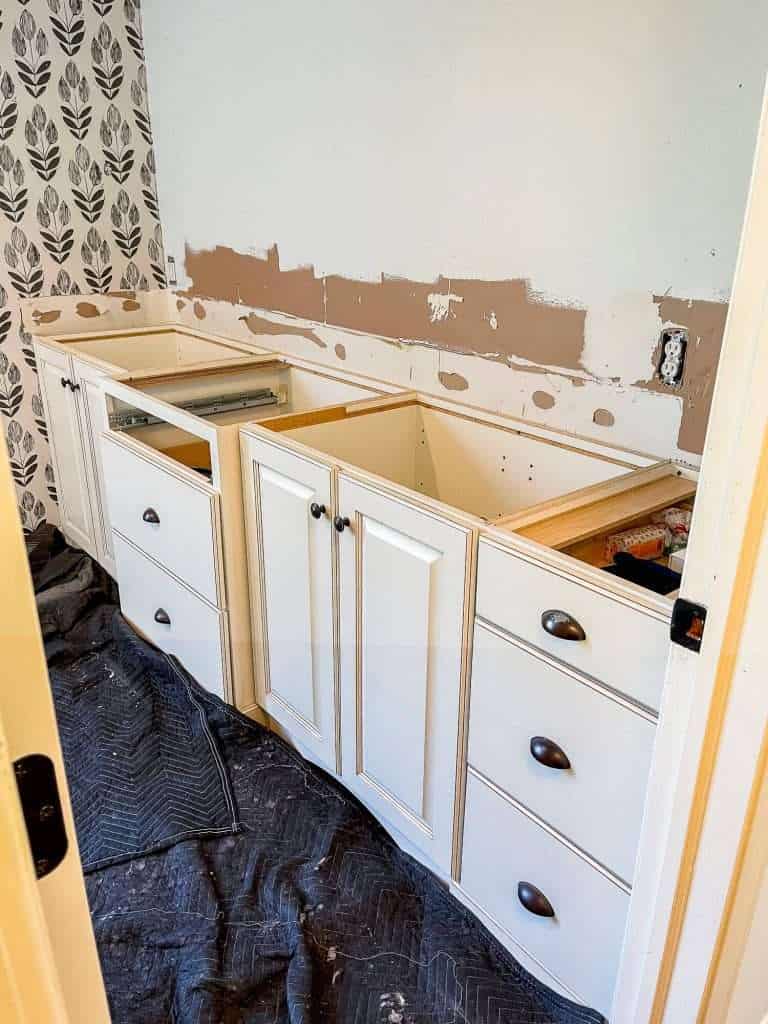
Since we decided to keep the existing vanity and only replace the counter, I knew I wanted a stone vanity top. I already love the look of an engineered marble vanity top because it gives the look of marble without the upkeep. This held true with my kitchen countertops and so I knew I wanted to use quartz again.
A quartz bathroom vanity countertop is simply more durable than marble and exactly what I needed for a high-traffic bathroom. Not only is this our guest bath, but it is the bathroom our kids use daily. So durability was extremely important.
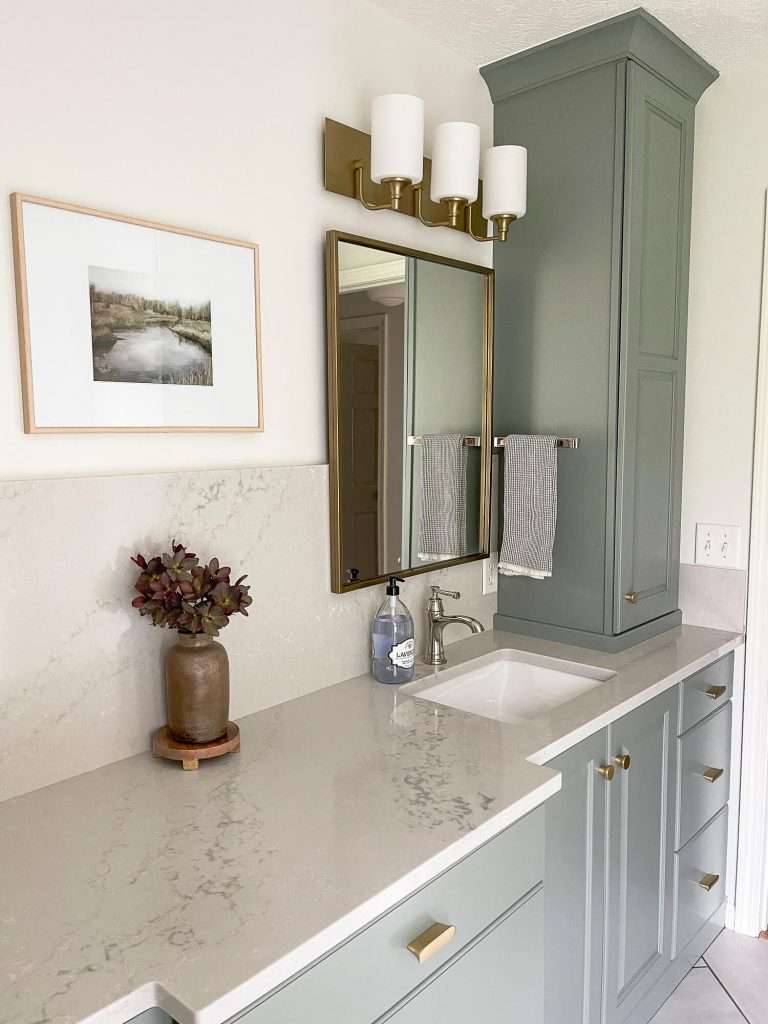
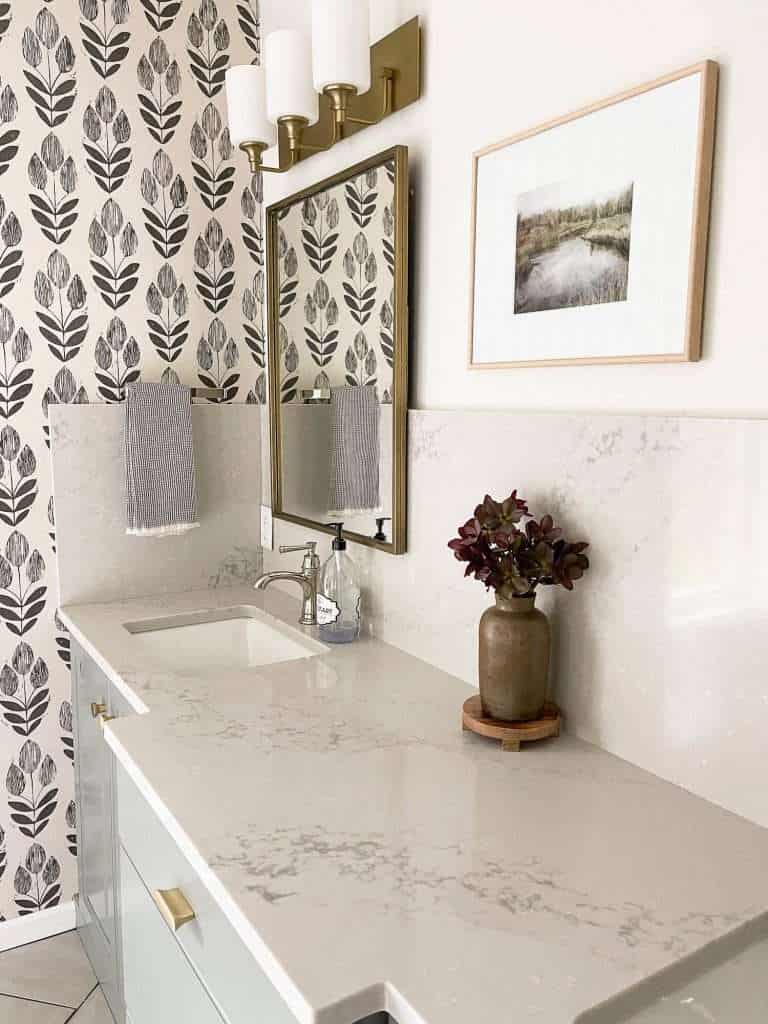
Another item to consider when replacing a bathroom vanity top is how thick you want the counter top to be. Since quartz is manufactured, you have great flexibility in how it looks. I was able to determine the thickness of my countertop, as well as the edge profiles and corner shape.
The thicker the countertop, the more high-end it appears to be. In the end, I decided to design our bathroom countertop with a flat eased edge and 3cm profile. Using a thicker design modernized the look as well.
And a final main consideration for countertops specifically, is what you want your backsplash to look like. And that is what leads me to today’s post!
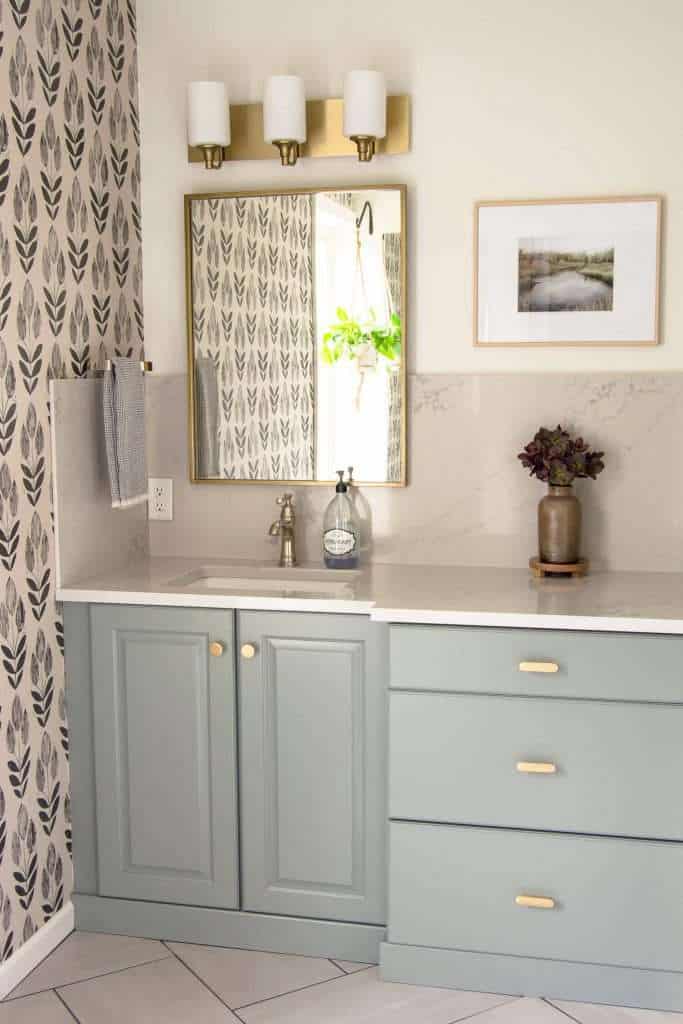
Full Height Quartz Backsplash
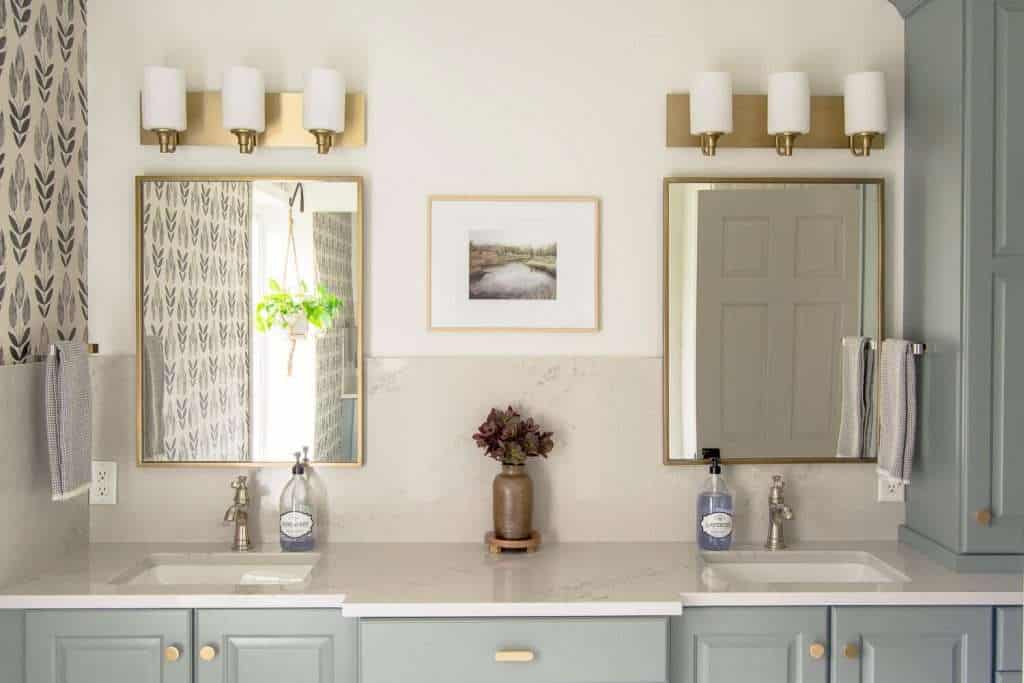
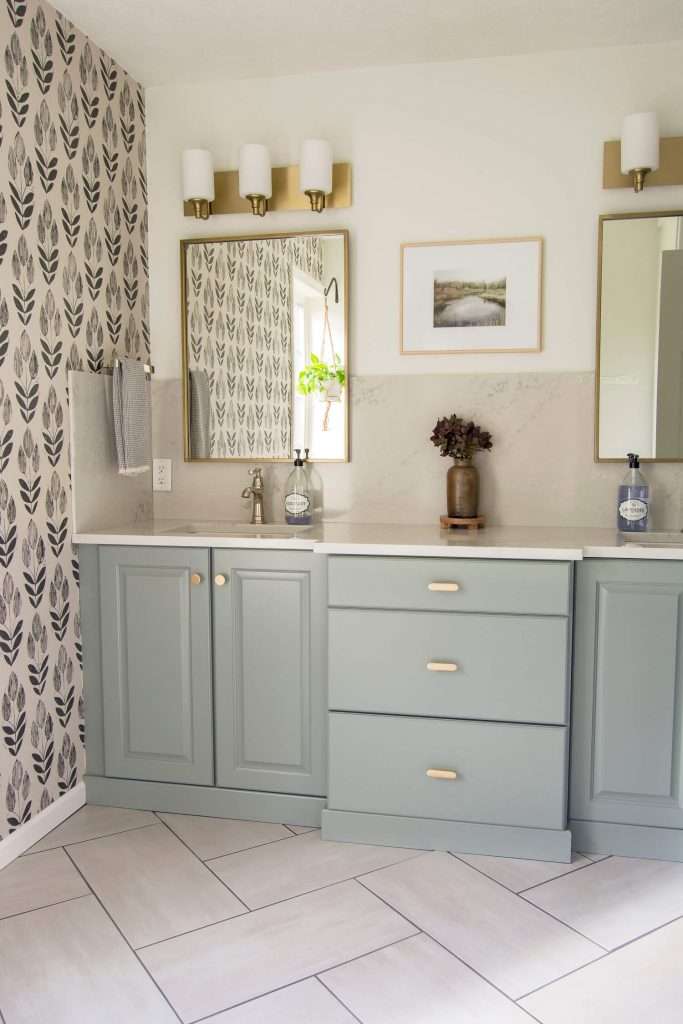
As you can see, I chose a full height quartz backsplash to compliment my quartz countertops. I LOVE the look of full height backsplashes in kitchens, but rarely see them in bathrooms. I wanted to elevate my design and using a statement-making backsplash did that immediately.
What is a full height backsplash?
Many people get confused on what actually defines a full height backsplash. A standard backsplash is 4 inches off the countertop. Full height backsplashes traditionally extend to the bottom of upper cabinets, or in the absence of upper cabinets, it can go to the ceiling.
My bathroom has a full height quartz backsplash that is 20 inches off the countertop. This height was a personal choice because of the existing height of our cabinets in relation to the ceiling. However, you can choose how tall you want your full height backsplash to be based on your unique circumstances.
How thick should quartz backsplash be?
A traditional quartz backsplash is usually milled to 3cm thickness (or 1 1/4″). For my backsplash, I actually had to have two thicknesses!
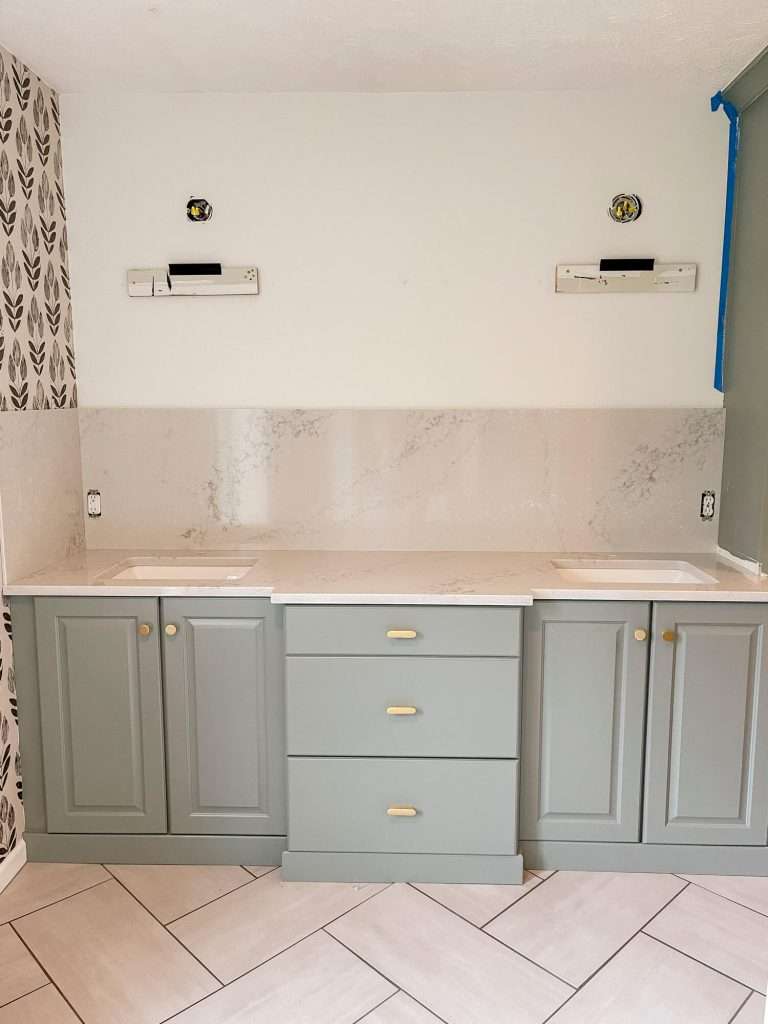
The main backsplash for my quartz vanity top is 3cm. However, as you can see from the image above, the side panel was milled to 2cm to accommodate for the existing outlet. At 3cm, the quartz side panel would have run into the outlet.
Rather than paying more to move electrical around, I opted to mill the side panels thinner.
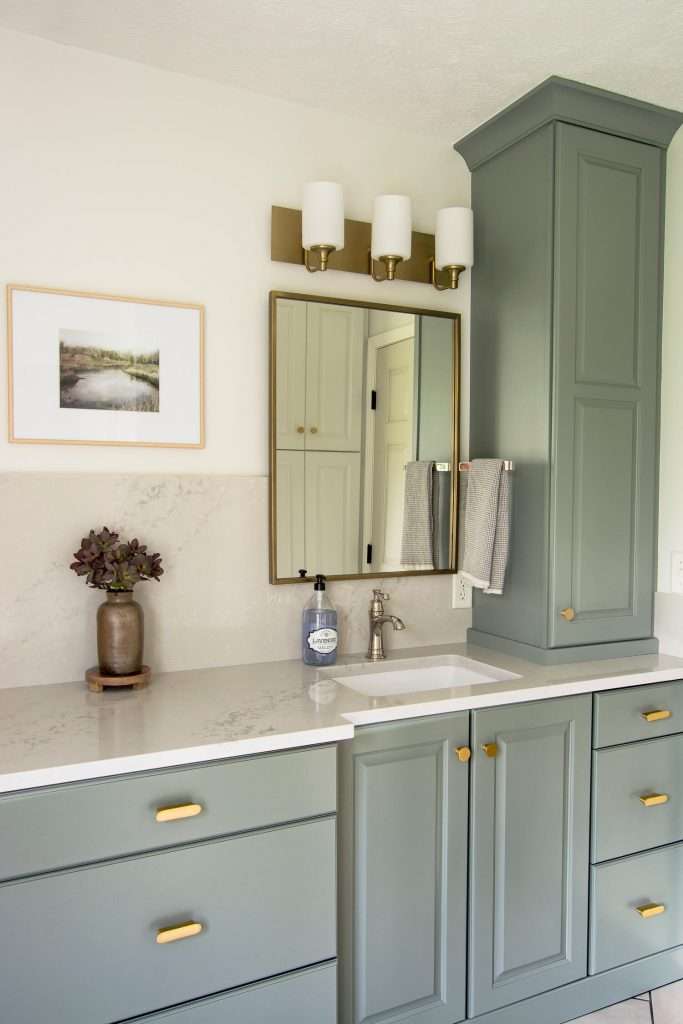
On the opposite side, I kept the same thickness of 2cm for the side panel, but chose to only add height to the bottom of the light switch panel.
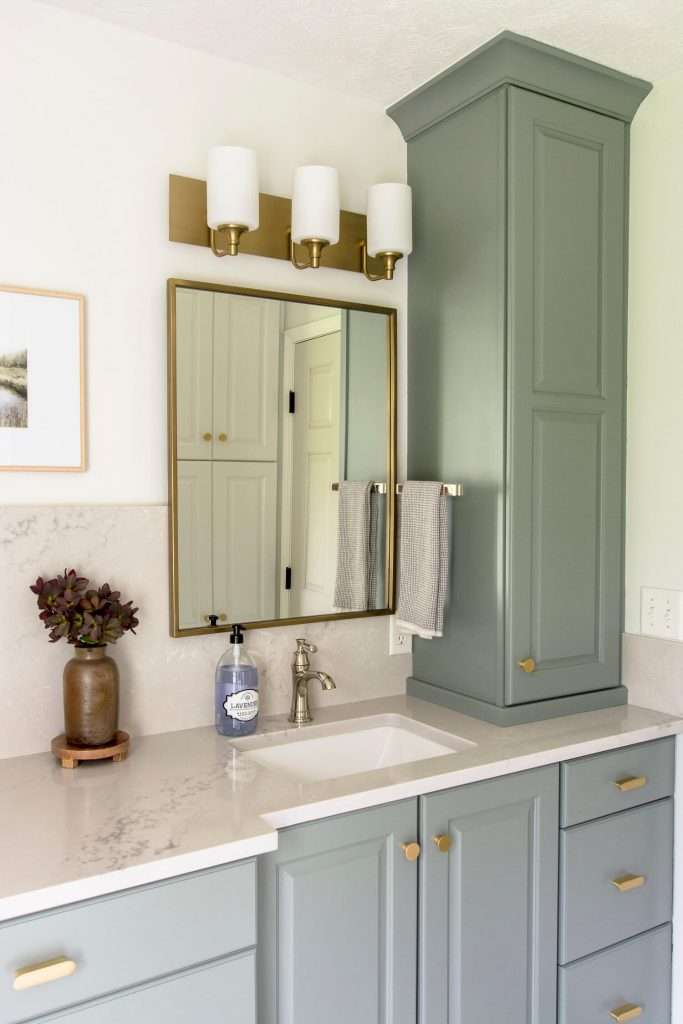
This is totally a preference! I could have chosen to take it the full 20 inches to match the rest of the backsplash. But, since the pattern was already disrupted by the upper cabinet (and the majority of that side panel would have been cut out for the switch anyway), I decided to save some money and go smaller.
Main Design Concern for a Full Height Quartz Backsplash
Beyond the height and thickness for your full height quartz backsplash, the main concern in how to design this type of backsplash is in the patterning.
This quartz is a Hanstone quartz called Monterey. Part of the design process includes a slabsmith which gives a visual image of what your quartz will look like once it is manufactured.
A slabsmith, if not provided by your quartz retailer, is a worthy investment so you can see how the veining in your quartz flows.
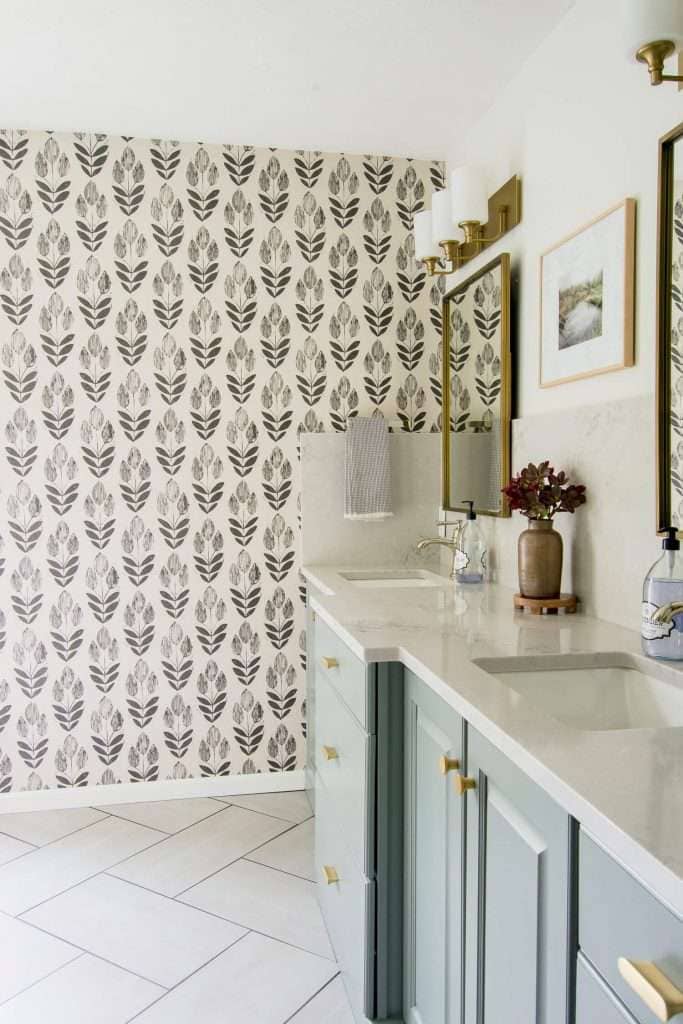
The main decision in designing a full height quartz backsplash is how the pattern, or veining, flows up the wall. In some of the images above I’ve shown a side panel that was not manufactured to the slabsmith design. As you can see, the veining and pattern do not flow up the wall on this side.
This causes a visual disruption that you want to avoid. Since quartz is manufactured, it gives a more authentic stone appearance when the pattern continues up walls and down edges. Thankfully, Lakeside Surfaces has excellent customer service and were able to re-manufacture the mistaken side panel.
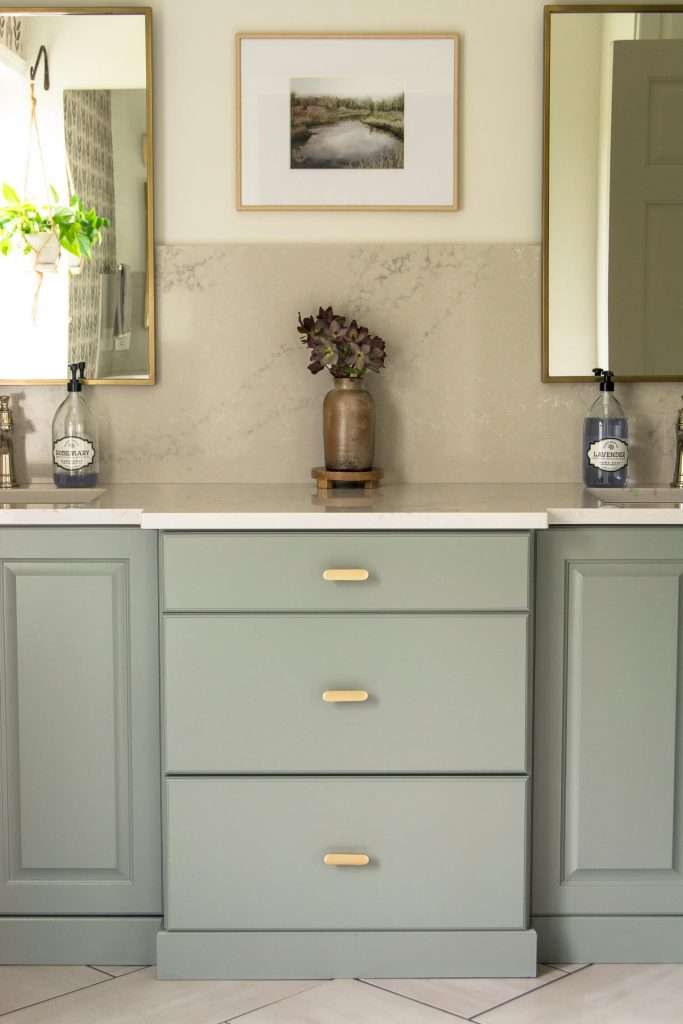
See below to note the difference in the two pieces. As you can see, it makes a huge difference visually to have the veining and movement continue up the wall from the countertop.

Ensure that your slabsmith design has this continued movement on side panels, backsplashes and down edges. It creates such a beautiful look that feels like a stone countertop would naturally.
Some bathrooms won’t warrant side panels if the backsplash dead ends into wall cabinets. Conversely, you can make an intentional design decision to only pull the backsplash up the back as well! These are all preferences and choices you can make for your own bathroom design.
Bathroom Remodel Source Book
Below you’ll find source information for frequently asked questions in our bathroom remodel!
- Vanity Paint Color: Intrigue by Benjamin Moore
- Vanity Hardware, Faucet, Mirrors & Lighting: Sourced in this post
- Quartz Countertops: Hanstone Quartz in Monterey
- Flooring: Source in this post
- Wallpaper, artwork and other decor sources linked via the affiliate images below

Stay Connected
Thanks so much for stopping by the blog today! Make sure to sign up for my newsletters and follow along with me daily on Instagram!
I hope you’ve enjoyed this article on how to design a full height backsplash! There are so many quartz designs available that would be beautiful in a bathroom. Take a look at my top 15 marble look-a-like quartz options in this article next!


The tips on choosing the right quartz and matching it with the kitchen decor are spot-on.
Hi! I’m curious if you water damage to your full height cabinet where it meets the counter? I just had one installed like that also and I’m wondering if it’s going to get damaged… :/
Never had any issues! Of course, if there is ever standing water on the counter we wiped it up as a precaution.
I never would have done the side panel. Should have stayed at the 4 inch like the opposite wall. Cuts into the wallpaper and has no stopping point other than the low cabinet. That wall paper is very nice. You just cut it off. Lost the balance there imo.
It improves home construction and value. Thank you for sharing your seven extremely insightful suggestions. I love it so much!
When my brother/contractor suggested I go with a full height backsplash, I had a hard time visioning it. After a quick search online, I found your page and fell in love with the look. I have one question. How did you mount your mirror? My backsplash is 2cm and now that it’s up, I’m wondering what your solution was on the mirror.
Hello! I simply mounted a piece of wood to the wall that is the same depth as my backsplash. Then mounted the mirrors to the board so it all lays flush.
About mounting those bath mirrors so they are flush with full height backsplash: Do you mean you mounted a large piece of wood so the entire mirror is essentially backed with wood (wouldn’t you see that? or is it set in a few inches so you can’t?), or is there only a small wood block where the mirror hanger goes (to attach and level it out) but otherwise a void behind the mirror? I’ve recently taken down some art to move it and was surprised at how much dust and cobwebbing can collect behind them even when the pieces sit very closely to the wall. In a bathroom, given humidity and sprays and powders, seems like any mirror that is offset from the wall might be a collection site.
I just used a block behind the hangers. I never had issues with dust or web build up, but that might be depend on the age of the house and geography.
Very interesting! We are in the process of a kitchen remodel and have chosen quartz (again) as we just love it over granite. We had bad experience with granite in a previous home with water stains around faucets and chipped edges. None of those problems with previous quartz. Also are going with full backsplash as well.
Sounds beautiful! I love full heigh backsplashes!