
The Secret to Creating a Realistic Faux Wood Finish (2025)
Learn the insider tips and tricks for creating a faux wood finish that looks just like the real thing. This article will cover everything from the tools you need to the techniques that will make your faux wood finishes stand out.

This post may contain affiliate links for your convenience.
The Basics of Faux Wood Finishes
Let’s cover some of the basic questions you may ask when trying to achieve a faux wood finish.
What is Faux Wood Finish?
To start, a faux wood finish is a method of taking something that is not wood, and making it look like real wood.
Typically, this is done over a painted surface, laminate countertops, metals or even smaller items like painted lamps. Most items that you want to look like wood can be transformed to look like wood with minimal effort!
Can I Make Painted Furniture Look Like Wood?
Transforming painted furniture to look like wood is a perfect example of when you may want to apply a faux wood finish.
Most furniture that is painted may be made of wood, however the process of stripping, sanding, and refinishing wood is very tedious and time consuming. As an alternative, you can apply a faux wood finish to get the look with less effort.
Can You Make Painted Cabinets Look Like Wood?
Another great example of when you may want to apply a faux wood finish is in the case of painted cabinetry.
Many newer kitchen cabinets or bathroom vanities come with a manufacturer painted finish. This may not be able to be sanded down and refinished to the original wood. In situations like these, adding a faux wood finish is a great option.
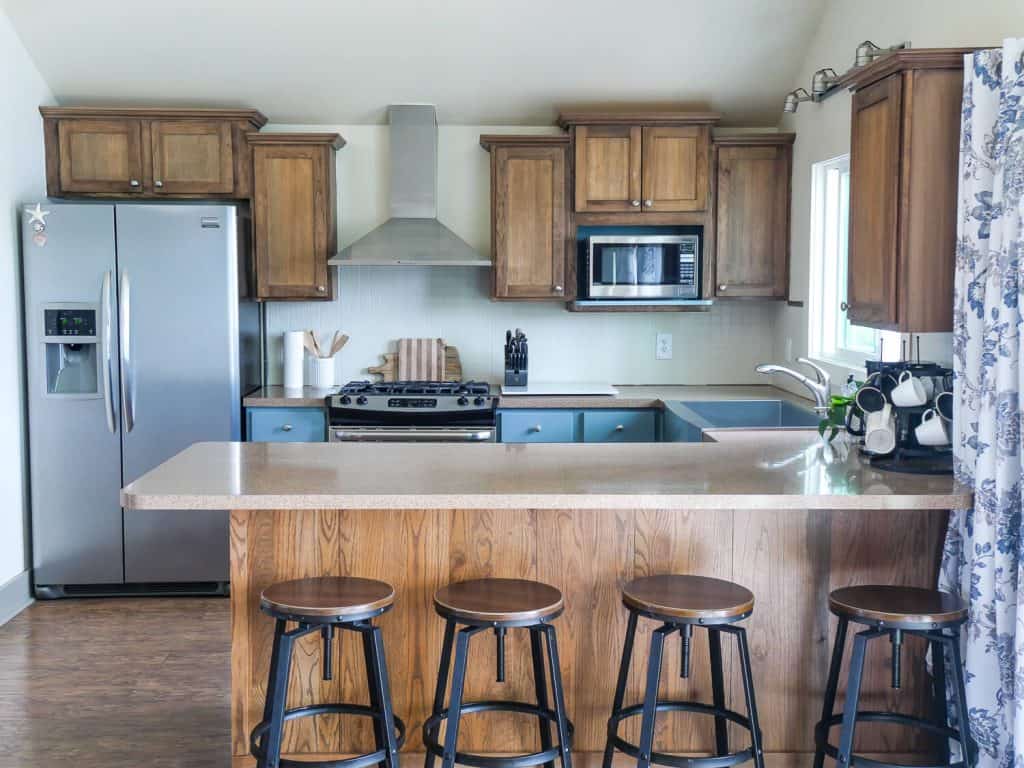
Today, I’ll be sharing how I transformed our cottage kitchen from painted cabinetry to a faux wood finish as an example of this!
How Do You Make a Painted Surface Look Like Stained Wood?
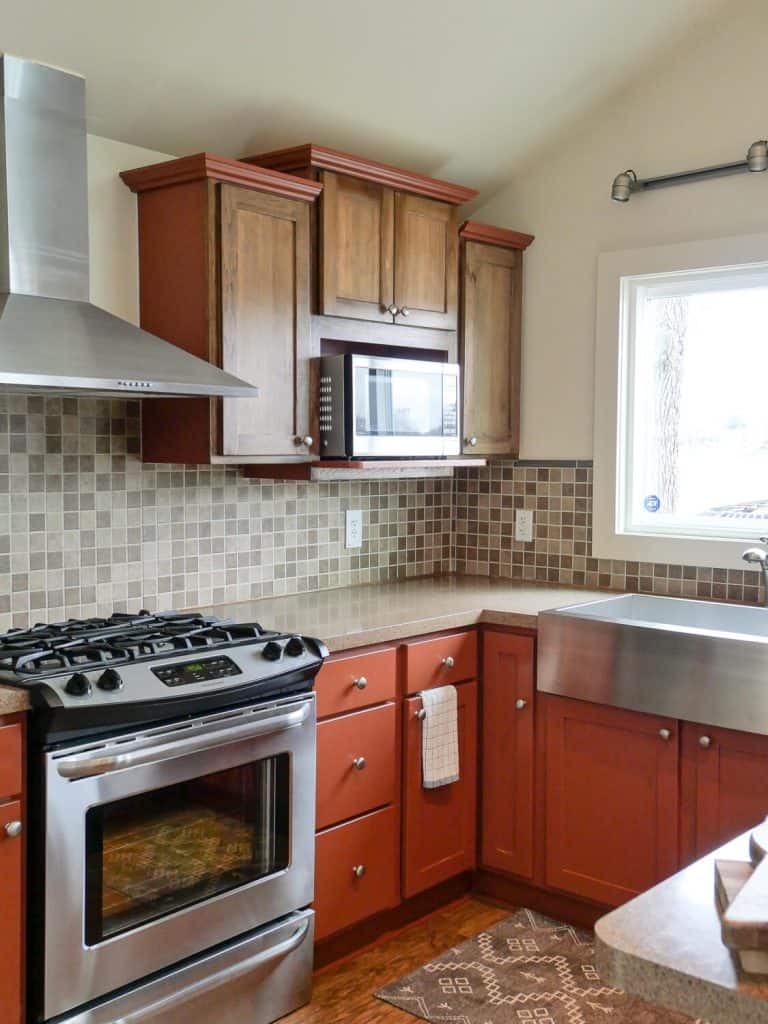
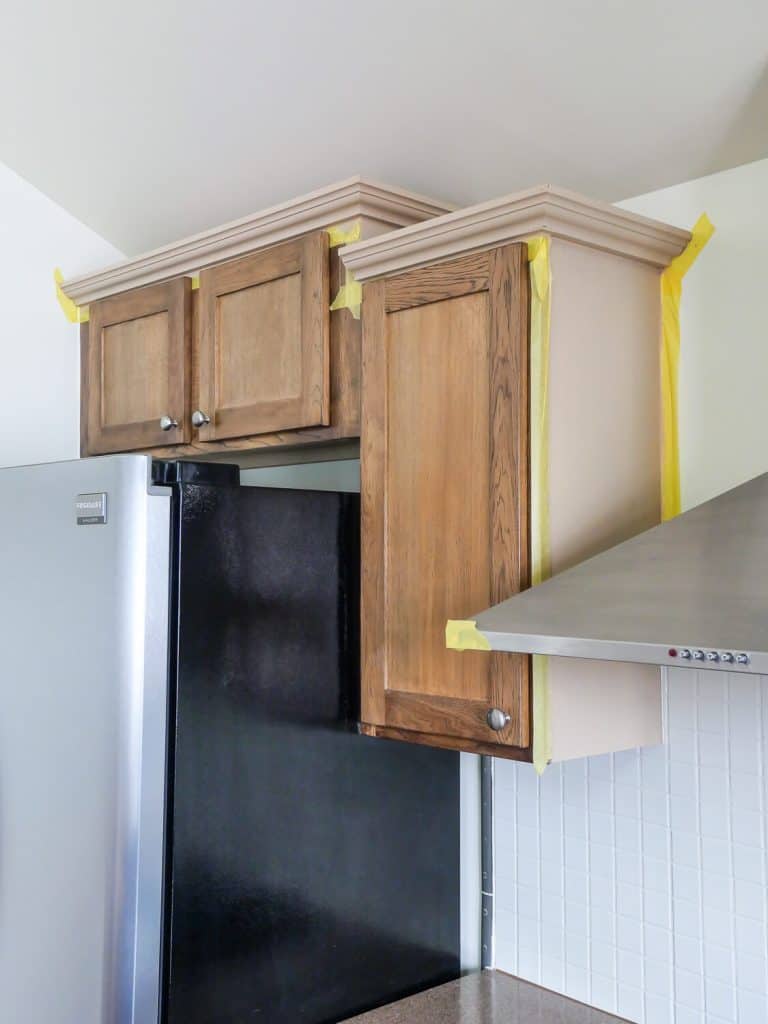
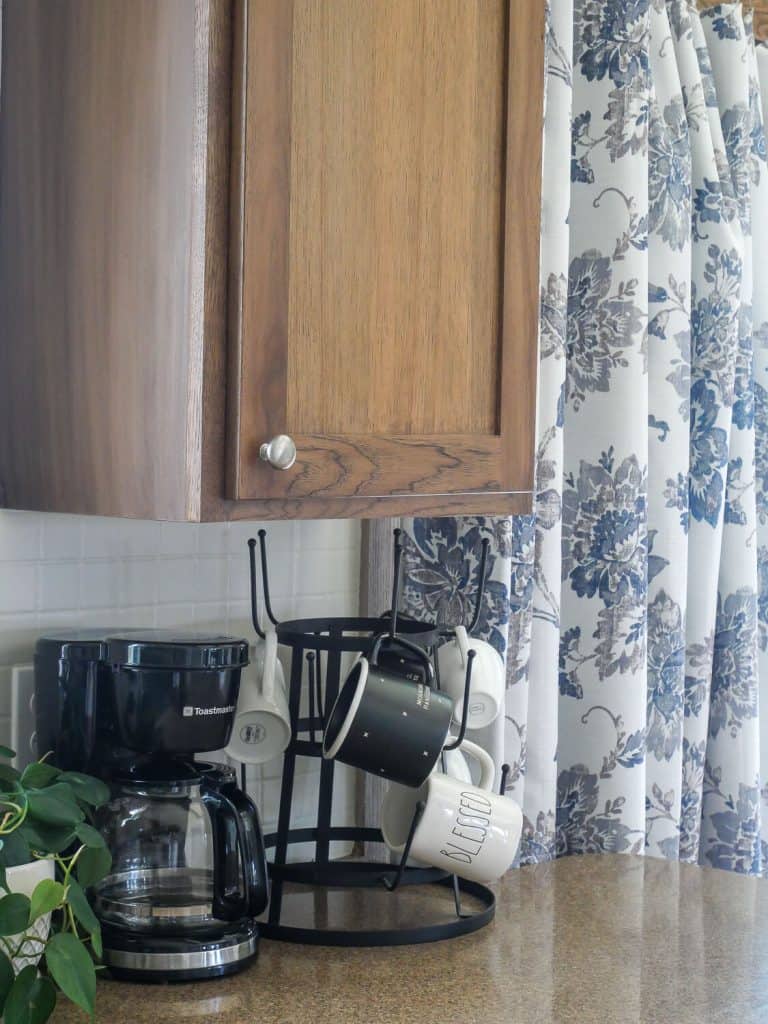
When I started our cottage kitchen makeover, I knew I needed to figure out how to transform the sides and crown of the painted upper cabinetry to match the wood tone of the door fronts.
Originally, I had planned to remove the crown and reinstall new stained wood crown moulding. Then, I was going to use pole wrap or reeding on the cabinet sides to hide the red paint that was painted by the previous owners.
However, after removing one cabinet’s crown moulding, I quickly decided that I would be better off to try to make the existing moulding look like wood. My finish carpentry skills weren’t quite up to the task of replacing all the crown moulding.
After some quick research, I found many methods using paint and stain combinations to create a faux wood paint. However, most of them were simply using interior latex paint, which didn’t guarantee the coloring I needed to match my existing wood doors.

Then I came across this faux wood finish paint. This option gave me a simplified method of creating a faux wood finish in a variety of guaranteed color options that suited my project perfectly.
Another benefit of this product is that the paint is actually liquid wood. It is a stainable wood fiber paint. Which means you are actually applying a thin layer of wood to your surface to get the most realistic faux wood finish available.
Tools you’ll need
If Retique It is sold out on Amazon, you can also find it here.
1. Properly Prep Your Surface
The key to success in any furniture refinishing or cabinet painting is proper surface prep.
Begin by thoroughly cleaning your surface according to Retique It instructions.
I simply used dish soap and water to ensure that my cabinets and moulding were cleaned and to fully remove any grease or dirt residue.
With Retique It, you do not have to sand prior to application! This is a huge bonus and time saver.
2. Paint On The Base Coat for Your Faux Wood Finish
Next, apply the base coat of Retique It to your surface.
I applied two coats several hours apart.
The key to success in this step is to use long even strokes. I always prefer my favorite paint brush for smaller detailed projects. However, if you are updating a larger piece of furniture then a roller is a great option as well.
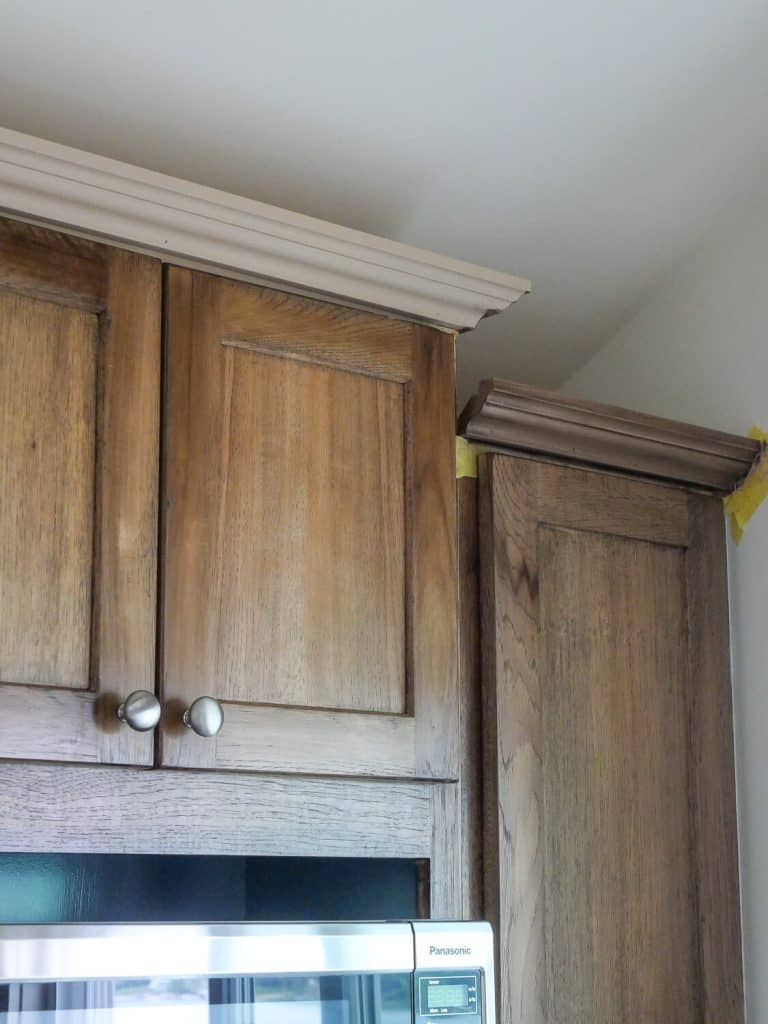
Using a paint brush also helped create some texture for the sides of the upper cabinets so the next step had some highlighted dimension to make it look even more like real wood.
3. Apply Stain Color of Choice
Once your base coat is dry, apply your stain color of choice.
If you are using a Retique It kit, like I did, then the stain color will be included.
If you are trying to match your own stain color, make sure to use the type of stain recommended by Retique It to go with the base coat to avoid any issues with compatibility.
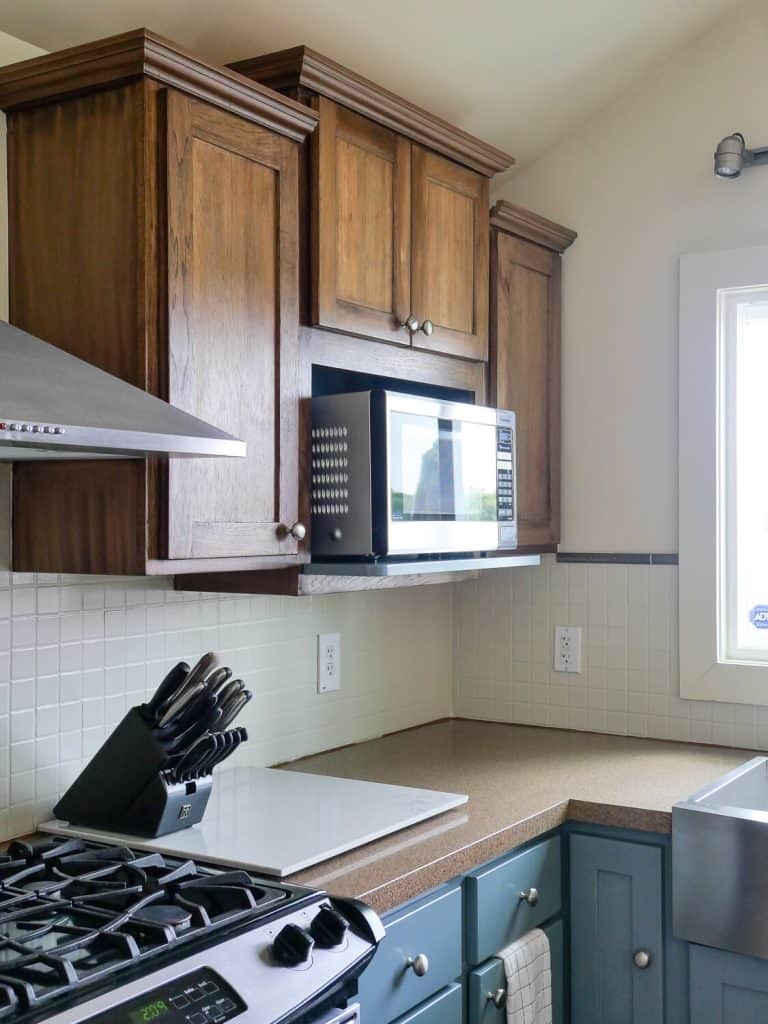
I chose the Dark Walnut kit because it looked like it would be closest to my original cabinetry. Thankfully, it is almost an identical match!

You can see video of this process in this YouTube video.
Using long brush strokes, brush your stain onto your surface and let sit for a few minutes. Then, wipe excess stain off with a dry rag.
I like to use my husband’s old undershirts cut up into scraps because they are lint free. Otherwise, these knit rags do the job well too!
Safety tip!
When you are done staining, make sure to lay your stain rags flat outdoors in the shade to fully dry before disposing. Wadding wet stain rags up and throwing them into a trash can before drying can cause spontaneous combustion and is a fire hazard.
I was able to get away with only one coat of stain to get the faux wood finish that matched my existing cabinet fronts. You may need to apply 2-3 coats to get the depth you desire.
Let each coat dry before applying the next.
4. Seal Your Faux Wood Finish
The last step in this simple process is to seal your faux wood finish.
After your final coat of stain is fully dry, apply a top coat of polyurethane. Two coats is generally recommended; especially if you are refinishing high traffic surfaces where moisture is present like bathrooms or kitchens.
How to Make Paint Look Like Wood Grain
If you want to create a faux wood grain to further elevate the look of your project, that is possible too!
Fake wood grain can be created using a simple wood graining tool.
There are a lot of options which will give you slightly different looks. From rollers to corner pieces to large and small width tools. Browse the options to see what will fit your needs most for your specific project.
I did not use a wood grain tool for my cabinets since I was trying to match an existing wood tone. I thought the variation of wood grain would be more obvious than having no wood grain at all to compete with the real wood doors.
Adding Faux Wood Grain Technique
If you chose to add wood grain to your project, make sure to use a large test board to perfect your technique.
Most wood graining tools work best when applied with a swift rocking back and forth motion. Using this motion, pull from one side of the piece all the way to the other side without stopping. I found this tutorial especially helpful starting at the 12:24 mark to see how to hold and move the tool for different looks.
Once you’ve learned how to use the tool to achieve the desired results, you can insert this step into your plan of action!
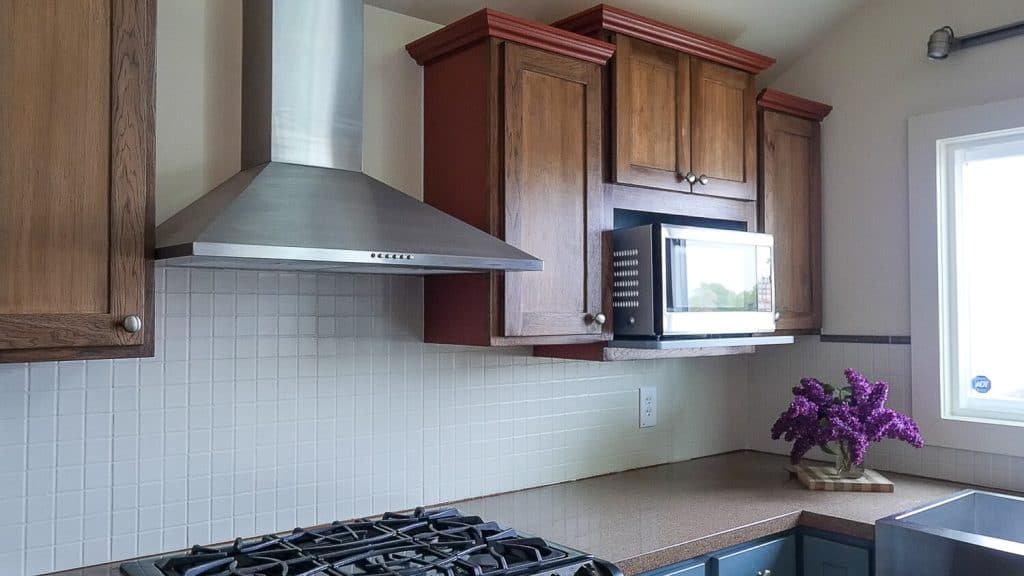
As you can see below, the side panel and crown moulding of this upper cabinet were both painted bright red before adding the faux wood finish. Even without using the graining tool, it has a subtle wood grain look because of the brush strokes.

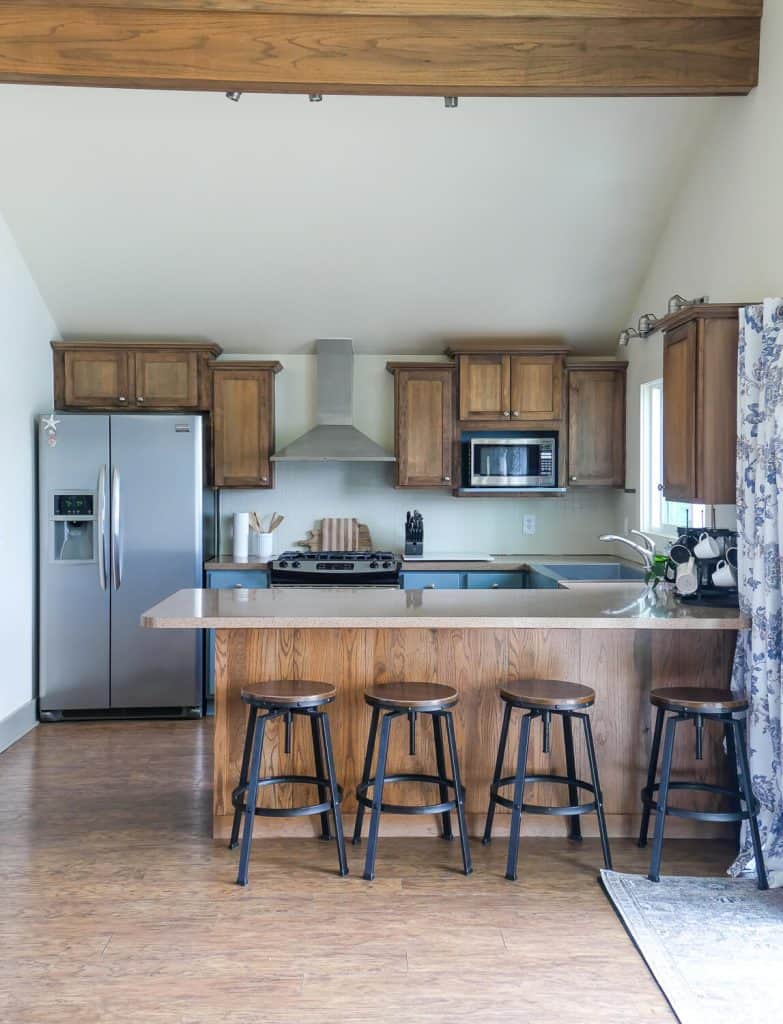
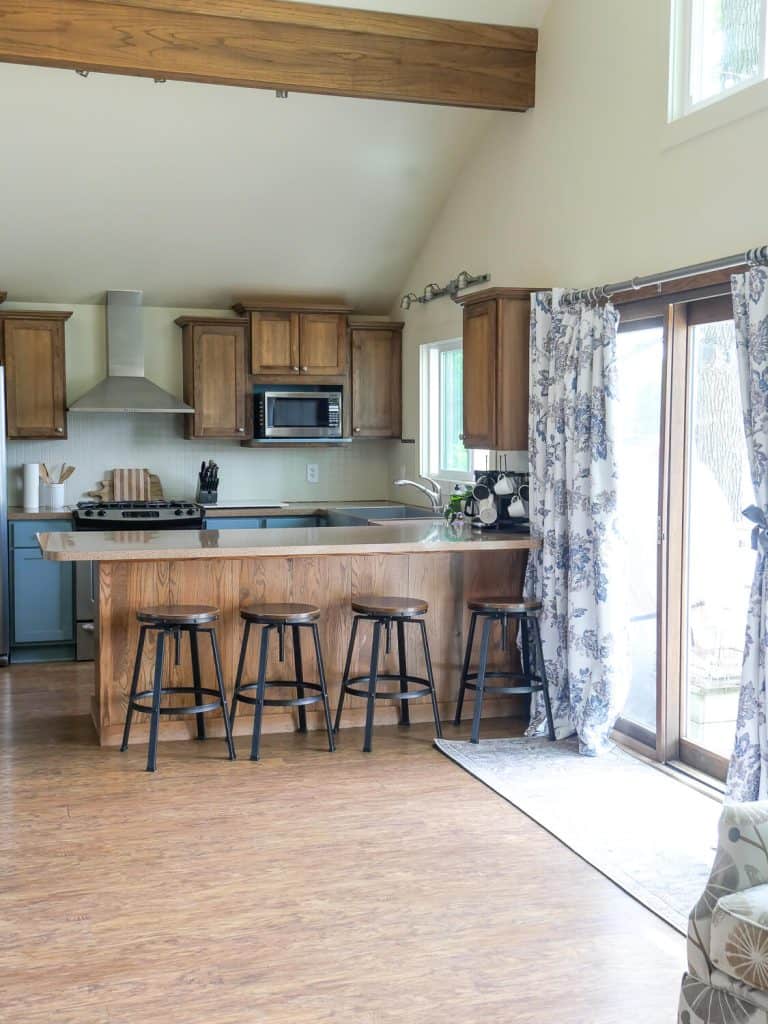
Complete Kitchen Makeover Using Only Paint
I hope this article on how to get a faux wood finish for almost any surface was helpful to you!
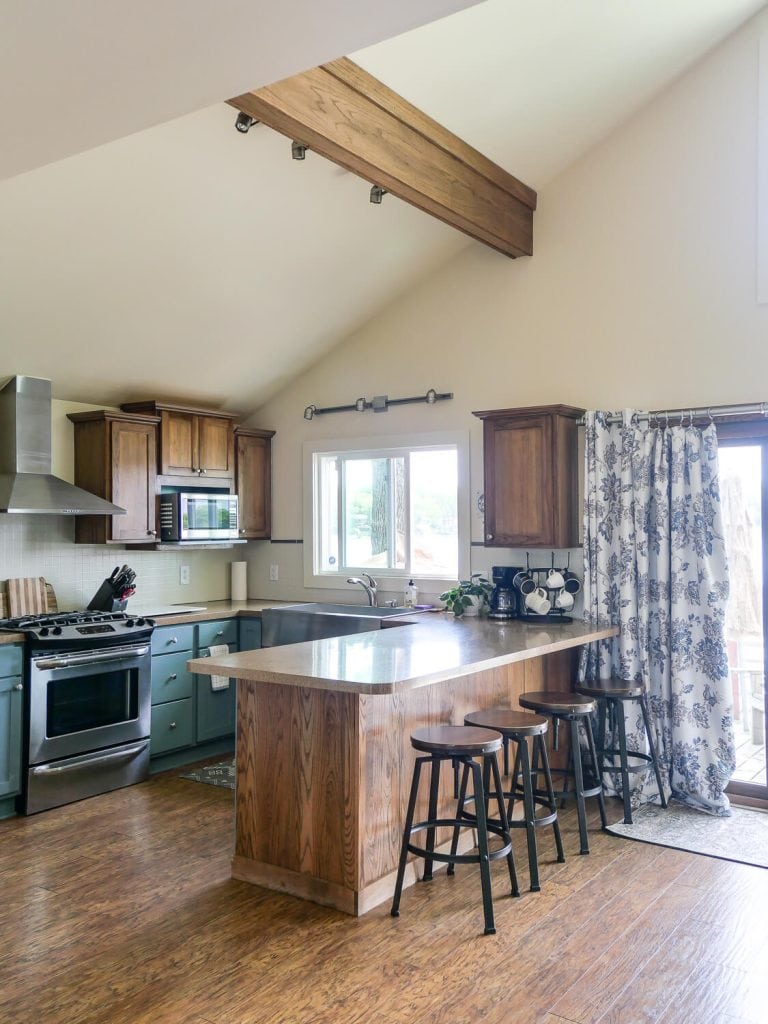
This method can be used on just about anything, including cabinetry, tables, doors, wainscoting, window trim, fireplace mantels, and even smaller countertops. It’s simply a matter of putting in the effort and perfecting your technique before applying the product.
If you missed my $155 kitchen makeover using only paint, you can see how I transformed the rest of the cottage kitchen in the articles below!
- How to Properly Clean Cabinets Before Painting
- How to Paint Already Painted Cabinets
- How to Paint a Tile Backsplash
Thanks for stopping by the blog today! Make sure to subscribe to get my Grace Notes directly to your inbox and to access all my insider perks. You can also follow along daily on Instagram and weekly on YouTube!
~Sarah


I absolutely love the tips you’ve shared on achieving that gorgeous faux wood finish! I’ve tried similar techniques in my living room decor and it truly transformed the space. Who knew a faux look could seem so real? I can’t wait to try the layering method you mentioned.
I absolutely love the tips you’ve shared on achieving that gorgeous faux wood finish! I’ve tried similar techniques in my living room decor and it truly transformed the space. Who knew a faux look could seem so real? I can’t wait to try the layering method you mentioned.
did a nice job. The cabinets look beautiful. I wouldn’t have known
“The Secret to Creating a Realistic Faux Wood Finish (2024)” unveils techniques akin to perfecting graphics in Traffic Rider Mod APK. Through meticulous layering and shading, artisans mimic wood’s texture and grain. Similarly, game developers craft lifelike environments, immersing players in virtual reality. Both endeavors blend artistry with technology for stunning results.
It looks magnificent! I admire your exquisite decorating of this space.
It looks great! I really like the way you decorate this space
Wow
You did a nice job. The cabinets look beautiful. I wouldn’t have known,
Awesome. It looks great.
Thanks so much!
amazing outline with great ideas
If I hadn’t read the article, but only looked at the pictures, I wouldn’t have known it was fake wood.
That’s the goal! 🙂