How to Decorate a Niche in the Wall So It Doesn’t Look Dated
There are some home design challenges that are undoubtedly peskier than others — figuring out how to decorate a niche in the wall is one of them.
Decorating a niche in the wall is a particularly challenging task because they are often awkward spaces. However, it doesn’t have to be that way. You can create a beautiful accent from a dated design with these simple tips.
Here, I’m sharing my top ideas on how to decorate a niche in the wall.
Post may contain affiliate links for your convenience.
How to Decorate a Niche in the Wall
SHOP THE LOOK
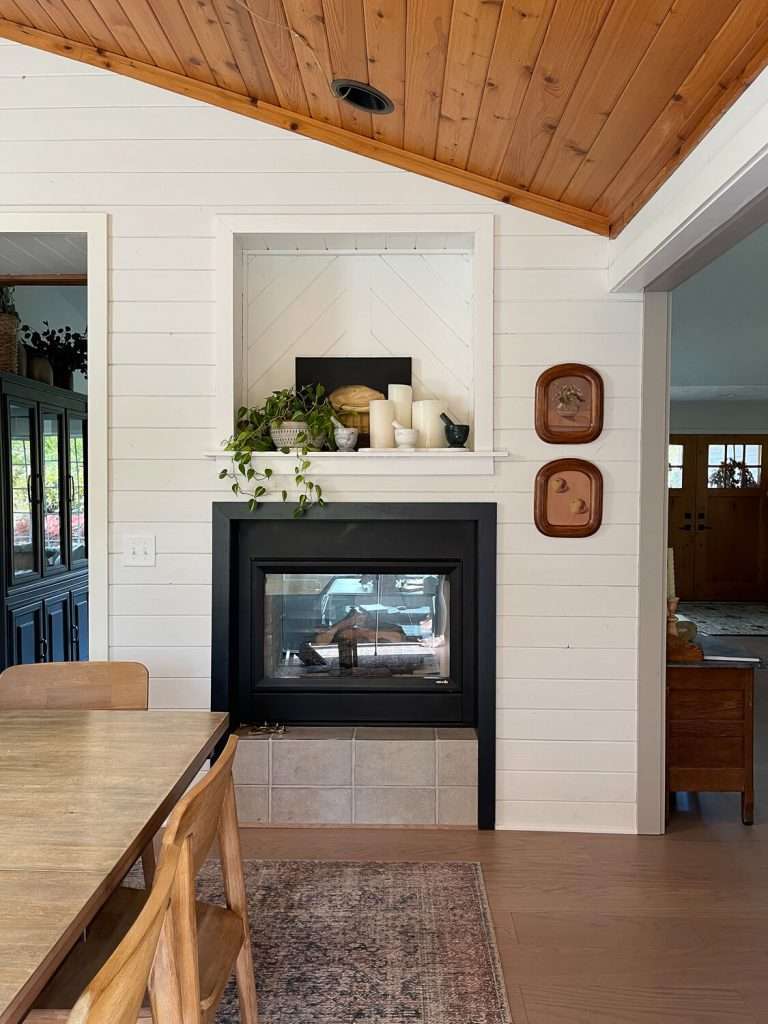
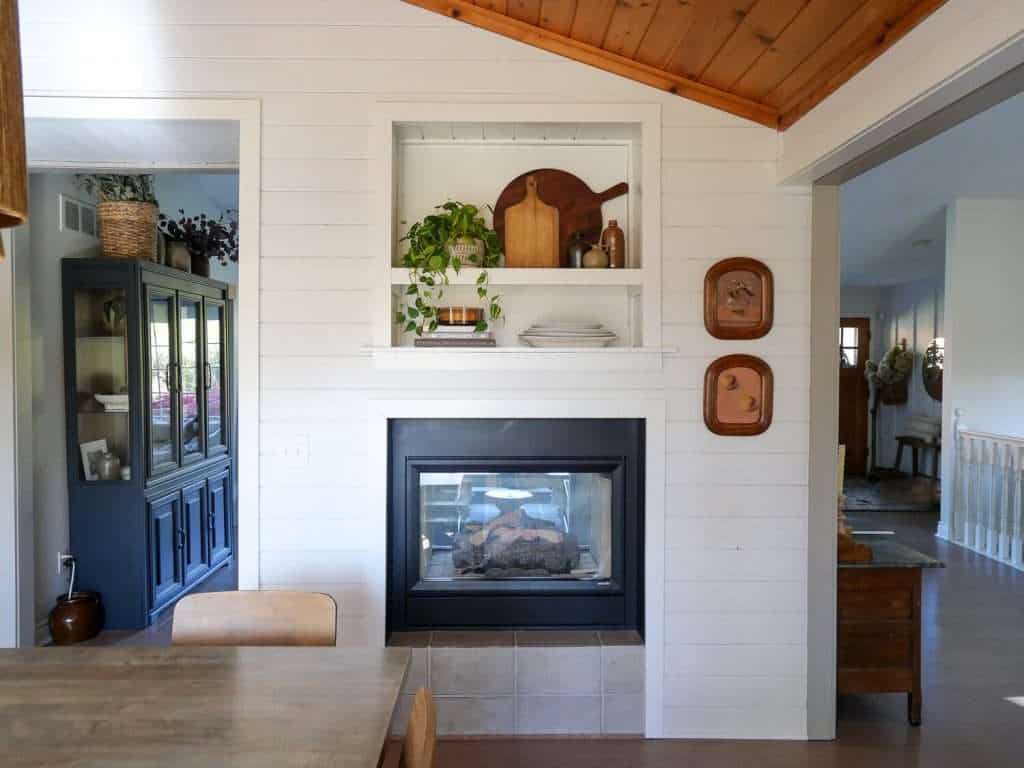
Ever since we moved into our home, I’ve wondered how to decorate the niche above our fireplace in the dining room.
We remodeled the dining room by taking down a wall and removing the indoor hot tub. As if that wasn’t awkward enough, we were still left with the niche above the fireplace that felt dated.
So we started by painting the entire room in the color Shiplap by Magnolia Home to make it feel cohesive and more subdued.
Over the years, I learned how to decorate a niche with a few tricks. There are two different camps on wall niches. Your first step is to determine which camp you’re in:
- Embracers: Embracers are willing to embrace wall niches as an opportunity to create a focal point and highlight specific decor.
- Maskers: Maskers aren’t a fan of niches and want to try to mask them or help them blend in to the room.
Tips to Embrace a Niche in the Wall
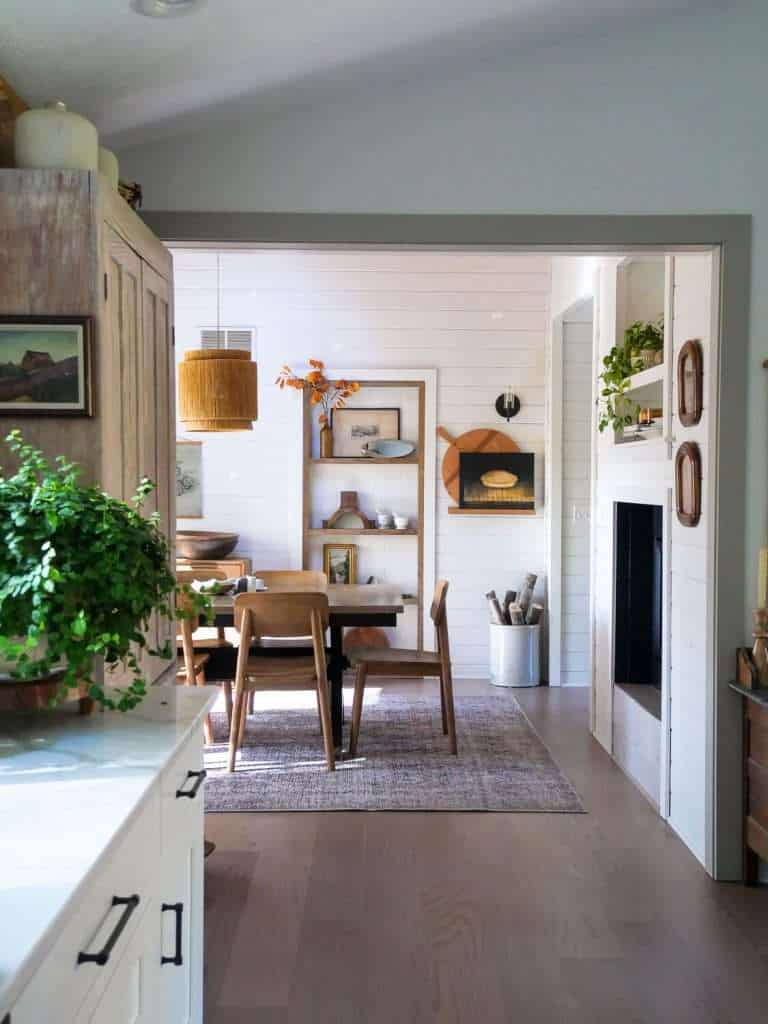
If you want to make the most of a wall niche, there are a handful of ways you can highlight the space.
SHOP THE LOOK
- Create contrast with the surrounding space. You can do this by:
- Painting the inset niche a color that contrasts the walls around the niche.
- Wallpapering the back of the niche with a fun pattern.
- Adding contrasting trim around the niche to make it pop.
- Painting the back of the niche two tones darker than the surrounding walls for a more subtle highlight.
- Adding millwork to the niche in a pattern.
- Create a focal point within the niche with statement decor.
- Draw attention to the space with bold artwork.
- Add a large floral arrangement that fills the entire nook.
- Include a sculpture or other interesting conversation starter.
- If near a window, create an indoor plant sanctuary with multiple houseplants.
- Incorporate stacks of books or showcase a mix of decorative objects like vases, candles, picture frames, and baskets.
Tips to Mask a Niche in the Wall
Now, even though we are still going to cover how to decorate a niche in the wall, it can also be accomplished more subtly.
Here are a few ways you can tone down, or mask, a wall niche.
- Blend the niche with the room. You can do this by:
- Painting it the same color as the walls.
- Removing trim and creating a seamless transition with the wall.
- Fixing any obvious architectural differences (ex: removing an arch if it doesn’t go with the style of the home).
- Covering the niche fully with wall art that is larger than the niche itself.
- Removing any existing pattern or contrasting wallpaper.
How do you decorate a large recessed niche?
No matter which camp you’re in, there are many ways to decorate a large recessed niche.
You can use some of the tips above, or you can take it a step further, like I’ve done.
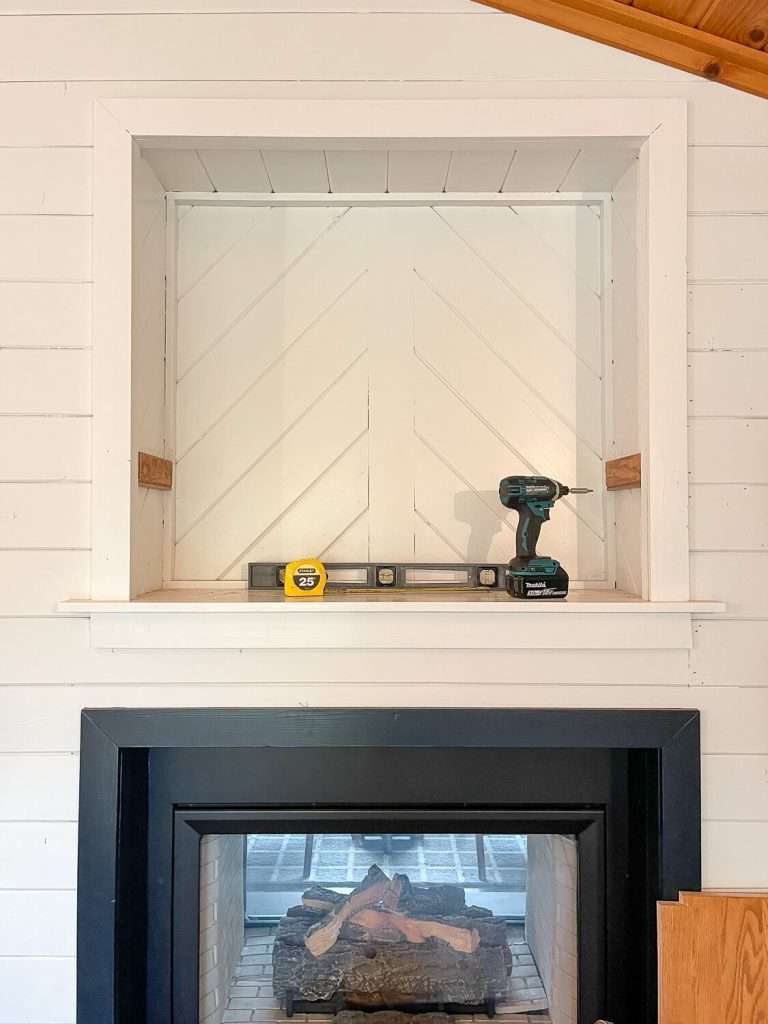
Since the niche above my fireplace is so large, I’ve always felt that there was a ton of wasted space in the height. So, I decided to break up the niche and build a shelf!
How to Build a Shelf in a Wall Niche
Adding a shelf to a wall niche is one of the easiest ways you can create a focal point that’s both aesthetically pleasing and practical.
It is so simple to pull off because you can easily use the recessed portion on both sides to create supports.
I happened to find a table leaf in my shed that was the exact length I needed to add a shelf to my fireplace niche.
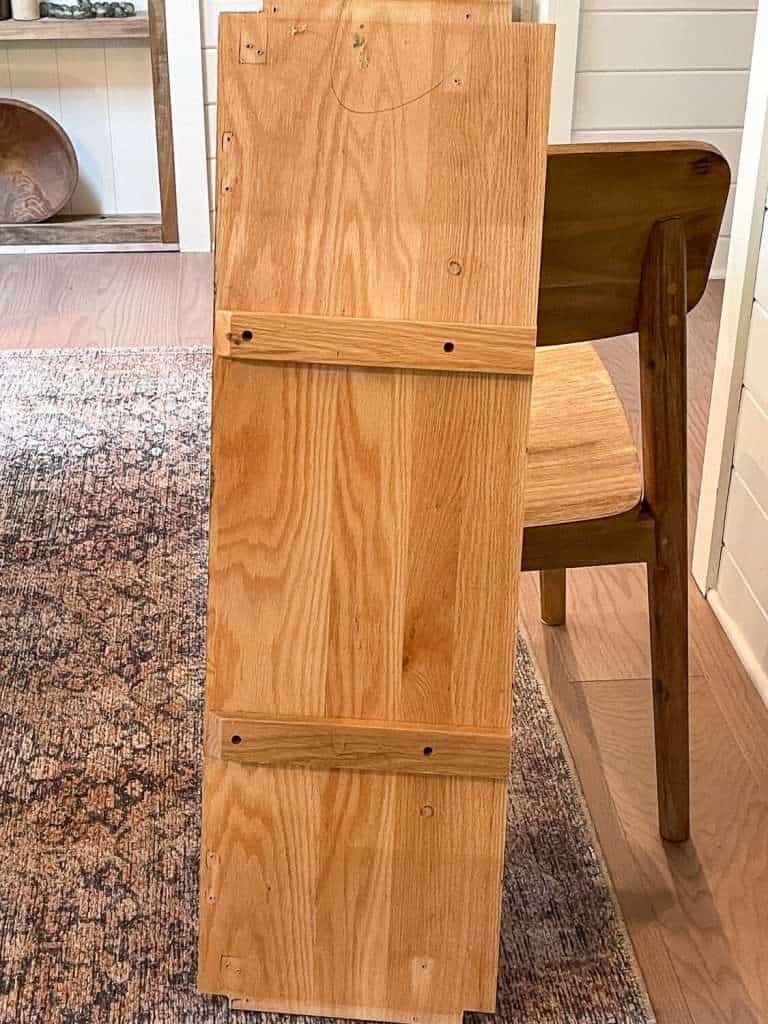
I simply cut it down to size, used my jig saw to cut the corners to fit my specific nook construction, and then installed it with side supports.

Obviously, it will be rare for everyone to have the perfect size piece of scrap wood in their shed. However, this is a very simple project to head into your local lumber yard with measurements and a plan!
Once I cut my leaf to size, I screwed 1x3s into each side of the nook to use as supports. The table leaf rests on those supports.
Next, I added a 1×3 to the front to give it a chunkier, built-in look.
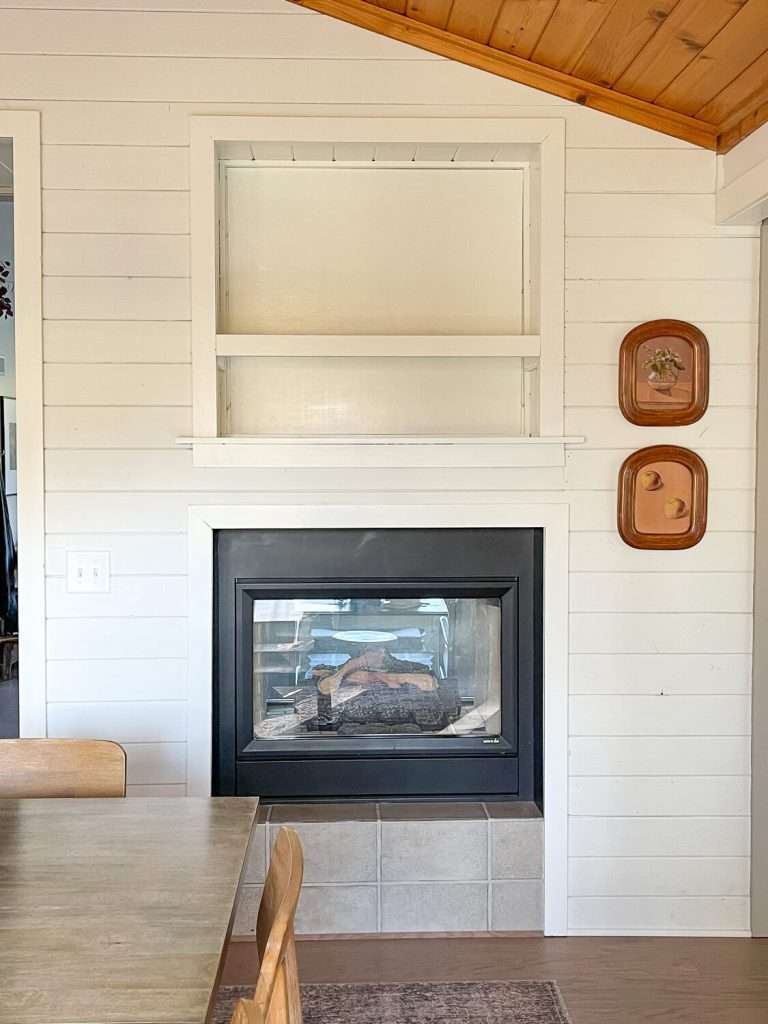
For my niche, I wanted to keep some height. So, rather than install the shelf in the middle to create equal spacing, I installed it with a 1/3 to 2/3 ratio.
This allows me to use the lower portion for small items, and the top can still accommodate a larger piece of art or a tall floral arrangement.
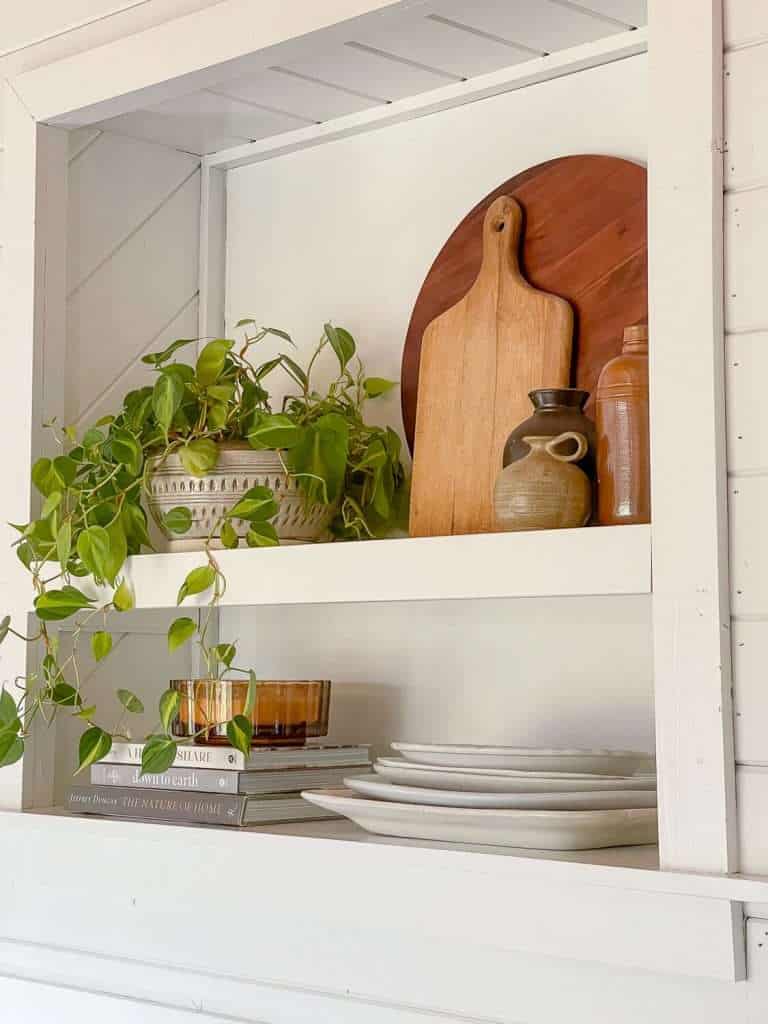
Niche Before & After
Let’s take a look at a quick before and after from the same angle to analyze some of the changes I made to this niche.
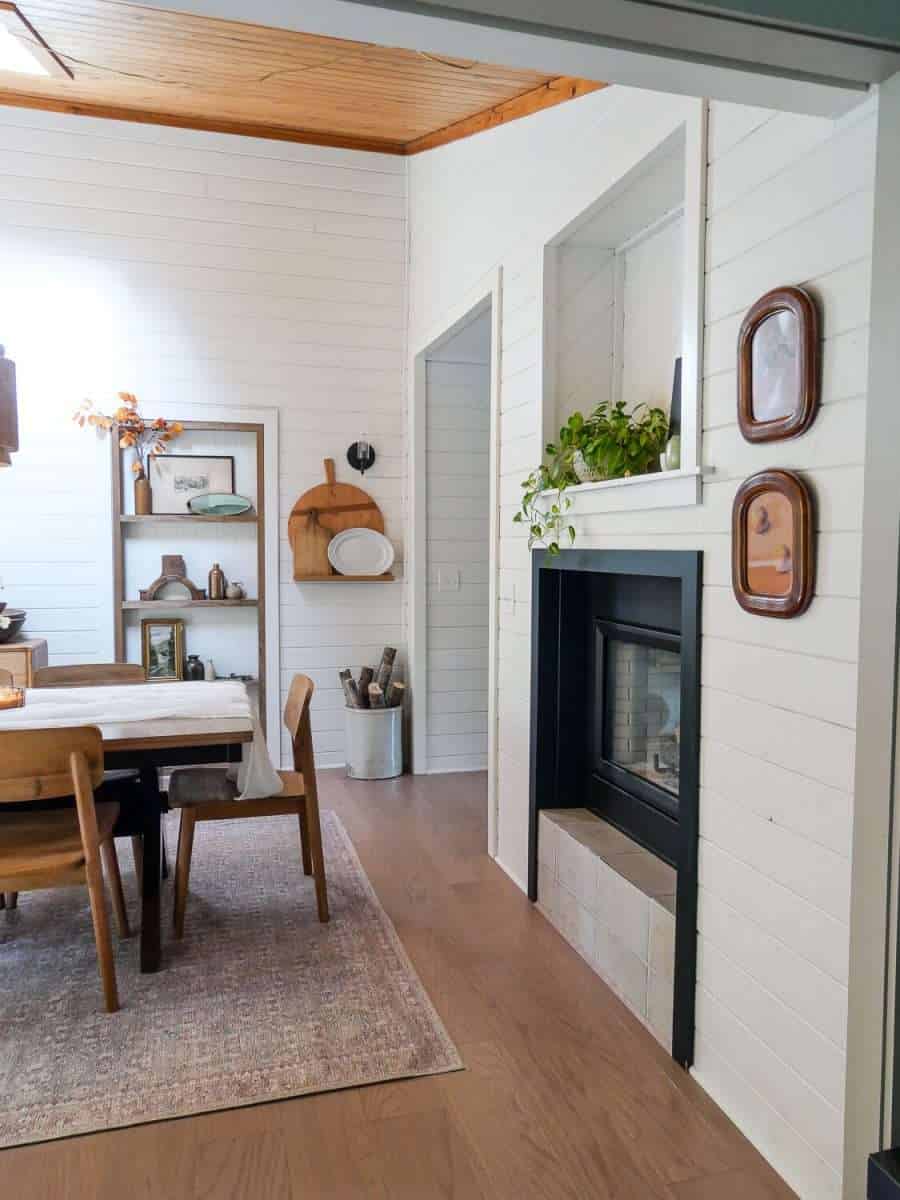
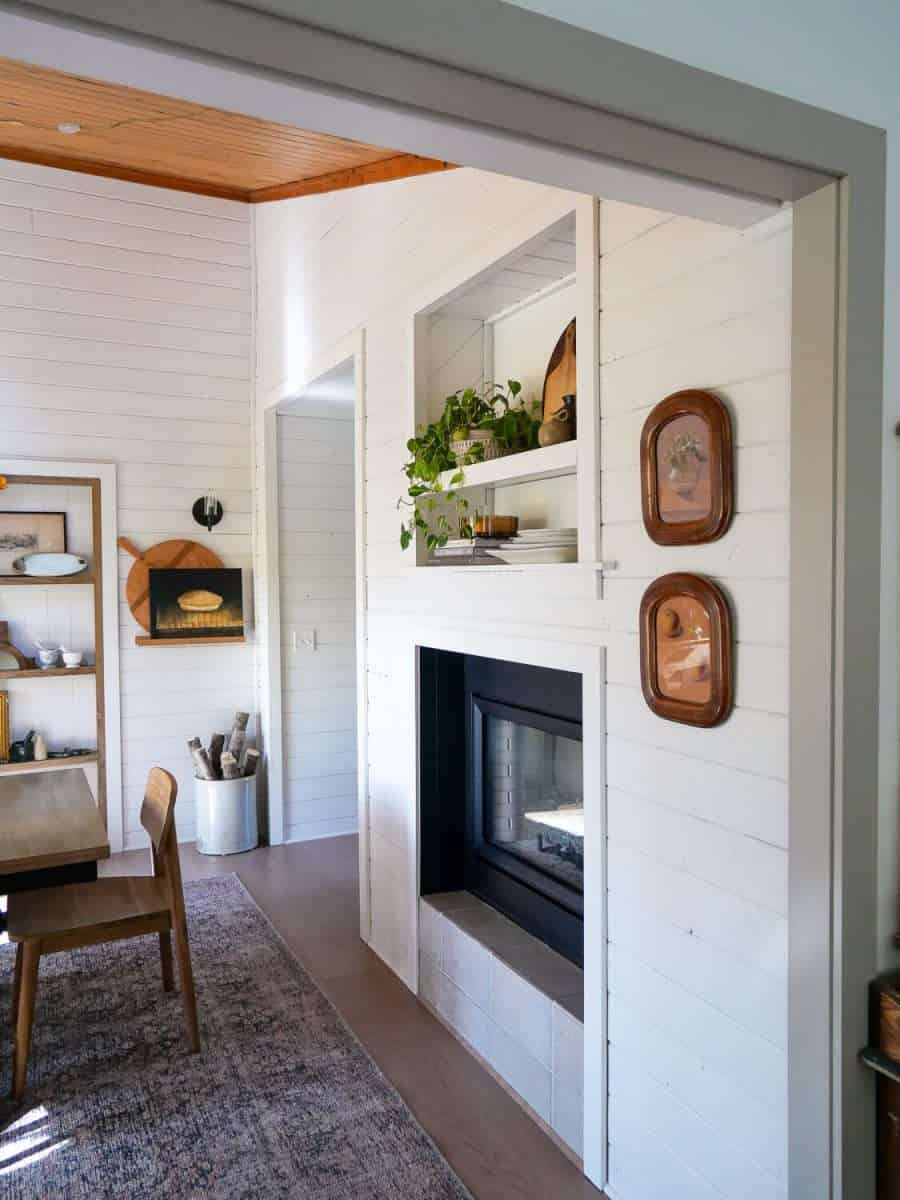
As you can see, I did a few more things than just add a shelf. During this project, I:
- Painted the lower trim from black to white to help it blend into the space better.
- Added underlayment to the back of the niche to streamline it and lose some of the eye catching chevron pattern that was there before.
- Added a shelf for more practical decorating space.
My main goal in this project was to help mask the nook, but also to not waste its potential.
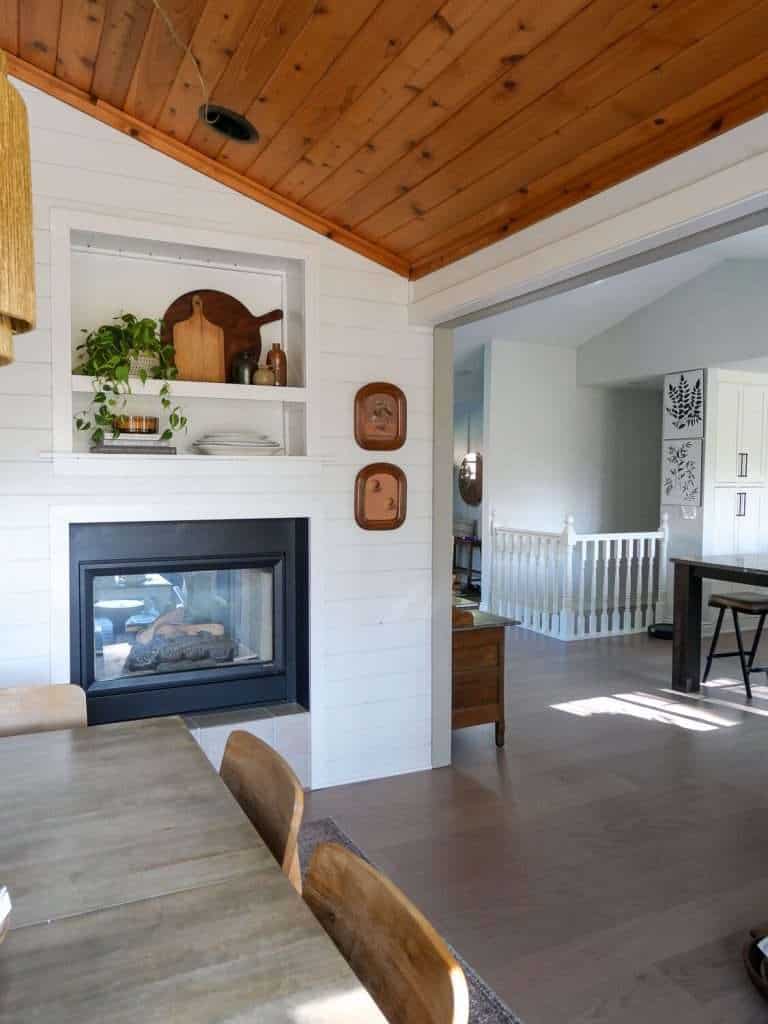
Someday, I’d like to bring the stone around from the other side of this double sided fireplace to make it completely streamlined. Until that day, these small changes do help me enjoy this slightly awkward niche a bit more!
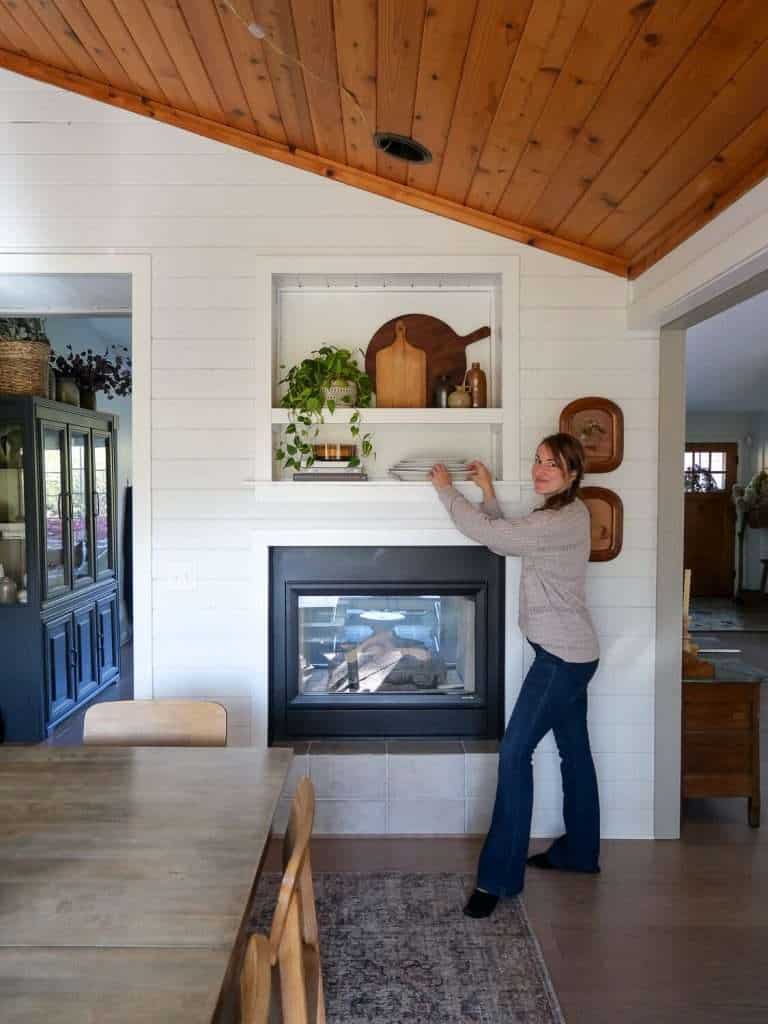
Specific Niche Decorating Tips
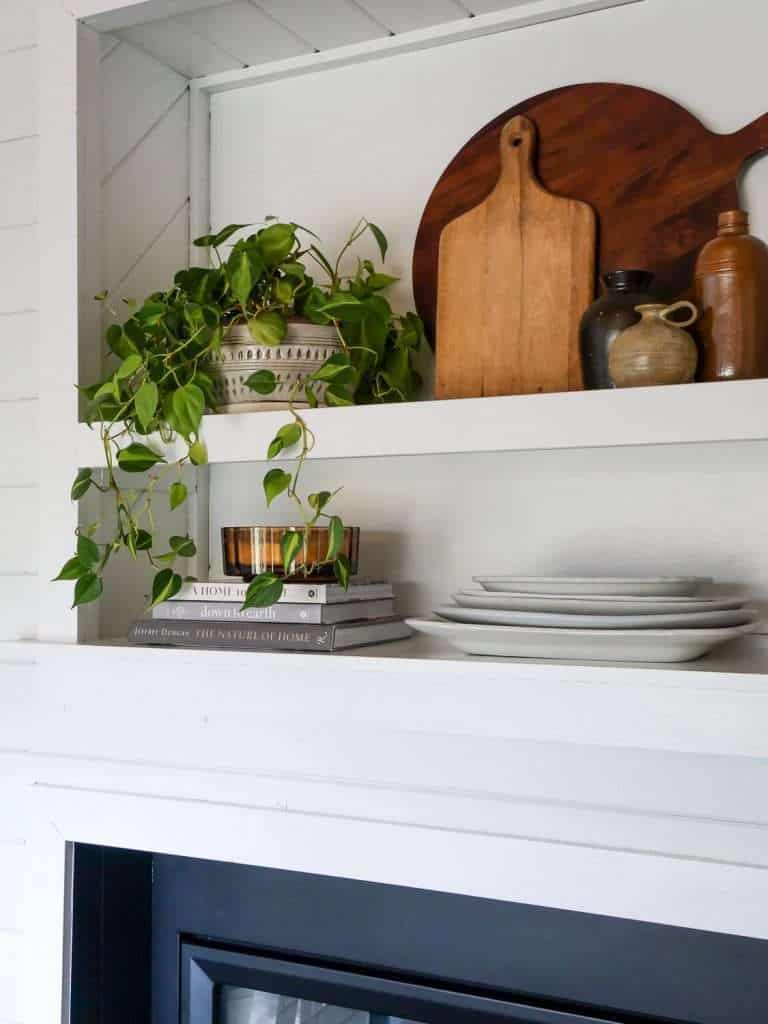
Here are a few specific tips to decorate a niche with layering, like I’ve done.
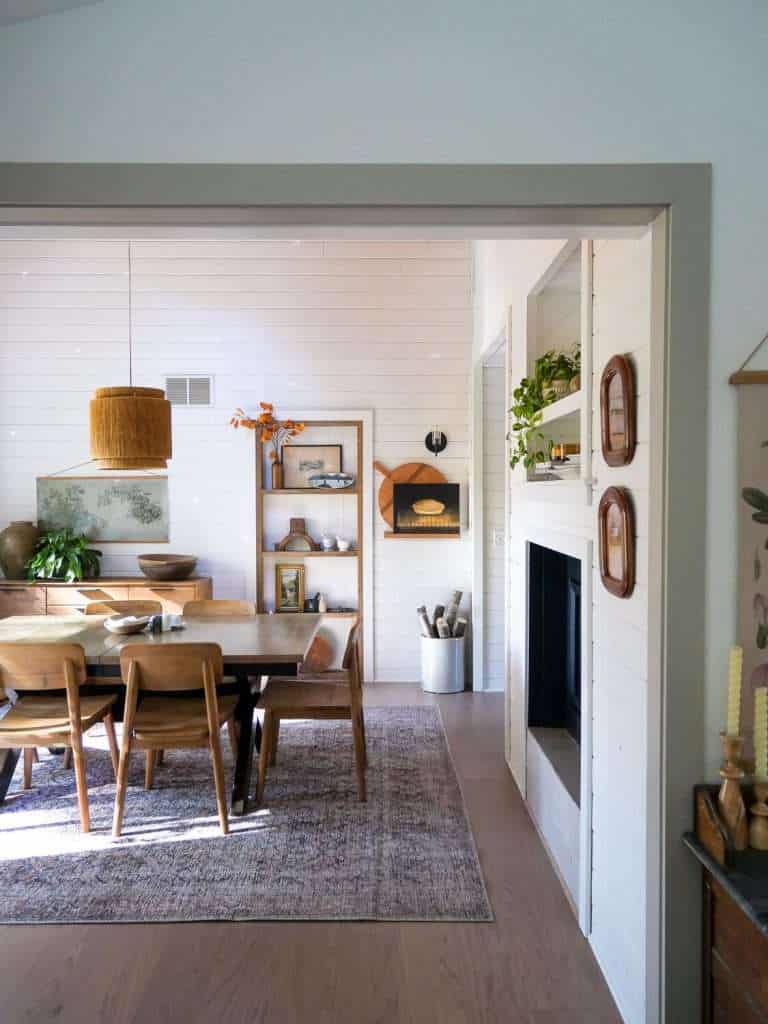
- Add layers both vertically and horizontally
- Stack books, platters, bowls, or other like items
- Layer taller items in the back, bringing forth similar items that are smaller in the front (Ex: my cutting boards)
- Add something living (or faux but looks real)
- Plants, flowers or greenery elevate a niche as something beautiful and interesting to look at
- Think practically for the space it’s in
- My niche is in a dining room, so platters and cutting boards make sense
- A living room niche would better display beautiful artwork
- An entryway niche would welcome guests with a floral arrangement
- A kitchen niche may work best to display spices or cooking utensils
- A bedroom niche would be a great space for family photos
- Bring in additional light
- If you have a large enough space to work with, adding a small table lamp is a great way to utilize your wall niche
- A small mirror tucked inside your niche is another way to bring in some natural light through reflection
- Don’t neglect the space around the niche
- If your niche is at the right height, a console table below it would help tie the space together
- Adding small artwork or a wall mirror that doesn’t compete on the sides can make the niche feel intentional and like a focal point
- Flank a niche with beautiful sconces to highlight your decor
SHOP THE LOOK

How do you cover a recessed niche wall?
Now, if you were in the mask it camp, then I’d venture a guess that you’ve wanted to simply remove your wall niche altogether.
If that’s the case, it can be done!
You simply need to essentially build and frame in a small wall. Then, you can add drywall (or whatever material your wall is made from) and patch the hole to create a seamless wall.
This article will help you if you try out this larger-scale project.
You’ll Also Enjoy…
Thanks so much for stopping by the blog today! I hope this article on how to decorate a wall niche was helpful to you!
I think you’ll also enjoy these articles next.
- How to Build Custom Built Ins in an Existing Doorway
- How to Create Spaces You Love
- Top 12 Organic Modern Design Rules
Make sure to subscribe to get my Grace Notes directly to your inbox and to access all my insider perks. You can also follow along daily on Instagram and weekly on YouTube!
~Sarah


love join thotscope
I really like neat rooms, but on the contrary, I also like to decorate my house a lot. Sometimes the rooms are full of beautiful but messy items. Will try your method. Thanks
Health guides! I love it. I wouldn’t change a thing. Thank you for sharing.
What a fantastic post! I love the creative ideas you shared for updating a wall niche. The use of layered textures and contrasting colors really makes it feel fresh and lively. I can’t wait to try some of these tips in my own space! Thank you for the inspiration!
Pretty! You could also create a large verticle plate rack to store trays and platters in the top section. I’m always looking for places to pop in vertical storage!
That’s a great idea!
Oh my! I love it. I wouldn’t change a thing. Thank you for sharing.
Thank you so much!
Doesn’t look awkward now! It nicely ties in with the niche shelving on the adjacent wall.
Thank you!