
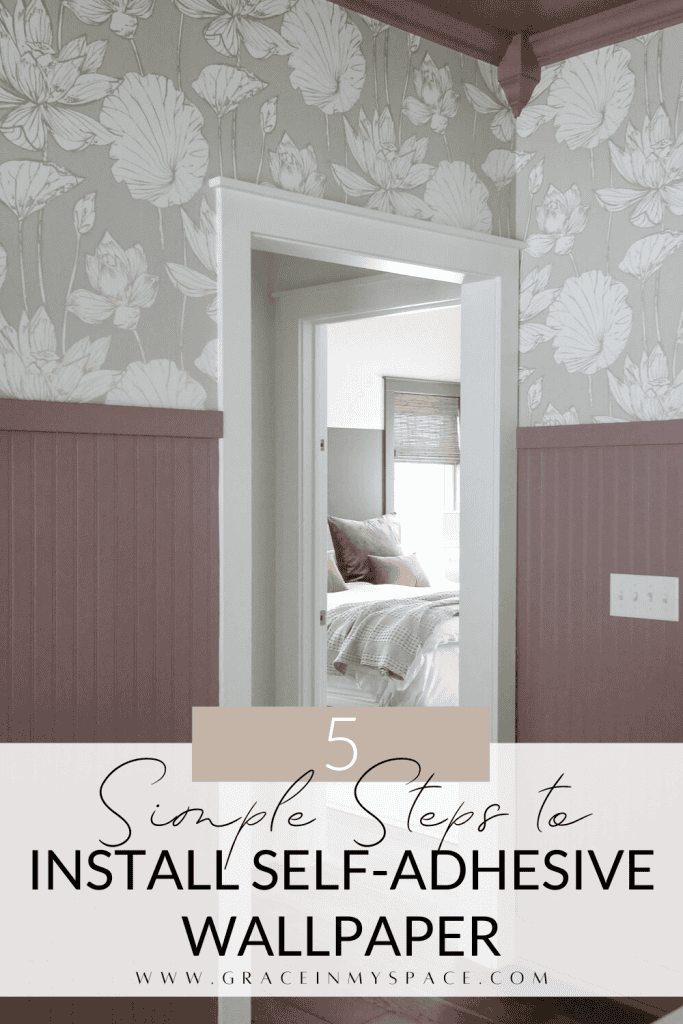
How to Install Self-Adhesive Wallpaper | Peel and Stick Wallpaper Demystified
Installing self-adhesive wallpaper is a transformative way to quickly update any room in your home. Wallpaper adds so much personality and character that showcases a homeowner’s unique sense of style. However, installing peel and stick, or self-adhesive, wallpaper can be very intimidating. In this article, I will walk you through the simple steps of how to install self-adhesive wallpaper easily.
This post may contain affiliate links for your convenience.
Self-Adhesive Wallpaper FAQs
Before we get into the tutorial, let’s cover some frequently asked questions.
Installing self-adhesive wallpaper is quite different than installing pasted or pre-pasted wallpaper. If you are a visual learner, make sure to watch my installation video included in this post below.
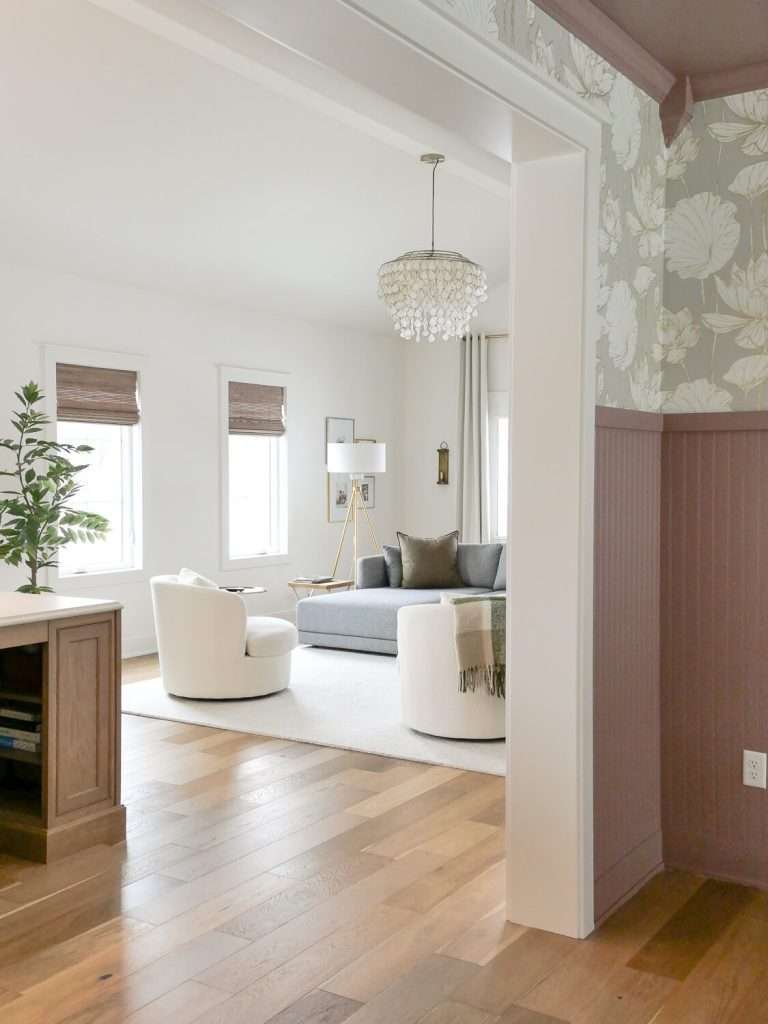
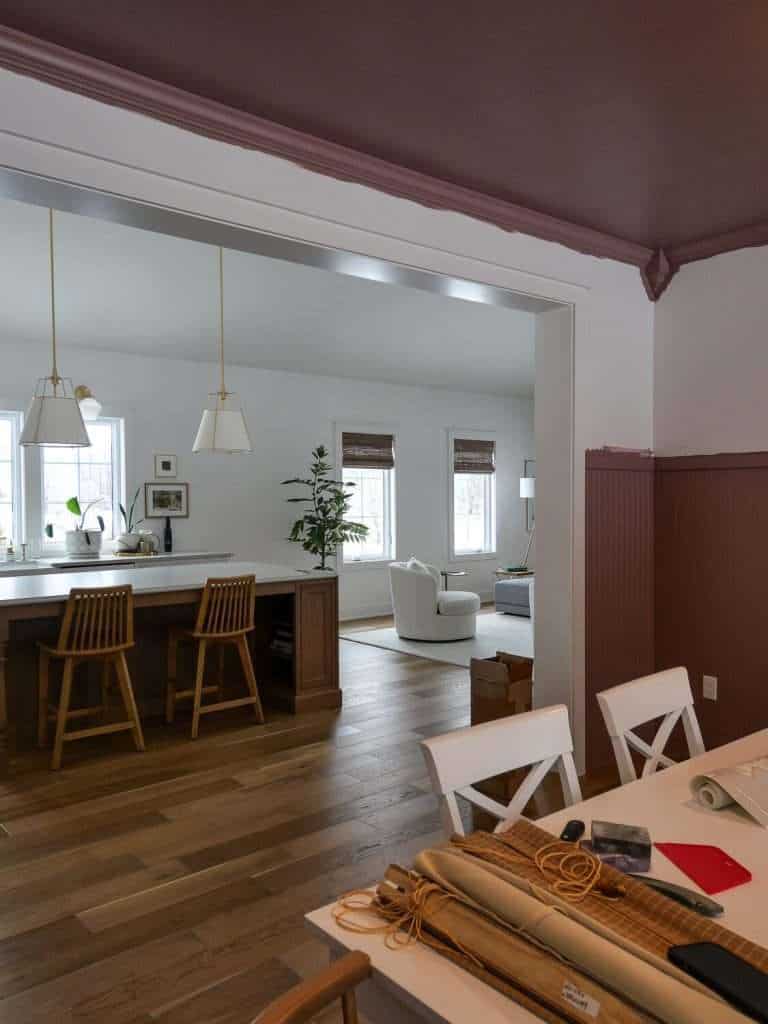
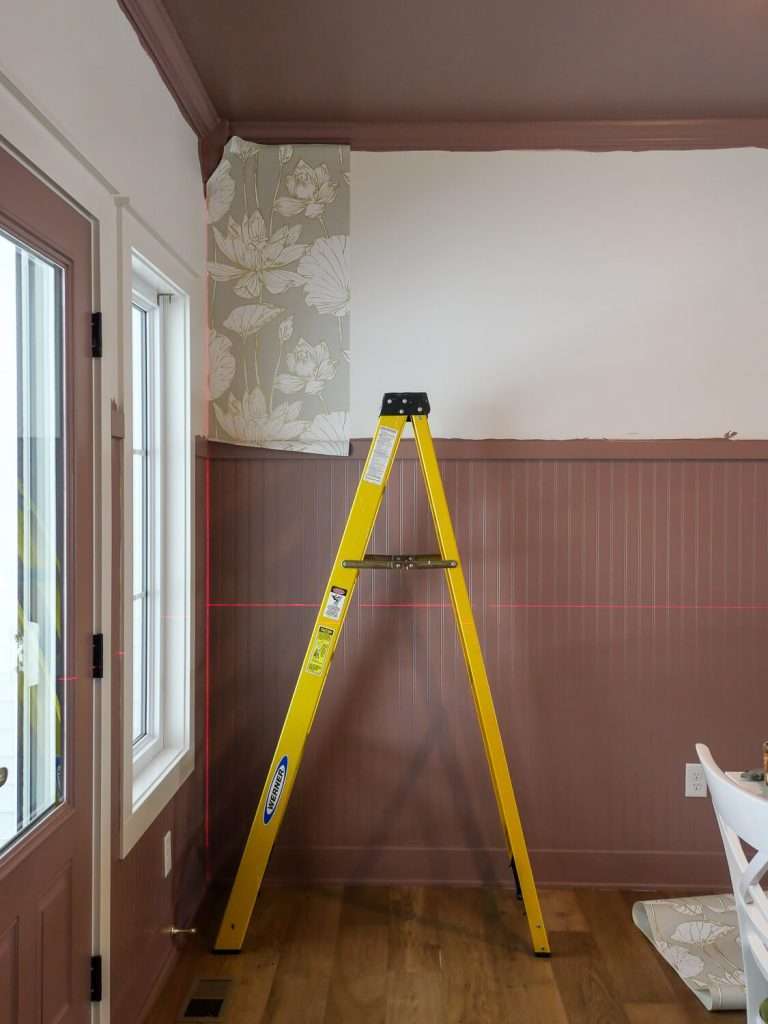
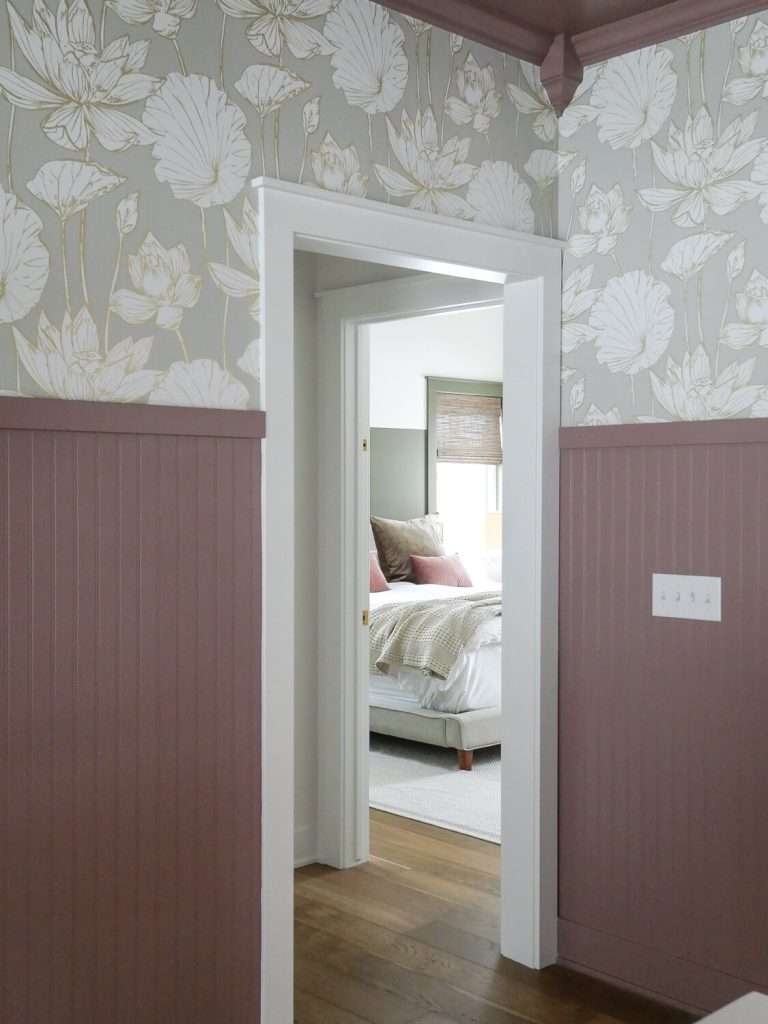
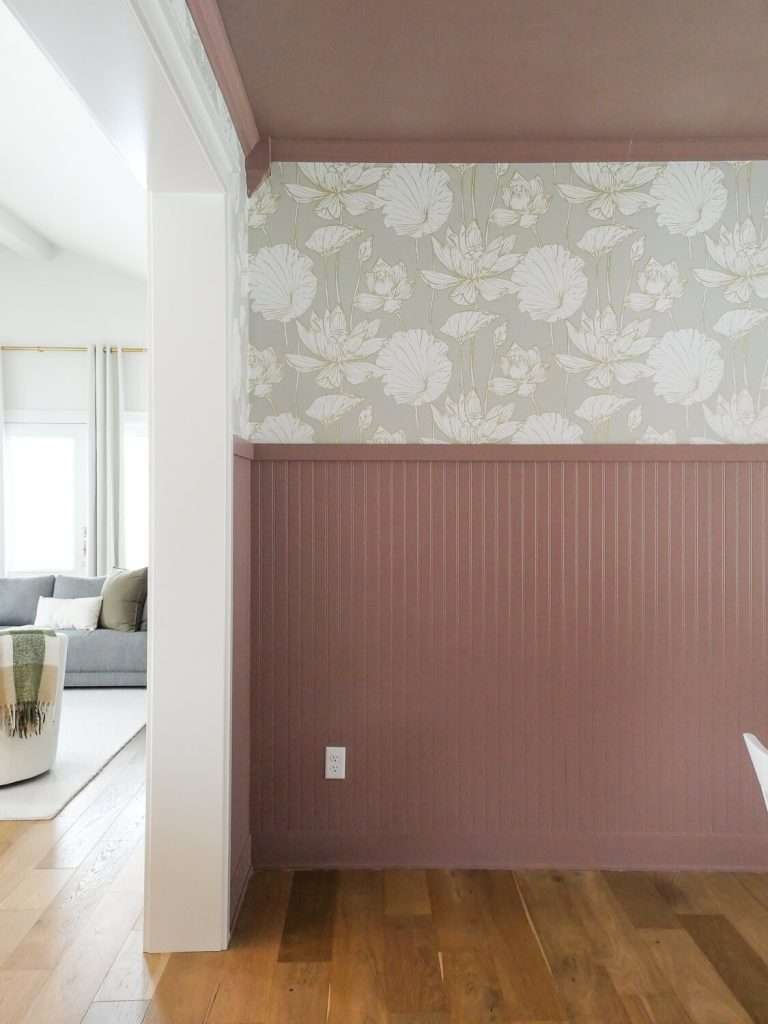
Here’s a quick look at the project I’m sharing today. We are installing self-adhesive wallpaper in Deidra’s beautiful home. Here’s a quick shot of the space before we installed the wallpaper.
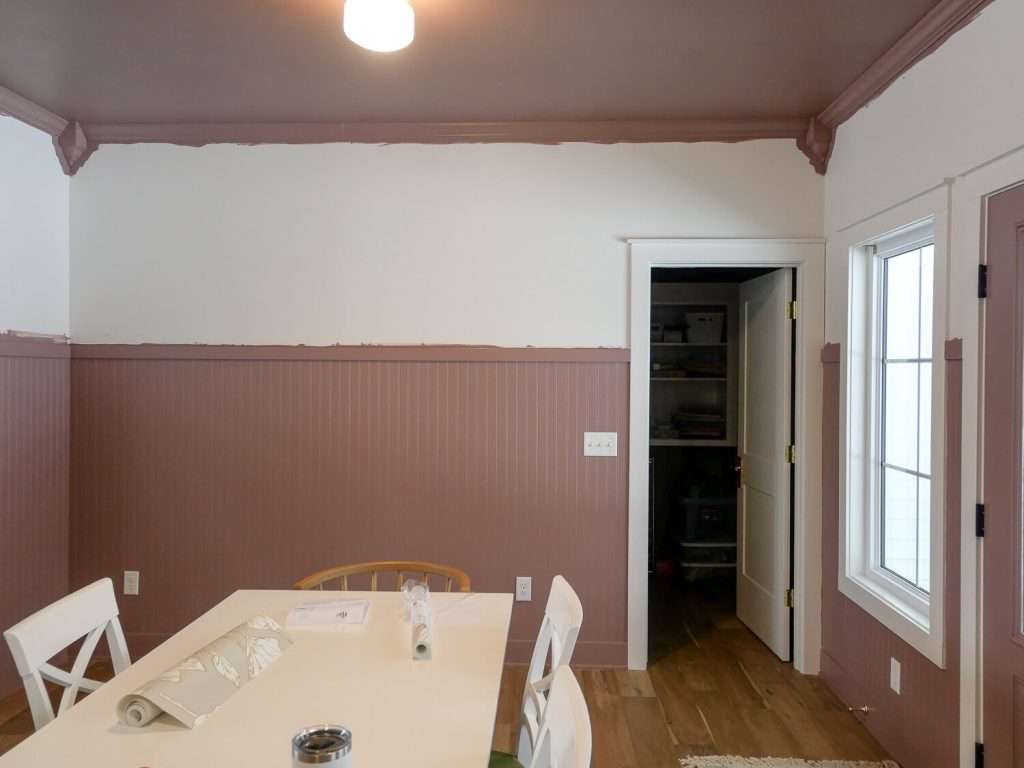
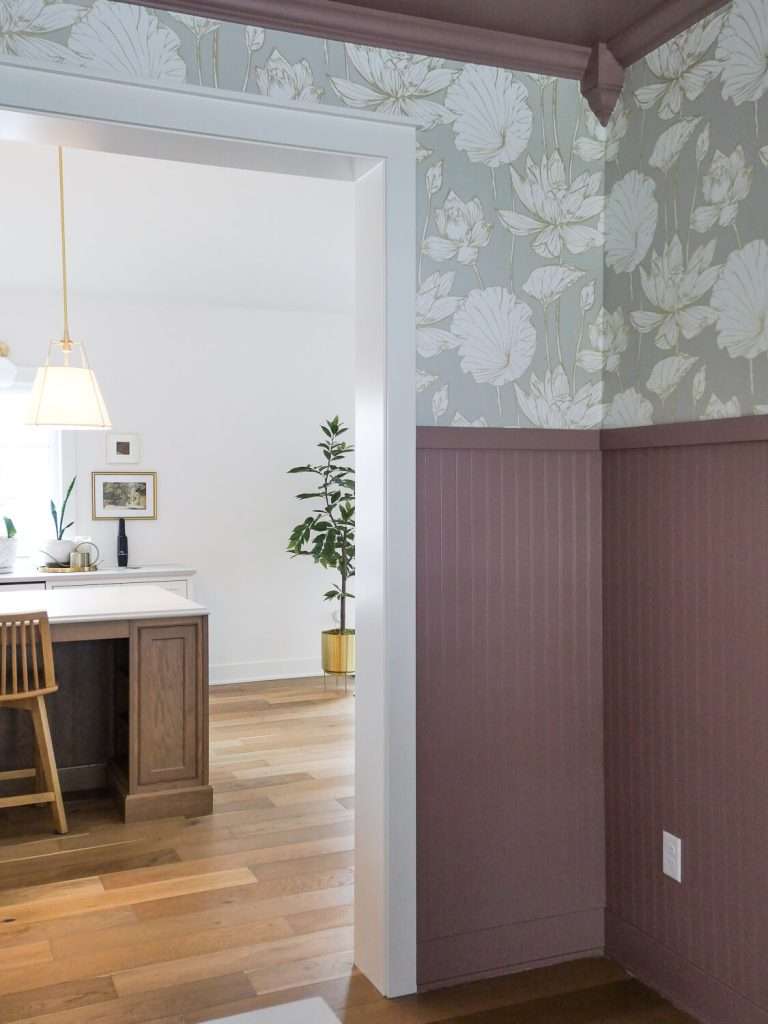
Deidra and her husband installed beadboard and crown moulding. Then painted it all this stunning color. The half wall looks lovely white, but adding wallpaper is really going to give tons of personality to this space! It will also help frame out the opening to her amazing kitchen.

Is Vinyl Wallpaper The Same As Peel and Stick Wallpaper?
There are a lot of terms tossed around when it comes to self-adhesive wallpaper.
Many self-adhesive wallpapers are made of vinyl. But not all vinyl wallpaper is self-adhesive.
Self-adhesive wallpaper and peel and stick wallpaper are typically interchangeable. They resembled the veteran “contact paper” that people used to use as drawer liners, however are typically thicker.
Self-adhesive wallpaper is essentially a giant sticker. The product has been updated to be applied to walls in a larger scale than originally designed for drawers and other smaller applications.
Is It Easy to Install Peel and Stick Wallpaper?
Now, this question depends on who you ask! Those who are used to pasted wallpaper typically think self-adhesive wallpaper is hard to deal with.
I personally do not mind installing peel and stick wallpaper. I do not find it more difficult than traditional pasted wallpapers, though many do. There are pros and cons to both!
Self-Adhesive Wallpaper Pros & Cons
Pros
- Typically more affordable
- Large variety of readily available patterns
- No messy paste or wetness
- Removable (most brands)
- Repositionable for installation
Cons
- Paper can stick to itself, causing a hassle
- Wrinkles can be harder to smooth out
- Cannot move the paper around once on the wall to position it
Pasted Wallpaper Pros & Cons
Pros
- Beautiful patterns
- More selection than self-adhesive
- Paper can be slid into place on the wall and easily moved to line up seams
- Air bubbles & wrinkles are easy to wipe out
Cons
- Messy paste during installation
- Usually more expensive
- Difficult to remove
- Paper can tear easily during installation if knife isn’t sharp enough
Can You Hang Peel and stick Wallpaper By Yourself?
With the above pros and cons in mind, I believe you can absolutely install peel and stick wallpaper by yourself. In fact, I typically prefer it.
Learning how to install self-adhesive wallpaper solo does take some time and patience. However, it is 100% doable.
A second set of hands is never a bad thing. Though I’d say that the helper should not try to install the wallpaper panel with you.
Helpers are most useful as tool grabbers and panel cutters. When two sets of hands are on the same panel pulling different ways, it makes it very difficult to line seams up since self-adhesive wallpaper doesn’t slide on the wall.
So, if you have a buddy for this project, assign each person a main role. One should install and line up panels. The other should prep the rolls and be a tool gopher.
What Tools Do I Need To Install Peel and Stick Wallpaper?
There are very few tools needed for self-adhesive wallpaper. One of the reasons I prefer this type of wallpaper over others!
Tools You’ll Need to install self-adhesive wallpaper:
- Wallpaper smoother
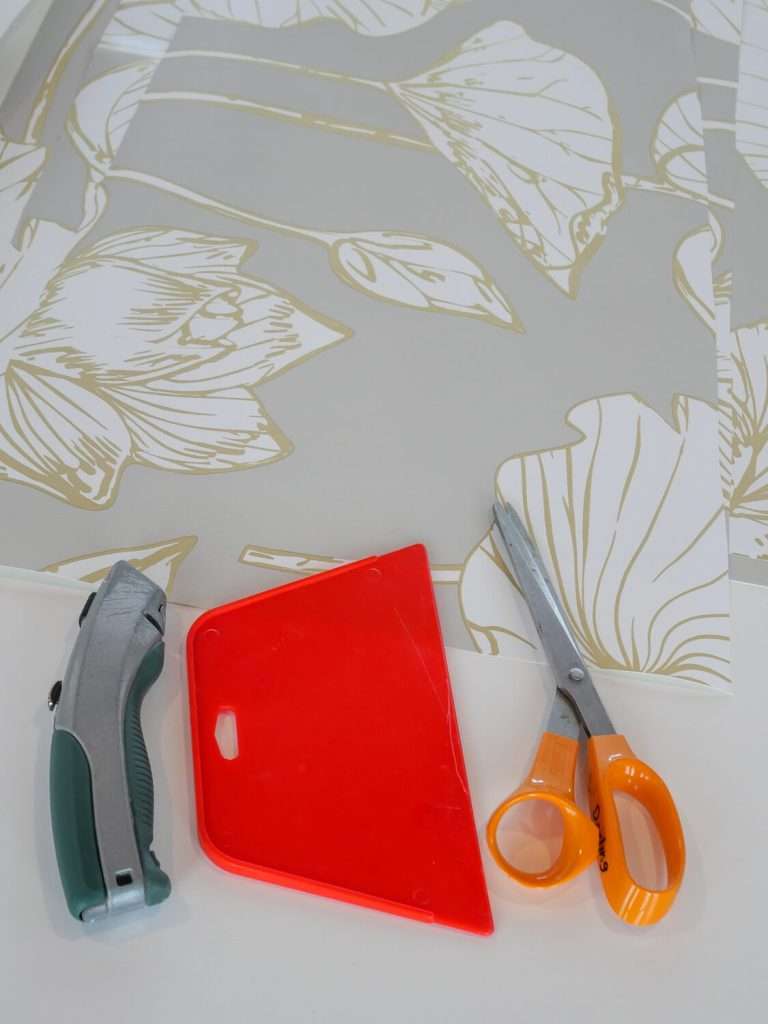
- Brand new utility knife with replacement blades (or breakaway blades). Very sharp blades are extremely important to getting clean cuts.
- Scissors
- Step ladder (or an adjustable ladder for tricky areas like stairs)
- Laser level (A regular level is acceptable as well, but I’ve always been grateful to have both hands free using my laser level! It makes it much easier.)
- Tape measure
This kit is a very affordable option to get started with #1-3 on the list!
How Do I Prepare the Wall Before Installing Self-adhesive Wallpaper?
It’s very easy to prepare most walls for wallpaper. Ensure that your wall surface is clean, smooth, and dry. Remove any existing wallpaper or adhesive residue, and fill any holes or cracks with spackle. Once the spackle is dry, sand the area smooth with sandpaper.
If your walls have any slick or sticky surfaces, make sure to clean them with TSP or another heavy duty cleaner to avoid areas that the adhesive will have an issue sticking to.
Can I Install Peel and Stick WallPaper on Textured Walls?
How textured are we talking?
Orange peel? Spray? Knock down? Comb? Slap brush?
Any of the above and I’d say stick to pasted wallpaper. Pasted wallpaper is typically thicker and won’t show texture underneath.
Unfortunately, the majority of self-adhesive wallpapers are thin and need a smooth surface to adhere properly. There are a few brands that tout adhesion to textured walls, but take care that the paper you choose says it can be installed on rough surfaces.
Can I Install Self-Adhesive Wallpaper in a Bathroom or Kitchen?
Yes, you absolutely can install self-adhesive wallpaper in a bathroom or kitchen.
You can see my most recent bathroom remodel and how my wallpaper looks in there.
I would avoid using wallpaper behind the stove top as excessive cleaning from grease splatters may ruin your paper. Otherwise, it should be good to go anywhere else!
How Do I Clean Peel and Stick Wallpaper?
Cleaning peel and stick wallpaper is simple. However, I wouldn’t recommend doing it often.
Most vinyl papers will tolerate being wiped down with simple soap and water, then dried, when needed. However, constant contact with water can release the paper from the wall, or fade or smear patterns.
Follow the cleaning guide of your specific wallpaper for best results.
Why Is My Peel and Stick Wallpaper Falling Off?
Head back up to the section on preparing your walls to install self-adhesive wallpaper!
If you didn’t properly prep your walls, then dirt and grime could be the culprit causing poor adhesion.
Sometimes papering over oil based paints can cause a problem as well. In that case, apply a latex bonding primer before trying to install paper again.
Does Vinyl Wallpaper Expand and Shrink?
Self-adhesive vinyl wallpapers can shrink.
Traditional pasted papers are installed by butting up the seams because they do not shrink. However, when I install peel and stick paper, I overlap the seam by 1/16″. This way, if the paper shrinks you do not have lines where your wall is showing through.
How To Install Self-Adhesive Wallpaper
Now that we’ve covered some FAQs, let’s learn how to install self-adhesive wallpaper!
Here is a very quick rundown of the process, followed by more detailed steps.
- Measure the room and account for waste to place your order. Ensure you order enough so the dye lots are the same.
- Use a laser level to start your first panel.
- Cut your panel to length, leaving two inches at the top and bottom to allow for adjustments.
- Pull down about 12″ of the vinyl wallpaper backing from the top, pulling more as you go down the wall. Line your panel up with the laser line and smooth all air bubbles out with a wallpaper smoother.
- Trim the excess off the top and bottom.
- Repeat around the room, matching up patterns on the seams.
Prep Process For How To Install Self-Adhesive Wallpaper
First, gather all your materials before starting the installation process. Make sure you have all the necessary materials on hand to save trips up and down the ladder. You will need a tape measure, a laser level, a utility knife, a smoothing tool, and of course, your self-adhesive wallpaper.
When ordering wallpaper, account for 10% waste. If you are choosing a large pattern that has a big repeat, account for 20% overage so you don’t run out of paper. This risks having to reorder a different dye lot, which may cause your paper coloring to be slightly off.
Next, prepare the wall surface. Ensure that your wall is clean, smooth, and dry. Remove any existing wallpaper or adhesive residue, and fill any holes or cracks with spackle. Once the spackle is dry, sand the area smooth with sandpaper.
If you notice that you have oil based paint, you may also want to prime the walls first with a bonding primer to avoid frustration down the road.
Wallpaper Installation Process
Now it’s time to install your first panel. Measure the height of the wall, and then add an extra 2 inches to ensure full coverage. Cut the wallpaper to the appropriate size using a utility knife or scissors.
If the wallpaper pattern has a repeat, make sure to see where the pattern will hit at the top and bottom to avoid extra waste.
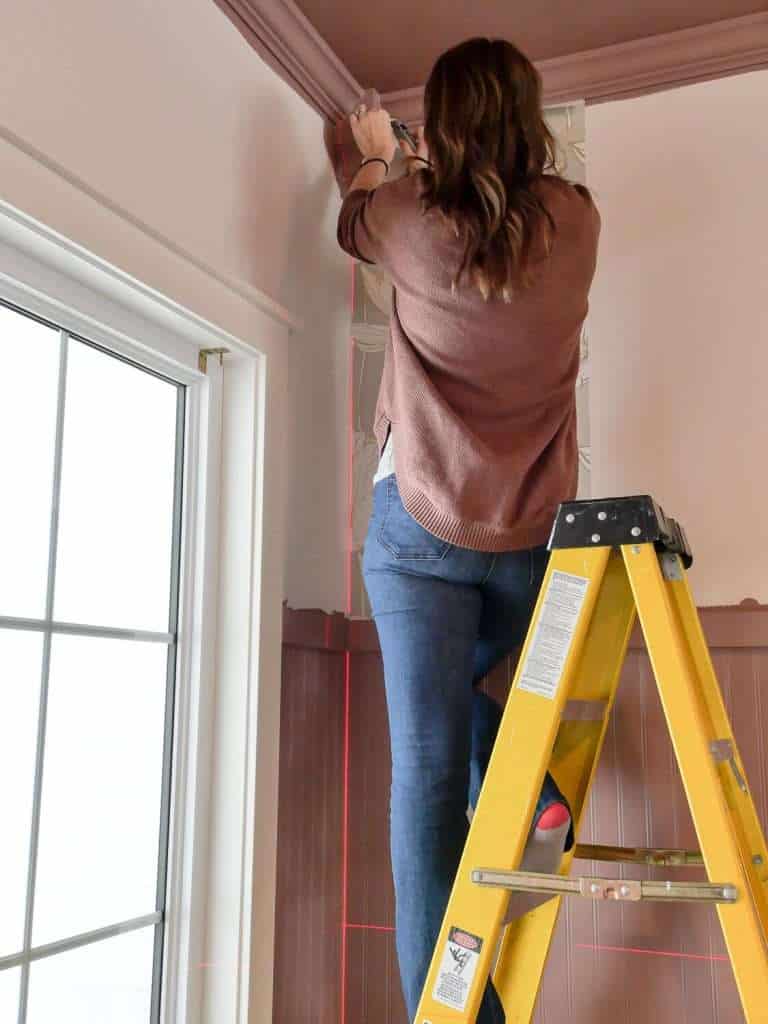
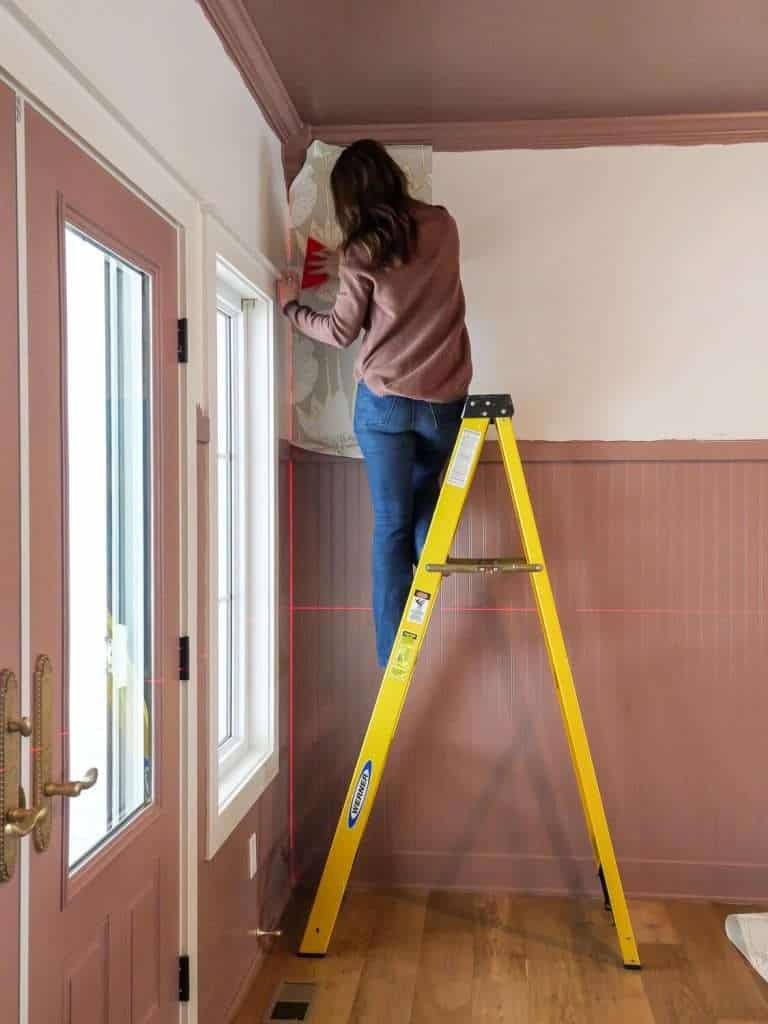
Start in an inconspicuous corner and line your laser level up as close to the corner as possible. Do NOT use the wall or ceiling as your level as they are often unlevel due to older construction or settling.
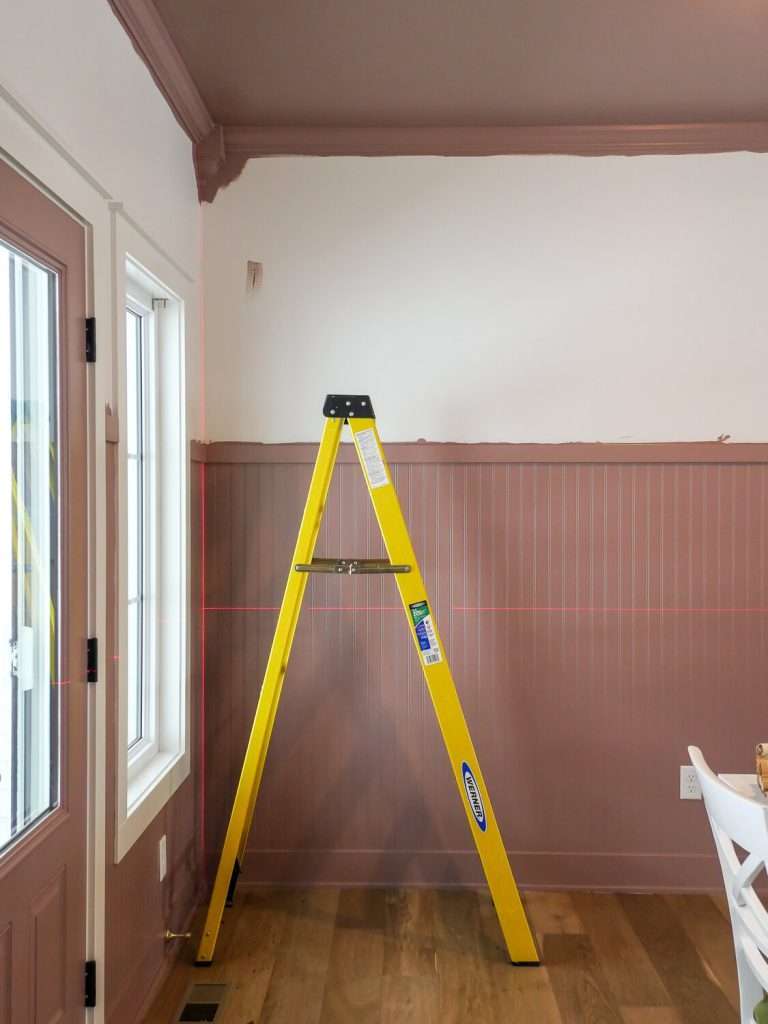
If your first piece is not level, then every panel thereafter will progressively become more crooked. That first panel is imperative to get straight.
Next, starting from the top of the wall, slowly peel the backing off the wallpaper 12″ at a time, while pressing the exposed adhesive side to the wall along your level line.
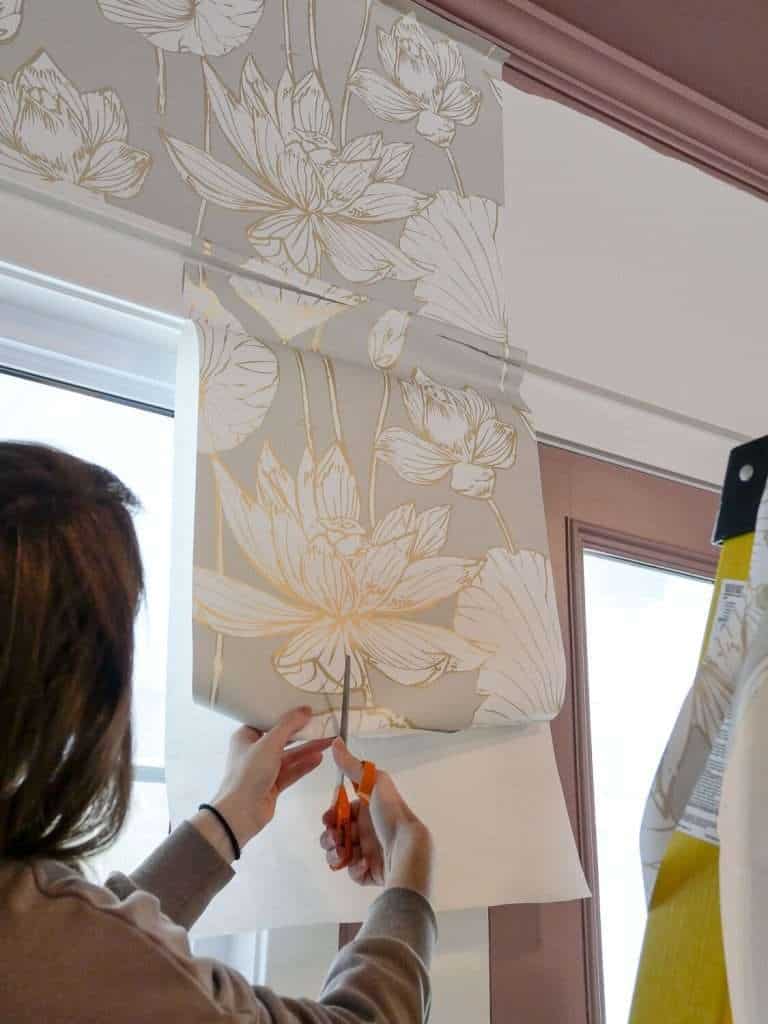
Use your smoothing tool to work out any air bubbles or creases as you go. Once your first panel is fully adhered to the wall with all air bubbles smoothed out, cut off the excess from the top and bottom.
Do not cut excess until you are 100% finished positioning the panel. I like to use my smoothing tool as a guide to get clean cuts on the top and bottom edges.
Hold the blade closest to the ceiling or floor, depending on where you’re cutting, and glide it along with the smoothing tool at a slight upward angle.
Repeat this process for each section of the wall until the entire area is covered in self-adhesive wallpaper. Make sure each panel is properly aligned with the previous one for a seamless look. I use a 1/16″ overlap on my seams to avoid shrinkage issues.
How To Install Wallpaper Around Corners and Doorways
Now, the installation of self-adhesive wallpaper is fairly straight forward for open walls with no obstacles. However, most projects have doorways, trim work, or receptacles to work around.
Check out this video for a quick tutorial on some tricky spots.
You can view the entire video on YouTube for a full visual tutorial as well.
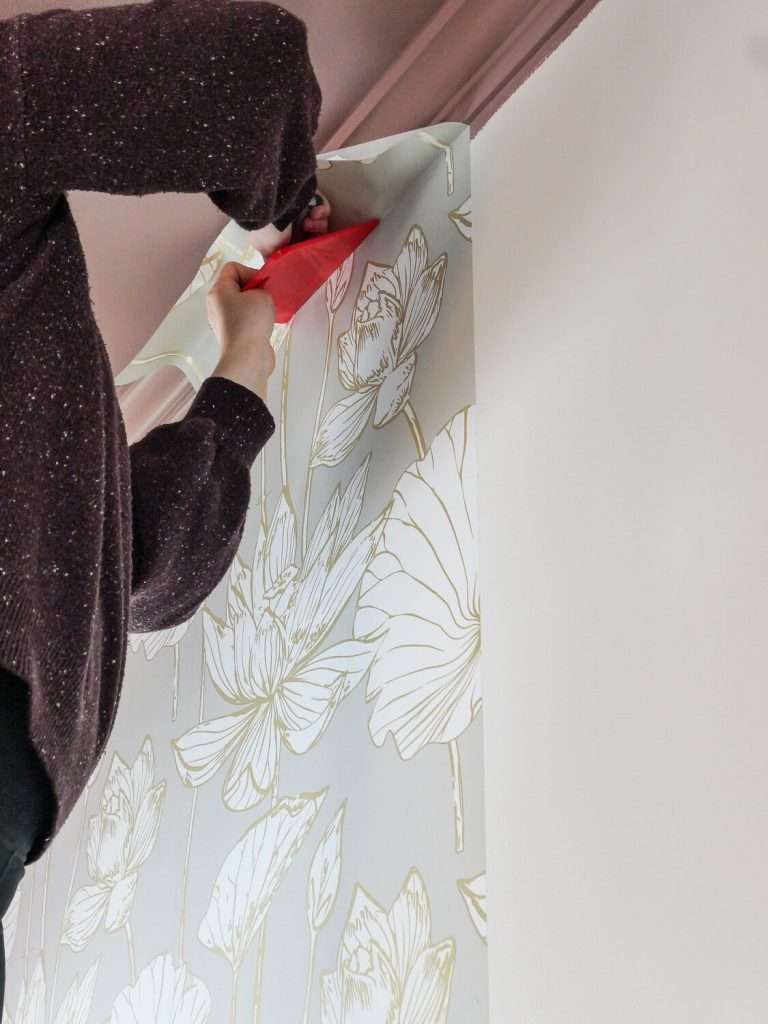
For small obstacles like this corner crown moulding trim, ensure that the wallpaper is fully adhered flat to the wall on both sides. Then, make a series of small intricate cuts to remove the excess from around the trim.
When working around doorways, remove as much excess as possible by cutting the unneeded areas off with the backing still on. That will help it not stick to itself when getting in tight spaces.
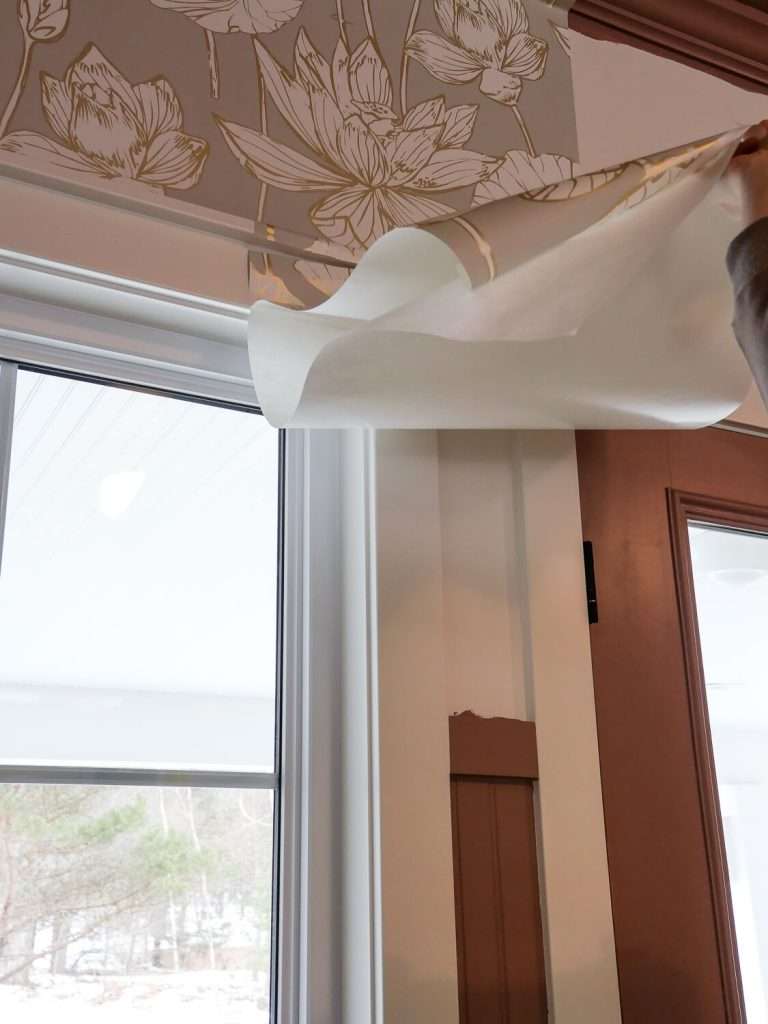
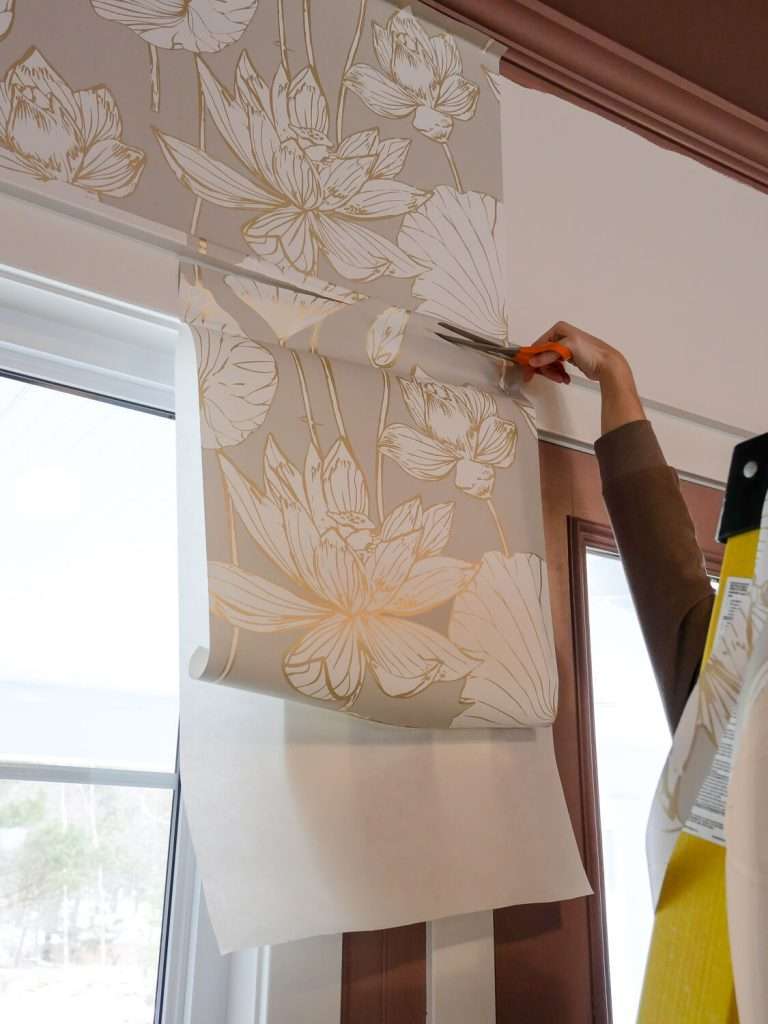
Once you’ve smoothed the paper onto the wall fully, make small cuts around door trim to remove the excess.
Tight spaces like this often mean that mis-cuts are made. Don’t rip the whole panel off if you make a mistake. Patching these issues is very easy to do. Simply find a matching piece from your scraps and cut it to fit!
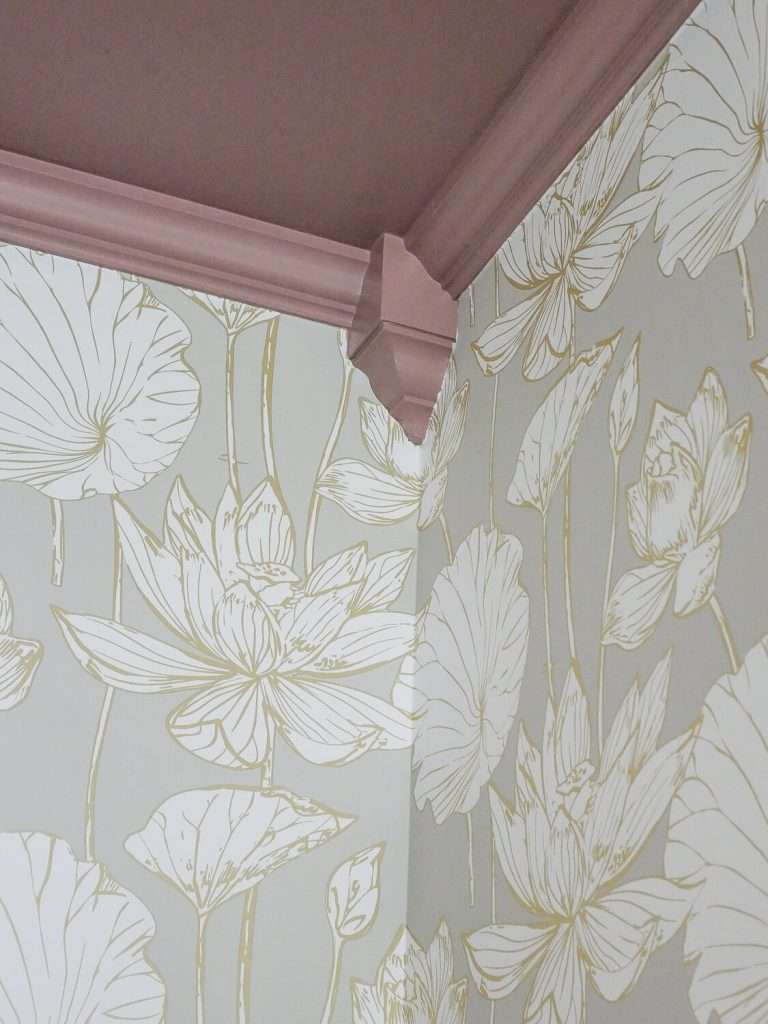
Installing wallpaper in corners depends on where and how your panels line up. Most of the time, you will continue your panel seamlessly from one wall to the next. Line up the panel as needed, then smooth the paper on the first wall into the corner with your smoothing tool.
Fully adhere the paper to that first wall, pushing all the way into the corner.
From the corner, smooth the panel the rest of the way onto the next wall from top to bottom. No need to cut the pieces to the corner. Just push and smooth it around the bend and onto the next wall.
More Wallpaper Examples
Installing self-adhesive wallpaper is a simple and cost-effective way to transform any room in your home. By following these easy steps, you can achieve a professional-looking installation without the mess of traditional wallpaper.
Installing self-adhesive wallpaper does require a high degree of patience and persistence. Tricky corners, like this crown moulding, took me 35-45 minutes for one panel because of the door trim and small intricate curves.
Plan on a couple of days of work for a full room installation.
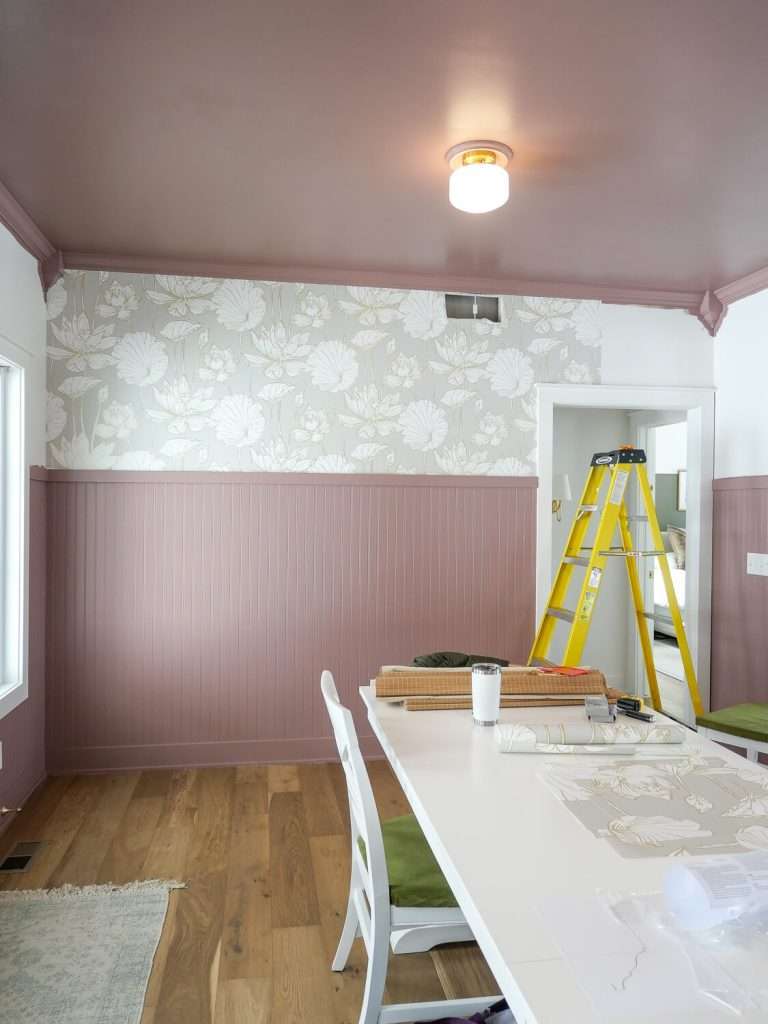
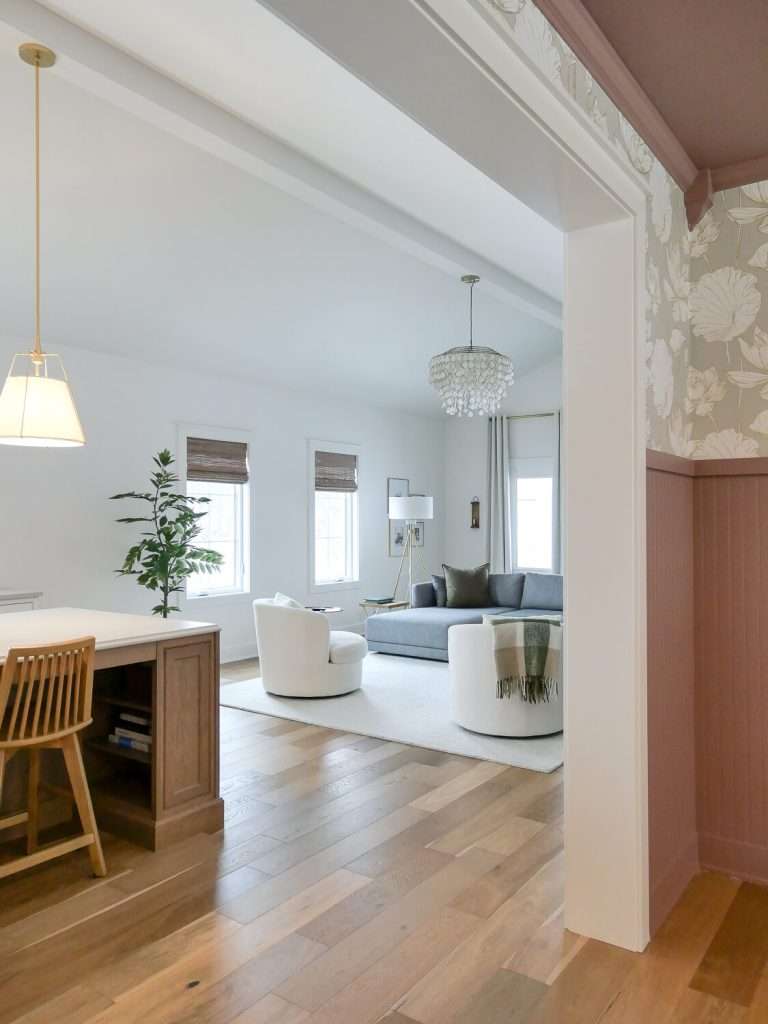
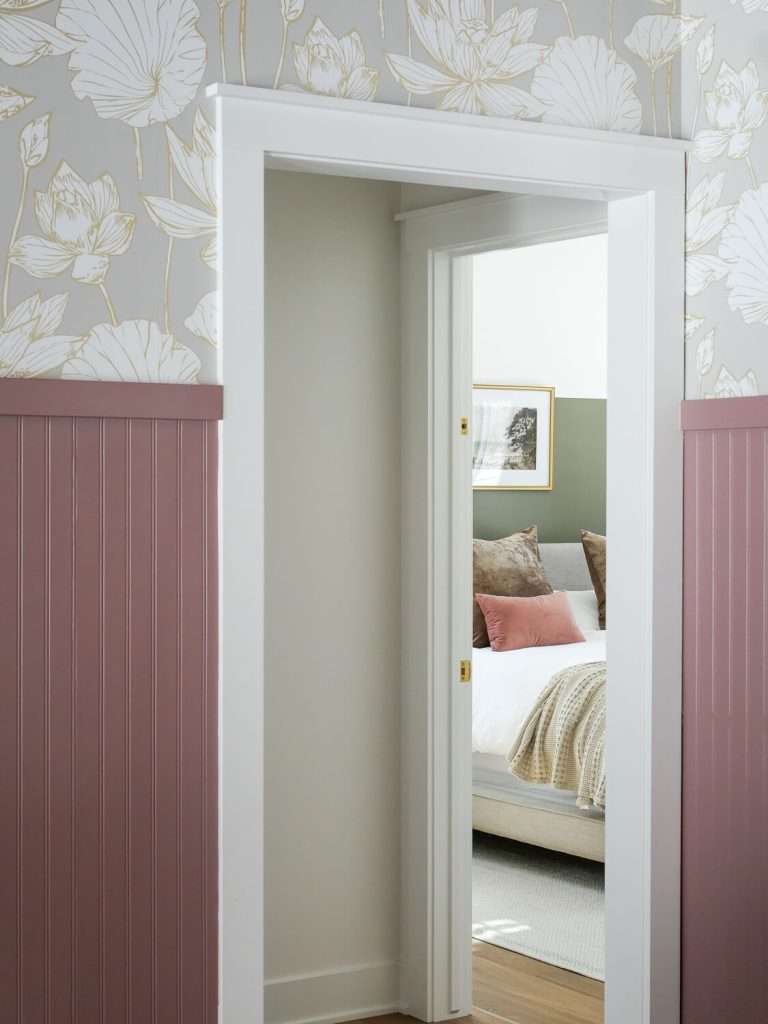
I just love how well Deidra’s wallpaper choice frames out both openings to her living room/kitchen and bedroom. It ties the dining room in so beautifully!
SHOP THE LOOK

If you’d like to see more areas of my home that I’ve installed wallpaper in, check out the articles below.
- Girl’s Bedroom Wallpaper
- Bathroom Wallpaper
- Office Wallpaper & Wainscoting
- Pasted Wallpaper
- Loft Wallpaper
I hope you found this article on how to install self-adhesive wallpaper helpful! Leave your questions in the comments and I’ll see if I can help out!
Thanks for stopping by the blog today! Make sure to subscribe to get my Grace Notes directly to your inbox and to access all my insider perks. You can also follow along daily on Instagram and weekly on YouTube!
~Sarah
Can you explain more how using a 1/16” overlap is sufficient for dealing with shrinkage issues long-term, particularly with respect to pattern alignment? It seems that if I apply the wallpaper initially with a 1/16” overlap such that the pattern aligns perfectly, any horizontal shrinkage will still cause the pattern to become misaligned as a different area of the lower piece will be exposed than when the upper piece was originally applied / aligned – causing a mismatch in the pattern, won’t it? Or am I missing something?
The paper doesn’t tend to shrink in sections. If it’s going to pull in, then you’ll see it happen from top to bottom. A small overlap helps with that issue. Of course, some papers are better than others so you may not have a shrinkage issue at all!
hy
its really good idea for wallpapers removing. Installation self-adhesive wallpaper is a great way to decor the home.
I have actually been looking at removable wallpaper for about 6 months now. But it is SO expensive! I have a large bedroom accent wall I want to paper, and it is huge so that means a LOT of rolls. If you have any sources of removable paper at an affordable price, please share! Thank you!
Amazon is a great source because they offer a ton of brands at various price points!
Temu….$5 and something for a roll and I bought 8 rolls…they where the biggest rolls they have.