
How to Lay a Flagstone Pathway
Flagstone is a beautiful choice for landscape pavers. When we were planning out our garden, I knew I wanted to include large flagstone pavers. So we went to work and are so happy with the results! Learn how to lay a flagstone pathway stepping-stone style with this easy tutorial.
Post may contain affiliate links for your convenience.
Creating Structure With Landscape Pavers
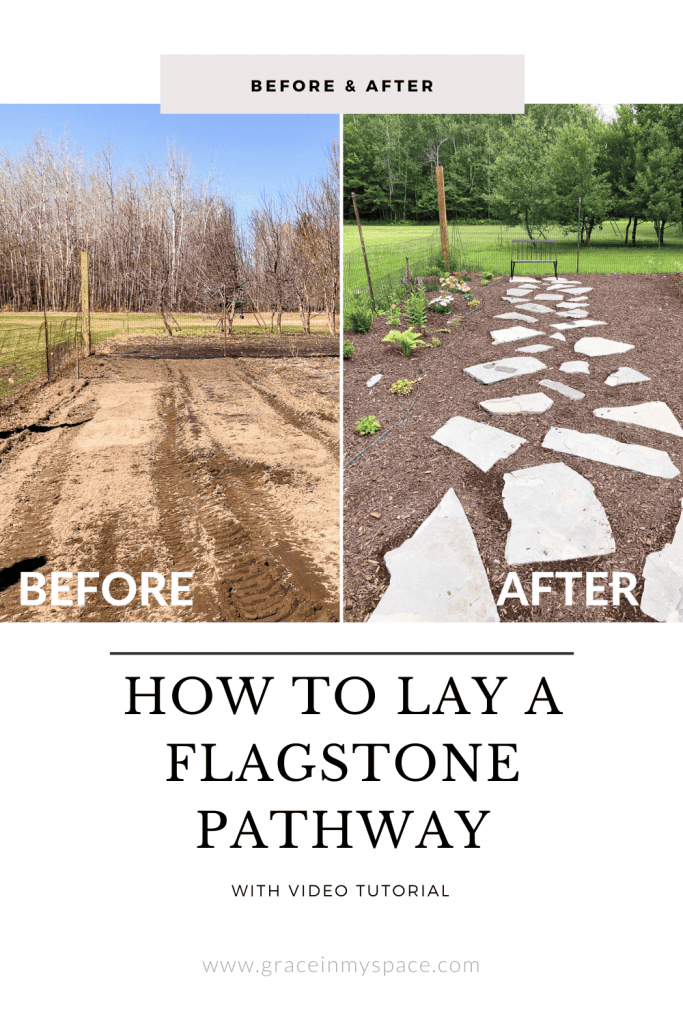
When we purchased our home, it came complete with a 5,000 square foot garden enclosure. We quickly found out the first year that we would not be able to maintain that much square footage of actual garden.
You can see how we managed that first year in this post on 5 lessons we learned as beginner gardeners. Let’s just say, it wasn’t pretty.
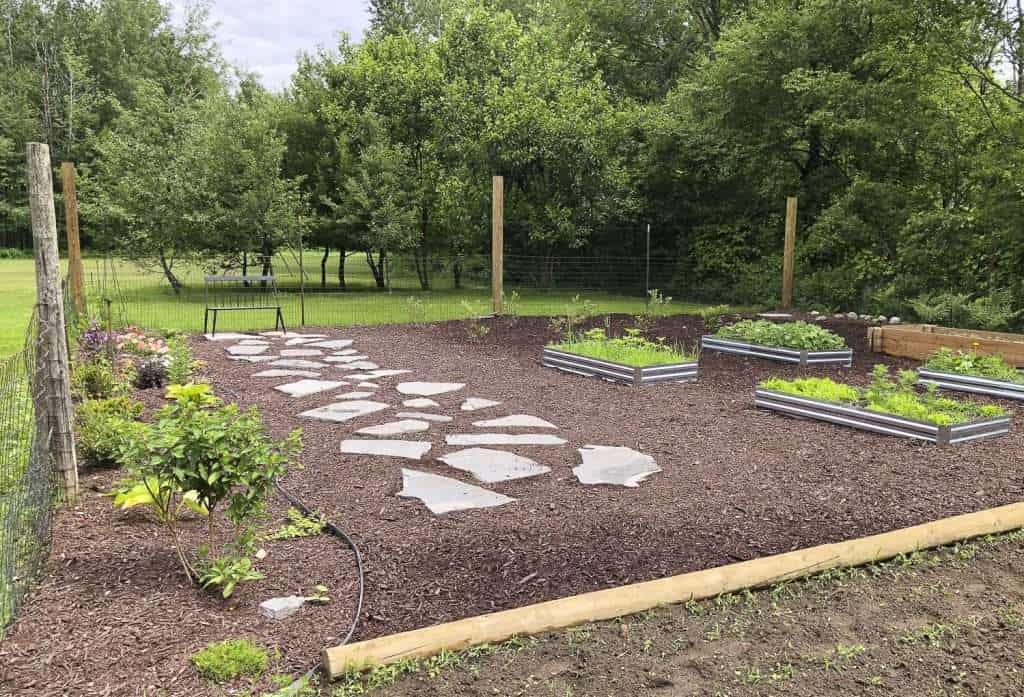
So this year we reduced the size of the garden enclosure to 3,000 square feet and made a game plan to add structure to the remaining garden.
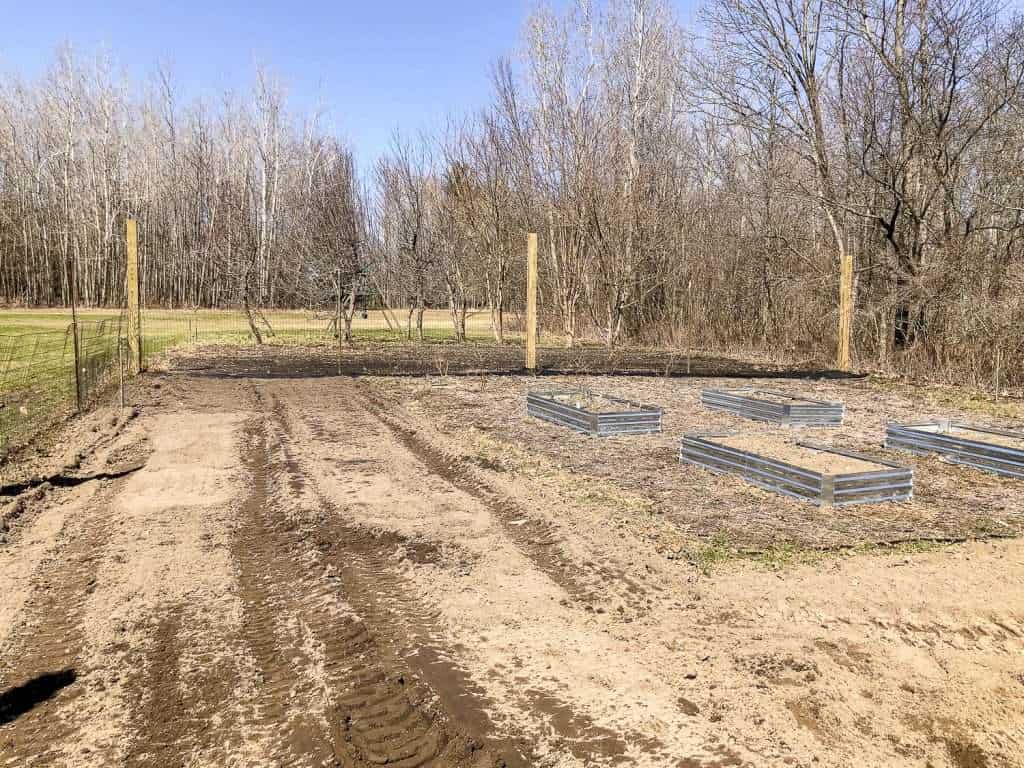
As you can see, we already had four raised galvanized beds in place. To combat the massive amount of weeds that grow here, we planned to do the following:
- Lay cardboard/landscape fabric on every surface not planted.
- Create a flower bed with metal landscape edging.
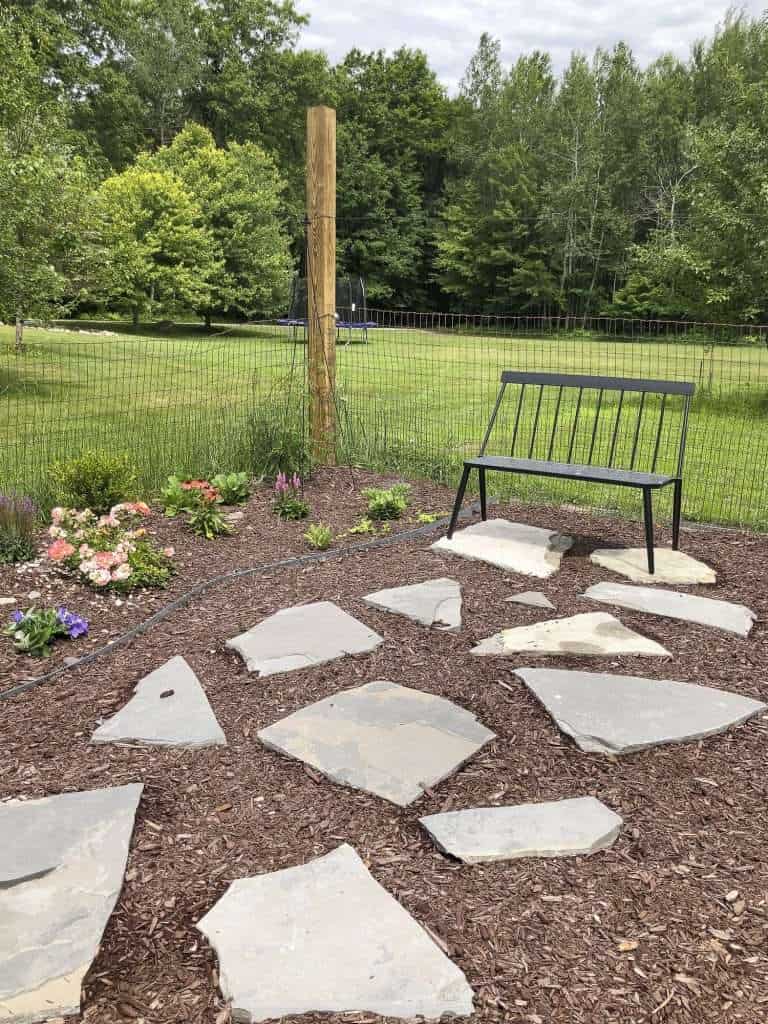
- Create a flagstone pathway with bench for seating.
- Add a fifth raised bed made of wood.
How to Lay a Flagstone Pathway
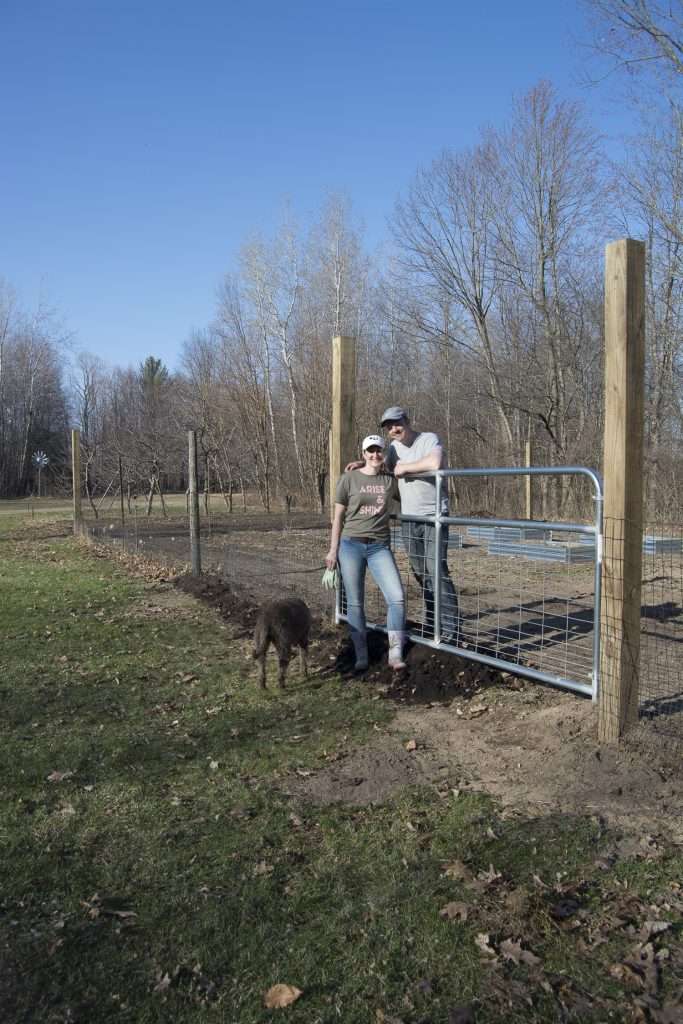
So let’s get started on this project! The first step was to lay our metal edging for the flower bed. This helped define where the flagstone pathway would go.
Next, we rototilled the soil to remove the weeds that were already starting to creep in. Once they were uprooted, we cleared the soil of weeds and compacted the dirt.
Compact The Dirt
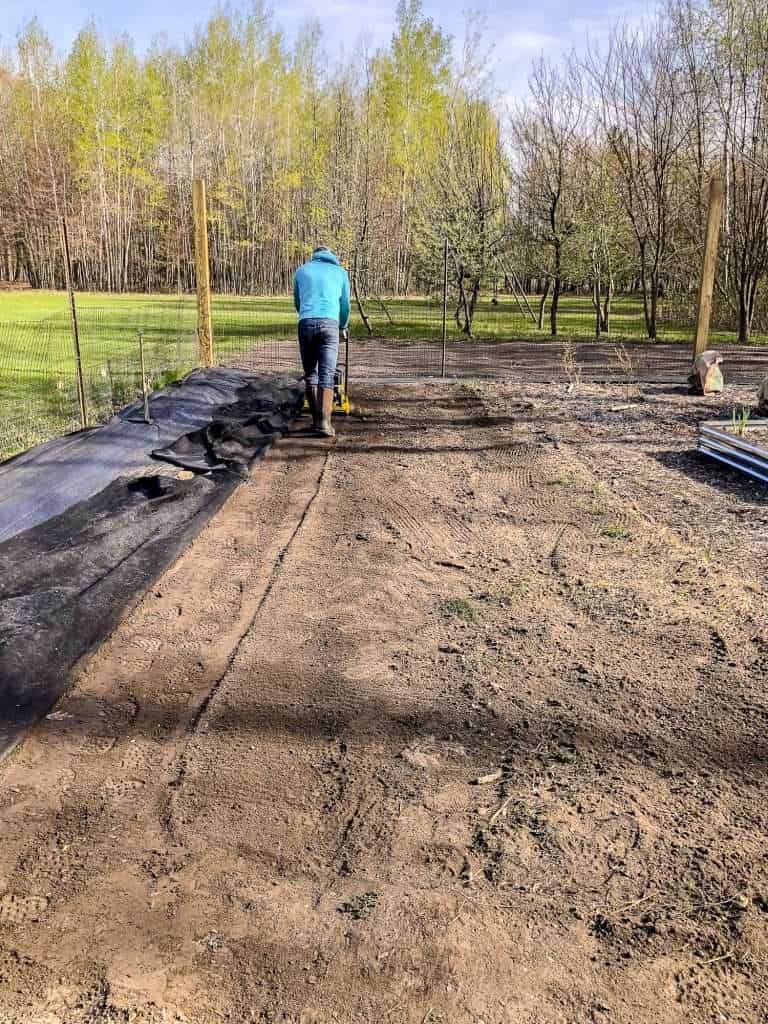
Aaron chose to rent a compacter rather than hand tamp the entire area. It made quick work of this step of the process. It also helped even out the soil so we had a level surface to lay the flagstone.
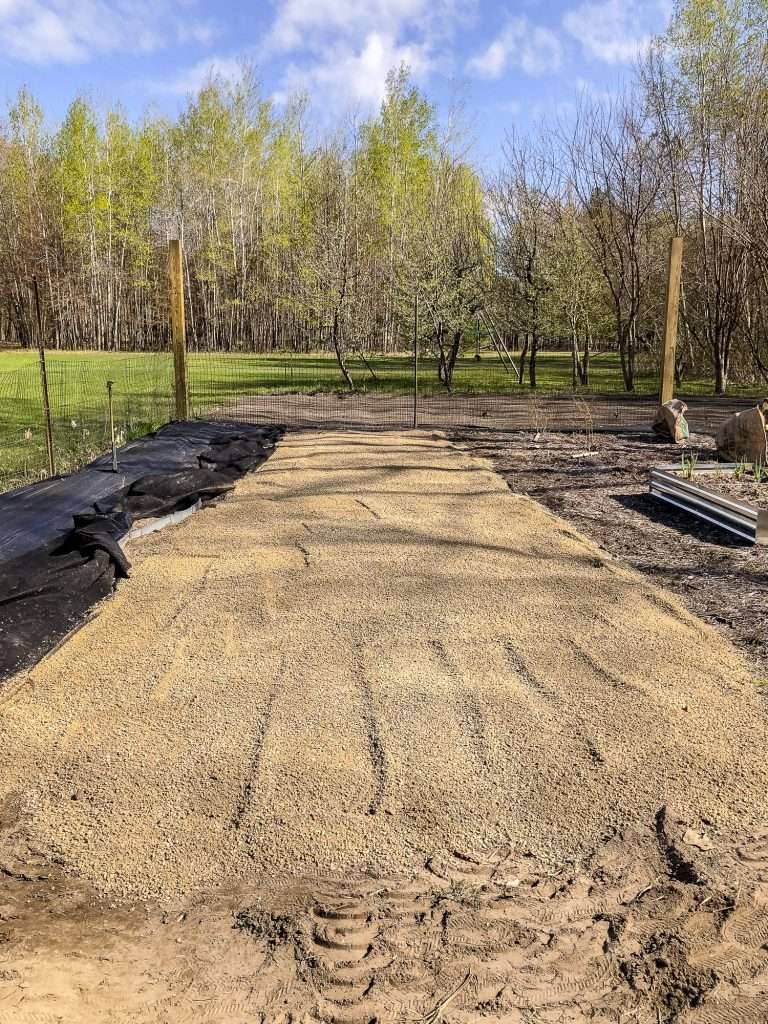
Add Gravel
The next step is to add gravel. There are two ways to go about creating a flagstone pathway.
- Create a solid flagstone patio without gaps.
- Create a flagstone pathway in a stepping-stone style.
We chose to lay our flagstone with large gaps in the stepping stone style.
If you want to create a solid flagstone patio, then you will want to add type 2 course gravel first. Compact or hand tamp the type 2 gravel, and then layer chips and dust gravel on top.
Since we didn’t do a solid surface, we simply used the chips and dust gravel. We laid enough gravel for it to be 5 inches thick.
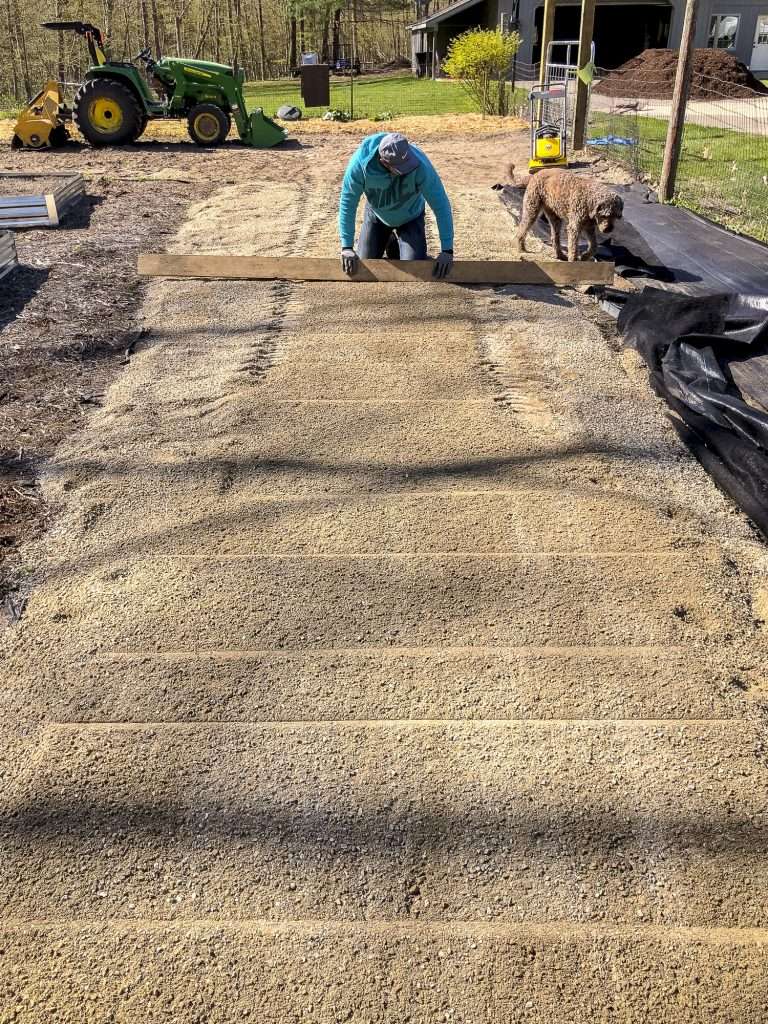
Level Gravel and Compact
Once you’ve laid your gravel, level it out as much as possible. We used a long board to pull the gravel through the entire area to hand level it. Next, we compacted the gravel. You can also hand tamp it.
The purpose of these steps is to create a level surface that is water permeable to avoid erosion. It gives your flagstone pavers a solid and level foundation to rest.
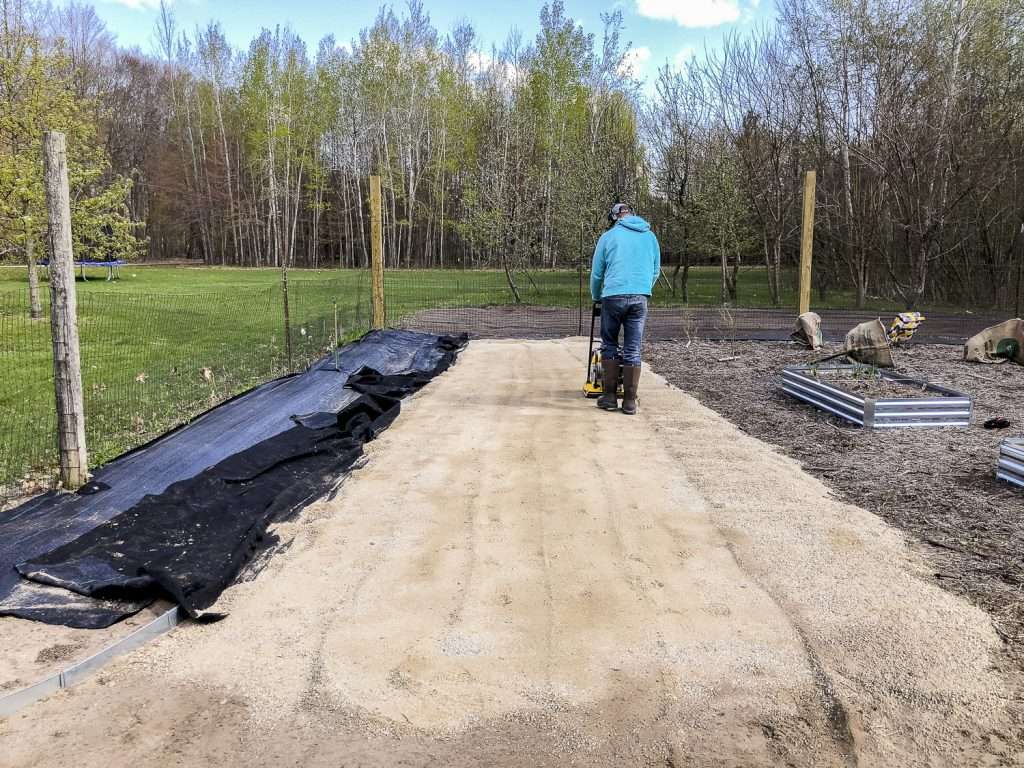
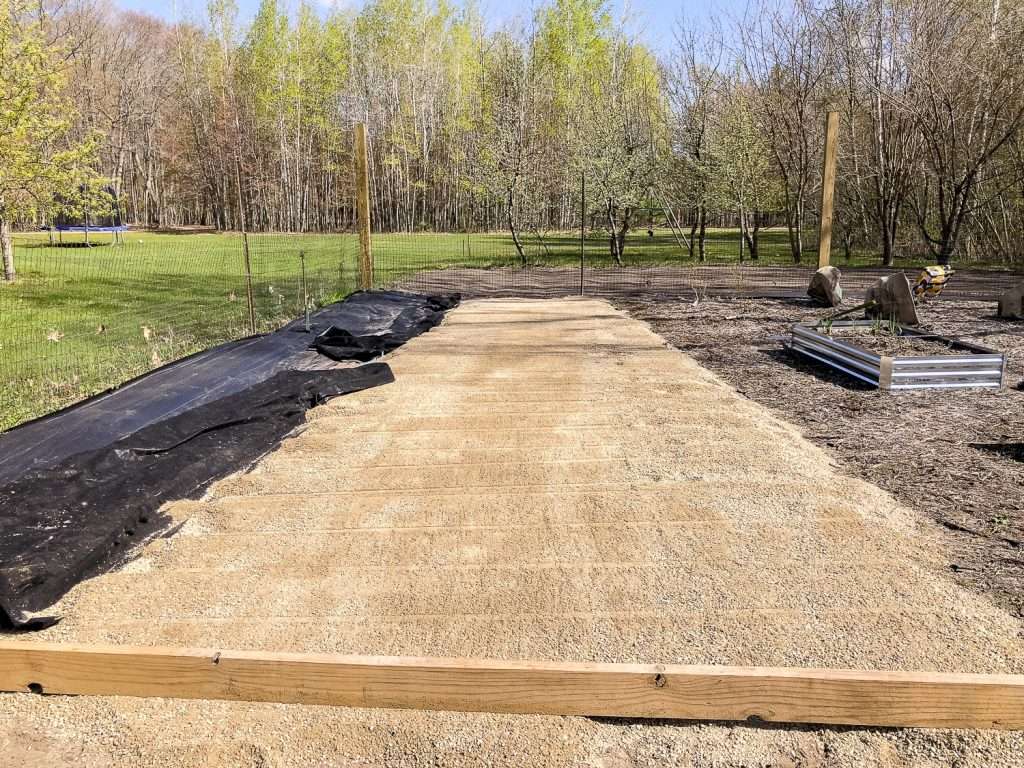
Lay Weed Barrier
The next step we chose to include is laying a weed barrier. This is not required, however, we wanted to be better safe than sorry since our weeds are so heavy.
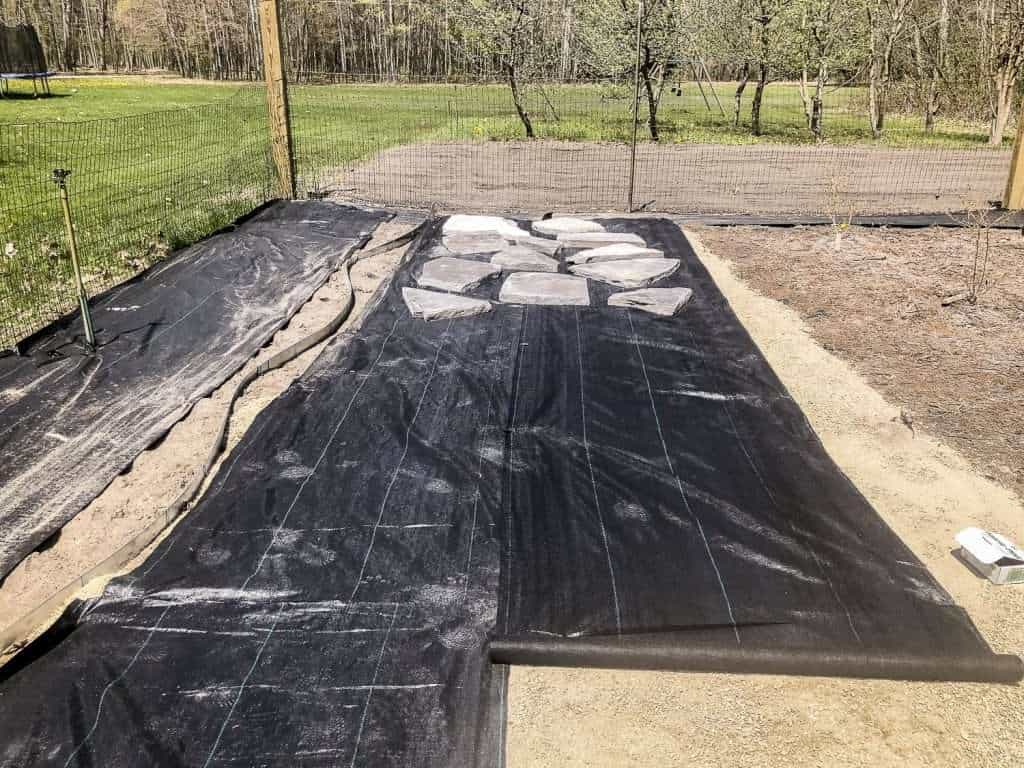
I used commercial grade landscape fabric directly on top of the gravel. It is important to use quality weed barrier since it is more or less permanent under your flagstone. Plus, you want it to provide good drainage.
Lay Flagstone in Desired Pattern
Once you’re foundation is solid and you’ve laid your weed barrier, if desired, it’s time to lay your flagstone pavers!
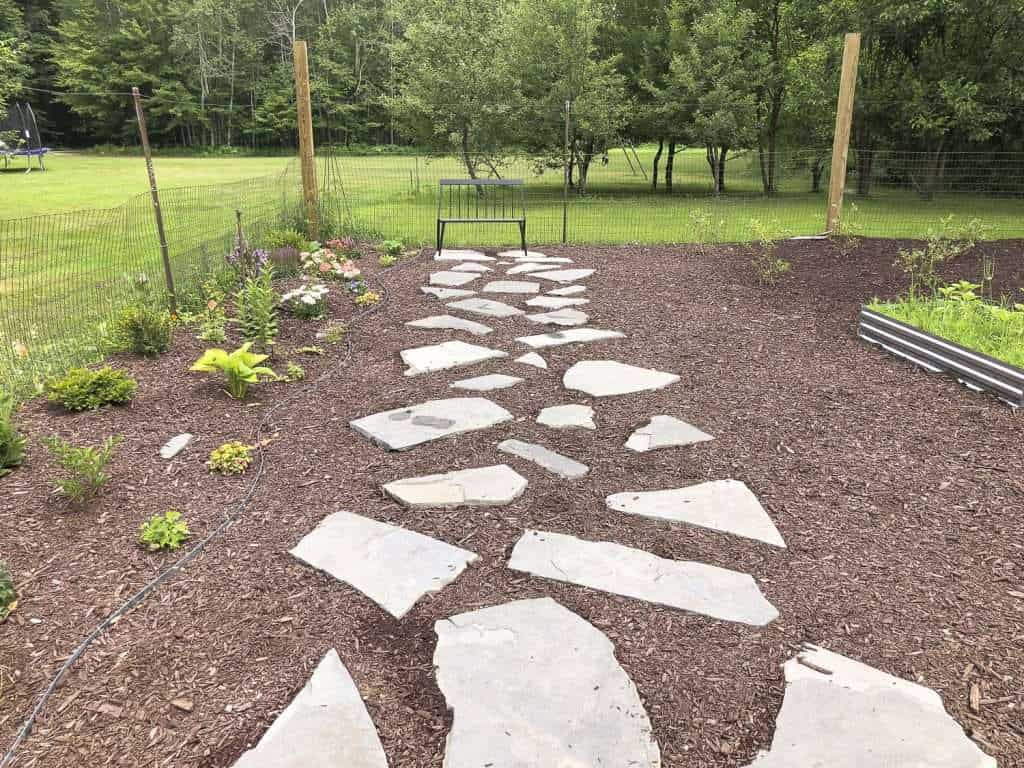
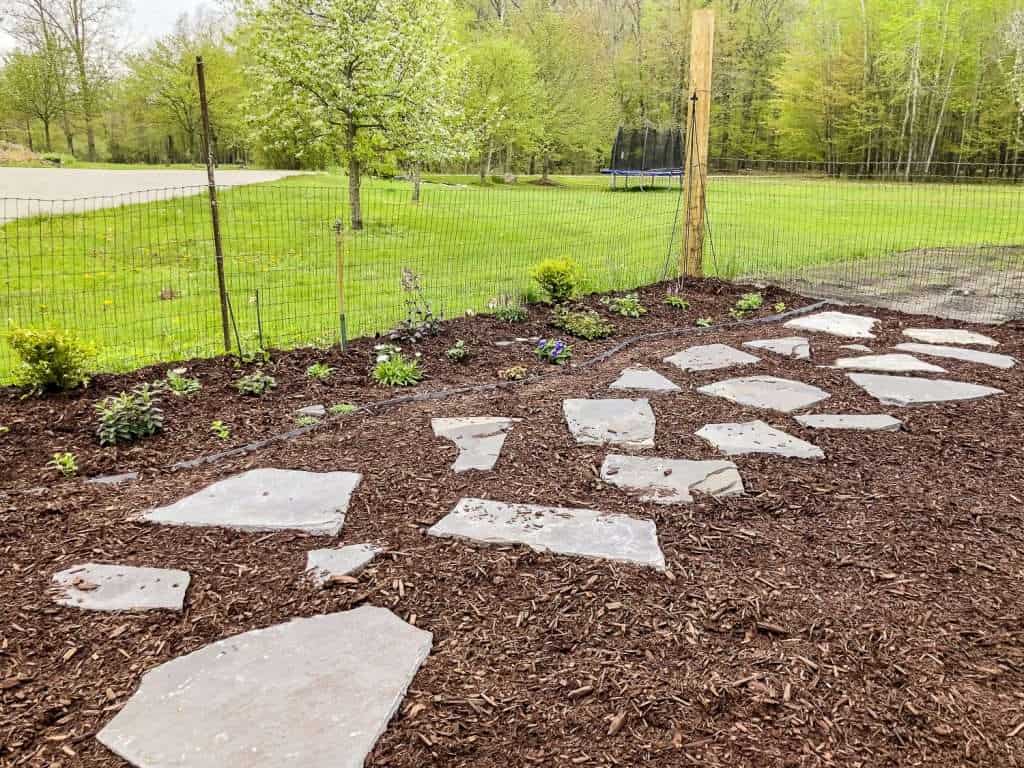
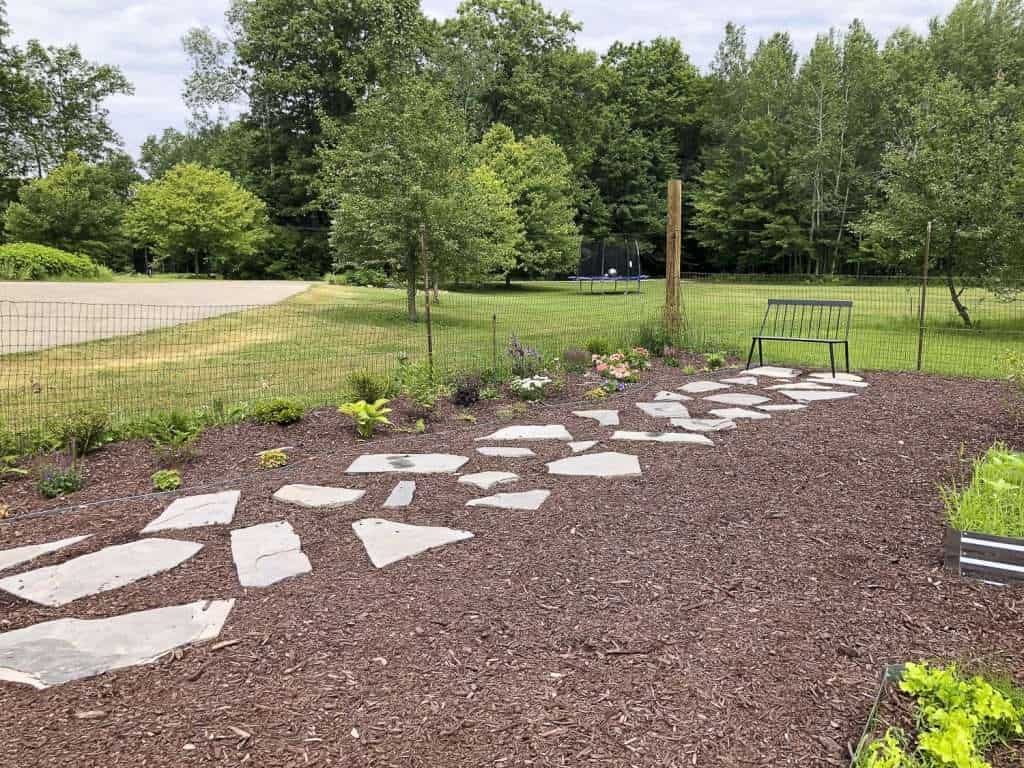
We were covering about 200 square feet and it took 2,000 pounds of flagstone, with the spacing you see below.
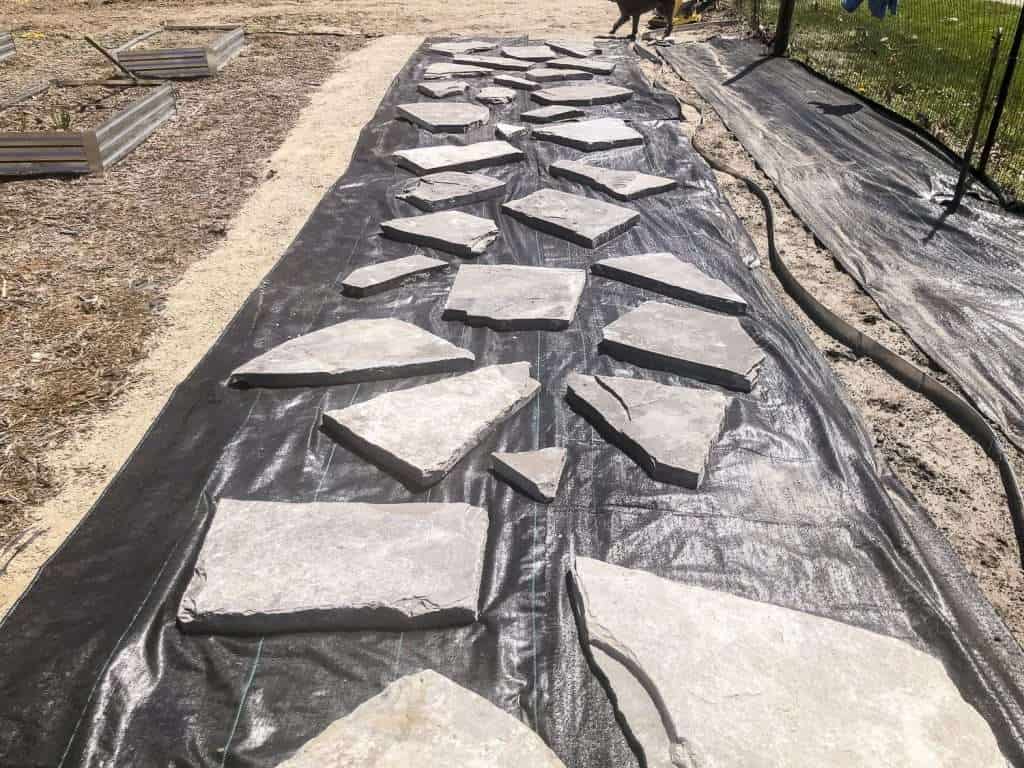
As I said before, we chose to lay the flagstone in a stepping stone style. There are large gaps, but not too large that you can’t easily walk up and down the pathway.
There is no right or wrong to this method! I tweaked the angles and distance of each paver a few times before I liked how they looked. Getting the spacing right was important to me so the flagstone pathway was easy to walk on.
Add Filler
The final step in completing your flagstone pathway is to add filler in the cracks. If you are building a flagstone patio, then patio sand is typically used to fill in and secure the cracks.
However, for my style pathway, I chose to use brown mulch.
It is up to your preference how you choose to fill the gaps in between the stones. Rock, sand, and pea gravel are all common fillers as well.
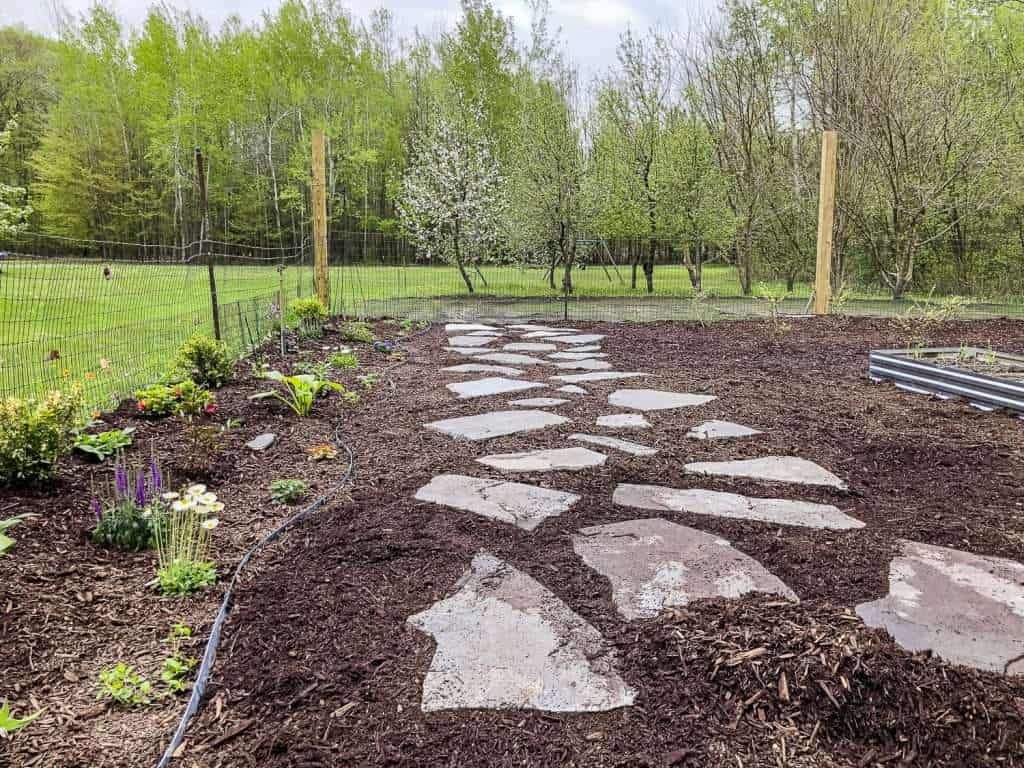
Completed Flagstone Pathway
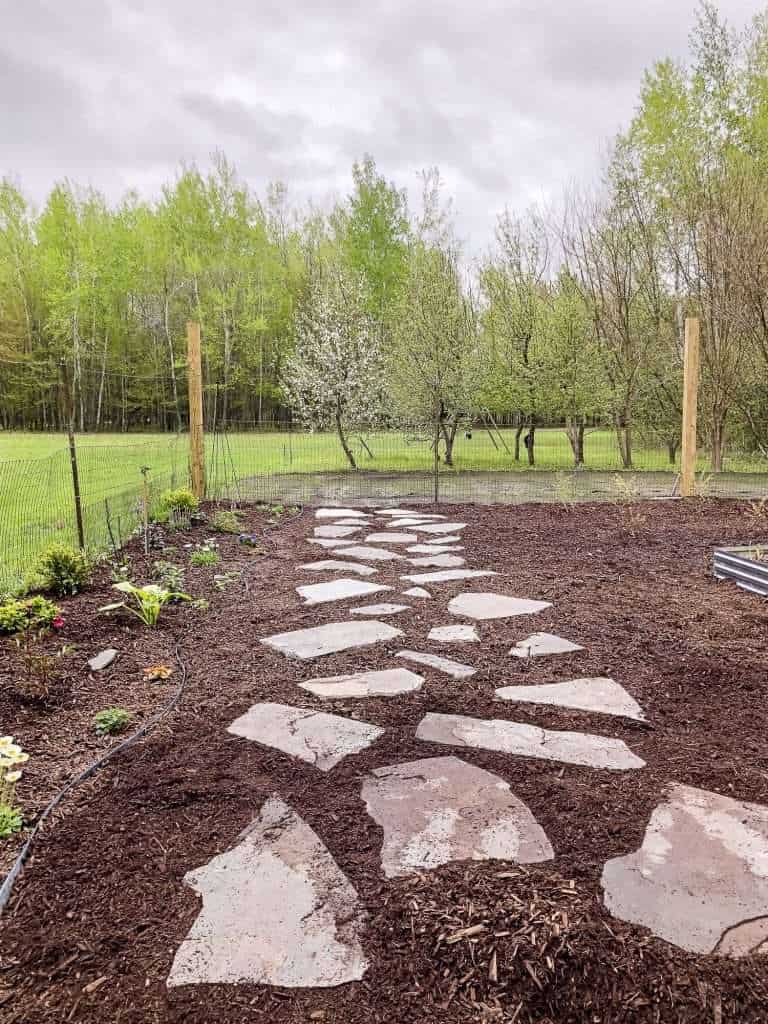
Now it’s time to enjoy the fruit of your labor!
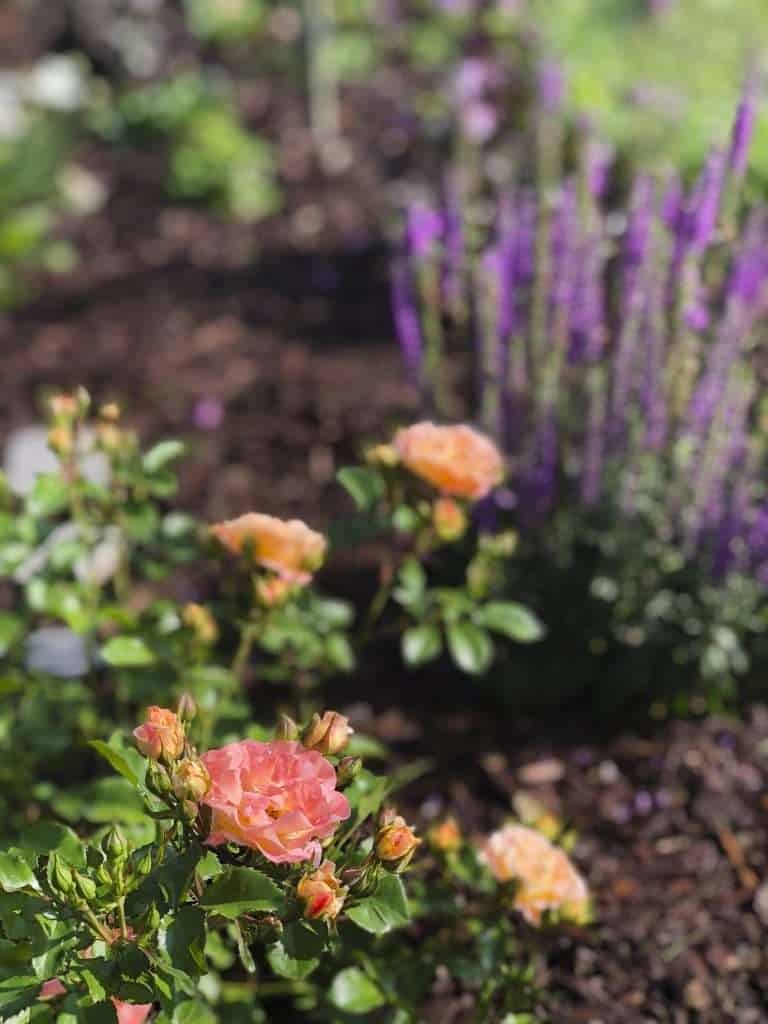
As you can see, we also planted the flower bed and added a cute garden bench. After a few weeks, the flowers are already starting to fill in!
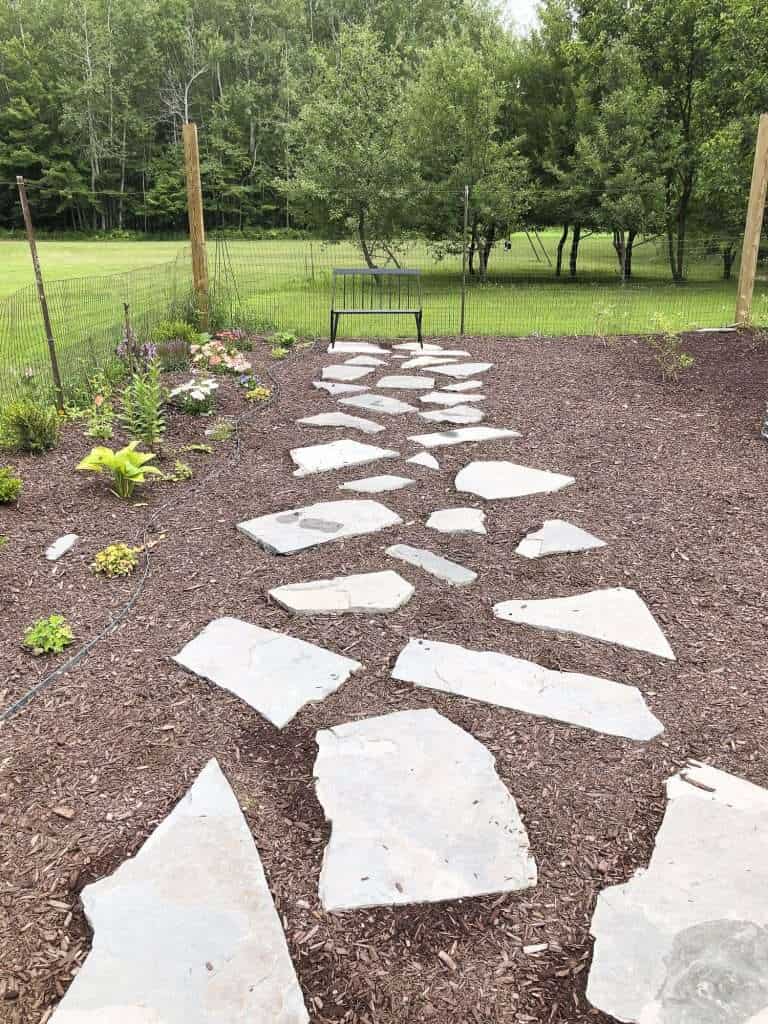
I’m so happy with how the flagstone pathway turned out. Not only is it beautiful, but it created structure in the garden and should be a great way to keep the landscaping simple and elegant.
Next up, I’ll be sharing how I built a 3×10 raised garden bed in less than an hour! Stay tuned and subscribe to the blog to be notified when that post is live!
Flagstone Path Video Tutorial
If you’re a visual learner, make sure to also check out our video tutorial on YouTube. We walk you through each step real time!

Stay Connected
Thanks so much for stopping by the blog today! I hope this tutorial on how to lay a flagstone pathway was helpful!


To anyone reading this, please do not do this – you will find the path full of weeds (or weed killer) after 2-3 years. Mulch on top of landscape fabric removes the value of the fabric. You would need to add 3″ of mulch annually, which either flows over onto the flagstones or requires lots of digging annually. If you are using landscape fabric, create a plastic or stone border for the path and then backfill with gravel. If you are using mulch, don’t use the fabric at all and be prepared to scoop it out and reapply annually.
Thanks for your input Josh. Stones would be a nice solution. However, we never had issues with weeds where we used this method. We did need to top off the mulch after a couple of years, but that is to be expected as it decomposes and settles.
Wow, it looks awesome!! Thanks for sharing your process! I recently had a landscape architect add a flagstone path that connects my front and back yard. It was well worth the money since I have a bad back and couldn’t do it myself. But, you guys did an amazing job!
Nice! Thx for the tutorial.