
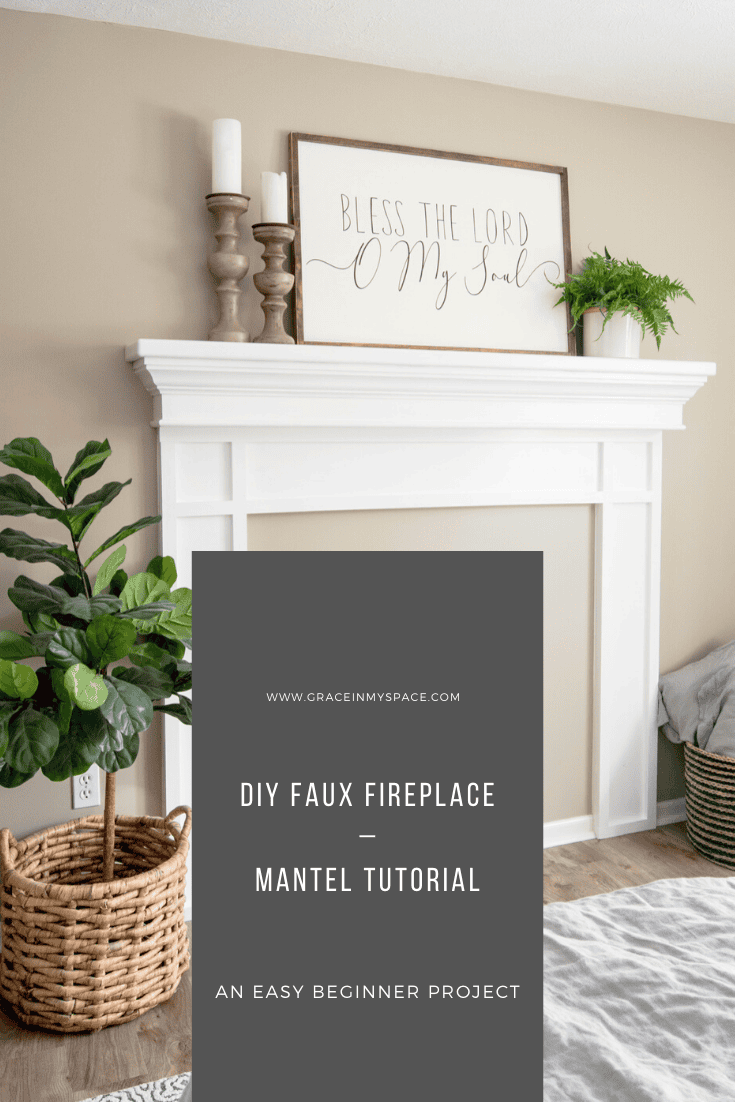
DIY Faux Fireplace Mantel Tutorial

Adding a faux fireplace mantel instantly creates a focal point and cozy atmosphere in a room. That’s why I chose to add a faux mantle in my guest room to instantly amp up the cozy factor! Learn how to build a DIY fireplace mantel in any room with this simple beginner tutorial!
Post may contain affiliate links for your convenience.
DIY Faux Fireplace Mantel
One of my goals when I remodeled my guest bedroom was to create a cozy focal point.
While I didn’t want the expense of adding an actual fireplace, even an electric one, I did want the coziness that a DIY fireplace surround could offer.
That led me to many tutorials on how to build out a fireplace surround to support an electric fireplace (which I didn’t want). So, since I was coming up empty on the tutorial front, I decided to make my own!
DIY is a huge part of my blog and how we’ve been able to do so much to our home in such a small amount of time. If you can dream it, you can DIY it! Make sure to join my blogging community for members-only freebies like my must have DIY tool list download!
How to Build a Fireplace Mantel for Decorative Purposes
This DIY fireplace mantel tutorial is intended for those who simply want the illusion of a fireplace or a fireplace mantel shelf to style.
It will not support an electric insert, though I’m sure it could be easily adapted to build it out for one! All you would have to do is frame out the surround to the depth of your electric fireplace. This can easily be accomplished using 2x4s and drywall or cement board, depending on how you want to finish the fireplace surround.
I hope you find this tutorial simple for beginner DIYers who just want that extra touch of cozy! The end product is a great way to create a DIY mantel for decorative purposes.
Fireplace Mantel Plans
Your measurements will be dependent on the space you have to work with. However, I’ll be sharing all my specs for this fireplace surround to give you examples!
The first step is to gather your materials:
- Multi-Tool for cutting trim
- Miter Saw or Table Saw (Or have wood cut at home improvement stores)
- Nail Gun
- Measuring Tape
- Long Level
- 2″ Finish Nails
- Wood Filler
- Paintable Caulk
- Paint
- Paint Brush or roller
- 1×10 Select Pine or Poplar
- 1×2 Select Pine or Poplar
- Mantel Shelf
The mantel top, or shelf, that I used was left over after remodeling my upstairs fireplace with a barn beam mantel. However, you can find mantel tops at hardware stores, on Facebook marketplace, or thrifting. You can also make your own!
This mantel top is extremely similar to mine, if you like the look. Otherwise, I’ve linked some options for you below!

Video Tutorial
If you’re a visual learner, make sure to check out my raw DIY fireplace mantel tutorial shared on IGTV. This was a fun project to do in my Instagram stories and my followers loved following along!
Faux Fireplace Mantel Plans| Step By Step
Once you have gathered your materials, it’s time to build!
Begin by measuring your space to determine how large you want your fireplace mantel shelf to be.
This measurement will determine how much wood you buy for the rest of the project.
Typically, you will base this measurement off the length of the wall you are adding your faux fireplace mantel to. If you plan to add this to a small wall, then you will likely want to make the width of your mantel smaller than mine.
On the other hand, a faux fireplace is a great focal point to add to a large blank wall. If you are ambitious, you could also install built in shelves on either side to create an awesome statement piece. This would also give you more space for decor and storage.
My mantel shelf is 70″ long and I placed it 5′ off the floor. That means that I needed:
- 3: 1x10x6 boards
- 1 for the top
- 1 for each side
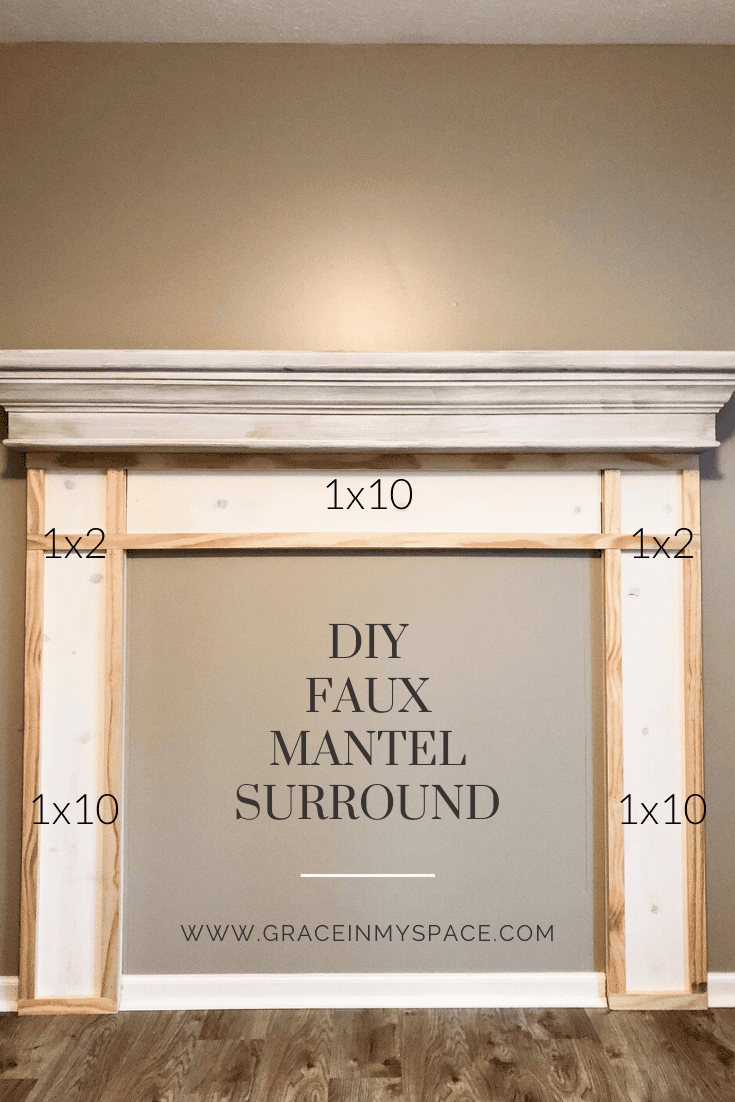
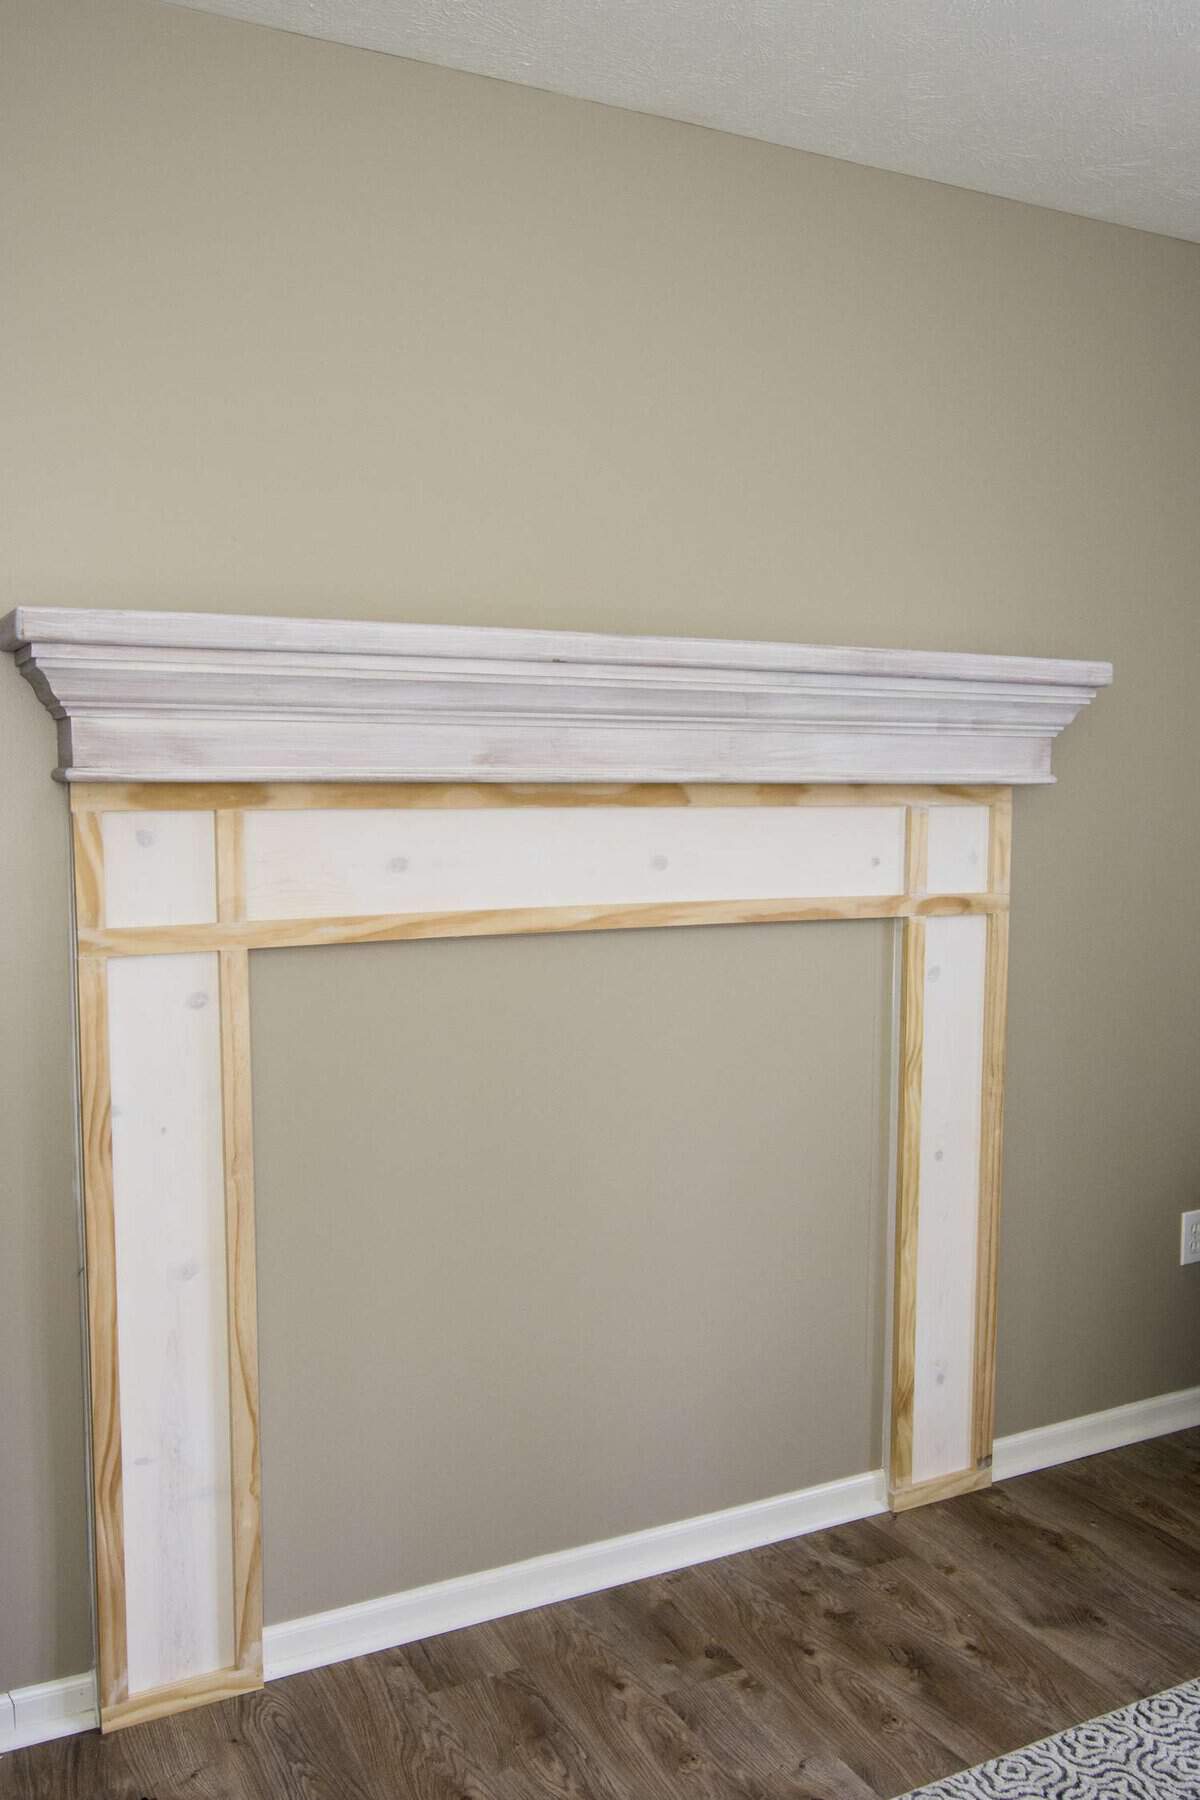
- 3: 1x2x8 boards
- As shown in the image, for the full surround detail.
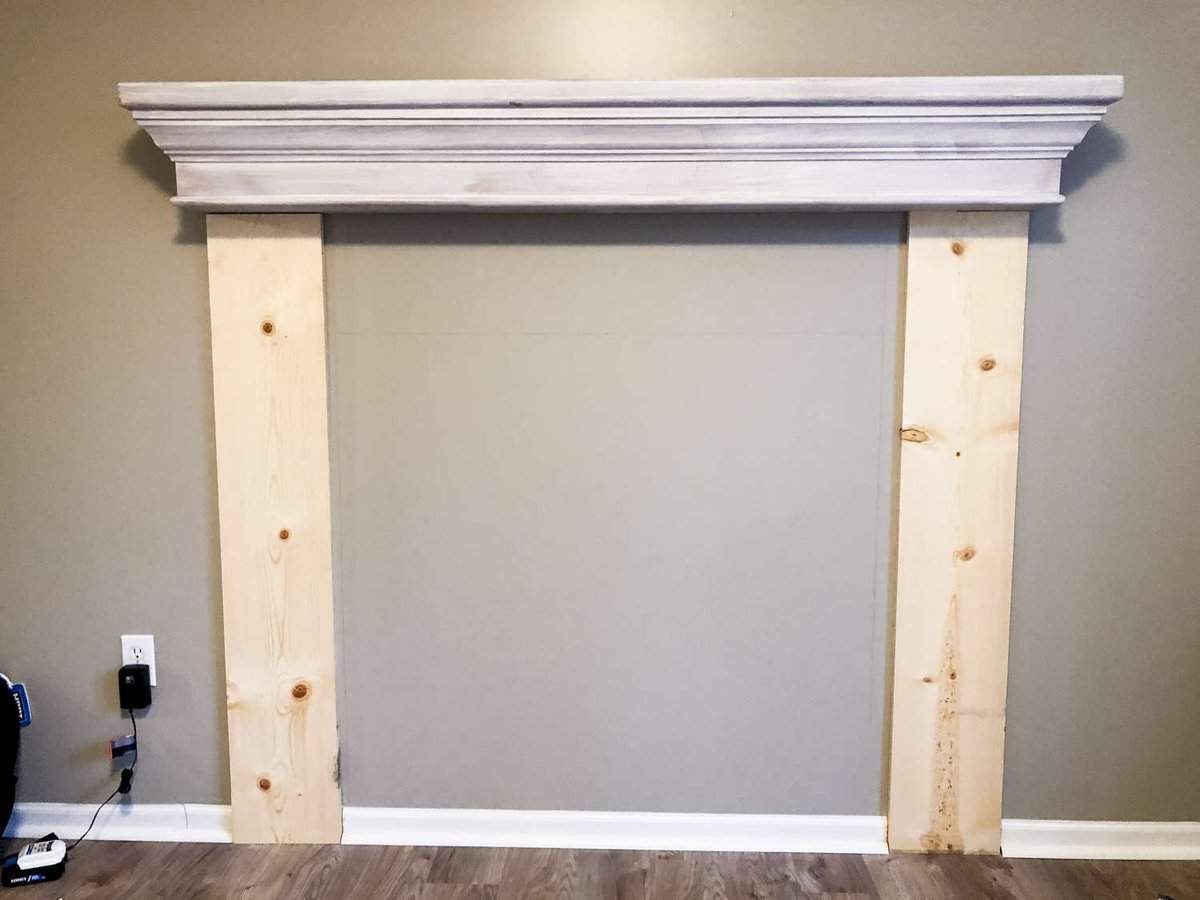
Step 1: Mount Your Mantel Top
The first step of this project is to mount your mantel top to the wall. Make sure to secure it level into the studs because the mantel top hardware is what will be supporting any weight you place on your shelf.
With this tutorial, the fireplace surround boards are purely aesthetic and do not support the weight of the shelf.
If you choose to fully frame out your new mantel surround, then the side boards can provide support to the mantel top. However, in this case your most secure option is to fasten your mantel shelf fully into studs.
Step 2: Cut Your Baseboard Trim
The next step is to cut your baseboard trim with your multi-tool to accommodate the 1×10 side boards.
This step is necessary so that the surround sits flush to the wall.
How to use an oscillating multi tool
Measure and mark where you need to make your cuts, then use your multi-tool with slow and steady pressure to get the cleanest cuts. Using the flat saw blade, line up your multi-tool with your marks and let the blade do the work.
Many people use too much pressure on a multi-tool, which will render it ineffective. The point of an oscillating multi-tool is that the blade moves extremely fast to reproduce the motion of a saw without you having to do the work.
So, if you put too much pressure on the blade, it will slow it down and make it ineffective. This is also a great way to burn out the motor on your tool by overheating it!
Using a multi-tool is fairly simple, but does require some practice. So go slow and steady and let the tool do most of the work.
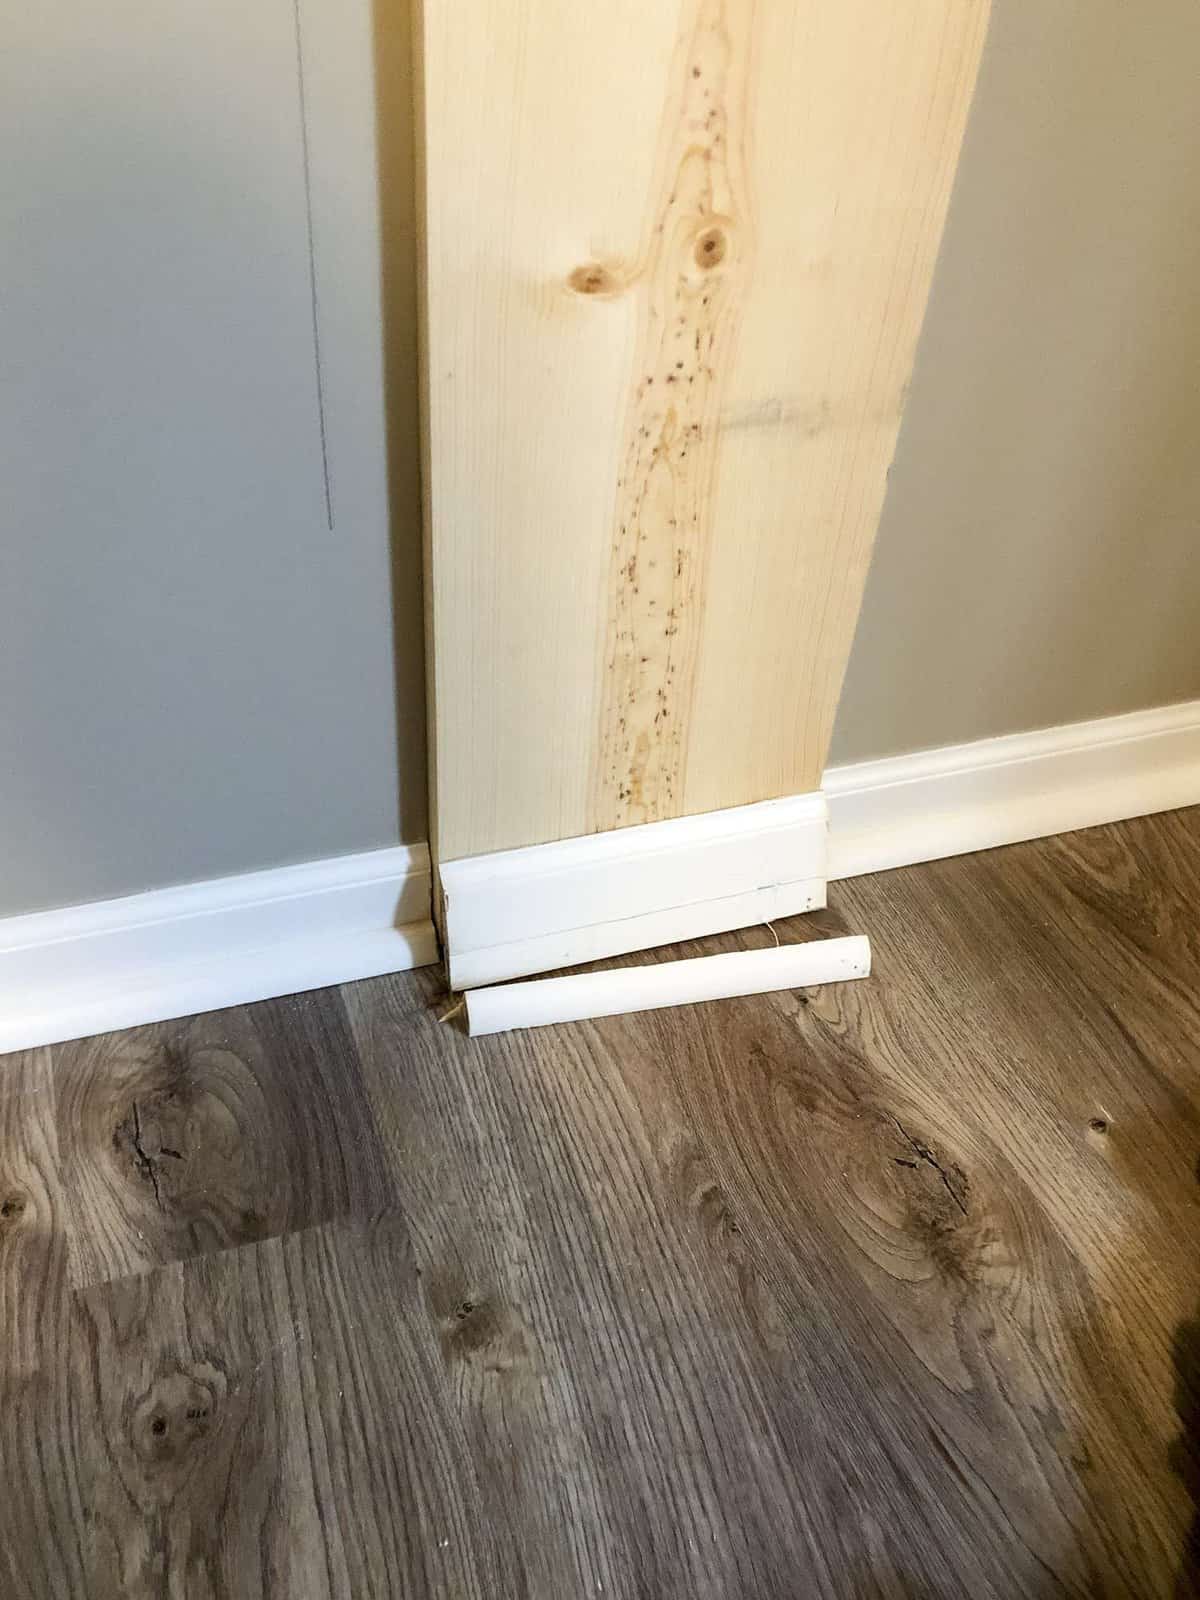
I kept my trim pieces in case I ever want to remove the faux fireplace surround. This way, I can repair the trim with caulk and paint without having to buy all new baseboard trim.
Step 3: Measure and Cut Your 1x10s
Next, measure the height needed from the floor to the base of your shelf and cut your 1×10 accordingly.
Mount your side boards with finish nails directly to your wall.
If this was a permanent fixture, I’d also recommend using construction adhesive or liquid nails on the side boards for extra security. I am the kind of person who changes her mind frequently, so I tend to skip that step.
This allows me to remove faux mantels, board and batten, and accent wall trim without destroying the drywall underneath! On the other hand, adding the construction adhesive is a great way to help secure the unit to the wall long term if desired.
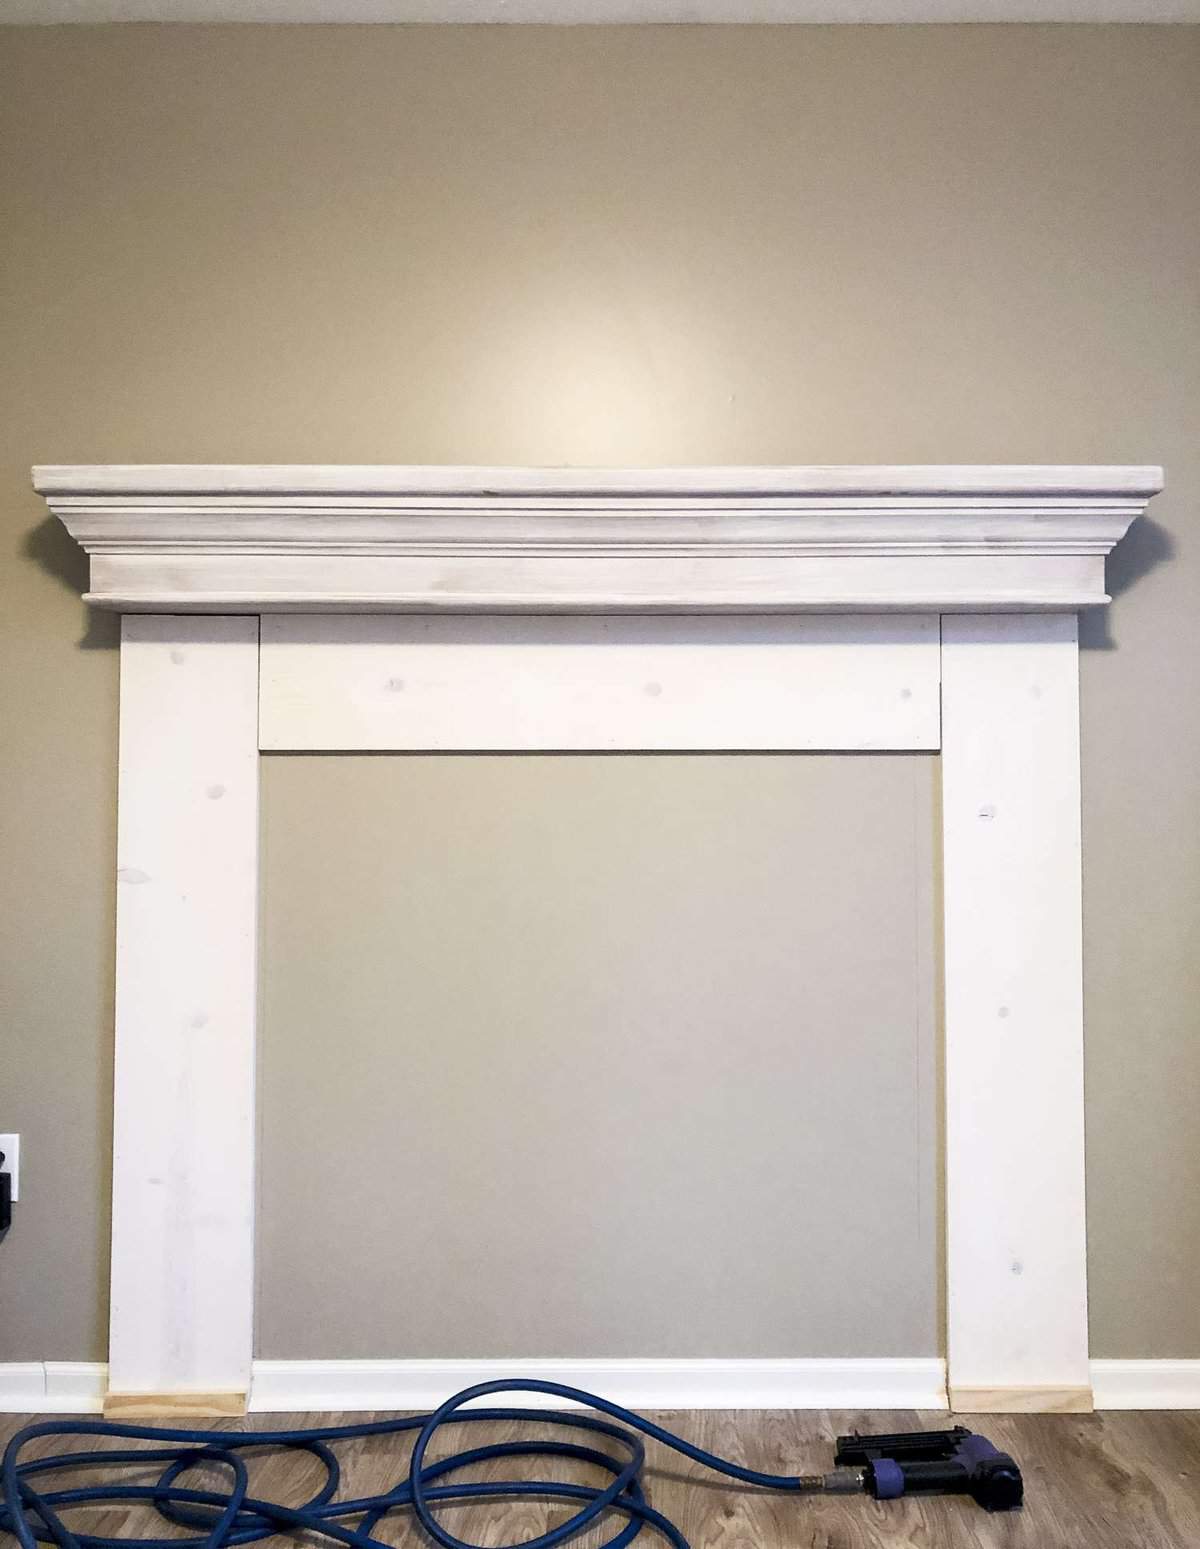
Next, measure the width between your side boards and cut your remaining 1×10 to fit in the middle. Mount to the wall with finish nails.
This step is where it’s important to note that your faux surround does not support any weight. Since the mantel shelf is weight bearing, the side panels are purely decorative and don’t need to be fastened into the studs.
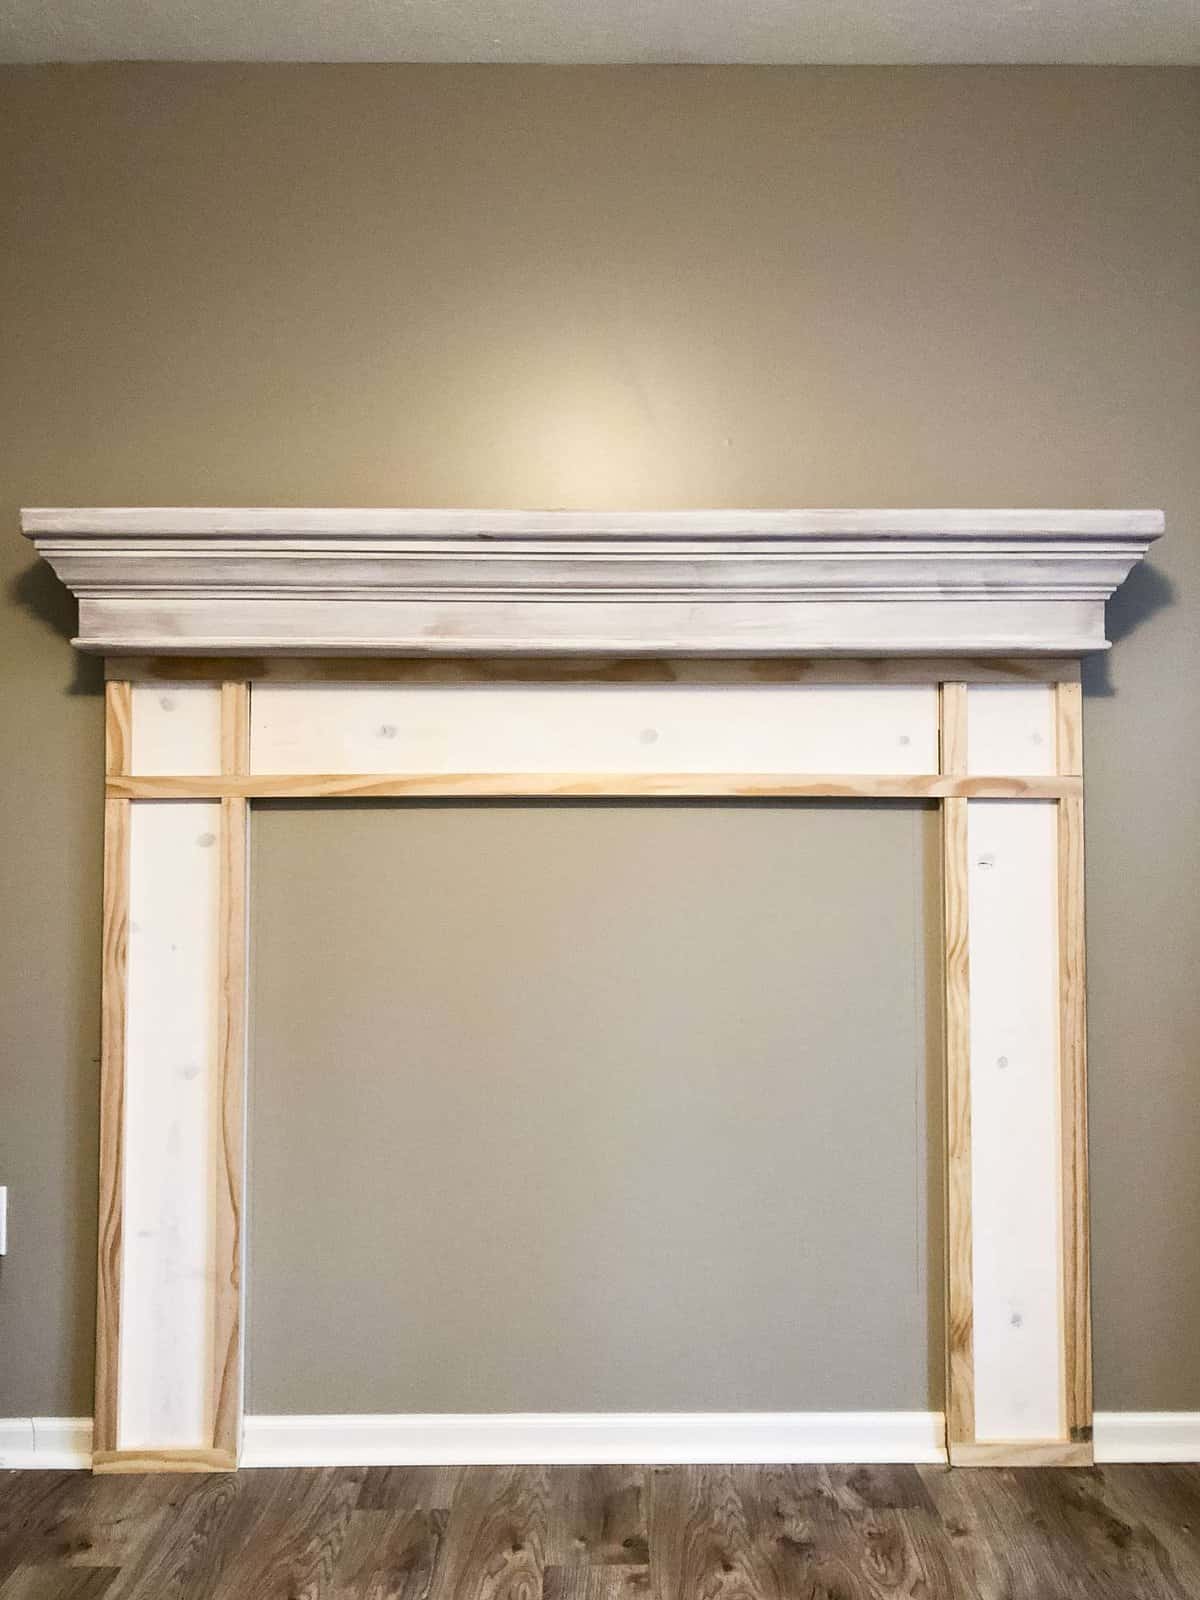
Step 4: Measure and Cut Your 1x2s
Once you’ve installed your 1x10s, measure and cut your 1x2s. These will be placed as shown below, along the edges of your 1x10s.
The purpose of the 1x2s is to create a detailed moulding and give it some visual weight.
I like to make the longest cuts first so that I am doing less caulking and patching in the finishing steps. I used the longest pieces horizontally, then cut my sides to size.
Secure them with finish nails as well, directly into the 1x10s. I use finish nails so that the nail holes are smaller and easier to fill in the finishing steps. They are just as effective as construction nails and offer a cleaner look.
Using a nail compressor or batter operated brad nailer is the best option for this step. However, if you only have a hammer and nails, it can still be accomplished! Just take care not to over-hammer, leaving lots of hammer marks on the wood.
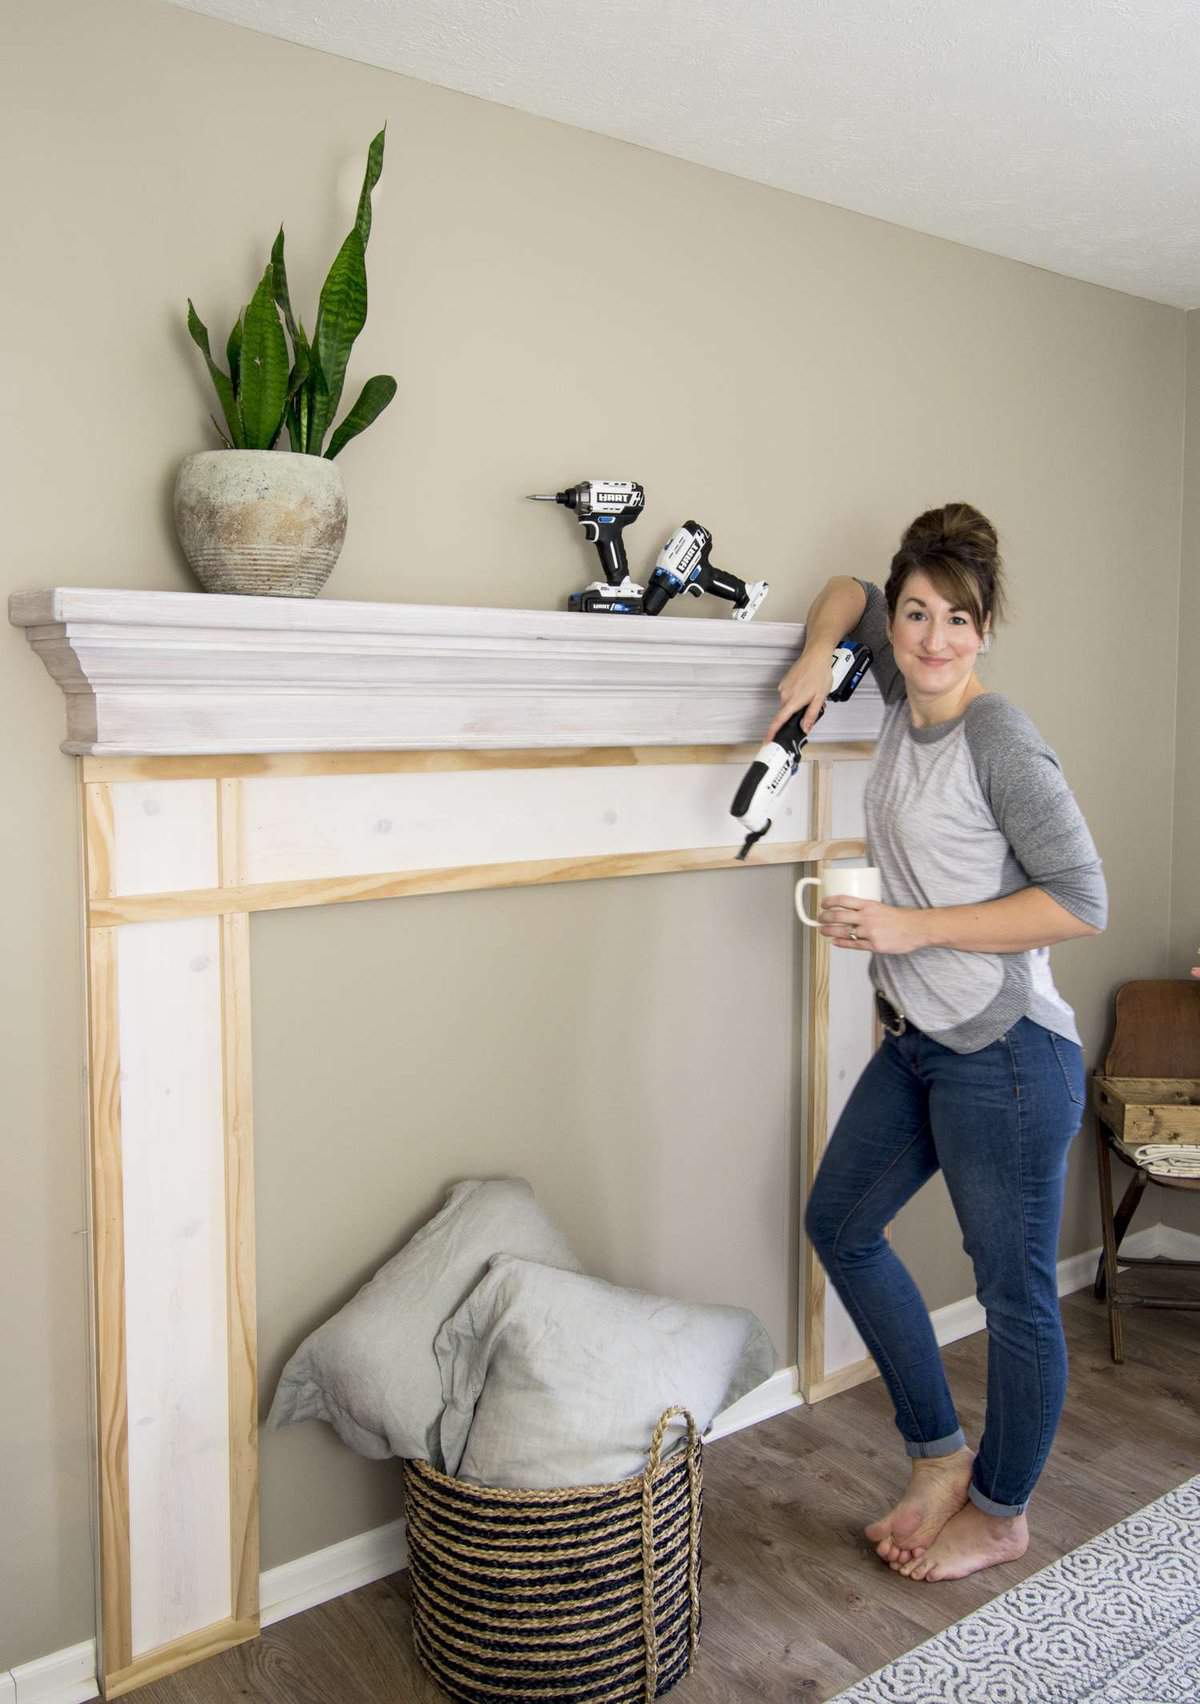
Step 5: Caulk and Patch
Now you can start to see it coming together!
Caulk all your seams, as well as along the wall and trim. Then, patch your nail holes with wood filler.
This is an important step for the final look. Caulking and patching will give your faux fireplace mantel surround a finished look as if it’s all one piece.
Many people tend to skip this finishing step, but it will make all the difference in your final appearance. Simply ensure that your caulk is paintable and you sand your wood filler flush.
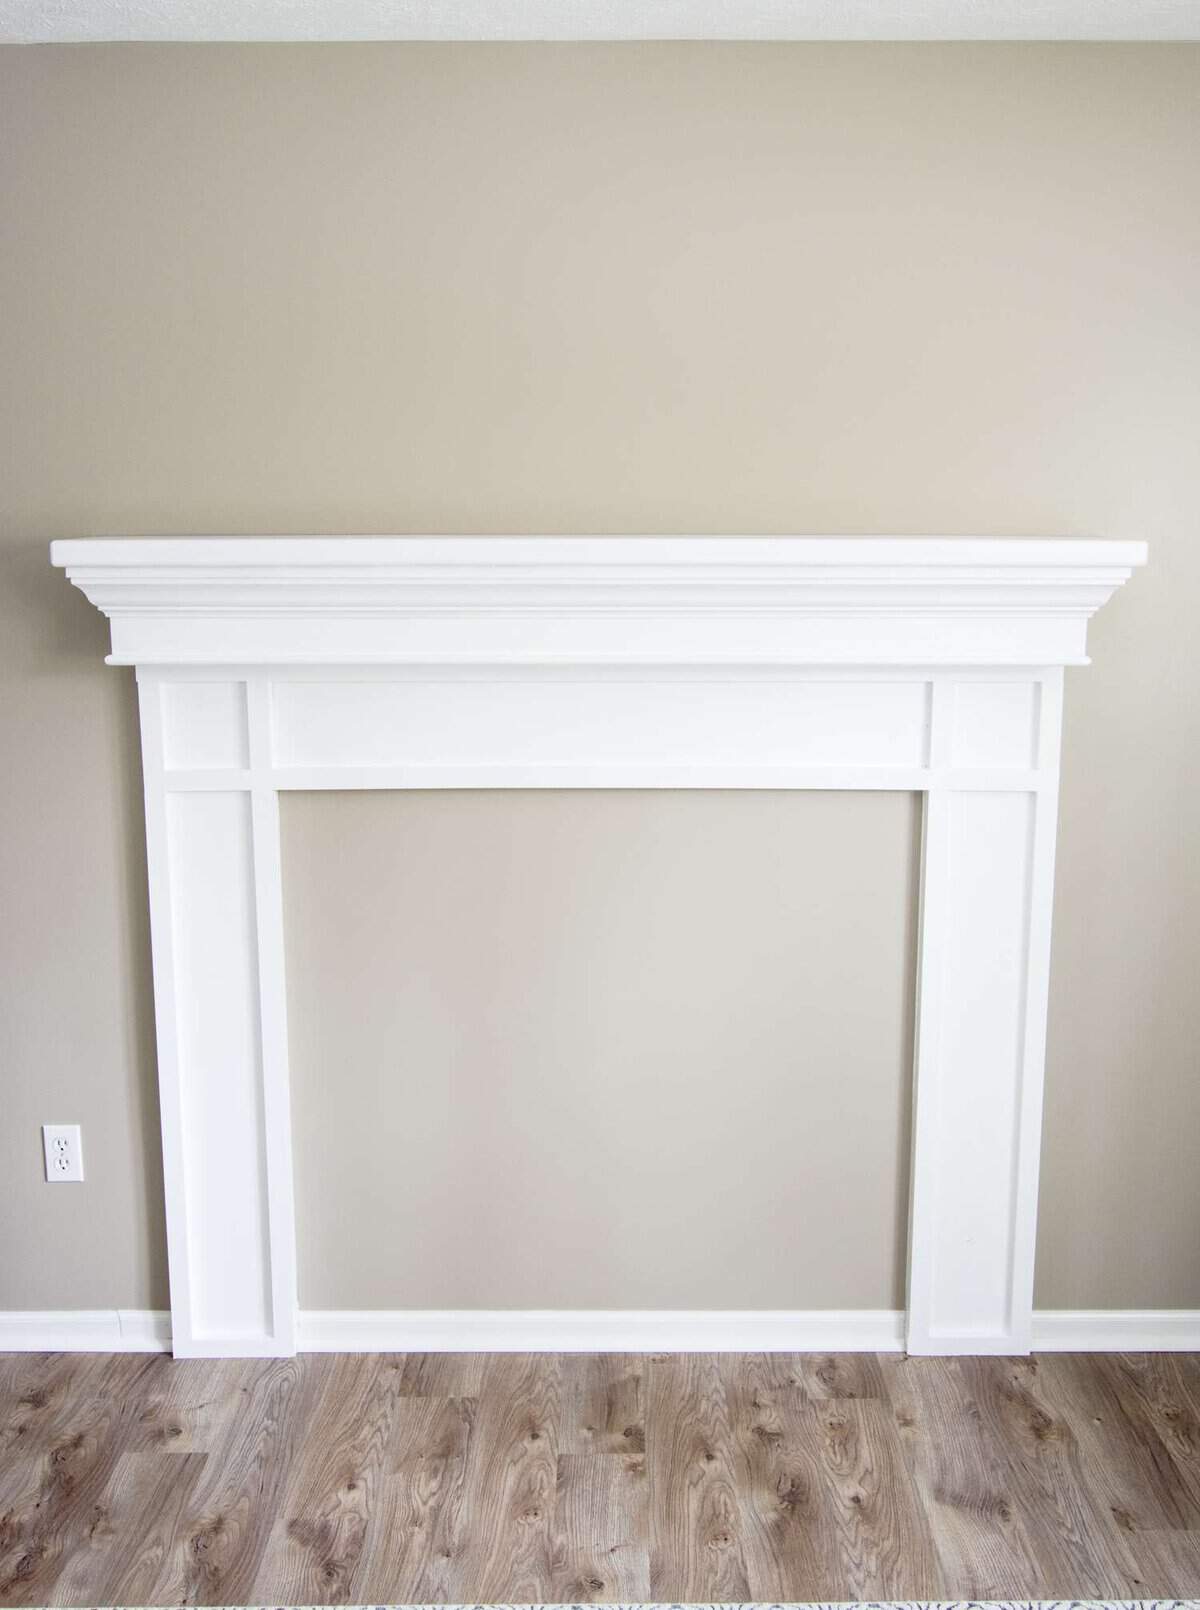
Step 6: Prime and Paint
The final step in building this faux mantel is to prime and paint! I chose a classic color, Fundamental White by Sherwin Williams. However, I can definitely see myself going bold with this at some point!
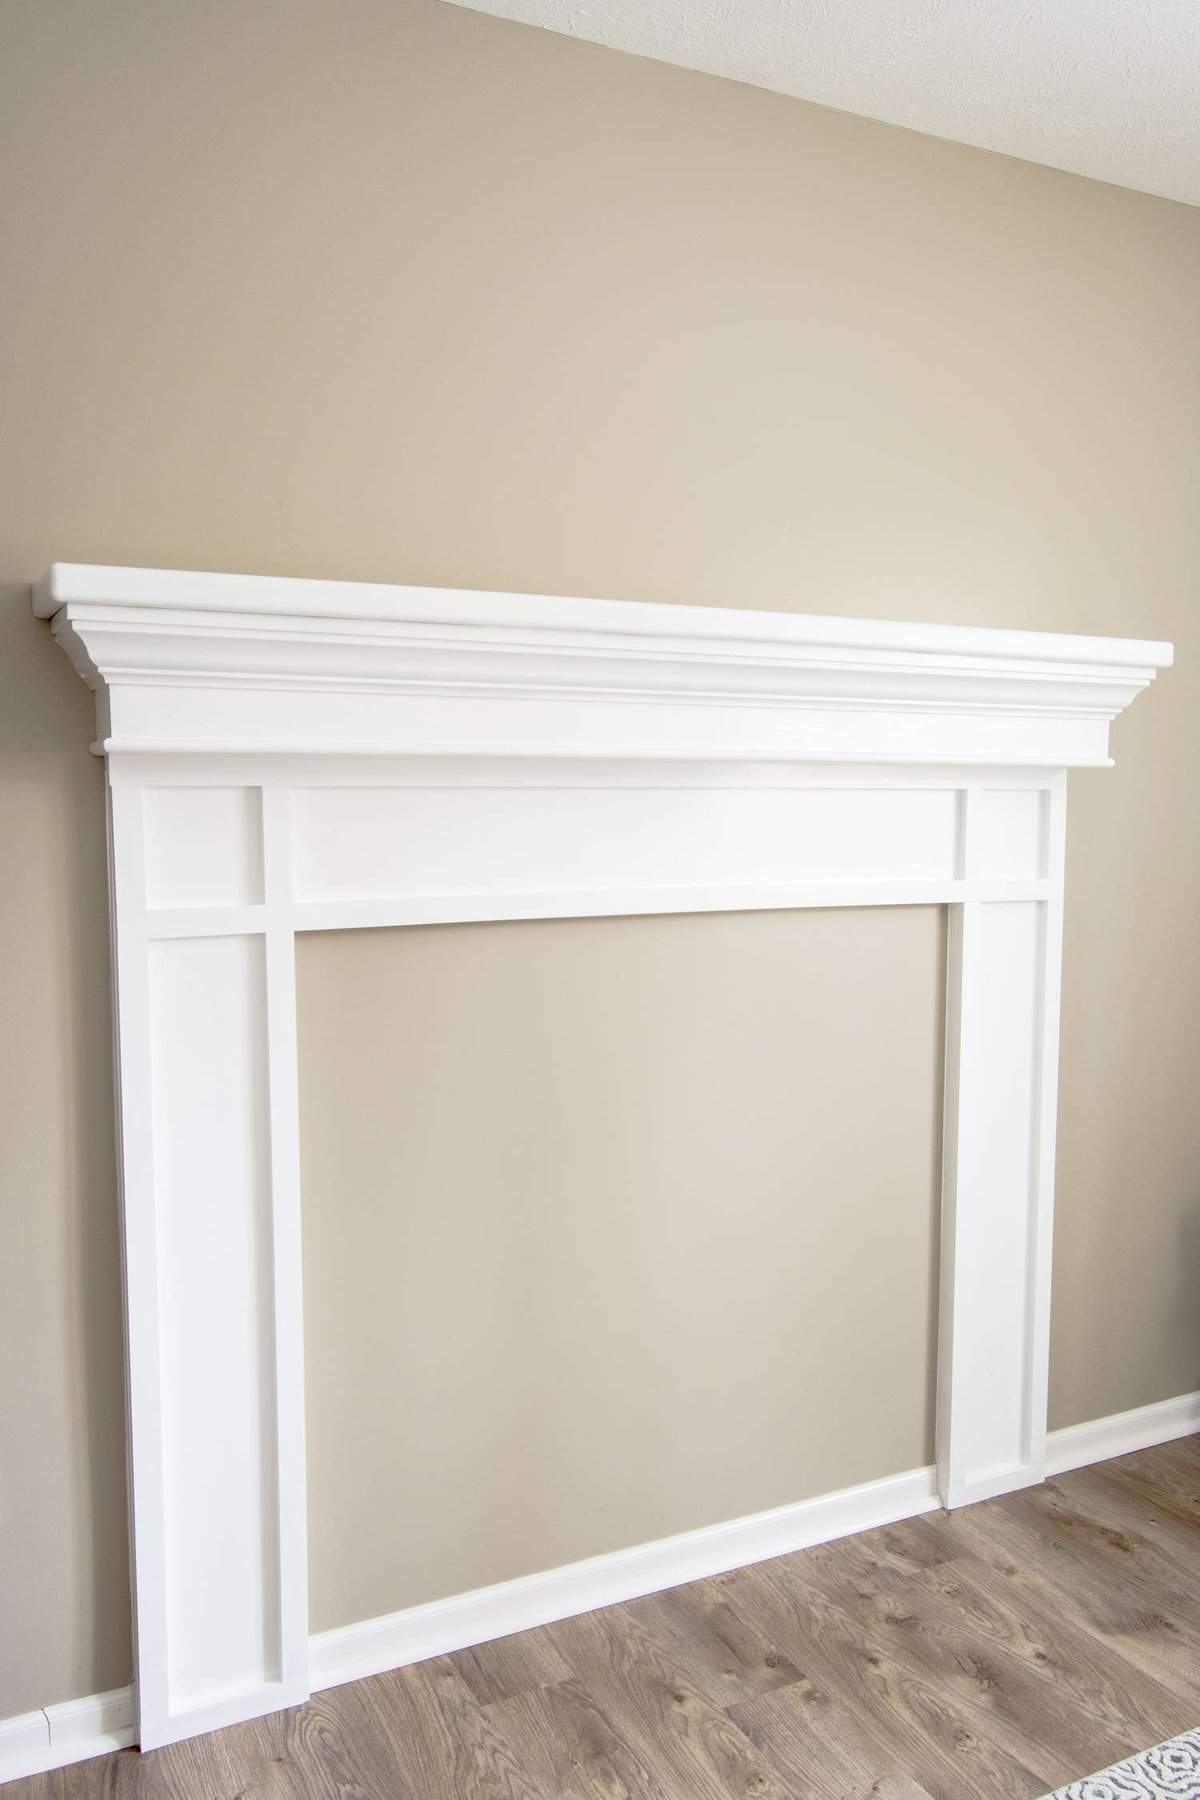
I always apply one coat of primer and two finish coats for the cleanest look. Using a quality primer, like Kilz, will go a long way in coverage. And applying two finish coats of your final paint color will provide the best saturation. Even if you are using a brush and roller, doing two coats of paint helps it look like a professional finish!
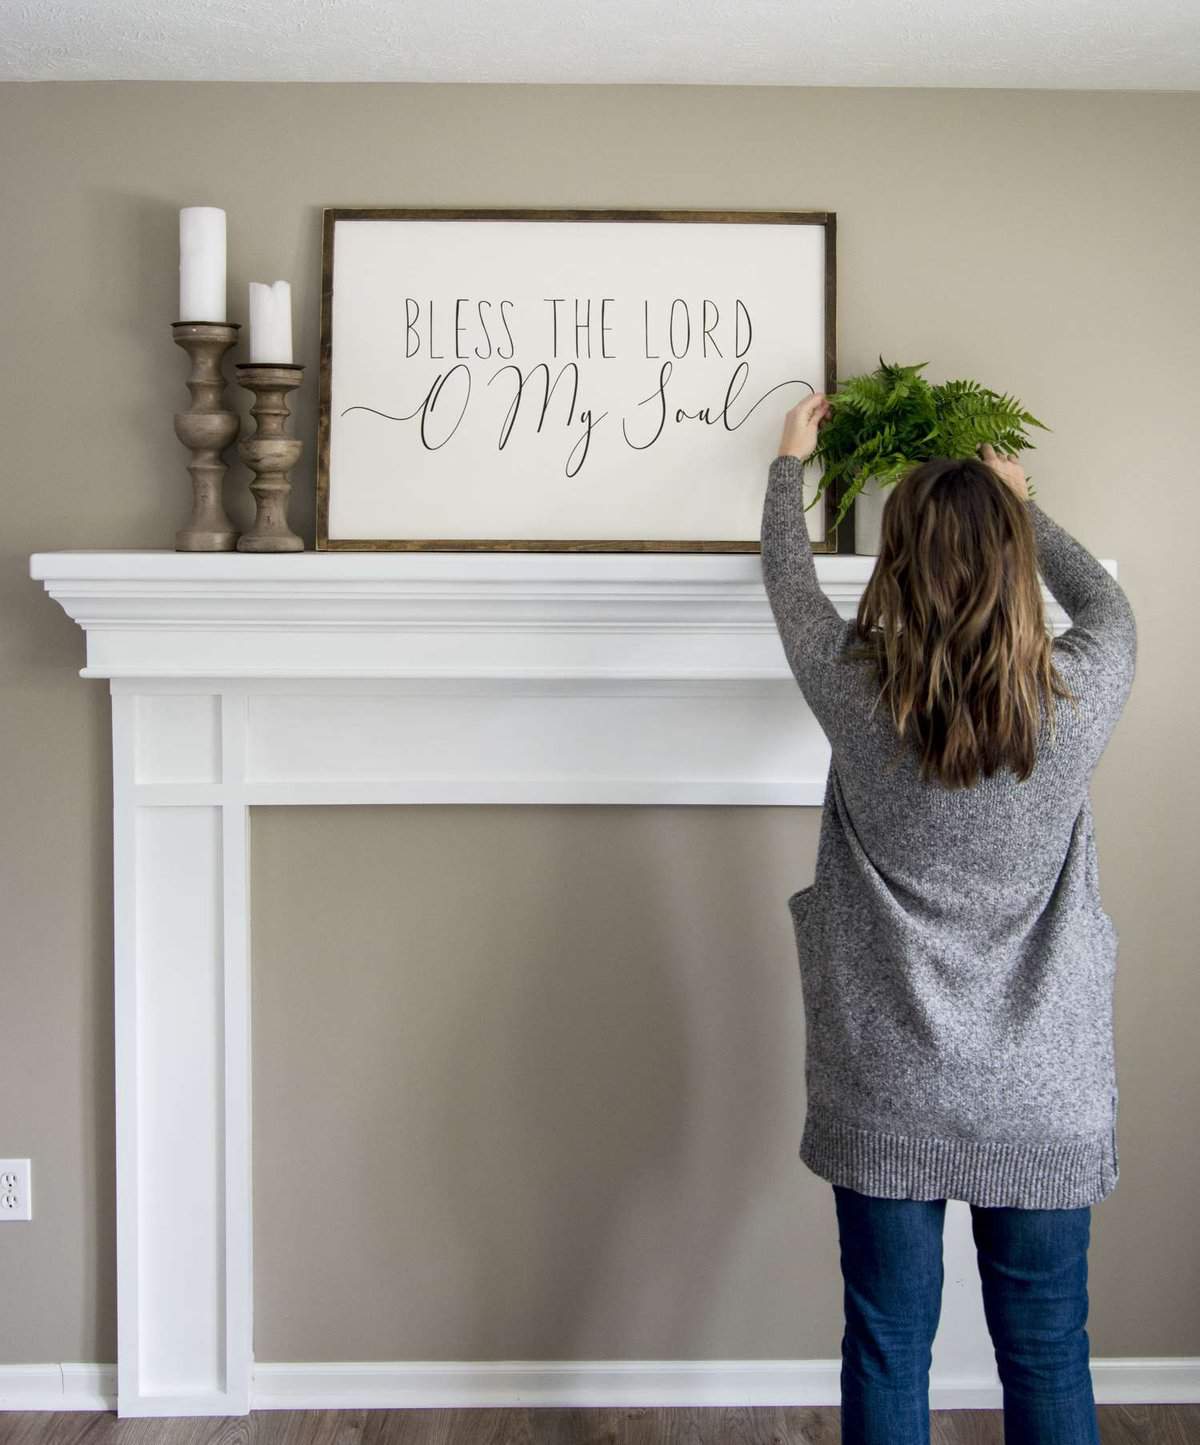
Styling Your Faux Mantel
And voila! You’re done! (With stage one, at least!)
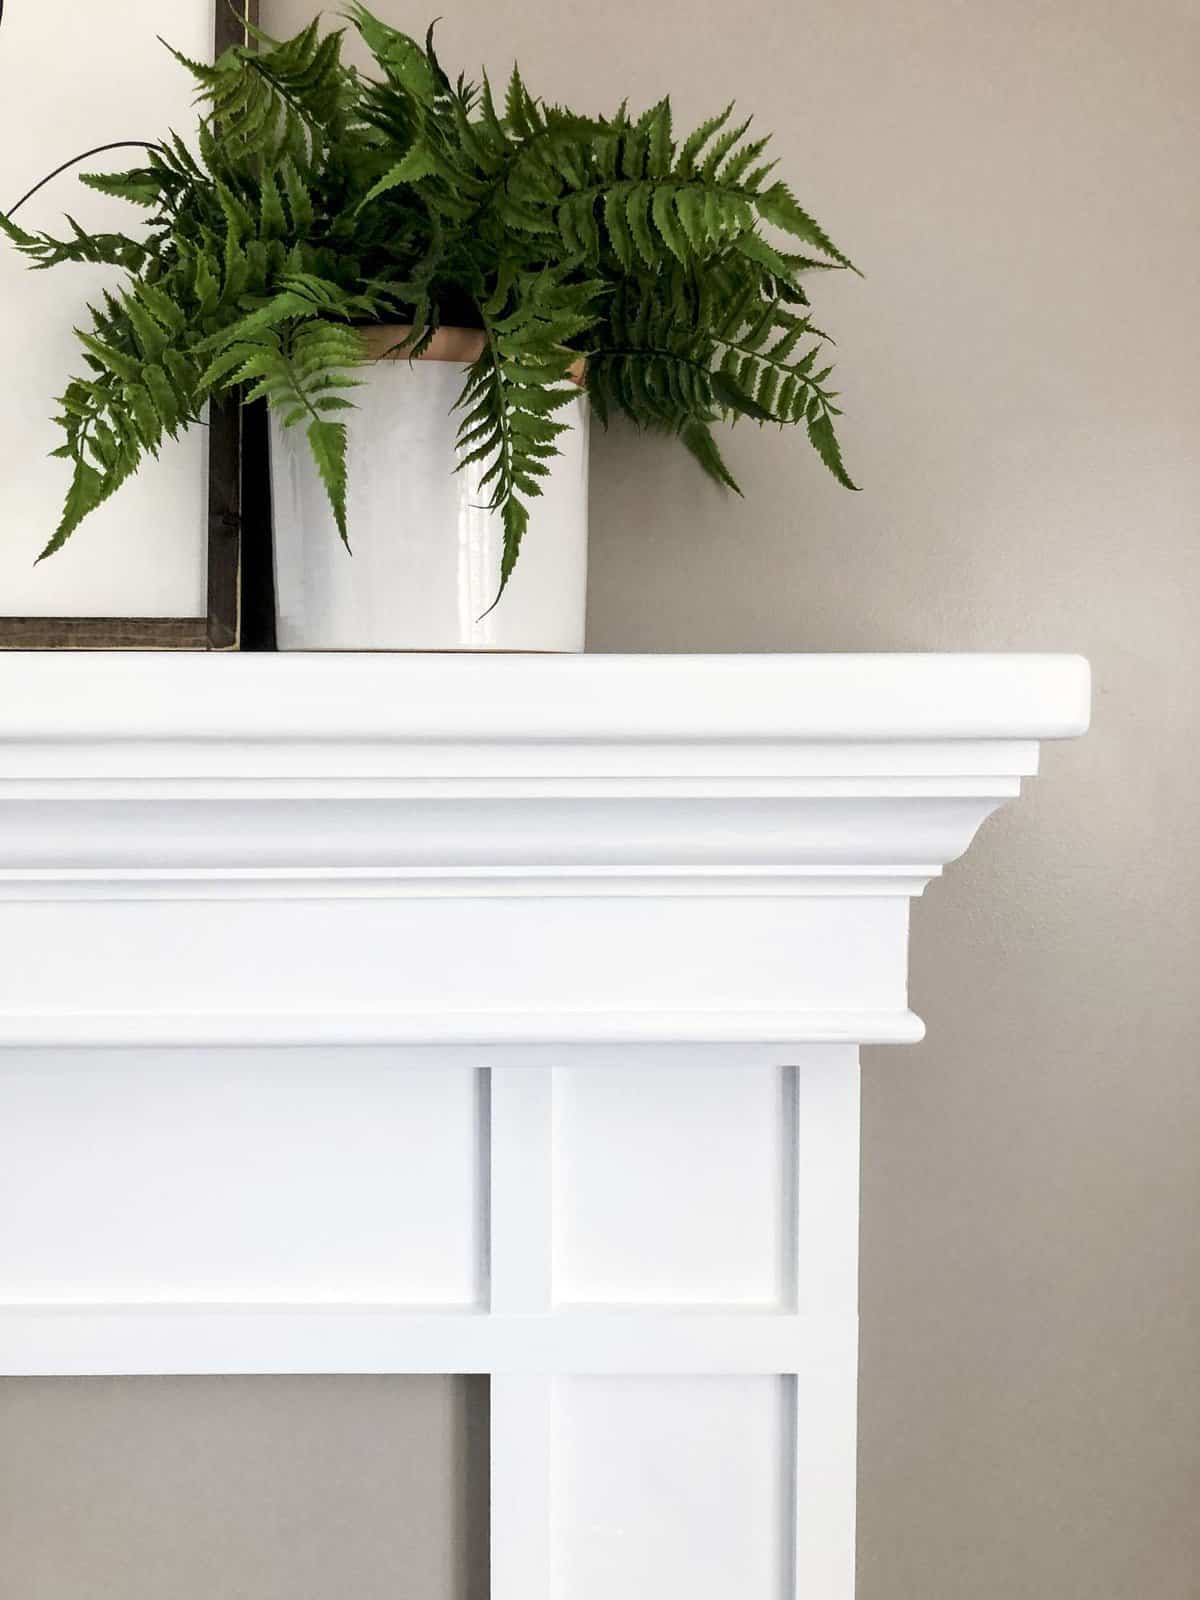
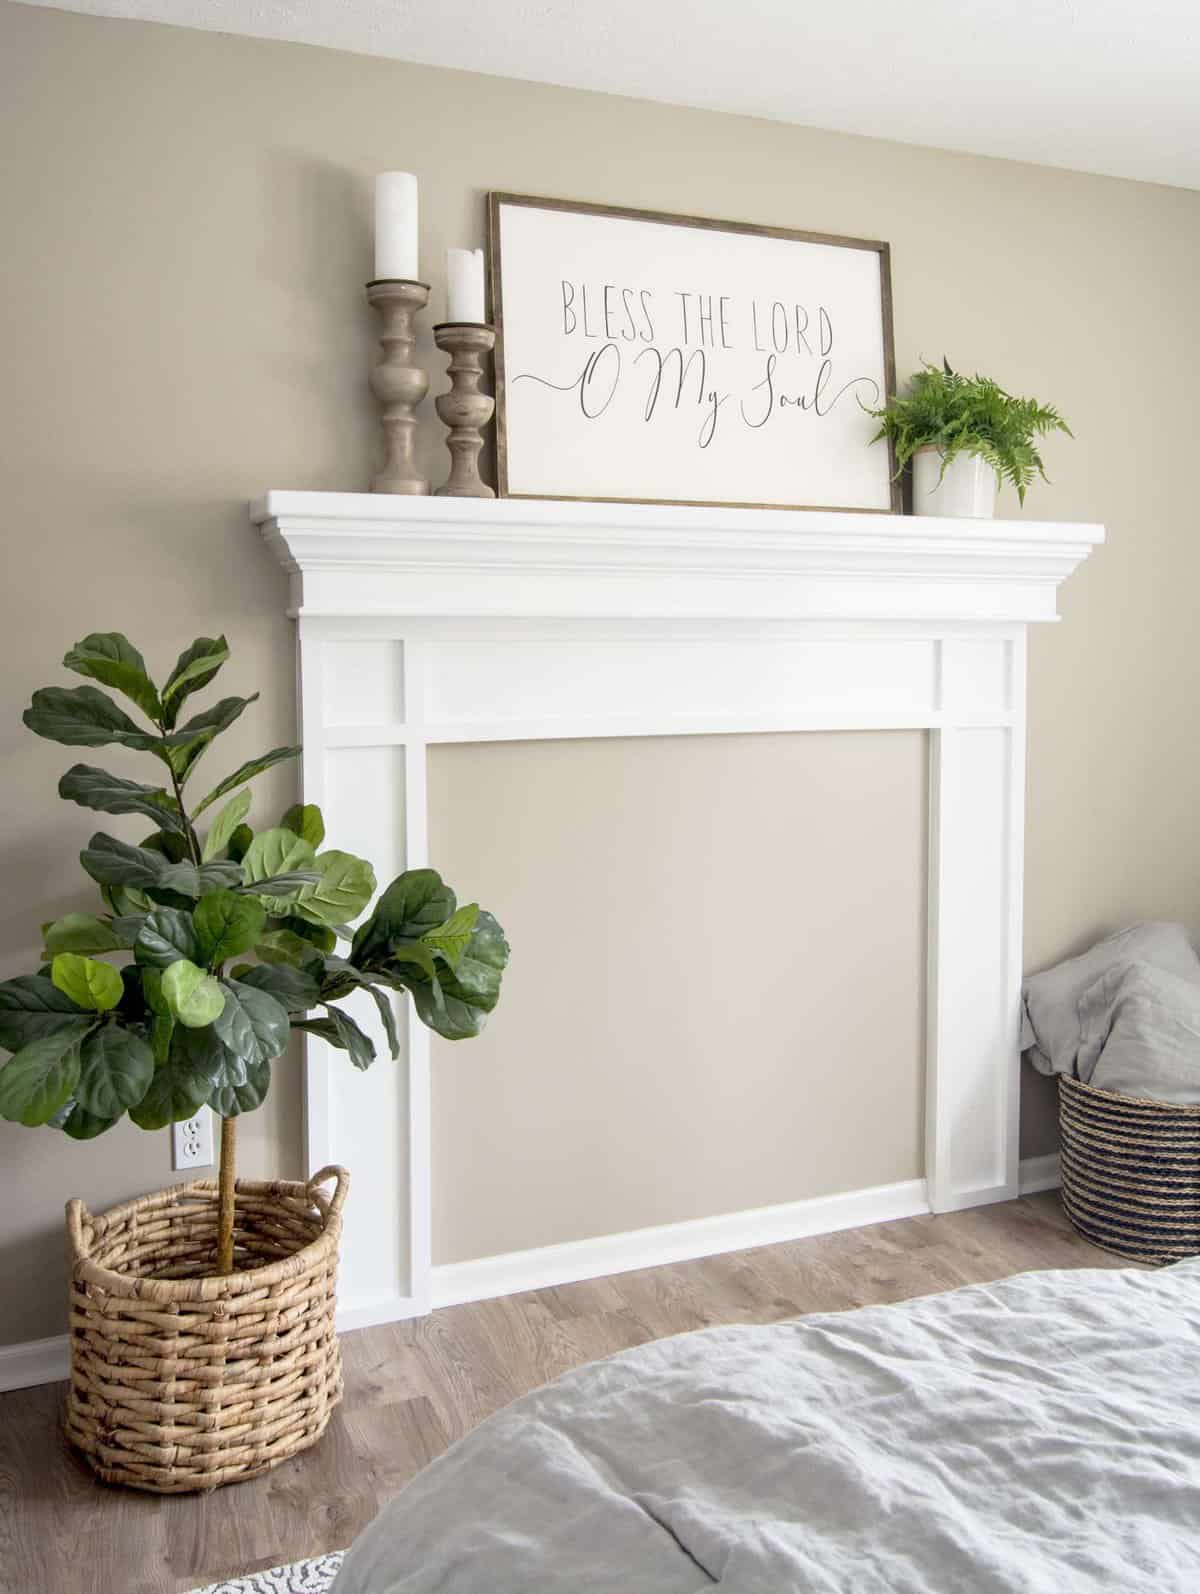
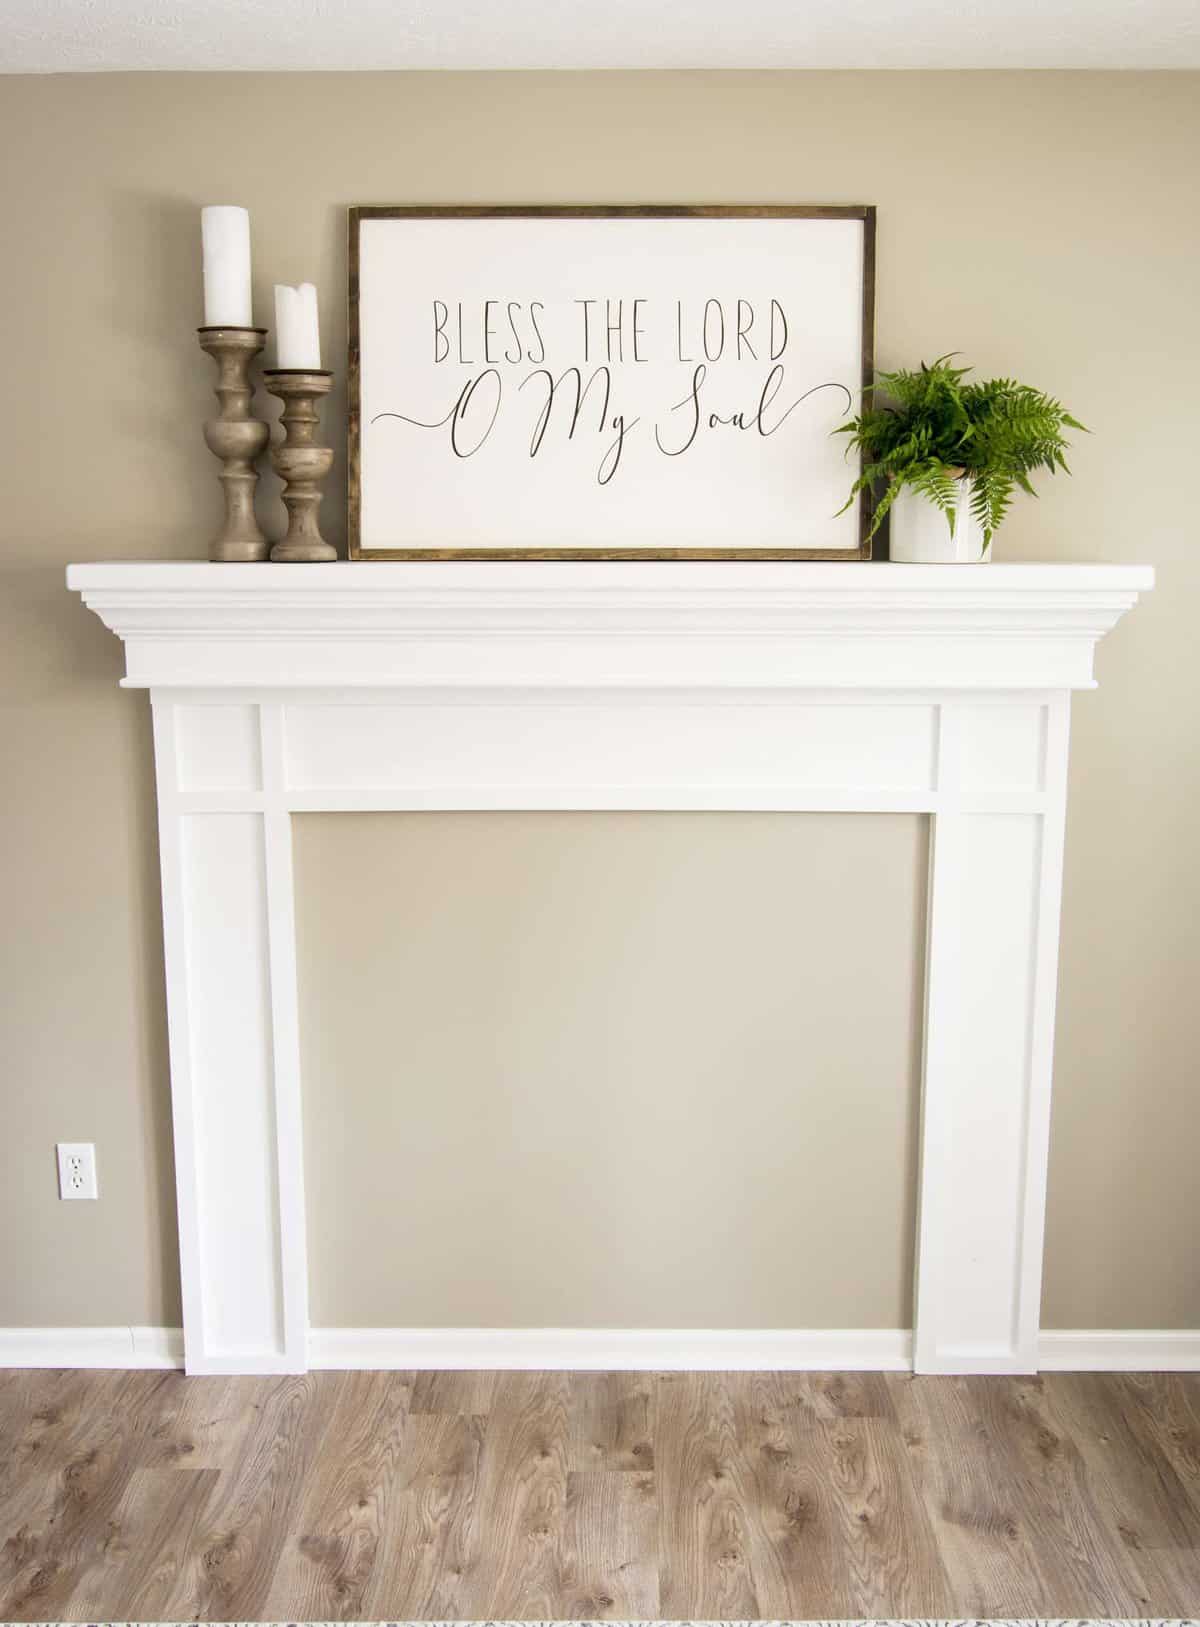
All that’s left to do, if you want to stop here, is to decorate! I kept my mantel styling very simple for the guest room. I wanted it to feel homey but not personalized so anyone could walk in and enjoy it.
Faux Fireplace Mantel | Stage 2
Now, at this point you may be wondering, “What about the middle?”

That’s totally up to you! You can choose to leave it as-is, or you can add decorative accents to make it feel more realistic.
I completed this project several weeks ago and yet, she still sits empty in the middle. However, my goal is to add a faux brick inset and then some kind of log feature to make it cozier. I just haven’t completed stage 2 yet!
{UPDATE} I’ve rounded up 10 decorative fake fireplace insert options for you! I’d love your vote on this post for which is your favorite.
I’ll be sure to share it on the blog when I do, so make sure to subscribe to be notified of new posts.
What would you put in the middle? I’d love to hear your ideas as well!
Stay Connected
Thank you so much for stopping by the blog today! I hope that this simple DIY fireplace surround tutorial sparks some creativity for how to add a pretty focal point in any room!

If you try my tutorial, I’d love to see how it turns out! Tag me on Instagram or Facebook and share your project with me!
And I’d love to have you join my YouTube community as well for weekly videos and projects!


Pin It For Later
Hi, how did you attach the mantle to the studs?
This is such an amazing project! I love how detailed your tutorial is – it makes the process so approachable, even for beginners. The faux fireplace mantel looks so stylish and cozy, it’s hard to believe it’s not real! I’m especially impressed with how you used trim and molding to add depth and character. Thank you for sharing this inspiring idea – I’m already excited to try something similar in my own home. 💕
You’re so welcome! Good luck!
I absolutely love this DIY faux fireplace mantel tutorial! It’s such a creative way to add charm and warmth to a space. The step-by-step instructions are super clear, and I can’t wait to try it out in my living room. Thanks for sharing this beautiful project!
Hello,
Will this design work around a real fireplace? My current fireplace sits within a faux brick wall, and it needs something to frame it. I thought of just a mantle but I love this. It looks easy to do, thank you for such simple directions.
Just wanna shout out BIG thankyou , this is exactly what my fire place in my bedroom needed. I tweaked my version a bit but still fallowed your instructions. Great post and directions . Wish I could post a pic to show you how it turned out. Thanks again
Jeff McCray
I’m so glad! Thanks for sharing Jeff!
Hi there! Love the FAUX FIREPLACE. Im moving into a new condo in two weeks and I picked up a fireplace surround for $25. I just didnt realize how I would attach this to the wall. It’s kinda big and heavy…. Any suggestions without damaging my walls? (Wall brackets?)
Wall brackets would be the way to go! Just make sure to get ones that can bear the weight of the surround and try to install into studs!
Hi Sarah! Thanks for sharing your awesome work! I see a cozy looking comforter on the bed in this tutorial. I can only see just a bit of it. Could you please share the details on this comforter? Thanks so much!
It is very old! I don’t believe it would be available anymore but it was originally from JCPenney.
So good!
Thank you!
Hi! Wow this is beautiful, did you finish the middle? I would love to see it… do you have a photo or video on your IG?
Thank you! Unfortunately I haven’t! It’s one of those projects I’ll get to eventually. 🙂
I wanted to let you know I rounded up some options to finish out the middle here! https://graceinmyspace.com/10-decorative-options-for-a-fake-fireplace-insert/
Hello,
Will this design work around a real fireplace? My current fireplace sits within a faux brick wall, and it needs something to frame it. I thought of just a mantle but I love this. It looks easy to do, thank you for such simple directions.