
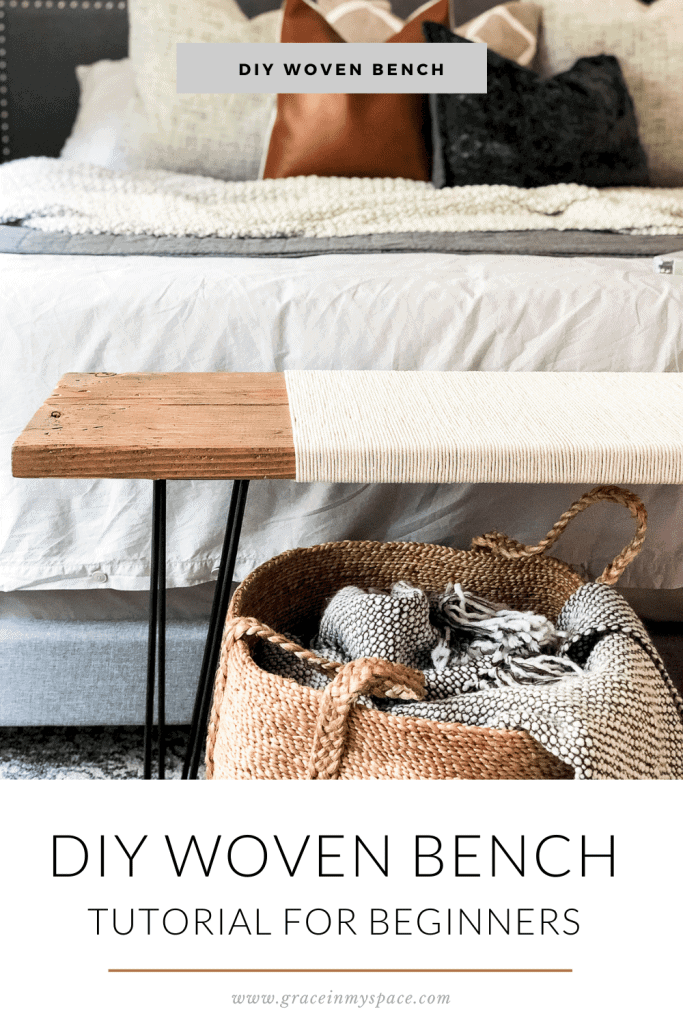
How to Make a DIY Woven Bench with Hairpin Legs
Making a DIY woven bench is a simple beginner project. I’ve seen lots of amazing tutorials lately, but none of them were simple. So I set out to create the look without the complication of time consuming weaving techniques. Learn how to make a DIY bench customizable to your space with this simple tutorial!
And, if you like this project, make sure to check out my top 20 DIY projects for beginners I’ve rounded up over the years!
Post may contain affiliate links for your convenience.
Mid-Century Modern Bench
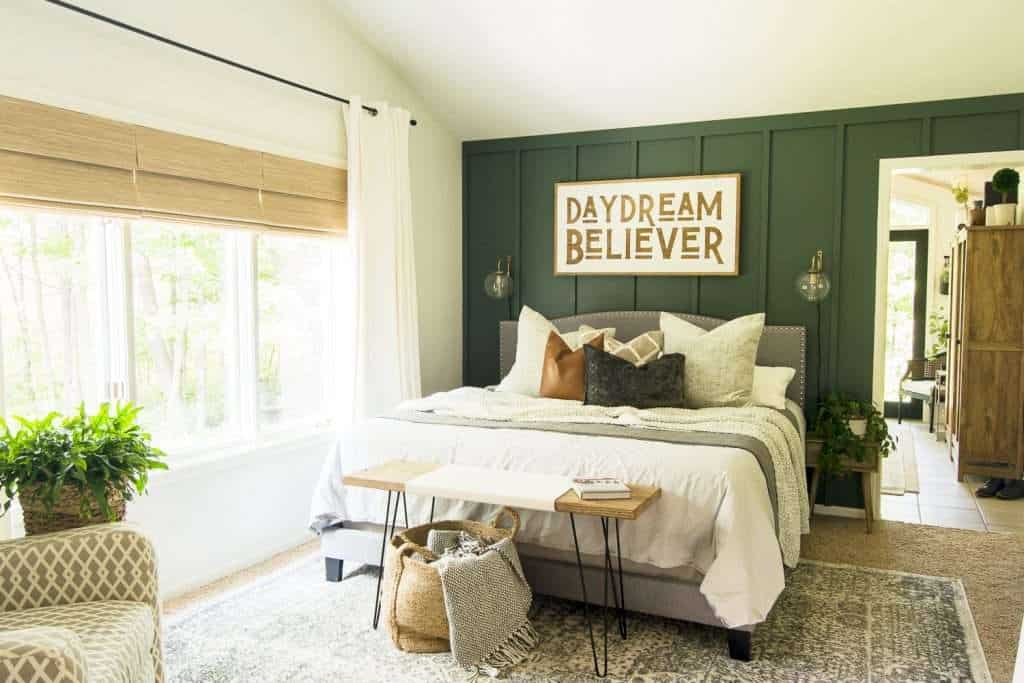
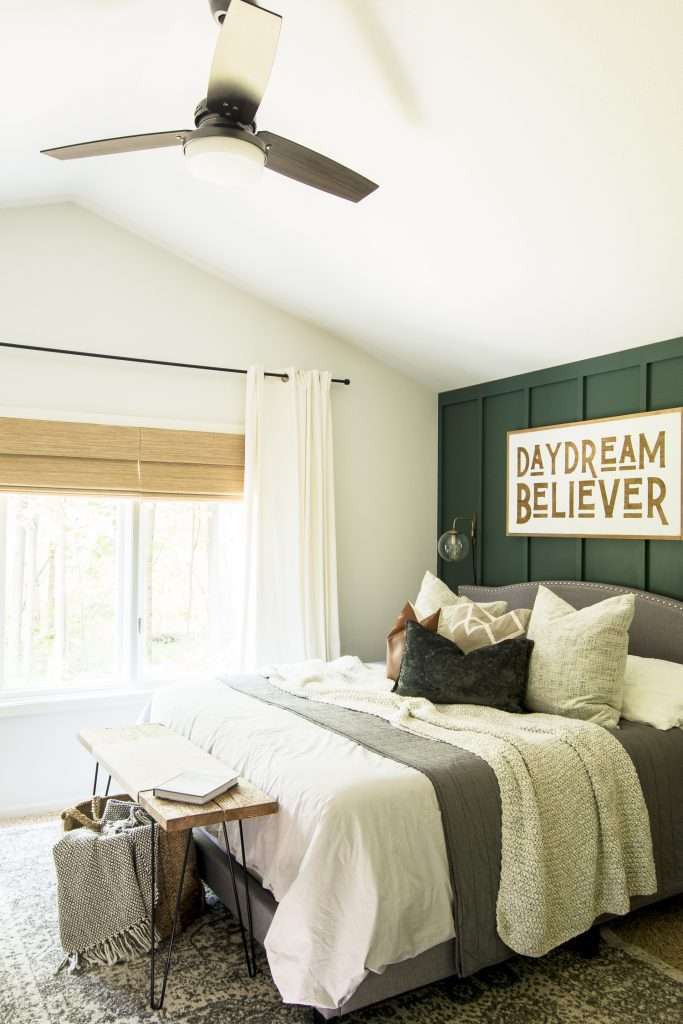
My home has slowly been transitioning design styles over the last few years. Mid-century modern pieces keep catching my eye, so I decided to try my hand at a DIY bench that mimicked this style.
Hair Pin Legs
The key element to help it feel mid-century are the hair pin legs. My father in law welded these legs for me years ago. Originally, they were attached to a small work table for my son.
Now that he’s grown too big (cue the mommy tears) I wanted to upgrade their use!
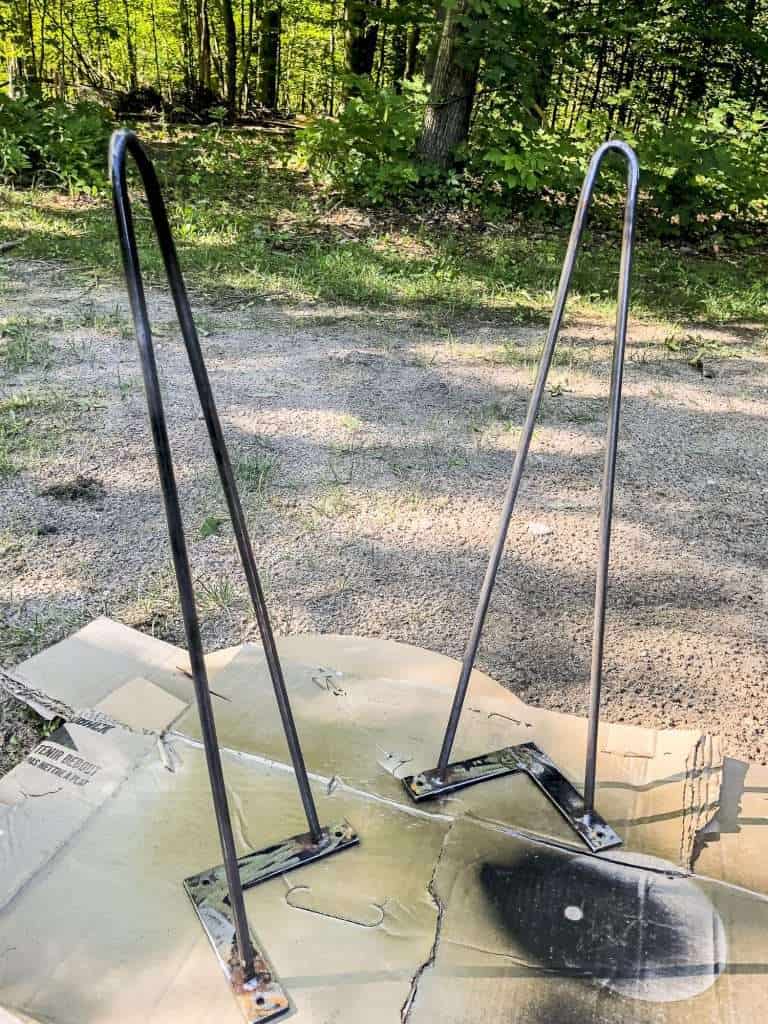
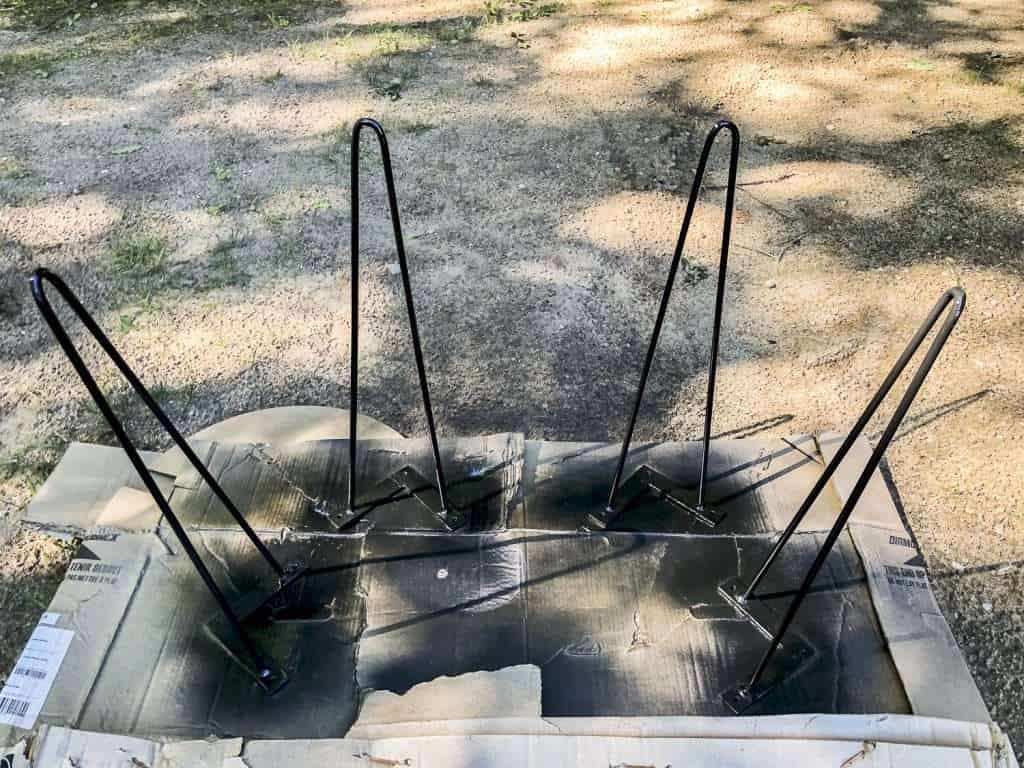
I spray painted them black with my favorite spray paint to begin the project.
Since I already had legs I wanted to use, I designed my bench around them! The beauty of this woven bench tutorial is that it is completely customizable to your style! So you can choose the size, height, color and style of your legs.
There are some beautiful options to purchase hair pin legs rounded up here. Just make sure to consider the height so your bench is comfortable for seating.
Next, it’s time for the building portion!
Bench Plans
My DIY bench plans work around the existing cross bars on my hair pin legs. The portion that bolts into the wood was large enough that I had to purchase two 8″ boards to fit it properly. Let’s get to the plans, which you can customize for your legs!
Woven Bench Materials
- 4- Hair pin legs of choice
- Spray paint color of choice for the legs
- 2 – 2″x8″ common boards, cut to length for your space
- Screws and washers to secure your legs and mending plates
- 2- Tie Plates
- Scrap wood
- Hand Sander
- Natural Cotton Rope – 400m
- Stain color of choice, I used Special Walnut
- 3 – Krazy Glue Super Glue {gifted}
- Heavy duty staple gun
- Wire brush for aging
Shop Materials

How to Make a DIY Woven Bench
Once you’ve found your hair pin legs, it’s time to start building!
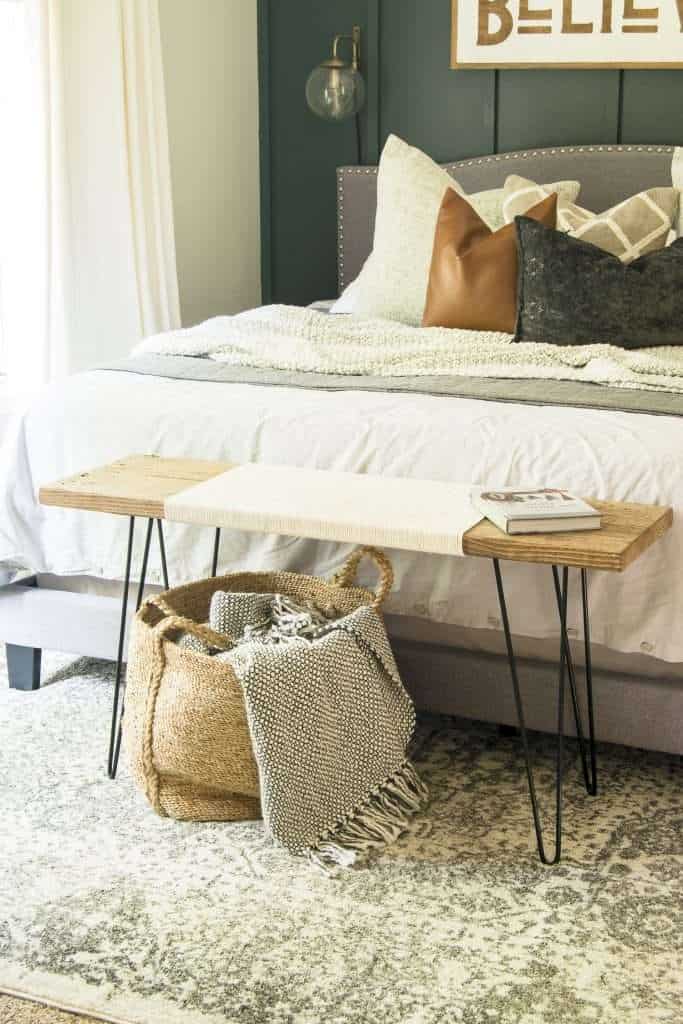
Measure the space you want to use your bench and cut your 2″x8″ boards to length. I wanted my bench to go at the foot of the bed, so I made it long enough to be a good scale to fit our king size bed.
Most home improvement stores will cut the boards to length if you come prepared with measurements. Otherwise a table saw, circular saw or miter saw will do the trick!
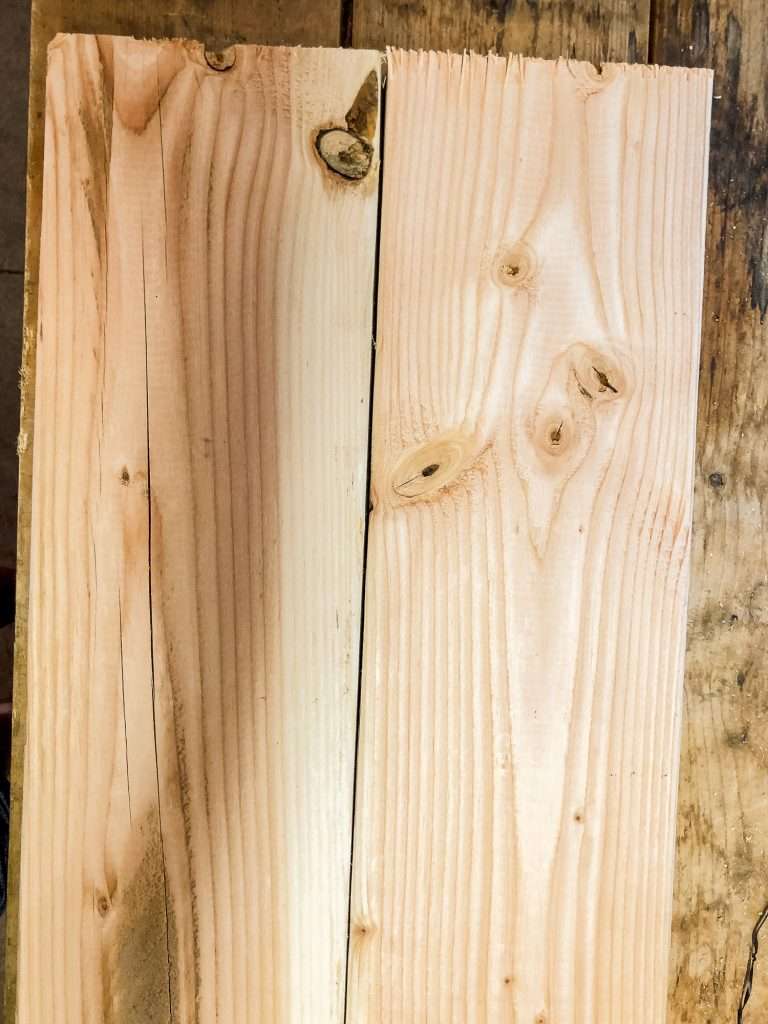
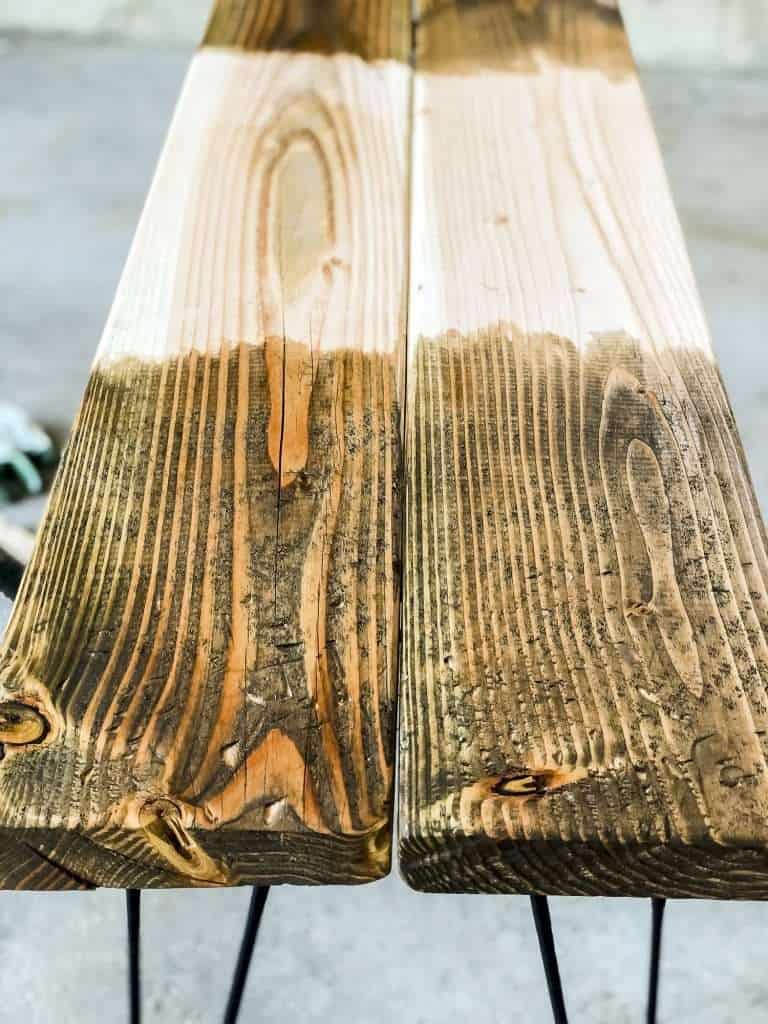
Once you’ve measured and cut your boards, sand them with a hand sander or sanding block to remove the rough edges.
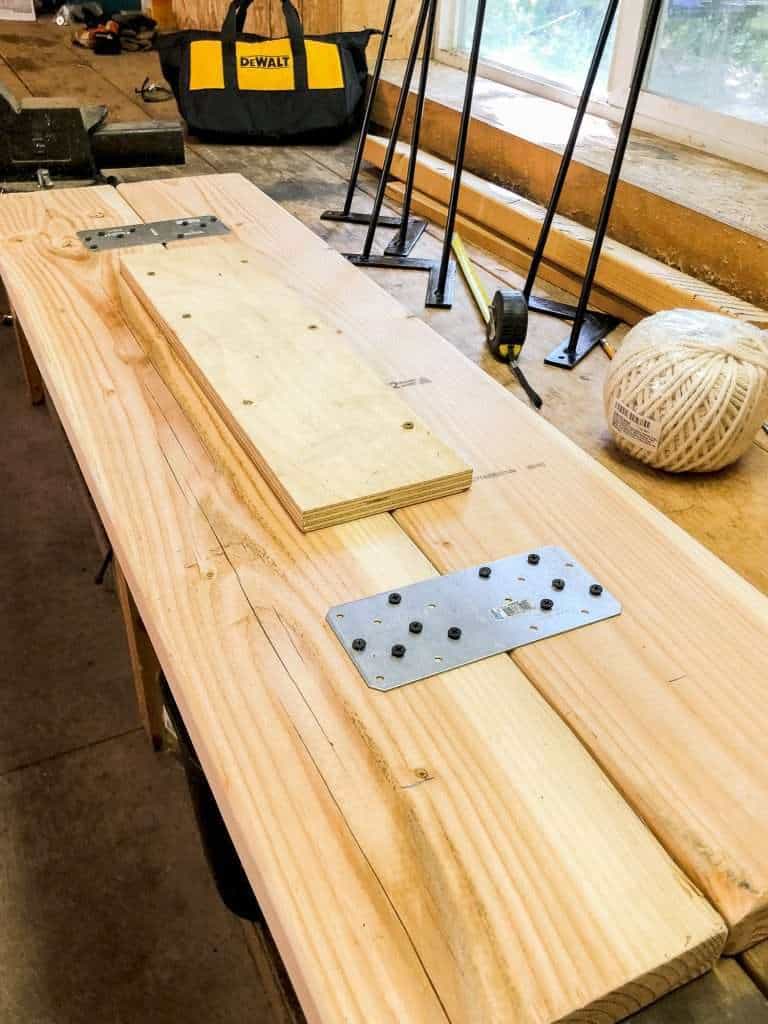
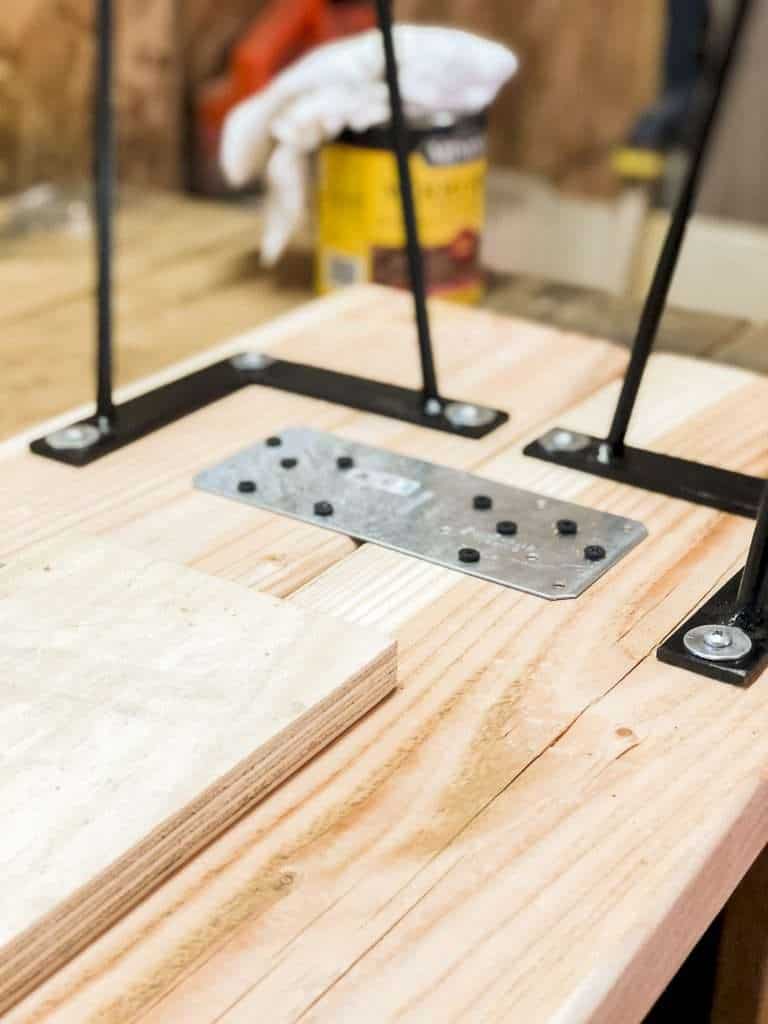
Next, join the two pieces of wood together with two tie plates and scrap wood. I used a piece of scrap for stability in the center, and one tie plate on each end. You can also use wood glue on the center seam for extra durability.
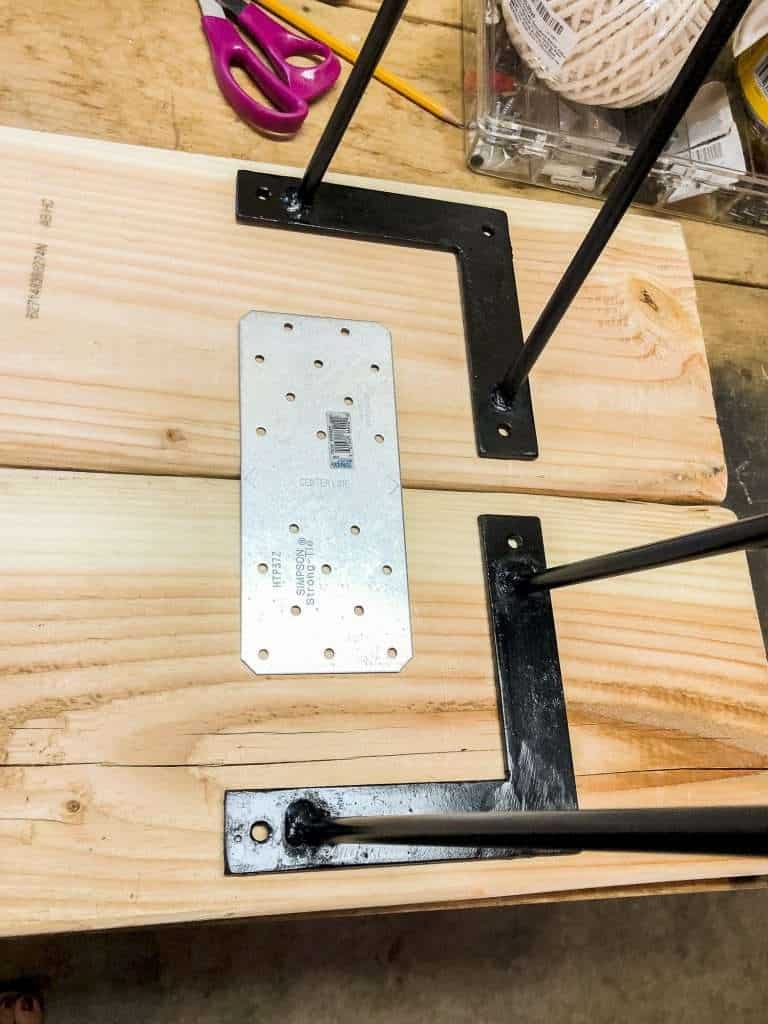
Now, we are ready to add the legs! Attach your hair pin legs with the appropriate hardware, ensuring that they are equally distanced on each end.
This image is a good example of why I had to use 8″ boards. You can see that smaller boards would have caused my leg brackets to overlap the seams. I wanted to avoid that and have them each screw into one board securly.
Congratulations, you’ve built a bench!
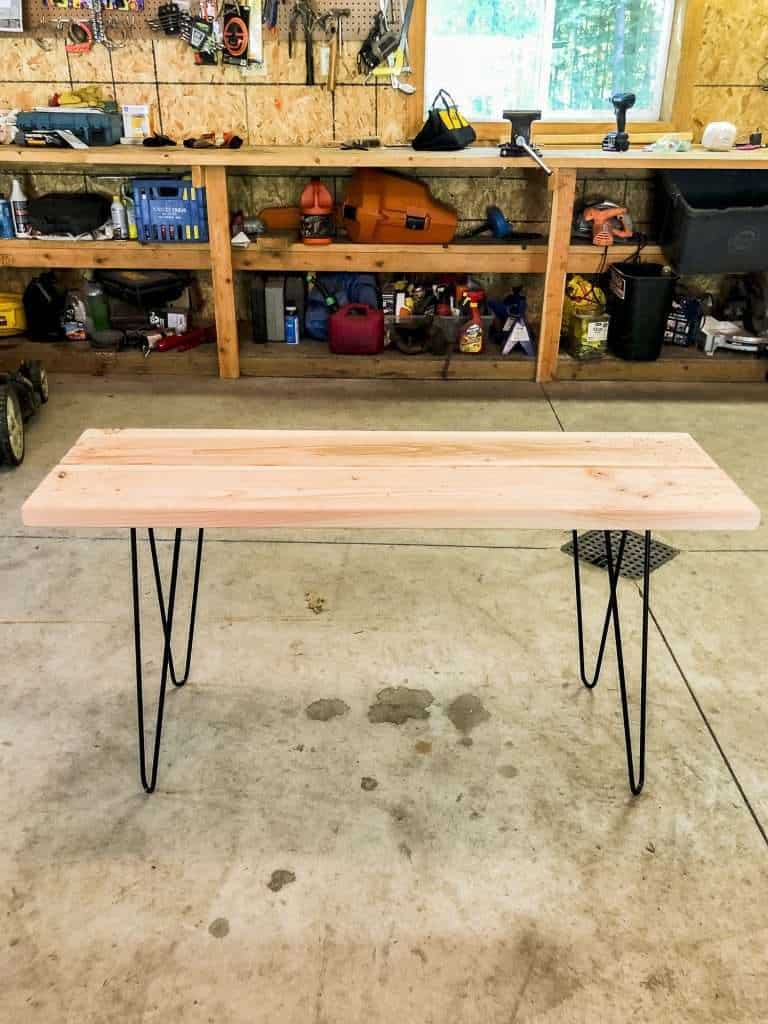
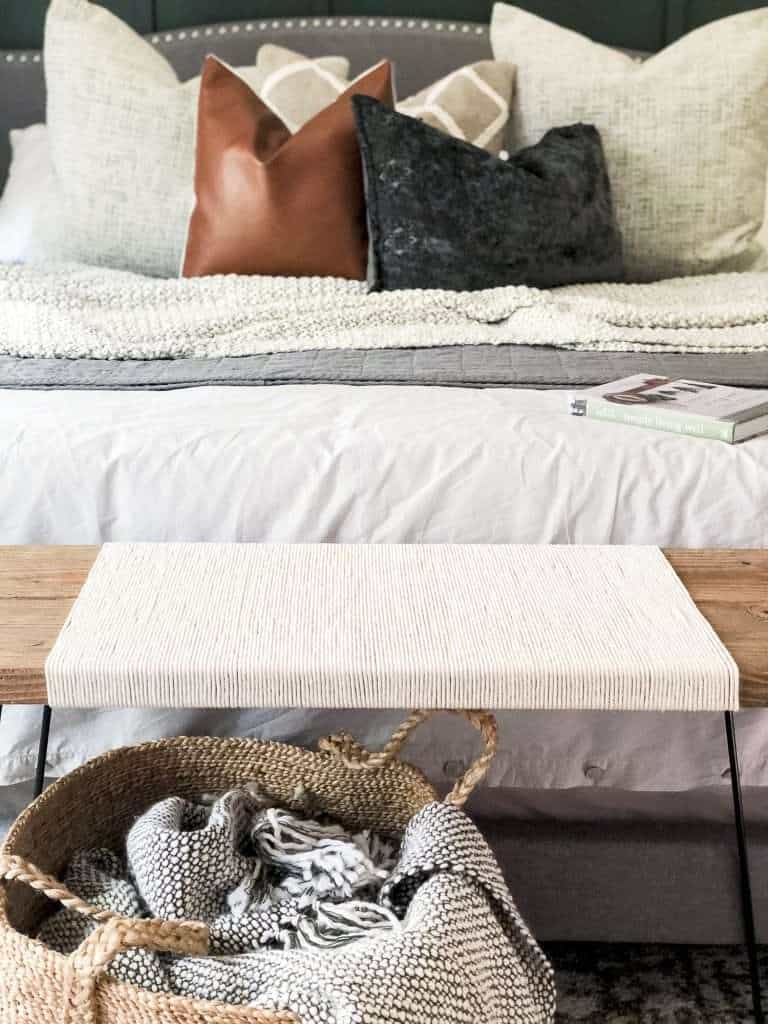
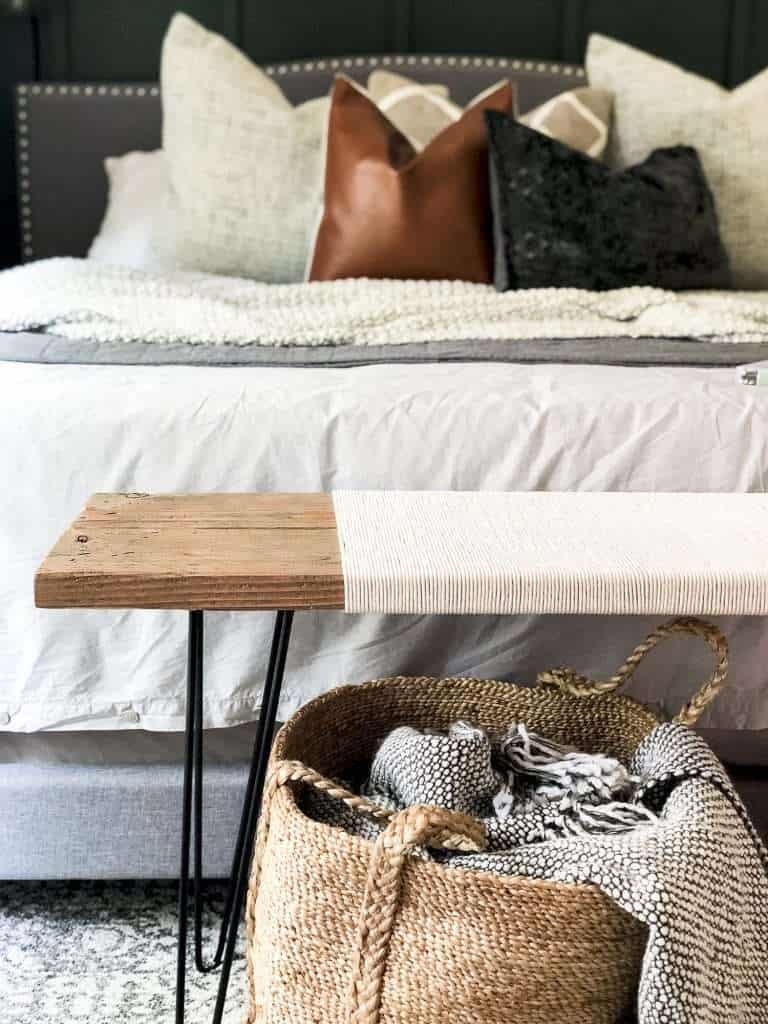
Honestly, you could stain this and be done if you like the simplified look! However, I was going for a woven look, so let’s keep going.
How to Create a Woven Look
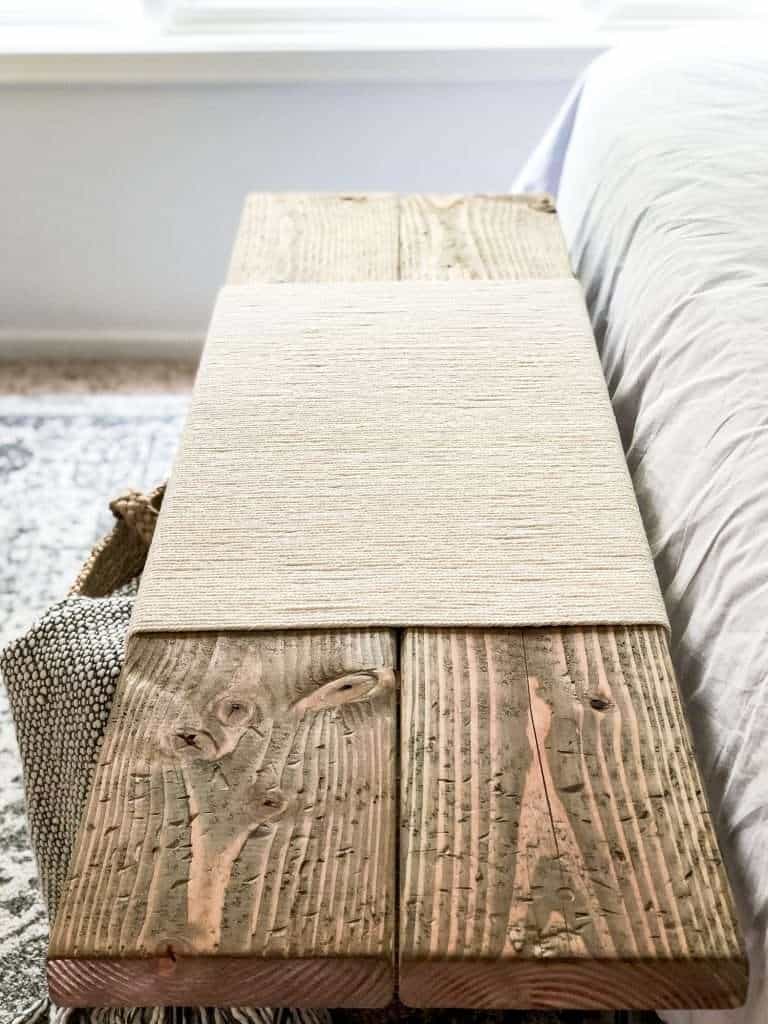
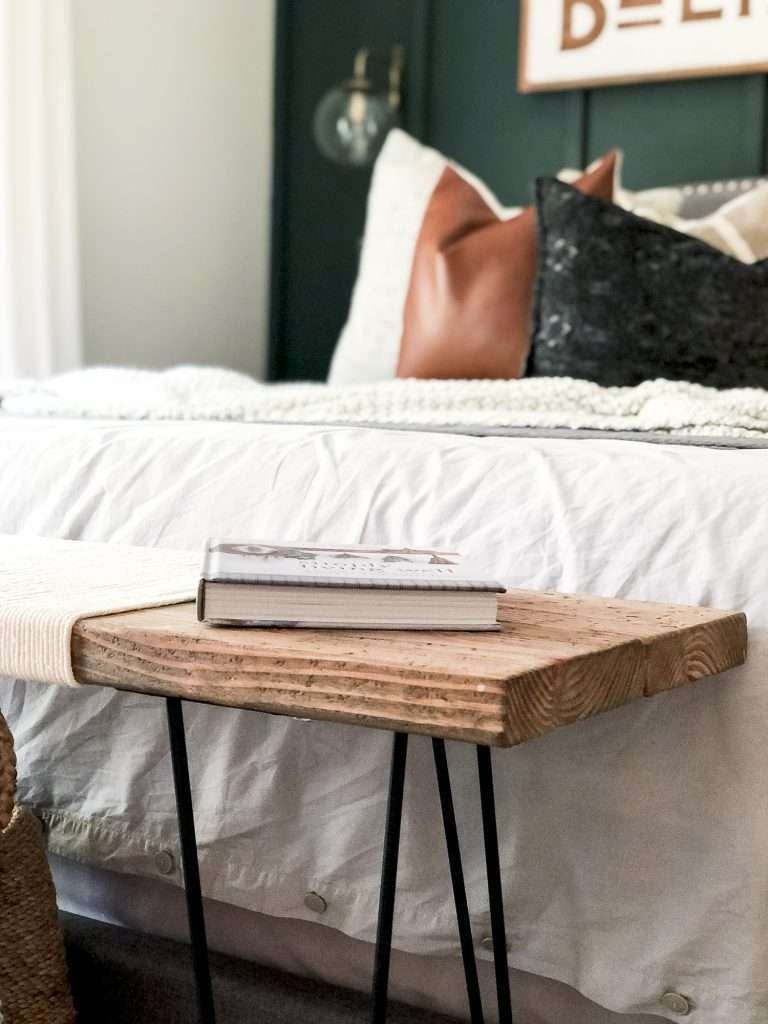
If you want to actually weave your bench, this tutorial would be much more complicated! Since I really love to simplify my life, I chose to wrap cotton rope to get the look of a woven bench instead.
However, before you do that, make sure to stain your wood. I only stained the edges since the rope will cover the center.
I also chose to beat up my wood with a wire brush, chain and hammer to give it a little bit of an aged look.
Once your stain is dry, get your cotton rope and start to wrap!
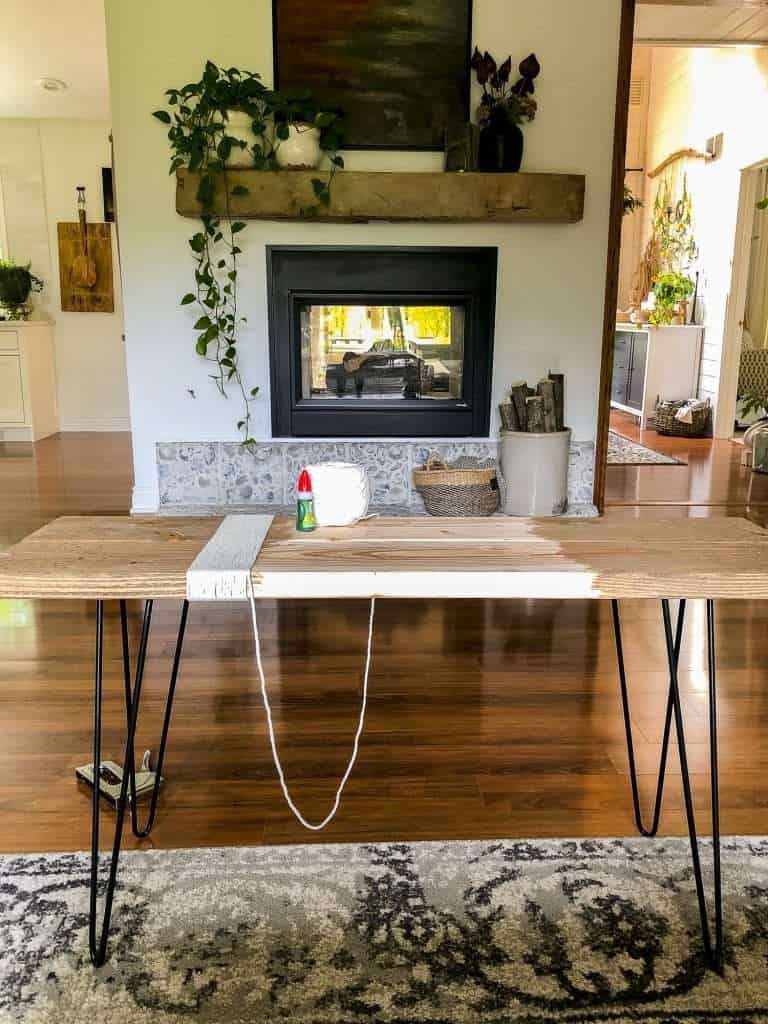
Measure where you will place your rope so that it is perfectly centered when you’re all done. I chose my starting point on the inside of the hairpin legs to make it easier.
Start on the underside of the bench on one side, and work your way to the opposite end. Tie a knot in your rope, then staple it directly into the underside of the wood for your anchor point.
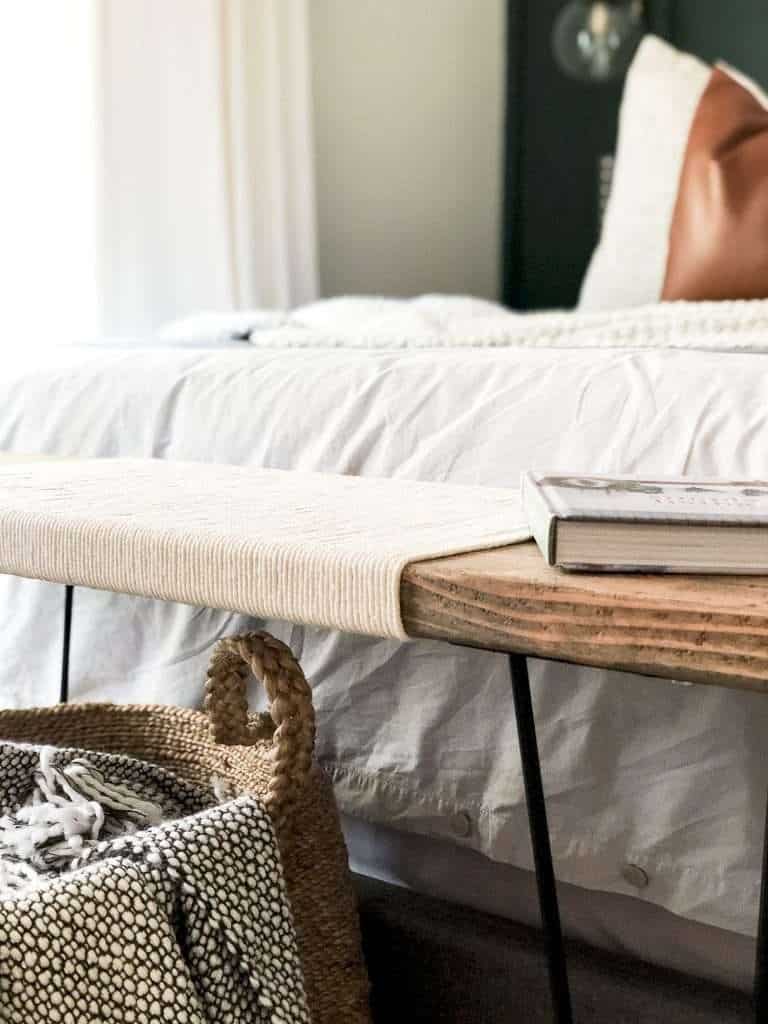
Then, all you’re going to do is wrap, staple and glue! Wrap your rope around and around the bench, making sure along the way that your lines are straight.
With each pass, glue down the rope on the top of the bench with Krazy Glue. I liked the precision tip for this project because it didn’t come out too quickly, leading to excess glue.

It also dried extremely quickly so I didn’t have to wait too long for each row to set before moving on.
I chose to glue on the top, and staple on the underside, for a seamless look. The glue helps secure the top once people are using the bench, and the staples keep everything tight underneath.
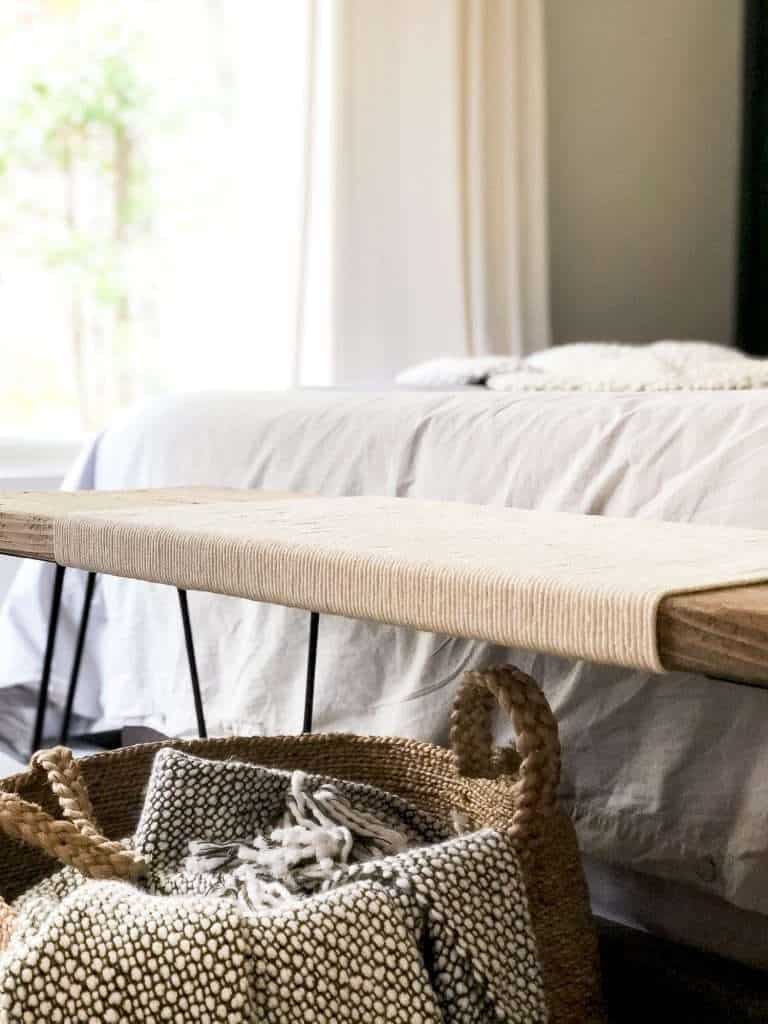
Make sure you pull each row tight, staple and glue, and then line up the next row flush so they don’t overlap.
PRO TIP
Repeat until you’ve reached the end of where you want the “weaving” to stop.
Once you’re done, tie another knot in your rope and secure it on the underside with a staple again. Tying a knot helps give tension so the rope doesn’t slide out of the staple.
Video Tutorial

And, you’ve woven a bench! At least, you’ve got the look of a woven bench.
Looking for a Source?
- Bedroom Paint Colors & Board and Batten Tutorial
- Bedroom Bedding and Decor
- Rug: Millie Ivory Medallion Distressed Rug by Well Woven
- Daydream Believer Sign: Use code GRACEINMYSPACE for 15% off their shop. Make sure to check out my custom sign I designed with them as well!
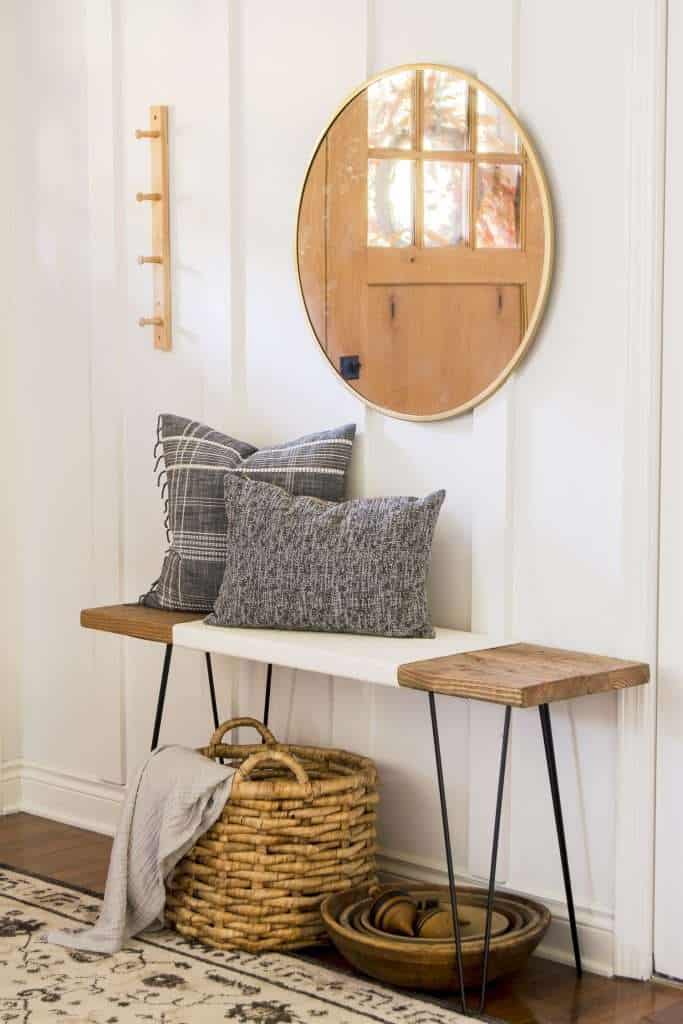
Styling a Woven Bench
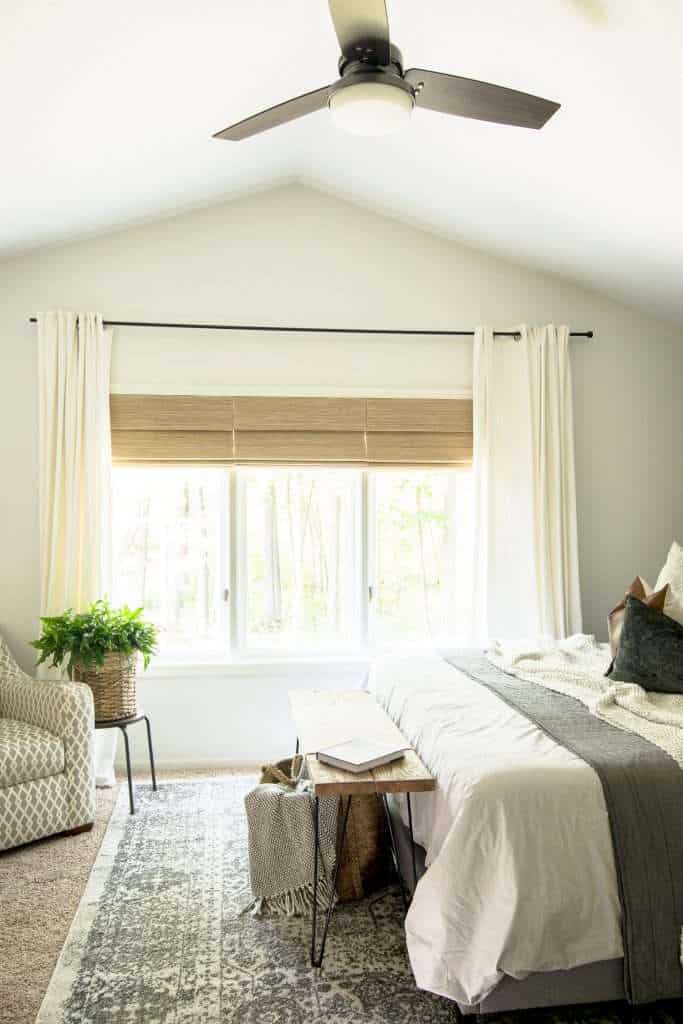
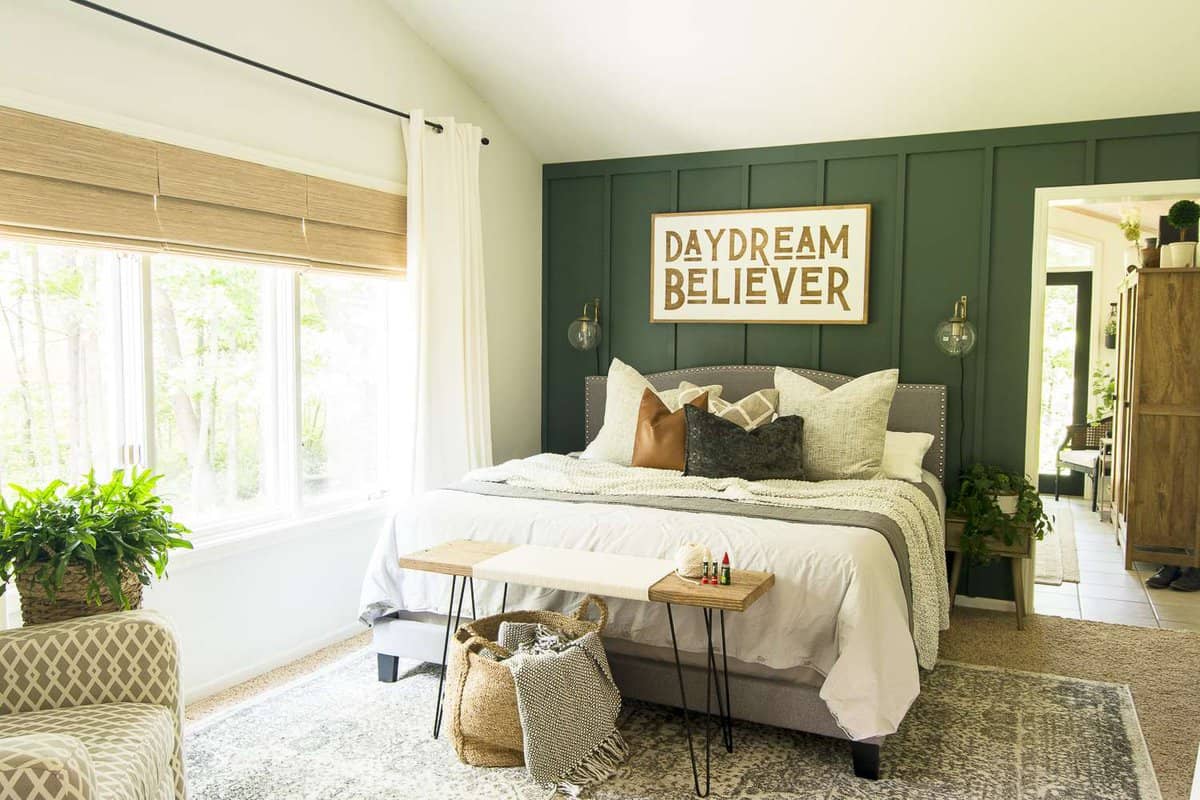
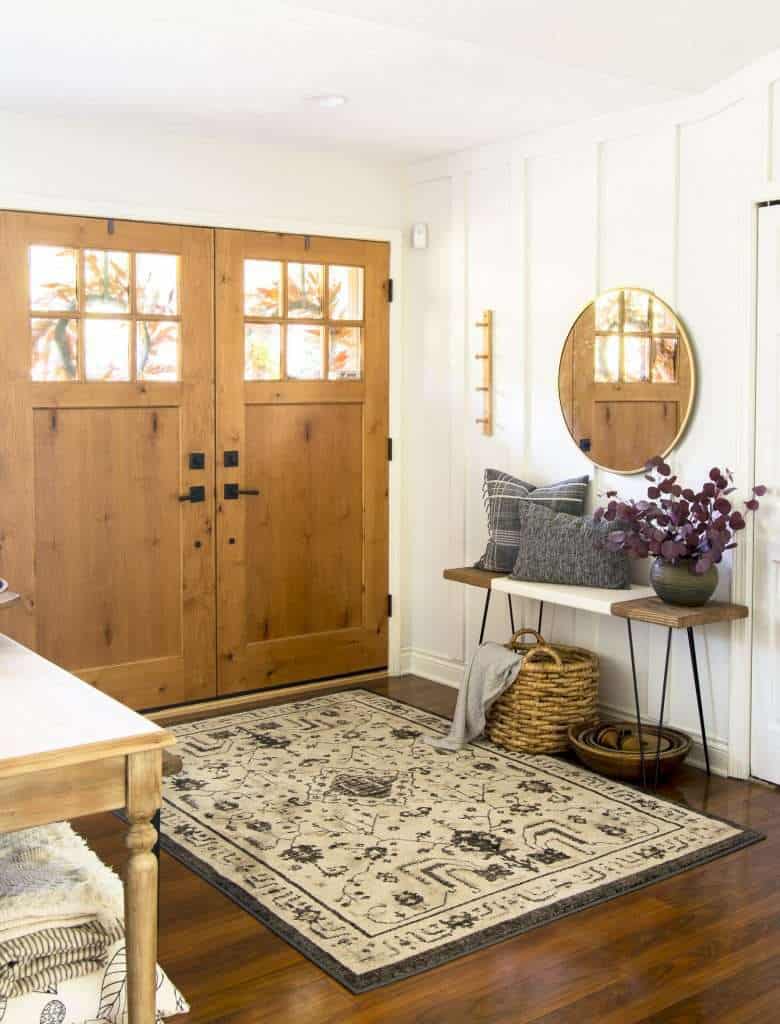
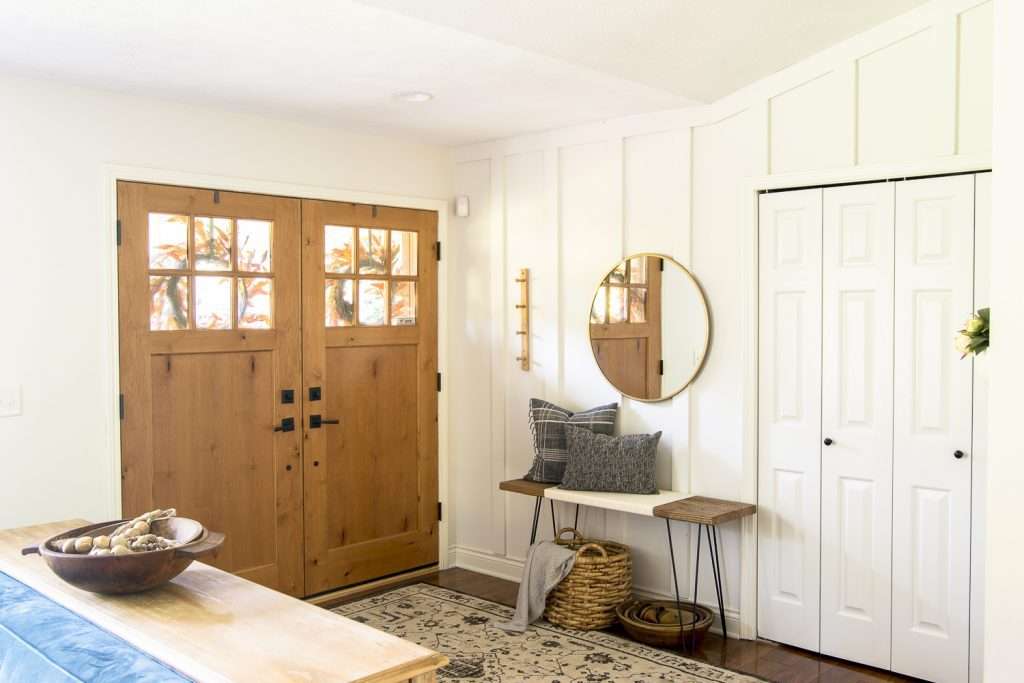
I originally wanted this bench for the end of our bed. However, it looks pretty in my entryway too!
Which is your favorite spot for this DIY woven bench?
Stay Connected
What do you think of how it turned out!? This was a very simple DIY project that gave me the look for less money and less time! The most expensive part of this project was the rope, but I’m glad I chose this cotton rope for its color, texture and durability.
Do you plan to make your own? I’d love to see it! Make sure to tag me @graceinmyspace on Instagram so I can share your work!


Love this idea!