
How to Make DIY Christmas Tree Art
Affordable Christmas wall art is hard to come by. There are many beautiful options, but in a season where budgets are tight, I’d rather spend $100 to bless others. So I decided to try my hand at making my own! Learn how to make DIY Christmas tree art with these simple Christmas tree drawings!

Post may contain affiliate links for your convenience.
Christmas Wall Art
This fall, I found the most perfect canvas at a flea market. It was busted up and falling apart, so I repaired the frame and did an aging technique to the original painting to give it a moodier look.

You can see how it turned out in this tutorial!
This canvas is the perfect size for good scale over my fireplace. While I enjoyed it for fall, I am ready to change it up to create Christmas wall art.
Many people would balk at the idea of DIYing artwork and then doing it again! However, I find that I tire of decor quickly. So by next fall, I likely wouldn’t have wanted to use this painting again.

Instead of going out and buying new, I decided to try my hand at Christmas tree art for the winter season! Best part of this project: it was FREE!
DIY Christmas Tree Art Tutorial
The first obstacle I had to overcome with this project is that I have zero artistic ability. My stick figures look like a toddler drew them. Thankfully, these simple Christmas tree drawings are much like tree stick figures!
Materials
- Old or New Canvas (any size for your space)
- White Paint in two shades
- Paint rollers
- Colored Pencil
- Rub n’ Buff (optional)

Base Coat
First, I painted my canvas White by Rustoleum. It is a very clean and classic white. This served as the base for my Christmas tree art and covered the existing painting nicely.
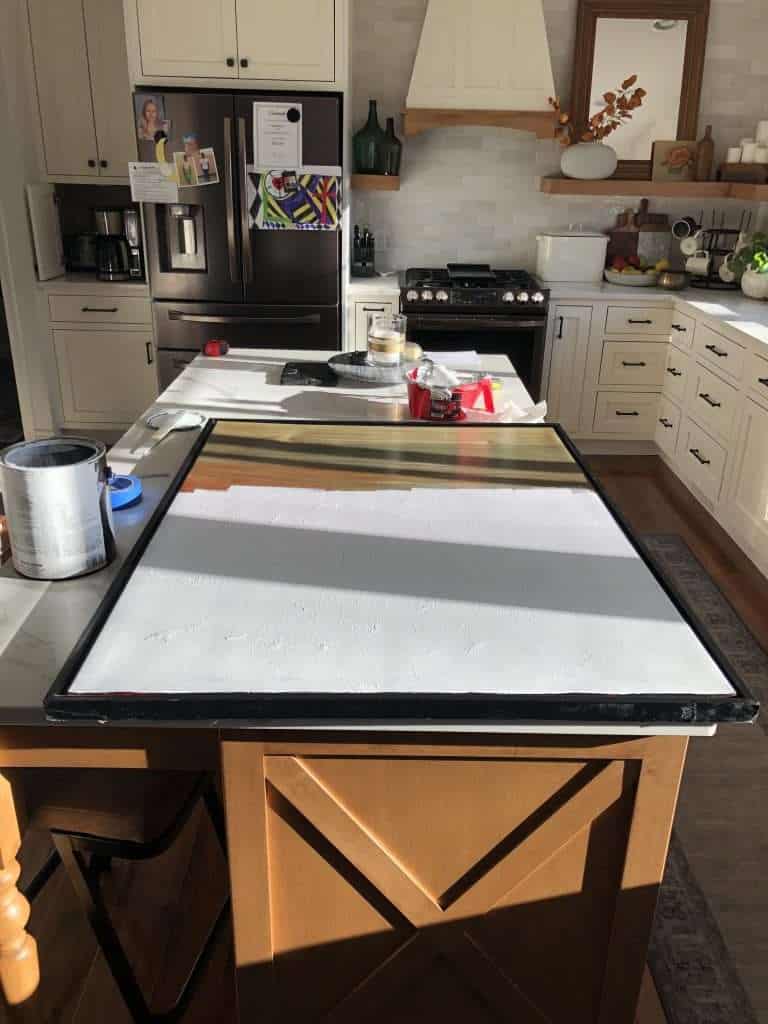
Next, I did a light coat of Shiplap Chalk Paint by Magnolia Home. This is a more grey white and gave the canvas a nice matte finish. I kept the second coat of paint light so that some of the brighter white showed through.
This gives the artwork dimension. My canvas also already had raised areas with organic texture. If you’re working from a blank, smooth canvas, then try this method to add some dimension!
Practice Those Simple Christmas Tree Drawing Skills
Next, I watched a few YouTube tutorials for how to draw a simple Christmas tree. Let me tell you, they make it look easy. Thankfully, I found one method that actually was!
If you can scribble like a pre-schooler, then you can make these trees.
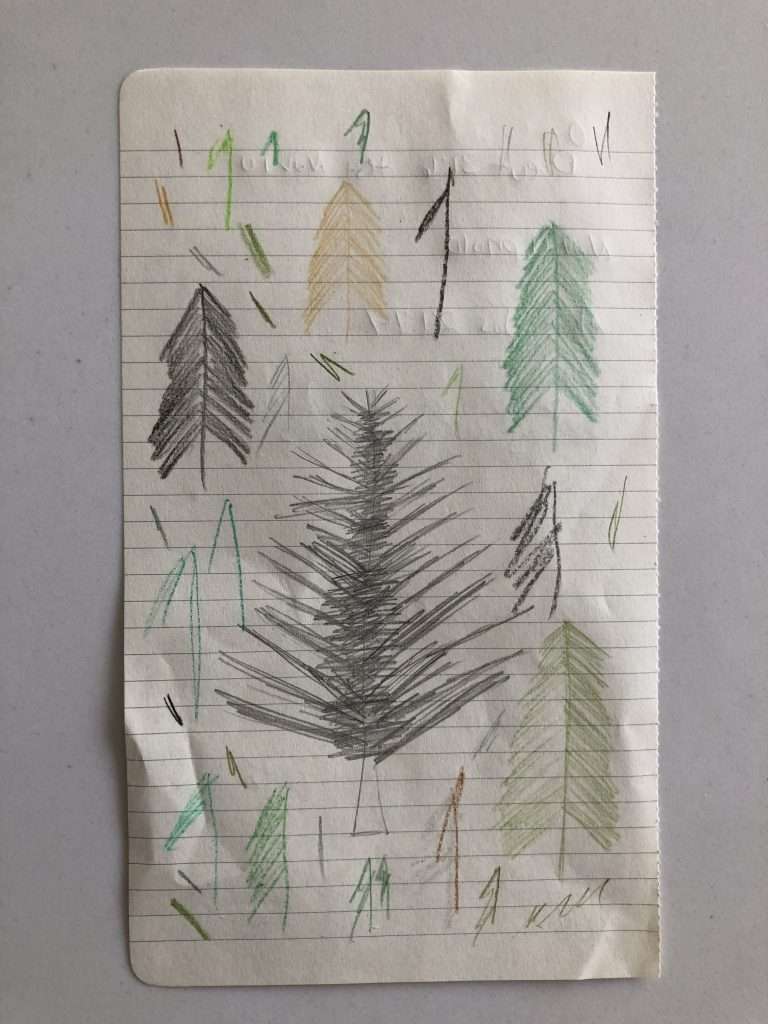
The largest tree in pencil was my first attempt and I quickly realized that branches pointing upwards were not my fortè.
So I switched to a downward pointing branch and found that to be much easier. I experimented with a few different color pencils from my kids’ art supplies and found three greens that I liked.
Add Christmas Tree Drawings to Your Canvas
The final step in this project is to transfer those simple tree drawing skills to your canvas. I used colored pencils in varying shades of green, brown and black.

I started with my largest tree first, and then added in differing sizes to create dimension and depth. I found it easiest to keep my outline simple and then fill in the middle with long strokes.
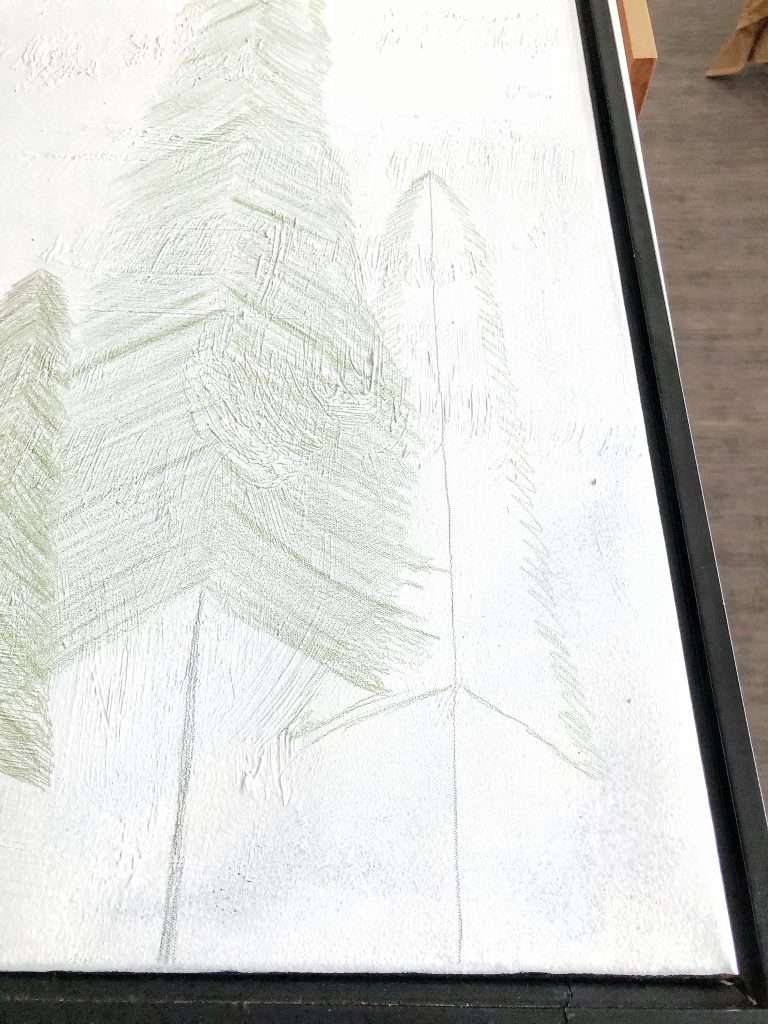
Once you’ve filled in your trees, go back through and add darker sections and shadows to help it pop off the canvas.

Watch the full video for a much clearer picture of how the process goes!

DIY Christmas Decor
And voilà! You’ve created your own Christmas decor. I photographed my new Christmas artwork and then as I was editing these pictures, I regretted not updating the black frame.

Updating a Frame With Rub n’ Buff
So I ran to the store and grabbed a tube of Rub n’ Buff in Gold Leaf. This stuff is amazing! I simply used an old lint-free rag and rubbed the gold onto the exterior of the frame.
Here is a before.

And after adding the Rub n’ Buff! This image is actually a bit more vibrant that it is in real life. The sun was streaming in quite nicely for once!
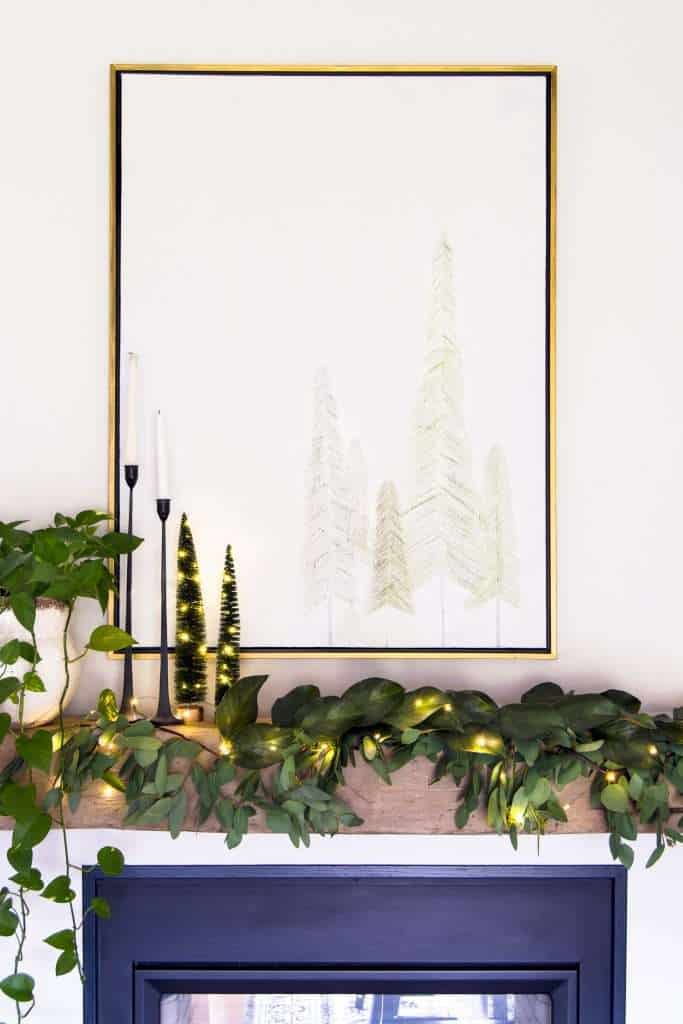
This simple update to the frame took less than 10 minutes and makes my DIY Christmas tree art so much cozier for the winter season. I love how gold tones warm up a space.
Stay Connected
Thanks so much for stopping by the blog today! This art was free for me since I already had a canvas to upcycle. But it is a very affordable way to make your own DIY Christmas tree art even if you have to purchase an affordable canvas!

Make sure to check out my Christmas archives for more decorating ideas for the season!


Lovely decorating idea! It seems easy to make for a clumsy man like me!
Cool Kitchen Utensils Review
Well, that’s just so easy and awesome. I just shopped my house yesterday and began looking online for a large print for over the buffet.
Problem solved! I have several correct sizes of new canvas and will try your technique with the plaster too.
Thanks for the ideas!
I’m so glad!
Your DIY Christmas art! It’s SO GOOD!!
Thank you so much!