
How to Update Thrifted Art in One Step
Thrifted art is so easy to come by, but often it needs some TLC! I found a huge canvas art piece at the flea market this summer that was falling apart for $3. A little DIY magic, and the piece has been transformed! Learn how to update thrift store art with one simple step for a vintage look.

Post may contain affiliate links for your convenience.
Transforming Thrifted Art in One Step
How many times have you found a piece of art that was “almost” what you were looking for? I’ve passed up so many pieces of art because they weren’t quite right. Then, this summer I stumbled upon this huge canvas art at the flea market.
It was literally falling apart at the seams. All four corners of the frame were broken, plus there was a dent in the canvas.
I passed it by and then circled back because I thought, maybe I could just reuse the canvas! I recently made my own abstract artwork for free, DIY style, and thought that perhaps I could make another one.
If nothing else, the canvas itself is massive and would be easy to remove from the broken frame and paint white to start fresh.
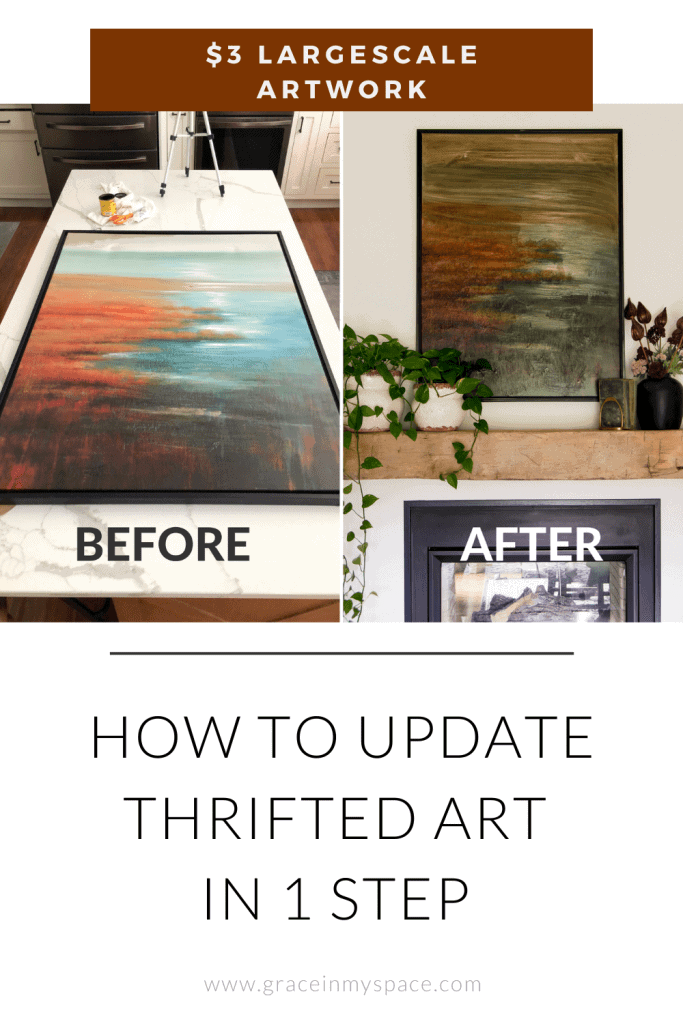
Did I mention that this huge canvas was only $3? A four foot by three foot canvas brand new easily costs upwards of $40 or more.
So, I set about my flea market flip with inspiration by Jenni Yolo from I Spy DIY. I had recently seen her take a vintage painting and use Old English to age it more.
Thus began my experiment!
Flea Market Flip Idea
While my painting wasn’t vintage to begin with, I wanted it to end up looking that way for the final result! I decided to try aging my modern oil painting using stain that I had on hand. One step later, and it was done!
Materials for DIY Thrifted Art Makeover
- Old rag
- Gloves
- Dark Stain: I used Jacobean Wood Stain
- Surface protection
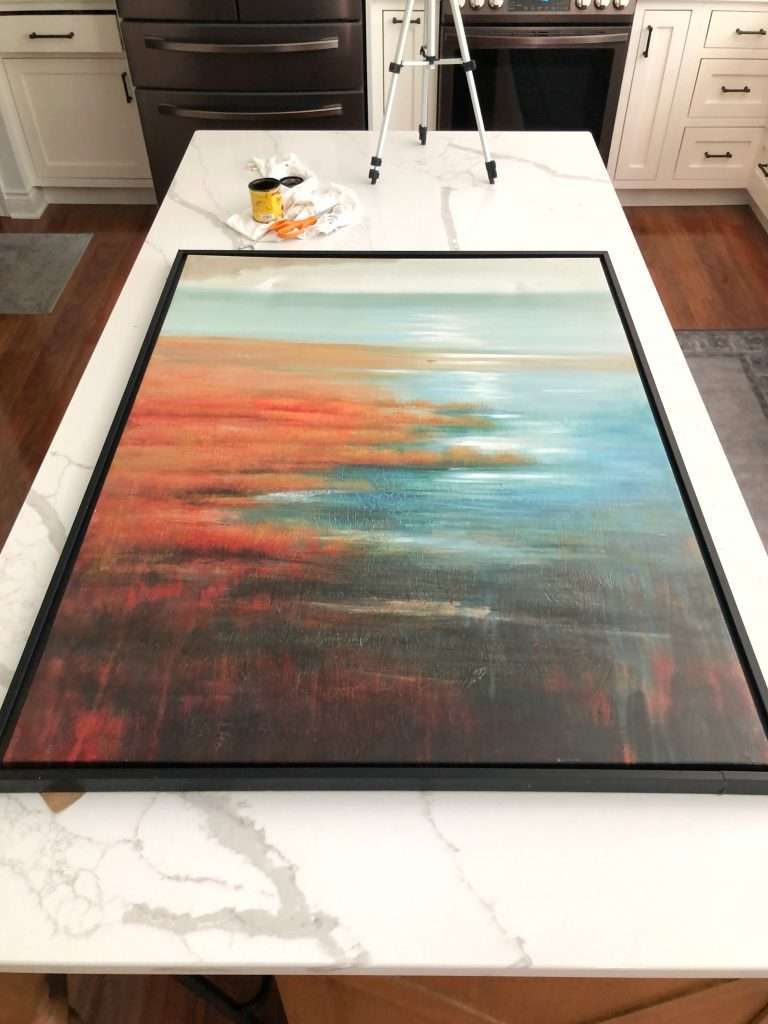
First, prepare your work surface. You’ll want to make sure it is protected against dripping stain.
Then, using gloves, dip your rag into the stain and start swiping it onto the canvas.
Apply the stain to all the areas you want to darken for that vintage painting look!

You can see at the top where I’ve begun to apply the stain.
Wherever you apply the stain, it will darken the existing colors and also add a brown aesthetic.

When I began, I was planning to leave certain colors as is. The dark browns and reds at the bottom seemed like they shouldn’t be darkened any further. However, once I got into it I decided to apply one coat to the entire painting to unify the canvas.
Then, I went back and applied a second and third coat to only specific areas that I wanted to darken more.
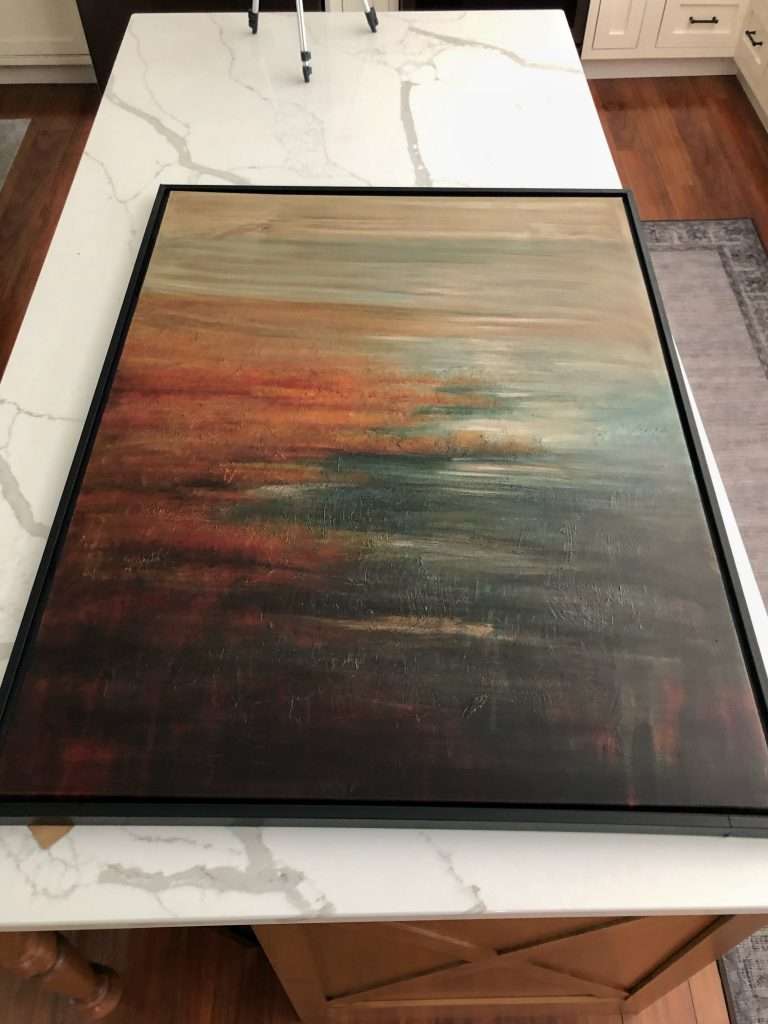
It worked perfectly!
Aging Thrifted Art for a Vintage Vibe
All of the hues that were too bright for me in the beginning were toned down by the stain.
Plus applying the stain to the entire surface gave it that vintage vibe I was looking for.
You can still see the undertones of the original colors, but they are much moodier and textured with the addition of the stain.
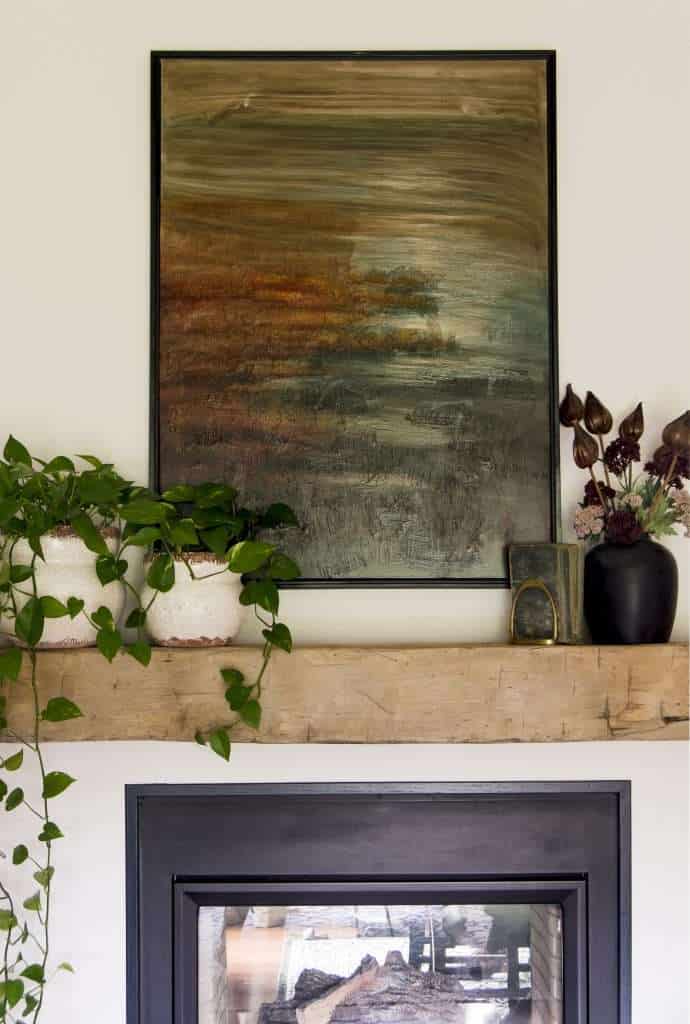
I love how the stain brought out all the ridges and texture from the brush strokes to make it feel more original rather than mass produced as well.
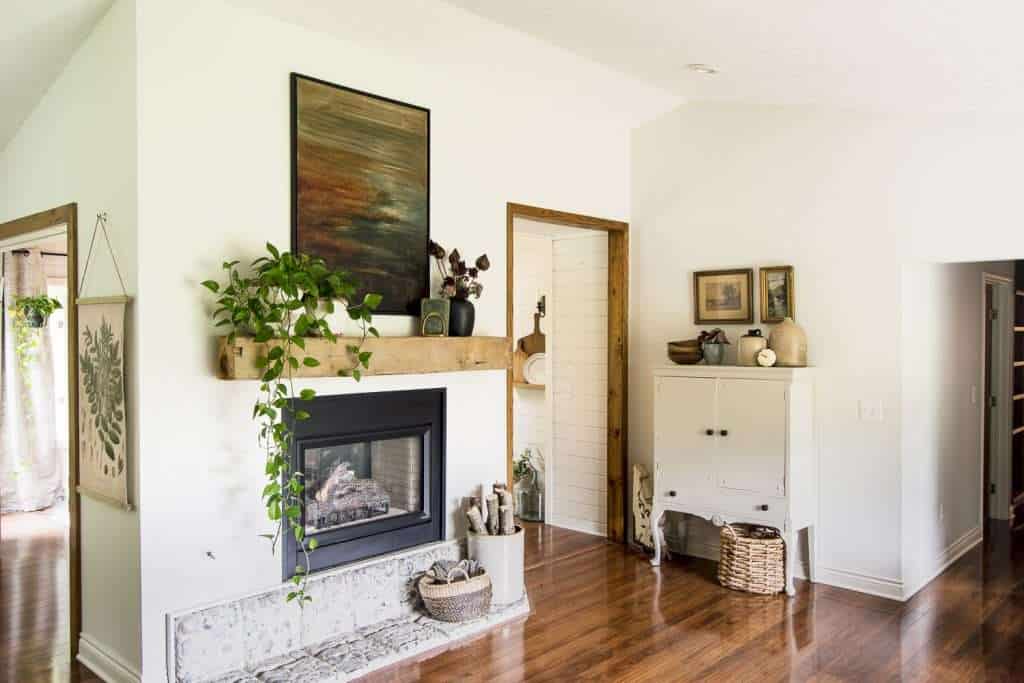
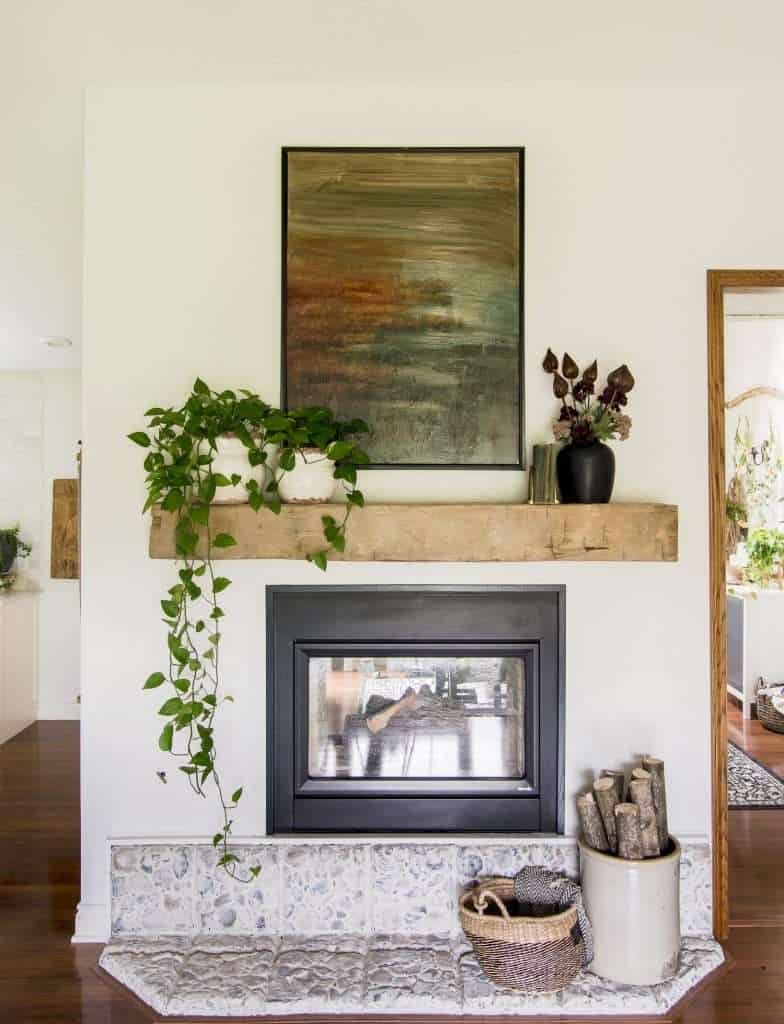
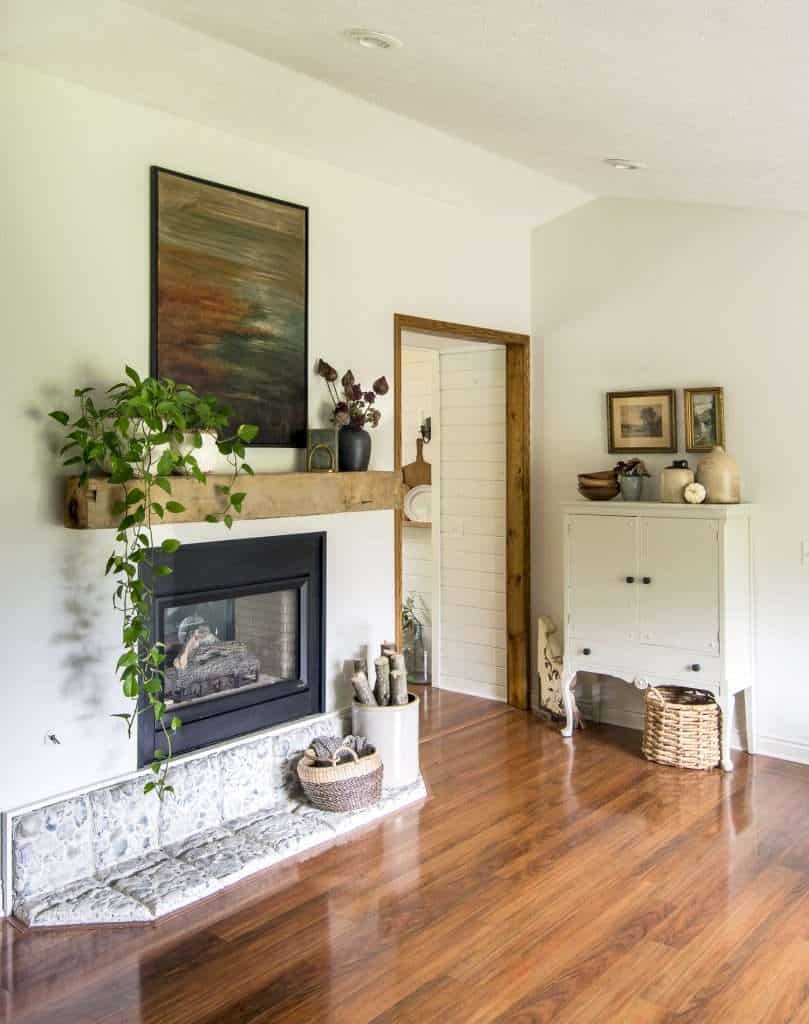
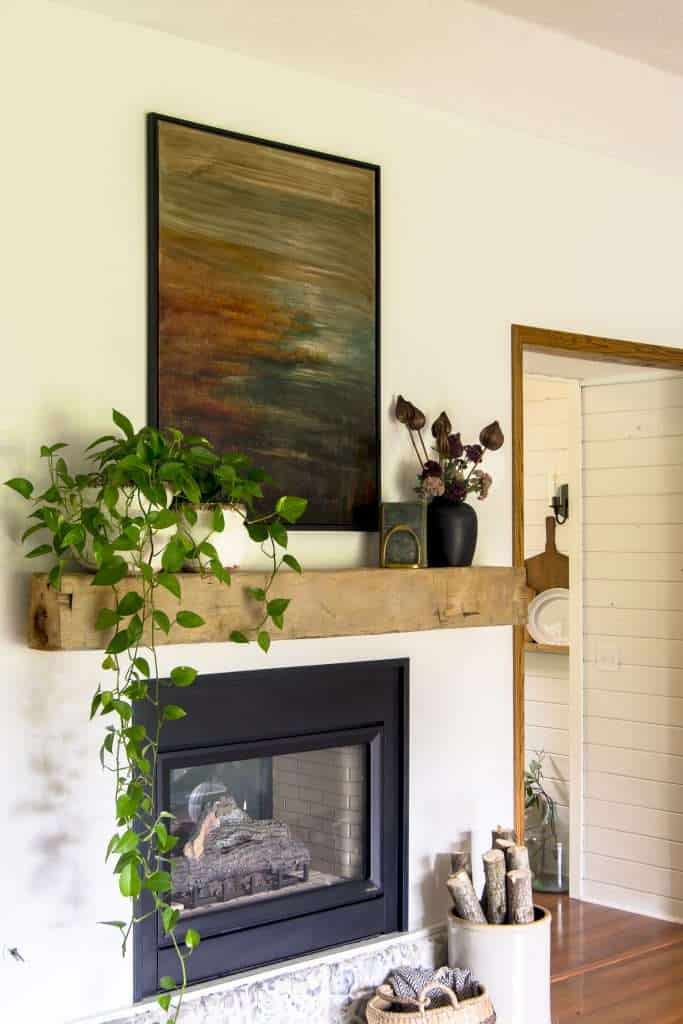
The moody colors are a perfect complement to my fall decor this year. I’ve gone very simple on my fall decor but adding this statement artwork above my fireplace went a long way to pull fall colors throughout the room.
More Fall Decor Inspiration
Make sure to browse the blog for more fall decor inspiration, as well!
- Cozy Fall Bedroom Decor
- Neutral Fall Decorating in the Kitchen
- Cozy Home Elements for Any Season
- Simple Fall Entryway Decor
- Fall Front Porch in 10 Minutes
- Fall Living Room Designed Around Vintage Artwork
Stay Connected
What do you think of how it turned out? A before and after is definitely warranted for this DIY!
I hope this one step project inspires you to look at thrifted art differently the next time you’re on the hunt! It really is amazing what one simple change can do.


Good job and a great idea! That was a nice result and I’m glad to learn that this can be done. But, I must say that I don’t think that this would work on just any old art, so people need to be careful what they try to upgrade. Good job and a great idea!
Good thing to note!
And to think that I just passed up a vintage picture at an estate sale, due to the fact that the sky was too bright blue! Great job, Sarah! I always enjoy perusing your blog, and even sneaking a few of your ideas.
God Bless,
Shonda
Thank you so much!