
The Easiest DIY Plate Rack Tutorial for a High End Look
Adding a homemade plate stand to your kitchen or dining room is an easy way to infuse charm and character into your home. Learn how to build a plate rack that is beginner friendly yet high-end. This DIY plate rack tutorial is simple and quick, yet results in a substantial elevated look.
Post may contain affiliate links for your convenience.
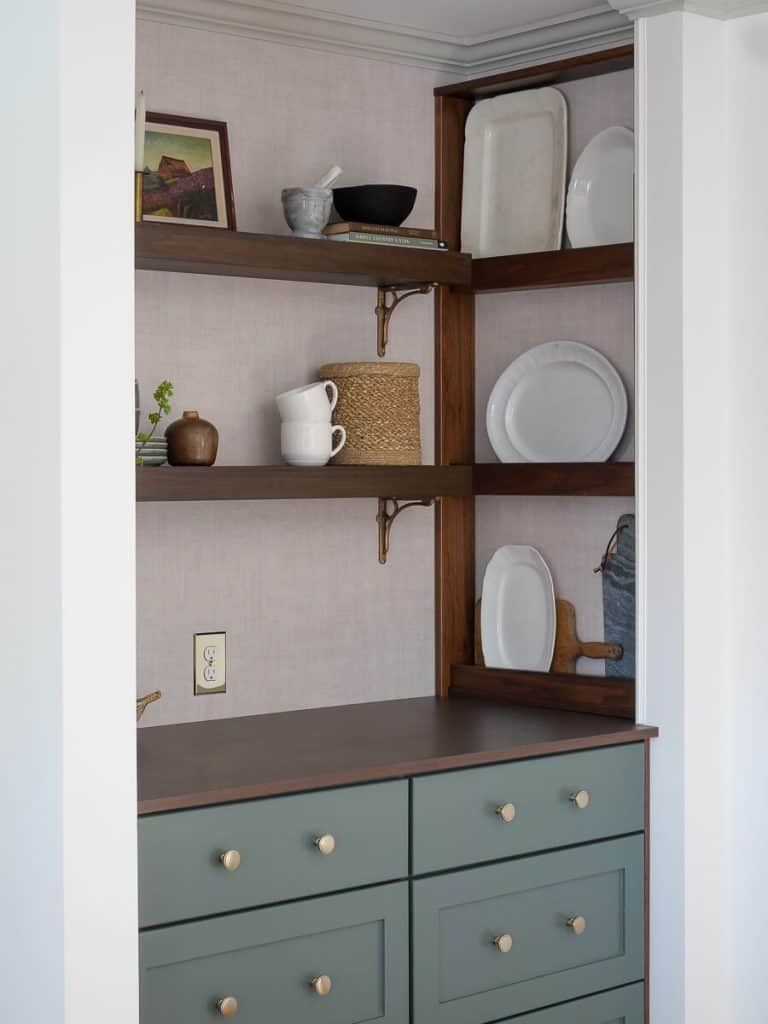
I love the look of a plate rack wall.
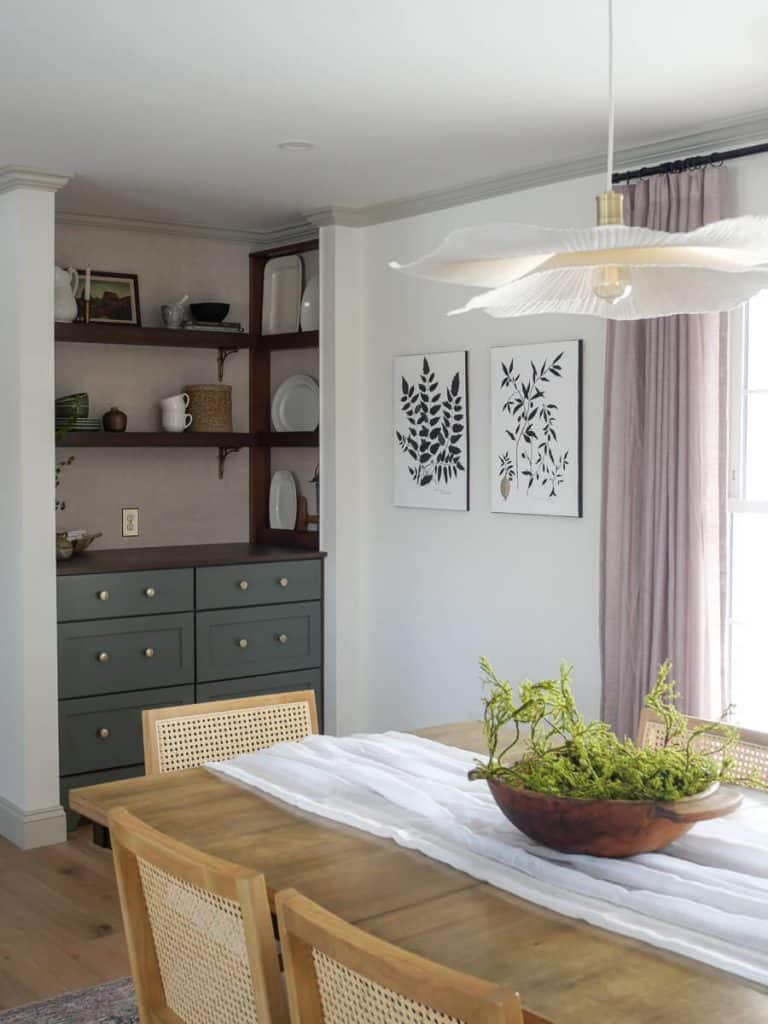
However, it was difficult to find a modern version that didn’t feel overly country or shabby chic. So I decided to make my own version as part of a broader project to update my dining room to a modern cottage design style.
The Best Wood for a Plate Rack
For this DIY plate holder, I’m using walnut. I love the grain pattern and natural wood tone.
I designed my kitchen with walnut cabinetry and since the dining room is off of our kitchen, I wanted to carry that wood tone into the space. This helps create a cohesive open-concept home.
If you would prefer a more affordable wood, poplar also stains to a dark chocolate with my favorite stain combination, shared below.
If you are painting your DIY plate rack, then primed pine would be a good option.
Materials Needed to Make a DIY Plate Rack
Since you are building your own plate rack, you will need to measure and purchase the correct amount of wood to fit your space.
- Shelves: 1×2 walnut boards (or alternative wood)
- Shelves: 1×3 walnut boards (or alternative wood)
- Side Supports & Top: 1×5 walnut boards (or alternative wood)
- Measuring tape
- Pencil (you’ll want this retractable one!)
- Level
- Square
- Kreg jig
- Pocket hole screws
- Drill
- Driver
- Wood glue
- Clamps (lots of clamps)
- Brad nailer
- Miter, circular saw or hand saw
- Sand paper
- Stain of choice or paint
- Polyurethane (see my recommendation below)
How to Build a Plate Rack
Measure & Spacing
Begin by measuring your wall space for your DIY plate display rack.
Decide how tall you want the plate rack wall to be first. This measurement will be your two side 1×5 boards.
Next, determine how many shelves you want and/or will fit in the space. When calculating this measurement, make sure you consider what you will be placing on the shelves.
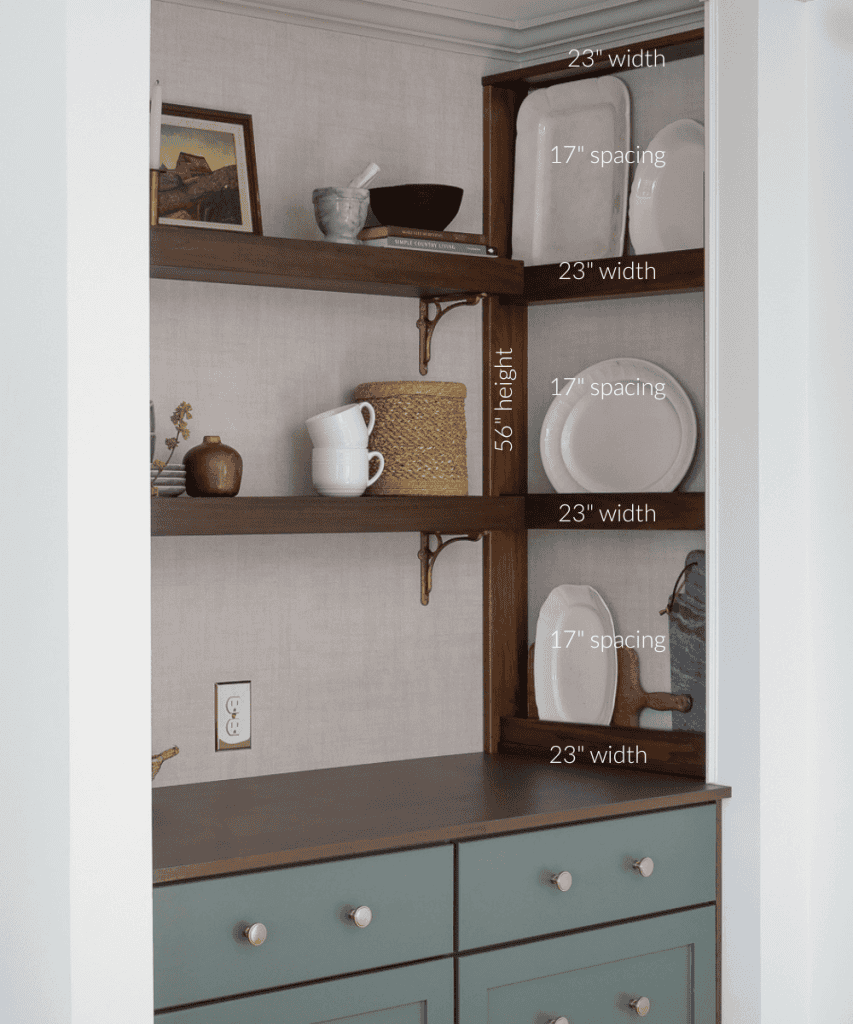
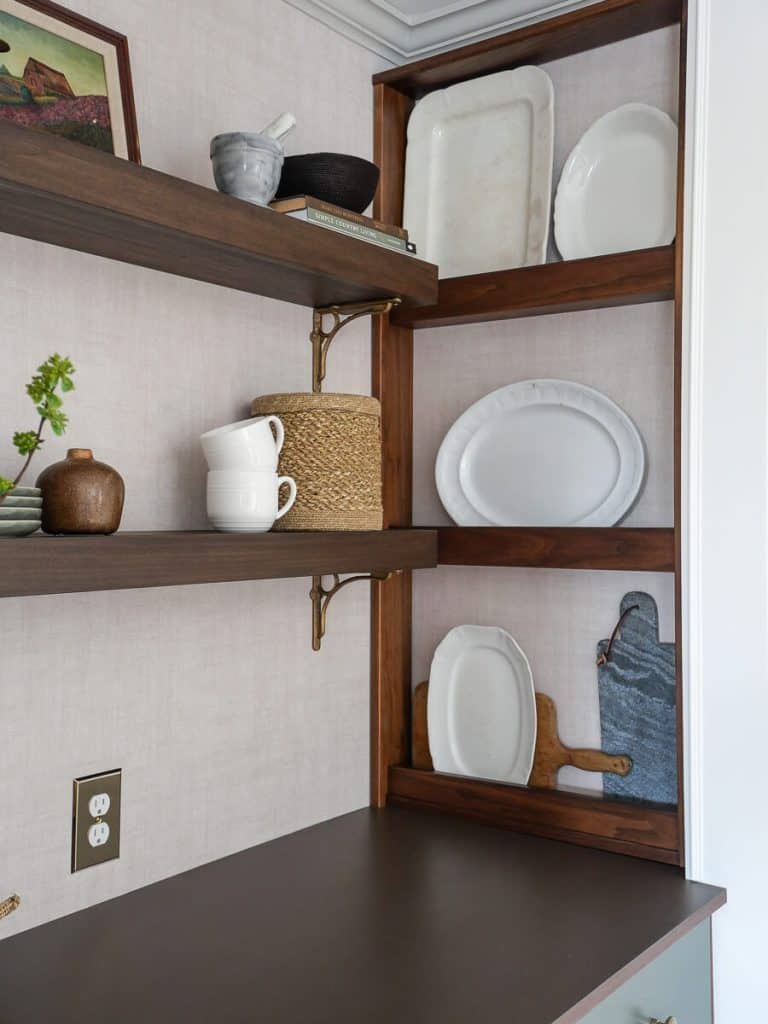
I have large platters so wanted to make sure I had enough space to fit them, whether I wanted to display them horizontally or vertically.
I have 17″ between each shelf.
Once you’ve determined how many shelves you can fit, calculate your cut list to purchase the wood.
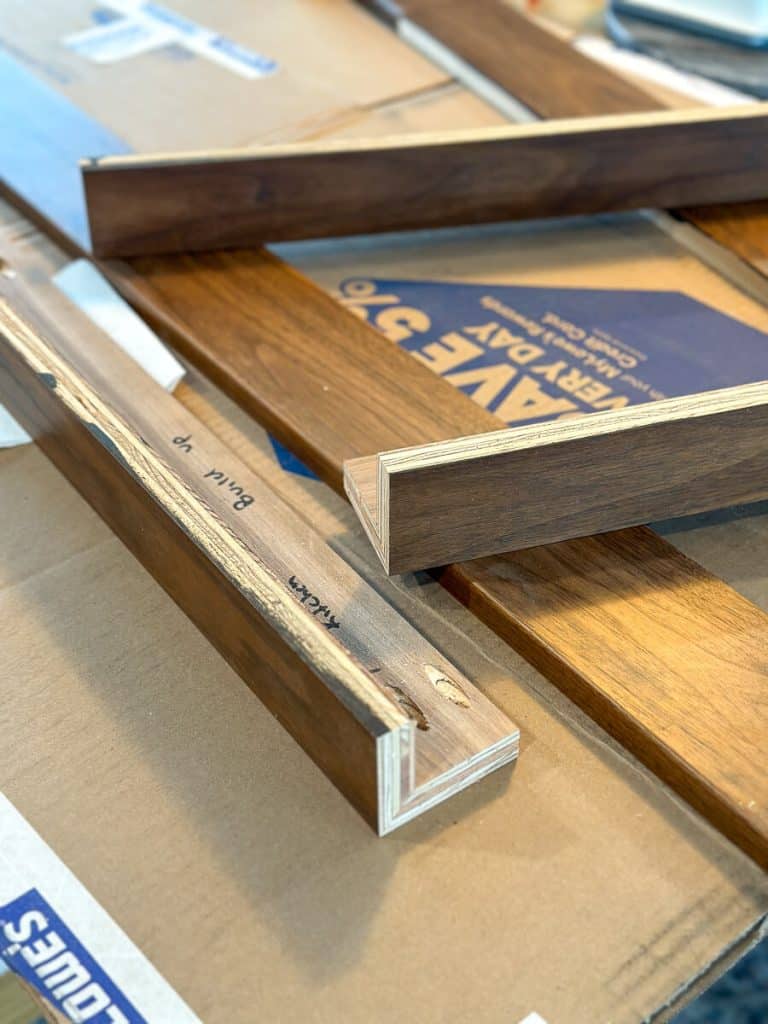
Cut Boards According to Measurements
Next, cut your boards to size.
Use the 1x5s as the side supports for the height of your shelves. You will also use the 1x5s as the top board.
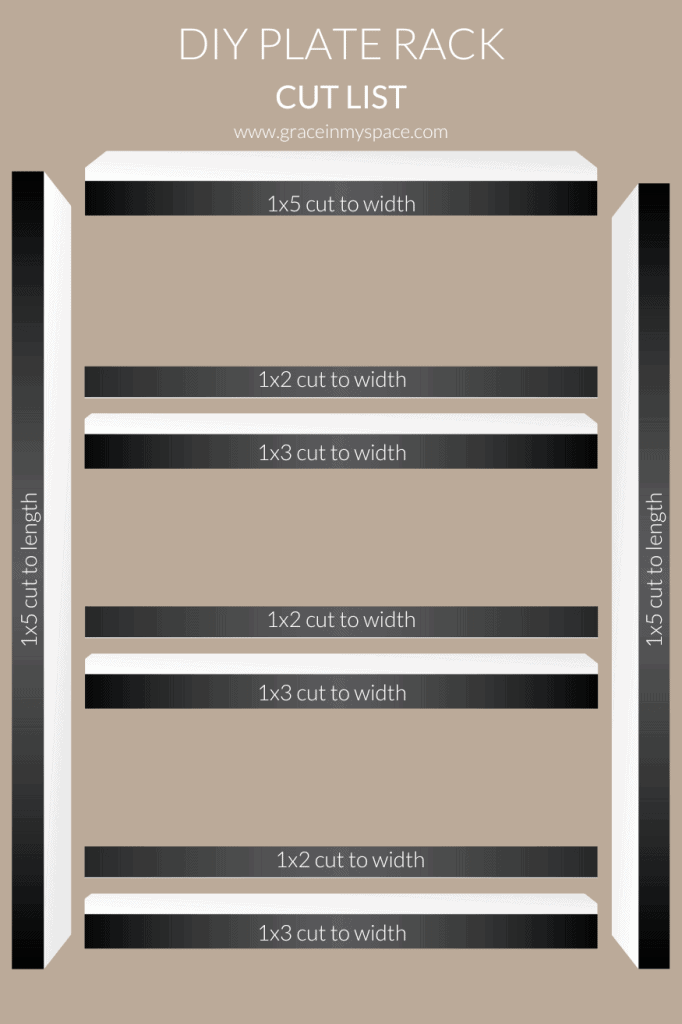
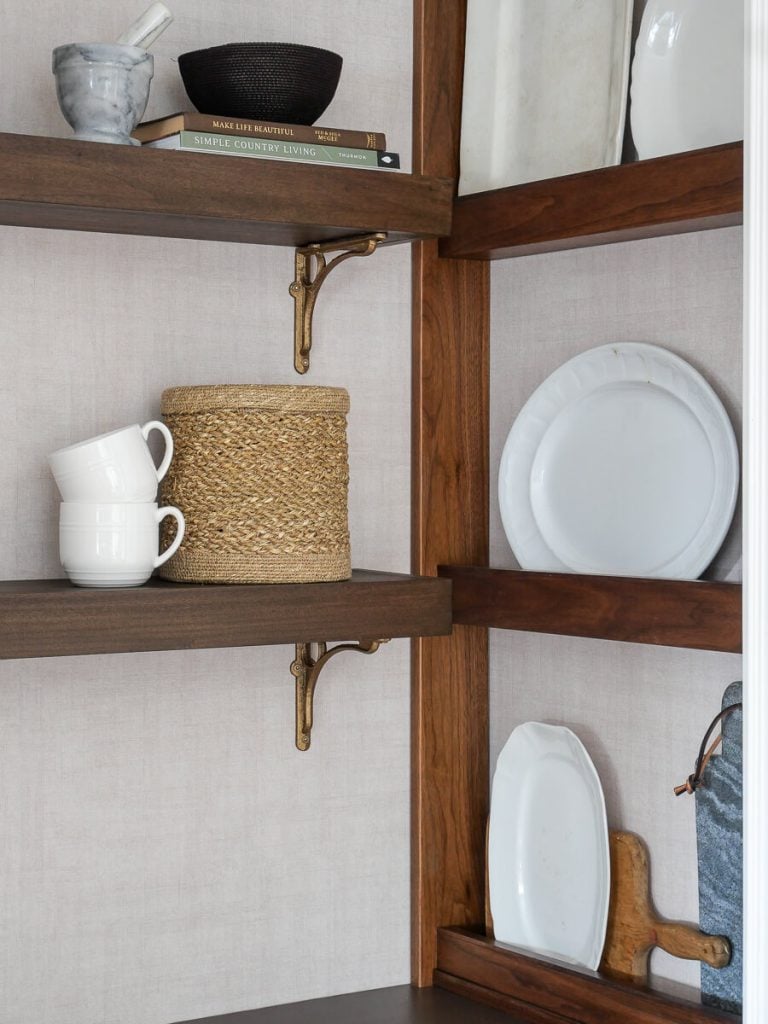
Your shelves will be made up of the 1×3 as the bottom of your shelf that supports the plates. The 1×2 is used as the face, or lip, that holds the plates in place so they don’t slide out.
Many plate racks use very shallow base shelves and add a thin strip mid-way up to keep plates from toppling over.
I chose to use a deeper base shelf and a lip so the plates are leaning against the wall more for support. This gives it a more modern and substantial “floating shelf” look.
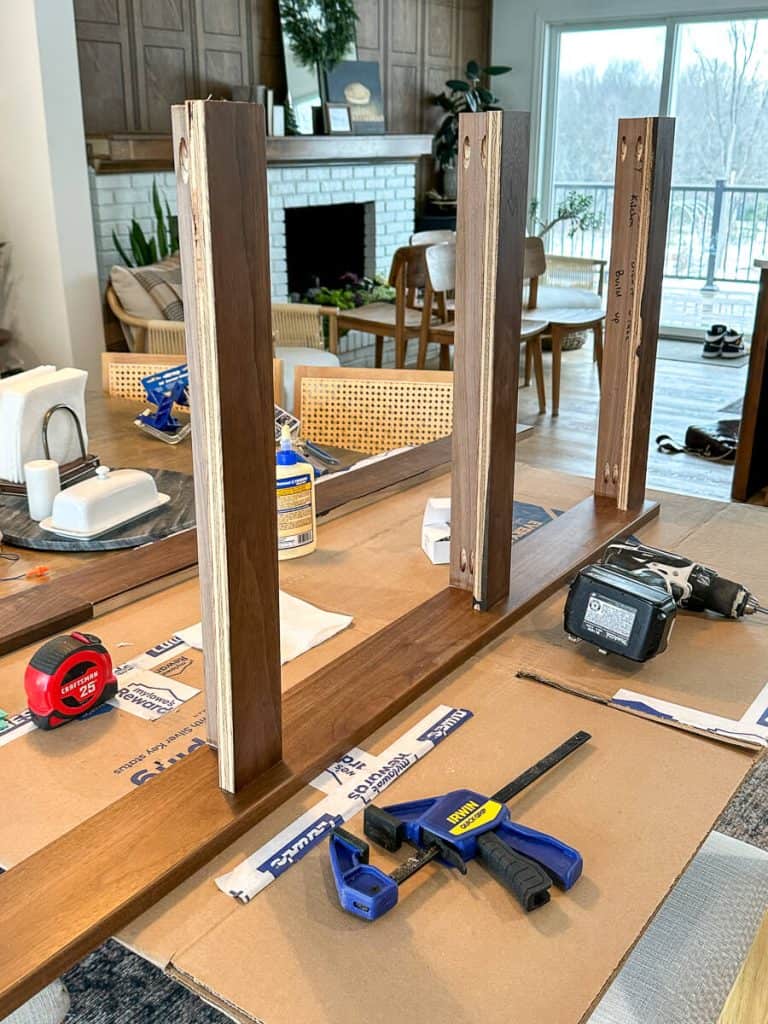
Begin by assembling your shelves.
Cut each 1×2 and 1×3 to the desired width, ensuring they are all identically sized.
Assemble your DIY Plate Rack
Next, you can either miter the long edge of each 1×2 and 1×3, like I have, and glue/clamp them together.

Or, you can simply attach the face to the bottom with a butt joint. Use wood glue and brad nail the face to the bottom. This option is more beginner friendly. However, it will add depth to your shelves.
Ensure you’ve wiped away all wood glue that seeps out from clamping while it’s still wet.
Once the glue on your shelves is dry, add pocket holes to the 1×3 bottom board on the inside of the support.
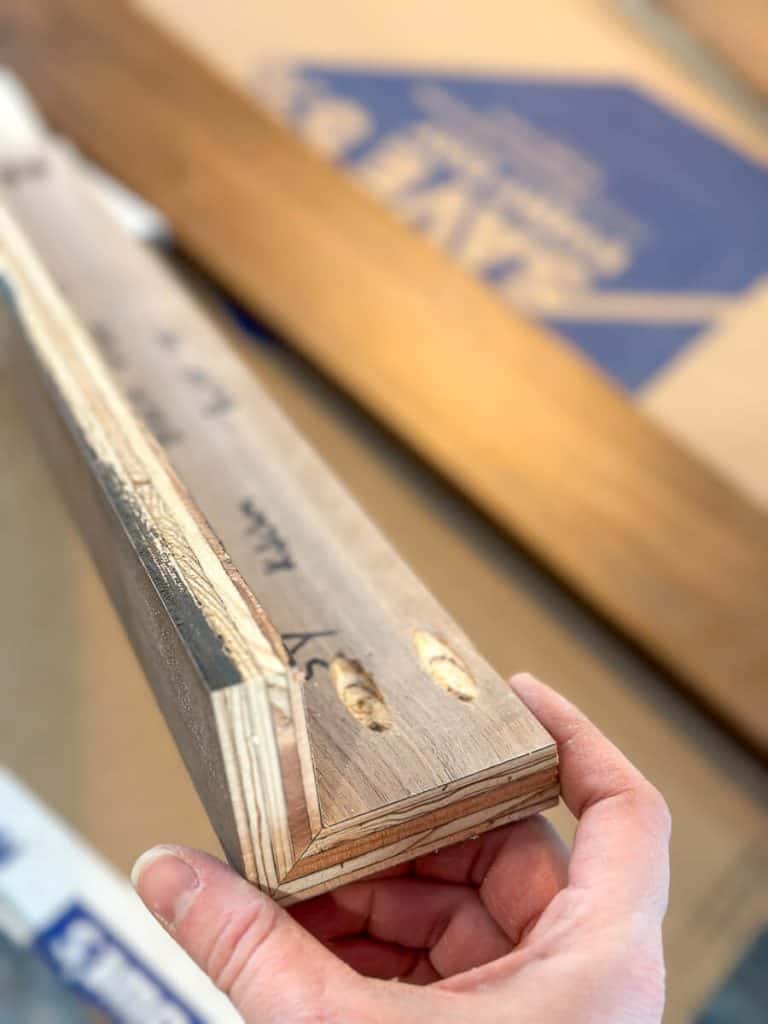
This will allow you to completely hide your screw holes.
Finally, attach all shelves, spaced evenly, to both side supports using a square to ensure everything stays level. Apply your wood glue first, then secure with 1″ pocket screws.
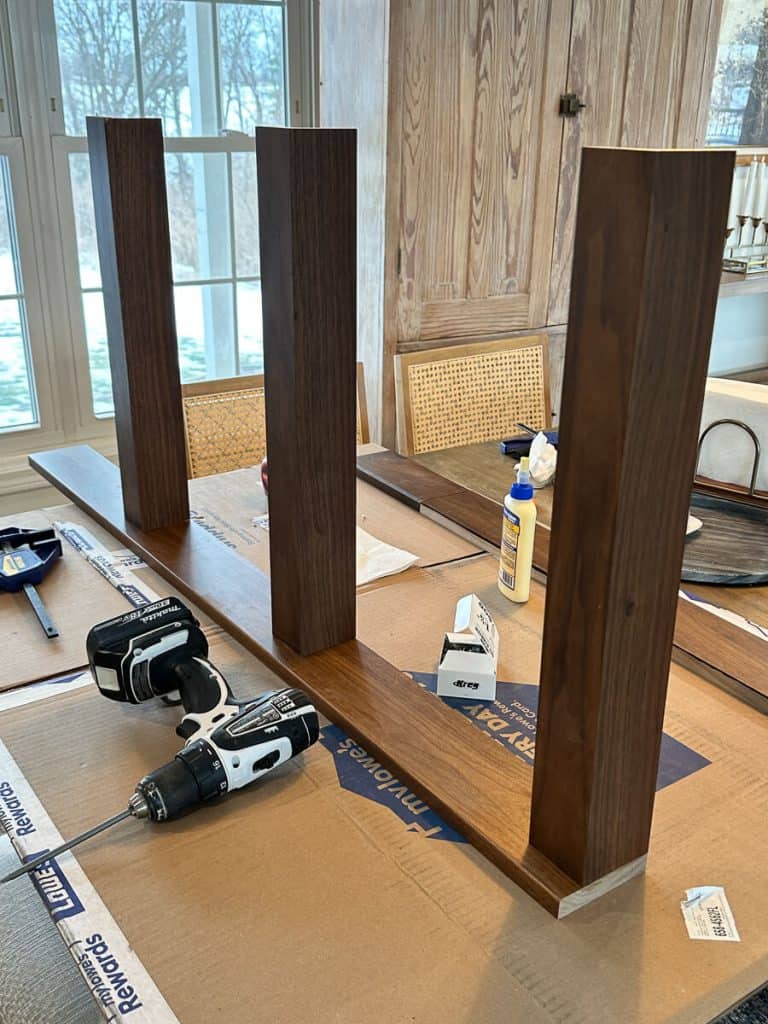
Finish by adding the top 1×5 board secured with glue and pocket screws.
Stain, Finish and Seal
I was working with pre-finished walnut. It is natural walnut with a clear coat glaze.
However, you will likely need to stain, finish and seal your piece.
Once your plate rack is assembled, sand everything down using 80 grit, then 150 grit, then 220 grit to prepare it for staining.
(If you prefer, you can sand prior to cutting and assembling for ease of using an electric sander. However, you will still want to go over everything with 150/220 grit once assembled to knock off any rough edges from cutting and assembling.)
Remove any sawdust or residue with a tac cloth and apply a wood conditioner if staining.
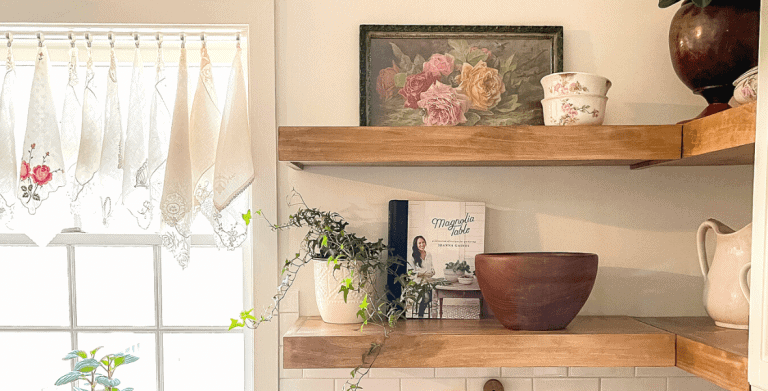
I made these floating shelves from poplar wood. If you choose to use poplar wood for your plate rack, this is the combination of stain I used to match my walnut. You can see it’s not identical, but it is close.
- One layer of Varathane Espresso
- One layer of Dark Walnut Gel Stain
Finish with 2-3 coats of polyurethane. A satin finish will give a nice high end sheen. Or a matte poly will give a more subtle look.
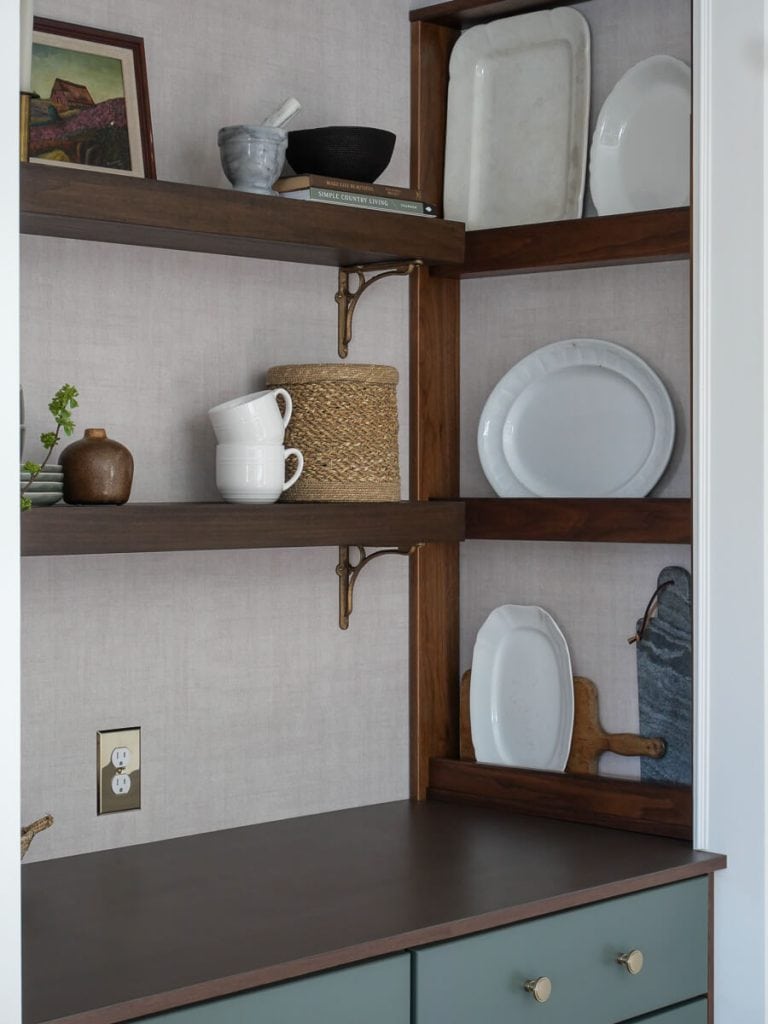
Secure your plate rack to the studs.
Styling Your DIY Plate Rack
Obviously, plates are a no brainer for styling your new plate rack.
However, you can use many thin or shallow pieces to jazz it up!
- Platters
- Cutting boards
- Artwork
- Mini bud vases
- Cheeseboards
- Battery operated candlesticks
- Family photos

SHOP THE LOOK

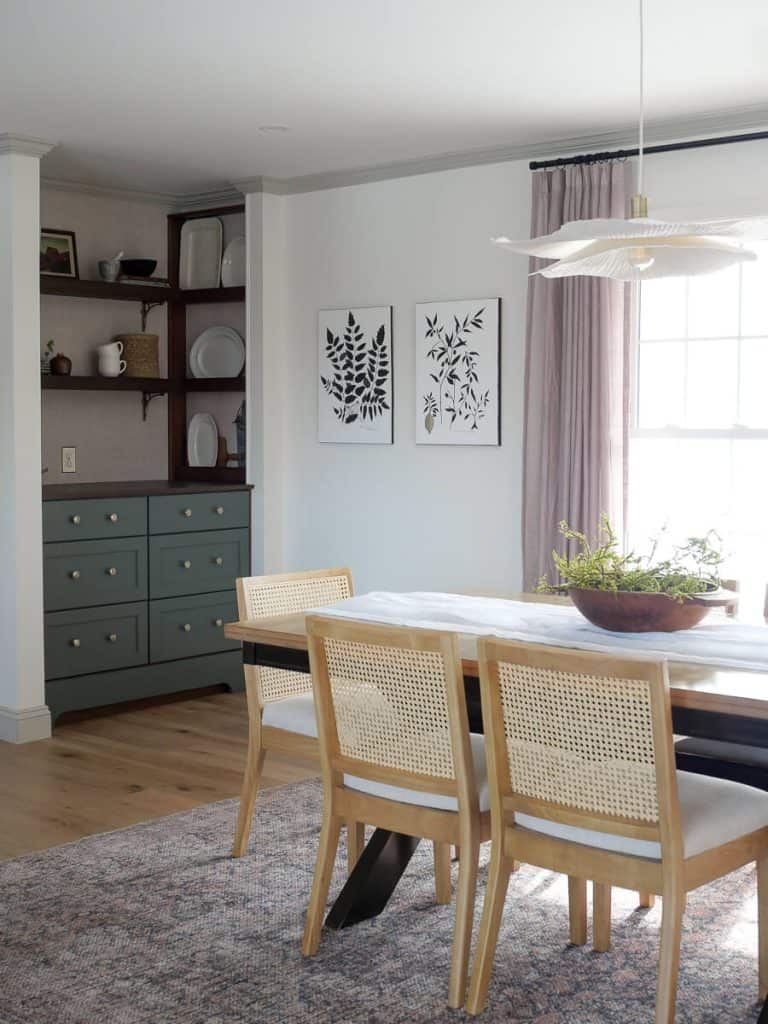
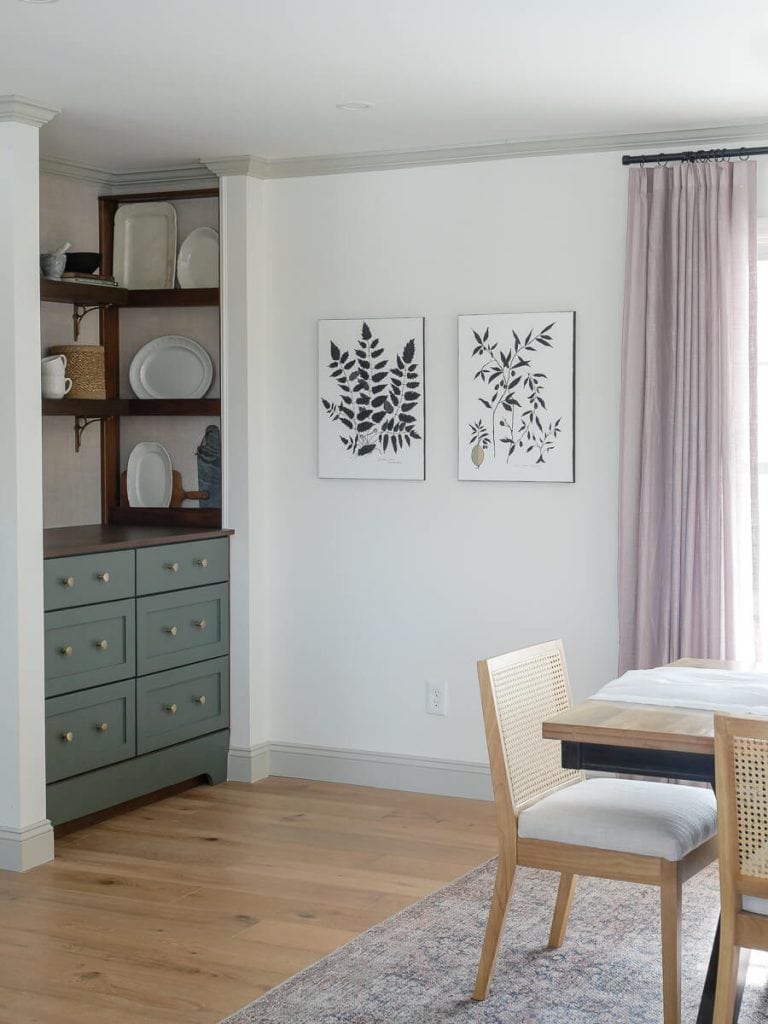
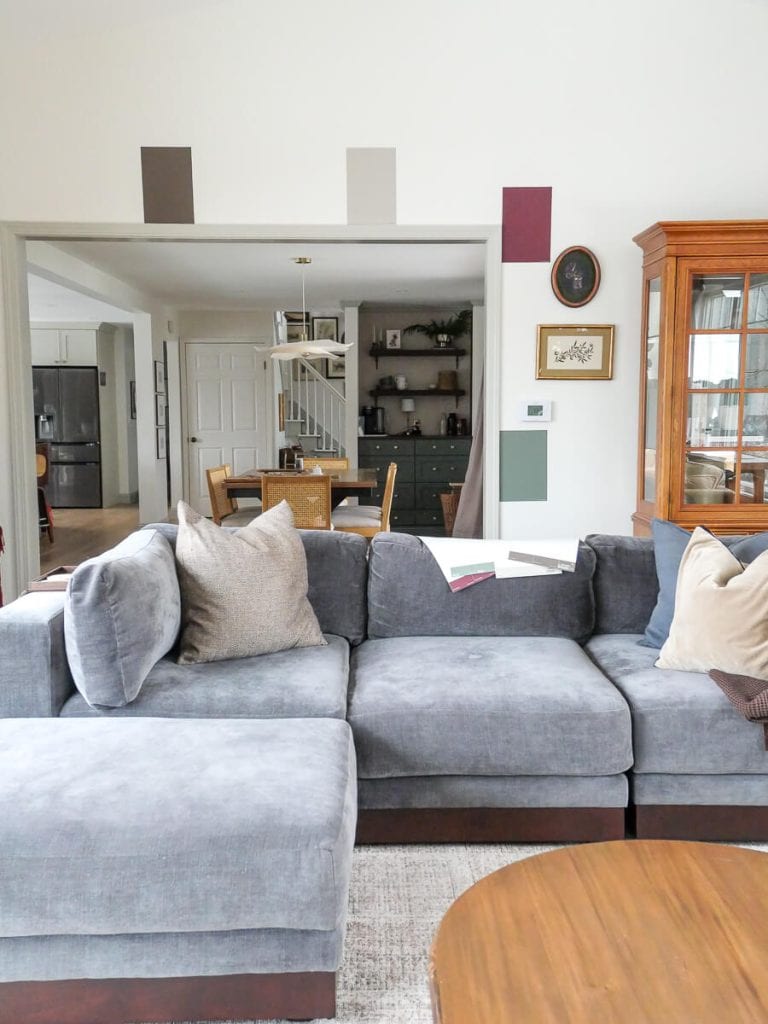
Modern Cottage Dining Room
I absolutely loved creating this custom coffee station with built in DIY plate rack.
SHOP THE LOOK
It was the first step in transforming my home to a modern cottage style.
If you’re interested in seeing the full transformation, see how I built this custom coffee bar and transformed the entire room.

You can see all my DIY building tutorials via the links below as well!
Thanks so much for stopping by Grace In My Space today! Make sure to subscribe to access all my free guides. Plus, you can follow along with me daily on Instagram and weekly on YouTube!
~Sarah
Good information!