
How to Display Antique Photos in a DIY Gallery Wall
Do you wonder what to do with old photos? My mom came to me with an idea in her mind and hundreds of antique photographs and we put together a plan to display them. Here is a creative and affordable way for how to display antique photos (or any photo) with a DIY vintage photo wall!

This post may contain affiliate links for your convenience.
How to Display Antique Photos
My mom loves antique photographs. She has figured out what to do with old photos with many creative ways to display them throughout her home. She has shared ways to display photos without frames by stacking them as a collection, creating a vintage photo wall collage, and now, in a gallery!
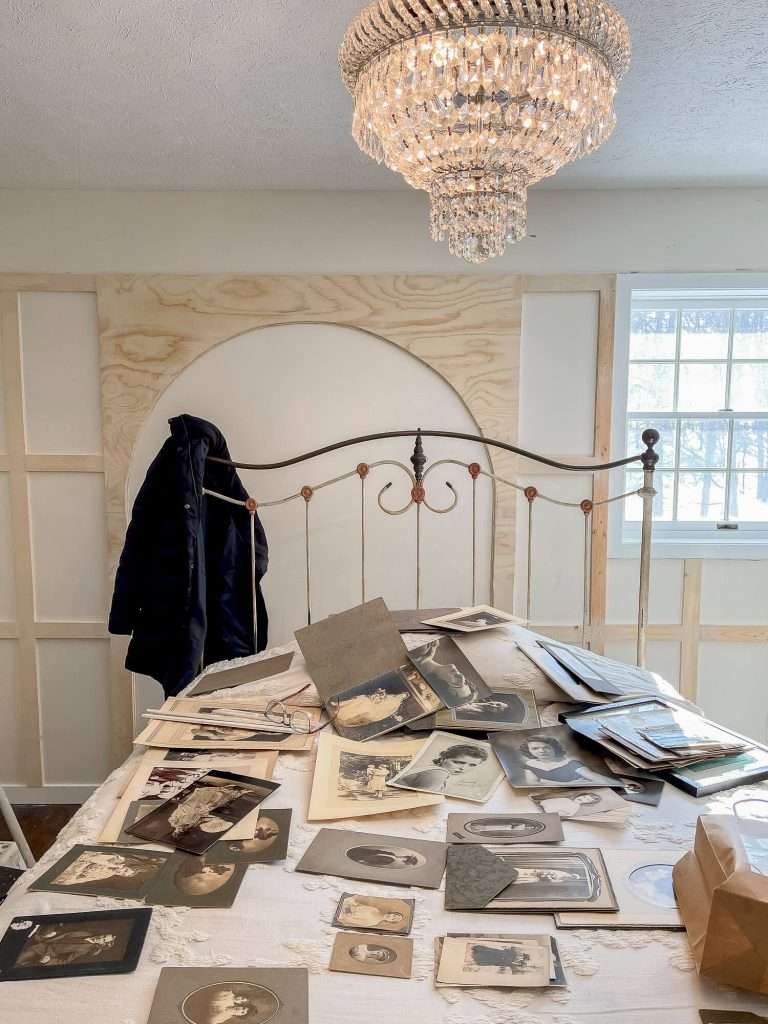
One of the biggest challenges to displaying old photos is that they are all oddball sizes. Standardized photo sizes (4×6, 5×7, 8×10) didn’t become the norm until modern day. So, all of the hundreds of antique photos in my mom’s collection are individually sized.
That meant that she would have to buy custom frames for all of them!
Over 70 photos with custom framing would have cost $1,500- $2,000. Instead, we made our own for $120 worth of wood and a ton of work. But it was worth it!
Let’s build some frames.
How to Build DIY Picture Frames
This beginner friendly DIY project is simple, yet tedious. We decided to save even more money by adhering the frames directly to the drywall. This eliminated the need for picture frame backs and glass.
If we were to build out full frames with glass and backing, it would have become much more expensive and complicated.
So while this method might not work for everyone’s situation, it worked for us!
Materials Needed
For this project, you will need:
- Trim moulding. The amount will depend on how many photos you want to frame. Choose your favorite design! We used this moulding.
- Brad nail gun with 1″ nails
- Paint or stain of choice
- Caulk (make sure it is paintable if you will be painting)
- Safety glasses. These are my favorite for women!
- Miter saw (or any saw if not doing mitered corners)
- Small level
- Wood putty
- Sand paper
Basic steps to build over 70 custom frames!
Here are the basic steps we took to build over 70 custom frames!
- Purchase small trim moulding for your frames.
- Pre-paint your trim.
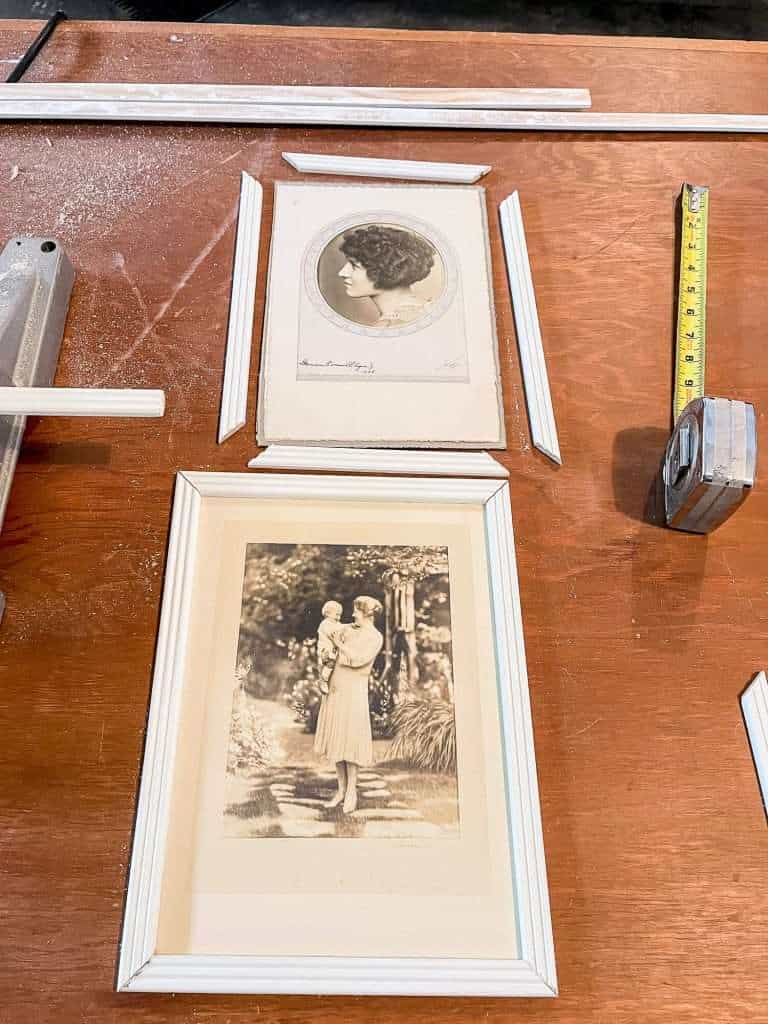
- Measure each individual photo on the sides, top and bottom. You will be placing your trim directly on top of the edges of the photos so that the outside edge of the trim is lined up with the outside edge of the photo.
- Cut your moulding with mitered corners to each measurement.
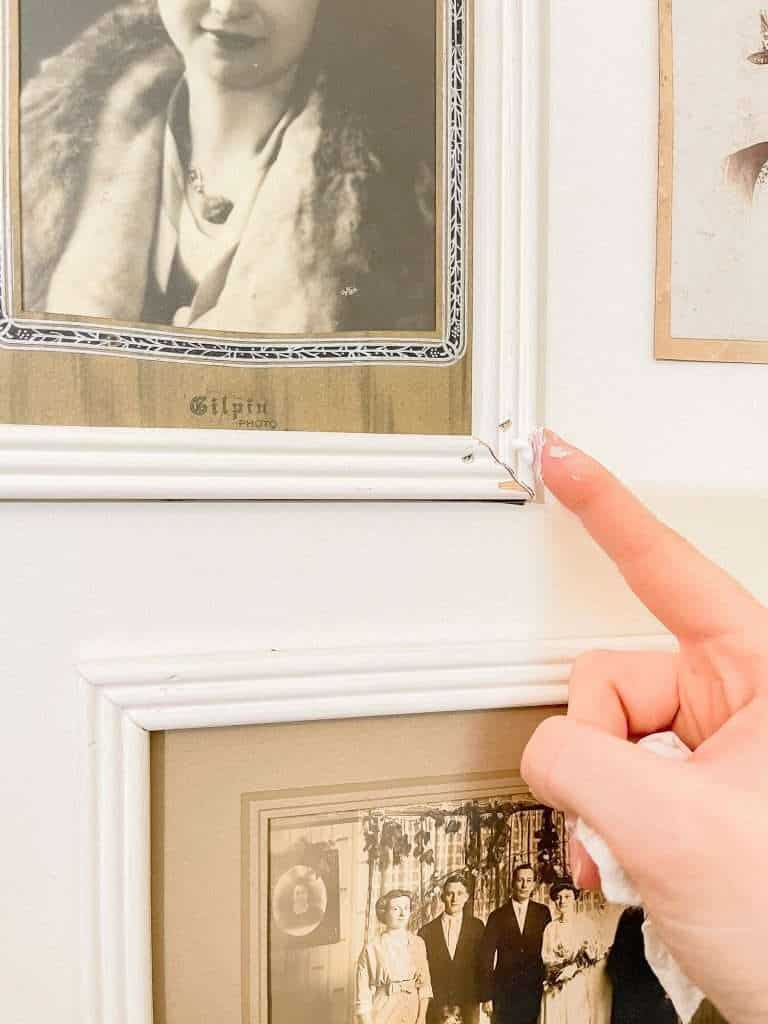
- Level your photo and first trim piece on the wall.
- Nail the trim directly into the wall (through the top of the photo). This will hold the photo to the wall.
- Level and nail the rest of the three trim pieces until you’ve built your frame around the photo.
- Caulk the seams and corners.
- Fill the nail holes with wood putty and sand.
- Touch up any paint as needed.
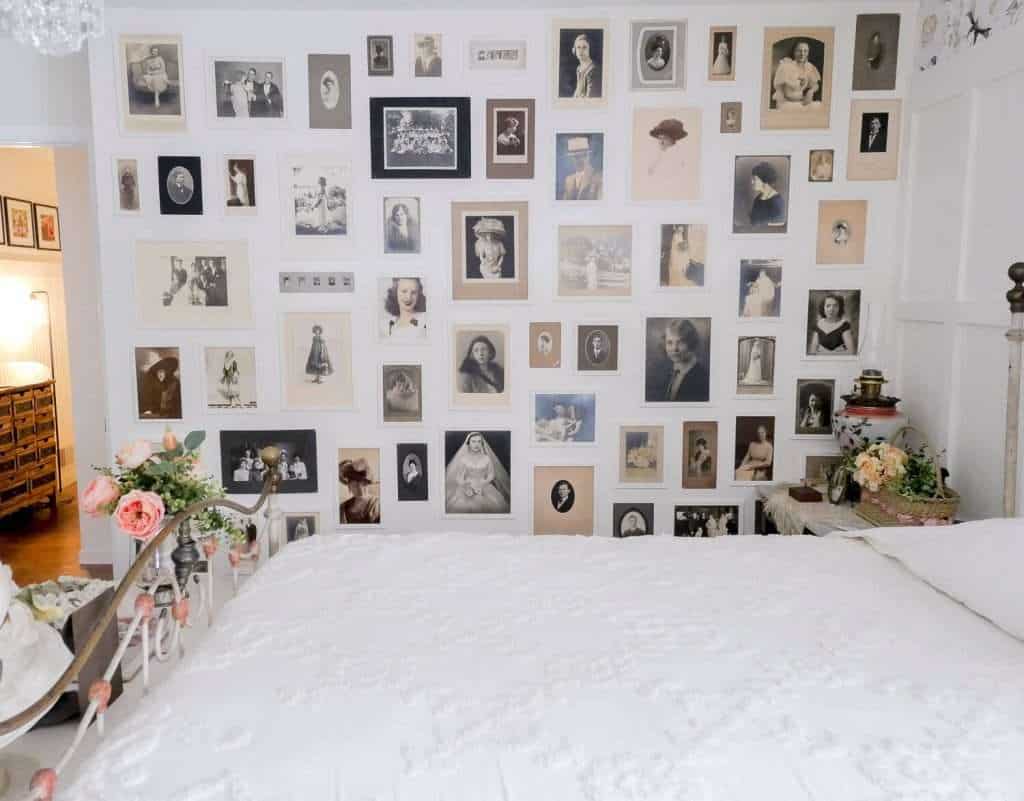
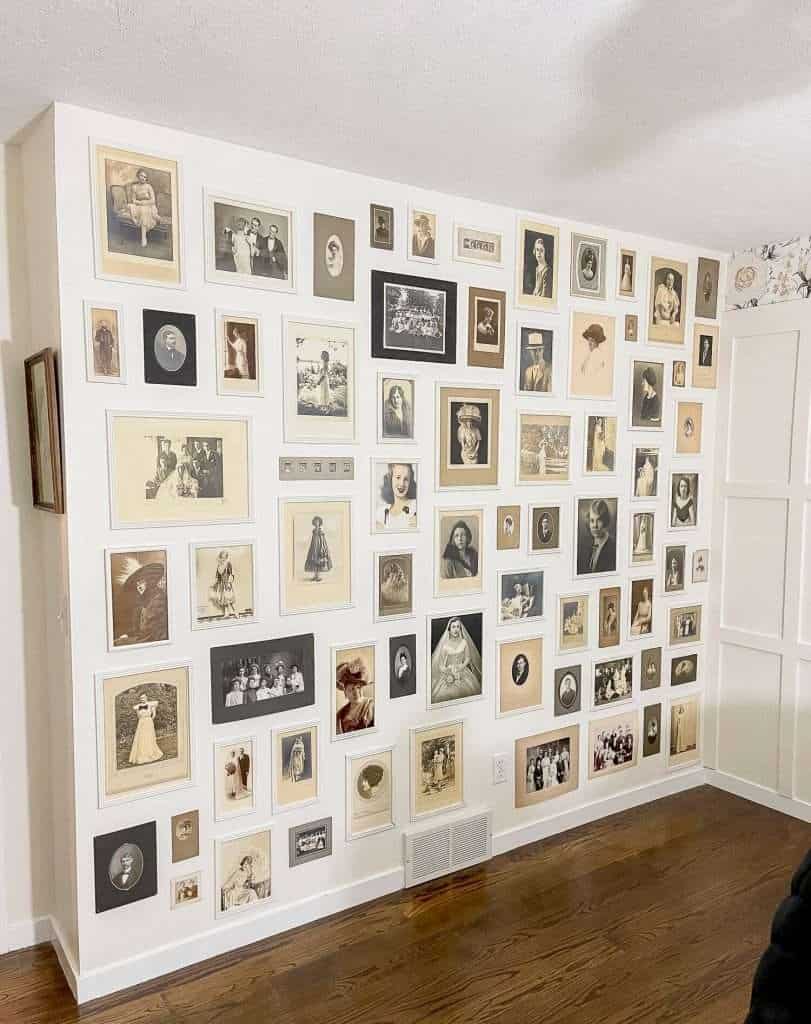
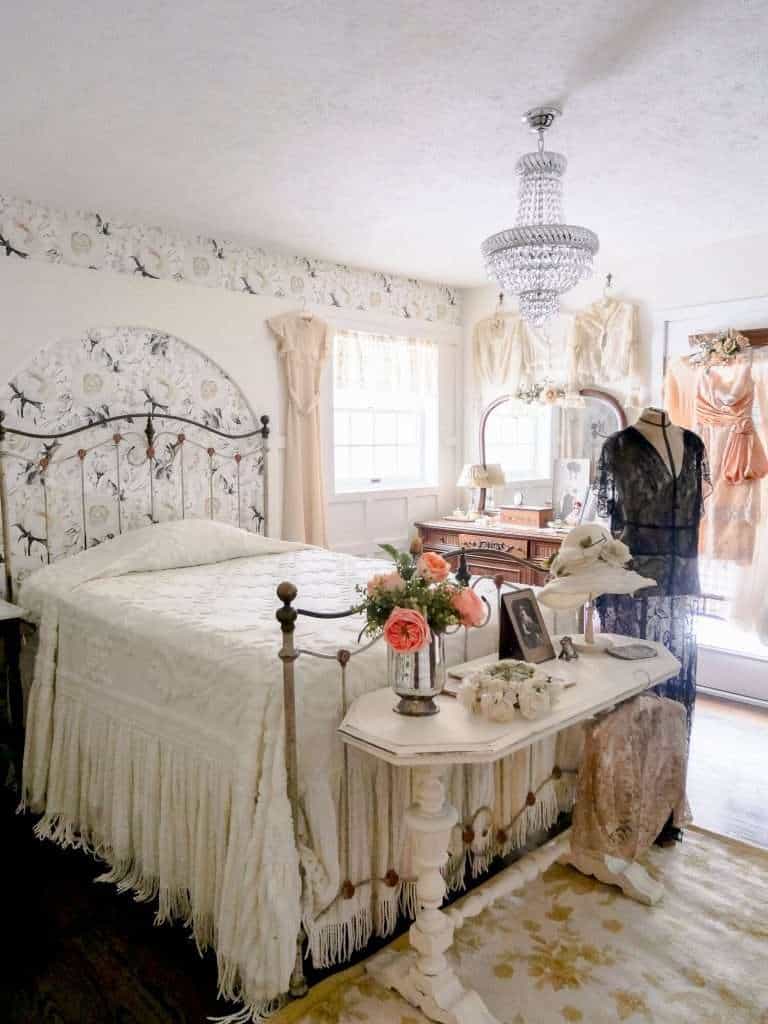
How to Display Antique Photos in a Gallery Wall
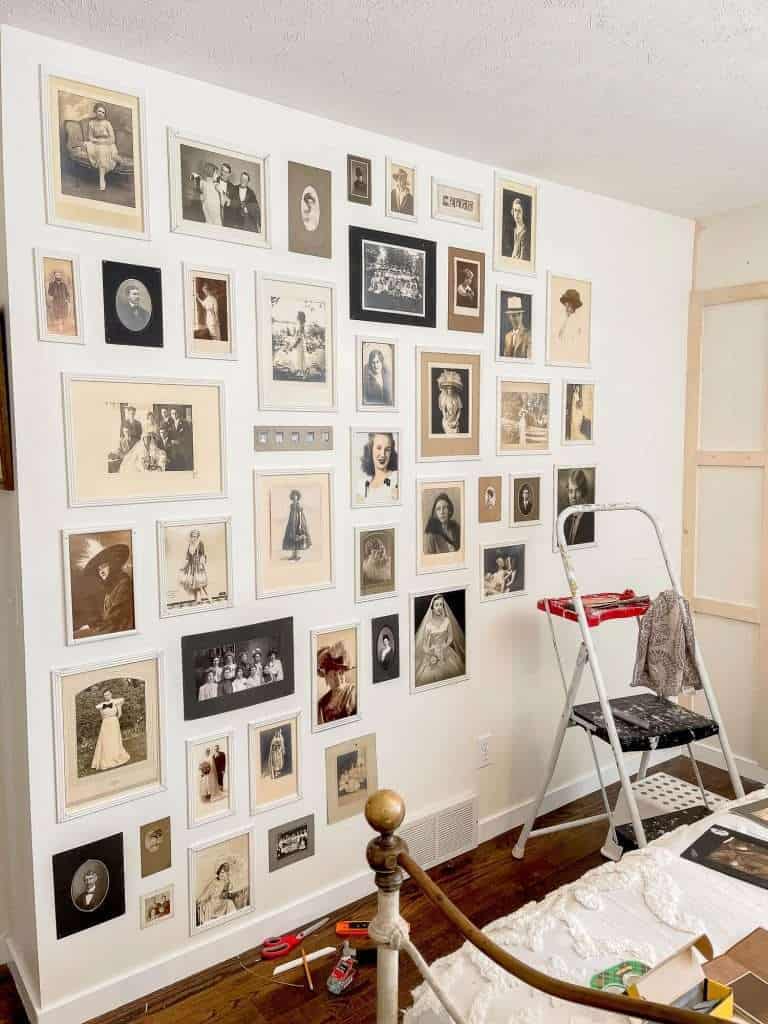
We absolutely love how it turned out! Many methods for creating a gallery wall would call for pre-planning the layout and placement.
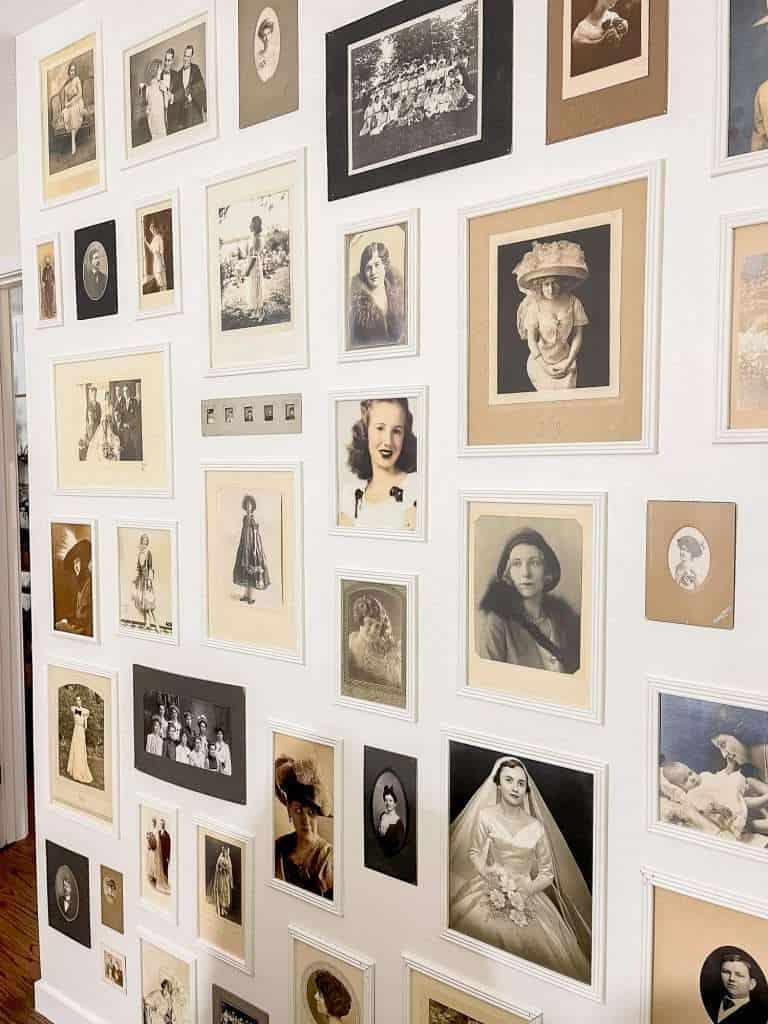
However, with over 70 photos that she wanted to include, it was simply too complicated to choose a layout ahead of time.
Instead, we moved from the middle out to the edges. She chose her favorite photos to be placed in the middle at eye level since they would be most seen.
Then, we worked out from there on both sides like a jigsaw puzzle. Let’s just call it antique photo tetris.
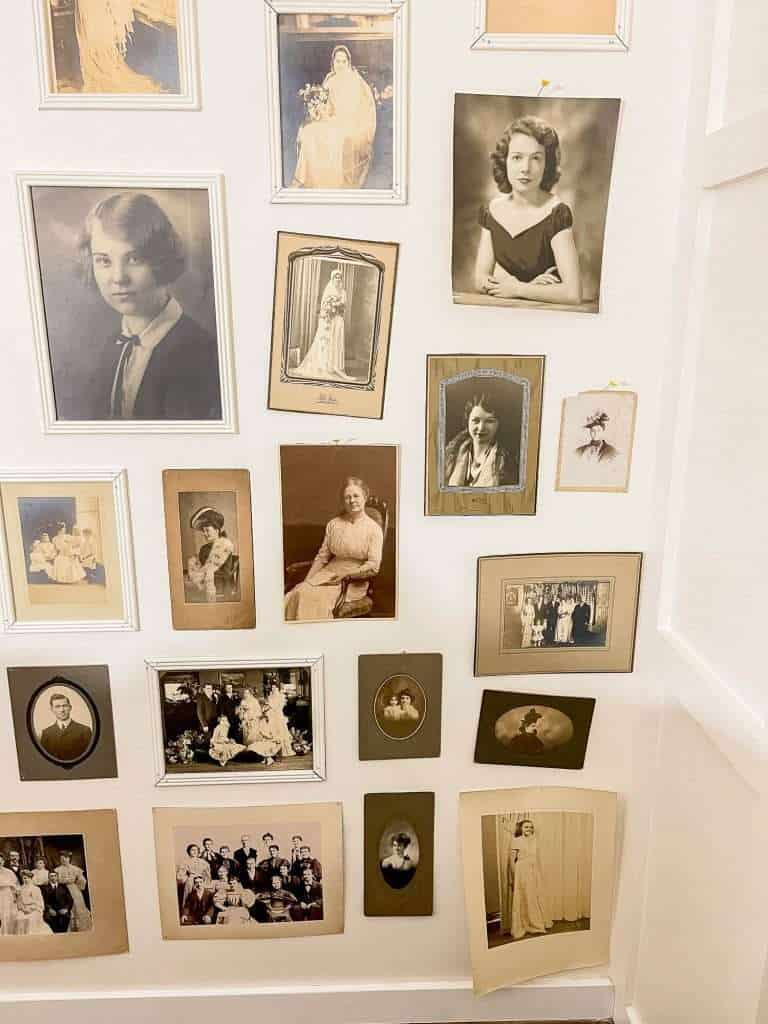
Along the way, we pinned up photos so we could play with placement before nailing anything in permanently.
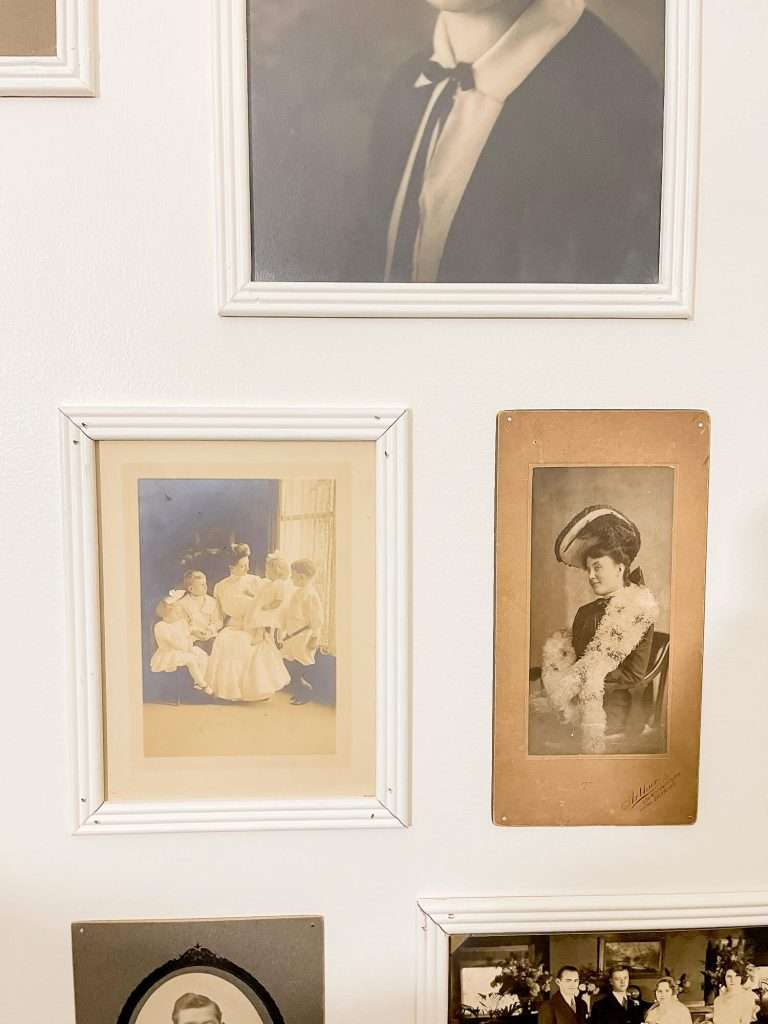
We also chose to leave some of the photos with stiff backing without a frame to add some interest to the wall.
Troubleshooting The Project
Since this is a very untraditional way to build a picture frame, we had to troubleshoot some issues along the way.

First, each photo is unique in the way that it is matted (or not), the thickness of the paper, and the sizing. Most of the photos were not exactly equal side to side and top to bottom.
So we did have to get creative with caulking seams that weren’t perfect.
We also had to eyeball some of the photos to be level rather than actually using a level. This was because some of the antique photos had been matted with glue and were crooked themselves. So if we were to level them, they would look crooked. This was a simple enough issue to correct.
Concern Over Photo Deterioration
One of the concerns we considered before even starting the project is how this method of framing would impact the photos themselves. There were a few things to consider:
- This method does nail through the outside edges of the photos.
- Light exposure
- No glass protecting them from being touched or bumped
Being an avid collector of antique photos, my mom decided she would rather risk small holes in the edges of the photos and actually see them daily, than have them in a box under her bed the rest of her life! This is obviously a personal choice and something to consider.
Removal Down the Road
Another concern we considered is how these would need to be removed down the road if she ever tired of the antique photo gallery wall. Or, if they moved.
Let’s just say, it’s going to be a lot of nail holes to fill. We will need to score and remove the caulk and then pry each side of the frames off the wall. The photos will not be harmed since we didn’t use any adhesive in this project. But it will still be a lot of work!
But it is worth it to bring mom’s vision to life!
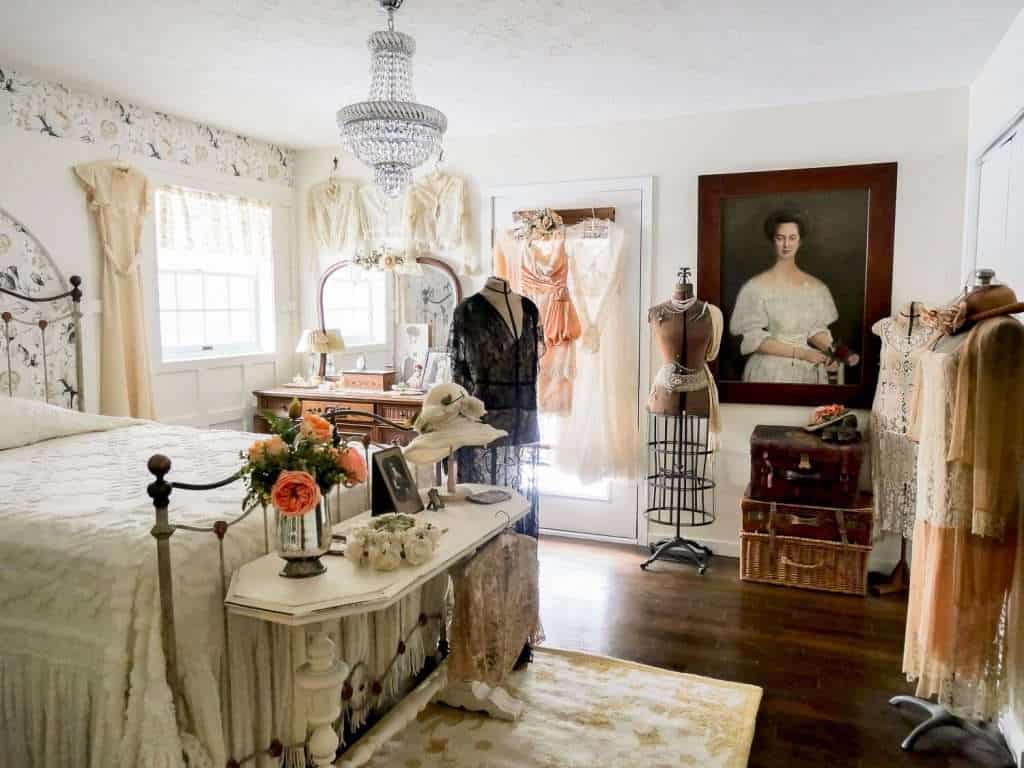
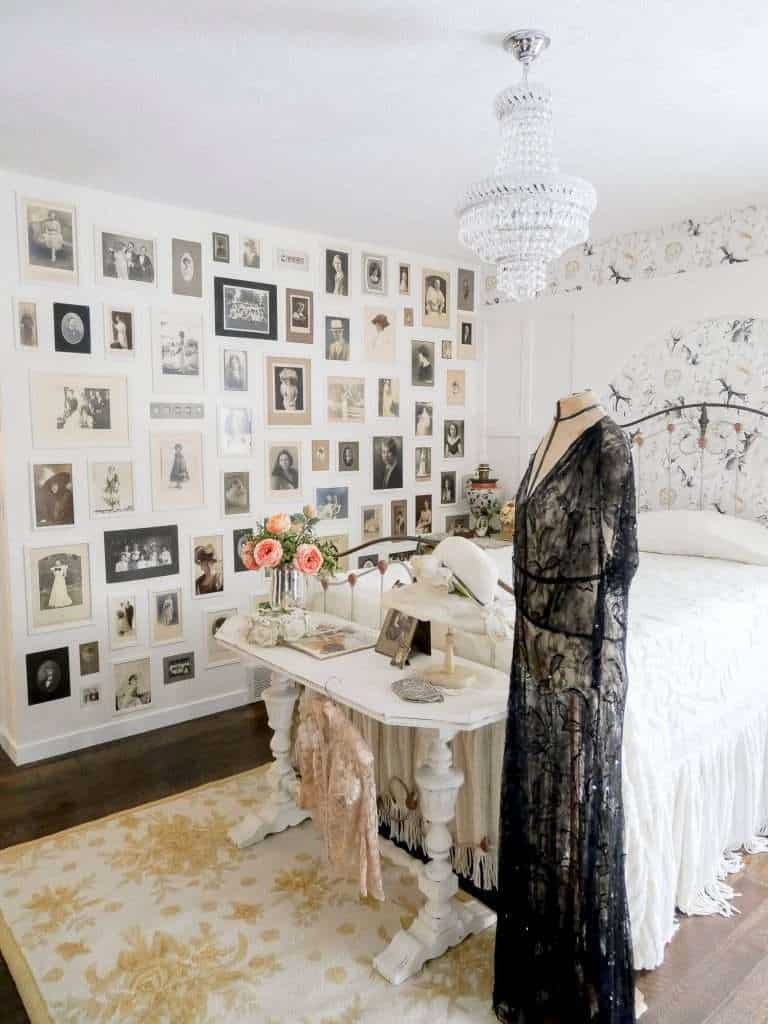
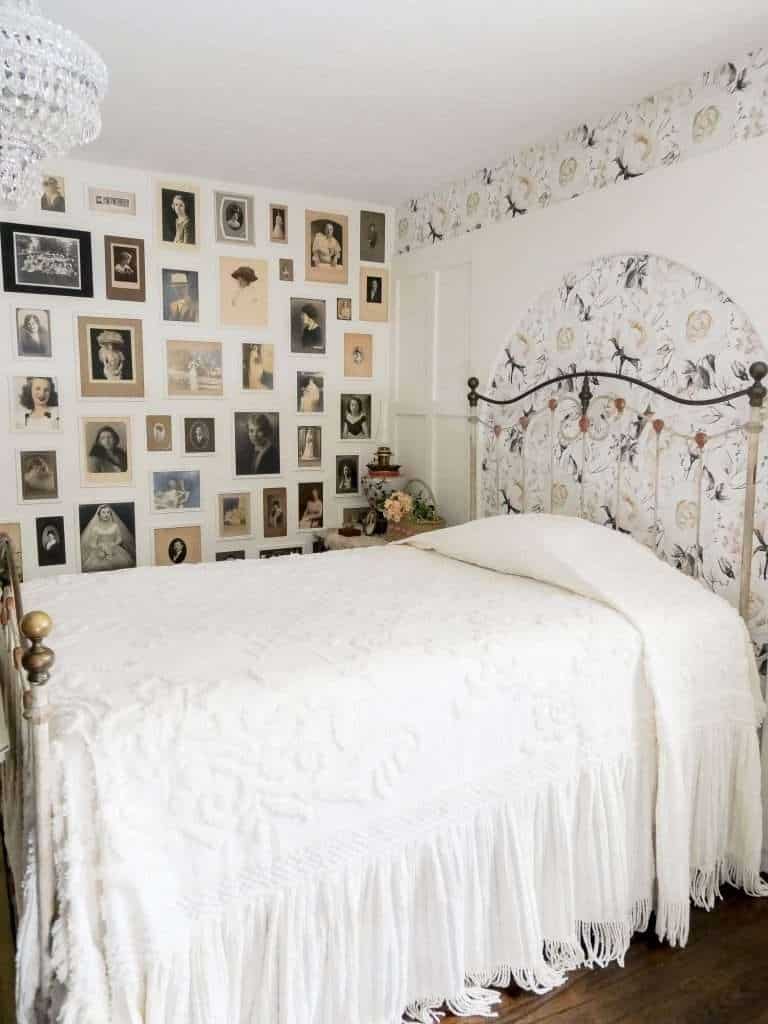
Vintage Bedroom Decor
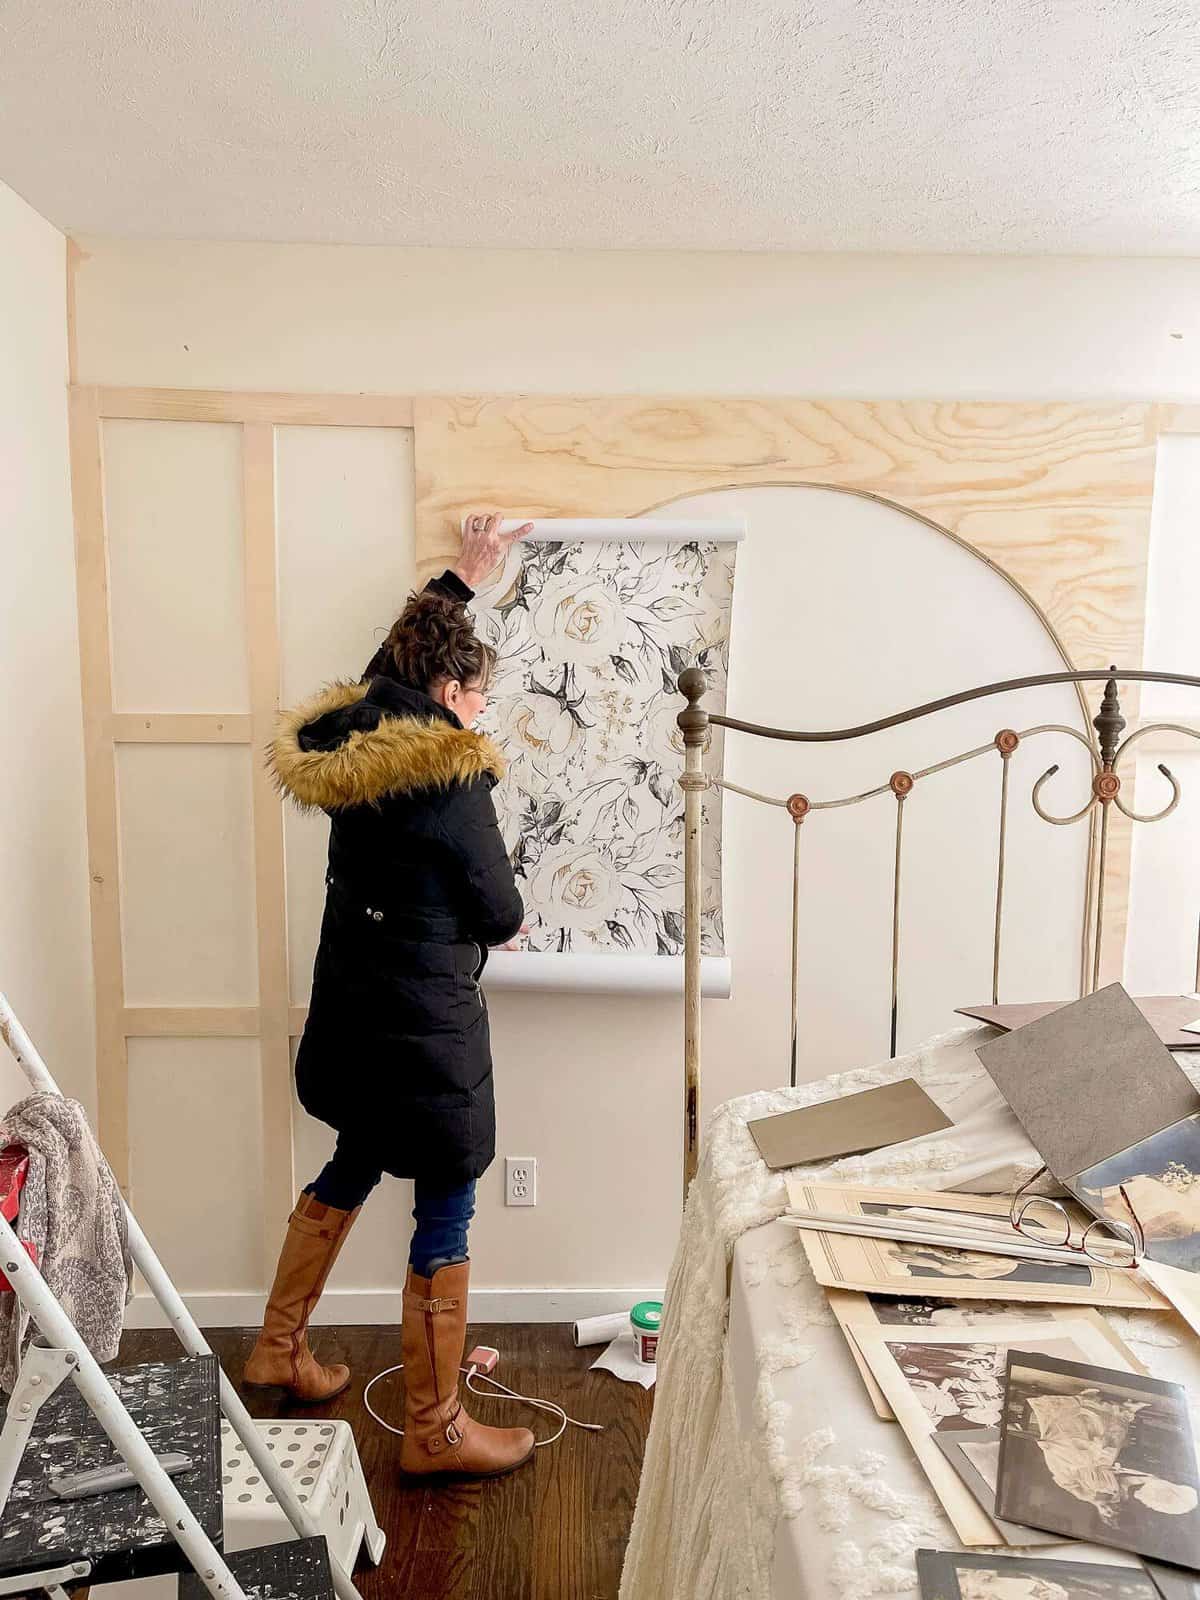
In addition to figuring out how to display antique photos in her bedroom, mom also added a focal point wall behind the bed.
My dad built out an arch design paired with board and batten to frame the bed.
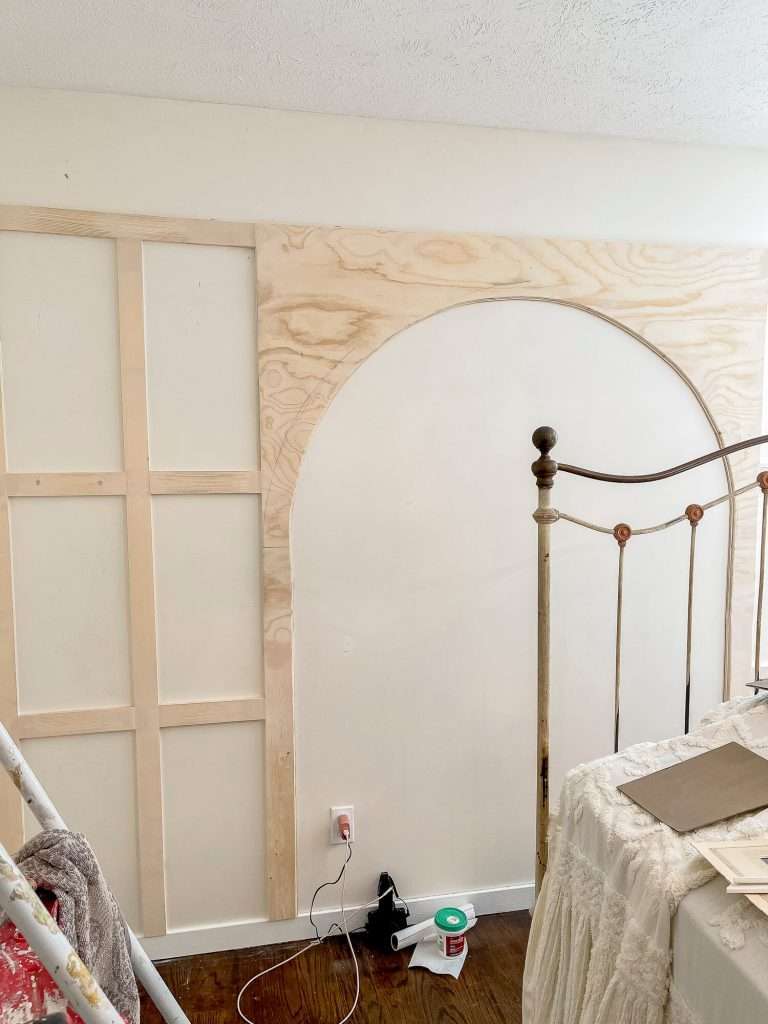
Then, we added wallpaper to the arch and above the board and batten to span the room.
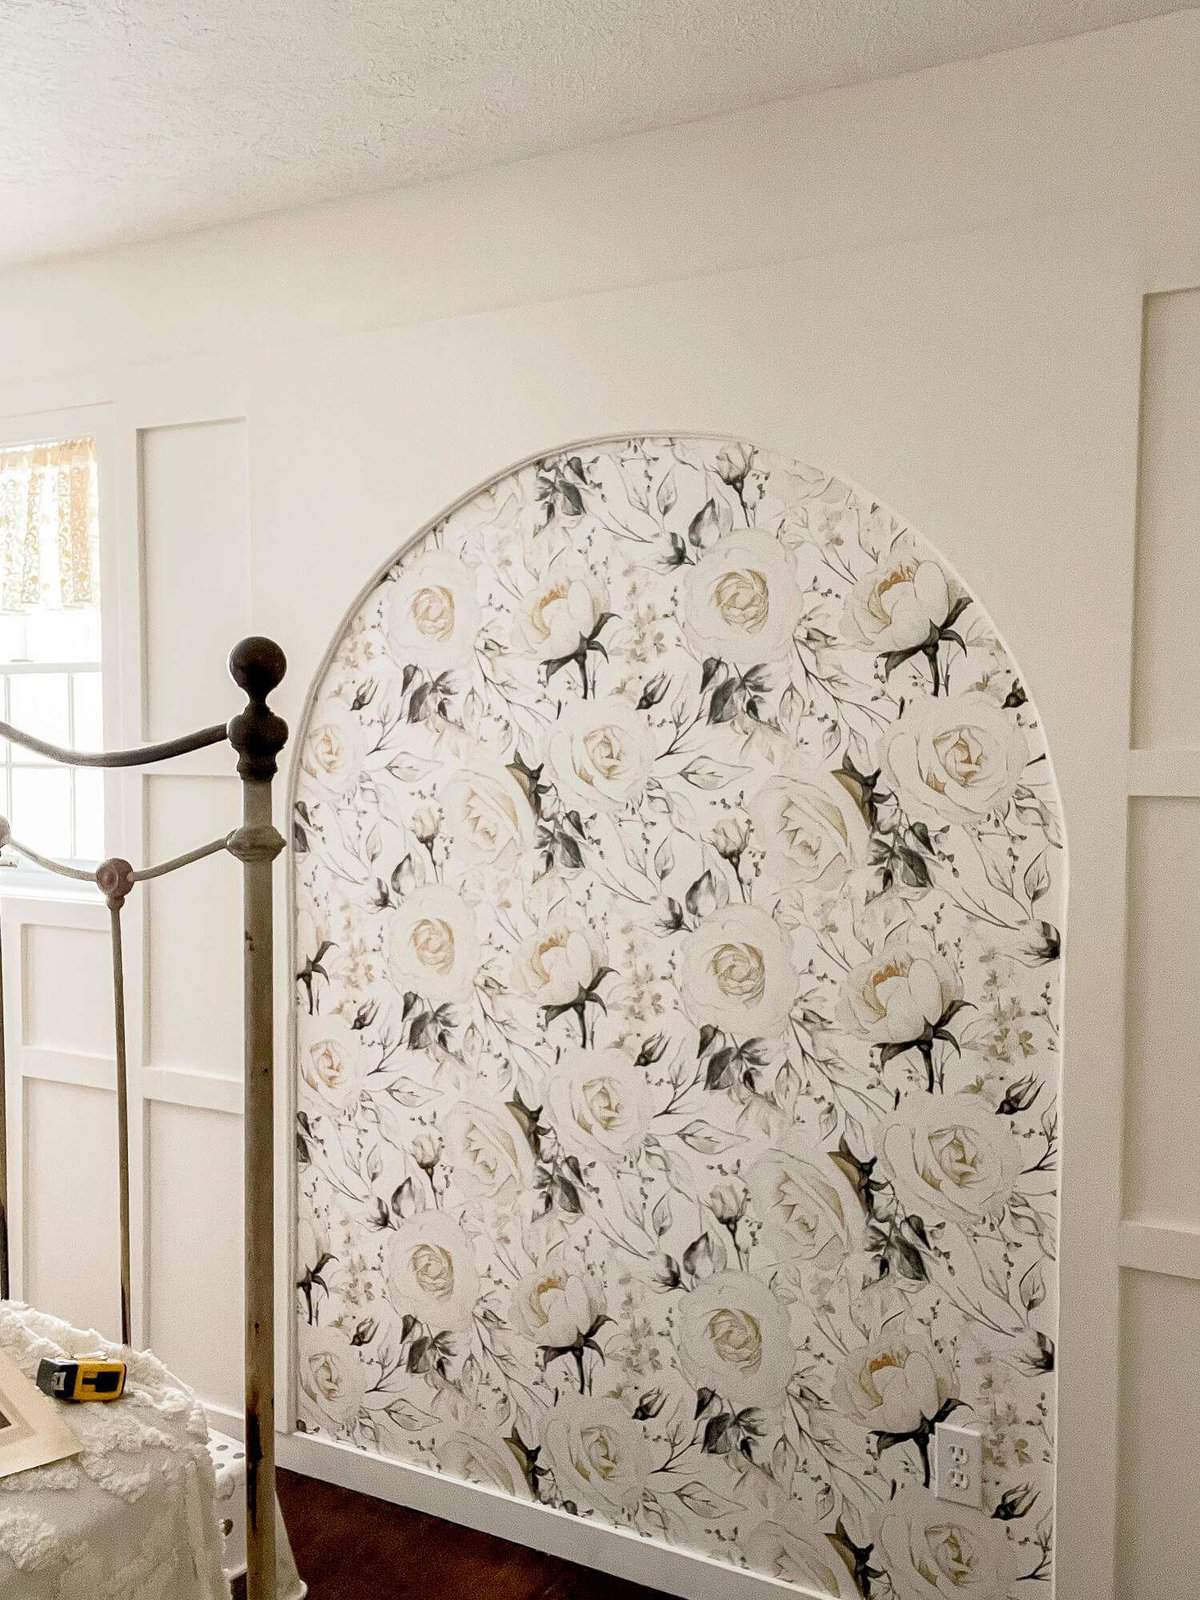
Her entire bedroom turned out so lovely and has an amazing vintage design style.

Stay Connected
I hope you enjoyed seeing this project come to life! This method would work as a creative and affordable way to display photos, old family portraits, artwork, or anything that requires a custom frame. You just need to weigh the pros and cons on the project to see if it’s right for you!
Thanks for stopping by the blog today. Make sure to subscribe to my newsletter for all the insider perks! You can also follow along with me daily on Instagram and weekly on YouTube to see projects come to life live.
More Unique Wall Treatments
If you’re looking for more unique ideas to decorate a large wall, check out some of these DIY projects below!


Love the wall! But I have to know – where did your mom find that bed spread? Love it!
I have a giant number of vintage photos collected from flea markets over the years featuring kids posed on ponies. I think the fun is in how many there are, especially since many, clearly from different era and places, almost look like they feature the same pony (fat, sturdy little paints) and so I want to put them together but not have it be too cluttered or where you lose the individual details. Your approach of putting them in frames the same color as the wall but with just that little bit of architectural detail that picks each one out is so effective. It really lets you focus on each photo individually but without all the additional visual clutter of a colored frame. Thank you for this inspiration
You’re so welcome!
Even while building a DIY gallery wall for old photographs can take some time, the finished product will be a stunning and significant display of treasured memories. Before deciding on a permanent installation, take your time to plan and test the layout.
So glad you like it!
i love this idea! I appreciate these vintage photos. Each one has a story and it would be fun to know their story. I love this bedroom!
This post is really insightful and informative. I learned some pretty essential ideas from your post that are excellent and useful to me. I only hope I see another post from you soon. I’m anticipating that.
Really informative! Damn, the gallery wall looks so good. Thanks a lot for sharing a wonderful blog.
Glad you enjoyed it!
This is a really awesome and helpful article for me. I really appreciate your work for providing such useful information, thank you so much!
You’re so welcome!
Great job love
Couldn’t have done it without you!
Such fun to see and hear the Tetris vintage photo wall. Sure turned out well…and so much better than in a box under a bed!
So glad you like it!
My parents passed away a few years ago and I found some old antique photos,.Some like your moms and some on tin. I have no idea who they are. I also have some blue and white China that belonged to my grandmother. I displayed a few of those pieces with an old photo in a guest bedroom. It turned out great. I loved the old frame . Thanks for sharing your mothers love of older things.
You’re so welcome!
That is a lot of work but good for your mom, history and pictures are something that should be shared. So many times pictures are left in boxes and yes handed down in great shape to the next generation but with no story behind them. They then become just antiques not family history that stays alive. It is beautiful.
Thank you so much!
not sure i could have taken on that project, but it is honestly one of the most beautiful, sentimental decorating endeavors ever!! it is dramatic and beautiful and sweet. the whole room is a sanctuary, may your mom enjoy!! you should be proud!
Thank you so much! That means a lot!