
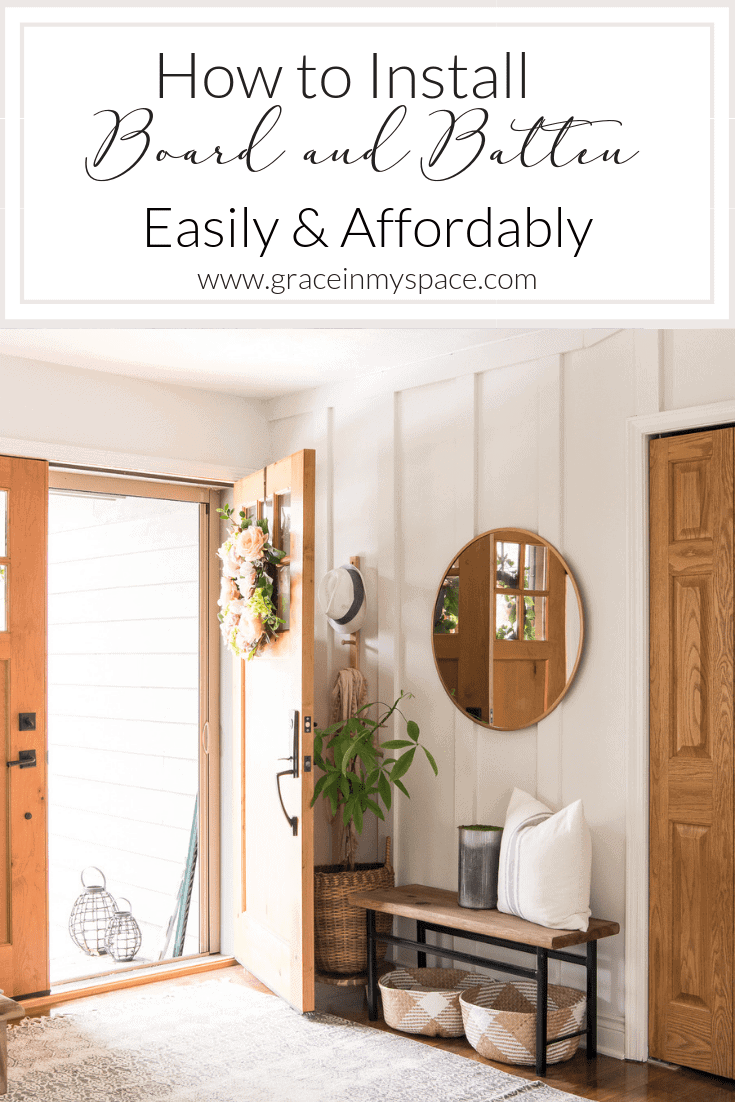
How to Install Board and Batten As an Accent Wall
Board and batten is an easy and affordable way to create a custom look in your home. Here is a full tutorial for how to install board and batten as an accent wall! I did this project for my entryway refresh but it can easily be adapted to any room in your home.
Post may contain affiliate links for your convenience.
Board and Batten Tutorial
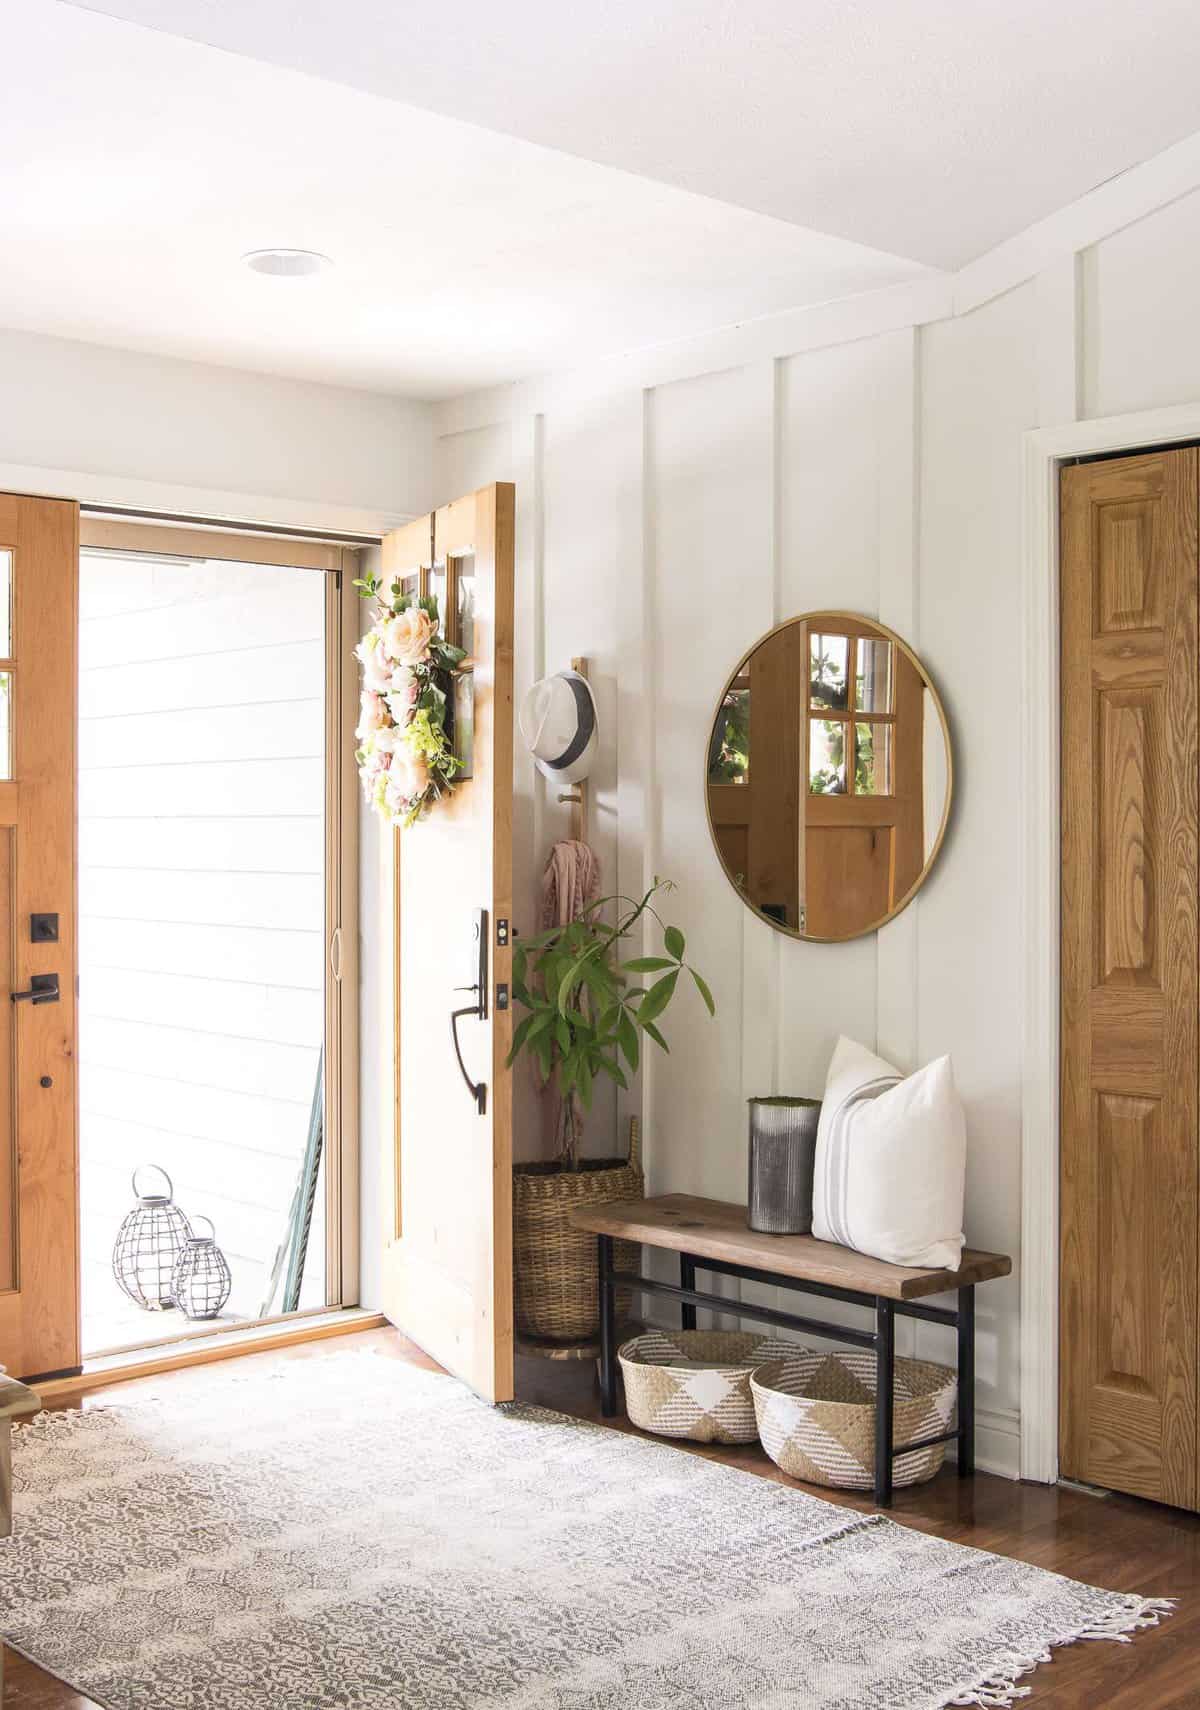
The longer I live in the design world the more convinced I am that the structural updates I do to my home make more of an impact than any amount of home decor. Projects, like this board and batten in my entryway, add a custom look to my home without breaking the bank.
I first decided to do this project when I wrote this series on creating spaces you love in your home. That three part series breaks down exactly how I design a space and gives you a complete guide to implement in your own home. And out of it was born this accent wall in my entryway!
So let’s get down to this simple board and batten tutorial. This project is something I’m proud of since it was 80% done all by myself! My dad helped me get that first wonky ceiling angle out of the way and then showed me a few cutting tips. And after that, I finished it all solo!
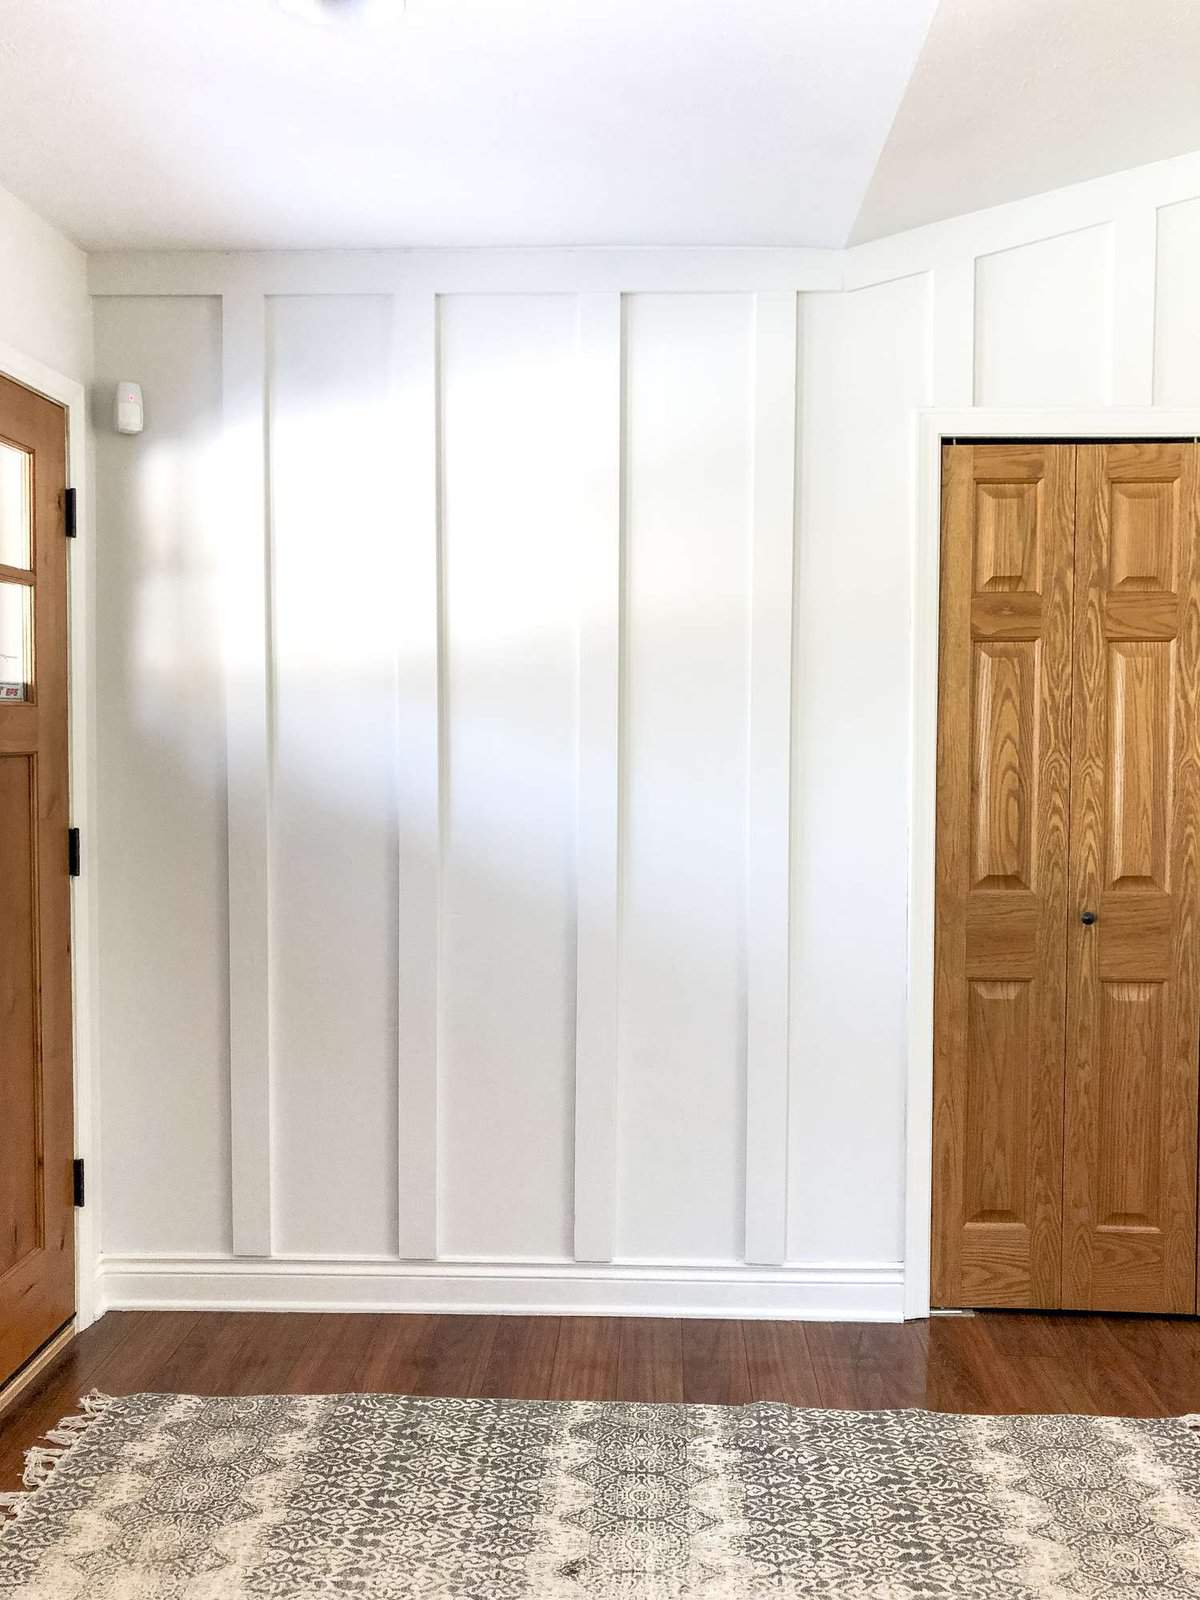
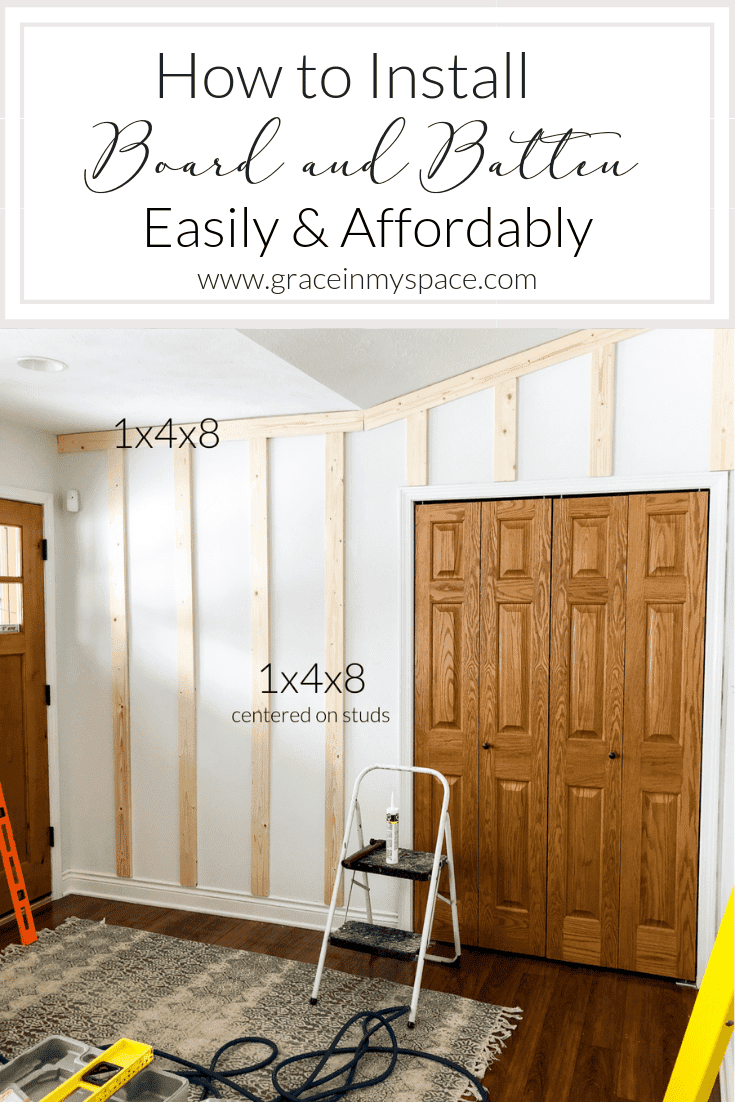
1. Buy your wood
I chose to go with affordable 1x4x8 common pine for my board and batten. Poplar is another beautiful wood choice if you have the budget. Measure your wall, determine the space you want between each board, and then you will be able to do the math to determine how many boards to buy.
I also found it easy to simply determine how many studs were on my wall to gauge the amount of wood I would need. More on that in step 2.
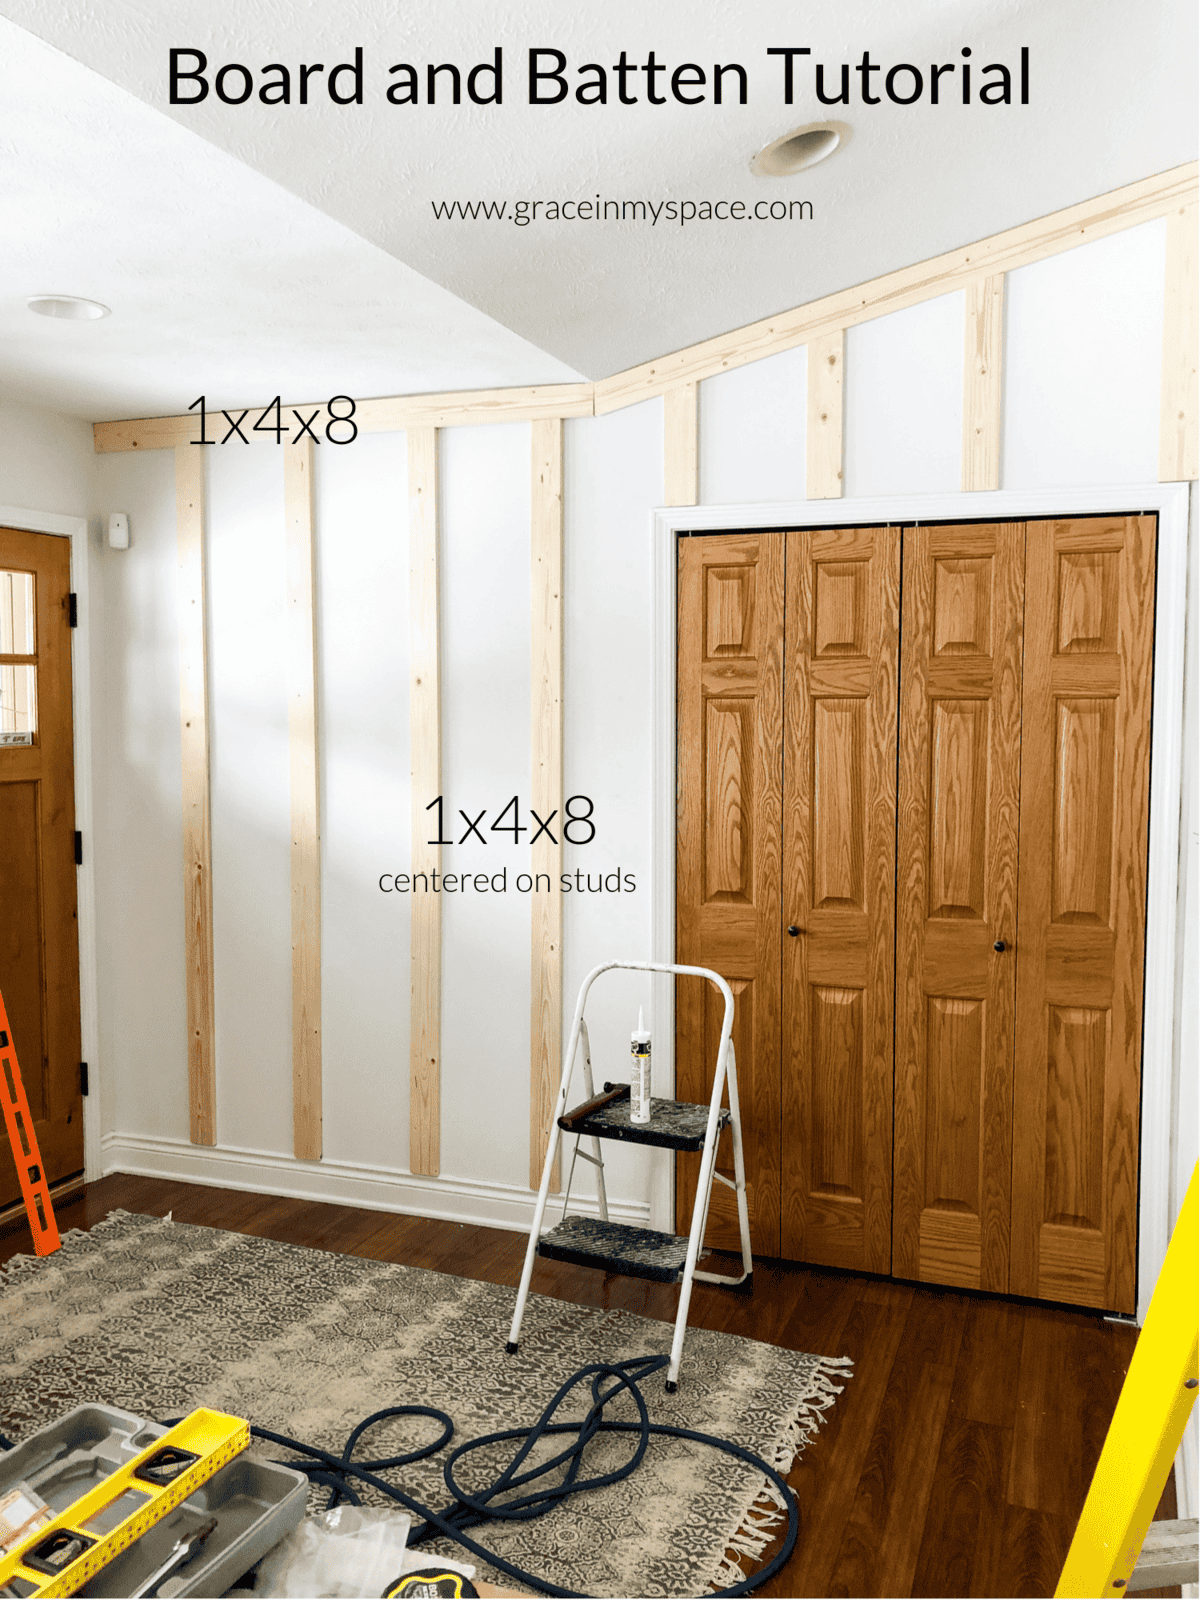
2. Find Your Studs
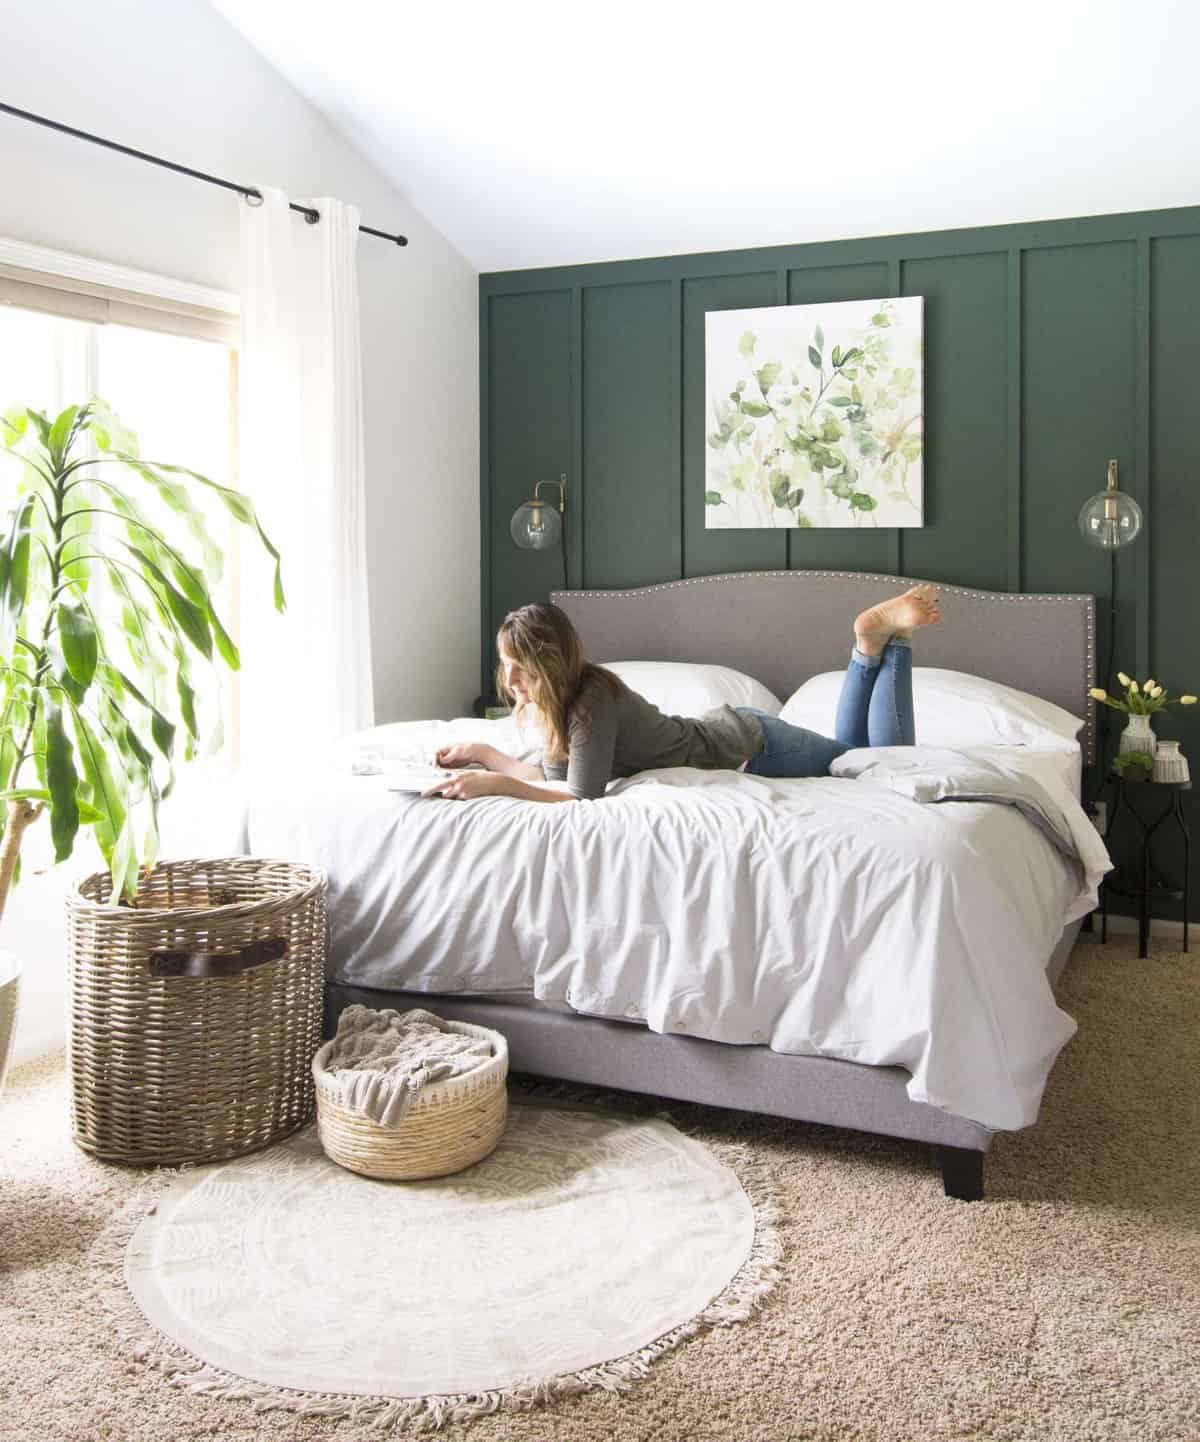
Ideally, you will nail your wood directly into your studs. This gives the best support. However, it isn’t always necessary. In my bedroom, I did a similar wall treatment and wasn’t able to space the board and batten to match every stud. With adhesive and caulk I was still able to ensure durability of my accent wall.
Another reason to find your studs, as I alluded to in step 1, is to be able to determine how much wood to buy. I placed my boards centered on each stud, so once I found them all I was able to determine how many pieces of wood I needed.
This will not always work! Traditionally, your studs should be 16″ apart. However, I’ve found in many houses that this standard gets fudged. So be sure to measure the distance apart so you can ensure that your board and batten will be evenly spaced.
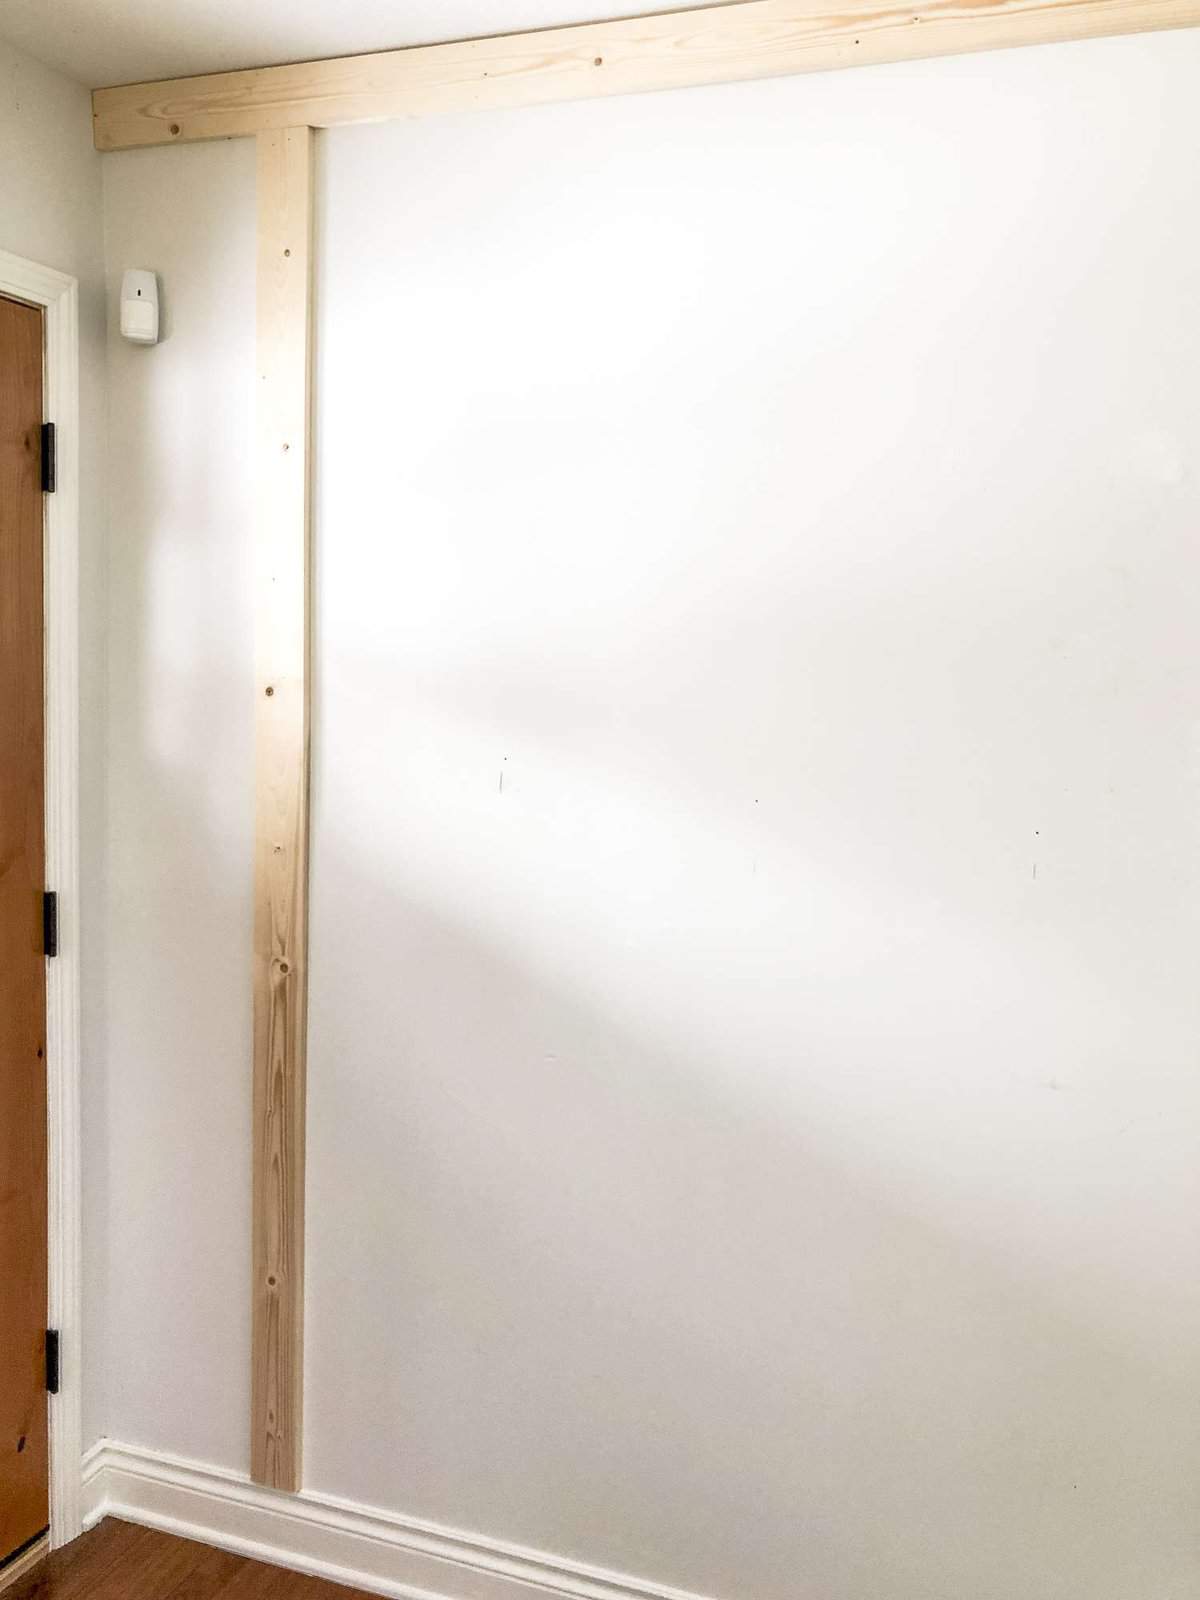
3. Nail Your Boards In
In some instances, step 3 will be to remove existing trim. Our baseboard trim is high-end and I love the curves it offers. For that reason, I chose to leave it in place. If you’re looking for a more built-in board and batten then I would recommend removing existing trim and using the same boards for the baseboard as you chose for the wall.
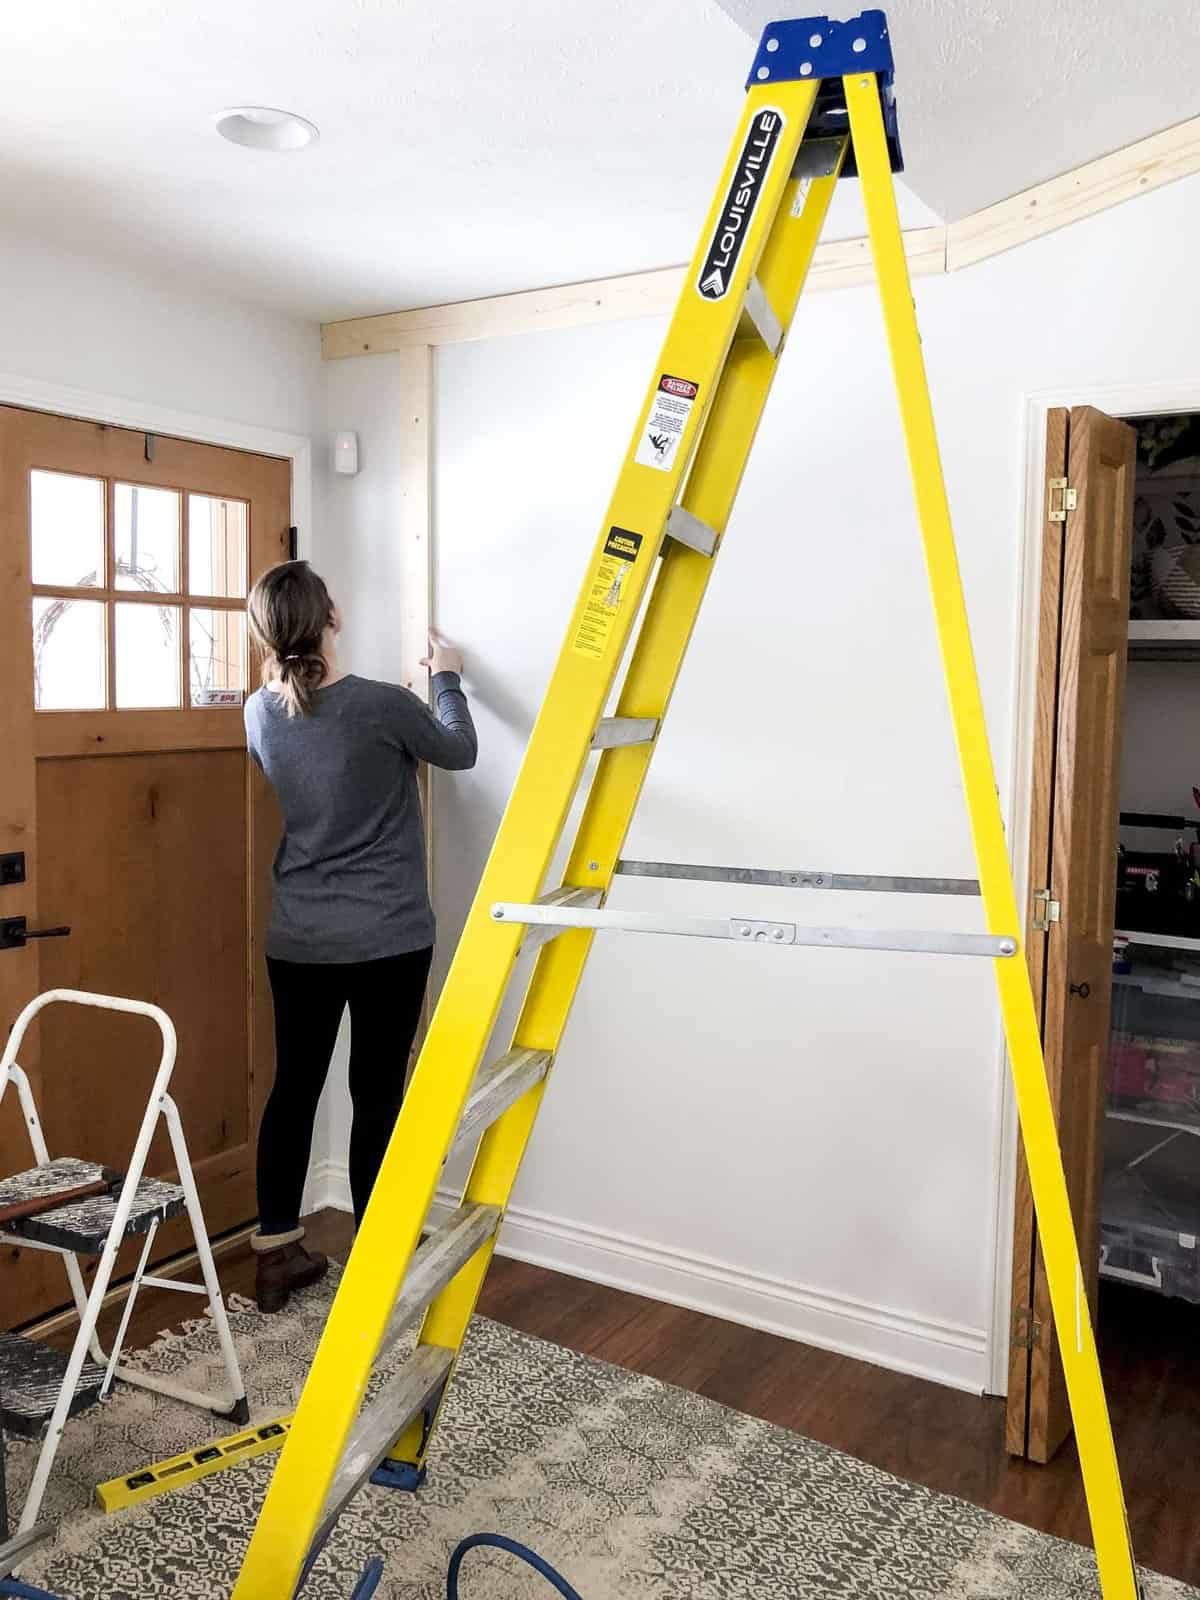
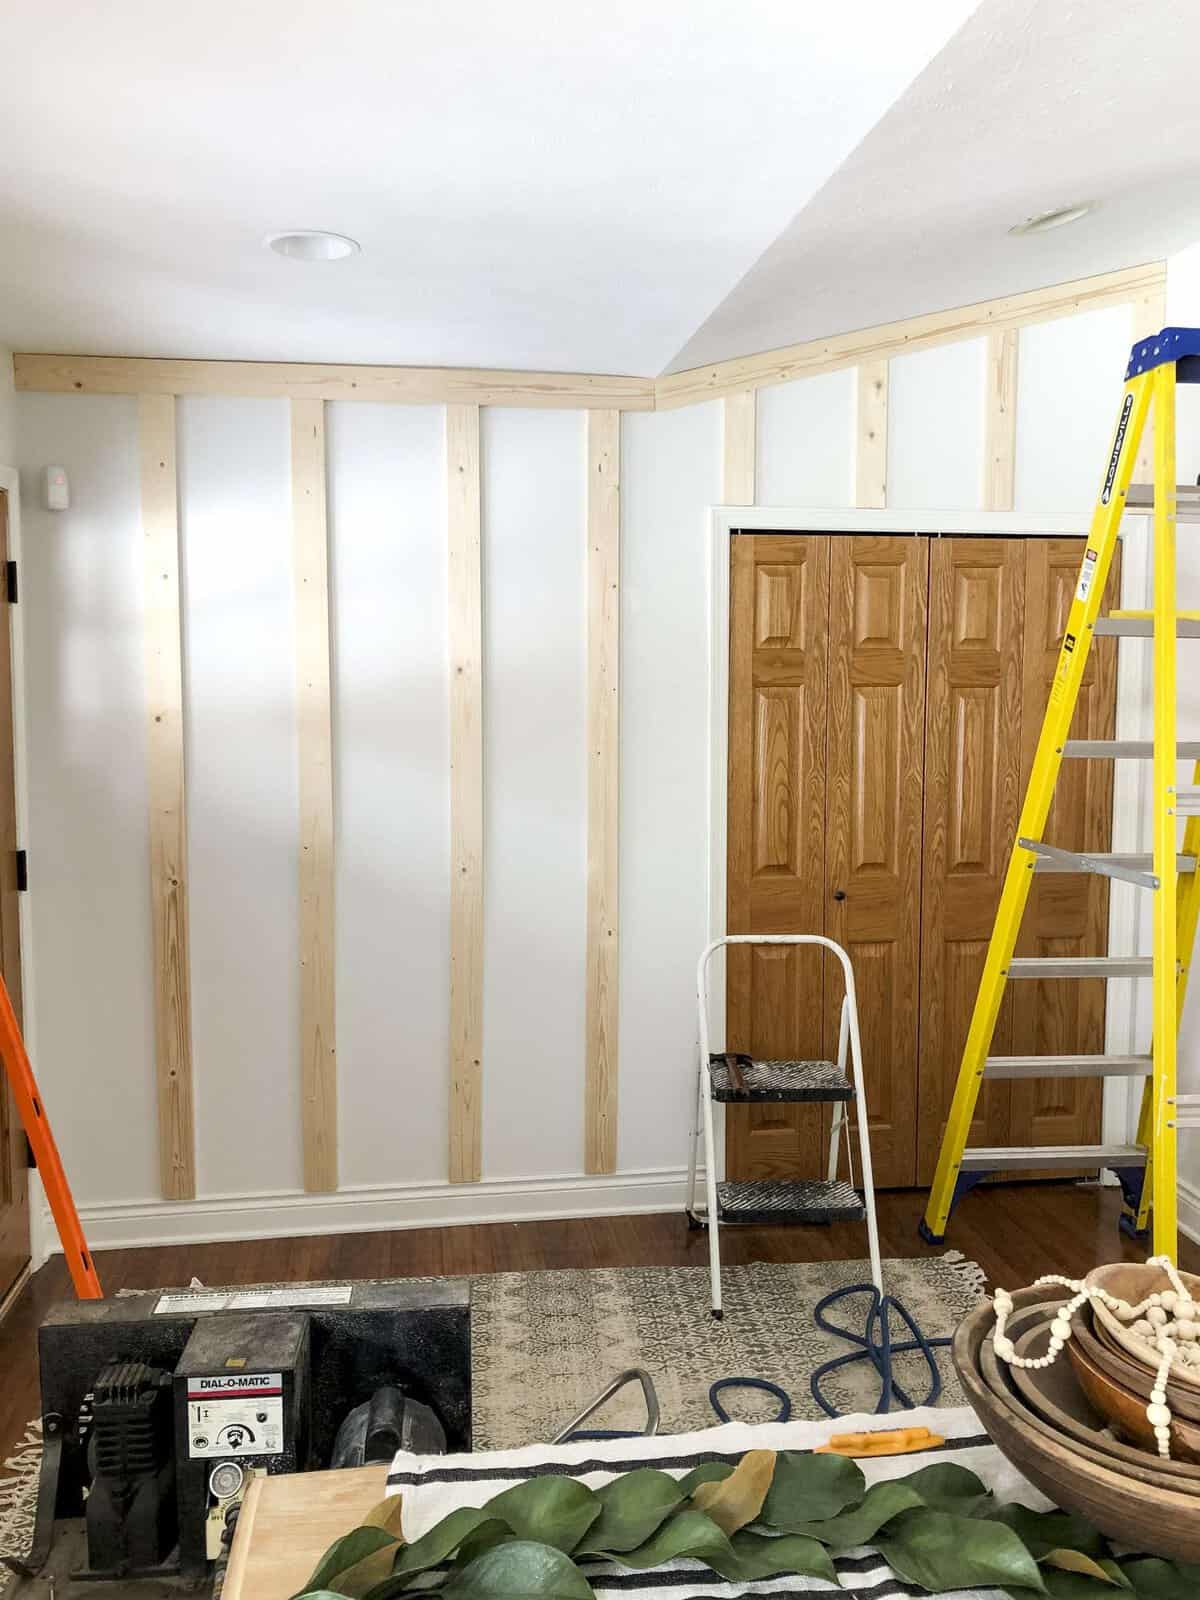
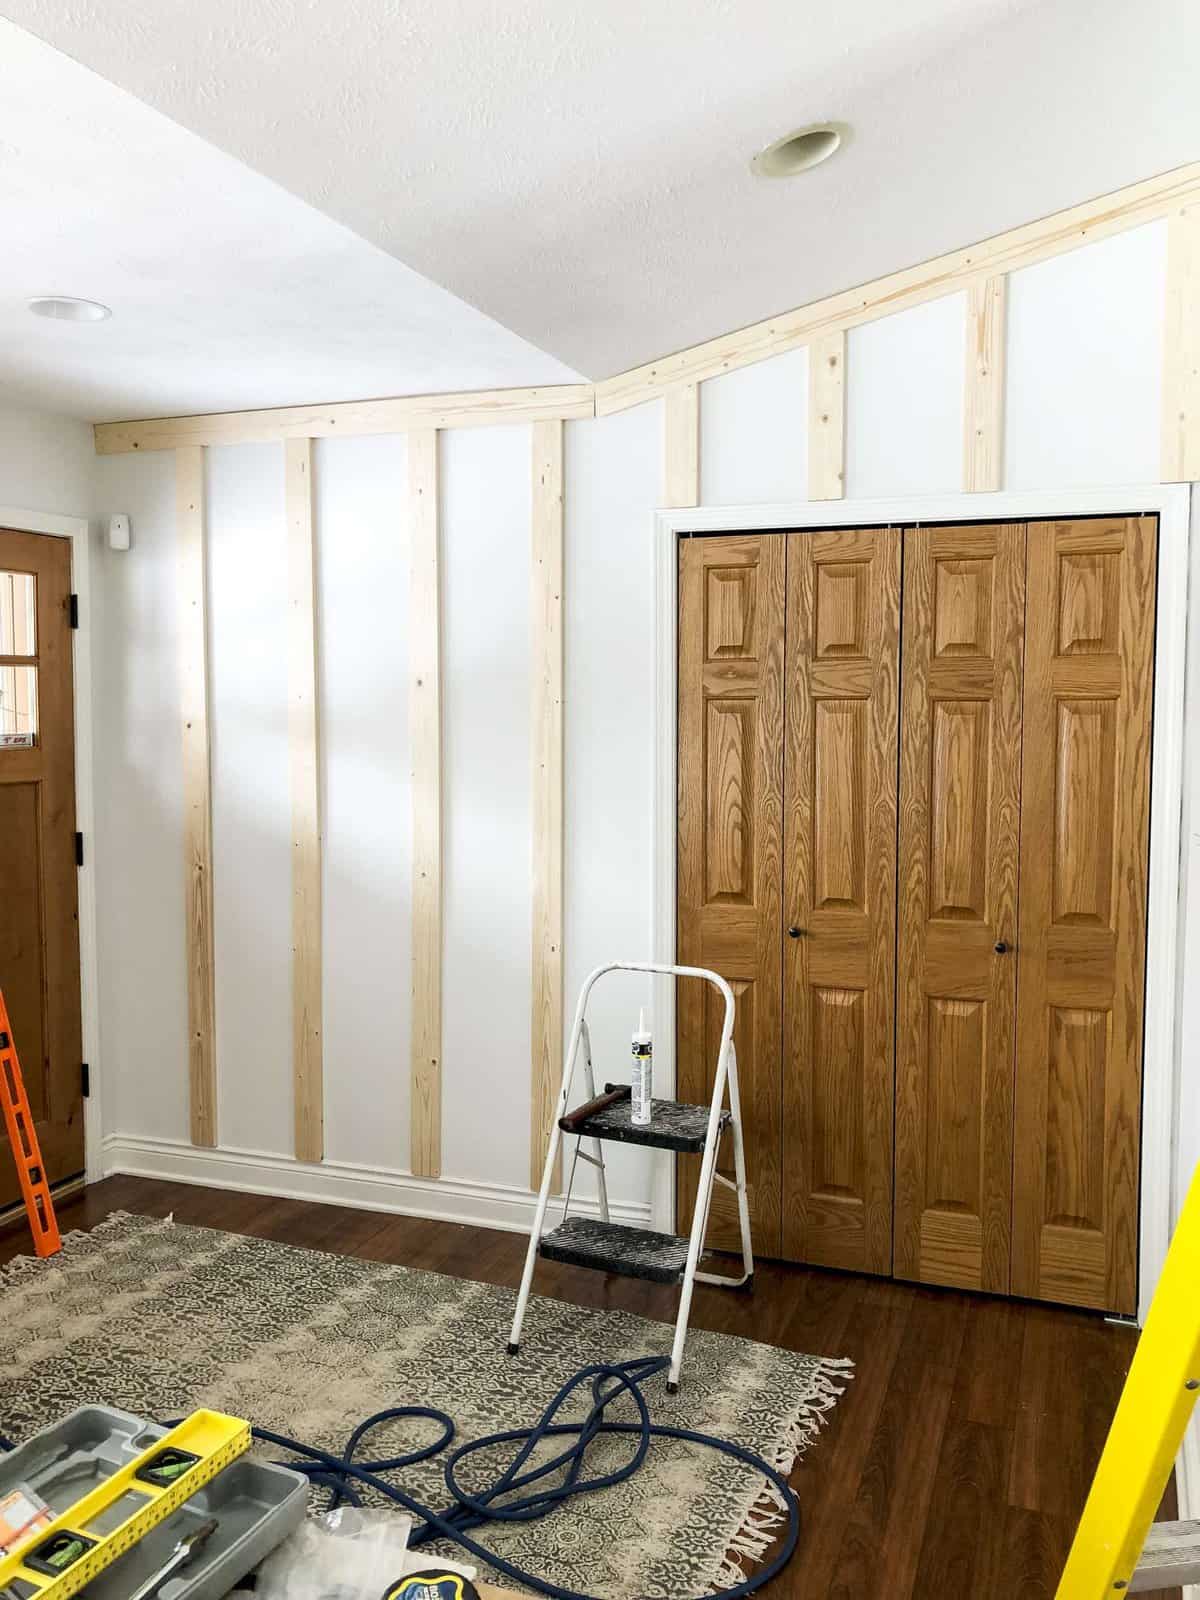
On to step 3; using a nail gun with 2″ finish nails, secure your wood to the studs. Begin with the ceiling (and baseboard if you are replacing them). These serve as guides for the remaining boards so make sure they are installed level!
You can see that our ceiling is as wavy as my labradoodle’s hair. This can be fixed in the finish stage with caulk so focus on leveling your boards rather than butting them up to the ceiling.
If you don’t have access to a nail gun you can also go with a good old hammer. However, be prepared to touch up dents for a clean finish.
Ensure that each piece is placed centered on your stud and equally spaced from the previously placed board. Level each vertical board as you secure it.
4. Caulk
Once all of your boards are installed, it is time to caulk! Caulk fixes so many things.
First, it will fill in any gaps from an uneven ceiling. Second, it makes your board and batten seamless. This is your goal! It should appear to be fully built in rather than boards resting atop your drywall.
Caulk every single space where your wood adjoins to another piece of wood, on both sides where it rests on the wall, and along the ceiling and baseboard trim. This will give you board and batten the customized look you want.
Also, make sure to add a little dollop of caulk to each nail hole. I find it is easiest to take a pea size amount of caulk on my fingertip and smoosh it into the nail hole. Then, simply wipe off the excess.
This is my favorite caulk. It is paintable, easy to apply, and dries quickly.
5. Paint
And of course, you will finish your board and batten with paint! Your paint will be the same color as the wall underneath. Ensure that you’ve used the same sheen so that it flows as if it was built in.
Tip: These are my all time favorite paint brushes! The short handle and angled bristles make cutting in and edges a breeze.
The walls in my main living areas are painted in Shiplap. I love the subtle grey undertones that make this a white that isn’t cold or stark.
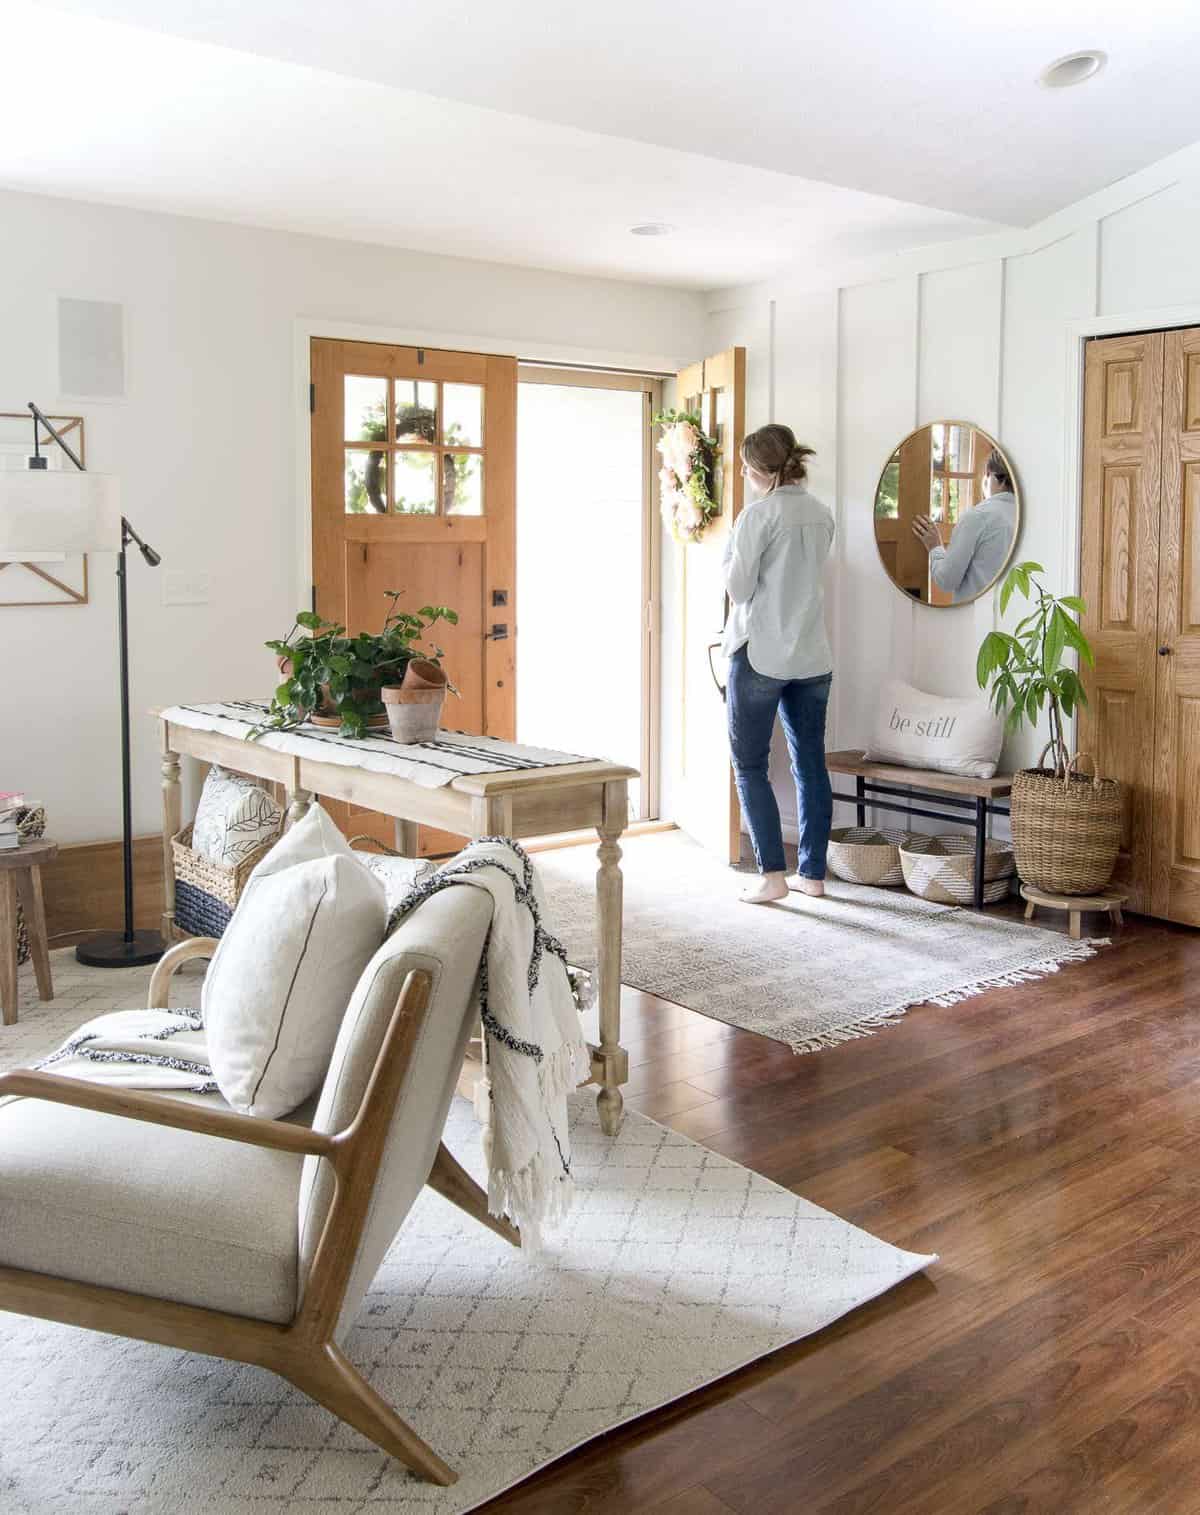
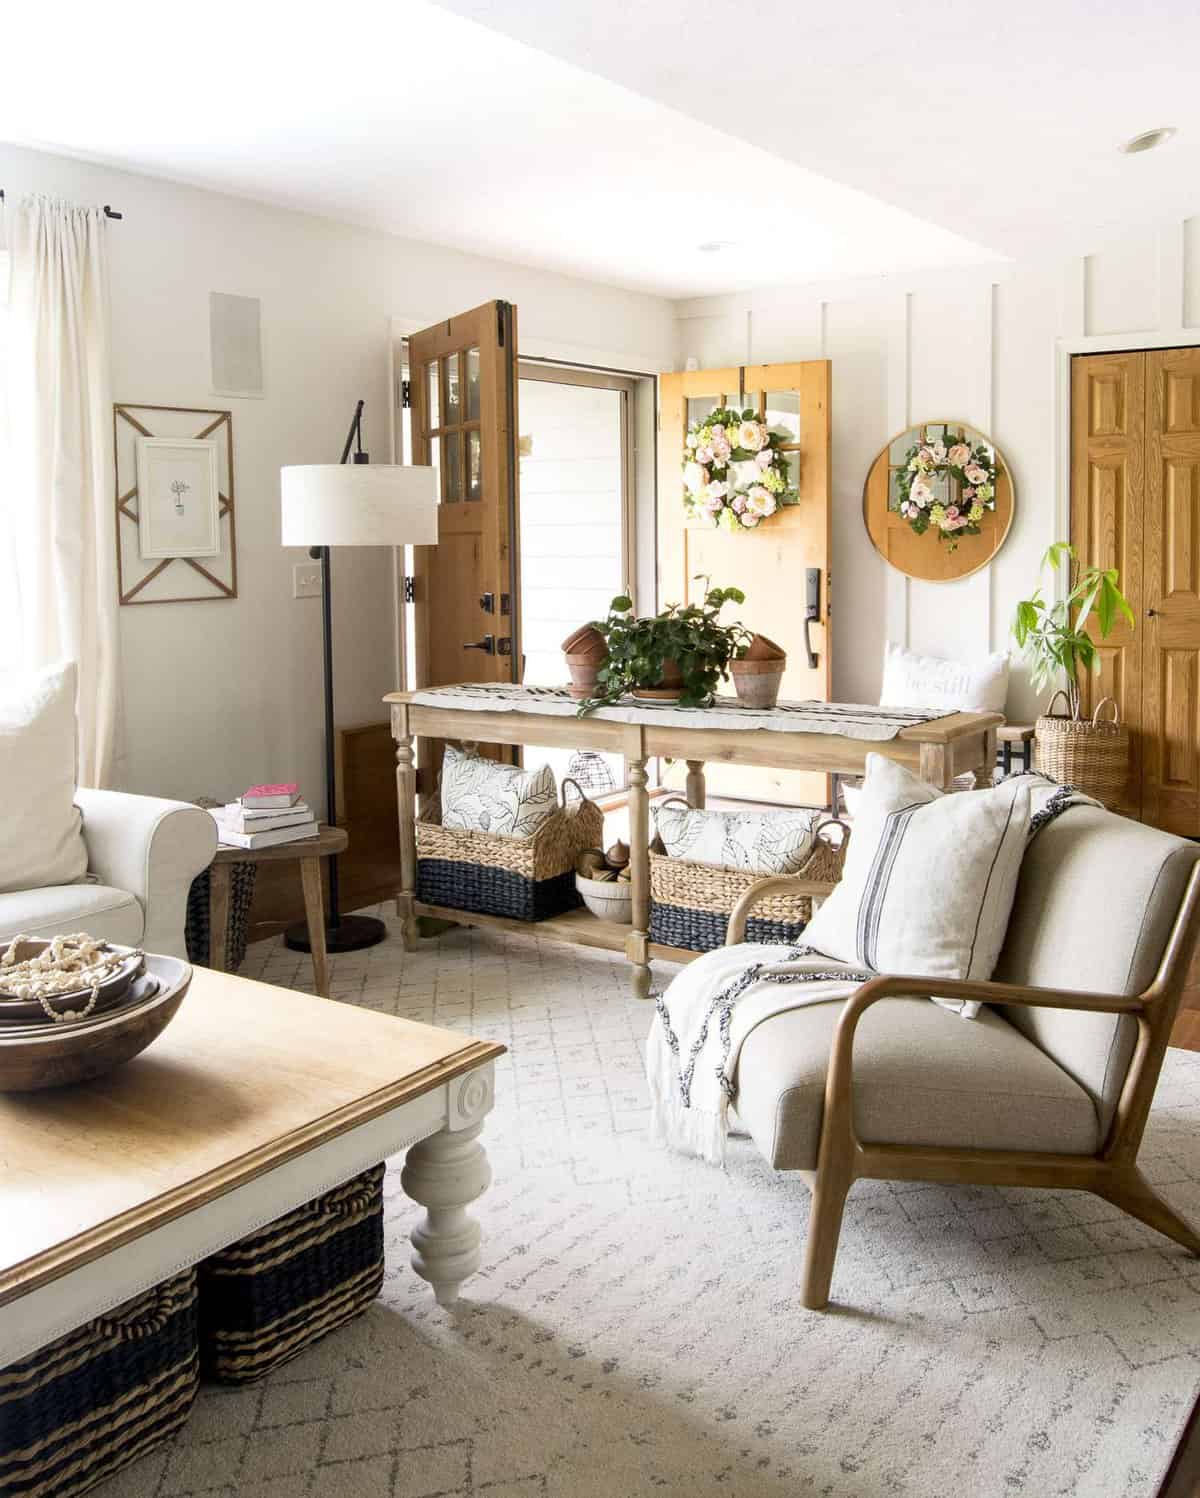
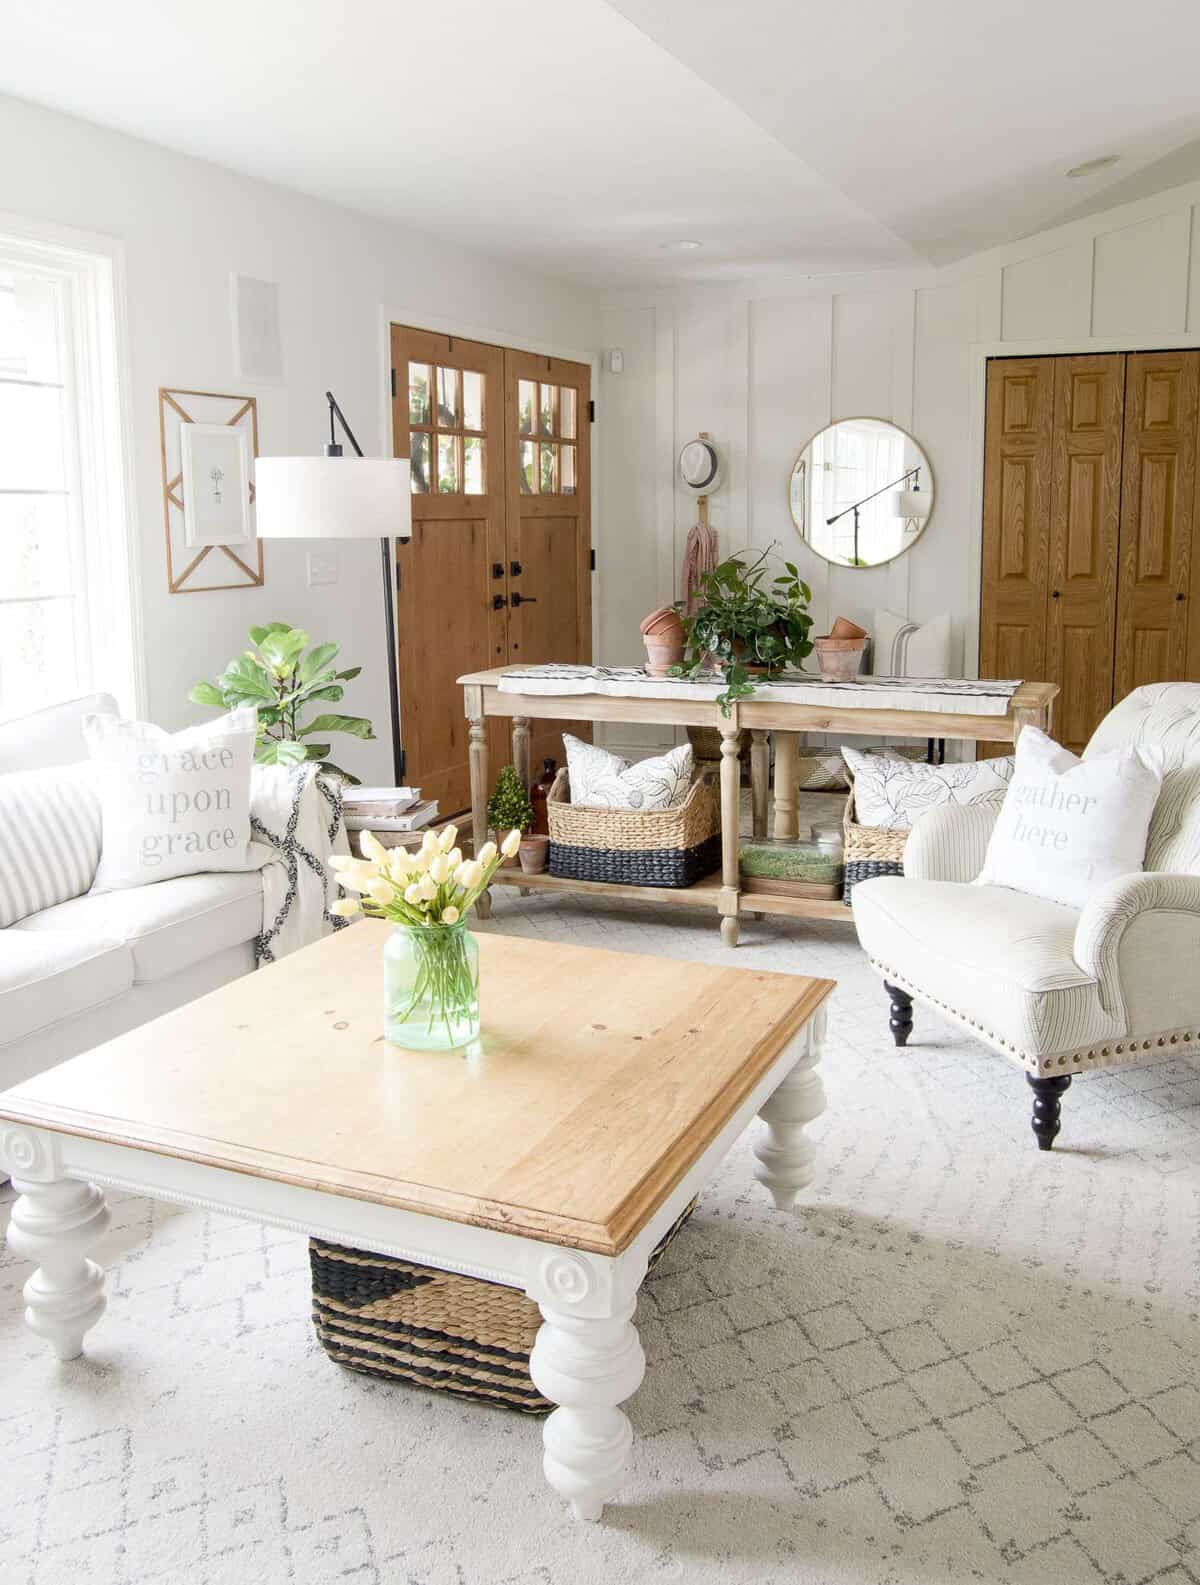
6. Style Your Board and Batten Wall
The styling of a new space is always my favorite. You can see my entire thought process for how I designed and styled this space in this series. It was actually so fun to break it down for you!
Shop This Look

If you’re looking for design ideas for a modern farmhouse entryway and living room, make sure to check out this post! I broke down all of the elements I incorporate to implement this design style.

I absolutely love how this board and batten heightens the design in my entryway. Plus, I was able to minimally decorate this space due to the fact that the wall treatment makes such a statement all on its own!
Hopefully this tutorial has been helpful to you! Feel free to ask any questions in the comments below and I will update the post as needed!


Hello!! Just wondering if you have completely untextured walls? I would love to do board and batten and my walls have a very light texture. I have been trying to figure out if I need to cover it or not.
Mine is smooth drywall. I have seen a few people do this on lightly textured walls and it just comes down to if you like the look or not!
Recently purchased a home with sagging cheesecloth and wallpaper that needs to go. I want to do the board and batten look but what should I do to cover the shiplap under the wallpaper once I remove it?
Thanks
You can put up panel board if you want a clean look. Or, you can drywall over it!
Hi!
For the paint on your common boards what did you use?! Also what finish was it? Eggshell or satin? So pretty!
Hi! I love love what you did and feel so inspired to do it myself. This will be my first diy wood project and I was needing a little design help. Would it have looked OK if you would have stopped right before the door and not taken it above the door?
Yes I think so! I’d just make sure to line up the last piece so that it runs floor to ceiling right along the edge of the doorway so it feels finished.
Looks great! My concern was leaving my existing trim and baseboard and the 1×4” pine being thicker than the existing trim….is yours a little thicker as well? Did you leave it like that?
Mine is a bit thicker! It’s totally a preference. It doesn’t bother me, but if you want to it is easy to swap out the baseboard!
You could use 1/2″x4″ for your board & batten material instead of 1″x
What are both of the color names and brands in the bedroom (green and off white)??
The green is Regal Leaf and the white is Shiplap. Both by Magnolia Paint. 🙂
Love this! How did you tie in with your existing baseboards?
I chose to simply but them up to the existing baseboards. There is a slight overhang, but it doesn’t bother me. If it bothers you, you’d just need to replace your baseboards with a similar sized wood trim to your battens.
Sarah,
This adds such beautiful texture to the walls. And so much easier than one would think!
🙂
Yes! These easy updates make such a huge difference.