
How to Stain a Door: The Ultimate Guide to Staining Doors
Are your interior wood doors looking dull and lifeless? Do you want to transform them into stunning focal points that add character and charm to your home? Look no further than this tutorial on how to stain a door!

Whether you’re a seasoned DIY enthusiast or just starting out, this comprehensive guide is here to help you unlock the secrets of professional door staining. From surface preparation to selecting the right tools and techniques, I’ll walk you through step-by-step instructions to achieve a flawless finish. So, grab your materials and let’s dive into the ultimate guide to staining doors!
This post may contain affiliate links for your convenience.
What is the Easiest Way to Stain a Door?
Everyone loves a quick and easy project. Here is an easy summary of the detailed tutorial you’re about to dive into.
The easiest way to stain a door is to follow these steps:
- Remove all hardware
- Sand and clean the door with proper preparation
- Set up a flippable workstation (see notes below)
- Apply wood conditioner, then sand smooth
- Apply stain to desired color depth
- Apply 2-3 coats of polyurethane
- Rehang door
Now, let’s dive into an often overlooked, but vital, part of the process.
Understanding the Importance of Surface Preparation
Before diving into your project, it’s crucial to understand the importance of surface preparation. While it may not seem like the most thrilling part of the process, trust me, it sets the foundation for a flawless finish that will make your doors look professionally finished.

Why is surface preparation so vital?
It is the foundation that ensures your chosen stain adheres properly to the wood and delivers optimal results. By taking the time to prepare the surface, you create a clean canvas that allows the stain to penetrate evenly and deeply, resulting in a rich and consistent color.
Proper Cleaning Technique
The first step in surface preparation is to thoroughly clean your doors.
If you are staining a brand new door, as I am in this tutorial, you can simply wipe down any dust with a dry cloth. However, if you are staining doors that have been used previously, you will want to take extra care.
Remove any dirt, dust, or grime using a mild detergent and a soft cloth. Pay attention to the nooks and crannies, as these spots tend to accumulate the most dirt over time. Once cleaned, allow the doors to dry completely before moving on to the next step.
Sanding for Optimal Coverage
Next, it’s time to sand the surface.
This step may sound tedious but it’s necessary. Sanding helps remove any existing finishes, smooths out imperfections, and creates a uniform texture, promoting better stain absorption.
Start with a coarse-grit sandpaper (80 grit) to tackle any rough areas or old finishes, and gradually work your way to a finer grit (220 grit) for a smooth and even surface. Ensure that you are always sanding with the grain. If you sand against the grain, you risk scratching the door. These scratches will show in your stain application.
If you are working on a door that has an existing finish, make sure to fully remove old stain or varnish in this step. New stain will not adhere correctly over old varnish.
After sanding, it’s important to remove any leftover dust and debris. Use a tack cloth or a lint-free cloth slightly dampened with mineral spirits to wipe down the doors. This step ensures that your doors are free from any lingering particles that could interfere with the staining process.
Protect Hardware
Lastly, it’s time to protect any areas that you don’t want to stain.
Apply painter’s tape around the edges and hardware of the doors to create a neat and clean finish. Better yet, remove all hardware completely so you can saturate the door in all the tight spaces.
This extra step may seem tedious, but it will save you hours of frustration and ensure that your focus remains on staining the doors, not removing accidental stains from unwanted areas.
By investing time and effort into proper surface preparation, you lay the groundwork for a successful door staining project. So, remember, take the time to clean, sand, and protect your doors before diving into the stain selection and application steps.
Choosing the Right Stain and Tools for the Job
Before you can begin staining your door, it’s crucial to choose the right stain and gather the necessary tools. Making these decisions early on will ensure a smooth and successful door staining project.
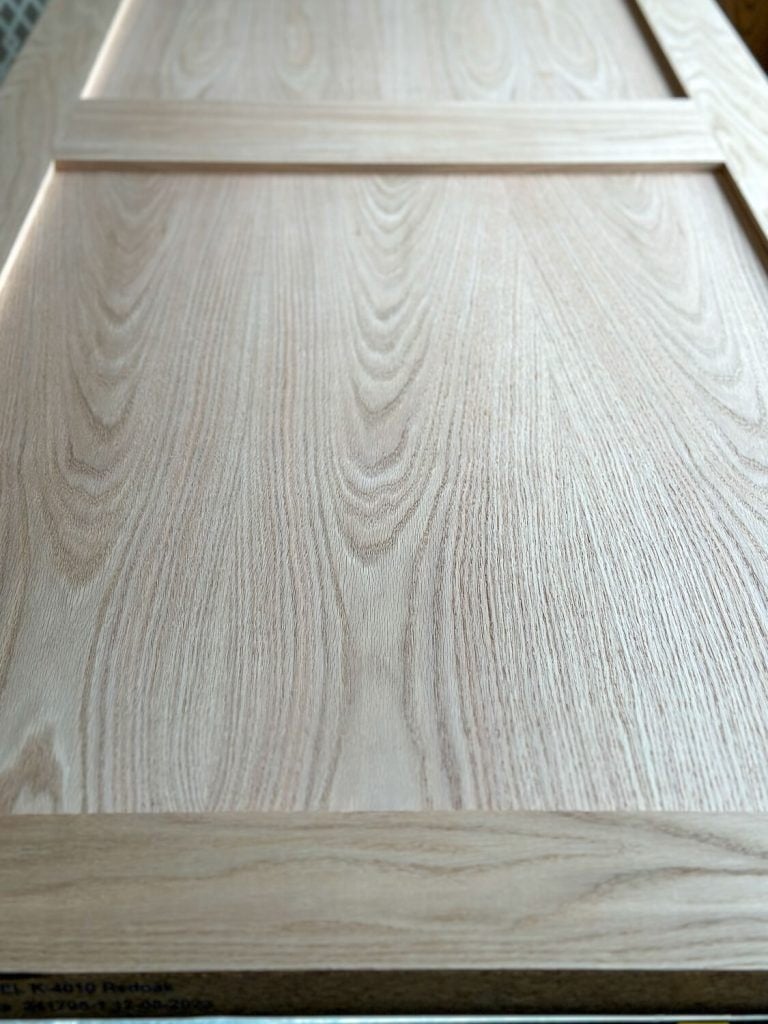
When it comes to selecting the right stain, consider the type of wood your doors are made of and the desired outcome you want to achieve.

Different stains provide varying levels of transparency, from a clear coat that simply enhances the natural beauty of the wood, to a solid color stain that completely covers the original surface.
Take into account the existing decor and color scheme of your space to determine which stain will best complement the overall aesthetics.
In addition to the stain itself, you’ll need a few essential tools to complete the job.
A high-quality brush is indispensable for applying the stain evenly and achieving a professional finish. Look for a brush specifically designed for oil-based stains, as it will have bristles that can handle the thicker consistency.
If you prefer a more controlled and precise application, consider using a foam brush or a staining pad.
Before you start staining, remember to protect any areas you don’t want to stain.
Recommended Materials List
You can purchase all of my favorites for this project linked directly via the affiliate links below.
- Sandpaper or sanding blocks (80-220 grit depending on if you need to strip an existing finish off first)
- Electric sander if removing a finish. This mouse detailer works well for corners.
- Wood Conditioner
- Stain color of choice. I like Miniwax brand and used the color Jacobean for this project.
- Gloves (May want to double up to avoid tears)
- Choice of Staining Applicator
- Tack cloths
- Additional brush for polyurethane
- Polyurethane or topcoat of choice
- Drop cloths for surrounding area
- Saw horses
The Complete Guide to How to Stain a Door
Step 1: Remove the Door and Prep the Workspace
Removing the door and prepping the workspace are the crucial first steps in achieving a beautifully stained door. Just as a painter carefully prepares their canvas, you must ensure that your workspace is clean and free from any obstacles that could hinder your progress.
Begin by removing the door from its hinges if it is already hung.
This will allow you to work on it more comfortably and access all its surfaces without any limitations. Remember to enlist the help of a friend or family member to make this process easier and avoid any potential damage to the door.
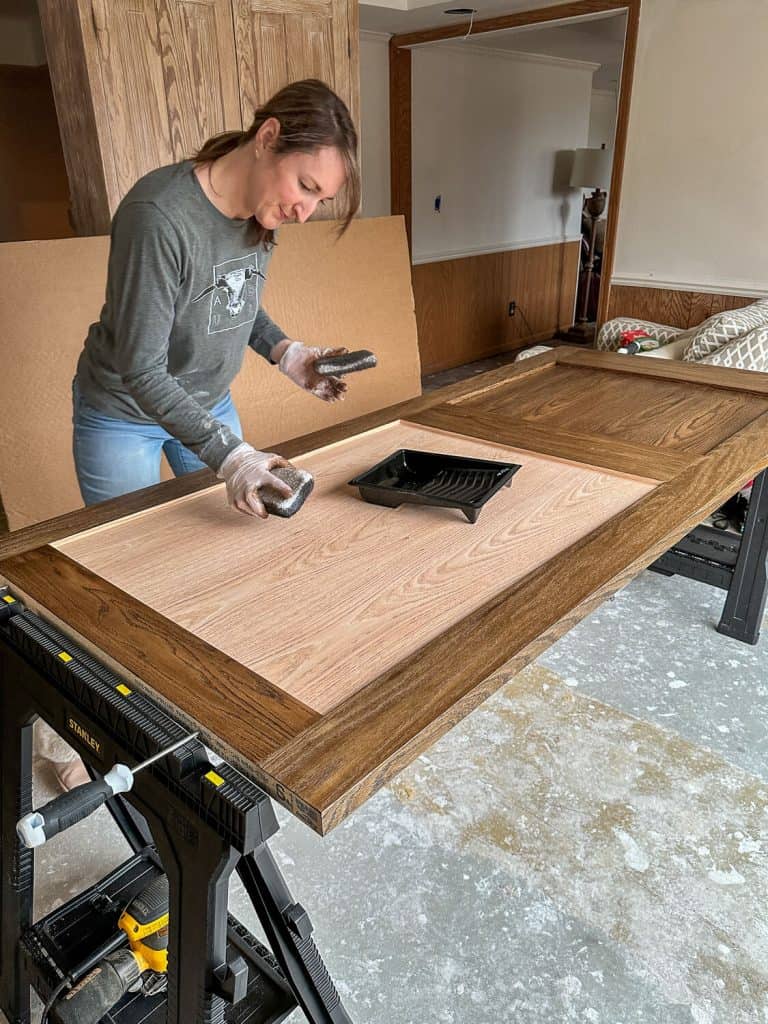
How to Set Up a Door for Staining
Once it’s removed, set the door on a pair of sturdy sawhorses or a flat, stable surface that will elevate it off the ground. I prefer to elevate my doors so they are flippable. This makes it a much quicker process to be able to do each step on both sides without extra dry time.
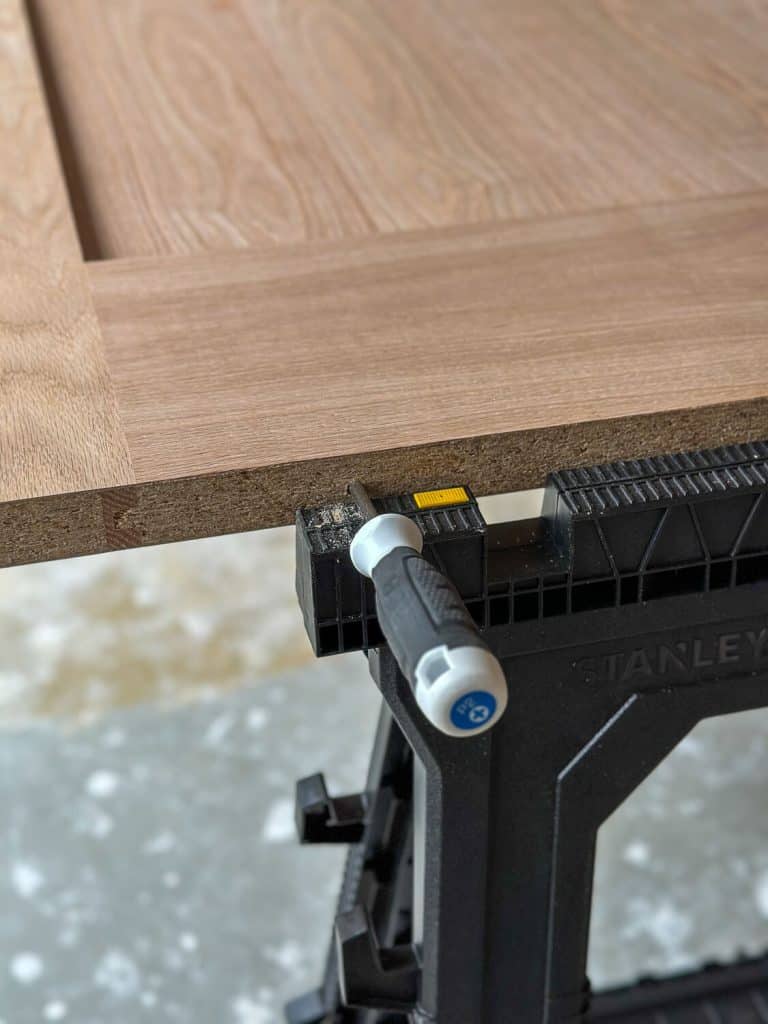
First, drill a hole in each corner of the top and bottom rails. Then, insert a long handled screwdriver into each hole. This serves as a way to flip the door easily as well as suspend the door on saw horses without touching the surface of the door.

Now that you have your door at a suitable working height, take a moment to survey your workspace.
Clear away any clutter or obstacles that could get in your way. Sweep or vacuum the area to remove any dust or debris that could potentially interfere with the staining process. By creating a clean and organized workspace, you’ll be able to focus on the task at hand and achieve the best possible results.
With your door removed and your workspace prepared, you’re ready to move on to the next section: sanding and cleaning the door. This is an essential step in ensuring a smooth and even stain application, so let’s roll up our sleeves and get to it!
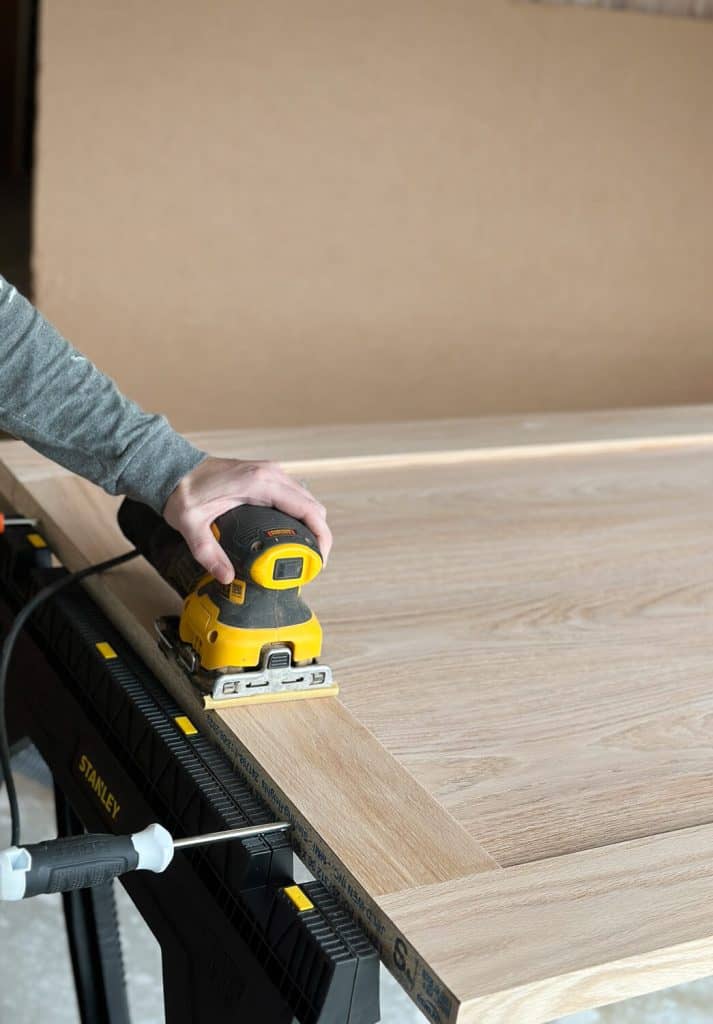
Step 2: Sand and Clean the Door
Sanding is a crucial part of the door staining process as it helps create a smooth surface for the stain to adhere to.
Do You Have to Sand a Door Before Staining?
While sanding prior to painting can be avoided using products like liquid sandpaper, staining a door is a different process.
You must sand your door prior to staining for the best finish.
Start by using a medium-grit sandpaper to gently sand the entire surface of the door. Be sure to sand along the grain of the wood, using long, even strokes. This will help remove any rough spots, imperfections, or old finish that may be present.
Once you have finished sanding, it’s time to clean the door thoroughly. Start by wiping it down with a tack cloth or a damp, lint-free cloth to remove any sanding dust. Pay close attention to the corners and crevices, ensuring no dust remains. Vacuum these areas if needed.
After wiping down the door, take a moment to inspect it for any stubborn dirt, grease, or stains. If you notice any, use a mild detergent diluted in water to gently scrub the affected areas.
Be sure to rinse and dry the door thoroughly after cleaning to ensure no residue is left behind.
By properly sanding and cleaning your door, you’ll create the ideal surface for the stain to penetrate and adhere to. This will result in a more professional and polished finish.
Optional: Apply Wood Conditioner
I like to use a wood conditioner prior to staining my interior doors. This serves two purposes.
- It helps control grain raising during the staining process.
- It aids in an even application.
After cleaning your door, apply one coat of wood conditioner with a brush. Apply with the grain in even strokes, without over-saturating. Make sure not to allow any pooling in corners.
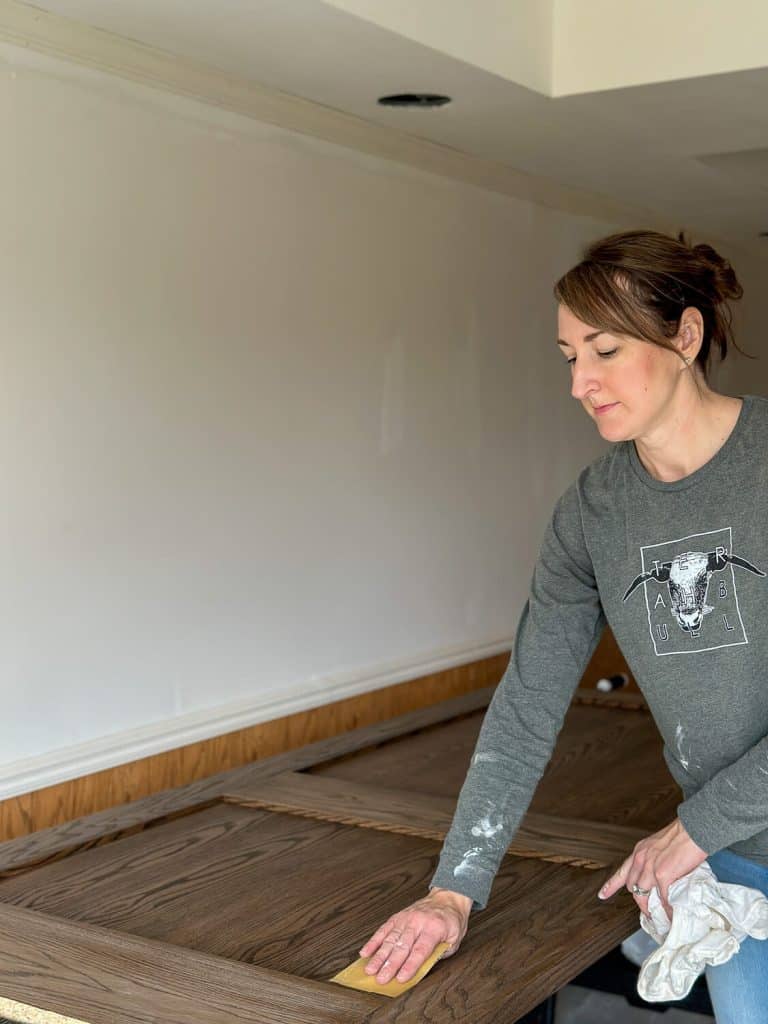
After the wood conditioner is dry, it will likely have raised the grain slightly. Do a light sanding with 120 grit sandpaper to even out the grain. Then, use your tack cloths to remove any dust once more before applying the stain.
This step is not required, however I find that wood conditioner helps the final product look the best on most wood species.
Step 3: Apply the Stain with Precision
After wiping down the door and ensuring it is thoroughly clean and dry, it’s time to move on to the next crucial step: applying the stain with precision. By taking the time to apply the stain carefully and evenly, you’ll achieve a beautifully finished door that will enhance the overall aesthetic of your space.
Before you begin staining your door, make sure you have all the necessary materials on hand.
This includes the stain of your choice, a high-quality paintbrush or foam applicator, and a clean, lint-free cloth. It’s important to choose a brush or applicator that is specifically designed for staining to ensure smooth and even application.
Make sure to reference my favorite materials above.
To start, give the stain a good stir to mix any settled particles, ensuring you get a consistent color throughout. Do not shake your stain. This will cause air bubbles that can cause an uneven finish once transferred to your door.
Then, dip your brush or applicator lightly into the stain, making sure to remove any excess on the rim of the container. Remember, it’s always better to start with less stain than you think you need and add more if necessary.
Begin applying the stain in long, even strokes, following the grain of the wood. Work in small sections, focusing on one area at a time to maintain control and avoid overlap or streaks. Take your time and pay attention to the coverage, making sure the stain is evenly spread across the entire surface.
As you work, periodically step back and inspect your progress. This will allow you to catch any missed spots or areas that may require additional attention. If you notice any unevenness or pooling of the stain, use your brush or applicator to smooth it out, blending it seamlessly into the surrounding area.
What Happens if you Don’t Wipe Off Stain?
I like to work in sections, applying the stain and letting it soak in for a few minutes, then wiping off with a lint free rag to remove any excess. This allows you to control how dark your finish is.

If you neglect wiping off the stain after the recommended time, it can result in a splotchy finish or oversaturated areas that don’t dry well. This can lead to a tacky (to the touch and visually) door.
How Many Coats of Stain Do You Put on a Door?
Once you’ve covered the entire door with the first coat of stain, allow it to dry according to the manufacturer’s instructions. This usually takes several hours, but it’s important not to rush this step. Rushing the drying process can lead to smudging or streaking, compromising the quality of your finish.
If you desire a deeper color or more richness, you can repeat the staining process with a second coat. Just be sure to follow the same application technique as before, ensuring an even and consistent finish.
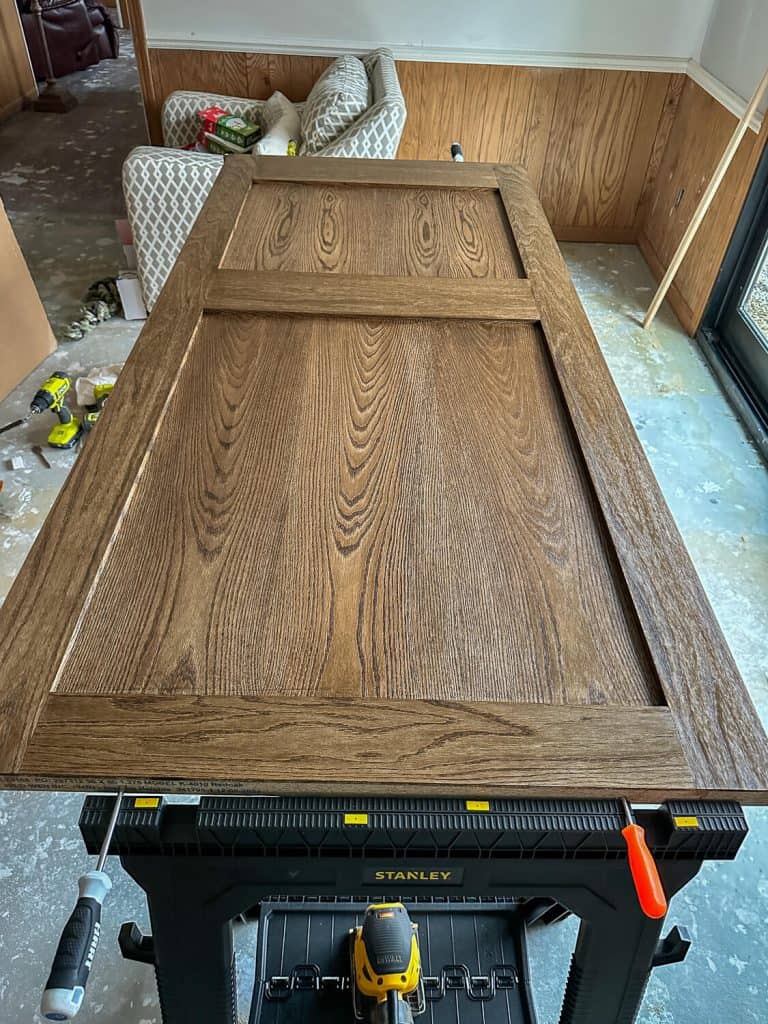
The more coats you stain a door with, the darker it will become. While only one coat of stain is necessary, you can apply more coats as needed to achieve your desired look.
With the stain applied and dried, you’re one step closer to achieving the beautiful, professionally finished door you envisioned. In the next section, we’ll cover the final touches and provide maintenance tips to keep your stained door looking its best for years to come.
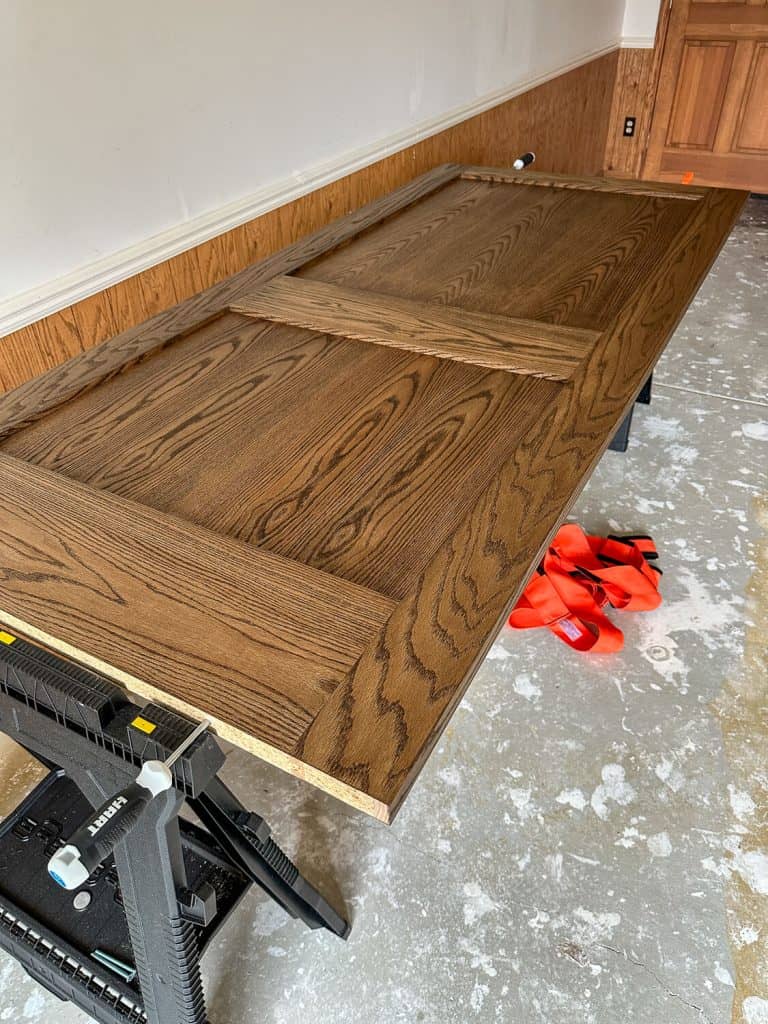
Step 4: Topcoat and Finishing Touches
Now that you have successfully stained your door, it’s time to put the finishing touches and learn some valuable maintenance tips to ensure your hard work lasts for years to come.
To add depth and protect the stained surface, a clear topcoat is recommended.
Before applying the topcoat, make sure the stain is completely dry.
Using a high-quality brush, apply a thin and even layer of the topcoat following the grain of the wood. This protective layer will not only enhance the look of your stained door but also guard it against everyday wear and tear.

Each brand of topcoat recommends a different number of coats. However, I’d recommend 2-3 coats for optimal protection.
Most brands of polyurethane recommend sanding lightly between coats to get the smoothest finish. This helps smooth out any bubbles or dust particles that have settled. Do not sand the final coat of polyurethane.
If you’ve chosen a light stain, make sure to avoid topcoats that can yellow your finish.
General Finishes, Flat out Flat is highly recommended for a non-yellowing polyurethane. However, I generally prefer this water based polyurethane which makes for easy clean up and a fast drying time.
Maintenance Tips
Remember, maintenance plays a crucial role in preserving the appearance and longevity of your stained door.
It’s important to keep the door clean and free from dust and debris. Regular dusting with a soft cloth will help maintain the luster and shine of the stained surface.
Avoid using harsh chemicals or abrasive cleaners, as they can damage the finish over time. Instead, opt for mild soap and water if the door requires more than a gentle wipe-down.

While staining provides a beautiful and durable finish, it is important to keep in mind that sunlight can cause fading and discoloration. If your stained door is exposed to direct sunlight, consider using curtains, blinds, or UV-protective film on nearby windows to minimize the impact.
Additionally, periodically inspect the door for any signs of wear or damage. Small scratches or dents can be easily repaired with a touch-up kit specifically designed for stained doors.
By taking these simple steps, you can maintain the beauty of your stained door and ensure its longevity for years to come.
Key Takeaways for How to Stain a Door
My hope is that this ultimate guide for how to stain a door has provided you with the knowledge and tools necessary to achieve a professional-looking finish on your interior wood doors.
Remember the importance of surface preparation, selecting the right stain and tools, and following the step-by-step instructions for a flawless outcome.

By taking your time, paying attention to detail, and enjoying the process, you have the power to transform your doors into stunning focal points. Remember, it’s not just about the end result, but also about the journey of creating something beautiful and learning a new skill.
Now that you have the knowledge and confidence to tackle this project, it’s time to put your skills to the test. So go ahead, pick up that brush, and let your creativity flow. You have the ability to turn your doors into works of art.
Can You Stain a Door While It’s Hanging?
It might be tempting to stain your door while it’s still hanging to avoid the hassle of taking it on and off and finding a new work surface. However, I would caution against it.

SHOP THE LOOK

Technically, you can stain a door while it’s hanging. But you will deal with catching relentless drips, a messy floor, and difficulty staining around hardware. In my opinion, it is more work to stain doors on a hinge than laid out flat.
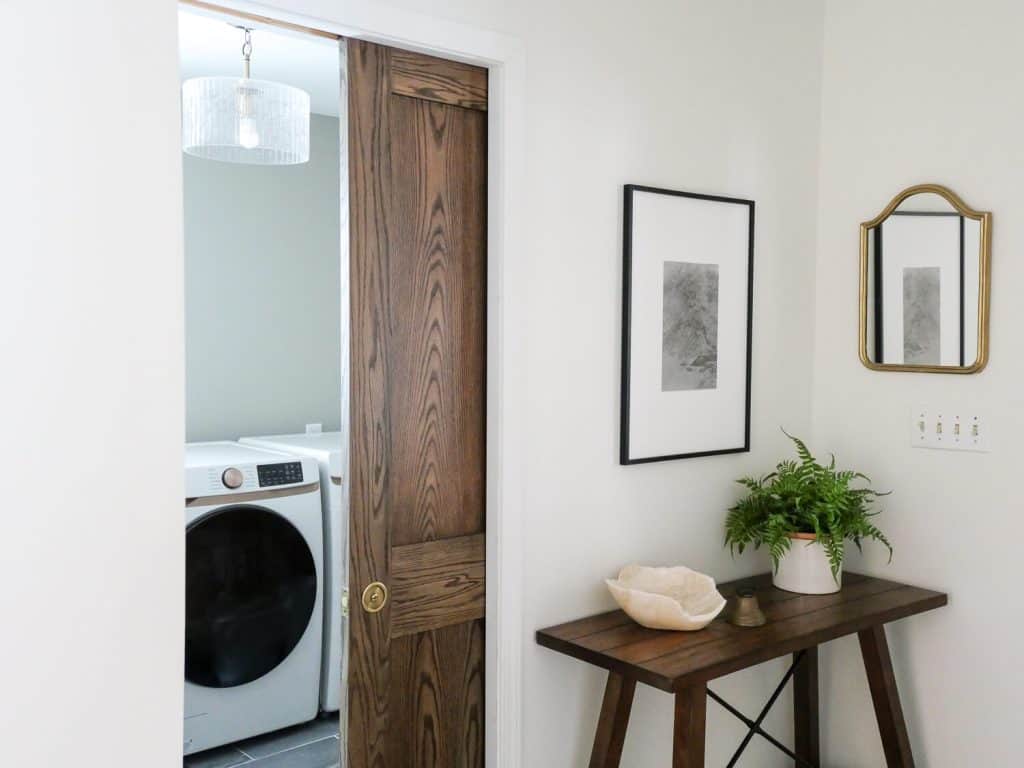
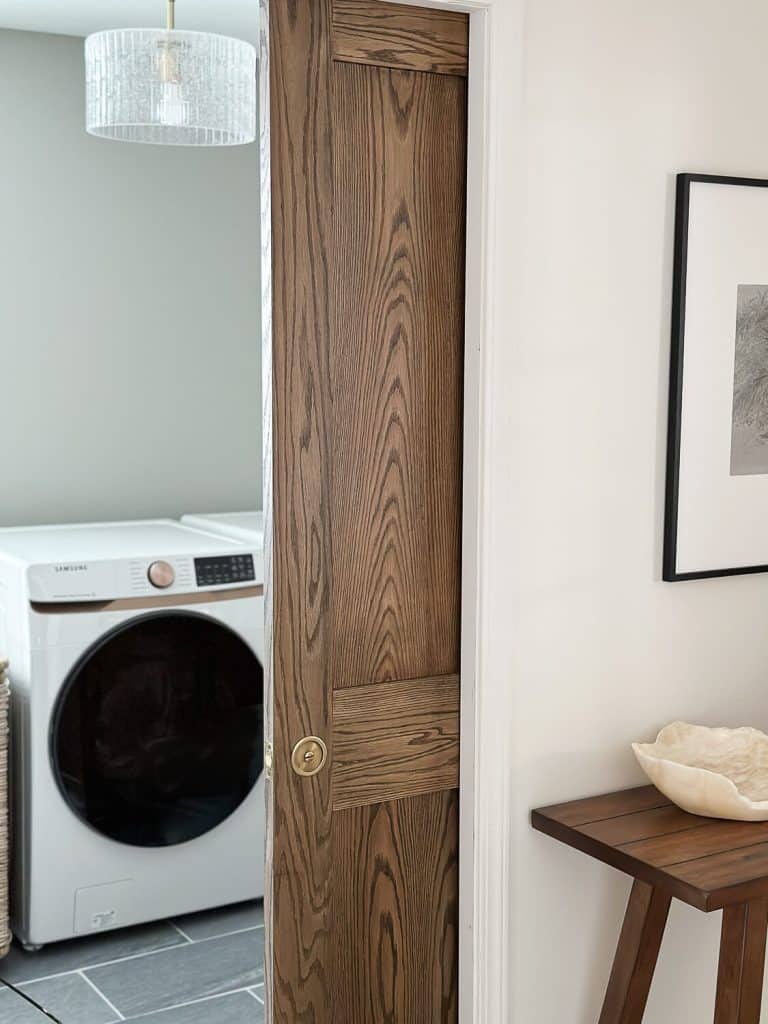
If you are staining a pocket door like I did, you will definitely want to remove it from its hardware to access all sides.
Best Way to Paint Interior Doors
While this article has focused on how to stain a door, there are many cases where painting interior doors is a great option as well. If you are on the fence about which route to go, check out these tutorials on how to paint interior doors.
- Pros and Cons of Spraying v. Hand Brushing Interior Doors
- How to Paint Interior Doors with a Paint Sprayer
More DIY Tutorials
I hope this guide to how to stain a door has been helpful to you! Make sure to check out my arsenal of DIY tutorials cataloged here at Grace In My Space.
DIY Archives


Thanks for stopping by the blog today! Make sure to subscribe to get my Grace Notes directly to your inbox and to access all my insider perks. You can also follow along daily on Instagram and weekly on YouTube!
~Sarah
Your narrative style is so engaging and immersive that I was drawn in from the very first paragraph.
I was drawn in from the very first paragraph; your narrative style is truly engaging and immersive.
That’s amazing! They’re exactly what I was looking for! I thank you all for sharing these wonderful and satisfying experiences with me! Now let’s go with family and friends.