
Easiest Way to Make a Custom Peg Rail Yourself
Have you ever wanted to make your own DIY peg rail? Building a peg rail yourself is a great way to save money and create something custom for your specific space. Follow these simple steps for a beginner-friendly custom peg rail tutorial!

Post may contain affiliate links for your convenience.
Where To Use Peg Rails in the Home
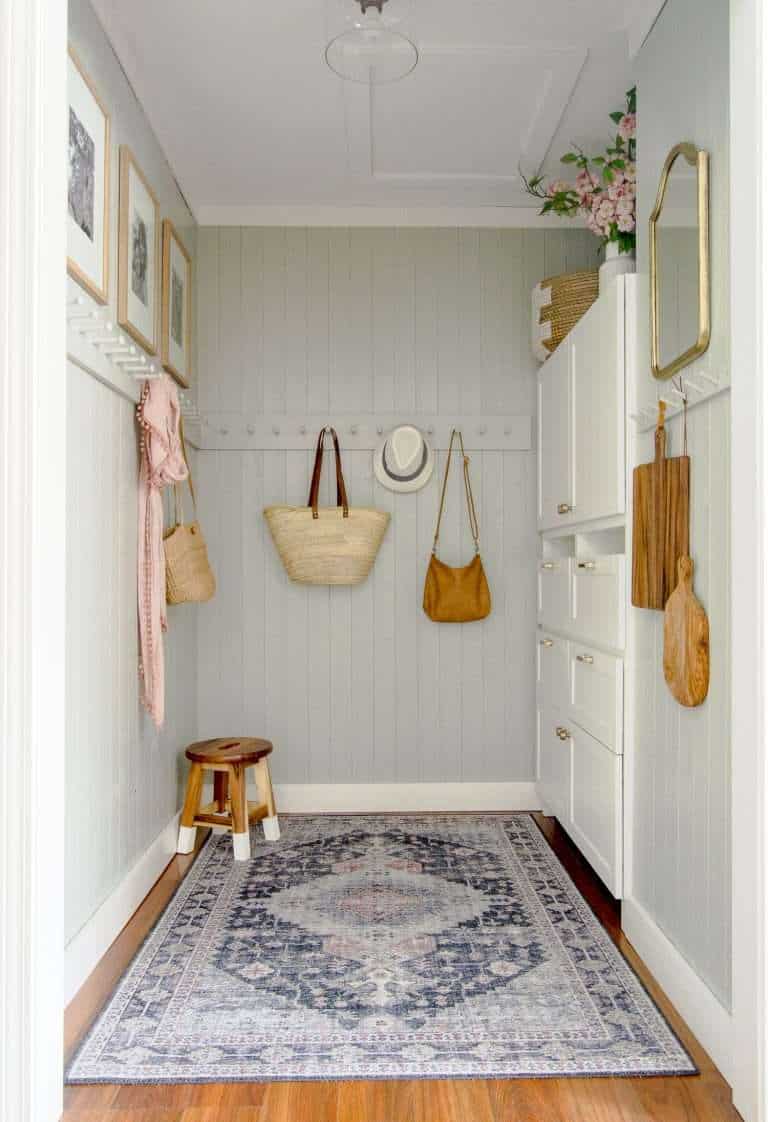
Most often, peg rails are used in entryways and mudrooms for simple coat storage. However, peg rails can be used in literally every room in the home!
They are so versatile, flexible to accommodate different designs, customizable for specific spaces, and functional for all types of organization.
What Do You Hang on a Peg Rail?
Here are a few ways I like to use peg racks throughout my home.
- Entryway: Guest coats, purses, market bags
- Mudroom: Backpacks, drying gloves and hats, coats, brooms, ball cap storage, go-bags
- Kitchen: Drying herb bundles, aprons, kitchen towels, oven mits, measuring cups/spoons, pretty and petite hanging decor
- Bathroom: Towels, bathing suit drying racks, loofahs, small mirrors
- Laundry: Delicates drying rack, hanging storage for dryer balls and scrub brushes
- Bedrooms: Robes, bags, next day’s clothes prep
- Living Room: Blankets, hanging artwork
- Dining Room: Coffee mugs, stemware, decor
- Storage Room: Extra chairs, folding tables, cleaning supplies, tools
How to Make a Custom Peg Rail
Now that you have some ideas of ways to use peg rails, follow this simple tutorial to make your own!
Most traditional peg rails use shaker pegs.
However, many modern pegs are also available if you prefer a sleeker look. One thing I would caution you on using modern pegs: they tend to be more difficult to use.
Modern pegs are usually cylindrical without any variance on the end. This means that there is no lip to catch and provide resistance to the items you’re hanging. Either this means that your items fall off easier, or you need to build your custom peg rail with the pegs at an angle.
This is more difficult to do from a wood working standpoint. So I personally prefer to use shaker pegs for a more beginner friendly project.
What is a Shaker Peg?
A shaker peg is the traditional style of peg that has been used for centuries. It has a tapered tenon on one end and is carved out with a lip on the other. This is the “peg” in the traditional term “peg rail”.

The rail is simply a piece of wood which the pegs are installed into. It can be various sizes of width and length depending on your space.
How Far Apart Should Pegs Be on a Peg Rail?
Pegs should be approximately 5″-6″ apart on a peg rail.
While any peg rail can be customized for a specific purpose, this is a standard distance that will accommodate most uses. If you are building something specific, like a peg rack for stemware, then you will likely install your pegs much closer together.
That is the beauty of making your own! You can customize it to your specific needs when it might be difficult to find already made elsewhere.
How Do You Paint a Peg Rail?
First of all, not all peg racks need to be painted. Many are built and stained, which is a beautiful option.
However, if you want to paint yours, then it is a very simple process.
You have a few choices for how to paint a peg rail:
- Build it fully, then spray paint the entire rack
- Pre-drill your peg holes into the rail, then paint the rail and pegs separately with a brush/roller
- Build it fully, then hand paint the entire rack with a brush
Each option has its pros and cons.
- Spray painting a fully built rack is easiest, but limiting if you don’t have a paint sprayer or want a custom color not found in traditional spray paints. It can also be difficult to do if you don’t have a spray booth or space to spray paint.
- Painting the rail and pegs separately works well, but you may need to touch up after the final assembly, and it can be time consuming.
- Hand painting a fully built rack is definitely the most tedious option as it can be hard to get all the pegs painted well. However, you won’t need to worry about touch ups at the end.
Personally, I prefer option 2. This also allows me to paint the rail, and leave the pegs wood, as you’ll see in today’s example.
Materials Needed to Build a Custom Peg Rack
Since each person’s project will be customized to their space, the dimensions of the materials will be personalized to you. Keep in mind, you can make yours with any species or size wood, any type of moulding, different style pegs, and the color or stain of your choice!
Poplar and pine paint well. Walnut, maple, and red or white oak will stain nicely.

Here are the items you will need to replicate what I’ve done.
- 1x8x8 Poplar board (Make sure to use good, straight boards. Avoid common boards. While they are cheaper, they usually have imperfections and bows that make the final product look poor.)
- Craftsman PVC shoe moulding (Optional. Or, trim style of your choice.)
- Pegs (I used walnut pegs to match my kitchen island. Here are some more affordable options if you are painting your pegs.)
- Drill and spade bit the same diameter as your peg tenon
- Miter saw, hand saw, circular saw or table saw to cut boards to length
- Sandpaper
- Wood glue
- Rags
- Paint/Stain of choice
- Rubber mallet
- Caulk and wood filler (optional depending on your customization)
- Screws and/or brad nailer for installation of rail and trim pieces
I prefer 3.5″ pegs for most of my builds. Any shorter, and they are limited on what it can hold.
Also, you can also purchase this type of peg which utilizes a screw rather than a tenon. This is a slightly different process for installation, but both options are very durable.
1. Measure and Customize
The first step for how to make a custom peg rail is to measure your space.
If you are making a single peg rail, then mark down all your measurements and cut your board and trim pieces to length.
You may want your end caps to be customized as well. If that’s the case, cut your returns now so you ensure that your board and trim are the same length.
I kept my cuts as simple straight cuts since I am painting my rail.
If you are going around a room, make sure to cut your corners on a miter saw so your angles match up correctly to turn the corner. You can see an example of a full room of peg rail in this other tutorial I’ve shared in the past.
2. Decide on Spacing
Next, lay out your pegs to customize your spacing.

Most peg rail boards are 4″-5″ wide. My board, shown here, is 8″. I purposefully bought an 8″ board so I could layer two rows of pegs. If you only want one row, space your pegs out down the middle of the board.
To add two rows of pegs, mark your board into thirds and then find the center on the top and bottom third to lay out your pegs.
Determine how far apart you want your pegs to be spaced, and then mark where each peg will be installed with a pencil.

I spaced my pegs 6″ apart, and offset the bottom row from the top every three inches.
3. Drill The Holes for Your Pegs
After you’ve pre-marked where each peg will go, drill a hole with a spade bit the size of your peg’s tenon. For example, if your tenon is 1/2″ in diameter, use a 1/2″ spade bit.

Place a piece of tape on your spade bit to mark how deep your tenon is. This is a good way to having a stopping point when drilling so you don’t go all the way through the board.
Place a piece of scrap wood under your rail board and drill all the peg holes. Take extra care to drill them straight up and down. If you drill at an angle, your peg will install at an angle.

If you mistakenly drill all the way through the board, that’s ok. Your tenon will still have the strength it needs when installed. However, I like to keep the peg hole only as deep as my tenon so the wood glue has something to adhere to on the back of the peg.
4. Paint/Stain and Assemble
Once all your peg holes are drilled, sand the rail smooth.

At this point, you can decide what order you want to finish your peg rail from the options above.
You can either assemble everything first and then paint/stain. Or you can paint/stain the rail and pegs separately and assemble once dry.

I chose to prime my rail first. Then, I attached it to the wall, painted and added the pegs. I painted it on the wall only because I was using the same color as the wall. If I was doing a different color, I would have painted and then installed.
I also seal my pegs with a clear coat so any moisture from drying gloves and hats doesn’t cause damage. This step may be optional for you depending on how you will use your peg rail.
Dry Fit and Adding Custom Options
When you are ready to assemble the peg rail, do a dry fit first to ensure everything looks the way you want it.

Then, use wood glue to install the pegs. Spread the wood glue out in an even layer across the entire sides and back of the tenon. Take care not to get it on the part of the peg that will show. It can easily be wiped off after installation, but before it is dry.
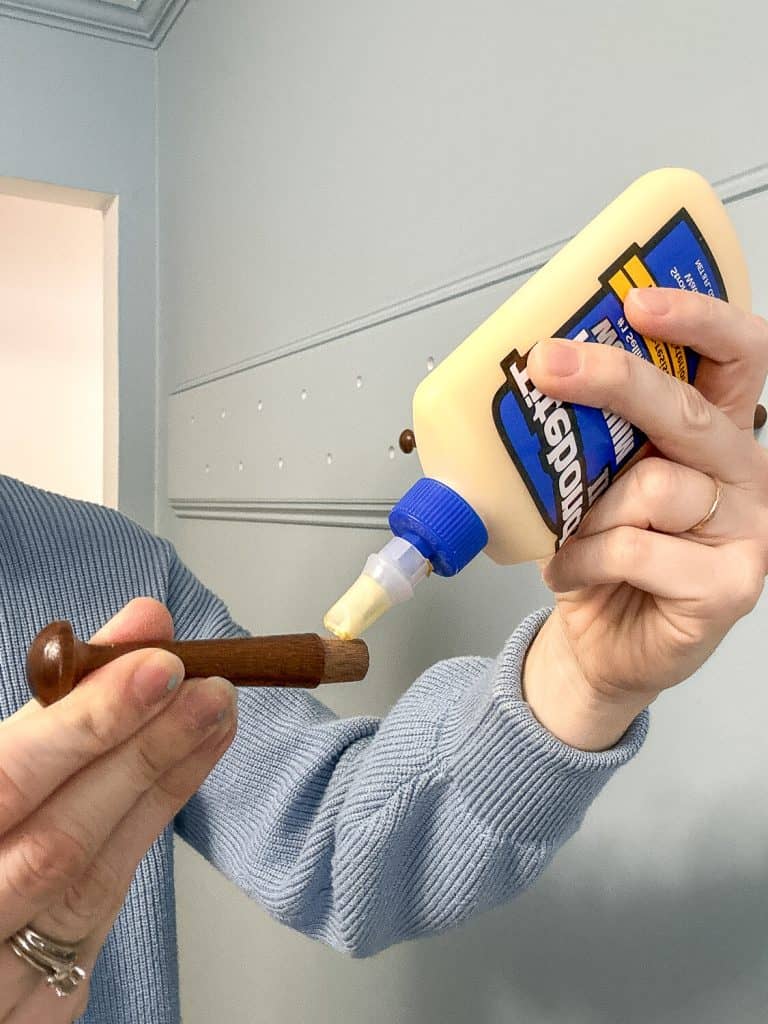

Use a rubber mallet to gently tap your glued tenon into the hole. Wipe away any excess glue and repeat this process for all the pegs. Let dry fully according to manufacturer’s instructions before use.
If you are also adding a custom trim option like I have, attach it to the rail board. Then, caulk any seams and fill/sand any nail holes for a seamless finish.
5. Installation
When you’re ready to install your peg rail on the wall, you have a few options depending on what you’re going to use it for.
Lightweight use of a peg rail (such as drying herbs) doesn’t require as much stability. You could even use picture hangers on the back of the rail and hang it on nails.
However, if you want to use it for items like coats and backpacks, you’re going to want to install the peg rail with screws into studs.
I like to countersink my screws using this countersink drill bit set.

This allows me to place my screw anywhere on the rail it needs to go to match up with a stud. Then, I can easily fill it with wood putty, sand smooth and paint over it. No one will ever know a screw is there!
Alternatively, you can use these wood plugs to cover your screws. The downside of these is that if your stud is in an odd spot on your rail, it may look uneven or obvious in relation to the pegs.
6. Touch ups and Decorating
After you’ve installed your custom peg rail, do any remaining touch ups from the installation process. You’re ready to use your new custom made peg rail!
I love that you can customize this with any width wood, any type of trim, or leave it without trim altogether like I did in this tutorial. You could also add a small shelf above the peg rail that mimics traditional board and batten.
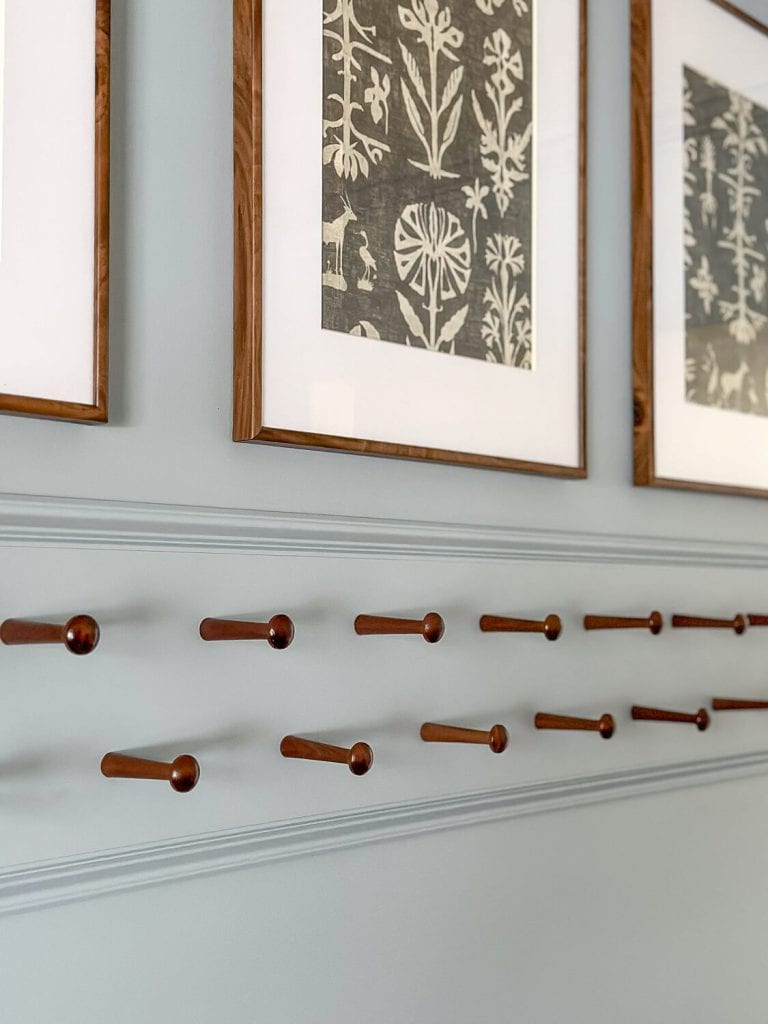
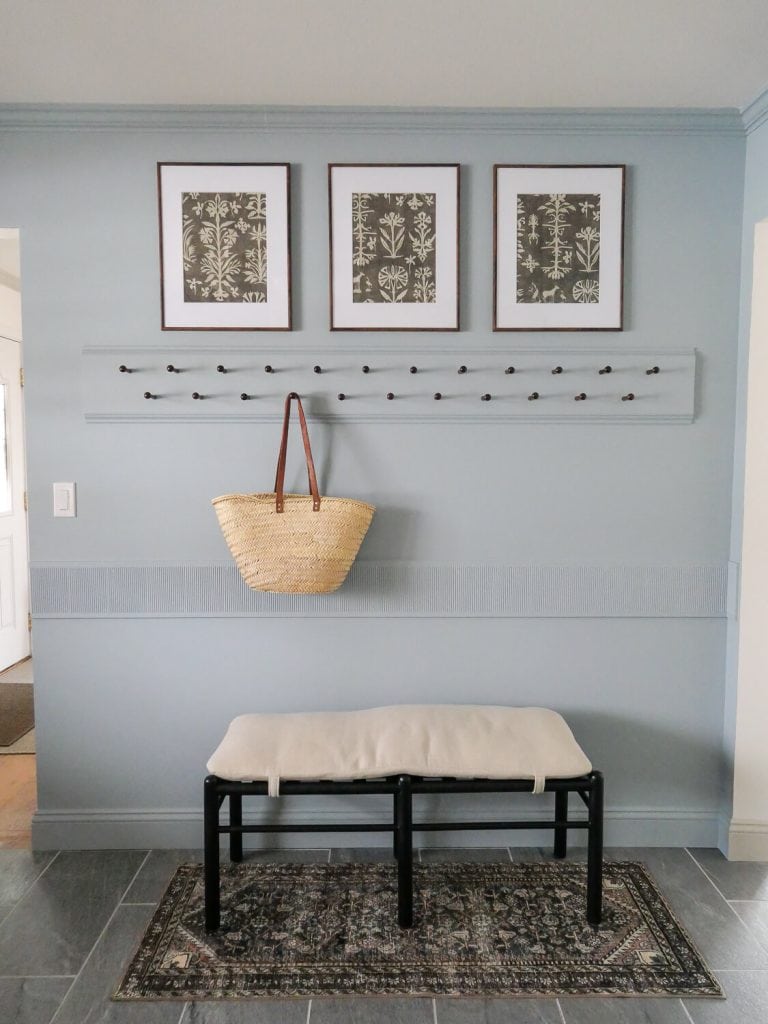
I really like how the wood pegs look against a painted rail. There are so many different ways you could design your own.
What kind of look do you prefer?
How Sturdy is a Peg rail?
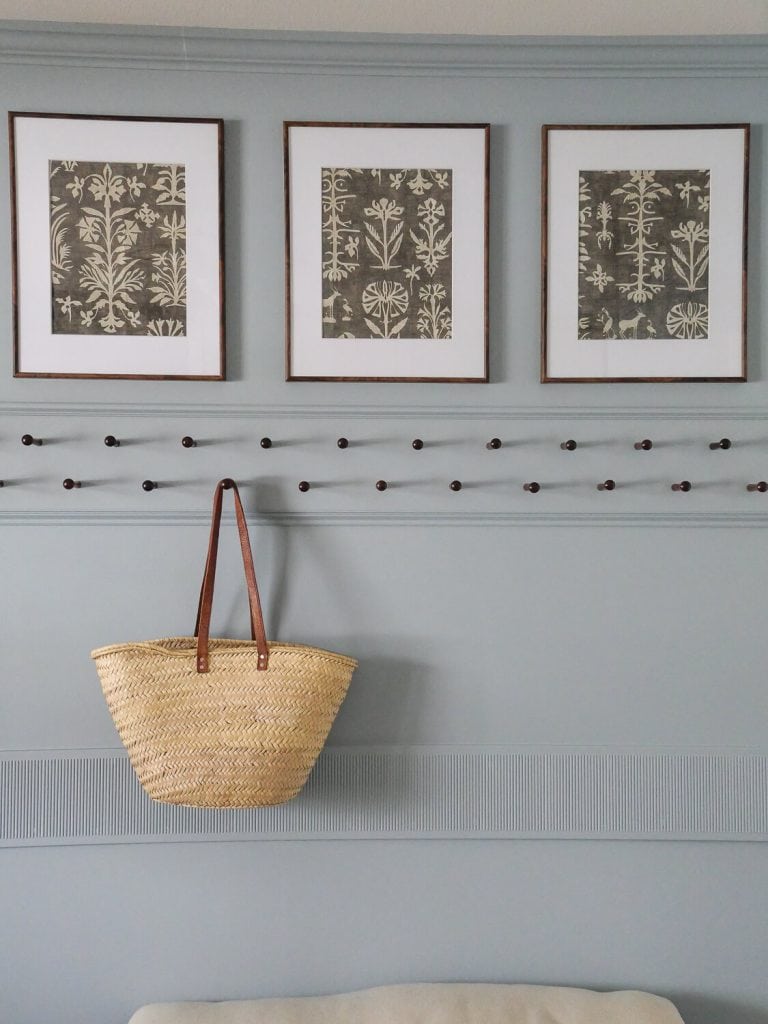
Now, we all love to look at pretty pictures and nicely styled spaces.
SHOP THE LOOK

But the reality is, I’m betting you need your new peg rail to actually hold some things.
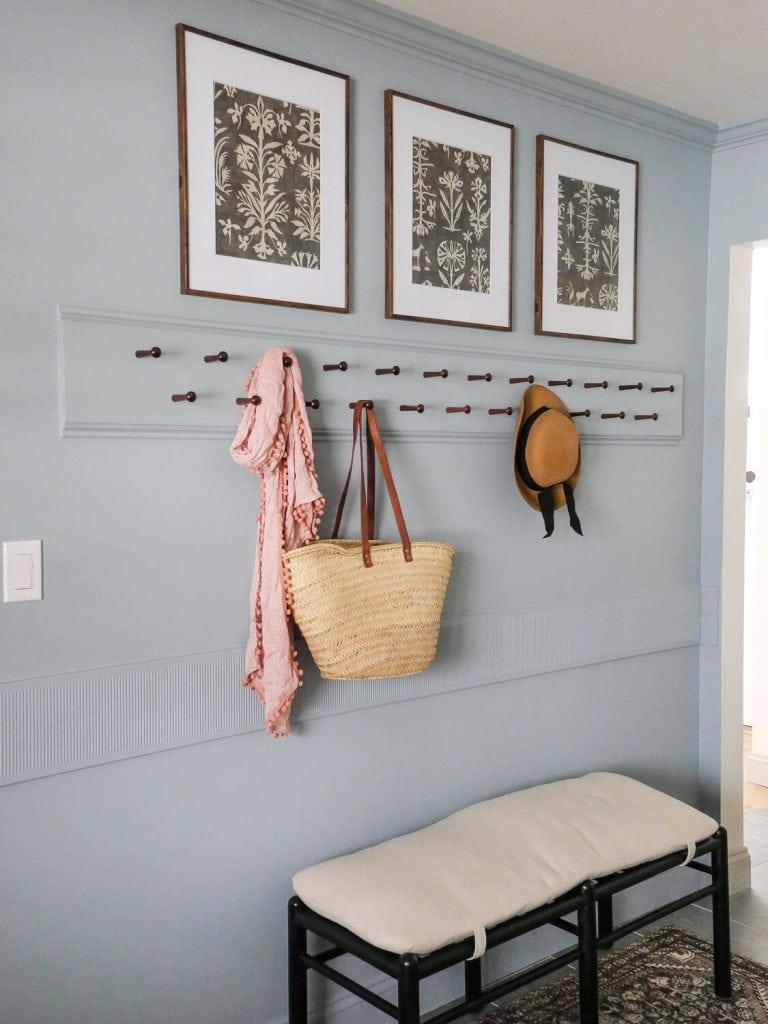
How’s this reality?

Seven winter coats, a heavy sports backpack and ball caps, with room to spare!
When installed into studs, a peg rack is very sturdy. It is all in the installation so be sure to do this portion of the project accurately.
More Beginner Friendly DIY Projects
I hope you enjoyed seeing this project come together.
If you prefer to learn visually, make sure to check out the full tutorial on YouTube.

You can head next to check out more beginner friendly DIYs here.
Thanks for stopping by the blog today! Make sure to subscribe to get my Grace Notes directly to your inbox and to access all my insider perks. You can also follow along daily on Instagram and weekly on YouTube!
~Sarah

Thanks
Hi Sarah!!
I love following along & have learned so much from you!! My husband and I are DIY’ers! I love the 3 pictures above the peg board. Are they linkable or did you make them yourself?
Thank you!!
Thanks so much for being here! The photos are actually just framed Wallpaper!