
Easy Updates for Fireplace Makeovers on a Budget
Fireplaces are an amazing asset in a home, but an outdated design can detract from a space. We have an amazing wood burning fireplace in our guest house that I’m excited to update for week 3 of the One Room Challenge! Here are some easy updates for fireplace makeovers on a budget!

Guest House Remodel
If you’re new to my guest house remodel, make sure to visit the first two posts in the series to see all the before photos and design plans! And, make sure to check out all of the ORC participants for hundreds of projects that are going to be amazing!
Fireplace Mantel Plans
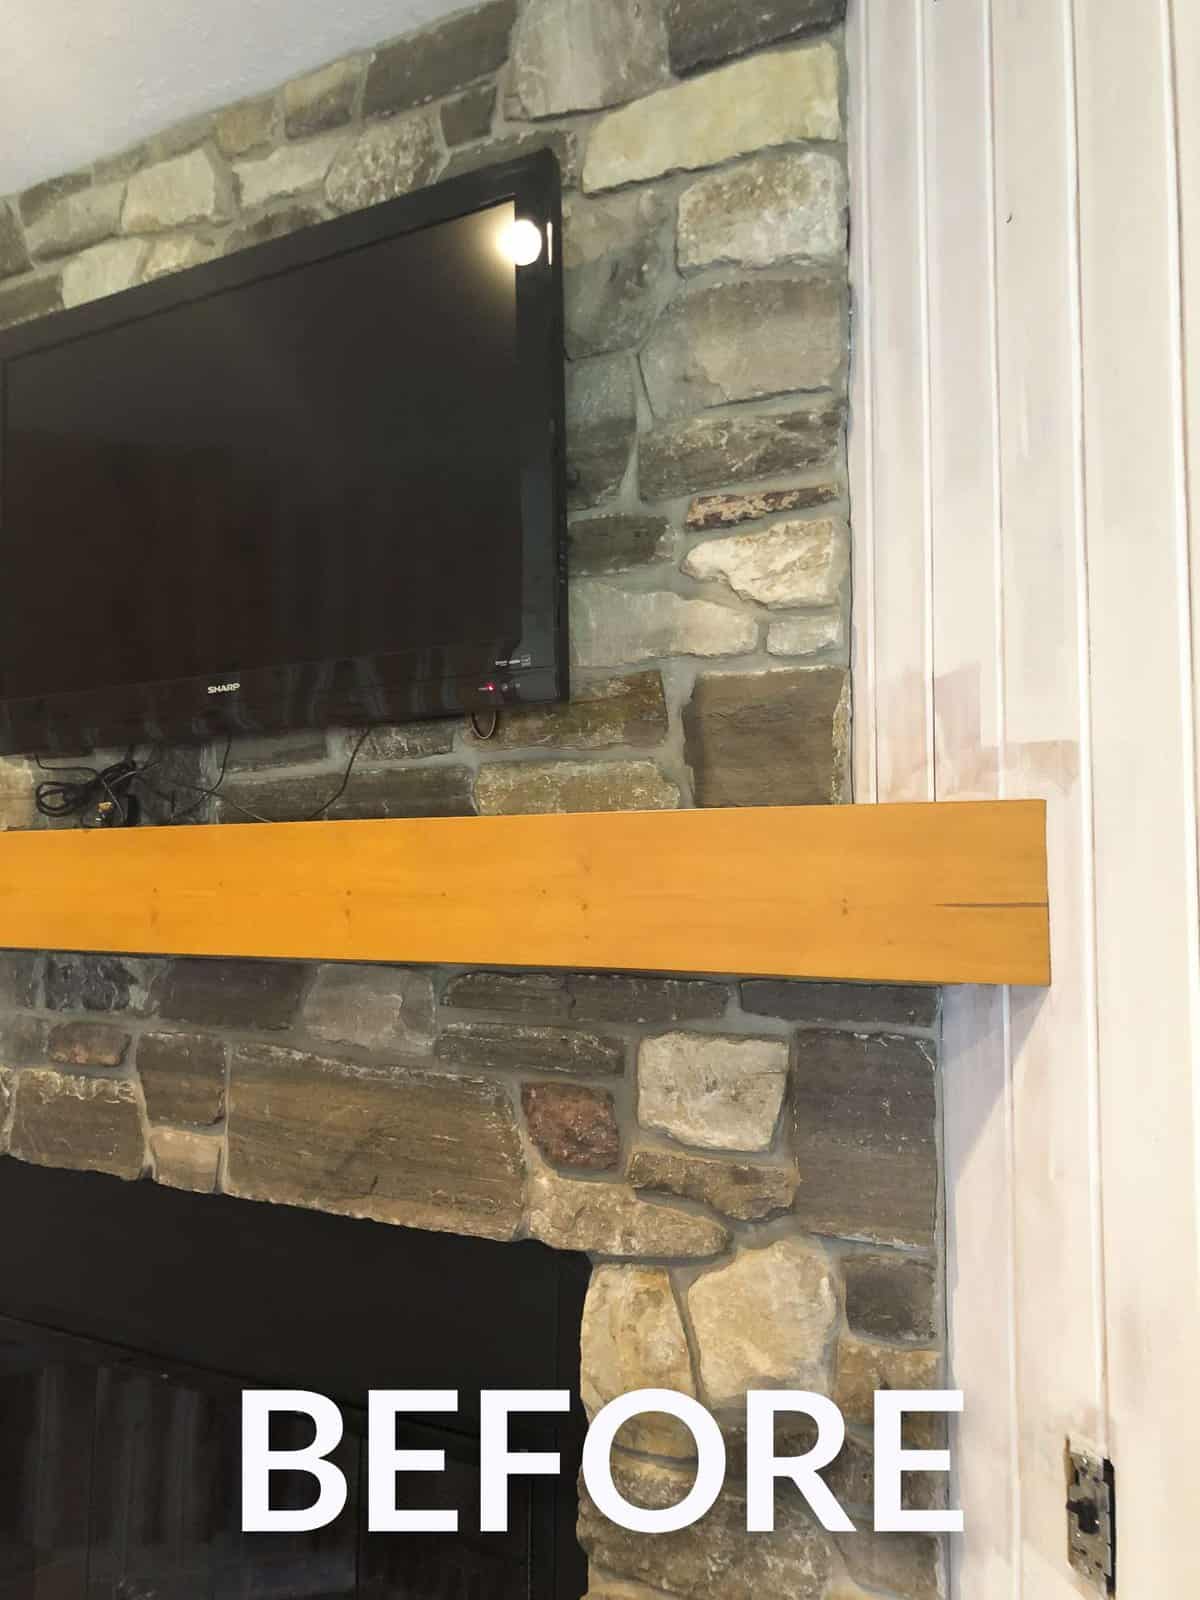
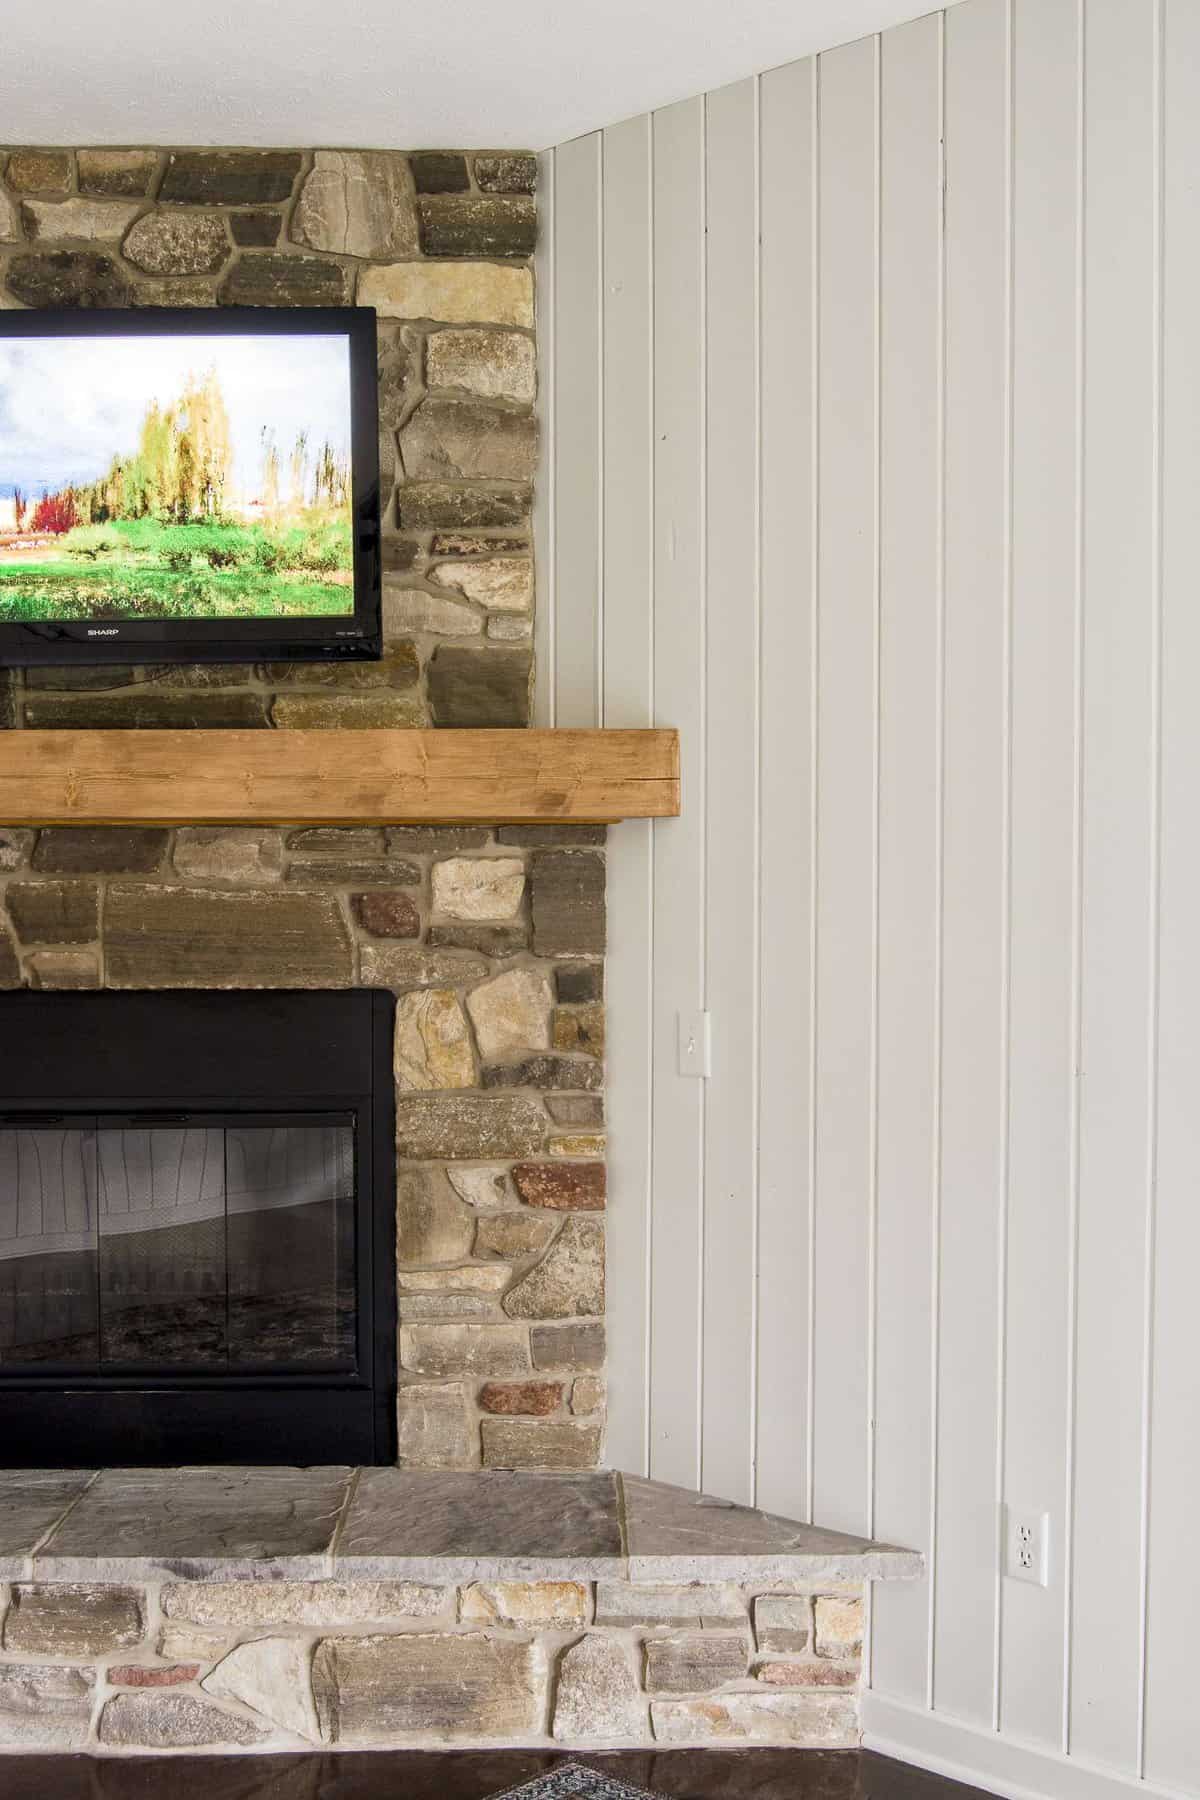
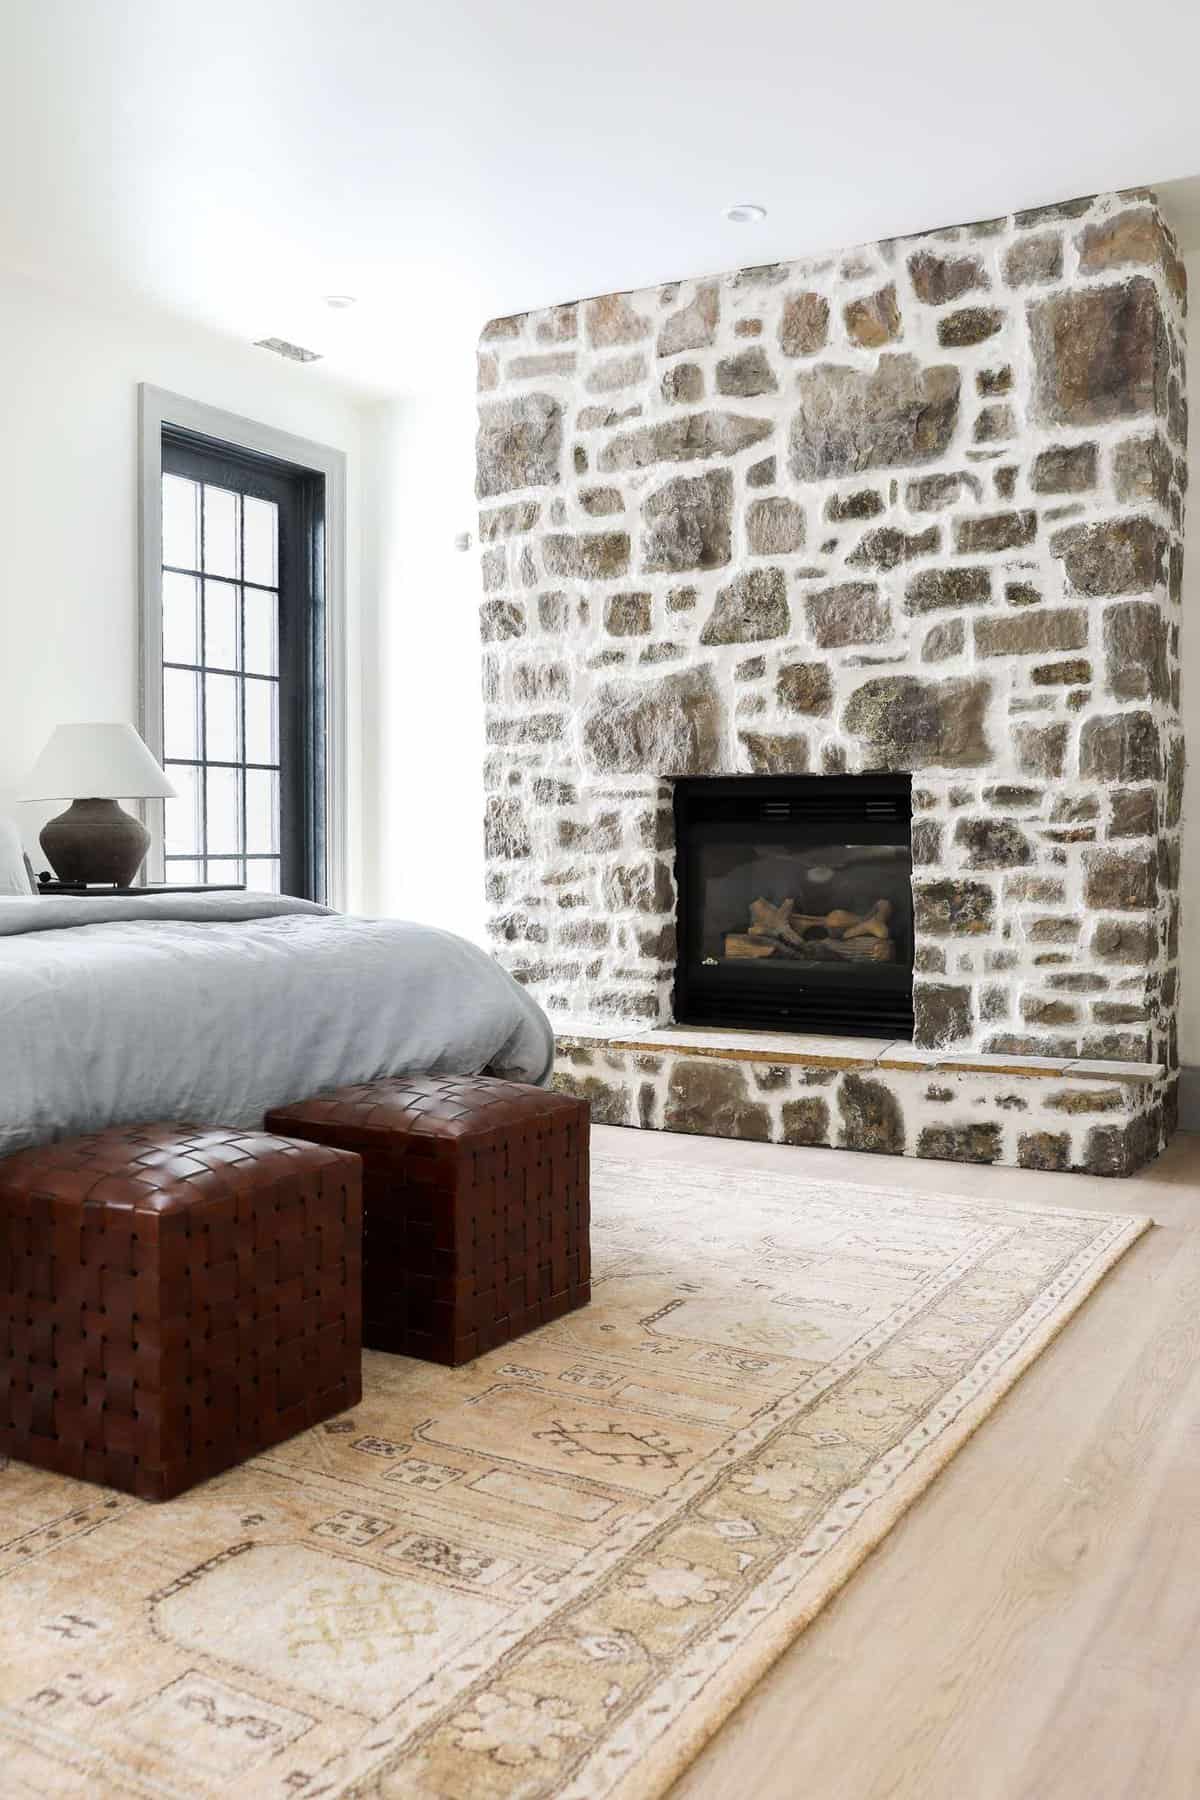
Let’s start by taking a look at our existing wood burning fireplace. It is well built, however the design aesthetics are not my style. The orange stained mantel had to go!
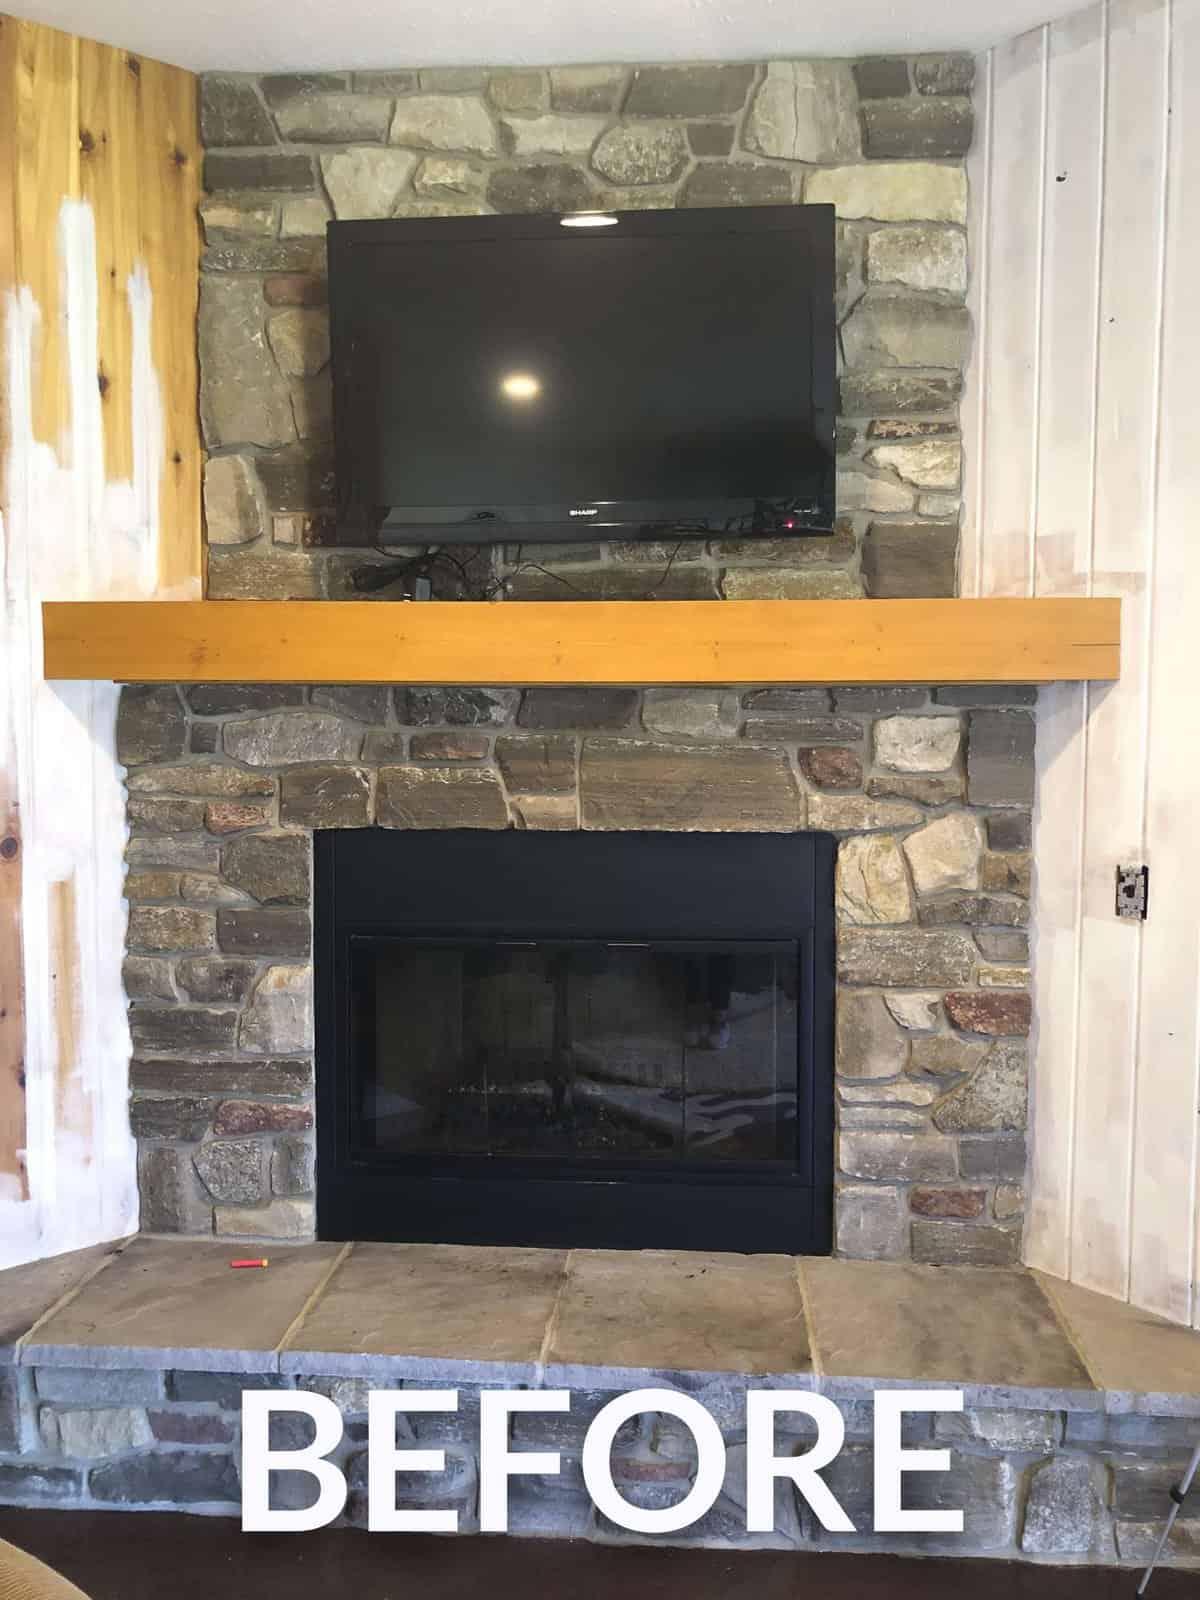
It literally assaulted my senses every time I looked at it. In my opinion, it detracts from the stonework because it is so bright.
My initial thought was that I would simply sand down the mantel and re-stain it to a calmer color. And that began my brainstorming for easy updates for fireplace makeovers on a budget!
Fireplace Makeovers on a Budget
I’ve updated my fair share of fireplaces over the years. In our previous home, I designed a brand new fireplace from scratch after our house fire. You can see that design in our remodel story, however it certainly was not a budget update. I just LOVED that stone though. I would use it again in a heart beat.
Then, in our current home, I’ve done two fireplace updates that were much more budget friendly. And that brings me to some ideas for a budget fireplace makeover!
Replacing or Refinishing a Mantel
There are two basic ways to update a mantel. You can either replace it altogether, like I did with our upstairs fireplace, or you can refinish the existing mantel.
Replacement Mantel
If you’d like to see what an amazing transformation it can make to replace an outdated mantel, make sure to check out my barn beam mantel update. This cost me $10 for the new mantel and $100 for the bracket system. Not too bad for a budget mantel update!
Refinishing a Mantel
In our guest house, I sanded down the existing mantel to remove all the orange stain. This was an extremely messy project, but not difficult or expensive!

No more orange! It took me approximately an hour and a half to chew through all that stain. In hindsight, I think I should have stripped it rather than sanding. However, each option is extremely budget friendly.
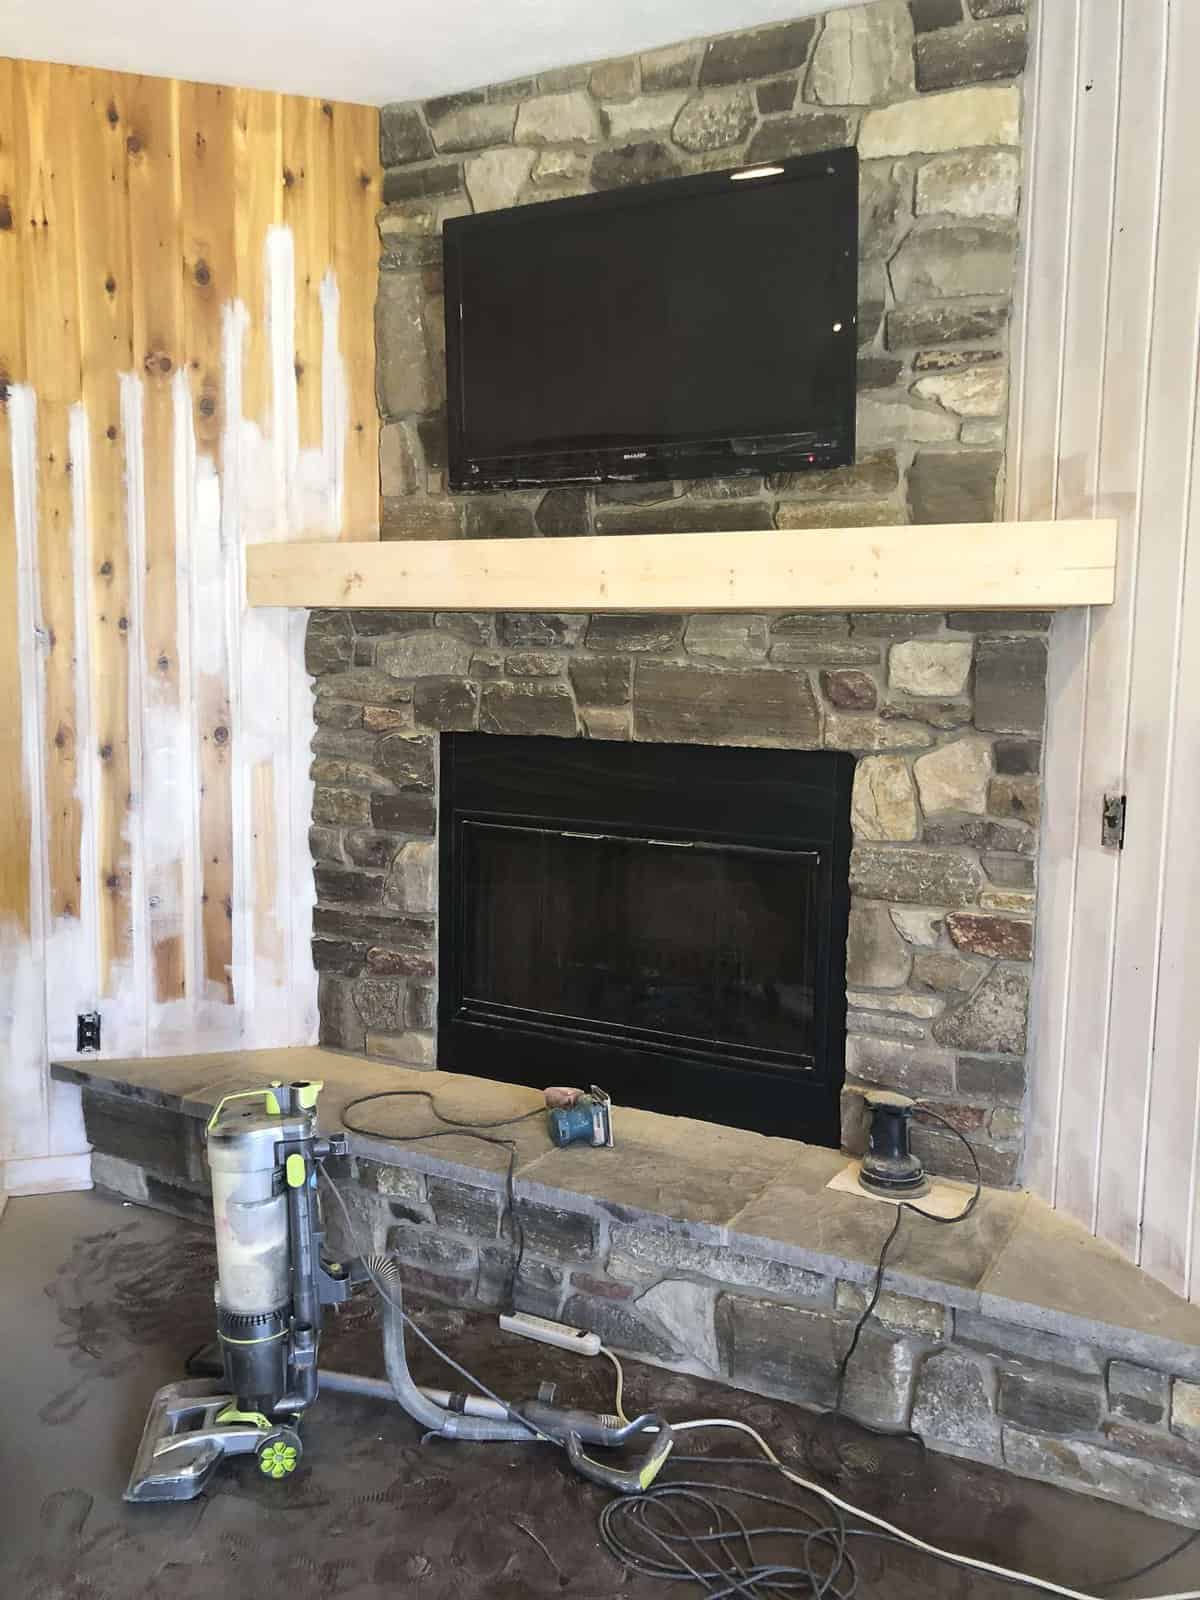
The mantel was built of affordable knotty pine, so it has some texture and character to it that wasn’t visible before.

Taking the mantel down to the raw wood allowed me to see what I was working with and formulate a plan. I decided to simply re-stain the mantel to a more toned down color that would help the stone pop!
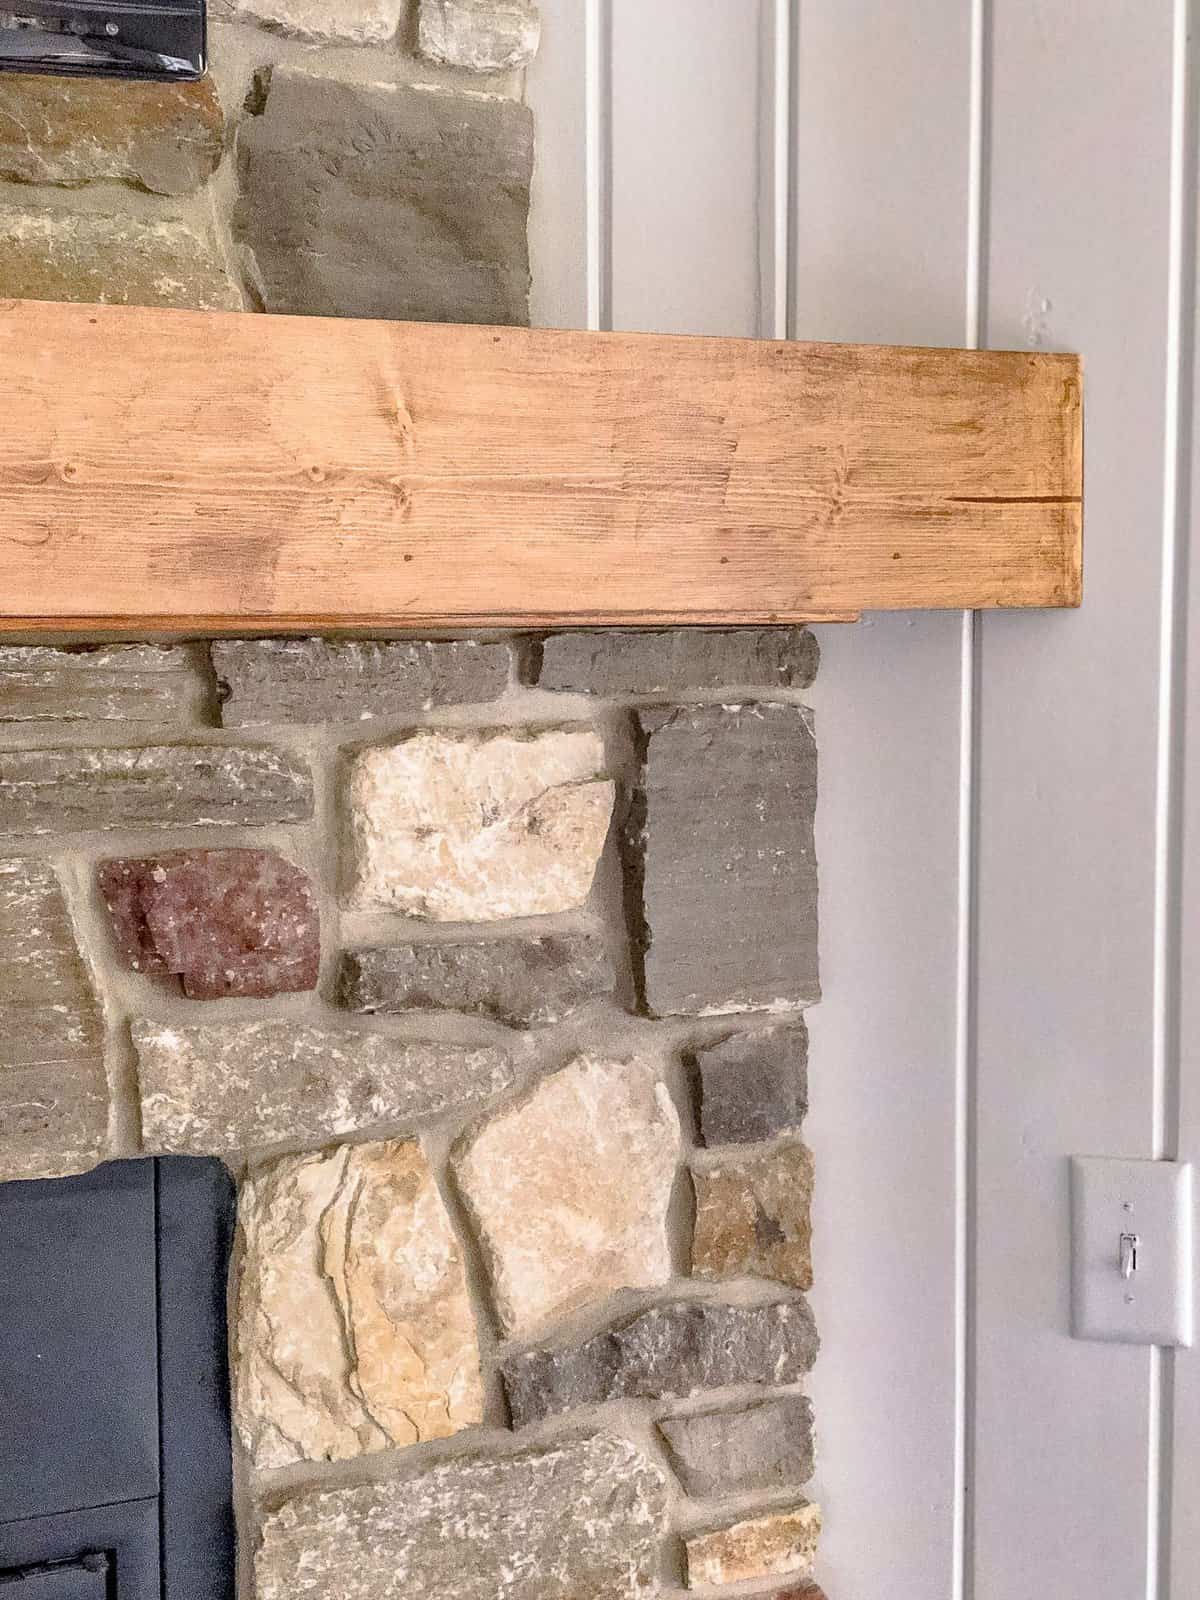
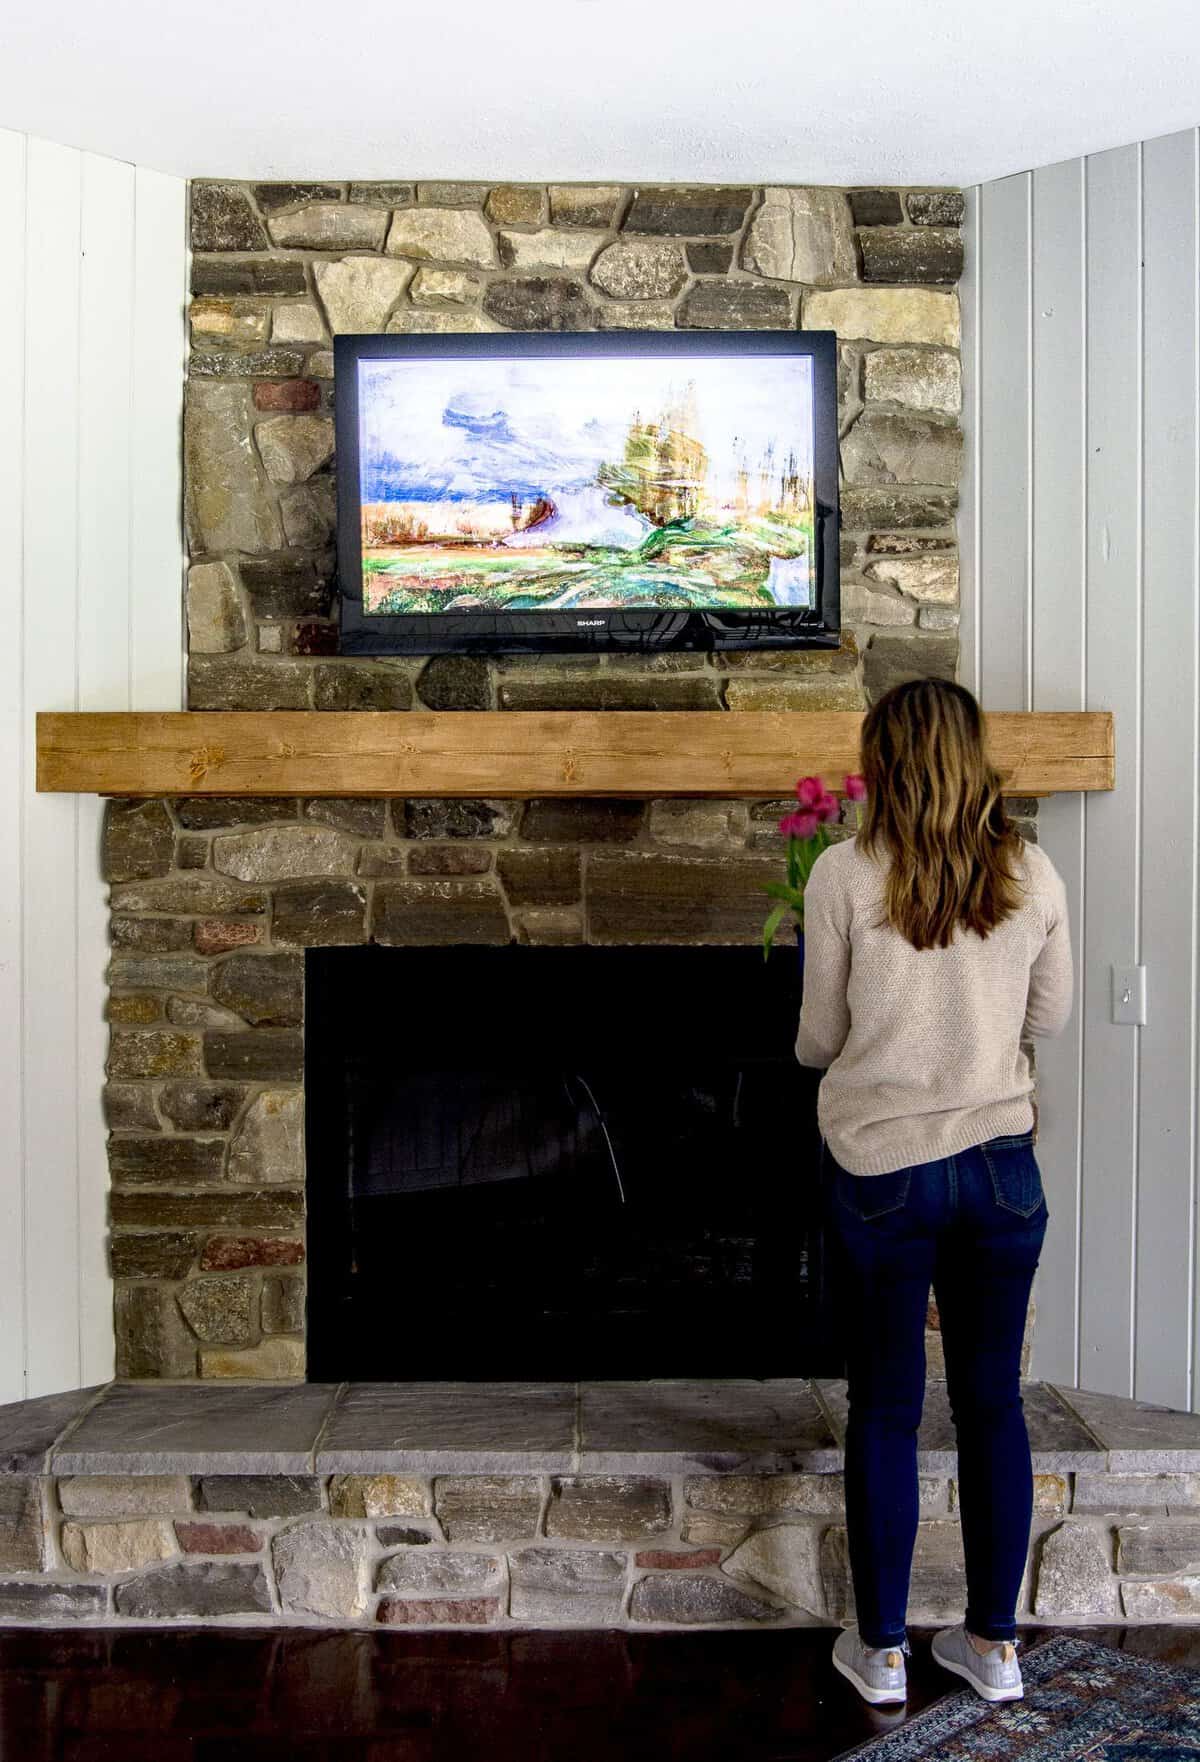
I used Miniwax Special Walnut and applied a very light coat. I like to use my husband’s old undershirts as my staining rags because it’s a great way to reuse instead of throwing them out.
It also helps me control how much stain I apply. I simply dip the rag in the stain, swipe it on, and then rub it in.
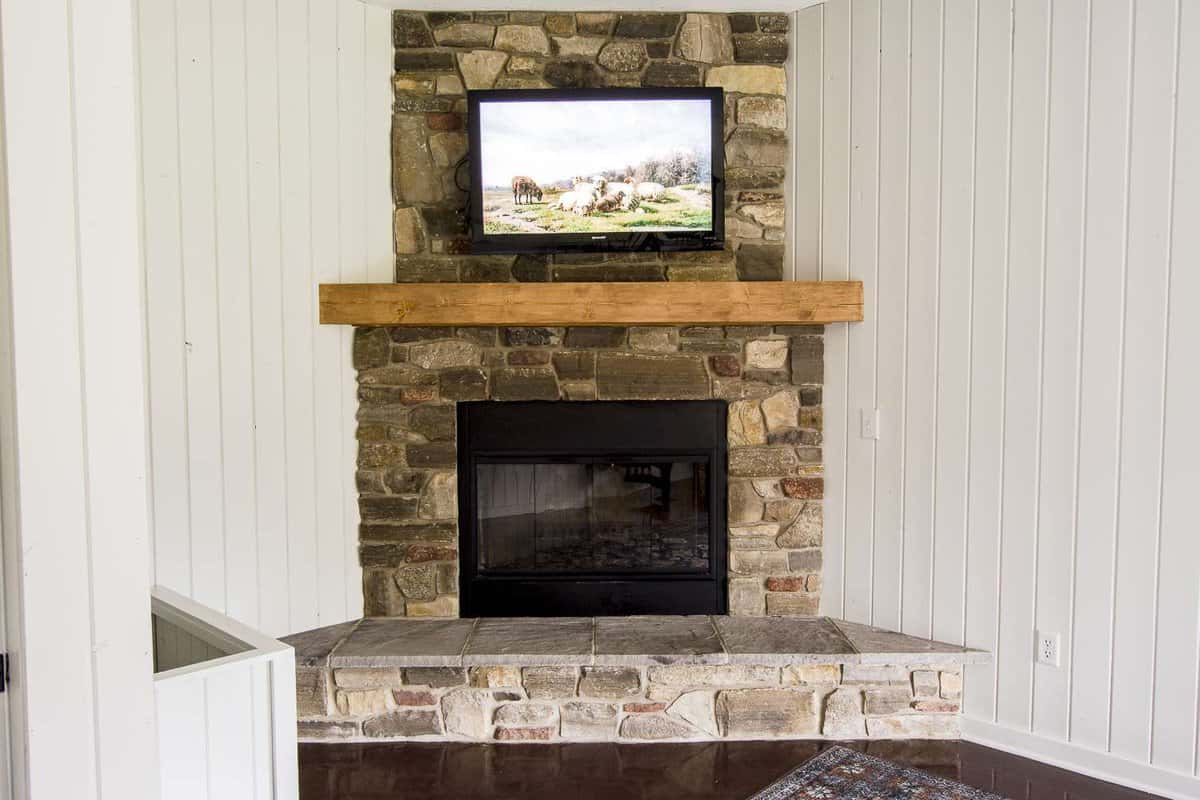
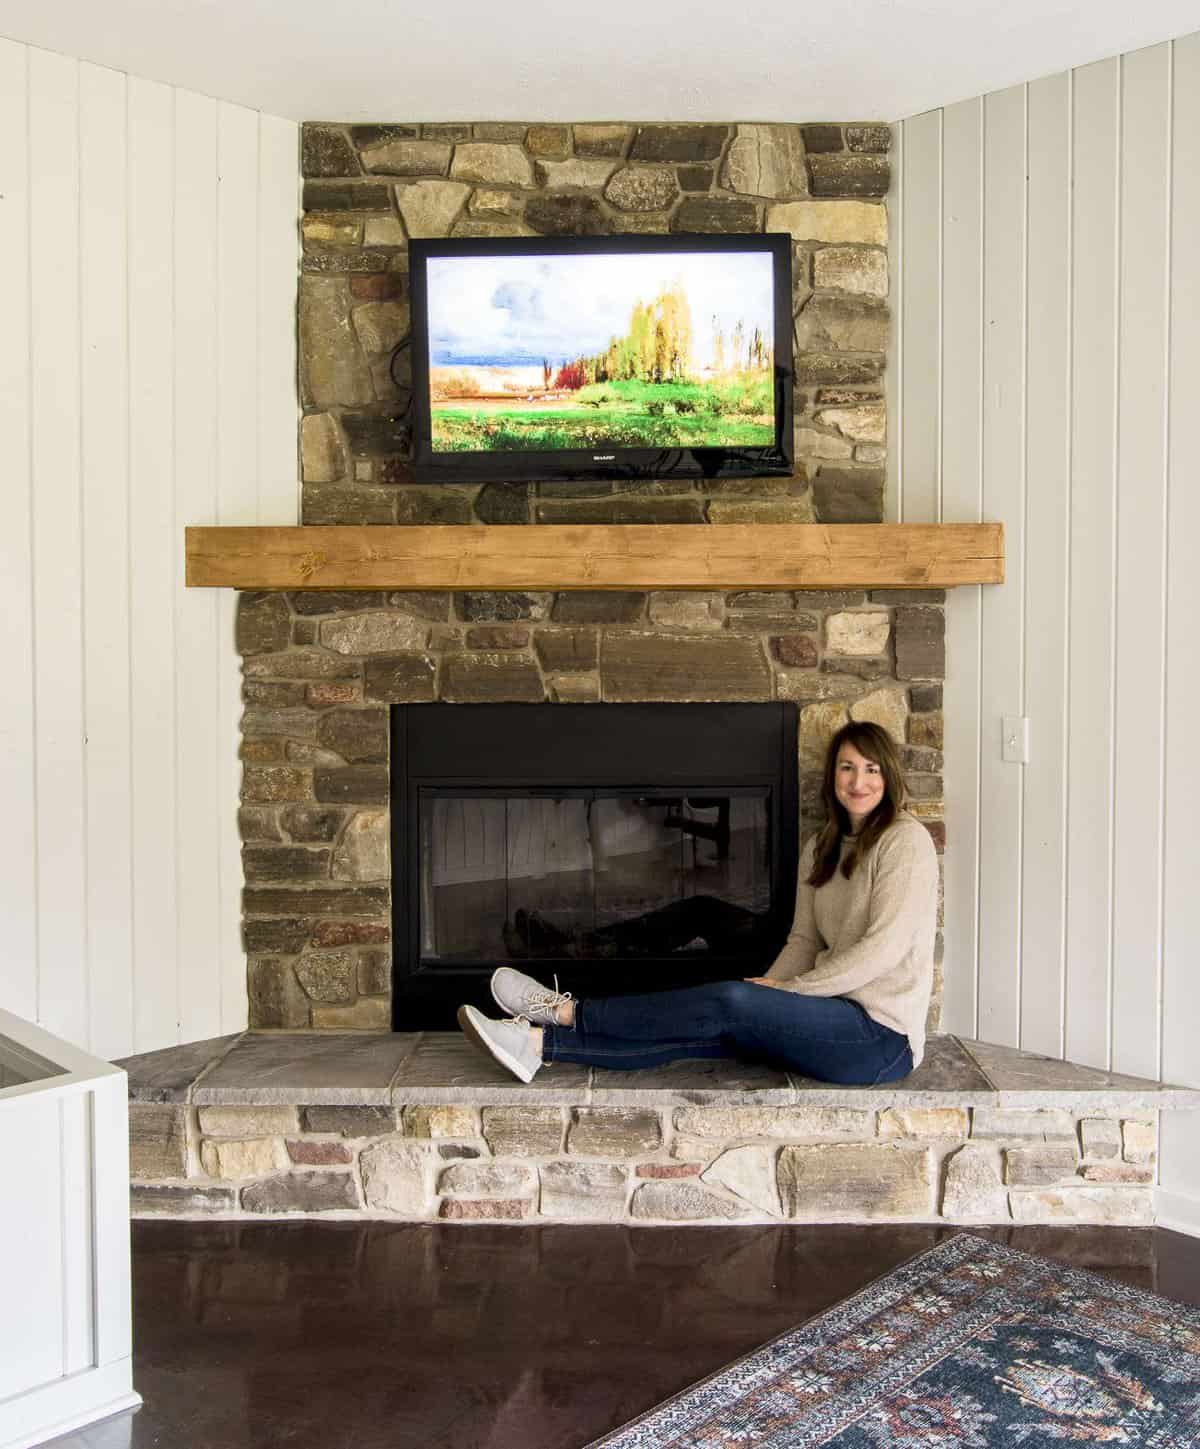
Changing the color of the mantel made a huge difference! It makes the stone pop more since the mantel itself is more subdued.
Fireplace Stone
Now, let’s talk about that stone! While the stone is lovely, it is not my style. I wouldn’t have chosen the red and orange hues. However, with the updated paint and mantel, the stone coloring is more palatable for me.
My husband likes the stone as is, so I’m torn on whether or not to do my next suggestion for fireplace makeovers on a budget: german schmear!
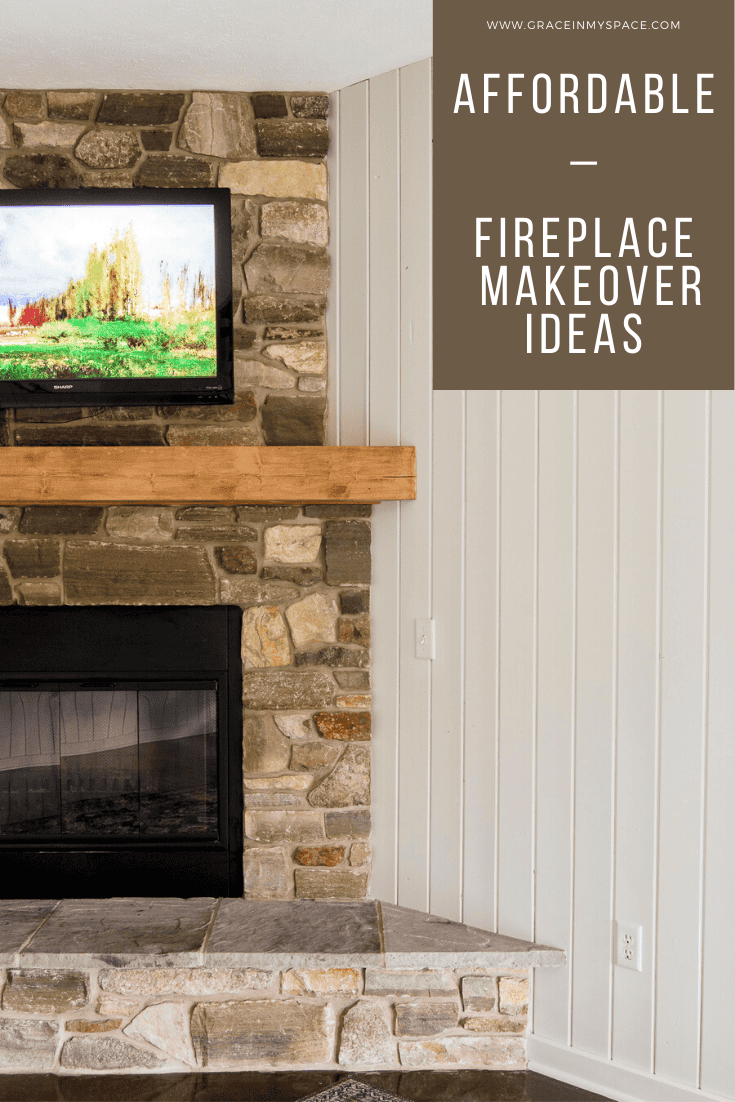
Our upstairs fireplace has a river rock hearth. River rock, unfortunately, is also a stone that I’m not a fan of on a fireplace. You can see how I updated it with an affordable german schmear for an example of how much this technique can change the look of stonework!
Another affordable way to update a stone/brick fireplace is by painting it or white washing it. I know SO many people would say that painting stone is a “design sin”; however, I say, if you don’t love it then change it!
Updating fireplace stonework with paint is extremely affordable and can be a quick and budget friendly makeover until the time when you can fully replace it. Chances are, you will love the look and want to keep it in the end anyway!
I Would Love Your Vote
So, my friends, I’d love your vote! Adding a german schmear treatment (or, over-grouting) to the stone would give this space a more earthy European feel, like this example from Chris Loves Julia.
I think it would tone down some of the reds and oranges since I can apply as much mortar to those stones as I want to mask the hues. On the other hand, I could leave it as is for a more cabin feel!
The rest of the guest house will have modern furniture that has a hint of rustic to it. You can see the full design plans here.
If you choose to update your stone with this method, you can get away with this budget friendly fireplace update for under $200 depending on the size of your fireplace!
Stay Connected
Thanks so much for stopping by the blog today! And, for one more update on this space, how about this before and after? The paint is on the walls! I chose Soft Secret by Behr and it has some green undertones that will work well with my rug.


I can’t wait to continue the remodel! Stay tuned for 5 more weeks of this project!
One Room Challenge Update
The project is complete! If you missed the 8 week process, catch up with the links below!
- Week 1: Guest House Before Photos
- Week 2: Guest House Design Plans
- Week 3: Mantel Update
- Week 4: How to Hide a Mini Split
- Week 5: Bathroom Remodel for $300
- Weeks 6 & 7: DIY Ceiling Beams
- Week 8: The Big Reveal


Go for it! The current fireplace has major cabin vibes, but the German schmear would help it flow with the modernized look of the rest of the room. I can’t wait to see what the whole guest house will look like!
My vote is to go for the German Schmear, it will brighten up the corner. And, have you given any thought to placing the TV in another area of the room? Not a fan of the over the mantel tv thing. Just a thought…..
Since you prefer to change the look of the stone on the fireplace and your husband likes it as it is, one of you will need to compromise. I can see both options looking lovely. Why not leave as is for now, complete the room then see how the fireplace rock “fits” in the design? It can always be changed later. Or you could flip a coin – let fate decide 😉
I definitely vote for the german schmear!! Rebeccaandgenevieve just did her fireplace in that technique, and it looks fabulous. Yours would be great in that technique, especially now that you’ve changed the mantel.
I think it looks good either way. The mantle sure changed the look for the better. I also think your beautiful rug tones it down. The schmear would look great, too.
Either way would look great. I am so not a fan of TVs over the fireplace. I feel like it’s such an American thing to do that. It just strikes me as untasteful. But as a guest house you might not have many options. Maybe you never thought about it before….just a trend. Anyway the place looks great and I’m loving what your doing in the bathroom!
I love a stone fireplace and yours is a beauty. If it were up to me I would grout with a gray to better compliment the hearth. Although you did a fantastic job on the mantel (so much better) the stain color still doesn’t seem right. Again, maybe try something with a little more gray that would showcase the beauty of the stone and help it to work with the room. Whatever you decide is certainly a step up from where you started. So much better and can’t wait to see the finished room.
Yes, the German Schmere! It lightens up the corner and would really pop with your painted walls! So cozy!!
Leave it. I do not like the schemata technique at all.
I love your inspiration photo for the stone. My vote is to go for it!
I say, go for it. Schmear away!
I think the new grout would brighten the look of the stone and compliment the room. Maybe start with just grouting in the grooves and then let that grow on you for awhile, and add more later if desired. Since the stone is real it’s very unique and beautiful, so just accent would be nice. Anxious to see the finished project.
I actually prefer it as is compared to your sample pic of overgrouting! To me (to be clear lol) that sample pic looks like a poorly done grout job.
I think it would be pretty to change I love that look better. Whatever you decide it will look lovely.
I’m personally, not a big fan of the German schmere technique (although every place I’ve seen it used, it “grows on me.”) so my vote would be to leave it, but I know it will be wonderful whichever way you decide to go.
Sarah I am loving following along with you on this challenge! I vote for the schemata technique! I wasn’t sold until I saw your inspiration picture. So pretty! Have fun!