
How to Make DIY Epoxy Coasters in 4 Simple Steps
Today I have such a fun project for you! You are going to learn how to make DIY epoxy coasters in 4 simple steps.
Have you ever worked with epoxy? It seems intimidating at first. This was my first experience using epoxy resin and I was delightfully surprised by how easy it was. Making coasters with resin epoxy is a great beginner project if you want to work your way up to larger DIYs like tables! Let’s get started.

This post may contain affiliate links where I earn a small commission on your purchases at no additional cost to you.
DIY Epoxy Coasters
This project was born from wanting to create something simple, but beautiful, to gift to friends and family. I have so many wood scraps from previous projects that were perfect for creating epoxy coasters!
There are so many coaster ideas floating around that I considered. Some options I could have done were:
- Modge podge fabrics or paper patterns to wood coasters
- Using old tile as coasters
- Giving new life to existing coasters with paint
- Concrete form coasters
However, I kept going back to working with epoxy. It is something I’d never tried before, and sometimes I just like to try something new!
So here are 4 simple steps to creating DIY epoxy coasters using Watco Super Glaze pour on high gloss epoxy.
Best Resin for Coasters
There are many options available for resin epoxy on the market. I was gifted Watco Super Glaze and fell in love with the simplicity of it.
This epoxy is especially wonderful for beginners who have never worked with epoxy before.
Here are a few reasons I found it extremely user friendly:
- There are no powders to mix.
- Colors come pre-mixed so you know exactly what you’re getting.
- One step mix and pour to activate the resin.
- Stable shelf life, even after opening, for leftover epoxy.
- One coat of epoxy is as thick as 75 coats of polyurethane.
- Multiple color choices and wood tones.
Here are the color choices Watco offers.
- Super Clear
- Metallic Blue
- Aged Wood
- Turquoise
- Classic Gray
How to Make DIY Epoxy Coasters Without a Mold
For my next project, I think I’ll try making epoxy coasters with a fun shaped mold! But for this project, we are simply taking some existing scrap wood and doing a pour on resin epoxy coating.
You will have beautiful coasters in 4 simple steps.

The beauty of this project is that you can choose whatever shape and size you want. I did a combination of square, rectangle and long rectangles, just based on the wood I had on hand.
You can also get creative and cut your wood base into shapes first!
Step 1: Gather and cut wood bases for your DIY epoxy coasters
You can easily create up to 10-12 average size coasters from one Watco kit. I did four each so I could try out each color option.
To start, gather the wood that you will use as your coaster base. This can be any shape or size. You can get really creative with this first step if you want, or you can go a classic route like I did.
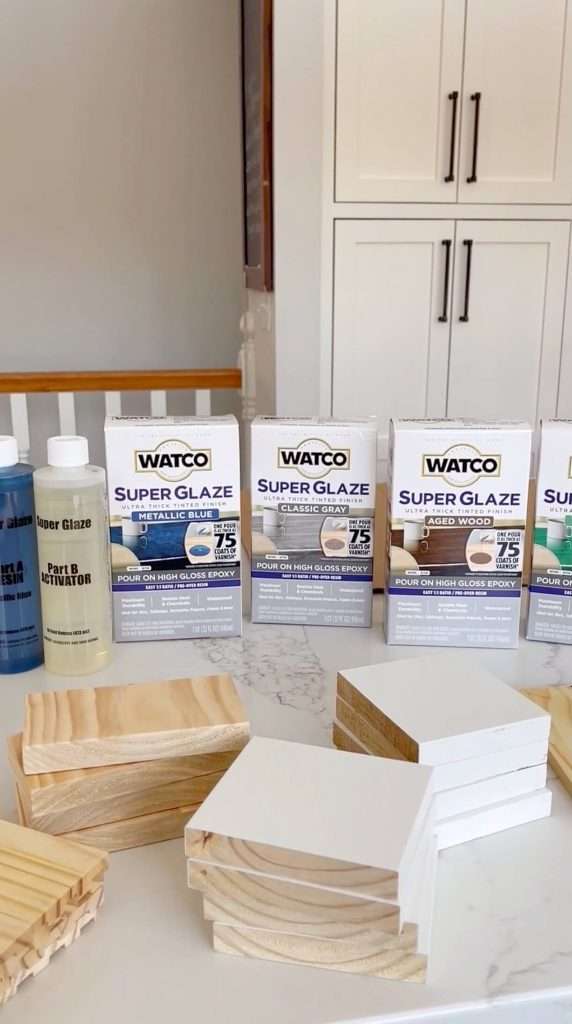
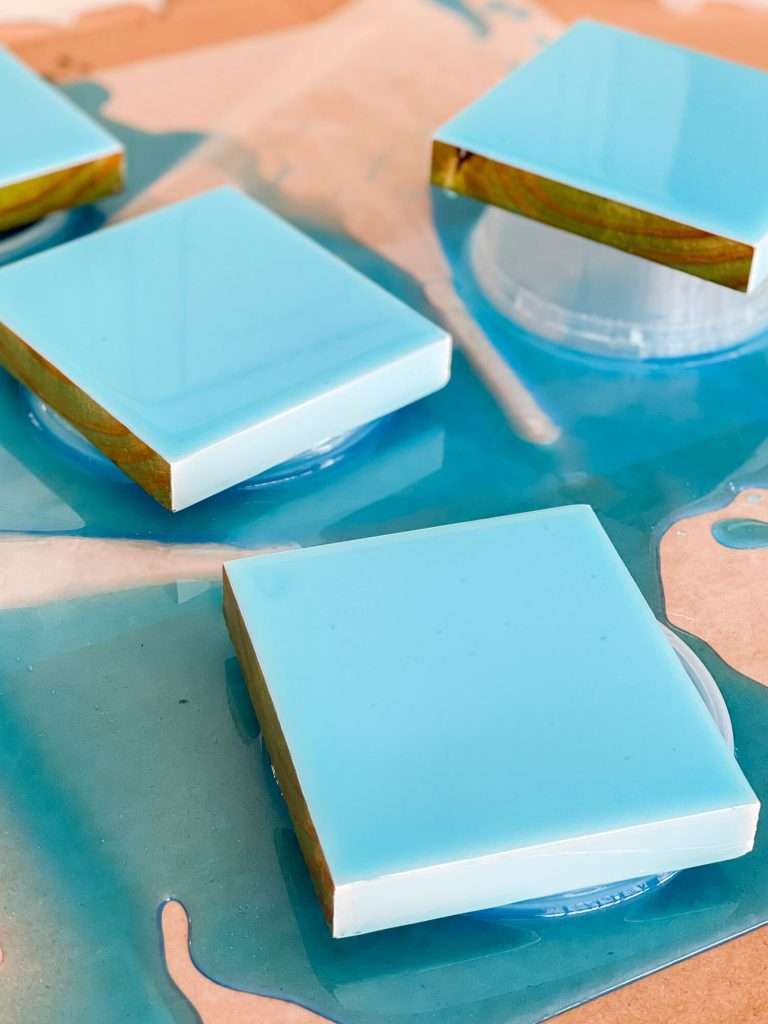
You’ll notice that some of my wood is raw and other pieces are already primed. I decided to use the white squares with the blue and turquoise epoxy to see what a white background did with the coloring. I think it turned out much more subtle than raw wood would have. But I still love the effect!
Step 2: Prepare Your Surface
There are no two ways around it. Epoxy is messy. I may have had a couple of heart attacks doing this project on my kitchen countertops. I thought I had protected my surfaces well enough, but resin epoxy is runny and doesn’t discriminate based on the beauty of a surface. 😉
When I work with epoxy in the future, I’ll do it in my workshop or the garage. If you don’t have a place like that, then protect your surfaces with card board and a drop cloth or other plastic coating.
The most important part of preparing your surfaces is to ensure you’re working on a level surface.
Since this epoxy pours on and is self-leveling, your surface must be level. Otherwise, you will have thicker epoxy on one side of your coaster than the other.
After I began the project, I found out that I should have taped the sides of my coasters. While the epoxy coated the sides, it didn’t have the same finish as the top.
I think I would have preferred the look of raw sides. Plus, taping the sides helps avoid any drips on the bottom of your coasters once it is dry.
Step 3: Mix Your Epoxy Resin and Pour Over
Once everything is securely protected, follow the packaged directions to mix your resin and activator to create the epoxy. Watco’s product is a simple 1:1 ratio so it was very easy to mix.
Special Tip: Stir slowly! You want to do everything you can to avoid adding air bubbles to your epoxy so that you get a smooth finish.

Make sure that everything you use is disposable. The epoxy will NOT clean off of Tupperware, dishes or brushes.
I used these containers to prop my coasters on to dry. They are shallow and wide, so the coasters didn’t tip or fall off easily.
I didn’t purchase the containers specifically for this project. I actually use them to freeze my homemade jams and applesauce. But they worked in a pinch!
You can use anything to prop your coasters on, but they do need to be elevated so the epoxy can drip off.
Conversely, you can tape the sides at the base of the wood and use your tape to create height for your epoxy if you want a very thick finish.
Once you’ve mixed your epoxy and have your coasters in place, simply pour the epoxy on!
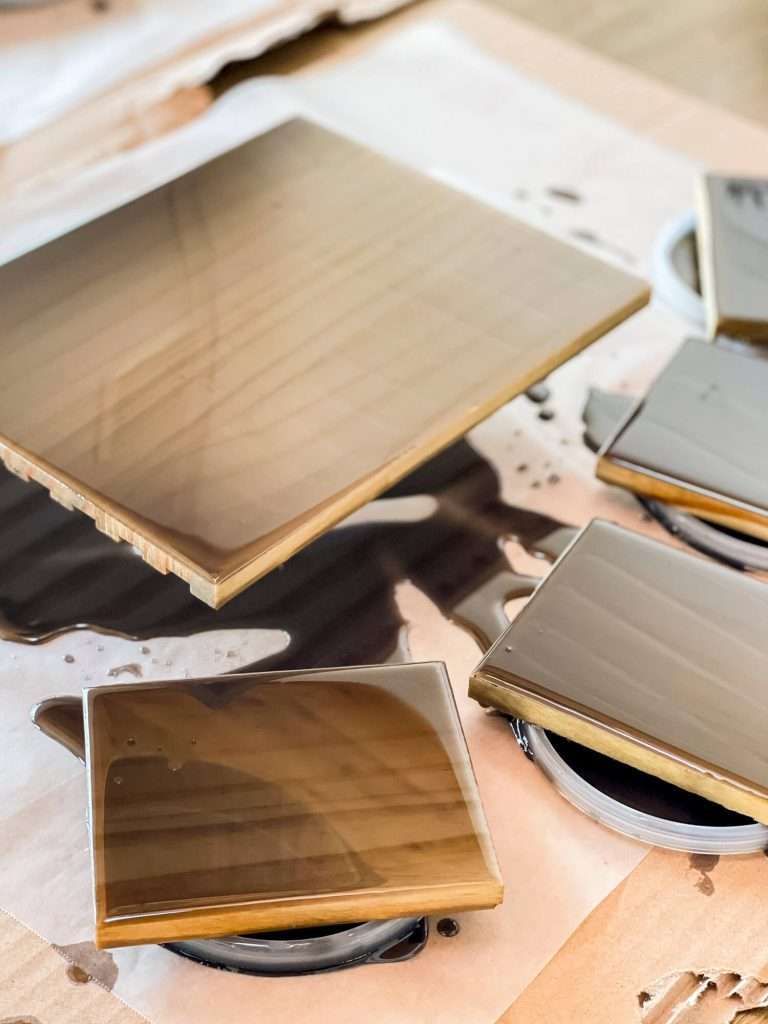
Work slowly as you pour. Use a putty knife to work the epoxy evenly over the surface.
I decided to also make a trivet to go with one of the DIY epoxy coaster sets since the Watco Super Glaze is heat resistant. It’s a fun pairing for a gift set!
Step 4: Let Cure Fully
The next step is, ironically, the hardest. Don’t touch or move your coasters until they are fully cured! You don’t want to accidentally add finger prints to your finish and moving them could throw off the self-leveling component.

Once they are fully cured, they are ready to use. Or be gifted to someone!
Great Gift Idea: Epoxy Coasters
I gave away most of my sets as birthday gifts and mother’s day gifts. However, I kept the classic grey set for myself.
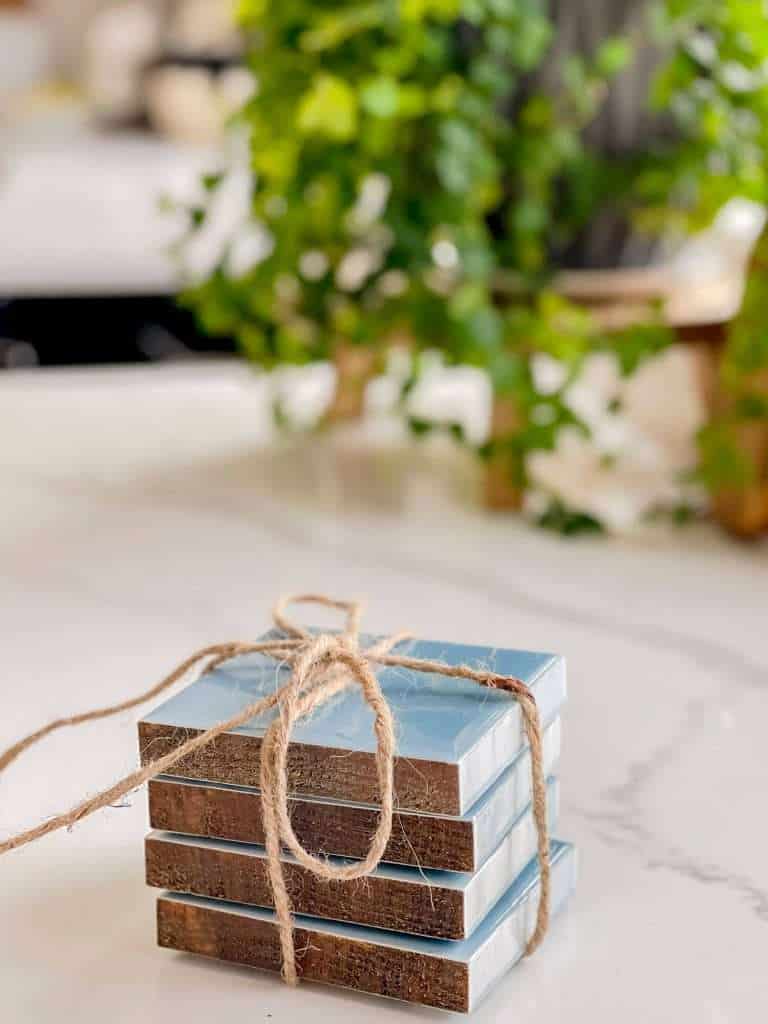
I love how they look stacked and tied up with simple twine. They are a great addition to a house-warming gift basket as well. Since you can make so many of them from one box of the Super Glaze, your investment can go a long way!
Video Tutorial
I shared this project with my Instagram community and thought it would be helpful for my blog readers as well!
If you are a visual learner, make sure to watch the process as I made this batch of coasters.
Other Simple Projects
If you like short-and-sweet projects, make sure to check out my other simple DIYs below!
- Painted Upholstered Bed
- DIY Woven Bench
- Upcycled DIY Pottery
- How to Update Thrifted Art in 1 Step
- DIY Texture Art
- 20 DIY Home Projects for Beginners
- DIY Faux Fireplace Mantel
Stay Connected
Thanks so much for stopping by the blog today! I hope this simple 4-step tutorial for how to make DIY epoxy coasters was helpful to you.
Next time, I will share how I make resin coasters in a mold! Or maybe…I’ll tackle a table. 🙂

Make sure to subscribe to the blog to get access to my free design e-course to help you as your design your haven! And follow along with me daily on Instagram where I share my projects in real time.


It is not as much as hard I thought it would be, Whatever, thanks for the post.