
Pros and Cons of Using Oven Cleaner to Strip Wood (2025)
Discover how you can use oven cleaner to effectively strip wood without having to spend a fortune on expensive alternatives. My step-by-step guide will help you achieve stunning results with ease. Plus, learn the pros and cons of using oven cleaner to strip wood!

This post may contain affiliate links for your convenience.
Determining the Best Method to Remove Stain and Varnish
Oven cleaner can be an effective way to strip wood, but is it the best option for you?
In this blog post, I’m sharing the best methods for using oven cleaner to strip wood.

Plus, let’s weigh the pros and cons of using oven cleaner for wood stripping. My goal is to help you make an informed decision about the best approach for your specific needs before you tackle your project.
How to Strip Furniture With Oven Cleaner
One method of stripping wood that has gained popularity among DIY enthusiasts is using oven cleaner to strip wood.
The proper method of using oven cleaner to strip furniture is very simple and straight forward. It is my favorite method on thrifted pieces because of the easy of use, short timeframe and decreased effort needed to get good results.
I highly recommend only doing this project outdoors due to the ventilation needed and mess it makes.
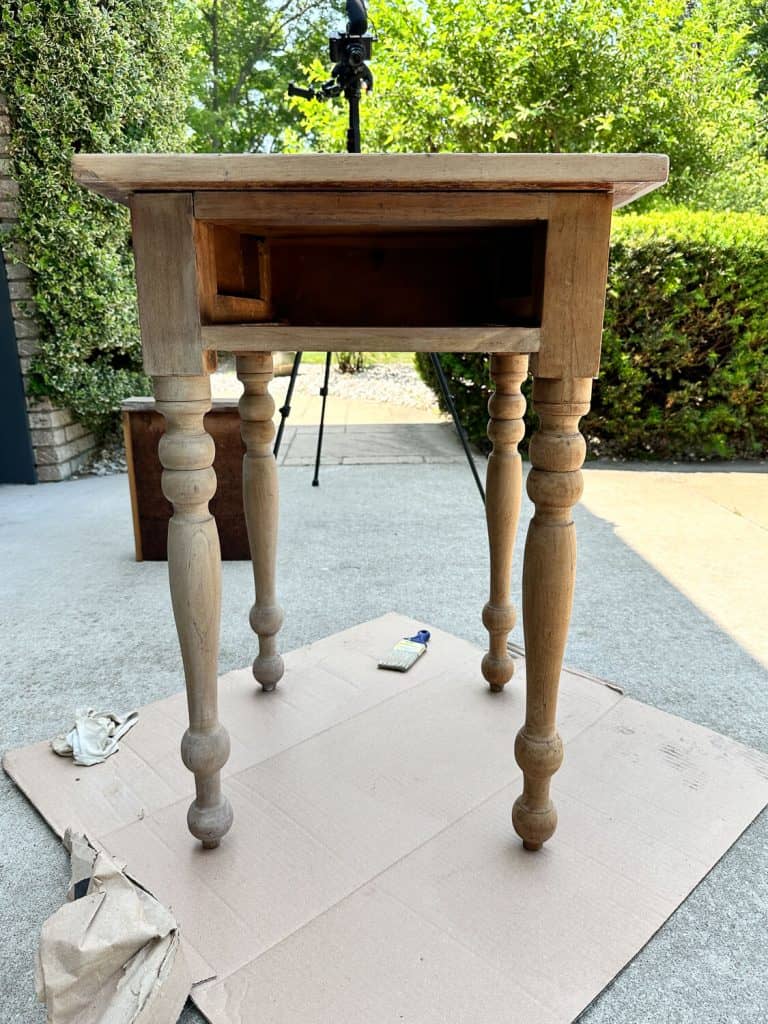
For today’s tutorial, I’m sharing the refinishing process for this antique table I found for $75.
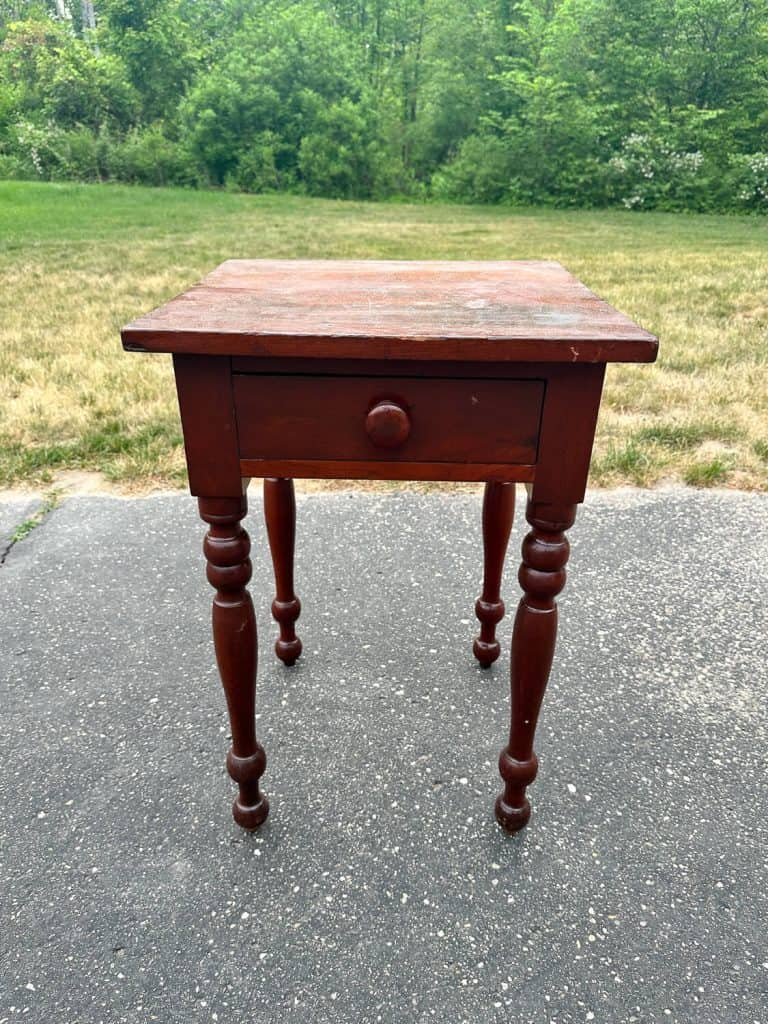
It’s a cutie and I wanted to remove the red varnish and bring back some of the natural wood tones.
- Start by cleaning your furniture to remove any dust or grime.
- Protect surrounding areas from overspray as needed.
- Gather your supplies and safety equipment.
- Easy Off Oven Cleaner (Fume free works great) I used one can for this small project.
- Thick gloves
- Safety glasses
- Apron to protect clothing and skin from splatter
- Respirator
- Bowl with soapy water (I use Dawn dish soap)
- Soft bristled scrub brush
- Hose
- Towel
- Hand sander or sandpaper
- Next, liberally spray oven cleaner all over the entire surface and let sit for 20 minutes.
- After 20 minutes has passed, take your bowl of soapy water and scrub the entire surface with a soft bristled brush. Clean your brush in the bowl as needed to remove build up.
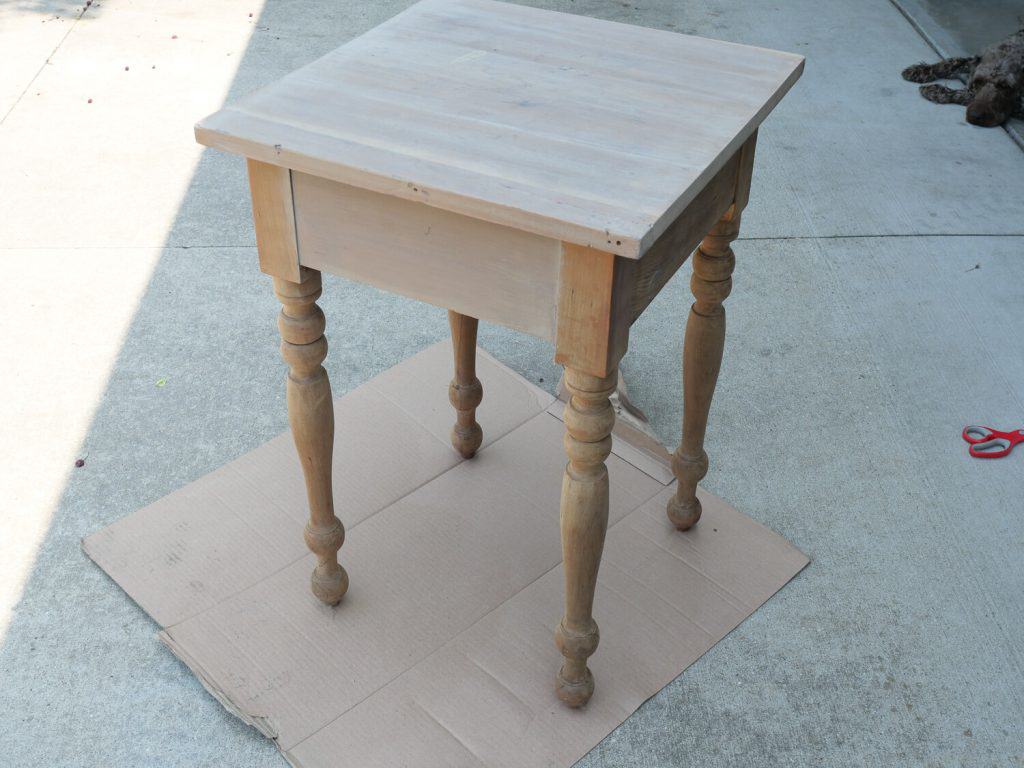
- Once you’ve scrubbed the whole surface, rinse off the piece with a hose until the water runs clear.
- Dry the piece with a towel and set in the sun.
- Wait a few hours to see how the piece dries. It may look like you didn’t do anything right away. It will lighten as it dries.
- Lightly sand with 120, then 150, then 220 grit sand paper to smooth out any raised grain.
- Finish as desired with choice of stain, wax or polyurethane.

Can I Use Any Oven Cleaner to Strip Wood?
While there are many different types of oven cleaner available, the simplest approach is to use a spray. This is much easier to apply than gels or powders.
I’ve had success with both the Easy Off oven cleaner, as well as this off brand.
However, the price difference is so minimal, that I stick to Easy Off.
How Long Do You Leave Oven Cleaner On to Strip Wood?
Leave the oven cleaner on for 20 minutes.
Some may be tempted to leave the oven cleaner sit for longer than 20 minutes, thinking it will work better. However, the chemical process fully reacts as it should in those first 20 minutes. Leaving it sit longer may damage the wood.
The Pros and Cons of Using Oven Cleaner to Strip Wood
Let’s explore the benefits and drawbacks of using oven cleaner for wood stripping. I’ll also provide alternatives, and offer safety precautions to keep in mind.

Pros of Using Oven Cleaner for Wood Stripping
While using oven cleaner to strip wood may seem like a quick and easy solution, it’s important to understand the potential benefits and drawbacks before getting started.
Here are some pros to consider:
- Cost-effective: Oven cleaner is often cheaper than alternative wood stripping products, making it a budget-friendly option for those on a tight budget.
- Time-efficient: Oven cleaner works quickly in 20 minutes to strip away layers of stain.
- Minimal effort required: Unlike some stripping methods that require a lot of elbow grease, oven cleaner can do the work for you with minimal scrubbing or scraping needed.
- Can be used on various surfaces: Oven cleaner is versatile and can be used on a range of surfaces beyond just wood, including metal and porcelain enamel.
- Lightens Wood Surfaces: Most wood species are lightened significantly by oven cleaner in the stripping process. The chemical reaction goes beyond just stripping the previous stain or varnish and has a bleached effect on many wood types.

Keep in mind that while these benefits may sound great, there are also some drawbacks to using oven cleaner for wood stripping.
Cons of Using Oven Cleaner for Wood Stripping
While there are several benefits to using oven cleaner for wood stripping, it’s important to consider the potential drawbacks as well.
Firstly, oven cleaner can be very harsh and contain harmful chemicals that can be dangerous to handle without proper protection. It’s crucial to wear gloves and other protective gear to avoid skin irritation or other health issues.
In addition, oven cleaner can damage delicate and intricate wooden surfaces, such as carvings or inlaid designs, making it an unsuitable option for certain types of wood. It is also not a good option for veneers as these thin layers of wood don’t withstand the chemicals and water needed to use this method.
Since oven cleaner uses harsh chemicals, it can also cause the wood to dry out more significantly than other methods. This can cause potential cracks or opening of the wood grain. In addition, using water to wash off the oven cleaner can raise the grain even more.
This method is also fairly limited to being done outside. It requires outdoor ventilation and is a very messy project.
Finally, oven cleaner may not be as effective as other methods for removing very old or stubborn layers of paint or varnish, requiring multiple applications and additional time to complete the job.
Oven cleaner is most effective on stain and varnish, with very limited effectiveness on paint.
Given these potential cons, it’s important to consider alternative methods for wood stripping that may be safer and more effective for your specific project.
Mistakes to Avoid When Using Oven Cleaner to Strip Wood
- Only use on solid wood. Particle board, laminates, veneers and MDF will not withstand this process.
- Fully wash off all residue. Any oven cleaner not washed off fully can leave a residue. If this happens, repeat the process and wash off until the water runs clear.
- Let dry fully in the sun before re-applying. At first you may think the process didn’t work. However, the wood will lighten as it dries. Don’t repeat the process until you see how the wood fully dries to determine if it needs another coating.
- Don’t leave on longer than 20 minutes to avoid damaging the wood.
- Don’t use this method on heirloom pieces. Since one of the cons is that it can cause the wood to become dry, with rough raised grain, you will want to use a gentler method on true antiques, high end pieces or heirlooms.
Alternatives to Using Oven Cleaner for Wood Stripping
Given the potential drawbacks of using oven cleaner for wood stripping, it’s important to explore alternative methods that may be more suitable for certain types of wood, safer to handle, and more effective.
One option is to use a heat gun, which uses hot air to lift paint and varnish from the wood surface. This method is particularly useful for intricate designs or carvings that may be damaged by harsh chemicals.
Another alternative is to use a paint and varnish remover, which is specially formulated to strip wood without damaging the surface. These products are typically less harsh than oven cleaner. They may also be a better option for those with sensitivity to certain chemicals.
Sandpaper can also be used to remove paint and varnish from wood. Although, it is more time-consuming and can be difficult to remove stubborn layers. However, sandpaper may be a good option for smaller projects or for those who prefer a more hands-on approach.
Ultimately, the best method for wood stripping will depend on the type of wood, the condition of the surface, and the preferences of the user.

By exploring different options and weighing the pros and cons of each, you can choose the method that works best for your needs and ensures a safe and effective outcome.
Remember, regardless of the method you choose, it’s important to take proper safety precautions to avoid potential health risks. The next section will cover some important measures to keep in mind when using oven cleaner, or any other method, for wood stripping.
Safety Precautions When Using Oven Cleaner for Wood Stripping
Regardless of the method you choose to strip wood, safety should always be a top priority.
When using oven cleaner, there are some important precautions you should take to avoid any potential health risks.
First and foremost, always wear protective gloves and eye goggles when handling oven cleaner. The chemicals in oven cleaner can be harsh and potentially harmful if they come into contact with your skin or eyes.
It’s also important to work in a well-ventilated area. I would not use this method of wood stripping indoors. Take your project outside for the safest environment. If possible, wear a face mask to further protect your lungs.
When applying oven cleaner to the wood surface, be sure to avoid overspray on your skin, and surrounding areas. Oven cleaner may also impact grass or landscaping negatively.
Use a brush or sponge to scrub the cleaner evenly and avoid dripping or splashing.
After applying the cleaner, allow it to sit for the recommended amount of time before wiping it away. Use a clean cloth to remove all traces of the cleaner, and be sure to dispose of any used rags or cloths properly.
Finally, wash your hands thoroughly with soap and water after handling oven cleaner.
By following these safety precautions, you can ensure a safe and effective outcome when using oven cleaner to strip wood.
Keep in mind that there may be other methods that are better suited for your specific needs and preferences, so be sure to explore all of your options before proceeding.
How I Finished My Antique Table
Now, you may be wondering what I did to finish out my antique table.
There are usually more steps than a simple slap on of new stain to get a desired look. For my project, I added a few layers to achieve this lightened natural wood tone.
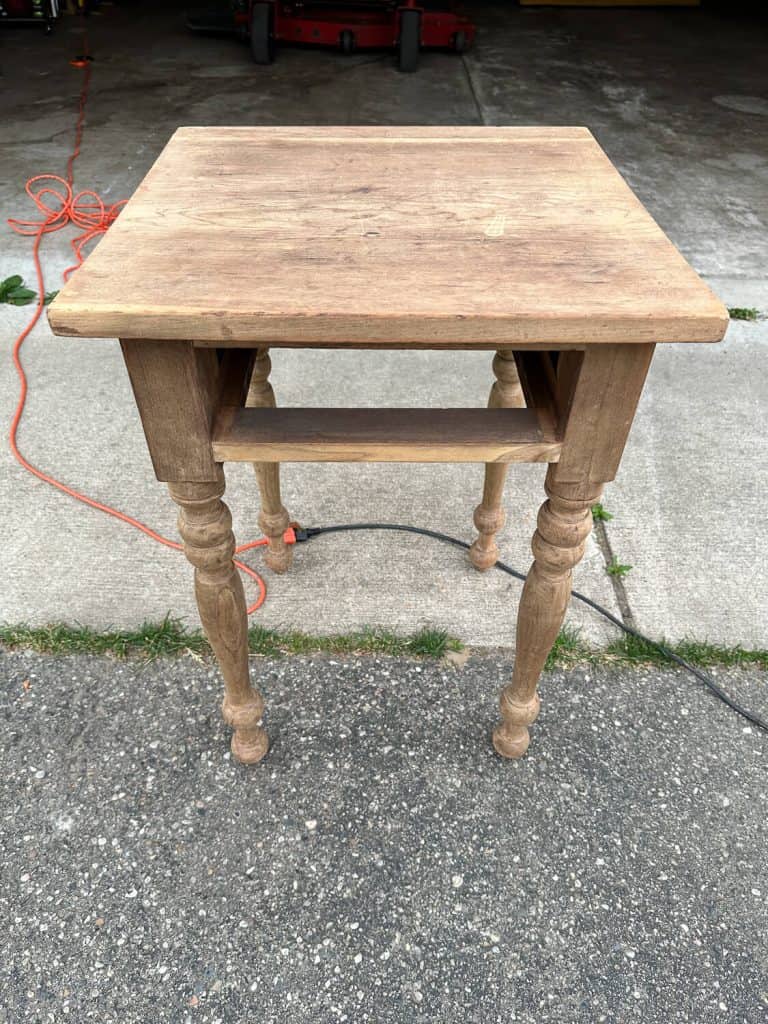
After removing the red varnish with the oven cleaner, if left my table in its natural state.
This table was actually a very pretty color, but the top wood had damage I wanted to try to even out. So I started with a paint wash using 1:1 ratio of water to SW Jogging Path paint.

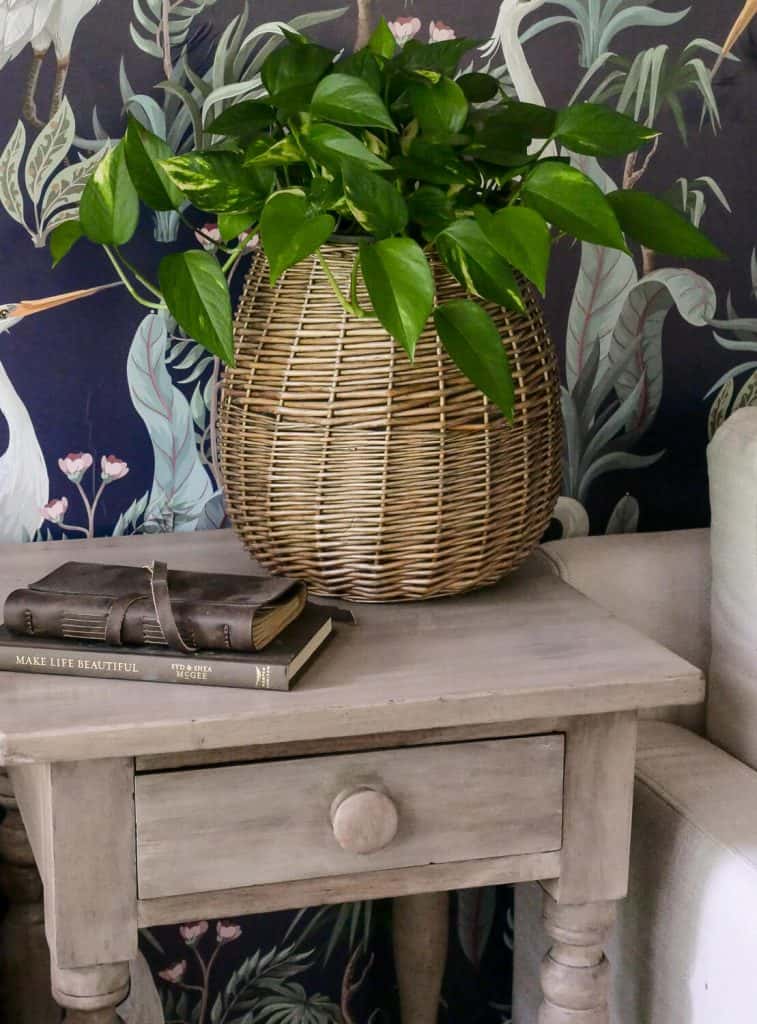
I used a taupe paint to keep some of the brown tones. Below you can see the difference a coat of paint wash makes to remove those yellow undertones.
If I were to do it again, I’d use a 3:1 water to paint ratio to make it more translucent.
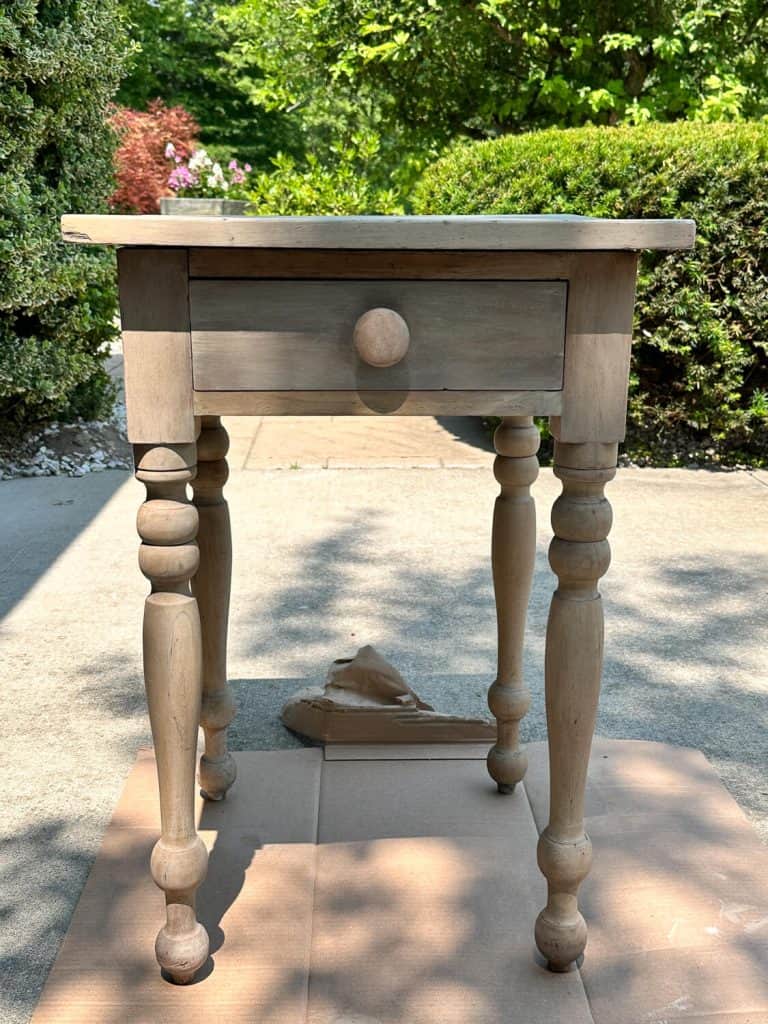
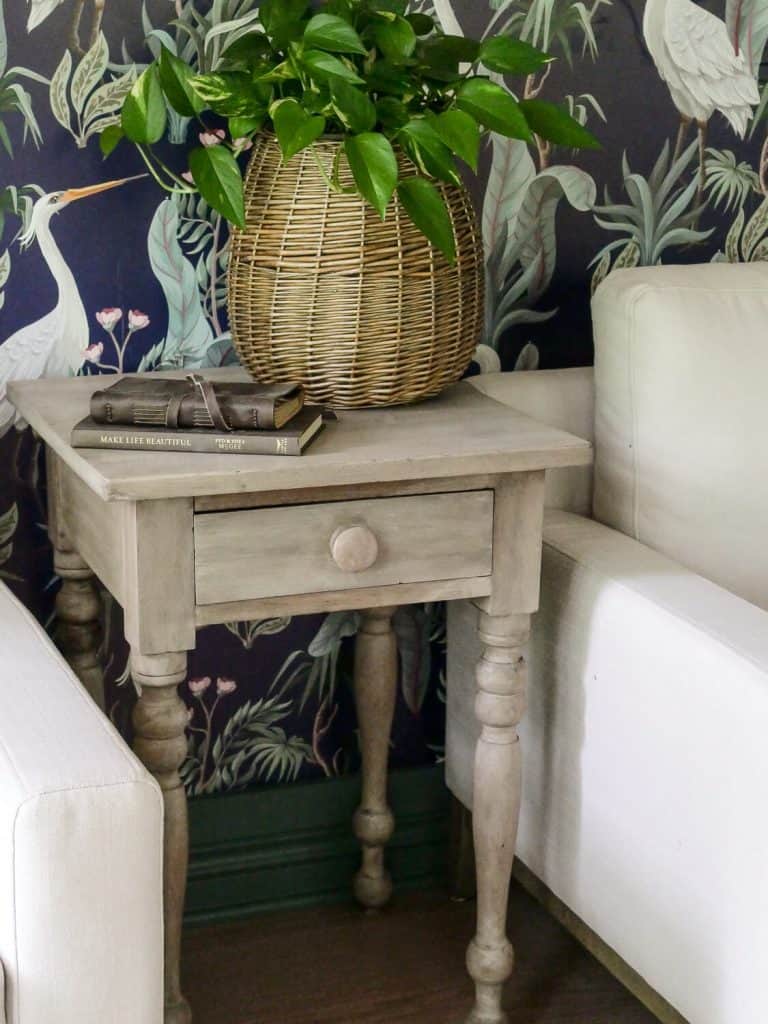
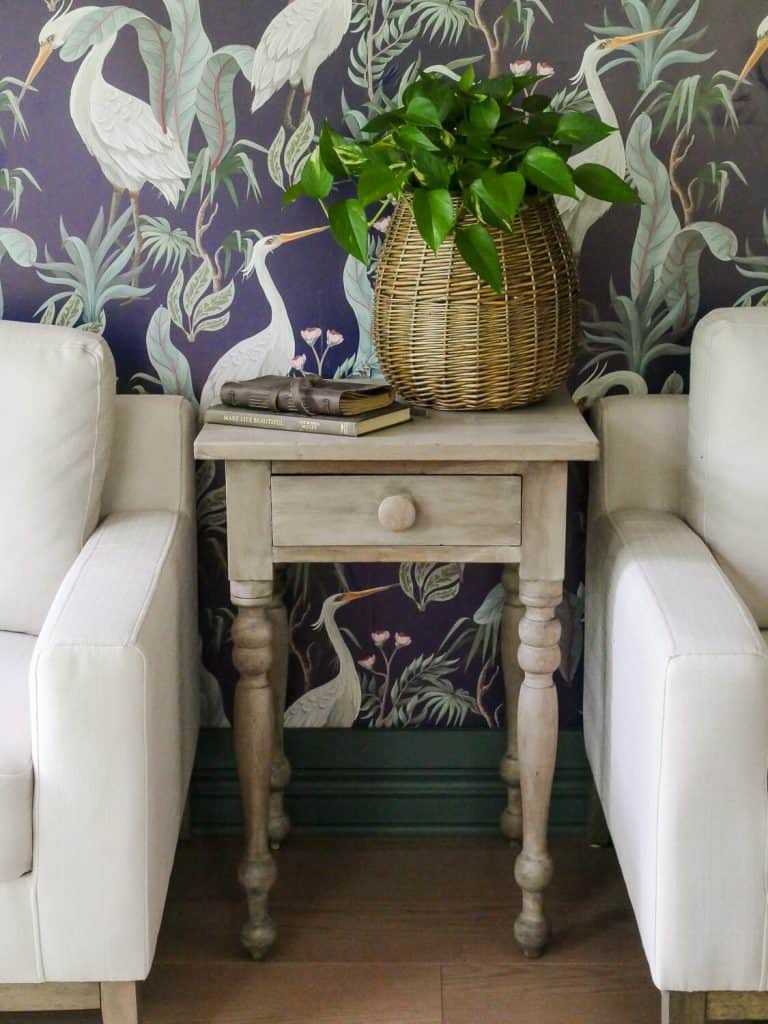
Once the paint wash was dry, I decided to add a layer of Special Walnut stain to bring out the wood tones and add some more depth. Below you can see how the stain makes a subtle difference on the right leg.


The stain added just enough color to give it some dimension. I haven’t yet added a coat of polyurethane as I’m testing the waters to see if this is the final look. However, when I do, this is my favorite matte poly.
Watch This Project on YouTube
More DIY Tutorials and Ideas
I hope that this article helps you determine if you should use oven cleaner to strip wood, or if you should use another method.

Make sure to check out my archives of DIY tutorials and more!
- 2 Reliable Ways to Change the Color of Wood
- 7 Methods to Lighten Stained Wood
- How to Paint Wood Furniture Without Sanding
Thanks for stopping by the blog today! Make sure to subscribe to get my Grace Notes directly to your inbox and to access all my insider perks. You can also follow along daily on Instagram and weekly on YouTube!
~Sarah


Thanks! I like this style